


SFW 250 A1
KOMPERNASS GMBH
BURGSTRASSE 21 · D-44867 BOCHUM
www.kompernass.com
ID-Nr.: SFW250A1-09/10-V1
IAN: 62025
KITCHEN TOOLS
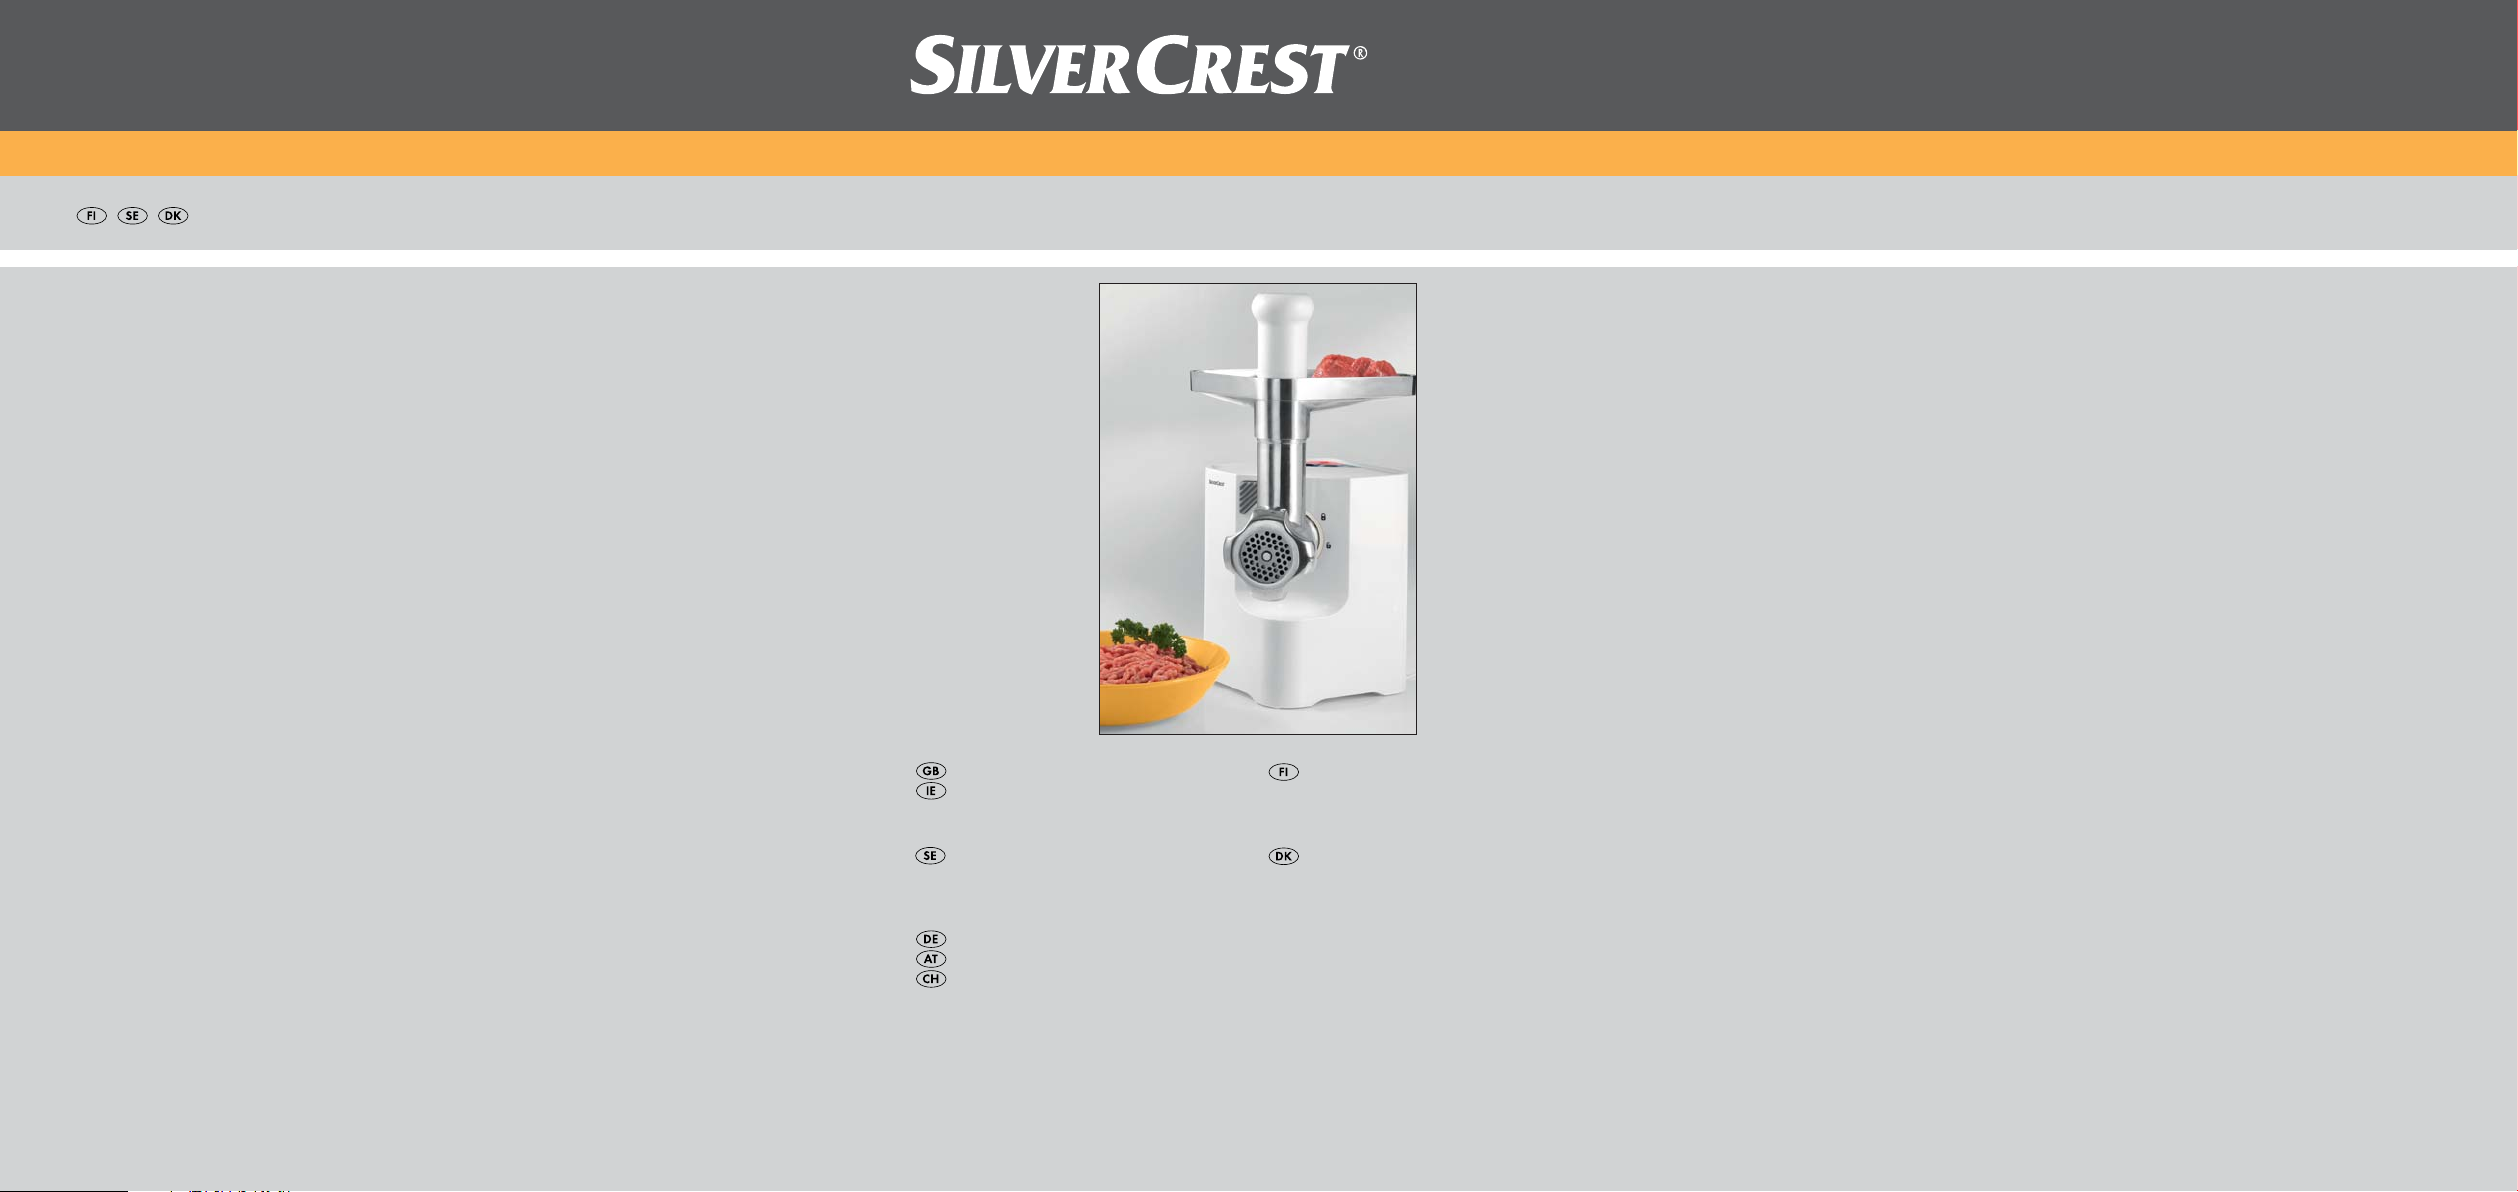
Mincer SFW 250 A1
Mincer
Operating instructions
Kødhakker
Betjeningsvejledning
Köttkvarn
Bruksanvisning
Lihamylly
Käyttöohje
Fleischwolf
Bedienungsanleitung

SFW 250 A1
q
w
e
r
tyuioa
d
s
f

- 1 -
CONTENT PAGE
1. Intended use 2
2. Technical data 2
3. Items supplied 2
4. Safety Instructions 2
5. Assembly / Disassembly 3
a) Assembling the meat grinder......................................................................................................3
b) Assembling the sausage attachment..........................................................................................4
c) Assembling the kubbe attachment..............................................................................................4
d) Assembling the biscuit pastry attachments ................................................................................4
6. Operation 5
a) Operating the appliance ............................................................................................................5
b) Processing meat ...........................................................................................................................5
c) Processing sausage meat ............................................................................................................6
d) Using the kubbe attachment.......................................................................................................6
e) Making biscuit pastry ..................................................................................................................6
7. Troubleshooting 7
8. Cleaning 7
a) Cleaning the motor block ...........................................................................................................7
b) Cleaning the accessories ............................................................................................................7
9. Storage 8
10. Disposal 8
11. Warranty and service 8
12. Importer 9
13. Recipes 9
Kubbe ................................................................................................................................................9
Fresh Grill Sausages......................................................................................................................10
Biscuits.............................................................................................................................................10
Read the operating instructions carefully before using the device for the first time and preserve this booklet
for later reference. Pass this manual on to whoever might acquire the device at a future date.

- 2 -
MINCER
1. Intended use
This appliance is intended for use in domestic house-
holds and for the processing of foodstuffs in small
quantities .
• Mincing fresh meat,
• Making sausages with natural or artificial sausage
skin,
• Making shortbread biscuits
This appliance is not intended for the processing of
frozen foods or other hard foodstuffs, e.g. bones or
nuts, or for use in commercial or industrial environ-
ments.
2. Technical data
Voltage : 220-240 V /
~
50 Hz
Power consumption : 250 W
Protection class: II
C.O. time: 15 minutes
C.O.-Time
The C.O. Time (Continuous Operation) details how
long an appliance may be used without the motor
overheating and being damaged. When the given
C.O. Time has lapsed, the appliance must be switched
off until the motor has cooled itself down.
3. Items supplied
q
Biscuit attachment with pattern strips
w
Stodger
e
Feed tray
r
Motor block
t
Meat grinder casing made of metal
y
Transport screw
u
Spring
i
Cross blade
o
Coarse and fine cutting discs
a
Clamping ring
s
Sausage attachment
d
Sausage disc
f
Kubbe attachment
4. Safety Instructions
To avoid potentially fatal electric
shocks:
• Ensure that the power cable does not become
damaged. Protect the cable from heat and ensure
that it cannot be trapped or clamped.
• Arrange for damaged power cables and/or
plugs to be replaced as soon as possible by
a qualified specialist or by Customer Services.
• Use the appliance only in dry rooms, not
outdoors.
• Never immerse the motor in water or other liquids!
If you do, you risk receiving a potentially fatal
electric shock.
Warning!
Never use the appliance for purposes other than
those listed here. There will be a major risk of serious
accidents should you try to neutralise the safety
devices on the appliance!

- 3 -
To avoid the risk of accidents and
injuries:
• Never put your hand into the openings of the ap-
pliance. Do not insert any objects of any kind
into the openings – except for the appropriate
stodger and the foodstuff to be processed. If you
do, there will be a serious risk of accidents!
• Unplug the appliance from the power source be-
fore attaching or removing accessories.
• Do not leave the appliance unsupervised when it
is ready for use. To avoid it being switched on
accidentally, always unplug the appliance after
use or during breaks.
• Use only original accessories for this appliance.
Other accessories may not meet the safety
requirements.
• This appliance is not intended for use by individuals
(including children) with restricted physical, physio-lo-
gical or intellectual abilities or deficiences in
experience and/or knowledge unless they are
supervised by a person responsible for their
safety or receive from this person instruction in
how the appliance is to be used.
• Children should be supervised to ensure that
they do not play with the appliance.
• Never operate the appliance in a no-load condi-
tion. This could irreparably damage the
appliance.
5. Assembly / Disassembly
IMPORTANT: All accessories are coated with
a thin film of oil to protect them from corrosion.
Therefore carefully clean all of the parts before
using the appliance for the first time, as com-
prehensively described on chapter "8 Clea-
ning". After subsequent usage, always apply a
light coating of cooking oil to the metallic
components.
a) Assembling the meat grinder
Unfold the fold-out side. There you will find the
step-by-step illustrations for assembling the appliance.
• Place the transport screw
y
into the mincer
casing
t
.
• Place the spring
u
onto the transport screw
y
.
• Then place on the cross blade
i
so that the
sharp side points away from the spring
u
.
Caution:
The cross blade
i
is very sharp! Risk of injury!
Important!:
The appliance will be damaged if the cross blade
i
is inserted the other way around!
• Select the desired cutting disc. The cutting discs
that are not required can be stored in the small
compartment on the appliance (Fig.
).
To open it, press on the symbol on the cover.
The cover can now be opened. Insert the two
unrequired cutting discs.
• Insert the selected cutting disc
o
into the meat
grinder casing
t
, so that the indentations on the
cutting disc
o
lie on the fixing points in the meat
grinder casing
t
.
• When everything has been correctly assembled,
screw the ring clamp
a
on until it is handtight.

- 4 -
• The assembled meat grinder
t
is connected
to the motor block
r
by a bayonet connector:
- Insert the meat grinder casing
t
into the motor
block
r
, such that the arrow on the feeding
shaft lies against the symbol on the motor
block
r
. The locking button presses itself in
(Fig.
).
- Lightly press the meat grinder casing
t
in and
at the same time turn the feeding shaft on the
meat grinder casing
t
into the middle position
(Fig.
), so that the arrow on the feeding shaft
lies against the symbol . When the meat
grinder casing
t
engages, the locking button
springs out.
- Finally place the feed tray
e
on top of the
feeding funnel.
- To dismantle it, press the locking button and
turn the feeding funnel to the right (Fig.
) .
You can now pull the meat grinder casing
t
out.
b) Assembling the sausage attachment
Unfold the fold-out side. There you will find the
step-by-step illustrations for assembling the appliance.
• Remove the meat grinder casing
t
as described
under a).
• Disassemble any attachments that might be fitted
and clean the meat grinder casing
t
.
Note:
The cross blade
i
with the spring
u
is not requi-
red for the sausage attachment
s
! If need be, re-
move them both from the meat grinder casing
t
.
• Coat all metal parts with cooking oil.
• Take the sausage disc
d
from the small com-
partment on the top of the appliance (Fig.
).
• Position the sausage disc
d
so that the indenta-
tions in the sausage disc
d
lie on the fixing
points in the meat grinder casing
t
.
• Then place the sausage attachment
s
before
the sausage disc
d
.
• Screw the ring clamp
a
on hand-tight.
• Assemble the meat grinder casing
t
as described
under a).
c) Assembling the kubbe attachment
Unfold the fold-out side. There you will find the
step-by-step illustrations for assembling the appliance.
• Disassemble the meat grinder casing
t
as de-
scribed under a).
• Disassemble any attachments that might be fitted
and clean the meat grinder casing
t
.
Note:
The cross blade
i
with the spring
u
is not requi-
red for the Kubbe attachment
f
! If need be, remo-
ve them both from the meat grinder casing
t
.
• Coat all metal parts with cooking oil.
• Insert both plastic parts of the Kubbe attachment
f
so that the indentations on the Kubbe attach-
ment
f
lie on the fixing points in the meat grin-
der casing
t
.
• When everything has been correctly assembled,
screw the ring clamp
a
on until it is handtight.
• Assemble the meat grinder casing
t
as described
under a).
d) Assembling the biscuit pastry
attachments
Unfold the fold-out side. There you will find the
step-by-step illustrations for assembling the appliance.
• Remove the meat grinder casing
t
as described
under a).
• Disassemble any attachments that might be fitted
and clean the meat grinder casing
t
.
Note:
The cross blade
i
with the spring
u
is not requi-
red for the biscuit attachment
q
! If need be, remo-
ve them both from the meat grinder casing
t
.
• Coat all metal parts with cooking oil.
• Remove the pattern strips
q
from the front of the
biscuit attachment
q
.

- 5 -
• First place the plastic disc and then the metal
disc of the biscuit attachment
q
into the meat
grinder casing
t
(see fold-out side).
Position the biscuit attachment
q
so that the
indentations on the biscuit attachment
q
lie on
the fixing points in the meat grinder casing
t
.
• When everything has been correctly assembled,
screw the ring clamp
a
on until it is handtight.
• Re-attach the pattern strips
q
to the front part of
the biscuit attachment
q
. Ensure that the grip on
the pattern strips
q
points away from the
appliance. If it does not, you will not be able to
adjust the pattern, which is located directly on
the grip.
• Assemble the meat grinder casing
t
as described
under a).
• To dismantle it, you must first remove the pattern
strips
q
before you can screw open the ring
clamp
a
and take the biscuit attachment
q
out.
6. Operation
Important!:
Do not use the appliance for longer than 15 minutes
continuously. To avoid an overheating of the app-
liance, after such a period switch it off and allow it
to cool down for ca. 30 minutes.
Important!:
NEVER activate the buttons ON or REV, with a
change of rotation direction, if the appliance motor
has not come to a complete stop. This could
damage the motor.
Warning:
NEVER open the housing of the motor block
r
– it
does not contain any user-serviceable elements. If
the housing is opened, the warranty becomes void.
If the housing is opened, there is a risk of receiving
a potentially fatal electric shock.
a) Operating the appliance
Once the appropriate attachments have been fixed:
• Place the appliance where it will at all times be
absolutely stable and under no circumstances
could it fall off of the work surface or in any way
come into contact with water (due to vibrations
or becoming snagged in the power cable). Vi-
bration is unavoidable when it is working.
Warning:
Never touch a machine, which is plugged in or is
operational when it happens to fall or land in water
– or in the case of other emergencies! First unplug
the appliance in all emergency situations! Otherwise
one runs the risk of serious injury or loss of life!
• Place the food to be processed into the feed tray
e
and position a container under the exit ope-
ning to collect the processed food.
• First press the OFF button to check that the appli-
ance is still switched off. Otherwise there is a risk
that the appliance could unintentionally start
when the plug is inserted into the power socket.
• Then put the plug into the socket.
• Press the button ON to start the appliance.
Important!:
Now push the foodstuff into the feeding shaft ONLY
with the round stodger
w
– NEVER with one’s fingers,
forks, spoonhandles or similar objects. This could
lead to injury and also damage the appliance.
Important!:
Do not ever press so hard that the motor gets audibly
slower. This could overburden the machine under
pressure and damage it.
b) Processing meat
• Use pieces of meat that fit without problem into
the feeding shaft. If needs be, cut the meat up
into smaller pieces. Check that the meat does not
have any bones and or tendons.

- 6 -
Caution:
Minced meat is very prone to bacterial contamina-
tion. Therefore take care to maintain good hygiene
when processing meat.
• When you have read all the instructions on the
topic ”Meat“, you can take the appliance into
use as described under 6.a).
c) Processing sausage meat
• Pass meat through the meat grinder twice before
using it as sausage stuffing.
• To make sausage stuffing, add some chopped
onions, spices and other ingredients to the minced
meat, as per your recipe, and knead the mixture
well.Refrigerate it for 30 minutes before proces-
sing it further.
• Position the sausage skin (natural or artificial) on
the sausage attachment
s
and close the other
end with a knot. For 1 kg of the filling, you will
need approximately 1.60 m of sausage skin.
Tip:
Soak the natural sausage skin in lukewarm water
for about 3 hours before using it and wring it out
before fixing it. This will make the natural sausage
skin more elastic. Natural sausage skins are available
from butcher suppliers close to slaughter houses or
from your family butcher.
• The sausage mixture will be pressed through the
sausage attachment
s
and into the sausage
skin. When it is long enough switch the appliance
off, press the sausage together at the ends and
rotate it a couple of times along its longitudinal
axis.
Tip:
Sausage meat tends to expand when cooked or fro-
zen. Therefore, to prevent it from bursting it is best
not to overstuff the sausage.
• When you have read all of the instructions about
the topic “Sausage“, you can take the appliance
into use as described under 6 a).
d) Using the kubbe attachment
With the kubbe attachment
f
foodstuffs can be
processed to form hollow rolls of meat or vegeta-
bles, which can then be stuffed as desired.
• Put the meat through the meat grinder twice be-
fore pressing it through the kubbe attachment
f
.
• When you have read all the instructions about
the topic “Kubbe attachment“, you can take the
appliance into use as described under 6 a).
e) Making biscuit pastry
When you have prepared a biscuit pastry accor-
ding to your recipe, and have fixed the biscuit at-
tachment
q
:
• When you have read all the instructions about
the topic ”biscuit attachment", you can take the
appliance into use as described under 6 a).
• Line a small baking tray with greaseproof paper
and place or hold it directly under the exit opening
at the front of the appliance.
• Press pastry evenly into the meat grinder casing
t
– the transport screw
y
then pushes it through
the design on the pattern strip of the biscuit at-
tachment
q
.
• When the biscuit is the required length, stop the
appliance and break the pastry off at the exit
opening. Lay the biscuits on the baking tray.

- 7 -
7. Troubleshooting
If the drive is blocked by accumulated food:
• Press the OFF button to stop the meat grinder.
• Hold the REV button pressed down. The app-
liance will now run in the reverse direction. This
enables you to transport the food which has be-
come stuck a short way backwards, and the motor
to run freely again.
• When the drive runs smoothly again, release the
REV button.
• Press the ON button to re-start the meat grinder.
• If you do not succeed in getting the drive free
with this, clean the appliance as described in
chapter "8. Cleaning“.
Should the motor suddenly stop, it could be due to
automatic activation of the internal overload device.
This is intended to protect the motor.
• Switch the appliance off and allow it cool down
for approximately 30 minutes before continuing
to use it.
• Should this time period not be sufficient, wait for
a further 15 minutes.
• If it still does not function at the end of this period,
this indicates a technical problem. In this case,
contact the Service Centre.
If the power cable is damaged or the accessories
are visibly damaged:
• Immediately switch the appliance off by pressing
the OFF button!
• If there is no risk to personal safety, unplug the
appliance.
• Arrange for the defective parts be repaired by
Customer Services before re-using the appliance.
8. Cleaning
Warning:
Pull out the plug from the socket, before cleaning
the appliance. In this way accidents caused by the
unexpected switching on of the machine and electric
shocks can be prevented.
a) Cleaning the motor block
• Clean the exterior surfaces and the power cable
with a slighly damp cloth. Dry the appliance
well before re-using it.
Warning:
Never immerse the motor block in water or any
other liquid! Should this occur, you are at risk of
a potentially fatal electric shock if permeating
moisture makes contact with the electrical wiring.
• Never use detergents, abrasive cleaners or sol-
vents. These could damage the appliance and
leave residues on the foodstuffs.
b) Cleaning the accessories
Note:
Do not clean the accessories in a dishwasher! This
could cause damage to them!
• Clean the accessories that could come in
contact with foodstuffs, ...
- by hand only, the accessories are not dish-
washer safe.
- with hot water and a household detergent
suitable for use with foods.
Caution:
The cross blade is very sharp! Risk of injury!
• Dry all parts thoroughly, before re-using the
appliance.
- 8 -
Note:
After every cleaning, apply a light coating of
cooking oil to all metallic components.
9. Storage
• Push the power cable (but not the plug) into the
cable storage shaft under the appliance base.
There it is protected from damage.
• Store the two cutting discs
o
that are not currently
fitted into the appliance in the small compartment
(Fig.
) on the appliance.
• Store the appliance in a dry place.
• After drying the metal attachments coat them
lightly with a little cooking oil – if you are not go-
ing to use the device immediately. This will pro-
tect them from corrosion.
• Store the appliance where it will be out of reach
of children and people requiring supervision.
They are not always able to correctly assess
the potential risks involved with using electrical
appliances.
10. Disposal
Do not dispose of the appliance in your
normal domestic waste. This appliance
is subject to the European Guidelines
2002/96/EC.
Dispose of the appliance through an approved dis-
posal centre or at your community waste facility.
Observe the currently applicable regulations. In
case of doubt, please contact your waste disposal
centre.
Dispose of all packaging materials in an
environmentally friendly manner.
11. Warranty and service
The warranty for this appliance is for 3 years from
the date of purchase. The appliance has been ma-
nufactured with care and meticulously examined be-
fore delivery. Please retain your receipt as proof of
purchase. In the event of a warranty claim, please
make contact by telephone with our Service Depart-
ment. Only in this way can a post-free despatch for
your goods be assured.
The warranty covers only claims for material and
maufacturing defects, but not for transport damage,
for wearing parts or for damage to fragile compo-
nents, e.g. buttons or batteries. This product is for
private use only and is not intended for commercial
use. The warranty is void in the case of abusive and
improper handling, use of force and internal tampe-
ring not carried out by our authorized service
branch. Your statutory rights are not restricted in
any way by this warranty.
The warranty period will not be extended by repairs
made under warranty. This applies also to replaced
and repaired parts. Any damage and defects extant
on purchase must be reported immediately after un-
packing the appliance, at the latest, two days after
the purchase date. Repairs made after the expira-
tion of the warranty period are subject to payment.
DES UK LTD
Tel.: 0871 5000 700
(£ 0.10 / minute)
e-mail: support.uk@kompernass.com
Kompernass Service Ireland
Tel.: 1850 930 412 (0,082 EUR/Min.)
Standard call rates apply. Mobile operators may vary.
e-mail: support.ie@kompernass.com
Kompernass Service Cyprus
Tel.: 800 9 44 01
e-mail: support.cy@kompernass.com
CY

- 9 -
12. Importer
KOMPERNASS GMBH
BURGSTRASSE 21
D-44867 BOCHUM
www.kompernass.com
13. Recipes
Kubbe
Ingredients for the wrapping
450g of lean mutton, veal or beef
150g flour
1 Tsp Pimento (type of pepper)
1 Tsp Nutmeg
1 Pinch Chili powder
1 Pinch Pepper
Ingredients for the meat filling
700g Mutton
1 1/2 Tbsp. olive oil
1 1/2 Tbsp Onions, finely chopped
1/2 Tsp Pimento (type of pepper)
1/2 Tsp. Salt
1 1/2 Tbsp Flour
Pass the meat for the wrapping through the meat
grinder twice (first with the coarse and then with the
fine cutting discs
o
) and then combine it with the in-
gredients. Then pass this mixture through the meat
grinder twice. Exchange the cutting disc
o
for the
Kubbe attachment
f
(see chapter " Assembling the
kubbe attachment").Shape the Kubbe wrappers
with the Kubbe attachment
f
then freeze them.
Filling:
Pass the meat through the meat grinder twice (first
with the coarse and then with the fine cutting discs
o
). Saute the onions and then mix them well with
the meat and other ingredients. Fill the Kubbe wrap-
pers and fry until done.
Alternative Fillings:
250g steamed broccoli
or 250g steamed zucchini
or 250g cooked rice

- 10 -
Fresh Grill Sausages
Ingredients:
300g lean Beef
500g lean Pork
200g Shoulder bacon
20g Salt
1/2 Tbsp ground white Pepper
1 Tsp Caraway
1/2 Tsp Nutmeg
Pass the beef, pork and bacon through the meat
grinder twice.
Add the mixed spices and salt and thoroughly
knead for 5 minutes.
Place the sausage filling in the refrigerator for ca.
30 minutes. Fill the skins with sausage meat as de-
tailed (see chapter "Preparing sausage") and make
sausages of ca. 25 cm in length.
Grill the sausages well and eat them on the same
day.
Biscuits
Ingredients:
125g Butter
125g Sugar
1 Packet of Vanilla sugar
1 pinch Salt
1 Egg
1 Egg white
250g Plain flour
1 Tbsp Baking powder
Scraped peel of half a lemon
Beat the butter until foamy. Add the sugar, vanilla
sugar, lemon peel and the eggs. Mix the flour, baking
powder and salt and, with a mixing spoon,stir it into
the mixture.
Allow the pastry to stand for ca. 30 minutes in the
refrigerator. Then pass it through the meat grinder
with the biscuit attachment
q
fitted.
Lay the biscuits on a baking tray lined with baking
paper.
Bake the biscuits in a pre-heated oven at 180°C for
ca.10-15 minutes until golden brown.

- 11 -
SISÄLLYSLUETTELO SIVU
1. Käyttötarkoitus 12
2. Tekniset tiedot 12
3. Toimituksen piiriin kuuluvat osat 12
4. Turvaohjeet 12
5. Kokoaminen / purkaminen 13
a) Lihamyllyn kokoaminen.............................................................................................................13
b) Makkarantäyttöosan asentaminen ..........................................................................................14
c) Kubba-osan asentaminen..........................................................................................................14
d) Pursotinosan asentaminen ........................................................................................................14
6. Käyttö 15
a) Laitteen käyttö............................................................................................................................15
b) Lihan käsittely.............................................................................................................................15
c) Makkaran valmistus...................................................................................................................16
d) Kubba-osan käyttö ....................................................................................................................16
e) Pursotinpikkuleipien valmistus...................................................................................................16
7. Virheen ilmetessä 16
8. Puhdistus 17
a) Moottorilohkon puhdistus.........................................................................................................17
b) Lisäosien puhdistaminen ...........................................................................................................17
9. Säilytys 17
10. Hävittäminen 18
11. Takuu ja huolto 18
12. Maahantuoja 18
13. Reseptejä 19
Kubba..............................................................................................................................................19
Tuoreet bratwurstit..........................................................................................................................19
Pursotinpikkuleivät..........................................................................................................................20
Lue käyttöohje ennen ensimmäistä käyttökertaa huolellisesti läpi ja pidä sitä lähettyvillä myös myöhemmissä
käytöissä. Jos myyt laitteen, anna ohje myös seuraavalle omistajalle.

- 12 -
LIHAMYLLY
1. Käyttötarkoitus
Laite on tarkoitettu yksinomaan kotitalouden elintar-
vikkeiden käsittelyyn yksityistalouksille tyypillisissä
määrissä:
• tuoreen lihan jauhamiseen
• makkaroiden valmistamiseen luonnonsuoleen tai
keinotekoiseen kuoreen
• pursotinpikkuleipien valmistamiseen.
Laitetta ei ole tarkoitettu pakasteiden eikä muidenkaan
kovien elintarvikkeiden, esim. luiden tai pähkinöiden,
käsittelyyn, eikä teolliseen tai kaupalliseen käyttöön.
2. Tekniset tiedot
Jännite: 220-240 V /
~
50 Hz
Tehontarve: 250 W
Suojausluokka: II
LK-aika: 15 minuuttia
LK-aika
LK-aika (lyhytaikaiskäyttö) ilmoittaa, kuinka kauan
laitetta voidaan käyttää moottorin ylikuumenematta
ja vaurioitumatta. Annetun LK-ajan jälkeen laite on
kytkettävä pois päältä niin pitkäksi aikaa, että moottori
on jäähtynyt.
3. Toimituksen piiriin kuuluvat
osat
q
Pursotinosa ja kuvioliuskat
w
Työnnin
e
Täyttökulho
r
Moottorilohko
t
Metallinen lihamyllyosa
y
Siirtokierukka
u
Jousi
i
Ristiterä
o
Karkea ja hieno reikälevy
a
Lukitusrengas
s
Makkarantäyttöosa
d
Makkaralevy
f
Kubba-osa
4. Turvaohjeet
Hengenvaarallisen sähköiskun
välttämiseksi:
• Älä päästä verkkojohtoa vaurioitumaan. Pidä
se etäällä kuumista paikoista ja asettele se niin,
ettei se joudu puristuksiin.
• Anna valtuutetun ammattihenkilöstön vaihtaa
vaurioitunut verkkojohto tai verkkopistoke välittö-
mästi uuteen vaarojen välttämiseksi.
• Käytä laitetta vain kuivassa tilassa, älä ulkona.
• Älä koskaan yritä puhdistaa moottorilohkoa
upottamalla sitä veteen tai muihin nesteisiin.
Muuten sähköisku aiheuttaa hengenvaaran.
Varoitus!
Älä koskaan käytä laitetta muihin kuin tässä kuvattuihin
tarkoituksiin. Jos laitteen suojavarusteet vaurioituvat
virheellisen käytön seurauksena, onnettomuusvaara
kasvaa merkittävästi.

- 13 -
Onnettomuus- ja loukkaantumis-
vaarojen välttämiseksi:
• Älä koskaan kajoa käsin laitteen aukkoihin. Älä
koskaan työnnä aukkoihin minkäänlaisia esineitä –
lukuun ottamatta kulloiseenkin sarjaan kuuluvaa ty-
önnintä ja käsiteltäviä elintarvikkeita. Muutoin on
olemassa huomattava tapaturmavaara!
• Irrota pistoke pistorasiasta, ennen kuin asetat
lisäosia paikalleen tai poistat niitä.
• Älä jätä laitetta vartioimatta sen ollessa käyttö-
kunnossa. Irrota pistoke pistorasiasta aina käy-
tön jälkeen tai käytön keskeytyessä, jotta laitetta
ei käynnistettäisi erehdyksessä.
• Käytä laitteessa vain alkuperäisiä lisävarusteita.
Muiden lisäosien käyttö laitteessa ei ole mahdol-
lisesti riittävän turvallista.
• Tätä laitetta ei ole tarkoitettu sellaisten henkilöiden
(mukaan lukien lapset) käyttöön, joiden rajoitetut,
fyysiset, aistilliset tai henkiset kyvyt tai kokemuksen
ja/tai tiedon puute estävät käytön, lukuun otta-
matta tilanteita, joissa heitä valvoo turvallisuudesta
vastaava henkilö tai joissa he ovat saaneet tältä
ohjeita laitteen käytöstä.
• Lapsia on valvottava ja on varmistettava, etteivät he
leiki laitteella.
• Älä koskaan käytä laitetta tyhjänä. Se saattaa
vaurioittaa laitteen korjauskelvottomaan kuntoon.
5. Kokoaminen / purkaminen
Huomio: Kaikki asennusosat on varustettu ohuella
öljykalvolla, joka suojaa niitä ruostumiselta.
Puhdista siksi ennen ensimmäistä käyttöä kaikki
osat huolellisesti kohdassa "8. Puhdistus" perus-
teellisesti kuvatulla tavalla. Hankaa sitten kaikki-
in metalliosiin ruokaöljyä.
a) Lihamyllyn kokoaminen
Avaa aukilevitettävä sivu, jolla kokoamisjärjestys
näytetään kuvallisesti.
• Aseta siirtokierukka
y
lihamyllyosaan
t
.
• Työnnä jousi
u
siirtokierukkaan
y
.
• Aseta ristiterä
i
paikoilleen niin, että terävä
puoli osoittaa jousesta
u
poispäin.
Vaara:
Terä on hyvin terävä
i
. Loukkaantumisvaara!
Huomio:
Laite vahingoittuu, jos ristiterä
i
asetetaan toisin
päin!
• Valitse haluttu reikälevy. Muita kuin tarvittavia
reikälevyjä voidaan säilyttää laitteen pienessä
lokerossa (kuva
).
Paina tätä varten suojuksessa olevaa kuvaketta .
Suojus voidaan nyt avata. Aseta molemmat
tarpeettomat reikälevyt lokeroon.
• Aseta valittu reikälevy
o
lihamyllyosaan
t
niin, että reikälevyn
o
ura sijaitsee lihamylly
osan
t
kiinnikkeessä.
• Kun kaikki osat on asennettu oikein, ruuvaa
lukitusrengas
a
käsin paikoilleen.

- 14 -
• Valmiiksi asennettu lihamyllyosa
t
liitetään
pikaliittimellä moottorilohkoon
r
:
- Työnnä lihamyllyosa
t
moottorilohkoon
r
niin, että täyttökuilun nuoli osuu moottorilohkon
r
symboliin . Lukituspainike painuu sisään.
(Kuva ).
- Paina lihamyllyosaa
t
kevyesti sisään ja kään-
nä tällöin lihamyllyosassa
t
olevaa täyttökui-
lua keskiasentoon (kuva ) niin, että täyttökui-
lun nuoli osoittaa symboliin . Kun
lihamyllyosa
t
lukittuu paikoilleen, lukituspaini-
ke ponnahtaa ulos.
- Aseta lopuksi täyttökulho
e
täyttökuilulle.
- Irrota lihamyllyosa painamalla lukituspainiketta
ja kierrä täyttökuilua jälleen oikealle (kuva
)
. Sen jälkeen voit vetää lihamyllyosan
t
ulos.
b) Makkarantäyttöosan asentaminen
Avaa aukilevitettävä sivu, jolla kokoamisjärjestys
näytetään kuvallisesti.
• Irrota lihamyllyosa
t
kohdassa a) kuvatulla
tavalla.
• Poista mahdolliset lisäosat ja puhdista lihamyllyo-
sa
t
.
Huomaa:
Makkarantäyttöosaa
s
varten ei tarvita ristiterää
i
ja jousta
u
! Irrota molemmat tarvittaessa liha-
myllyosasta
t
.
• Hankaa kaikkiin metalliosiin ruokaöljyä.
• Ota makkaralevy
d
laitteen yläosassa sijaitse-
vasta pienestä lokerosta (kuva
).
• Aseta makkaralevy
d
paikoilleen niin, että mak-
karalevyn
d
lovi osuu lihamyllyosassa
t
olevaan
kiinnikkeeseen.
• Aseta sitten makkarantäyttöosa
s
makkara-
levyn
d
eteen.
• Ruuvaa lukitusrengas
a
käsin paikoilleen.
• Asenna lihamyllyosa
t
kohdassa a) kuvatulla
tavalla.
c) Kubba-osan asentaminen
Avaa aukilevitettävä sivu, jolla kokoamisjärjestys
näytetään kuvallisesti.
• Irrota lihamyllyosa
t
kohdassa a) kuvatulla
tavalla.
• Poista mahdolliset lisäosat ja puhdista
lihamyllyosa
t
.
Huomaa:
Kubba-osaa
f
varten ei tarvita ristiterää
i
ja
jousta
u
! Irrota molemmat tarvittaessa
lihamyllyosasta
t
.
• Hankaa kaikkiin metalliosiin ruokaöljyä.
• Aseta molemmat kubba-osan
f
muoviosat lait-
teeseen niin, että kubba-osan
f
lovi osuu liha-
mylly-osassa
t
olevaan kiinnitykseen.
• Kun kaikki osat on asennettu oikein, ruuvaa luki-
tusrengas
a
jälleen käsin paikoilleen.
• Asenna lihamyllyosa
t
kohdassa a) kuvatulla
tavalla.
d) Pursotinosan asentaminen
Avaa aukilevitettävä sivu, jolla kokoamisjärjestys
näytetään kuvallisesti.
• Irrota lihamyllyosa
t
kohdassa a) kuvatulla
tavalla.
• Poista mahdolliset lisäosat ja puhdista
lihamyllyosa
t
.
Huomaa:
Pursotinpikkuleipäosaa
q
varten ei tarvita ristiterää
i
ja jousta
u
! Irrota molemmat tarvittaessa
lihamyllyosasta
t
.
• Hankaa kaikkiin metalliosiin ruokaöljyä.
• Irrota kuvioliuska
q
pursotinosan
q
edestä.
• Aseta ensin muovilevy ja sitten pursotinosan
q
metallilevy lihamyllyosaan
t
(katso kääntösivu).
Aseta pursotinosa
q
paikoilleen niin, että
pursotinosan
q
lovi osuu lihamyllyosan
t
kiinnitykseen.
• Kun kaikki osat on asennettu oikein, ruuvaa
lukitusrengas
a
käsin paikoilleen.
 Loading...