


HAIR & BEARD TRIMMER SHBS 5 A1
HAIR & BEARD TRIMMER
Operating instructions
HAJÉS SZAKÁLLVÁGÓ
Használati utasítás
ZASTŘIHOVAČ VLASŮ A VOUSŮ
Návod k obsluze
HAARUND BARTSCHNEIDER
Bedienungsanleitung
MASZYNKA DO STRZYŻENIA WŁOSÓW I BRODY
Instrukcja obsługi
APARAT ZA STRIŽENJE LAS IN BRADE
Navodila za uporabo
STROJČEK NA STRIHANIE VLASOV A BRADY
Návod na obsluhu
|
|
|
|
IAN 96126 |
4 |
|
|
|

Before reading, unfold the page containing the illustrations and familiarise yourself with all functions of the device.
Przed przeczytaniem proszę rozłożyć stronę z ilustracjami, a następnie proszę zapoznać się z wszystkimi funkcjami urządzenia.
Olvasás előtt kattintson az ábrát tartalmazó oldalra és végezetül ismerje meg a készülék mindegyik funkcióját.
Pred branjem odprite stran s slikami in se nato seznanite z vsemi funkcijami naprave.
Před čtením si otevřete stranu s obrázky a potom se seznamte se všemi funkcemi přístroje.
Pred čítaním si odklopte stranu s obrázkami a potom sa oboznámte so všetkými funkciami prístroja.
Klappen Sie vor dem Lesen die Seite mit den Abbildungen aus und machen Sie sich anschließend mit allen Funktionen des Gerätes vertraut.
GB |
Operating instructions |
Page |
1 |
PL |
Instrukcja obsługi |
Strona |
19 |
HU |
Használati utasítás |
Oldal |
37 |
SI |
Navodila za uporabo |
Stran |
55 |
CZ |
Návod k obsluze |
Strana |
73 |
SK |
Návod na obsluhu |
Strana |
91 |
DE / AT / CH |
Bedienungsanleitung |
Seite |
109 |

A  B
B
C
D E

Contents
Introduction . . . . . . . . . . . . . . . . . . . . . 2
Information concerning these operating instructions . . . . . . . . . . . . . . . . . . . . . . . . . . . . 2
Copyright. . . . . . . . . . . . . . . . . . . . . . . . . . . . . 2 Limitation of liability . . . . . . . . . . . . . . . . . . . . . 2 Intended use . . . . . . . . . . . . . . . . . . . . . . . . . . 2 Warnings used. . . . . . . . . . . . . . . . . . . . . . . . . 3
Safety. . . . . . . . . . . . . . . . . . . . . . . . . . 4
Basic safety instructions . . . . . . . . . . . . . . . . . . 4
Package contents . . . . . . . . . . . . . . . . 7
Spare Parts . . . . . . . . . . . . . . . . . . . . . . . . . . . 8 Disposal of packaging. . . . . . . . . . . . . . . . . . . 8
Appliance description . . . . . . . . . . . . . 8
Before first use . . . . . . . . . . . . . . . . . . 9
Charging the batteries . . . . . . . . . . . . . . . . . . . 9 Operation with the mains power adapter . . . . 9 Oiling the cutting attachments . . . . . . . . . . . . 10
Handling and use . . . . . . . . . . . . . . . 10
Attaching/changing the cutter attachments . . 10 Attaching/changing the comb attachments. . 10 Hair trimmer attachment . . . . . . . . . . . . . . . . 11 Beard trimmer attachment . . . . . . . . . . . . . . . 12 Precision trimmer attachment . . . . . . . . . . . . . 12 Ear/nose hair trimmer attachment . . . . . . . . . 12 Shaver attachment . . . . . . . . . . . . . . . . . . . . . 12
GB
Cleaning and care . . . . . . . . . . . . . . . 13
Cleaning the shaver attachment . . . . . . . . . . 14
Cleaning the ear/nose hair trimmer
attachment . . . . . . . . . . . . . . . . . . . . . . . . . . . 14
Disposal . . . . . . . . . . . . . . . . . . . . . . . 15
Disposal of the appliance . . . . . . . . . . . . . . . 15 Disposal of batteries . . . . . . . . . . . . . . . . . . . 16
Appendix . . . . . . . . . . . . . . . . . . . . . . 17
Technical details. . . . . . . . . . . . . . . . . . . . . . . 17 Notes on the Declaration of Conformity . . . . 17 Warranty . . . . . . . . . . . . . . . . . . . . . . . . . . . . 17 Service . . . . . . . . . . . . . . . . . . . . . . . . . . . . . . 18 Importer . . . . . . . . . . . . . . . . . . . . . . . . . . . . . 18
SHBS 5 A1 |
1 |

Introduction
GB
Information concerning these operating instructions
Congratulations on the purchase of your new appliance.
You have selected a high-quality product. The operating instructions are a constituent of this product. They contain important information about safety, use and disposal. Before using the product, familiarise yourself with all operating and safety instructions. Use this product only as described and only for the specified areas of application. Retain these instructions for future reference. Please also pass these operating instructions on to any future owner(s).
Copyright
This documentation is subject to copyright protection.
Any copying or reproduction, including extracts thereof, and the reproduction of images (even in a modified state), is only permitted with the written authorisation of the manufacturer.
Limitation of liability
All technical information, data and information for installation, connection and operation contained in these operating instructions corresponds to the latest state at the time of printing and takes into account our previous experience and our best available knowledge.
No claims can be derived from the details, illustrations and descriptions in these instructions.
The manufacturer assumes no responsibility for damage caused by failure to observe these instructions, improper use, incompetent repairs, making unauthorised modifications or for using unapproved replacement parts.
Intended use
This appliance is intended for use only in private environments, not for commercial purposes. This appliance is only intended for cutting natural hair. It may only be used with human hair, not with artificial or animal hair.
It is not intended for any other use or for uses extending beyond those stated. Claims of any kind for damage arising as a result of non-intended use will not be accepted. The user is the sole bearer of the risk.
2 |
SHBS 5 A1 |

Warnings used
The following warnings are used in these operating instructions: |
GB |
|
|
DANGER |
|
A warning at this risk level indicates an imminently hazardous situation. |
|
If the hazardous situation is not avoided, it could lead to death or serious physical injury. |
|
► Follow the instructions in this warning to avoid a fatality or serious personal injury. |
|
|
|
WARNING |
|
A warning of this risk level indicates a potentially hazardous situation. |
|
Failure to avoid this hazardous situation could result in physical injury. |
|
► Follow the instructions in this warning to prevent physical injury. |
|
|
|
CAUTION |
|
A warning of this risk level indicates potential damage to property. |
|
Failure to avoid this situation could result in damage to property. |
|
► Follow the instructions in this warning to prevent damage to property. |
|
|
|
NOTE |
|
► A note indicates additional information that will assist you in handling the appliance. |
|
|
|
SHBS 5 A1 |
3 |

Safety
GB |
This section provides you with important safety information regarding |
|
|
|
handling of the appliance. The appliance complies with the statutory |
|
safety regulations. Incorrect usage can lead to personal injury and |
|
property damage. |
|
Basic safety instructions |
|
For safe handling of the appliance, follow the safety information below: |
■This appliance may be used by children aged 8 over and by persons with reduced physical, sensory or mental capabilities or lack of experience and knowledge, provided that they are under supervision or have been told how to use the appliance safely and are aware of the potential risks. Children must not play with the appliance. Cleaning and user maintenance tasks must not be carried out by children unless they are supervised.
■Before use, check the appliance for externally visible damage. Never operate an appliance that is damaged. There is a risk of electrocution.
■The appliance may no longer be used if there is any damage to the cable, to the mains power adapter, the housing or any other components.
■All repairs must be carried out by authorised specialist companies or the Customer Service department. Improper repairs can pose significant risks to the user. Warranty claims also become void.
■Do not use the appliance with a defective cutter attachment or defective comb attachment, since these may have sharp edges. There is a risk of personal injury!
4 |
SHBS 5 A1 |

■ Defective components must always be replaced with original replacement |
|
parts. Compliance with safety requirements can only be guaranteed if |
GB |
original replacement parts are used. |
|
|
■Never operate the appliance unsupervised, and only in accordance with the information on the nameplate.
■Use only the mains power adapter provided when using mains power.
■Remove the mains power adapter from the wall socket
-if a defect occurs,
-before cleaning the appliance,
-if you do not intend using the appliance for long periods,
-after every use.
When doing so, pull the mains power adapter itself and not the cable.
■ATTENTION! Keep the appliance dry.
■Do not use the appliance while taking a bath. Risk of fatal electrical shocks!
■Never submerge the appliance or the cable with mains power adapter in water or other liquids.
■If the appliance falls into the water, it is imperative that you pull the mains power adapter out of the power socket before you reach into the water.
■Never touch the mains power adapter with wet hands, especially when plugging it in or unplugging it. Risk of fatal electrical shocks!
SHBS 5 A1 |
5 |

■ The installation of a residual current circuit breaker with a rated tripping GB current of no more than 30 mA o ers further protection from electric
shocks. Have the installation carried out only by a qualified electrician.
■Check the mains power adapter and the hair and beard trimmer regularly for any possible mechanical defects.
■Ensure that the cable does not get jammed in cupboard doors or pulled over hot surfaces. If this occurs, the cable insulation may be damaged.
■Only plug the mains power adapter into an easily reachable power socket so that you can pull the mains power adapter out of the power socket quickly in an emergency.
■Do not cover the mains power adapter to avoid impermissible warming.
6 |
SHBS 5 A1 |
Package contents
This appliance is supplied with the following components as standard: |
GB |
|
|
||
|
Hair and beard trimmer |
|
|
Charging station |
|
|
Mains power adapter |
|
|
Hair trimmer attachment |
|
|
Beard trimmer attachment |
|
|
Precision trimmer attachment |
|
Ear/nose hair trimmer attachment |
|
|
|
Shaver attachment |
|
Comb attachment for the hair trimmer attachment |
|
|
Comb attachment for the beard trimmer attachment |
|
|
|
Cleaning brush |
|
|
Scissors |
|
Comb |
|
|
|
Blade oil |
|
|
Storage pouch |
|
|
This operating manual |
|
NOTE
►Check the delivery for completeness and for signs of visible damage.
►If the delivery is incomplete, or is damaged due to defective packaging or through transportation, contact the Service Hotline (see chapter Service).
♦Remove all appliance parts from the carton.
♦Remove all packaging materials from the appliance.
 DANGER
► Packaging material must not be used as a plaything. There is a risk of su ocation.
SHBS 5 A1 |
7 |
GB |
Spare Parts |
You can also contact the Service Hotline if you need replacement parts (see chapter |
|
|
Service). |
|
Disposal of packaging |
|
The packaging protects the appliance from transport damage. |
|
Returning the packaging to the material cycle conserves raw materials and reduces the amount of |
|
waste that is generated. Dispose of packaging material which is no longer needed in accordance |
|
with applicable local regulations. |
Appliance description
Figure A:
|
Hair trimmer attachment |
2 |
Slide switch for cut length fine adjustment |
3 |
On/o switch |
4 |
Charging indicator lamp |
5 |
Charging station/holder with connecting socket for mains power adapter |
Figure B:
6 Mains power adapter
Figure C:
7Beard trimmer attachment
8Precision trimmer attachment
9Ear/nose hair trimmer attachment
10Shaver attachment
11Comb attachment for the hair trimmer attachment
12Comb attachment for the beard trimmer attachment
8 |
SHBS 5 A1 |
Before first use
The hair and beard trimmer can be used as a battery-powered or mains-powered appliance. |
GB |
|
Charging the batteries
The battery for the hair and beard trimmer should be charged for at least 90 minutes before first use. ♦ Connect the mains power adapter cable 6 to the hair and beard trimmer charging station 5 .
♦Avoid damaging the appliance! Ensure that the appliance is switched o before charging the battery.
♦Plug the mains power adapter 6 (wide-range voltage 100–240 V) in a power socket complying with the appliance specifications.
♦The charging progress is indicated by the charging indicator lamp 4 .
–charging indicator lamp flashes red: the battery is discharged
–charging indicator lamp illuminates red: battery is being charged
–charging indicator lamp illuminates green: battery is fully charged
♦Once the battery is fully charged, you can use the appliance for around 60 minutes without connecting it to the power supply.
Operation with the mains power adapter
If your hair and beard trimmer stops working during shaving due to a discharged or weak battery, you can continue shaving by plugging in the mains power adapter 6 .
♦Plug the mains power adapter plug 6 into the socket on the underside of the hair and beard trimmer.
♦To avoid injuries and damage to the appliance, always switch the appliance o before connecting it to the power supply.
♦Plug the mains power adapter 6 (wide-range voltage 100–240 V) in a power socket complying with the appliance specifications.
♦After 1–2 seconds, you can switch the appliance on by pressing the ON/OFF switch 3 . If the appliance does not start immediately, switch it o again and wait around 1 minute before switching it on again.
♦If you want to charge the battery without using the charging station 5 in this manner you can only do this when the appliance is switched o .
SHBS 5 A1 |
9 |

GB |
Oiling the cutting attachments |
We recommend that you oil the hair trimmer , beard trimmer 7 and precision trimmer attach- |
|
|
ments 8 before first use and after cleaning to ensure full mobility. |
♦To do this, simply apply a couple of drops of blade oil (accessory) between the blades, and then distribute it evenly.
♦Wipe o any access oil with a soft cloth. Use only non-corrosive oils such as sewing machine oil.
Handling and use
Attaching/changing the cutter attachments
 WARNING
►Switch o the appliance before attaching or changing the cutter attachments. There is a risk of personal injury!
♦Press your thumbs forwards against the cutter attachment to release it from its holder (see Fig. D). Then remove the cutter attachment from the appliance.
♦To attach the cutter attachment, insert the lower plug-in tab into the opening on the appliance (see Fig. E).
♦Then press the upper part of the cutter attachment onto the appliance until it audibly clicks into place and is firmly seated (see Fig. F).
Attaching/changing the comb attachments
Comb attachment for the hair trimmer attachment
The comb attachment 11 has settings for 6 di erent cut lengths (13 mm/15 mm/17 mm/ 19 mm/21 mm/23 mm).
♦Attach the comb attachment 11 from the front onto the hair trimmer attachment  and press the rear end firmly until it clicks into place.
♦To remove the comb attachment 11, release the lower end and pull it forwards o the appliance.
10 |
SHBS 5 A1 |
Comb attachment for the beard trimmer attachment
The comb attachment 12 has settings for 6 di erent cut lengths (4 mm/6 mm/9 mm/12 mm/ |
GB |
|
15 mm/18 mm). |
|
|
♦ |
Attach the comb attachment 12 from the front onto the beard trimmer attachment 7 and press |
|
|
it down. |
|
♦ |
To remove the comb attachment 12 press it forwards o the appliance. |
|
Hair trimmer attachment
NOTE
►Any hair to be cut should be clean and dry.
►Brush the hair carefully through to remove any knots.
►Place a hairdressing cape or cloth around your neck and throat to avoid cut hair ends falling inside your collar.
►Start by setting the comb attachment 11 to a longer length and reduce this in stages while cutting the hair.
►Please note that the corresponding cut length will only be achieved if the slide switch 2 is set to position 3 and the appliance is being held at right angles to the skin surface.
♦Switch the hair and beard trimmer on by pressing the ON/OFF switch 3 .
♦Run the hair and beard trimmer slowly through your hair.
♦Hold the appliance so that the comb attachment 11 is as flat as possible.
♦Always cut from your neck towards the top of your head, or from your forehead and temples upwards towards the middle of your head.
♦Use the hair trimmer attachment  without the comb attachment 11 to cut the hair very short.
♦You can use the slide switch 2 to finely adjust the cut length in three steps.
SHBS 5 A1 |
11 |

Beard trimmer attachment
GB
NOTE
►Comb the beard in the direction of growth to remove any knots.
►Start by setting the comb attachment 12 to a longer length and reduce this in stages while cutting the hair.
►Please note that the corresponding cut length will only be achieved if the slide switch 2 is set to position 3 and the appliance is being held at right angles to the skin surface.
♦Cut the beard against the beard growth direction (upwards from chin to ear). Trim first one side and then other.
♦Use the beard trimmer attachment 7 without the comb attachment 12 to cut the beard very short or to add shape or trim a moustache.
♦You can use the slide switch 2 to finely adjust the cut length in three steps.
Precision trimmer attachment
♦Use the precision trimmer attachment 8 to add shape to a moustache, mutton chops, sideburns or eyebrows.
♦Lay the edge of the precision trimmer attachment 8 at the required level of the hair growth and move the appliance downwards.
Ear/nose hair trimmer attachment
♦Use the ear/nose hair trimmer 9 if you want to remove ear or nose hair.
♦Guide the metal end of the ear/nose hair trimmer attachment 9 slowly into the nostril or ear.
♦Move the appliance slowly in a circular motion to cut the hair.
Shaver attachment
♦Use the shaver attachment 10 for a dry shave.
♦Hold the appliance at right angles to the skin surface and move it gently over your face.
♦Shave in the opposite direction to the beard growth. In complicated areas, such as the chin, pull the skin tight to achieve a better result.
12 |
SHBS 5 A1 |
Cleaning and care
GB
 DANGER
Danger to life due to electric shock!
►Pull the mains power adapter 6 out of the power socket before cleaning the appliance.
►Never touch the mains power adapter 6 with wet hands, especially when plugging it in or unplugging it.
►Always keep the mains power adapter 6 and the cable dry.
CAUTION
Possible damage to the appliance.
►The hair and beard trimmer may never be immersed in water or other liquids for cleaning, since the appliance is not watertight. If this is done, live parts (batteries) can be damaged.
►Do not use aggressive or abrasive cleaning agents, as these can damage the upper surfaces.
►Clean the housing only with a soft damp cloth and a mild detergent.
♦Switch the hair and beard trimmer o by pressing the ON/OFF switch 3 .
♦Disconnect the cable from the appliance and pull the mains power adapter 6 out of the power socket.
♦If any comb attachment (11 or 12) is attached, remove this first.
♦Wash the comb attachment (11 or 12) if required under running water.
♦Dry the comb attachment (11 or 12) thoroughly afterwards.
♦Press your thumbs against the cutter attachment to release it from its holder (see Fig. D).
♦Use the cleaning brush supplied to remove any hair residue from the cutter attachment.
♦Once you have completed cleaning, plug the cutter attachment plug-in tab back into the mounting opening on the appliance (see Fig. E).
♦Push the cutter attachment back onto the appliance by pressing lightly from above (see Fig. F).
NOTE
►In order to reduce friction, occasionally apply a couple of drops of blade oil (accessory) between the blades, and then distribute it evenly. You can also use any non-corrosive oil (e.g. sewing machine oil). Wipe o any access oil with a soft cloth.
SHBS 5 A1 |
13 |
Cleaning the shaver attachment
GB
CAUTION
Possible damage to the appliance.
►Do not remove the shaving foil from the foil holder and do not clean this with the cleaning brush.
♦Remove the shaver attachment 10 from the appliance.
♦Press the buttons at the side of the shaver attachment 10 and pull o the shaving foil holder. Hold the shaving foil holder only by the sides and do not press on the foil itself.
♦Clean the cutting blades with the supplied cleaning brush.
♦Clean the shaving foil in the shaving foil holder by holding it under running water and allow it to dry o completely before reattaching it to the shaver attachment 10.
♦Replace the shaving foil holder onto the shaver attachment 10. During replacement ensure that the fixing tabs on the shaving foil holder are inserted into the corresponding openings on the shaver attachment 10, and then press the shaving foil holder gently down until it audibly clicks into place.
NOTE
►Every now and again, apply a couple of drops of blade oil (accessory) between the blades, and then distribute it evenly. Attach the shaver attachment 10 to the appliance and allow the appliance to run for a few seconds without using it. Wipe o any access oil with a soft cloth.
Cleaning the ear/nose hair trimmer attachment
♦Remove the ear/nose hair trimmer attachment 9 from the appliance.
♦Clean the ear/nose hair trimmer attachment 9 under running water and allow it to dry completely before using it again.
14 |
SHBS 5 A1 |
Disposal
GB
Disposal of the appliance
Never dispose of the appliance in the normal domestic waste. This product is subject to the provisions of European Directive 2012/19/EU (Waste Electrical and Electronic Equipment).
Dispose of the appliance via an approved disposal company or your municipal waste facility. Please observe the currently applicable regulations. Please contact your waste disposal centre if you are in any doubt.
NOTE
► Before disposing of the appliance it is essential to first remove the battery.
CAUTION
►Removal of the battery requires a certain amount of manual dexterity; otherwise there is a risk of injury! If you have no experience in using tools, you should entrust the task to someone who is competent to do the job properly.
►Ensure that the battery does not get damaged during removal. There is a risk of fire!
►The removed battery may not be reused.
►Never short-circuit the battery. The contacts on the removed battery should not be connected by an metallic objects. The battery can overheat and explode.
►WARNING! Only remove the battery for disposal of the appliance. Removal will destroy the appliance. Never operate an appliance that has been dismantled.
♦Disconnect the appliance from the power supply.
♦Switch on the appliance and let it run until the battery is fully discharged.
♦Remove the cutter attachment from the appliance (see chapter Attaching/changing the cutter attachments)
♦There are three screws on the rear of the appliance. Two of the screws are in the mounting opening of the appliance.
♦Loosen both the screws with a Philips screwdriver.
SHBS 5 A1 |
15 |

GB |
♦ |
Remove the rear side of the appliance. |
♦ |
Use a diagonal cutter/flat-head screwdriver to disconnect the battery from the circuit board. |
|
|
|
Remove the battery. Take the battery and the appliance separately to appropriate disposal |
|
|
facilities. |
Disposal of batteries
Used batteries may not be disposed of in household waste. All consumers are statutorily required to dispose of batteries at a collection point provided by their local community or at a retail store. The purpose of this obligation is to ensure that batteries are disposed of in a non-polluting manner. Only dispose of batteries when they are fully discharged.
16 |
SHBS 5 A1 |
Appendix
GB
Technical details
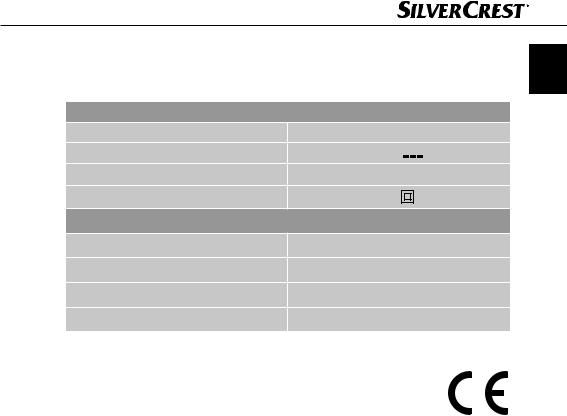
Mains power adapter PTB-045100EU |
|
|
|
|
|
|
|
Input voltage |
100–240 V , 50/60 Hz |
||||||
Output voltage |
4.5 V |
|
|
|
|
|
|
|
|
|
|
|
|||
Output current |
1000 mA |
||||||
Protection class |
II / |
||||||
Hair and beard trimmer |
|
|
|
|
|
|
|
Input voltage |
4.5 V |
|
|
|
|
|
|
|
|
|
|
|
|||
|
|
|
|
|
|
||
Input current |
1000 mA |
||||||
Rechargeable battery |
3.7 V/700 mAh Li-ion battery |
||||||
Environmental temperature |
5°C up to 35°C |
||||||
Notes on the Declaration of Conformity |
|
|
|
|
|
|
|
With regard to conformity with essential requirements and other relevant provisions, this appliance complies with the guidelines of the Electromagnetic Compatibility Directive 2004/108/EC and the Low Voltage Directive 2006/95/EC.
The full original Declaration of Conformity is available from the importer.
Warranty
The warranty for this appliance is for 3 years from the date of purchase. The appliance has been manufactured with care and meticulously examined before delivery.
Please retain your receipt as proof of purchase. In the case of a warranty claim, please make contact by telephone with our Customer Service Department. Only in this way can a post-free despatch for your goods be assured.
SHBS 5 A1 |
17 |
NOTICE
GB |
► |
The warranty covers only claims for material and manufacturing defects, but not for |
|
||
|
|
transport damage, wearing parts or for damage to fragile components, e.g. buttons or |
|
|
batteries. |
|
|
|
This product is for domestic use only and is not intended for commercial use. The warranty is void in the case of abusive and improper handling, use of force and internal tampering not carried out by our authorised service branch.
Your statutory rights are not restricted in any way by this warranty. The warranty period is not extended by repairs made under the warranty. This applies also to replaced and repaired parts.
Damages and defects extant at the time of purchase must be reported immediately after unpacking, resp. no later than two days after the date of purchase.
Repairs made after the lapse of the warranty period are subject to charge.
Service
 Service Great Britain
Tel.: 0871 5000 720 (£ 0.10/Min.)
E-Mail: kompernass@lidl.co.uk
IAN 96126
Hotline availability: Monday to Friday 08:00 - 20:00 (CET)
Importer
KOMPERNASS HANDELS GMBH BURGSTRASSE 21
44867 BOCHUM GERMANY www.kompernass.com
18 |
SHBS 5 A1 |
Spis treści
Wprowadzenie . . . . . . . . . . . . . . . . . 20
Informacje o niniejszej instrukcji obsługi . . . . 20 Prawa autorskie . . . . . . . . . . . . . . . . . . . . . . . 20 Ograniczenie odpowiedzialności . . . . . . . . . 20 Użytkowanie zgodne z przeznaczeniem . . . 20 Zastosowane wskazówki ostrzegawcze . . . . 21
Bezpieczeństwo . . . . . . . . . . . . . . . . 22
Podstawowe zasady bezpieczeństwa . . . . . . 22
Zakres dostawy . . . . . . . . . . . . . . . . 25
Części zamienne . . . . . . . . . . . . . . . . . . . . . . 26 Utylizacja opakowania . . . . . . . . . . . . . . . . . 26
Opis urządzania . . . . . . . . . . . . . . . . 26
Przed uruchomieniem. . . . . . . . . . . . 27
Ładowanie akumulatora . . . . . . . . . . . . . . . . 27
Praca z wykorzystaniem zasilacza wtyczkowego. . . . . . . . . . . . . . . . . . . . . . . . . 27
Oliwienie nasadek. . . . . . . . . . . . . . . . . . . . . 28
Obsługa i praca . . . . . . . . . . . . . . . . 28
Zakładanie / wymiana nasadek . . . . . . . . . . 28
Zakładanie / wymiana nasadek grzebieniowych . . . . . . . . . . . . . . . . . . . . . . . 28
Nasadka do strzyżenia włosów . . . . . . . . . . 29 Nasadka do strzyżenia brody. . . . . . . . . . . . 30 Nasadka - precyzyjny trymer. . . . . . . . . . . . . 30 Nasadka - trymer do nosa i uszu. . . . . . . . . . 30 Nasadka do golenia . . . . . . . . . . . . . . . . . . . 30
. . . . . . . . .Czyszczenie i pielęgnacja |
31 |
|
|
Czyszczenie nasadki do golenia |
32 |
|
|
|
|||
Czyszczenie nasadki - trymer do nosa i uszu . 33 |
PL |
||
|
|
|
|
Utylizacja. . . . . . . . . . . . . . . . . . . . . . |
33 |
|
|
|
|||
Utylizacja urządzenia . . . . . . . . . . . . . . . . . . |
33 |
|
|
Utylizacja baterii/akumulatorów . . . . . . . . . . |
34 |
|
|
Załącznik . . . . . . . . . . . . . . . . . . . . . . 35
Dane techniczne . . . . . . . . . . . . . . . . . . . . . . 35 Wskazówki dotyczące deklaracji zgodności . 35 Gwarancja. . . . . . . . . . . . . . . . . . . . . . . . . . . 35 Serwis . . . . . . . . . . . . . . . . . . . . . . . . . . . . . . 36 Importer . . . . . . . . . . . . . . . . . . . . . . . . . . . . . 36
SHBS 5 A1 |
19 |

Wprowadzenie
Informacje o niniejszej instrukcji obsługi
Serdecznie gratulujemy zakupu nowego urządzenia.
PL |
Wybrany produkt charakteryzuje się wysoką jakością. Instrukcja obsługi stanowi element składowy |
|
|
|
produktu. Zawiera ona ważne wskazówki na temat bezpieczeństwa, użytkowania i utylizacji. |
|
Przed przystąpieniem do eksploatacji produktu należy zapoznać się ze wszystkimi wskazówkami |
|
dotyczącymi obsługi i bezpieczeństwa. Produkt należy użytkować wyłącznie zgodnie z zamiesz- |
|
czonym tu opisem oraz w podanym zakresie zastosowań. Instrukcję obsługi przechowuj zawsze |
|
w bezpiecznym miejscu. W przypadku przekazania urządzenia następnej osobie, nie zapomnij |
|
dołączyć również instrukcji obsługi. |
Prawa autorskie
Niniejsza dokumentacja jest chroniona prawem autorskim.
Wszelkie rozpowszechnianie, wzgl. każdy przedruk, także we fragmentach, jak również odtwarzanie ilustracji, także w zmienionym stanie, jest dozwolone wyłącznie po uzyskaniu pisemnej zgody producenta.
Ograniczenie odpowiedzialności
Wszystkie zawarte w niniejszej instrukcji obsługi informacje techniczne, dane, wskazówki montażu i podłączania oraz obsługi, są aktualne na dzień przekazania do druku i uwzględniają nasze dotychczasowe doświadczenie oraz spostrzeżenia zgodnie z najlepszą wiedzą.
Na podstawie zawartych tu informacji, ilustracji i opisów nie można wysuwać żadnych roszczeń.
Producent nie ponosi żadnej odpowiedzialności za szkody, spowodowane nieprzestrzeganiem instrukcji, użytkowaniem urządzenia niezgodnie z przeznaczeniem, niefachowymi naprawami, niedozwolonymi przeróbkami oraz używaniem niedozwolonych części zamiennych.
Użytkowanie zgodne z przeznaczeniem
Urządzenie przeznaczone jest wyłącznie do użytku domowego, a nie do zastosowań komercyjnych. Urządzenie przewidziane jest wyłącznie do strzyżenia naturalnych włosów. Może być ono wykorzystywane wyłącznie do włosów ludzkich, a nie do włosów sztucznych ani zwierzęcych.
Inne lub wykraczające poza powyższe użytkowanie uznaje się za niezgodne z przeznaczeniem. Wszelkie roszczenia z tytułu szkód wynikających z użytkowania niezgodnego z przeznaczeniem są wykluczone. Ryzyko ponosi wyłącznie użytkownik.
20 |
SHBS 5 A1 |
Zastosowane wskazówki ostrzegawcze
W niniejszej instrukcji obsługi zastosowano następujące wskazówki ostrzegawcze: |
|
|
|
|
|
NIEBEZPIECZEŃSTWO |
|
|
|
|
|
Wskazówka ostrzegawcza tego stopnia zagrożenia oznacza grożącą |
PL |
|
sytuację niebezpieczną. |
|
|
Nieuniknięcie niebezpiecznej sytuacji może doprowadzić do śmierci lub powstania ciężkich obrażeń.
►Należy przestrzegać instrukcji w niniejszej wskazówce ostrzegawczej, aby uniknąć zagrożenia śmiercią lub ciężkich obrażeń ciała.
 OSTRZEŻENIE
Wskazówka ostrzegawcza tego stopnia zagrożenia oznacza możliwą sytuację niebezpieczną.
Nieuniknięcie niebezpiecznej sytuacji może doprowadzić do powstania obrażeń.
►Należy przestrzegać instrukcji zawartych w niniejszej wskazówce ostrzegawczej, by uniknąć obrażeń u osób.
UWAGA
Wskazówka ostrzegawcza tego stopnia zagrożenia oznacza możliwą szkodę materialną.
Nieuniknięcie takiej sytuacji może doprowadzić do powstania szkód materialnych.
►Aby uniknąć szkód materialnych, należy przestrzegać instrukcji zawartych w niniejszej wskazówce ostrzegawczej.
WSKAZÓWKA
► Wskazówka oznacza dodatkowe informacje, ułatwiające korzystanie z urządzenia.
SHBS 5 A1 |
21 |

Bezpieczeństwo
W tym rozdziale znajdują się ważne wskazówki bezpieczeństwa, dotyczące obsługi urządzenia. Niniejsze urządzenie jest zgodne z odpo-
PL wiednimi przepisami bezpieczeństwa. Mimo to, nieprawidłowe użycie może spowodować obrażenia u ludzi i szkody materialne.
Podstawowe zasady bezpieczeństwa
Mając na uwadze bezpieczne użytkowanie urządzenia, przestrzegaj następujących wskazówek bezpieczeństwa:
■To urządzenie może być używane przez dzieci od 8 roku życia oraz przez osoby o zmniejszonych zdolnościach fizycznych, sensorycznych lub umysłowych lub też osoby nieposiadające odpowiedniego doświadczenia i/lub wiedzy, wyłącznie pod nadzorem lub po przeszkoleniu w zakresie bezpiecznego używania urządzenia oraz wynikających z
niego zagrożeń. Dzieci nie mogą bawić się urządzeniem. Czyszczenie i konserwacja przez użytkownika nie mogą być wykonywane przez dzieci bez nadzoru.
■Przed przystąpieniem do użytkowania sprawdź, czy urządzenie nie ma widocznych uszkodzeń. Nie uruchamiaj uszkodzonego urządzenia. Istnieje niebezpieczeństwo porażenia prądem elektrycznym.
■W przypadku stwierdzenia uszkodzeń kabla, zasilacza wtyczkowego, obudowy lub innych elementów, dalsze korzystanie z urządzenia jest zabronione.
■Naprawy urządzenia zlecaj wyłącznie autoryzowanym serwisom lub serwisowi producenta. Nieprawidłowo wykonane naprawy mogą powodować poważne zagrożenie dla użytkownika. Ponadto, w takim przypadku wygasa gwarancja.
22 |
SHBS 5 A1 |

■Nie używaj urządzenia z uszkodzoną nasadką tnącą ani uszkodzoną nasadką grzebieniową, ponieważ mogą one mieć ostre krawędzie. Niebezpieczeństwo odniesienia obrażeń!
■ Uszkodzone elementy wymieniać zawsze na oryginalne części zamienne. |
PL |
|
Tylko te części gwarantują odpowiednie bezpieczeństwo użytkowania |
||
|
||
urządzenia. |
|
■Nigdy nie pozostawiaj urządzenia działającego bez nadzoru oraz korzystaj z niego wyłącznie zgodnie z informacjami na tabliczce znamionowej.
■Do zasilania sieciowego korzystaj wyłącznie z dostarczonego zasilacza wtyczkowego.
■Zasilacz wtyczkowy należy wyciągnąć z gniazda
-kiedy wystąpi usterka,
-przed przystąpieniem do czyszczenia urządzenia,
-gdy urządzenie przez dłuższy czas nie jest używane,
-po każdym użyciu.
Należy przy tym chwytać bezpośrednio za zasilacz wtyczkowy, a nie za kabel.
■UWAGA! Urządzenie przechowywać w suchym miejscu i utrzymywać w suchym stanie.
■Nie korzystać z urządzenia podczas kąpieli. Niebezpieczeństwo porażenia prądem elektrycznym!
■Nie zanurzać urządzenia ani kabla wraz zasilaczem wtyczkowym
w wodzie ani w żadnej innej cieczy.
■Gdyby urządzenie wpadło do wody, najpierw bezwzględnie wyciągnij zasilacz wtyczkowy z gniazda, zanim sięgniesz po urządzenie do wody.
SHBS 5 A1 |
23 |

■ Nigdy nie dotykaj zasilacza wtyczkowego mokrymi rękoma, w szczególności podczas wkładania go do gniazda lub wyjmowania z gniazda. Zagrożenie porażenia prądem elektrycznym!
PL |
■ Zamontowanie wyłącznika różnicowo-prądowego o pomiarowym napię- |
|
ciu wyłączającym o wartości nie większej niż 30 mA zapewnia dalszą |
||
|
||
|
ochronę przed porażeniem prądem elektrycznym. Montaż należy |
|
|
zlecić wyłącznie elektrykowi. |
|
|
■ Sprawdzaj zasilacz wtyczkowy oraz maszynkę do strzyżenia włosów i |
|
|
brody regularnie pod kątem ewentualnych uszkodzeń mechanicznych. |
|
|
■ Dopilnuj, aby kabel nie został przycięty między drzwiczkami szafek |
|
|
ani nie był przeciągany po gorących powierzchniach. Mogłoby w ten |
|
|
sposób dojść do uszkodzenia izolacji kabla. |
|
|
■ Zasilacz wtyczkowy podłączać wyłącznie do łatwo dostępnego gniazda, |
|
|
aby w razie usterki można było szybko wyjąć zasilacz z gniazda. |
|
|
■ Nie zakrywać zasilacza wtyczkowego, by nie spowodować jego |
|
|
przegrzania. |
24 |
SHBS 5 A1 |
Zakres dostawy
Urządzenie dostarczane jest standardowo z następującymi elementami: |
|
Maszynka do strzyżenia włosów i brody |
|
|
|
Stacja do ładowania |
PL |
Wtyczkowy zasilacz sieciowy |
|
Nasadka do strzyżenia włosów |
|
Nasadka do strzyżenia brody |
|
Nasadka - precyzyjny trymer |
|
Nasadka - trymer do nosa i uszu |
|
Nasadka do golenia |
|
Nasadka grzebieniowa do nasadki do strzyżenia włosów |
|
Nasadka grzebieniowa do nasadki do strzyżenia brody |
|
Szczotka do czyszczenia |
|
Nożyczki |
|
Grzebień |
|
Oliwa do ostrzy |
|
Woreczek do przechowywania |
|
Niniejsza instrukcja obsługi |
|
WSKAZÓWKA
►Po rozpakowaniu nowego urządzenia sprawdź, czy w środku znajdują się wszystkie części oraz czy nie ma żadnych widocznych uszkodzeń.
►W przypadku niekompletnej dostawy, bądź wystąpienia uszkodzeń wskutek wadliwego opakowania lub transportu skontaktuj się z infolinią serwisową (patrz rozdział Serwis).
♦Wyjmij wszystkie elementy urządzenia z kartonu.
♦Usuń z urządzenia wszelkie materiały opakowaniowe.
 NIEBEZPIECZEŃSTWO
►Elementów opakowania nie dawać dzieciom do zabawy. Istnieje niebezpieczeństwo uduszenia.
SHBS 5 A1 |
25 |
|
Części zamienne |
|
Gdy potrzebne są części zamienne, należy skontaktować się z infolinią serwisową (patrz roz- |
|
dział Serwis). |
PL |
Utylizacja opakowania |
|
Opakowanie chroni urządzenie przed uszkodzeniami podczas transportu. |
|
Zwracanie opakowania do obiegu materiałów oszczędza surowce naturalne i zmniejsza |
|
zanieczyszczenie odpadami. Zbędne materiały opakowania utylizować zgodnie z miejscowo |
|
obowiązującymi przepisami. |
Opis urządzania
Rysunek A:
Nasadka do strzyżenia włosów
2Przełącznik suwakowy do precyzyjnego ustawiania długości strzyżenia
3Włącznik/wyłącznik
4Wskaźnik stanu naładowania
5Stacja ładowania / uchwyt z gniazdem przyłączeniowym zasilacza wtyczkowego
Rysunek B:
6 Wtyczkowy zasilacz sieciowy
Rysunek C:
7Nasadka do strzyżenia brody
8Nasadka - precyzyjny trymer
9Nasadka - trymer do nosa i uszu
10Nasadka do golenia
11Nasadka grzebieniowa do nasadki do strzyżenia włosów
12Nasadka grzebieniowa do nasadki do strzyżenia brody
26 |
SHBS 5 A1 |
Przed uruchomieniem
Maszynka do strzyżenia włosów i brody może być zasilana akumulatorowo i sieciowo.
Ładowanie akumulatora
Przed pierwszym zastosowaniem akumulator maszynki do strzyżenia włosów i brody powinien |
PL |
|
|
być ładowany przez co najmniej 90 minut. |
|
♦Podłącz kabel zasilacza wtyczkowego 6 do stacji ładowania 5 maszynki do strzyżenia włosów i brody.
♦Unikaj uszkodzeń urządzenia! Przed rozpoczęciem ładowania akumulatorów upewnij się, że urządzenie jest wyłączone.
♦Włóż zasilacz wtyczkowy 6 (zakres napięcia 100 - 240 V) do gniazda spełniającego wymagania urządzenia.
♦ Przebieg procesu ładowania jest sygnalizowany przez kontrolkę 4 :
-kontrolka ładowania miga na czerwono: akumulator jest rozładowany
-kontrolka ładowania świeci się na czerwono: akumulator jest ładowany
-kontrolka ładowania świeci się na zielono: akumulator jest naładowany.
♦Przy całkowicie naładowanym akumulatorze można korzystać z urządzenia w czasie do 60 minut bez konieczności podłączania go do sieci.
Praca z wykorzystaniem zasilacza wtyczkowego
Jeżeli z powodu rozładowanego lub słabego akumulatora maszynka do strzyżenia włosów i brody zatrzyma się w trakcie jej użytkowania, można kontynuować strzyżenie po podłączeniu zasilacza wtyczkowego 6 .
♦Włóż wtyk zasilacza wtyczkowego 6 do gniazda znajdującego się na dolnej części maszynki do strzyżenia włosów i brody.
♦Aby uniknąć obrażeń oraz uszkodzeń urządzenia, wyłączaj je zawsze przed podłączeniem do zasilania sieciowego.
♦Włóż zasilacz wtyczkowy 6 (zakres napięcia 100 - 240 V) do gniazda spełniającego wymagania urządzenia.
♦Po 1 - 2 sekundach możesz włączyć urządzenie przełącznikiem WŁ. / WYŁ. 3 . Gdyby urządzenie nie włączyło się od razu, wyłącz je ponownie i odczekaj ok. 1 minutę, zanim je ponownie włączysz.
SHBS 5 A1 |
27 |
 Loading...