Silvercrest SDR 900 A1 User Manual [cs, pl, en, de]
HANDHELD STEAM CLEANER SDR 900 A1
HANDHELD STEAM CLEANER
Operating instructions
KÉZI GŐZTISZTÍTÓ
Használati utasítás
RUČNÍ PARNÍ ČISTIČ
Návod k obsluze
HANDDAMPFREINIGER
Bedienungsanleitung
RĘCZNE, PAROWE URZĄDZENIE
CZYSZCZĄCE
Instrukcja obsługi
ROČNI PARNI ČISTILNIK
Navodila za uporabo
RUČNÝ PARNÝ ČISTIČ
Návod na obsluhu
IAN 103808

Before reading, unfold the page containing the illustrations and familiarise yourself with all functions of the device.
Przed przeczytaniem proszę rozłożyć stronę z ilustracjami, a następnie proszę zapoznać się z wszystkimi funkcjami urządzenia.
Olvasás előtt kattintson az ábrát tartalmazó oldalra és végezetül ismerje meg a készülék mindegyik funkcióját.
Pred branjem odprite stran s slikami in se nato seznanite z vsemi funkcijami naprave.
Před čtením si otevřete stranu s obrázky a potom se seznamte se všemi funkcemi přístroje.
Pred čítaním si odklopte stranu s obrázkami a potom sa oboznámte so všetkými funkciami prístroja.
Klappen Sie vor dem Lesen die Seite mit den Abbildungen aus und machen Sie sich anschließend mit allen Funktionen des Gerätes vertraut.
GB |
Operating instructions |
Page |
1 |
PL |
Instrukcja obsługi |
Strona |
17 |
HU |
Használati utasítás |
Oldal |
33 |
SI |
Navodila za uporabo |
Stran |
49 |
CZ |
Návod k obsluze |
Strana |
65 |
SK |
Návod na obsluhu |
Strana |
81 |
DE / AT / CH |
Bedienungsanleitung |
Seite |
97 |

A
B

Contents
GB
Introduction . . . . . . . . . . . . . . . . . . . . . . . . . . . . . . . . . . . . . . . . . . . . . . . . . . . 2
Copyright. . . . . . . . . . . . . . . . . . . . . . . . . . . . . . . . . . . . . . . . . . . . . . . . . . . . . . . . . . . . . . . 2 Warning notes . . . . . . . . . . . . . . . . . . . . . . . . . . . . . . . . . . . . . . . . . . . . . . . . . . . . . . . . . . . 2
Intended use . . . . . . . . . . . . . . . . . . . . . . . . . . . . . . . . . . . . . . . . . . . . . . . . . . 3
Package contents . . . . . . . . . . . . . . . . . . . . . . . . . . . . . . . . . . . . . . . . . . . . . . 4
Description of appliance/accessories . . . . . . . . . . . . . . . . . . . . . . . . . . . . . . 5
Technical data . . . . . . . . . . . . . . . . . . . . . . . . . . . . . . . . . . . . . . . . . . . . . . . . . 5
Safety guidelines . . . . . . . . . . . . . . . . . . . . . . . . . . . . . . . . . . . . . . . . . . . . . . 6
Operating the appliance . . . . . . . . . . . . . . . . . . . . . . . . . . . . . . . . . . . . . . . . 8
Filling/refilling with water . . . . . . . . . . . . . . . . . . . . . . . . . . . . . . . . . . . . . . . . . . . . . . . . . . 8 Operating the appliance . . . . . . . . . . . . . . . . . . . . . . . . . . . . . . . . . . . . . . . . . . . . . . . . . . 10 Areas of application . . . . . . . . . . . . . . . . . . . . . . . . . . . . . . . . . . . . . . . . . . . . . . . . . . . . . 11 Fitting/removing attachments. . . . . . . . . . . . . . . . . . . . . . . . . . . . . . . . . . . . . . . . . . . . . . . 11 Child safety lock . . . . . . . . . . . . . . . . . . . . . . . . . . . . . . . . . . . . . . . . . . . . . . . . . . . . . . . . 13
Cleaning. . . . . . . . . . . . . . . . . . . . . . . . . . . . . . . . . . . . . . . . . . . . . . . . . . . . . 13
Storage . . . . . . . . . . . . . . . . . . . . . . . . . . . . . . . . . . . . . . . . . . . . . . . . . . . . . 14
Troubleshooting . . . . . . . . . . . . . . . . . . . . . . . . . . . . . . . . . . . . . . . . . . . . . . 14
Disposal of the appliance . . . . . . . . . . . . . . . . . . . . . . . . . . . . . . . . . . . . . . . 15
Disposal of packaging materials . . . . . . . . . . . . . . . . . . . . . . . . . . . . . . . . . . . . . . . . . . . . 15
Notes on the Declaration of Conformity . . . . . . . . . . . . . . . . . . . . . . . . . . . 15
Warranty . . . . . . . . . . . . . . . . . . . . . . . . . . . . . . . . . . . . . . . . . . . . . . . . . . . . 16
Service . . . . . . . . . . . . . . . . . . . . . . . . . . . . . . . . . . . . . . . . . . . . . . . . . . . . . . 16
Importer. . . . . . . . . . . . . . . . . . . . . . . . . . . . . . . . . . . . . . . . . . . . . . . . . . . . . 16
SDR 900 A1 |
1 |

Introduction
GB |
Congratulations on the purchase of your new appliance. |
|
|
|
You have selected a high quality product. The operating instructions are part of |
|
this product. They contain important information on safety, usage and disposal. |
|
Before using the product, familiarise yourself with all handling and safety instruc- |
|
tions. Use the product only as described and for the range of applications specified. |
|
Keep these operating instructions in a safe place. Please also pass these operating |
|
instructions on to any future owner(s). |
Copyright
This documentation is protected by copyright.
Any copying or reproduction, including in the form of extracts, or any reproduction of images (even in a modified state), is permitted only with the written authorisation of the manufacturer.
Warning notes
The following warnings are used in these operating instructions:
 WARNING
A warning at this hazard level indicates a potentially hazardous situation.
Failure to avoid this hazardous situation could result in physical injury. ► Follow the instructions in this warning to prevent physical injury.
CAUTION
A warning at this hazard level indicates potential property damage.
Failure to avoid this situation could result in property damage.
► Follow the instructions in this warning to prevent property damage.
NOTE
►A note provides additional information that will assist you in using the appliance.
2 |
SDR 900 A1 |

Intended use
This appliance is a steam cleaner designed for the removal of dirt and stains in |
GB |
|
|
domestic households, for example ... |
|
– smooth surfaces: work surfaces, tiles, glazed tiles, windows, mirrors |
|
– hard-to-reach areas: corners, joints, blinds, WC, bathroom fittings, etc. |
|
– textiles: curtains, cushions, clothing, car seats. |
|
This appliance is not intended:
–for outdoor use,
–for use with liquids other than water,
–for use in commercial or industrial applications.
 WARNING
Danger if not used for the intended purpose!
The appliance may pose a hazard if it is not used for its intended purpose and/or if it is used for any other purpose.
►Use the appliance only for its intended purpose.
►Observe the procedures described in these operating instructions.
NOTE
►Incorrect use of the appliance and/or using it for an alternative purpose can be dangerous. Use the appliance only for its intended purpose. Observe the procedures described in these operating instructions.
Claims of any kind for damage resulting from misuse, incompetent repairs, unauthorised modification or the use of unauthorised spare parts will not be accepted. The risk shall be borne solely by the user.
SDR 900 A1 |
3 |

Package contents
GB |
The appliance is supplied with the following components as standard: |
|
|
||
|
|
Steam cleaner |
|
|
Extension hose |
|
|
Extension nozzle |
|
|
Angle nozzle |
|
|
Upholstery nozzle |
|
|
Round brush |
|
|
Safety valve |
|
|
Pulling attachment |
|
|
Cotton cover |
|
|
Funnel |
|
|
Measuring cup |
|
|
Operating instructions |
Remove all parts of the appliance from the packaging and remove all packaging materials.
 WARNING
Risk of su ocation!
► Packaging material must not be used as a plaything. Risk of su ocation.
NOTE
►Check the package for completeness and for signs of visible damage.
►If the consignment is incomplete or damaged due to defective packaging or carriage, contact the Service hotline (see the section Service).
4 |
SDR 900 A1 |

Description of appliance/accessories
Steam lever |
GB |
|
2“Child safety lock” button
3Water tank
4Red control lamp
5Green control lamp
6Steam nozzle
7Water tank filler opening
8Safety valve
9Extension hose
10Extension nozzle
11Round brush
12Angle nozzle
13Squeegee attachment
14Upholstery nozzle
15Cotton cover
16Measuring cup
17Funnel
Technical data
Mains voltage |
220–240 V ~, 50 Hz |
Rated power |
900–1050 W |
Appliance protection rating |
IPX4 |
|
350 ml |
Water tank capacity |
With a water filling of 250 ml (MAX), steam |
|
can be generated for about 5 minutes. |
SDR 900 A1 |
5 |

Safety guidelines
GB
 RISK OF ELECTRIC SHOCK
►Connect the appliance only to mains power sockets supplying a mains power voltage of 220–240 V ~ / 50 Hz.
►In the event of operating malfunctions, and before cleaning the appliance, disconnect the plug from the mains power socket.
►To disconnect the power cable, always pull the plug from the socket, do not pull the power cable itself.
►Do not kink or crush the power cable, and route the cable so that it cannot be stepped on or tripped over.
►To avoid risks, arrange for defective plugs and/or power cables to be replaced at once by qualified technicians or our Customer Service Department.
►Ensure that the power cable does not become wet or moist during use. Route the cable in such a way that it cannot be crushed or damaged.
►Should the appliance, the power cable or the plug become damaged, arrange for them to be repaired by Customer Services to avoid hazardous situations.
►Disconnect the appliance from the mains power socket before filling it with water, changing accessories or cleaning it.
►Use the appliance only in dry indoor areas, not outdoors.
►Never submerse the appliance in water or other liquids!
►Never aim the steam jet directly at electrical appliances or equipment which contains electrical components, such as the interior of ovens.
►Never leave a heat-generating device unattended! After use or during work pauses, always remove the plug from the mains power socket. The appliance heats up and generates steam pressure continuously when the plug is connected to a mains power socket!
►Use the appliance only with dry hands and never without shoes (i.e. not barefoot). This will help reduce the e ect of an electric shock in the event of a malfunction.
►Never aim the appliance at moisture-sensitive objects.
►This appliance may be used by persons with limited physical, sensory or mental capabilities or lack of experience and knowledge, provided that they are under supervision or have been told how to use the appliance safely and are aware of the potential risks. The appliance must not be used as a plaything by children.
6 |
SDR 900 A1 |
WARNING! RISK OF INJURY!
GB
►Never remove the safety valve 8 if steam is still exiting the steam nozzle!
►Do not operate the appliance with an empty water tank. When the water reserve is used up, remove the power cable to prevent the appliance from overheating.
►The accessories will get hot during use! There is a risk of scalding!
►Allow the accessories used to cool down before dismantling them.
►Use only the original accessory parts for this appliance. Other accessories may not meet the safety requirements.
►The appliance may not be used if it has been dropped, if there are any obvious signs of physical damage or if it is leaking.
►The appliance must be kept out of the reach of children if it is switched on or is cooling down.
►Wear gloves, protective glasses and breathing protection equipment when attempting to remove substances that could be hazardous to health.
►Never direct the steam toward people or animals. Hot steam can cause serious injuries!
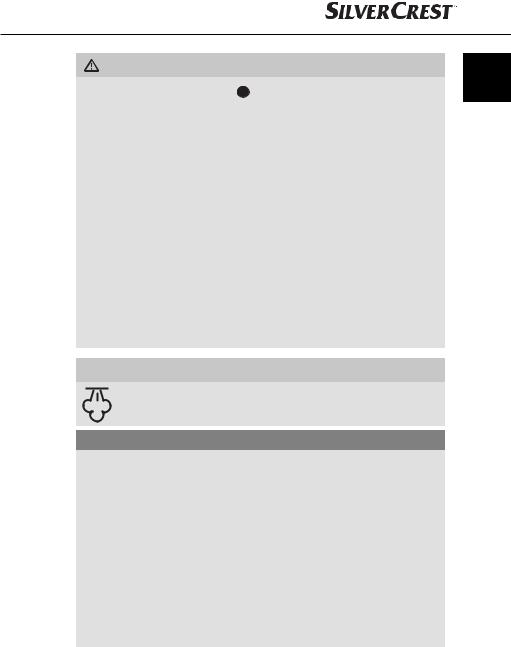
 WARNING! RISK OF SCALDING!
This symbol warns you about escaping steam.
Please follow the safety instructions!
CAUTION – PROPERTY DAMAGE!
►Start by carrying out a test on an unobtrusive area to be certain that the material is suitable for cleaning with a steam cleaner, for instance:
–Painted/varnished wood or leather can be bleached by steam.
–Unprotected wood can swell up.
–Protective wax coatings can be dissolved by steam.
–Plastics can become tarnished from the e ects of steam.
–Soft plastics can deform when exposed to steam.
–Cold glass or mirror surfaces can crack when sprayed with hot steam.
►If you wish to clean windows, you must first preheat them, for instance by applying the steam over large areas from a greater distance, then moving in progressively closer.
►Acrylics, velvet and silk react sensitively to hot steam, as do plastic fibres.
SDR 900 A1 |
7 |
Operating the appliance
GB
 WARNING! RISK OF INJURY!
To ensure fault-free operation and a long service life for the appliance, pay heed to the following instructions:
► Do not press the steam lever  until the green control lamp 5 lights up. If you press too early, it may cause an accumulation of hot water in the steam nozzle 6 which will drip or spray from the nozzle. There is a risk of scalding.
►Before switching o , allow all of the steam to escape from the appliance. Press the steam lever  until no more steam comes out of the steam nozzle 6 .
►If the appliance is to be used in continuous operation, the "Child safety lock" button 2 with the symbol  must be pressed before switching o .
Filling/refilling with water
 RISK OF ELECTRIC SHOCK
►Always disconnect the plug from the mains power socket before you add water to the water tank 3 !
Open the safety valve 8 .
CAUTION – PROPERTY DAMAGE!
► Do not put any additives or cleaning agents in the water tank 3 !
NOTE
► Ensure that you fill the appliance’s water tank 3 with around 250 ml of water.
Fill the water tank 3 with water through the filler opening 7 .
To do this, use the supplied measuring cup 16 and the funnel 17 for assistance (see figure). Fill the measuring cup 16 with water up to the marking line (approx. 250 ml).
Reclose the safety valve 8 .
8 |
SDR 900 A1 |

■ If there is no more water in the water tank 3 , no steam will come out when |
GB |
the steam lever is pressed . The water tank must be filled as follows: |
Remove the plug from the mains power socket.
Wait about 10 seconds.
Slowly open the safety valve 8 . Before fully opening up the valve, wait a few seconds until the hissing of the water vapour stops.
Fill the water tank 3 with water.
Reclose the safety valve 8 .
If the mains water at your locality is rated as hard, it is recommended that you mix the mains water with distilled water. Otherwise, the appliance could calcify prematurely and clog the steam nozzle 6 .
To extend the optimal functioning of the appliance, mix the mains water with distilled water as per the following table.
Water hardness |
Ratio of distilled water |
|
to mains water |
||
|
||
very soft/soft |
0 |
|
medium |
1:1 |
|
hard |
2:1 |
|
very hard |
3:1 |
The water hardness level of your tap water can be queried at your local water works.
SDR 900 A1 |
9 |

Operating the appliance
GB |
1) Insert the plug into a mains power socket. |
|
|
|
The red control lamp 4 lights up to indicate that there is a connection to the |
|
mains electricity. |
2)As soon as the appliance is ready to use, the green control lamp 5 lights up. The red control lamp 4 stays lit.
NOTE
► While heating up, steam may occasionally escape from the steam nozzle |
6 . |
|
3) Press the steam lever |
downwards. Steam comes out of the steam nozzle |
6 . |
If the steam pressure drops, the green control lamp 5 will go out. |
|
|
Release the steam lever |
until the green control lamp 5 comes back on. |
|
4)If you want to work with the appliance in continuous operation, press the
steam lever  down and at the same time press the "Child safety lock" button 2 with the
  icon.
icon.
5)To end continuous operation, press the "Child safety lock" button 2 with the  icon.
icon.
NOTE
►If water drips out of the steam nozzle 6 during operation or the steam pressure falls, release the steam lever  . The appliance needs to heat up again. Wait until the green control lamp 5 lights up again.
►The steam cleaner has a thermal cut-out. It switches itself o automatically in case of overheating (e.g. due to an empty water tank). If this happens, pull out the mains plug and refill the water tank 3 .
 WARNING! RISK OF INJURY!
►If you stop working for an extended period of time and leave the appliance
switched on, steam may occasionally escape even though the steam lever  is not pressed.
10 |
SDR 900 A1 |

Areas of application
You can clean either by using steam directly from the steam nozzle |
6 or you |
GB |
|
||
can fit an accessory. |
|
|
■Do not use an accessory if you want to clean items such as toilets and sinks, taps and drains, windows, furniture, fabrics, shutters or mirrors.
You can easily remove water and dissolved dirt from smooth surfaces after cleaning using the squeegee attachment 13.
NOTE
►The closer you hold the steam nozzle 6 to the surface to be cleaned, the better the e ect. The steam pressure and temperature are at their highest directly after leaving to the steam nozzle 6 .
►Stubborn stains and dirt must be soaked with water beforehand.
■Use the angle nozzle 12 for tight corners or joints, or hard-to-reach places.
■Use the round brush 11 for stubborn soiling, for example, on wheel rims.
Fitting/removing attachments
 WARNING! RISK OF INJURY!
►Always remove the plug from the mains power socket before you fit/remove an attachment.
►Wait until the appliance has cooled down before you fit/remove an attachment.
►Wait until all of the steam has dissipated before you fit/remove an attachment.
Extension hose
Push the extension hose 9 on to the steam nozzle 6 as far as the stop. The marking line on the extension hose 9 and the marking
line on the appliance must be aligned with each other (see fold-out page Figure A).
Turn anticlockwise until both marking lines on the extension hose 9 are aligned with both marking lines on the appliance. The extension hose 9 remains locked in this position (see fold-out page Figure B).
NOTE
►The fixture on the appliance has a joint so that the attachment can be aligned to the best usage position. This is, however, not possible with the extension hose 9 .
■The extension hose 9 is removed in the reverse order.
SDR 900 A1 |
11 |
Extension nozzle
GB |
Push the extension nozzle 10 on to the steam nozzle 6 as far as the stop . |
|
|
|
The marking line on the extension nozzle 10 and the marking line on the |
|
appliance must be aligned with each other (see fold-out page Figure A). |
Turn anticlockwise until both marking lines on the extension nozzle 10 are aligned with both marking lines on the appliance. The extension nozzle 10 remains locked in this position (see fold-out page Figure B).
NOTE
►The fixture on the appliance has a joint so that the attachment can be aligned to the best usage position. This is, however, not possible with the extension nozzle 10.
■The extension nozzle 10 is removed in the reverse order.
Assembling the squeegee
Remove the upholstery nozzle 14 and place this together with the two brackets onto the squeegee attachment 13.
Then press the upholstery nozzle 14 under the mount of the squeegee attachment 13 (see fold-out page).
Upholstery nozzle
Push the upholstery nozzle 14 on to the steam nozzle 6 as far as the stop. The marking line on the upholstery nozzle 14 and the marking line on the appliance must be aligned with each other (see fold-out page Figure A).
Turn anticlockwise until both marking lines on the upholstery nozzle 14 are aligned with both marking lines on the appliance. The upholstery nozzle 14 remains locked in this position (see fold-out page Figure B).
■A cotton cover 15 is supplied for use with the upholstery nozzle 14. This can be used for the cleaning of sensitive surfaces, such as sofas and armchairs.
NOTE
►The fixture on the appliance has a joint so that the attachment can be aligned to the best usage position. This is, however, not possible with the upholstery nozzle 14.
■The upholstery nozzle 14 is removed in the reverse order.
12 |
SDR 900 A1 |
Angle nozzle and round brush
■ Both of these attachments can be used either on the extension hose 10 or on |
GB |
|
|
the extension nozzle 9 or directly onto the steam nozzle 6 . |
|
Push the respective attachment on the hexagonal mount. |
|
NOTE
►The fixture on the appliance has a joint so that the attachment can be aligned to the best usage position.
►The respective attachment can now be turned to the desired position.
Child safety lock
This appliance is equipped with a child safety lock 2 .
■To activate the child safety lock 2 , press the "Child safety lock" button 2 with the  icon. The steam lever
  can now no longer be pressed down.
■To deactivate the child safety lock 2 , press the "Child safety lock" button 2 with the  icon. The steam lever
  can now be activated again.
Cleaning
 RISK OF ELECTRIC SHOCK
►Always remove the plug from the mains power socket before cleaning the appliance.
► You must never immerse the appliance in water when cleaning it or hold it under running water.
 WARNING – RISK OF INJURY!
► Allow the appliance to cool su ciently before cleaning it.
CAUTION – PROPERTY DAMAGE!
►Do not use aggressive, chemical or abrasive cleaning agents! They could irreparably damage the surface!
Remove the power plug from the socket.
Allow the appliance to cool down.
Empty the water tank 3 .
Clean the appliance and the accessories with a moist cloth. For stubborn dirt, wipe, adding mild detergent to the cloth.
SDR 900 A1 |
13 |

|
GB |
|
■ |
If it is dirty, the removable cotton cover 15 can be cleaned in accordance |
||
|
|
|
with the symbols on the label: |
|
||
|
|
|
|
|
The cotton cover 15 |
is machine washable at 60°C. |
|
|
|
|
|
||
|
|
|
|
|
The cotton cover 15 |
can be dried at a low temperature in |
|
|
|
|
|
||
|
|
|
|
|
a tumble drier. |
|
|
|
|
|
|
|
|
|
|
|
|
|
Do not iron the cotton cover 15. |
|
Storage
Store the cleaned and dried appliance in a clean and dust-free location.
Troubleshooting
PROBLEM |
POSSIBLE |
POSSIBLE |
|
CAUSE |
SOLUTIONS |
||
|
|||
|
The plug is not con- |
Connect the appliance to |
|
The appliance is |
nected. |
a mains power socket. |
|
not working. |
The appliance is |
Contact the Customer |
|
|
damaged. |
Service department. |
|
|
The water tank 3 is |
Fill the water tank 3 with |
|
No steam is |
empty. |
water. |
|
produced. |
The appliance is not yet |
Wait until the green control |
|
|
|||
|
heated up. |
lamp 5 lights up. |
|
The green control |
This is not a fault: the |
|
|
temperature dropped |
|
||
lamp 5 lights up and |
for a short time and the |
- |
|
then goes out again. |
appliance started heat- |
|
|
|
ing up again. |
|
|
The steam volume is |
The temperature is too |
Wait until the appliance |
|
low. |
low. |
has heated up again. |
|
Water drips from the |
The temperature is too |
Wait until the appliance |
|
steam nozzle 6 . |
low. |
has heated up again. |
14 |
SDR 900 A1 |
Disposal of the appliance
GB
Under no circumstances should you dispose of the appliance
with the normal household waste. This product is subject to the provisions of European Directive 2012/19/EU.
Dispose of the appliance via an approved waste disposal company or your municipal waste disposal facility. Please observe applicable regulations. Please contact your waste disposal facility if you are in any doubt.
Disposal of packaging materials
The packaging protects the appliance from damage during carriage.
The packaging materials have been selected for their environmental friendliness and ease of disposal, and are therefore recyclable.
Returning the packaging to the materials cycle conserves raw materials and reduces the amount of waste that is generated. Dispose of packaging materials
 that are no longer needed in accordance with applicable local regulations.
NOTE
►If possible, keep the original packaging of the appliance during the warranty period so that the device can be packed properly for returning in the event of a warranty claim.
Notes on the Declaration of Conformity
This appliance complies with the essential requirements and other relevant provisions of the European Electromagnetic Compatibility Directive 2004/108/EC, the Low Voltage Directive 2006/95/EC and the RoHS Directive 2011/65/EU. The complete Declaration of Conformity, in its original form, is available from the importer.
SDR 900 A1 |
15 |

|
GB |
|
Warranty |
|
|
|
|
You are provided a 3-year warranty on this appliance, valid from the date |
|
|
|
|
|
of purchase. This appliance has been manufactured with care and inspected |
|
|
|
|
meticulously prior to delivery. |
|
|
|
|
Please retain your receipt as proof of purchase. In the event of a warranty claim, |
|
|
|
|
please contact your Customer Service unit by telephone. This is the only way to |
|
|
|
|
guarantee free return of your merchandise. |
|
|
|
|
|
|
|
|
|
NOTE |
|
|
|
|
► The warranty is valid only for material or manufacturing faults, not for |
|
|
|
|
transport damage, parts subject to wear or damage to fragile parts, e.g. |
|
|
|
|
switches. |
|
|
|
|
This appliance is intended solely for private use and not for commercial purposes. |
|
|
|
|
The warranty shall be deemed void in the case of misuse or improper handling, |
|
|
|
|
use of force or interventions which were not carried out by one of our authorised |
|
|
|
|
Service centres. |
|
|
|
|
Your statutory rights are not restricted by this warranty. |
|
|
|
|
The warranty period is not prolonged by repairs made under the warranty. |
|
|
|
|
This also applies to replaced and repaired components. |
|
|
|
|
Any damage or defects present at the time of purchase must be reported im- |
|
|
|
|
mediately after unpacking, but no later than two days after the date of purchase. |
|
|
|
|
Repairs carried out after expiry of the warranty period shall be subject to charge. |
Service
 Service Great Britain
Tel.: 0871 5000 720 (£ 0.10/Min.)
E-Mail: kompernass@lidl.co.uk
IAN 103808
Hotline availability: Monday to Friday 08:00 - 20:00 (CET)
Importer
KOMPERNASS HANDELS GMBH BURGSTRASSE 21
44867 BOCHUM GERMANY www.kompernass.com
16 |
SDR 900 A1 |

Spis treści
Wstęp. . . . . . . . . . . . . . . . . . . . . . . . . . . . . . . . . . . . . . . . . . . . . . . . . . . . . . . 18
Prawa autorskie . . . . . . . . . . . . . . . . . . . . . . . . . . . . . . . . . . . . . . . . . . . . . . . . . . . . . . . . . 18 PL Ostrzeżenia . . . . . . . . . . . . . . . . . . . . . . . . . . . . . . . . . . . . . . . . . . . . . . . . . . . . . . . . . . . . 18
Użytkowanie zgodne z przeznaczeniem . . . . . . . . . . . . . . . . . . . . . . . . . . 19
Zakres dostawy . . . . . . . . . . . . . . . . . . . . . . . . . . . . . . . . . . . . . . . . . . . . . . 20
Opis urządzenia / akcesoria . . . . . . . . . . . . . . . . . . . . . . . . . . . . . . . . . . . . 21
Dane techniczne . . . . . . . . . . . . . . . . . . . . . . . . . . . . . . . . . . . . . . . . . . . . . . 21
Wskazówki bezpieczeństwa . . . . . . . . . . . . . . . . . . . . . . . . . . . . . . . . . . . . 22
Obsługa urządzenia. . . . . . . . . . . . . . . . . . . . . . . . . . . . . . . . . . . . . . . . . . . 24
Nalewanie/dolewanie wody . . . . . . . . . . . . . . . . . . . . . . . . . . . . . . . . . . . . . . . . . . . . . . 24 Uruchamianie urządzenia . . . . . . . . . . . . . . . . . . . . . . . . . . . . . . . . . . . . . . . . . . . . . . . . . 26 Obszary zastosowań. . . . . . . . . . . . . . . . . . . . . . . . . . . . . . . . . . . . . . . . . . . . . . . . . . . . . 27 Zakładanie / zdejmowanie końcówek . . . . . . . . . . . . . . . . . . . . . . . . . . . . . . . . . . . . . . . 27 Zabezpieczenie przed dziećmi . . . . . . . . . . . . . . . . . . . . . . . . . . . . . . . . . . . . . . . . . . . . . 29
Czyszczenie . . . . . . . . . . . . . . . . . . . . . . . . . . . . . . . . . . . . . . . . . . . . . . . . . . 29
Przechowywanie . . . . . . . . . . . . . . . . . . . . . . . . . . . . . . . . . . . . . . . . . . . . . 30
Usuwanie usterek . . . . . . . . . . . . . . . . . . . . . . . . . . . . . . . . . . . . . . . . . . . . . 30
Utylizacja urządzenia . . . . . . . . . . . . . . . . . . . . . . . . . . . . . . . . . . . . . . . . . 31
Utylizacja opakowania . . . . . . . . . . . . . . . . . . . . . . . . . . . . . . . . . . . . . . . . . . . . . . . . . . . 31
Informacje dotyczące deklaracji zgodności . . . . . . . . . . . . . . . . . . . . . . . . 31
Gwarancja. . . . . . . . . . . . . . . . . . . . . . . . . . . . . . . . . . . . . . . . . . . . . . . . . . . 32
Serwis . . . . . . . . . . . . . . . . . . . . . . . . . . . . . . . . . . . . . . . . . . . . . . . . . . . . . . 32
Importer. . . . . . . . . . . . . . . . . . . . . . . . . . . . . . . . . . . . . . . . . . . . . . . . . . . . . 32
SDR 900 A1 |
17 |

Wstęp
Serdecznie gratulujemy zakupu nowego urządzenia.
Wybrany produkt charakteryzuje się wysoką jakością. Instrukcja obsługi jest czę- PL ścią składową produktu. Zawiera ona ważne informacje na temat bezpieczeń-
stwa, użytkowania i utylizacji. Przed rozpoczęciem użytkowania produktu należy zapoznać się ze wszystkimi informacjami dotyczącymi obsługi i bezpieczeństwa. Produkt należy użytkować wyłącznie zgodnie z zamieszczonym tu opisem oraz w podanym zakresie zastosowań. Instrukcję obsługi przechowuj zawsze w bezpiecznym miejscu. W przypadku przekazania urządzenia osobie trzeciej należy dołączyć również całą dokumentację.
Prawa autorskie
Niniejsza dokumentacja jest chroniona prawem autorskim.
Wszelki rodzaj powielania lub przedruku, także we fragmentach, jak również reprodukcja ilustracji, także w zmienionym stanie, jest dozwolone wyłącznie po uzyskaniu pisemnej zgody producenta.
Ostrzeżenia
W niniejszej instrukcji obsługi użyto następujących formuł ostrzeżeń:
 OSTRZEŻENIE
Informacja o tym stopniu zagrożenia oznacza możliwą sytuację niebezpieczną.
Nieuniknięcie niebezpiecznej sytuacji może doprowadzić do powstania obrażeń.
►Należy przestrzegać instrukcji zawartych w niniejszej wskazówce ostrzegawczej, by uniknąć obrażeń u osób.
UWAGA
Ostrzeżenie o tym stopniu zagrożenia oznacza możliwość wyrządzenia szkody materialnej.
Narażanie się na takie ryzyko może doprowadzić do powstania szkód materialnych.
►Aby uniknąć szkód materialnych, należy przestrzegać instrukcji zawartych w tym ostrzeżeniu.
WSKAZÓWKA
►Wskazówka oznacza dodatkowe informacje, ułatwiające korzystanie z urządzenia.
18 |
SDR 900 A1 |

Użytkowanie zgodne z przeznaczeniem
Niniejsze urządzenie przeznaczone jest do usuwania zabrudzeń za pomocą
pary wodnej w gospodarstwie domowym np. z ...
– |
gładkich powierzchni: blatów roboczych, płytek, kafli, okien, luster |
PL |
– trudno dostępnych miejsc: narożników, fug, żaluzji, WC, armatur itd. |
|
|
– |
tekstyliów: zasłon, wyściółek meblarskich, ubrań, foteli samochodowych. |
|
Niniejsze urządzenie nie nadaje się:
–do używania go na otwartej przestrzeni,
–do używania z zastosowaniem innych cieczy niż woda
–do zastosowania do celów komercyjnych lub przemysłowych.
 OSTRZEŻENIE
Niebezpieczeństwo związane z użytkowaniem niezgodnym z przeznaczeniem!
Użytkowanie urządzenia niezgodnie z jego przeznaczeniem i/lub inne jego wykorzystanie może wiązać się z różnymi zagrożeniami.
►Urządzenie należy użytkować wyłącznie w sposób zgodny z jego przeznaczeniem.
►Należy przestrzegać zasad postępowania opisanych w niniejszej instrukcji obsługi.
WSKAZÓWKA
►Użytkowanie urządzenia w sposób niezgodny z jego przeznaczeniem i/ lub inny rodzaj wykorzystania urządzenia może wiązać się z różnymi zagrożeniami. Wykorzystywać urządzenie wyłącznie do celów zgodnych z jego przeznaczeniem. Należy przestrzegać zasad postępowania opisanych w niniejszej instrukcji obsługi. Roszczenia wszelkiego rodzaju, wynikające ze szkód powstałych wskutek użytkowania niezgodnie z przeznaczeniem, przeprowadzenia niefachowych napraw, zmian wprowadzonych bez zezwolenia lub wskutek zastosowania niedopuszczonych części zamiennych, są wykluczone. Ryzyko ponosi wyłącznie użytkownik.
SDR 900 A1 |
19 |

|
|
|
Zakres dostawy |
|
|
|
|
|
Urządzenie dostarczane jest standardowo z następującymi elementami: |
|
|
|
|
Myjka parowa |
|
PL |
|
||
|
|
|
Wąż przedłużający |
|
|
|
|
|
Dysza przedłużająca |
|
|
|
||
|
|
|
|
Dysza kątowa |
|
|
|
|
Dysza do tapicerki |
|
|
|
|
Okrągła szczotka |
|
|
|
|
Zamknięcie bezpieczeństwa |
|
|
|
|
Końcówka zbierająca |
|
|
|
|
Pokrowiec bawełniany |
|
|
|
|
Lejek |
|
|
|
|
Miarka |
|
|
|
|
Instrukcja obsługi |
|
|
|
|
Wyjmij wszystkie części urządzenia z opakowania i zdejmij wszystkie |
|
|
|
|
elementy opakowania. |
|
|
|
|
|
|
|
|
|
OSTRZEŻENIE |
|
|
|
|
Niebezpieczeństwo uduszenia! |
|
|
|
|
► Elementów opakowania nie udostępniać dzieciom do zabawy. |
|
|
|
|
Istnieje niebezpieczeństwo uduszenia. |
|
|
|
|
|
WSKAZÓWKA
►Po rozpakowaniu nowego urządzenia sprawdź, czy w środku znajdują się wszystkie części i czy nie ma żadnych widocznych uszkodzeń.
►W przypadku stwierdzenia braku lub uszkodzenia jakiegokolwiek elementu wskutek wadliwego opakowania lub transportu skontaktuj się z infolinią serwisową (patrz rozdział Serwis).
20 |
SDR 900 A1 |

Opis urządzenia / akcesoria
|
Spust pary |
|
2 |
Przełącznik „Zabezpieczenie przed dziećmi“ |
|
3 |
Zbiornik wody |
PL |
|
4Czerwona kontrolka
5Zielona kontrolka
6Dysza parowa
7Otwór do napełniania zbiornika wody
8Zamknięcie bezpieczeństwa
9Wąż przedłużający
10Dysza przedłużająca
11Okrągła szczotka
12Dysza kątowa
13Końcówka zbierająca
14Dysza do tapicerki
15Pokrowiec bawełniany
16Miarka
17Lejek
Dane techniczne
Napięcie zasilania |
220 |
- 240 V ~, 50 Hz |
|
Moc znamionowa |
900 |
– 1050 W |
|
Stopień ochrony urządzenia |
IPX4 |
|
|
|
350 ml |
||
Pojemność zbiornika na wodę |
Przy napełnieniu 250 ml wody (MAX) |
||
można wytworzyć parę wodną przez |
|||
|
|||
|
około 5 minut. |
||
SDR 900 A1 |
21 |

Wskazówki bezpieczeństwa
 NIEBEZPIECZEŃSTWO PORAŻENIA PRĄDEM ELEKTRYCZNYM
|
PL |
|
► Urządzenie podłączać wyłącznie do prawidłowo zainstalowanego gniazda |
|
|
|
|
zasilania o napięciu 220-240 V ~ / 50 Hz. |
|
|
|
|
|
|
|
|
|
► W razie jakichkolwiek problemów eksploatacyjnych oraz przed czyszcze- |
|
|
|
|
||
|
|
|
|
niem urządzenia należy wyciągnąć wtyk z gniazda zasilania. |
|
|
|
► Odłączać kabel zasilający wyłącznie poprzez wyciągnięcie wtyku z |
|
|
|
|
|
gniazda sieciowego – nigdy nie należy ciągnąć za sam kabel. |
|
|
|
► Kabla zasilającego nie zaginać ani zgniatać. Należy go ułożyć w taki |
|
|
|
|
|
sposób, aby nikt nie mógł na niego nadepnąć ani się o niego potknąć. |
|
|
|
► Naprawę uszkodzonego wtyku lub kabla zasilającego zlecać niezwłocz- |
|
|
|
|
|
nie wykwalifikowanemu specjaliście lub serwisowi, aby uniknąć wszelkich |
|
|
|
|
zagrożeń. |
|
|
|
► |
Należy zwracać uwagę na to, aby podczas pracy urządzenia kabel |
|
|
|
|
zasilający nie był mokry ani wilgotny. Kabel należy tak poprowadzić, |
|
|
|
|
aby nie został zakleszczony ani uszkodzony. |
|
|
|
► Jeżeli urządzenie, kabel zasilający lub wtyk ulegną uszkodzeniu, przed |
|
|
|
|
|
ponownym użyciem urządzenia należy zlecić serwisowi wymianę uszko- |
|
|
|
|
dzonej części. |
|
|
|
► Przed przystąpieniem do napełniania zbiornika wodą, czyszczenia lub |
|
|
|
|
|
wymiany akcesoriów należy wyciągnąć wtyk z gniazda. |
|
|
|
► Urządzenie wolno stosować wyłącznie w suchych pomieszczeniach. |
|
|
|
|
|
Nie wolno stosować go na otwartej przestrzeni. |
|
|
|
► |
Nigdy nie zanurzać urządzenia w wodzie ani w innych cieczach. |
|
|
|
► Nigdy nie kierować pary bezpośrednio na urządzenia elektryczne lub |
|
|
|
|
|
urządzenia zawierające elementy elektryczne, takie jak wnętrza kuchenek. |
|
|
|
► Urządzenia, które wytwarza wysokie temperatury nie wolno nigdy pozo- |
|
|
|
|
|
stawiać bez nadzoru! Po zakończeniu pracy z urządzeniem oraz podczas |
|
|
|
|
przerw w pracy należy zawsze wyciągać wtyk z gniazda. Urządzenie |
|
|
|
|
nagrzewa się i wytwarza tak długo ciśnienie pary, jak długo wtyk znajduje |
|
|
|
|
się gnieździe! |
|
|
|
► Urządzenia należy używać mając suche ręce oraz będąc w butach (nie |
|
|
|
|
|
wolno być boso). W przypadku błędu pozwoli to zmniejszyć niebezpie- |
|
|
|
|
czeństwo porażenia prądem. |
► Nigdy nie kierować urządzenia na przedmioty wrażliwe na wilgoć.
► To urządzenie może być używane przez osoby o zmniejszonych zdolnościach fizycznych, sensorycznych lub umysłowych lub też osoby nieposiadające odpowiedniego doświadczenia i wiedzy, wyłącznie pod nadzorem lub po przeszkoleniu w zakresie bezpiecznego używania urządzenia oraz wynikających z niego zagrożeń. Dzieciom nie wolno bawić się urządzeniem.
22 |
SDR 900 A1 |
 OSTRZEŻENIE! NIEBEZPIECZEŃSTWO ODNIESIENIA OBRAŻEŃ!
►Nigdy nie usuwać zamknięcia bezpieczeństwa 8 , dopóki para wodna wydostaje się z dyszy parowej!
► Nie wolno używać urządzenia, gdy zbiornik jest pusty. Jeżeli zapas wody |
PL |
się skończy, należy wyciągnąć wtyk z gniazda, aby uniknąć przegrzania. |
|
►Akcesoria podczas pracy nagrzewają się! Niebezpieczeństwo poparzenia!
►Przed zdjęciem używanych akcesoriów należy odczekać, aż ostygną.
►Do niniejszego urządzenia należy stosować wyłącznie oryginalne akcesoria. Inne akcesoria mogą nie być wystarczająco bezpieczne.
►Urządzenie nie może być używane po upadku, jeśli widoczne są oczywiste uszkodzenia, lub jeśli jest nieszczelne.
►Urządzenie należy trzymać z dala od dzieci, gdy jest włączone lub jest w trakcie schładzania.
►Podczas usuwania niebezpiecznych dla zdrowia związków, należy nosić rękawice, okulary ochronne oraz ochraniacz dróg oddechowych.
►Nie wolno nigdy kierować strumienia pary na ludzi ani zwierzęta. Gorąca para pod ciśnieniem może spowodować poważne obrażenia!
 OSTRZEŻENIE! NIEBEZPIECZEŃSTWO POPARZENIA!
Ten symbol ostrzega przed wydostającą się parą.
Przestrzegaj zasad bezpieczeństwa!
UWAGA – SZKODY MATERIALNE!
►Należy skontrolować w nierzucającym się w oczy miejscu, czy czyszczony materiał nadaje się do czyszczenia myjką parową, np.:
–Lakierowane drewno lub skóra mogą wyblaknąć pod wpływem pary.
–Niechronione drewno może pęcznieć.
–Ochronne powłoki woskowe mogą się oddzielić na skutek działania pary.
–Tworzywa sztuczne w wyniku działania pary wodnej mogą się stopić.
–Miękkie tworzywa sztuczne pod wpływem pary mogą się odkształcić.
–Zimne powierzchnie szklane lub lustrzane mogą pęknąć, pod wpływem gorącej pary.
►Przed przystąpieniem do czyszczenia okna należy je najpierw ogrzać np. kierując parę najpierw z dalszej odległości a potem z coraz bliższej na dużą powierzchnię szyby.
►Akryl, aksamit i len są wrażliwe na działanie gorącej pary, podobnie włókna z tworzywa sztucznego.
SDR 900 A1 |
23 |
|
|
|
Obsługa urządzenia |
|
|
|
|
|
|
|
|
|
|
OSTRZEŻENIE! NIEBEZPIECZEŃSTWO ODNIESIENIA OBRAŻEŃ! |
|
PL |
|
|
Należy przestrzegać poniższych instrukcji, aby zapewnić |
|
|
|
prawidłowe działanie i długą żywotność urządzenia: |
|
|
|
|
|
► Spust pary naciśnij dopiero wtedy, gdy zapali się zielona kontrolka 5 . |
|
|
|
||
W przeciwnym razie w urządzeniu może się zebrać gorąca woda, która będzie kapała lub pryskała z dyszy parowej 6 . Niebezpieczeństwo poparzenia.
► Przed wyłączeniem zawsze odczekać, aż cała para wodna wydostanie się z urządzenia. Nacisnąć spust pary  , aż z dyszy parowej 6 nie będzie się wydostawała żadna para wodna.
► Jeśli urządzenie zostało wykorzystane w pracy ciągłej, przełącznik "Za-
bezpieczenie przed dziećmi" 2 z symbolem |
musi zostać naciśnięty |
przed wyłączeniem. |
|
Nalewanie/dolewanie wody
 NIEBEZPIECZEŃSTWO PORAŻENIA PRĄDEM ELEKTRYCZNYM
►Przed przystąpieniem do nalewania wody do zbiornika wody 3 zawsze wyciągnij wtyk kabla zasilającego z gniazda zasilania!
Otwórz zamknięcie bezpieczeństwa 8 .
UWAGA – SZKODY MATERIALNE!
►Do zbiornika wody 3 nie dodawać żadnych dodatków ani środków czyszczących!
WSKAZÓWKA
► Upewnij się, że do zbiornika 3 urządzenia nalewasz około 250 ml wody.
Przez otwór do napełniania 7 napełnij zbiornik 3 wodą.
W tym celu użyj znajdującej się w komplecie miarki 16 i lejka 17 do pomocy (patrz rysunek). Napełnij miarkę 16 wodą do linii znacznika (ok. 250 ml).
Zamknij ponownie zamknięcie bezpieczeństwa 8 .
24 |
SDR 900 A1 |
■Jeśli nie ma więcej wody w zbiorniku 3 , po naciśnięciu spustu pary  nie wydostaje się już żadna para wodna na zewnątrz. Napełnianie wody musi być wykonane w następujący sposób:
Wyciągnij wtyk z gniazda.
|
Odczekaj około 10 sekund. |
PL |
|
Odkręć zamknięcie bezpieczeństwa 8 powoli i odczekaj kilka sekund, zanim je całkowicie otworzysz, dopóki nie przestanie być słychać syczenia pary.
Napełnij zbiornik wody 3 ponownie wodą.
Zamknij ponownie zamknięcie bezpieczeństwa 8 .
Jeśli woda w kranie jest za twarda, zaleca się mieszanie jej z wodą destylowaną. W przeciwnym razie w urządzeniu może odłożyć się kamień i spowodować zapchanie dyszy pary 6 .
W celu przedłużenia prawidłowego działania urządzenia zmieszaj wodę z kranu z wodą destylowaną w proporcjach podanych w tabeli.
|
Stosunek ilości wody |
Twardość wody |
destylowanej do wody |
|
kranowej |
bardzo miękka / miękka |
0 |
średnio twarda |
1:1 |
twarda |
2:1 |
bardzo twarda |
3:1 |
Informacje dotyczące twardości wody można uzyskać w miejscowym zakładzie wodociągowym.
SDR 900 A1 |
25 |
Uruchamianie urządzenia
1)Włóż wtyk kabla zasilającego do gniazda zasilania.
Czerwona kontrolka 4 świeci się i sygnalizuje połączenie z siecią elektryczną.
PL |
2) Gdy urządzenie będzie gotowe do pracy, zapali się zielona kontrolka 5 . |
|
Czerwona kontrolka 4 będzie świeciła się dalej. |
WSKAZÓWKA
►Podczas rozgrzewania, może dochodzić do wydostawania się pary wodnej z dyszy parowej 6 .
3)Naciśnij spust pary  w dół. Para wydostaje się z dyszy parowej 6 . Jeśli uderzenie pary przestaje być dostatecznie silne, zielona kontrolka 5 gaśnie.
Wtedy należy puścić spust pary  , aż zielona kontrolka 5 zapali się ponownie.
4)Jeśli chcesz pracować z urządzeniem w trybie ciągłym, naciśnij spust pary  w dół i jednocześnie przełącz przełącznik "Zabezpieczenie przed dziećmi" 2 z symbolem
  .
.
5)Aby zakończyć tryb pracy ciągłej, naciśnij przełącznik "Zabezpieczenie przed dziećmi" 2 z symbolem  .
.
WSKAZÓWKA
►Jeżeli w czasie pracy zacznie z dyszy parowej 6 kapać woda lub zmniej-
szy się ilość wydostającej się pary, puścić spust pary  . Urządzenie musi się rozgrzać ponownie. Zaczekaj, aż ponownie zapali się zielona kontrolka 5 .
►Myjka parowa wyposażona jest w zabezpieczenie przed przegrzaniem. Automatycznie wyłącza się w przypadku przegrzania (np. przez pusty zbiornik na wodę). Jeśli to jest przyczyną, należy odłączyć wtyk kabla zasilającego i napełnić zbiornik na wodę 3 .
 OSTRZEŻENIE! NIEBEZPIECZEŃSTWO ODNIESIENIA OBRAŻEŃ!
►Jeśli włączono urządzenie zostanie odstawione na dłuższy czas, może się zdarzyć, że wydostawać się z niego będzie para wodna, choć spust pary  nie będzie naciśnięty!
26 |
SDR 900 A1 |

Obszary zastosowań
Do czyszczenia można używać bezpośrednio pary z dyszy parowej 6 lub założyć odpowiednią końcówkę.
■ Nie należy stosować końcówki do czyszczenia na przykład toalety i umywalek, |
PL |
baterii i odpływów, okien, tkanin meblowych, żaluzji lub luster. |
|
Wodę z rozpuszczonymi zanieczyszczeniami można na gładkich powierzch- |
|
niach usuwać po czyszczeniu łatwo za pomocą końcówki zbierającej 13. |
|
WSKAZÓWKA
►Im bliżej znajduje się dysza parowa 6 czyszczonej powierzchni, tym lepsze działanie. Ciśnienie pary i jej temperatura są bezpośrednio na wylocie z dyszy parowej 6 najwyższe.
►Uporczywe zanieczyszczenia należy najpierw namoczyć wodą.
■Korzystaj z dyszy kątowej 12 do czyszczenia ciasnych narożników lub fug albo trudno dostępnych miejsc.
■Korzystaj z okrągłej szczotki 11 do uporczywych zabrudzeń, np. na felgach.
Zakładanie / zdejmowanie końcówek
 OSTRZEŻENIE! NIEBEZPIECZEŃSTWO ODNIESIENIA OBRAŻEŃ!
►Przed zakładaniem/zdejmowaniem końcówki zawsze wyciągaj wtyk z gniazda zasilania.
►Poczekaj, aż urządzenie ostygnie przed założeniem/zdjęciem końcówki.
►Poczekaj, aż cała para wydostanie się z urządzenia, zanim założysz/ zdejmiesz końcówkę.
Wąż przedłużający
Nasuń wąż przedłużający 9 aż do oporu na dyszę parową 6 , przy czym linia oznaczenia na wężu przedłużającym 9 oraz linie oznaczenia na urządzeniu muszą być ustawione zgodnie ze sobą (patrz rysunek A na rozkładanej stronie).
Tak długo obracaj w prawo, aż obie linie oznaczenia na wężu przedłużającym 9 będą ustawione zgodnie z liniami oznaczenia na urządzeniu. Wąż przedłużający 9 pozostaje w tej pozycji zablokowany (patrz rysunek B na rozkładanej stronie).
WSKAZÓWKA
►Przyrząd w urządzeniu wyposażony jest w przegub, dzięki czemu końcówka może zostać ustawiona w najlepszej pozycji. Nie jest to jednak możliwe przy używaniu węża przedłużającego 9 .
■Demontaż węża przedłużającego 9 odbywa się w odwrotnej kolejności.
SDR 900 A1 |
27 |
 Loading...