


TIMER SWITCHES
TIMER SWITCHES
Operation and Safety Notes
PROGRAMMATEURS
Instructions d‘utilisation et consignes de sécurité
TIJDSCHAKELAAR
Bedienings - en veiligheidsinstructies
ZEITSCHALTUHREN
Bedienungs - und Sicherheitshinweise
IAN 101036
Before reading, unfold the page containing the illustrations and familiarise yourself with all functions of the device.
Avant de lire le mode d‘emploi, ouvrez la page contenant les illustrations et familiarisez-vous ensuite avec toutes les fonctions de l‘appareil.
Vouw vóór het lezen de pagina met de afbeeldingen open en maak u vertrouwd met alle functies van het apparaat.
Klappen Sie vor dem Lesen die Seite mit den Abbildungen aus und machen Sie sich anschließend mit allen Funktionen des Gerätes vertraut.
GB |
Operation and Safety Notes |
Page |
5 |
|
|
|
|
|
|
FR / BE |
Instructions d‘utilisation et consignes de sécurité |
Page |
17 |
|
NL / BE |
Bedieningsen veiligheidsinstructies |
Pagina |
31 |
|
DE / AT / CH |
Bedienungsund Sicherheitshinweise |
Seite |
45 |
|

A |
1 |
2 |
3 |
4 |
|

 5
5
6 
 7
7
8
B 

4

Introduction |
|
|
Intended use......................................... |
Page |
6 |
Control elements.................................. |
Page |
7 |
Technical Data..................................... |
Page |
7 |
Safety notices............................... |
Page |
8 |
Start-up |
|
|
Setting switching times......................... |
Page |
9 |
Selecting the operating mode............. |
Page |
11 |
Adjusting the time................................. |
Page |
12 |
Cleaning............................................ |
Page |
12 |
Disposal............................................. |
Page |
13 |
Warranty and Service.......... |
Page |
14 |
Service address.................................... |
Page |
15 |
Manufacturer........................................ |
Page |
15 |
|
GB |
5 |

Timer Switches
Mechanical – for indoors
Introduction
Intended use
This device is intended as a daily timer switch for enclosed, dry rooms only and designed for private use.. It is not suitable for commercial use. Only operate the device individually. Do not connect several timer switches in series. Any other use is considered improper. The manufacturer is not liable for damages due to improper use.
Read the entire instructions for use before using the device. Keep these instructions for use. Include the instructions for use when passing the device on.
6 GB
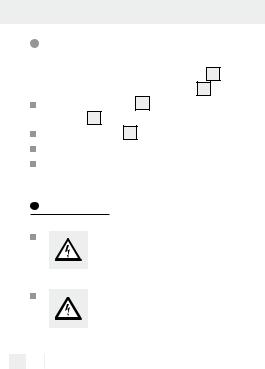
Control elements (Fig. A)
1Clock ring
2Direction of rotation
3Mark
4Switching pins
5Toggle timer / continuous mode
6Status light
7Safety plug (back)
8Isolated ground receptacle with child protection
Technical Data
Model designation: |
MZ 20-1 FR |
Operating voltage: |
220–240 V ~ |
|
50 Hz |
Switched voltage: |
220–240 V ~ |
|
16(2) A |
Switching capacity: |
0–3500 VA |
GB 7
Ambient temperature: -10° – + 40° C Shortest switching time: approx. 15 minutes Power reserve: none
CE compliant:
Safety notices
Children are not able to understand the dangers arising from improper use of electric devices. Never leave children unsupervised when using electronic devices.
Only plug the device into conventional isolated ground receptacles with an alternating current of 220–240 V and 50 Hz.
Only connect loads within the specified capacities of the device.
Do not cover the device. Heat accumulates when covered. There is a fire hazard.
8 GB
Regularly check the device for damage. Do not replace damaged parts. Contact the manufacturer or dispose of the device in an environmentally responsible way.
Do not touch the device with wet hands. Disconnect the device from the power mains to de-energise.
Start-up
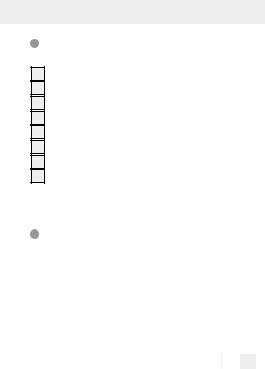
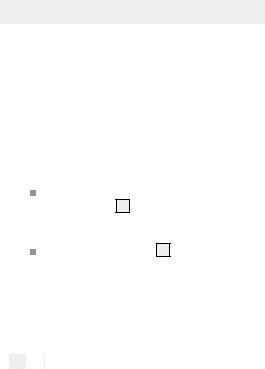
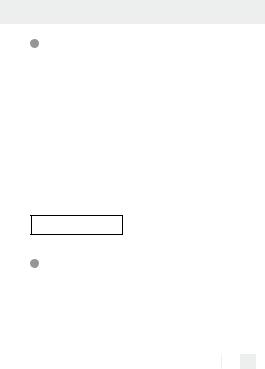
Setting switching times (Fig. B)
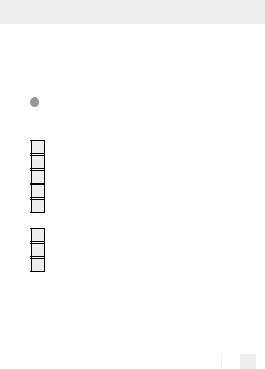
Use the switching pins 4 to set the times when you wish the timer to switch the connected device on or off. Using a pointy object, e.g. pen, push one or several pins down to lock into place to set the desired switching time. Every switching pin corresponds to a switching time of approx. 15 minutes.
GB 9
Device for private use, set times may be offset. Not suitable for applications requiring precise and accurate switching.
In figure B the grey pins mark a switching time of 8:30 pm to 10:30 pm. A load is switched on during the time from 8:30 pm to 10:30 pm.
Setting the switching time
Push down the respective number of switching pins 4 .
Disabling switching time
Push the switching pins 4 up again.
10 GB
Selecting the operating mode
The device will work in switching mode or in continuous mode.
Activating switching mode
Plug the device into a socket. Connect and switch on the load.
Slide the toggle |
5 |
down until it locks in. |
The status light |
6 |
will light up when |
switched time is activated. |
||
Activating continuous operation
Plug the device into a socket. Connect and switch on the load.
Slide the toggle |
|
5 |
all the way up until |
|
it locks in. |
|
|
|
|
The status light |
6 |
will light up. |
||
GB 11
Adjusting the time
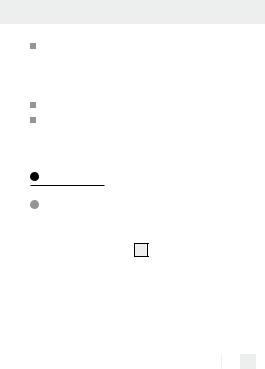
Set the current time with the clock ring 1 . You will see the time by the marking 3 .
Turn the clock ring 1 in the direction of rotation 2 .
Set the marking 3 to the current time.
Plug the device into a socket to switch it on. Connect and switch on the load.
Cleaning
ATTENTION! RISK OF ELECTRIC SHOCK! Disconnect the device from the
mains before cleaning.
ATTENTION! RISK OF ELECTRIC SHOCK! Do not allow liquids to enter the
12 GB
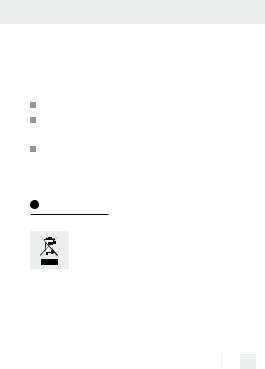
device. Liquids entering can result in a short circuit.
 ATTENTION! Danger due to harsh cleaners.
Never use harsh or scouring cleaners.
Clean the device with a soft, slightly damped cloth and mild detergent. Ensure the device is completely dry before using it again.
Disposal
Do not dispose of electric equipment in the household waste!
In accordance with European Directive 2012 / 19 / EC relating to old electrical and electronic appliances, used electrical equipment must be collected separately and
GB 13

recycled in an ecologically compatible way. Contact your local authorities for information on how to dispose of the appliance at the end of product life.
Warranty and Service
This device is covered by a 3 year warranty from the date of purchase. Please keep your receipt as proof of purchase. The product has been produced to the highest standards and thoroughly checked before dispatch. The guarantee only applies to faults in material or manufacture when used properly. Any modifications will void the guarantee. This warranty does not limit your legal rights. Please phone the service centre for guarantee claims. This is the only way to return your product free of charge.
14 GB
Service address
BAT Lindenstraße 35 72074 Tübingen Germany
E-Mail: exp@bat-tuebingen.com Service phone: 00800 48720741
If you need further information, we recommend that you consult Service/FAQ‘s on our homepage www.dvw-service.com.
IAN 101036
Manufacturer
BAT
Lindenstraße 35
72074 Tübingen
Germany
GB 15

16 GB

Introduction |
|
|
Utilisation conforme.............................. |
Page |
18 |
Éléments de réglage............................. |
Page |
19 |
Caractéristiques techniques.................. |
Page |
20 |
Indications de sécurité........... |
Page 20 |
|
Mise en marche |
|
|
Réglage du temps de commutation..... |
Page 22 |
|
Choisir le mode de fonctionnement..... |
Page |
23 |
Réglage de l’heure................................ |
Page |
25 |
Nettoyage........................................ |
Page 25 |
|
Mise au rebut................................. |
Page 27 |
|
Garantie et service |
|
|
après-vente..................................... |
Page 27 |
|
Adresse du service après-vente............ |
Page |
29 |
Fabricant................................................ |
Page |
29 |
|
FR/BE |
17 |

Programmateurs
Mécaniques - pour l’intérieur
Introduction
Utilisation conforme
Cet appareil est une horloge programmable journalière. Son usage est prévu dans une pièce fermée et sèche et dans un cadre privé. Il n‘est pas destiné à un usage commercial. Cet appareil ne peut être utilisé qu‘individuellement. Ne pas installer plusieurs horloges programmables côte à côte. Toute autre utilisation n‘est pas conforme. La responsabilité du fabricant n‘est pas engagée en cas d‘utilisation inappropriée.
Veuillez lire intégralement ce mode d‘emploi avant d‘utiliser l‘appareil. Conservez ce mode d‘emploi. Si vous transmettez cet
18 FR/BE
appareil à un autre utilisateur, remettez-lui également ce mode d‘emploi.
Éléments de réglage (voir ill. A)
1Anneau de l‘horloge
2Sens de rotation
3Repère
4Broches de commutation
5Commutateur du temps de commutation / fonctionnement continu
6Témoin de fonctionnement
7Prise de prise de courant (verso)
8Prise de courant avec protection enfant
FR/BE 19
 Loading...