


DEHUMIDIFIER SLE 420 A1
DEHUMIDIFIER |
POCHŁANIACZ WILGOCI |
Operating instructions |
Instrukcja obsługi |
PÁRÁTLANÍTÓ |
SUŠILEC ZRAKA |
Kezelési útmutató |
Navodilo za uporabo |
VYSOUŠEČ VZDUCHU |
ODVLHČOVAČ VZDUCHU |
Návod k obsluze |
Návod na obsluhu |
LUFTENTFEUCHTER |
|
Bedienungsanleitung |
|
IAN 89301
RP89301_Luftentfeuchter_Cover_LB4.indd 2 |
|
|
02.04.13 11:56 |
|
|
||
|
|
|
|

__RP89301_B4.book Seite 1 Freitag, 19. April 2013 7:28 19
English..................................................................................... |
2 |
Polski .................................................................................... |
16 |
Magyar ................................................................................. |
30 |
Slovenš ina ........................................................................... |
44 |
esky .................................................................................... |
56 |
Sloven ina ............................................................................. |
68 |
Deutsch ................................................................................. |
82 |
ID: SLE420 A1_13_V2.0_EN

__RP89301_B4.book Seite 2 |
Freitag, 19. April 2013 7:28 19 |
|
|
|||
Overview / Przegl d / Áttekintés / Pregled / P ehled / Preh ad / |
||||||
Übersicht |
|
|
|
|
|
|
1 |
2 |
3 |
|
8 |
|
A |
|
|
|
|
|
|
9 |
|
|
4 |
|
|
|
109 |
|
|
|
|
|
|
|
|
|
5 |
|
|
|
|
7 |
|
6 |
|
2 |
11 |
|
|
|
|
11 |
10 |
|
|
12 |
|
13 |
|
14 |
15 |
D |
|
|
HIGH |
AIR CLEAN |
|
|
|
|
|
|
|
|
|
|
|
|
MID. |
DRY CLOTHES |
|
||
TANK FULL |
|
LOW |
CONTINUOUS |
|
||
TIMER |
|
RH% Hr. |
AUTOMATIC |
OPERATION |
|
|
|
|
|
||||
|
|
|
|
|
|
|
|
|
SETTING |
|
|
|
|
TIMER |
|
|
MODE |
STAND-BY |
|
|
20 19 |
|
18 |
17 |
|
16 |
|
B |
|
C |
|
|
|
|
|
|
21 |
|
|
|
|
|
|
22 |
|
|
|
24 |
|
|
|
|
|
25 |
|
|
|
23 |
|
|
|
|
|
|
|
|
|
|
|

__RP89301_B4.book Seite 2 Freitag, 19. April 2013 7:28 19
Contents
1. |
Overview ........................................................................................ |
3 |
|
2. |
Intended purpose ............................................................................ |
4 |
|
3. |
Safety information ........................................................................... |
5 |
|
4. |
Items supplied ................................................................................. |
6 |
|
5. |
How to use ...................................................................................... |
7 |
|
6. |
Notes on operation .......................................................................... |
7 |
|
7. |
Operation ........................................................................................ |
7 |
|
|
7.1 |
Switching on and off ............................................................................. |
7 |
|
7.2 |
Displays............................................................................................... |
8 |
|
7.3 |
Modes of operation............................................................................... |
8 |
|
7.4 |
Water tank........................................................................................... |
9 |
|
7.5 |
Timer................................................................................................... |
9 |
8. |
Hose drainage ............................................................................... |
10 |
|
9. |
Cleaning and replacing the filter .................................................... |
10 |
|
10. Cleaning ........................................................................................ |
10 |
||
11. Protection against overheating ...................................................... |
11 |
||
12. Storage ......................................................................................... |
11 |
||
13. Trouble-shooting ............................................................................ |
11 |
||
14. Disposal ........................................................................................ |
12 |
||
15. Technical specifications .................................................................. |
12 |
||
16. Warranty of the HOYER Handel GmbH ........................................... |
13 |
||
2GB

__RP89301_B4.book Seite 3 Freitag, 19. April 2013 7:28 19
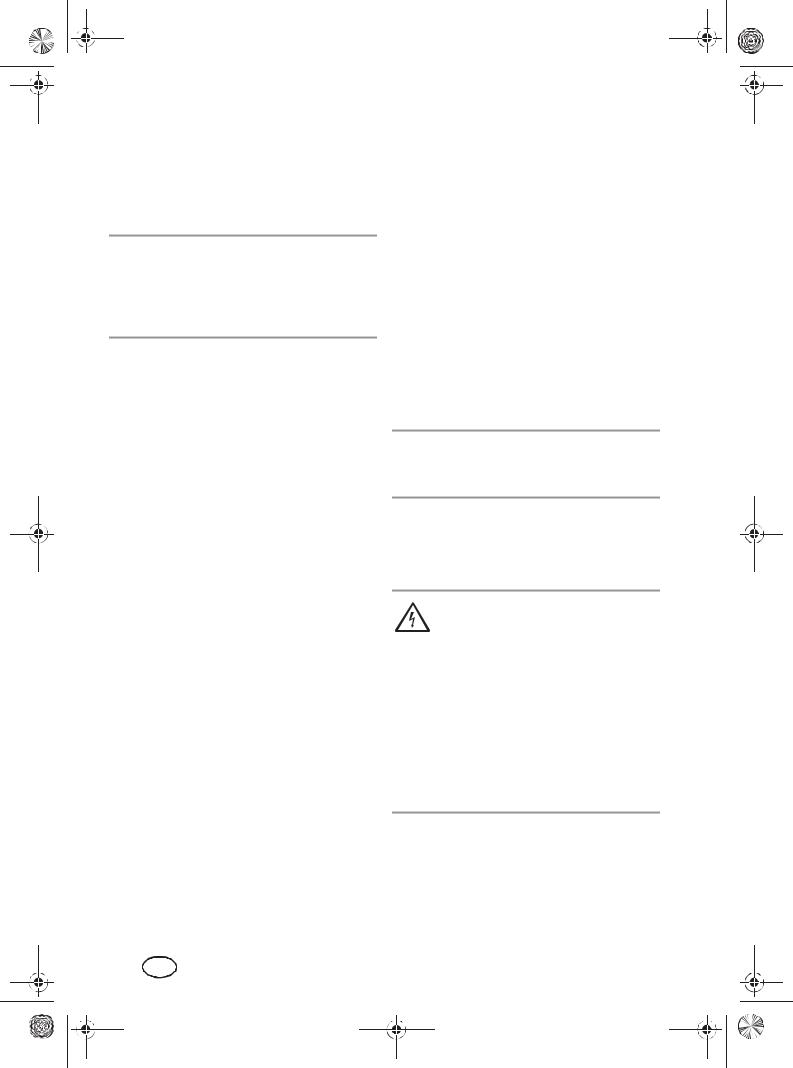
1. Overview
1 Mobile flap valve for air outlet
2Operating panel
3Handle
4 Recessed grip for water tank
5Water tank (5 L)
6Rollers
7 Inspection window for checking water level
8Grid for air inlet (removable)
9 Hook for coiling up the power cable
10Power cable with safety plug
11Rating plate
12 |
TANK FULL |
LED illuminates when water tank is full |
13 |
HIGH/MID./LOW |
Display for the selected humidity and switch-off time |
14 |
Modes of operation |
LEDs display the active mode |
15 |
OPERATION |
LED illuminates during operation |
16 |
STAND-BY |
Switch the device on and off |
17 |
MODE |
Switch between the 4 modes |
18 |
RH%HR/ SETTING |
Set humidity and timer |
19 |
TIMER |
Switch the timer on and off |
20 |
TIMER |
LED illuminates when timer is active |
21Fastener for connecting the hose (Remove the fastener with a screwdriver. Remove plug and connect hose)
22Hose
23Plug
24Plastic filter
25Carbon filter
GB 3
__RP89301_B4.book Seite 4 Freitag, 19. April 2013 7:28 19
Thank you for your trust!
Congratulations on your new dehumidifier.
For a safe handling of the product and in order to get to know the entire scope of features:
•Thoroughly read these operating instructions prior to initial commissioning.
•Above all, observe the safety instructions!
•The device should only be used as described in these instructions.
•Keep these instructions for reference.
•If you pass the device on to someone else, please include these instructions.
We hope you enjoy your new dehumidifier!
2. Intended purpose
The dehumidifier is intended exclusively for dehumidifying residential, cellar and storage rooms with a temperature of between 5 °C and 35 °C.
The device must only be used indoors. This device must not be used for commercial purposes.
Foreseeable misuse
DANGER! Risk of illness!
The water collected is not suitable for drinking or for watering plants. There is a risk of illness.
DANGER! Risk of electric shock!
Do not place the device in water / also do not place in pools or puddles of water.
WARNING! Risk of material damage!
•Do not use the device in swimming pools, washrooms, or any similar rooms.
•The device is not intended for drying insulation material. If lagging or insulating material has become damp after a water pipe has broken, always consult a specialist.
•Never expose the device to temperatures of 0 °C or lower. Residual water in the piping could freeze and damage the system.
•Do not use the device in environments that are dusty or which contain chlorine.
4GB
__RP89301_B4.book Seite 5 Freitag, 19. April 2013 7:28 19
3. Safety information
Warnings
If necessary, the following warnings will be used in these operating instructions:
DANGER! High risk: failure to observe this warning may result in in-
jury to life and limb.
WARNING! Moderate risk: failure to observe this warning may result in injury or serious material damage.
CAUTION: low risk: failure to observe this warning may result in minor injury or material damage.
NOTE: circumstances and specifics that must be observed when handling the device.
Instructions for safe operation
•This device is not designed to be used by people (including children) with limited physical, sensory or mental capabilities or people without adequate experience and/or understanding unless they are supervised by someone responsible for their safety or are instructed by them on how to use the device.
•Children must be supervised to ensure that they do not play with the device.
•Do not install the device in a narrow space. Leave a minimum clearance of approx. 20 cm at the rear and sides, 10 cm at the front, and 30 cm at the top.
•The device must only be operated in rooms with a temperature of between 5 °C to 35 °C.
•Only use the device in rooms with a size of max. 20 m2.
•Only connect the mains plug to a properly installed and easily accessible grounded wall socket whose voltage corresponds to the specifications on the rating plate. The wall socket must continue to be easily accessible after the device is plugged in.
•The appliance shall be installed in accordance with national wiring regulations.
DANGER for children
•Packing materials are not children's toys. Children should not be allowed to play with the plastic bags. There is a risk of suffocation.
•Keep the device out of the reach of children.
DANGER of explosion
•The device must never be operated in areas with potentially aerosol-forming or explosive atmosphere.
DANGER! Risk of electric shock due to moisture
•This device must never be operated close to a bathtub, shower, filled hand basin or similar.
GB 5
__RP89301_B4.book Seite 6 Freitag, 19. April 2013 7:28 19
•The device, the power cable and the mains plug must not be immersed in water or any other liquids.
•Protect the device from water drops and water spray.
•If liquid gets into the device (except in the water container), pull out the mains plug immediately. Have the device checked before reusing.
•Never touch the device with wet hands.
•If the device falls into water, disconnect the mains plug immediately. Only then is it safe to retrieve the device.
DANGER! Risk of electric shock
•Ensure that the power cable cannot be damaged by sharp edges or hot points. Do not wrap the power cable around the device.
•The device is not fully disconnected from the power supply, even after it is switched off. In order to fully disconnect it, pull out the mains plug.
•When using the device, ensure that the power cable cannot be trapped or crushed.
•When removing the mains plug from the grounded power socket, always pull on the plug and never the cable.
•Pull the safety plug out of the grounded power socket, …
…if there is a fault,
…when you are not using the device,
…before you clean the device, and
…during thunderstorms.
•Do not use the device if there is visible damage to the device or the power cable.
•To avoid any risk, do not make modifications to the device. You also must not replace the power cable yourself. Repairs must be carried out by a specialist workshop or the Service Centre.
WARNING! Risk of material damage
•Never place objects filled with liquid on top of the device, e.g. vases.
•Heavy objects must never be placed on the device.
•Protect the device from heat.
•The device must not be covered (e.g. with newspapers, cushions or blankets).
•Never insert objects into the ventilation slit.
•Open sources of ignition, e.g. burning candles, must never be placed on or immediately next to the device.
•Place the device somewhere that it will never be exposed to direct sunlight.
•Place the device on a solid, flat surface.
•Clean the air filter before it becomes heavily contaminated.
•When draining water through the hose, ensure that the hose does not become blocked, and that the open end of the hose is lower down than the device.
•Only operate the device with the water tank installed, or the hose attached. The hose end must be placed over a drain.
•Only use the original accessories.
•Do not use any astringent or abrasive cleaning agents.
•Only clean the device with a slightly damp cloth.
4. Items supplied
1Dehumidifier with water tank 5
1Hose 22
1Set of operating instructions
6GB

__RP89301_B4.book Seite 7 Freitag, 19. April 2013 7:28 19
5. How to use
•Remove all packing material.
•Remove all transport packing material.
•Strip off the foil from the operating panel.
•Check to ensure that all parts are present and undamaged.
1.Place the device on a level, dry and solid surface.
2.Let the device rest in its working position for about 30 minutes, so that the coolant fluid can settle.
3.Make sure that the float at the left-hand side of the water tank 5 can move freely.
4.Check that the water tank 5 is inserted correctly. If it is installed incorrectly, or if the water tank has been removed, the LED 12 TANK FULL will illuminate.
5.Connect the mains plug 10 to a grounded power socket.
6.Notes on operation
•If the relative humidity in residential rooms is continuously excessive, the cause should be found and rectified.
(Continuous ventilation - i.e. for several years - is generally not reasonable.)
•The optimum ambient temperature for removing humidity from the air is 5 °C to 35 °C. Below 5 °C, the use of a dehumidifier is not helpful, as there is only relatively little humidity in the air.
•During operation, the room temperature may rise by between 1 °C and 4 °C, depending on room size. This is normal.
Automatic defrosting
In order to prevent the device from freezing over while in continuous operation, it defrosts itself automatically. To do this, the dehumidification process is interrupted, and the motor switches to its highest setting.
The intervals at which this happens vary.
Conditions |
Defrosting |
|
|
|
|
Temperature: |
no defrosting |
|
over 20 °C |
||
|
||
|
|
|
Temperature: |
after 40 minutes dehu- |
|
midification, |
||
12 °C to 20 °C |
||
8 minutes defrosting |
||
|
||
|
|
|
Temperature: |
after 25 minutes dehu- |
|
midification, |
||
5 °C to 12 °C |
||
10 minutes defrosting |
||
|
||
|
|
|
Temperature: |
operation not possible |
|
under 5 °C |
||
|
||
|
|
7. Operation
7.1 Switching on and off
•By pressing the button 16 STAND-BY, you can switch the device on and off. The corresponding LEDs illuminate or go out.
-The device will start with the setting last selected.
-If the device has failed due to a power outage, has been disconnected from the mains power or stopped by the overheating protection system, it will start in the AUTOMATIC mode.
•If a timer has been set, the device will shut down after the time has run out (1- 12 hours).
•If a value has been set for relative humidity in the CONTINUOUS mode, the device will stop when the value has been reached, and re-start when the value is exceeded again.
•The device switches off when the water tank is full or has been removed.
GB 7
__RP89301_B4.book Seite 8 Freitag, 19. April 2013 7:28 19
Air outlet flap valve
Figure B: irrespective of which mode the device is being operated in, open the top flap valve 1. It clicks into place in four positions.
If the flap valve is not opened, the overheating protection will switch the device off after a while for approx. 3 minutes.
7.2 Displays
The mode of operation LEDs 14 and the display 13 show the selected functions and the humidity range.
Mode of operation LEDs
LED illuminated |
Meaning |
|
|
|
|
|
The water tank is |
|
TANK FULL |
full or has not been |
|
|
inserted. |
|
|
|
|
TIMER |
A switch-off time is |
|
activated. |
||
|
||
|
|
|
AIR CLEAN |
|
|
DRY CLOTHES |
Selected mode |
|
CONTINUOUS |
||
|
||
AUTOMATIC |
|
|
|
|
|
OPERATION |
The device is |
|
switched on. |
||
|
||
|
|
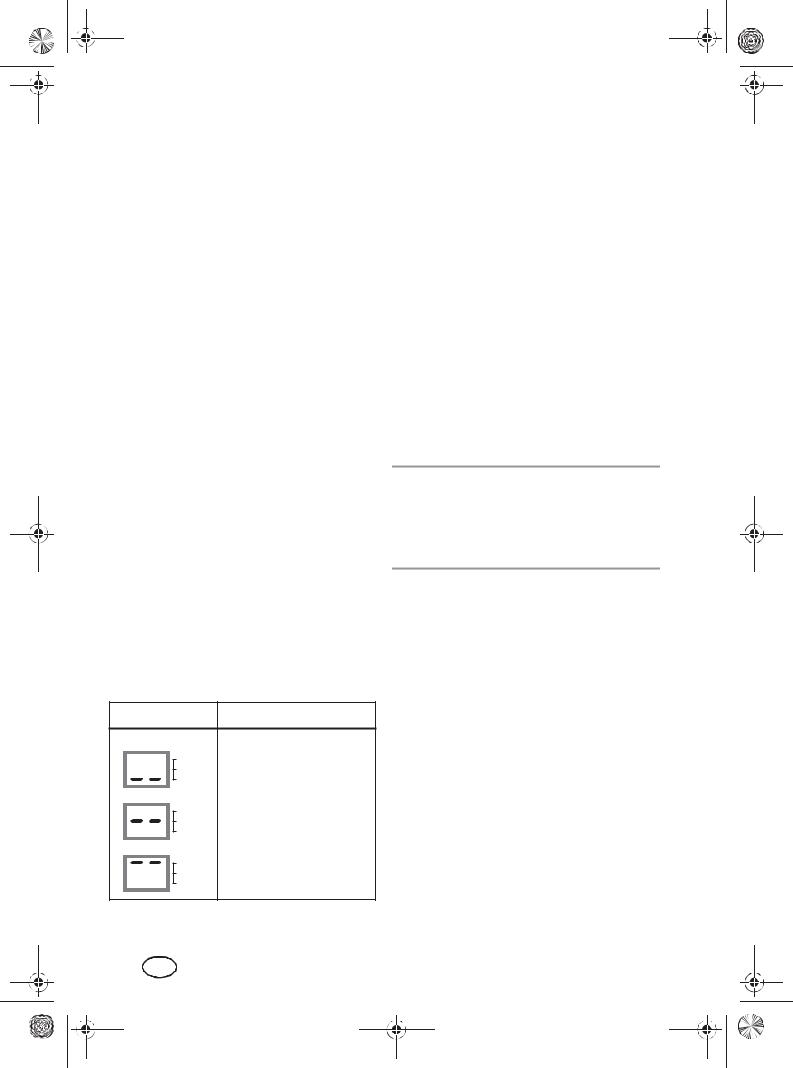
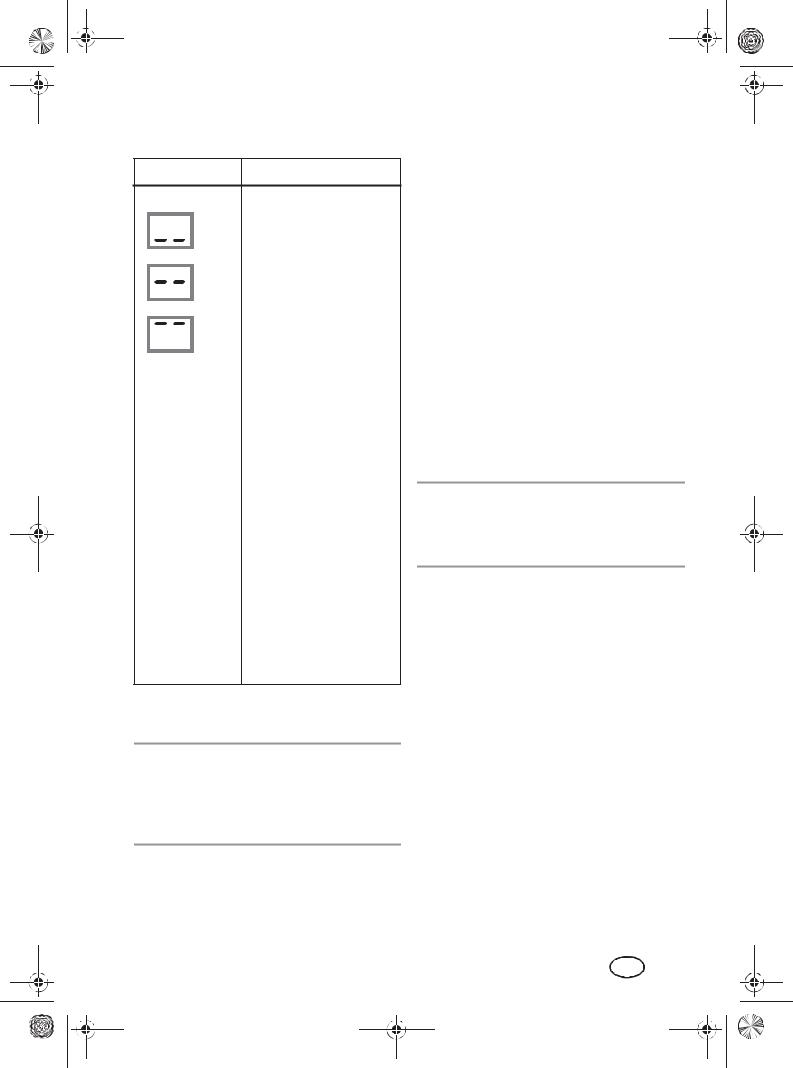
Display
Display |
Meaning |
HIGH |
This display can be seen |
|
|
MID. |
continuously during oper- |
LOW |
|
|
ation. It shows the humid- |
HIGH |
ity range in the room: |
|
|
MID. |
LOW: under 65% |
LOW |
|
|
MID: 65% to 75% |
HIGH |
HIGH: over 75% |
|
|
MID. |
|
LOW |
|
Display |
Meaning |
|
|
|
Timer for all modes: |
1 - 12 |
These values (1 - 12 hours) |
will flash for 5 seconds |
|
flash for 5 sec. |
when you use the arrow |
|
keys to select a switch-off |
|
time. |
|
|
|
Set relative humidity in |
|
continuous operation. |
30 - 80 or CO |
Values between 30 and |
80 or CO will flash for |
|
flash for 5 sec. |
5 seconds when |
|
selected. |
|
CO: The device dehu- |
|
midifies continuously. |
|
|
7.3 Modes of operation
NOTE: the values selected for relative humidity (RH%) are recognised with an upwards or downwards deviation of approx. 3%. This is necessary so that the device does not constantly switch on and off.
•The device has 4 different modes available.
•By pressing the button 17 MODE, you can switch between the modes.
•The mode of operation LED 14 next to the active mode illuminates.
AUTOMATIC
The setting for the target relative humidity (RH) is fixed at 55%. The compressor dehumidifies until this value has been reached, and will then switch off. When the relative humidity rises again, the compressor switches on again.
In this mode, the device operates in 3 different stages:
-RH over 70%: the device dehumidifies at its highest setting.
8GB
__RP89301_B4.book Seite 9 Freitag, 19. April 2013 7:28 19
-RH between 55% and 70%: the device dehumidifies at its normal setting.
-RH under 55%: no dehumidification, only the fan is running.
NOTE: the relative humidity values of the automatic system are not identical to the values HIGH/MID./LOW on the display 13.
Select this mode for continuous dehumidification to a pleasant relative humidity of 55%.
CONTINUOUS
In the CONTINUOUS mode, you can set the relative humidity in 5% increments to between 30% and 80%. The device dehumidifies at a low level until the set value has been reached, and then deactivates itself. When the relative humidity rises again, the device switches on again.
-30 - 80%: setting for the desired relative humidity in the room.
-CO: the device dehumidifies continuously.
Select this mode for continuous dehumidification, or for dehumidification to a value that you have set.
DRY CLOTHES
You can use this mode in order to dry damp clothes or shoes faster. The device dehumidifies at its highest setting. Shift the flap valve 1 of the air outlet in such a way that the jet of air is directed towards the items of clothing to be dried.
AIR CLEAN
No dehumidification takes place with this mode. The room air is drawn in through the filter in front of the air inlet, and is cleaned there.
7.4 Water tank
•The water tank 5 has a holding capacity of 5 litres.
•The water level can be checked using the inspection window 7 in the front.
•The device can only be operated with the water tank in place.
•When the water tank 5 is full, the TANK FULL LED 12 starts flashing. The device switches off after a few seconds. An alarm sounds for approx. 20 seconds. The TANK FULL LED 12 flashes until the tank has been emptied.
1.Figure A: in order to empty the water tank 5, pull it out slightly on the left and right-hand sides, and then carry it by the handle 3.
2.Pour the water out and place the tank back in the device.
7.5 Timer
•The timer can be combined with all 4 modes.
•There are 12 switch-off times that can be selected, from 1 to 12 hours.
•After the expiry of the time that has been set, the device is shut down and the timer function is terminated.
1.During operation, press the TIMER 19 button. The TIMER LED 20 will flash.
2.Use the arrow keys 18 to select a switchoff time of between 1 to 12 hours. The selected time flashes in the display 13 for 5 seconds and is then saved.
•If you want to end the timer earlier than the set time, press TIMER 19 twice or switch the device off by pressing
STAND-BY 16.
GB 9
__RP89301_B4.book Seite 10 Freitag, 19. April 2013 7:28 19
8. Hose drainage
In the case of very damp rooms, it is often more reasonable for the water not to be collected in the water tank, but to be discharged directly through a hose.
WARNING! During hose drainage, the device runs in continuous mode. This means that the water collected must be able to drain reliably, otherwise puddles will form on the floor.
1.Figure C: use a screwdriver to remove the fastener 21 on the rear.
2.Remove the plug 23.
3.Figure C: place the hose 22 included in the box over the opening.
4.Place the device in a position where the end of the hose is over a drain. It is essential here that the open end of the hose is lower down than the drain outlet on the device (i.e. the hose must run at a downward angle).
5.Switch the device on as described above and select a mode.
6.If you wish to drain into the water tank 5 again, switch the device off, remove the hose 22, and replace the plug 23 firmly over the opening.
9.Cleaning and replacing the filter
The performance of the device also depends on the cleanliness of the filter.
•The carbon filter 25 should be cleaned every 2 weeks and replaced every 6 months. Clean the filter by brushing or vacuum suction.
•The normal plastic filter 24 should be washed every 2 weeks.
1.Switch the device off and pull out the mains plug 10.
2.Figure D: reach into the upper opening of the grid 8 and pull it off.
3.Rotate grid 8 and press, if necessary with both thumbs, in the middle of the grid.
4.The plastic filter 24 and the carbon filter 25 come loose from the grid. Remove them from the grid 8.
5.Rinse out both filters with lukewarm water. (The carbon filter 25 should be replaced after approx. 6 months.)
6.Allow both filters to dry completely.
7.Place the filters into the grid 8.
8.Place the grid onto the device.
NOTE: new carbon filters are available in almost all household goods shops. The pads just need to be cut to size.
10. Cleaning
Clean the device prior to its first use!
DANGER! Risk of electric shock!
•Pull the mains plug 10 out of the grounded power socket before you clean the device.
•The device, the power cable and the mains plug 10 must not be immersed in water or any other liquids.
WARNING! Risk of material damage! Do not use any astringent or abrasive cleaning agents.
•Wipe the housing and the power cable 10 with a damp cloth if necessary.
•Remove the water tank 5, pour out the water, and dry the tank well inside and outside before re-inserting it into the device.
10 GB
__RP89301_B4.book Seite 11 Freitag, 19. April 2013 7:28 19
11.Protection against overheating
The device has an overheating protection system.
•The overheating protection system will switch the device off automatically if there is a risk of overheating.
•It is then impossible to switch the device on again for 3 minutes.
•After approx. 3 minutes, the device starts automatically.
•Check whether external conditions could have triggered the overheating protection system, e.g. temperature above 35 °C or a closed flap valve 1 over the air outlet.
12. Storage
DANGER for children! Keep the device out of the reach of children.
•Always store the device in an upright position.
•Select a location where neither high temperatures nor moisture can affect the device.
13. Trouble-shooting
If your device fails to function as required, please try this checklist first. Perhaps there is only a minor problem, and you can solve it yourself.
DANGER! Risk of electric shock! Do not attempt to repair the device yourself under any circumstances.
Fault |
Possible causes/Action |
||
|
|
|
|
|
• |
Has the device been |
|
|
|
connected to the power |
|
|
|
supply? |
|
|
• |
Check the water level in |
|
|
|
the water tank 5. |
|
No function. |
• |
Check the position of |
|
|
|
the water tank. |
|
|
• |
The overheating protec- |
|
|
|
tion system has |
|
|
|
switched the device off. |
|
|
|
Wait for approx. 3 min- |
|
|
|
utes. |
|
|
|
|
|
|
• |
Are the filters 24, 25 |
|
|
|
dirty? |
|
|
• |
Is the air inlet 8 |
|
The dehumid- |
|
blocked? |
|
• |
The temperature is low. |
||
ification |
• |
Is the device operating |
|
does not |
|||
|
in AIR CLEAN mode? |
||
seem to be |
|
||
|
No dehumidification |
||
working very |
|
||
|
takes place with this |
||
well. |
|
||
|
program. |
||
|
|
||
|
• |
Is a window open, or |
|
|
|
has steam been generat- |
|
|
|
ed in the room? |
|
|
|
|
|
Excessive |
• |
Is the device standing |
|
|
on a level, solid sur- |
||
noise. |
|
||
|
face? |
||
|
|
||
|
|
|
|
|
• |
Room temperature |
|
Occasion- |
|
above 35 °C? |
|
ally the |
• |
Room temperature be- |
|
device stops |
|
low 5 °C? |
|
working. |
• |
Defrosting mode is ac- |
|
|
|
tive. |
|
|
|
|
|
Damp cloth- |
• |
Is the air flow from the |
|
ing is not |
|
device directly pointed |
|
drying, or is |
|
at the damp clothing? |
|
only drying |
• |
Is the room temperature |
|
very slowly. |
|
too low? |
|
|
|
|
|
GB 11
__RP89301_B4.book Seite 12 Freitag, 19. April 2013 7:28 19
14. Disposal
The symbol showing a wheelie bin crossed through indicates that the product requires separate refuse collection in the European Union. This applies to the product and all accessories marked with this
symbol. Products identified with this symbol may not be discarded with normal household waste, but must be taken to a collection point for recycling electric and electronic appliances. Recycling helps to reduce the consumption of raw materials and protect the environment.
Packaging
When disposing of the packaging, make sure you comply with the environmental regulations applicable in your country.
15.Technical specifications
Model: |
SLE 420 A1 |
|||||||
|
|
|
|
|
|
|
|
|
Mains voltage: |
220 - 240 V~ 50 Hz |
|||||||
|
|
|
|
|
|
|
|
|
Protection class: |
I |
|
|
|
|
|
|
|
|
||||||||
|
|
|
|
|
|
|||
|
|
|
|
|
|
|||
|
|
|
|
|
|
|
|
|
Input power: |
320 W (27 °C 60%) |
|||||||
|
|
|
|
|
|
|
|
|
Power rating max.: |
420 W |
|||||||
|
(35 °C 90%) |
|||||||
|
|
|
|
|
|
|
|
|
Nominal current: |
1,39 A (27 °C 60%) |
|||||||
|
|
|
|
|
|
|
|
|
Power consump- |
max.1.82 A |
|||||||
tion: |
(35 °C 90%) |
|||||||
|
|
|
|
|
|
|
|
|
Dehumidification |
20 L /day (30 °C 80%) |
|||||||
capacity: |
11 L /day (27 °C 60%) |
|||||||
|
|
|
|
|
|
|
|
|
Air flow: |
195 m3/h |
|||||||
Coolant / |
R134a/190g |
|||||||
Volume: |
||||||||
|
|
|
|
|
|
|
||
|
|
|
|
|
|
|
|
|
Coolant group: |
L1 |
|||||||
|
|
|
|
|
|
|
|
|
Water tank: |
5 l |
|||||||
|
|
|
|
|
|
|
|
|
Room size: |
20 m2‚ (Rh. 2.3 m) |
|||||||
Room |
|
|
|
|
|
|
|
|
temperature: |
5 - 35 °C |
|||||||
|
|
|
|
|
|
|
|
|
Weight: |
12.5 kg |
|||||||
|
|
|
|
|
|
|
|
|
Dimensions: |
360 x 230 x 610 |
|||||||
|
WxDxH |
|||||||
|
|
|
|
|
|
|
|
|
Noise level: |
48 dB(A) |
|||||||
|
|
|
|
|
|
|
|
|
Intake pressure: |
0,5 MPa |
|||||||
|
|
|
|
|
|
|
|
|
Exhaust pressure: |
1,5 MPa |
|||||||
|
|
|
|
|
|
|
|
|

 Subject to technical modification.
12 GB
__RP89301_B4.book Seite 13 Freitag, 19. April 2013 7:28 19
16.Warranty of the HOYER Handel GmbH
Dear Customer,
your device is provided with a 3 year warranty starting with the purchase date. In the event of product defects, you are entitled to statutory rights against the vendor. These statutory rights are not restricted by our warranty presented in the following.
Warranty conditions
The warranty period starts with the purchase date. Please keep the original purchase receipt in a safe place. This document is required to verify the purchase.
If within three years from the purchase date of this product a material or factory defect occurs, the product will be repaired or replaced by us – at our discretion – free of charge to you. This warranty implies that within the period of three years the defective device and the purchase receipt are presented, including a brief written description of the defect and the time it occurred.
If the defect is covered by our warranty, the repaired or a new product will be returned to you. No new warranty period starts with a repair or replacement of the product.
Warranty period and statutory claims for defects
The warranty period is not extended when the warranty has been claimed. This also applies to replaced and repaired parts. Any damages and defects already existing at the time of purchase must be reported immediately upon unpacking. Repairs arising after the expiration of the warranty period are subject to a charge.
uct parts that are subject to standard wear and therefore can be considered wear parts; the same applies to damages at fragile parts, e.g. switches, rechargeable batteries or parts made of glass.
This warranty expires if the product is damaged, not used as intended or not serviced. For the proper operation of the product, all instructions listed in the operating instructions must be observed carefully. Any form of use and handling that is advised against in the operating instructions or warned against must always be avoided.
The product is only intended for private and not for commercial use. In the case of incorrect and improper treatment, use of force and interventions not performed by our authorised Service Centre, the warranty shall cease.
Handling in case of a warranty claim
In order to ensure prompt processing of your matter, please observe the following notes:
•Please keep the article number
IAN: 89301 and the purchase receipt as a purchase verification for all inquiries.
•If faulty operation or other defects occur, first contact the Service Centre listed in the following by telephone or email.
•Then, you are able to send a product reported as defective free of charge to the service address specified to you, includ-
ing the purchase receipt and the information on the defect and when it occurred.
Please visit www.lidl-service.com to download this and many other manuals, product videos and software.
Warranty coverage
The device was produced carefully according to strict quality guidelines and tested diligently prior to delivery.
The warranty applies to material or factory defects. This warranty does not include prod-
GB 13

__RP89301_B4.book Seite 14 Freitag, 19. April 2013 7:28 19
Service Centre
GB Service Great Britain
Tel.: 0871 5000 720 (£ 0.10/Min.) E-Mail: hoyer@lidl.co.uk
IE Service Ireland
Tel.: 1890 930 034 (0,08 EUR/Min., (peak))
(0,06 EUR/Min., (off peak)) E-Mail: hoyer@lidl.ie
IAN: 89301
Supplier
Please note that the following address is no service address. First contact the aforementioned Service Centre.
HOYER Handel GmbH
Kühnehöfe 5
22761 Hamburg
Germany
14 GB

__RP89301_B4.book Seite 15 Freitag, 19. April 2013 7:28 19
GB 15

__RP89301_B4.book Seite 16 Freitag, 19. April 2013 7:28 19
Spis tre ci
1. |
Przegl d......................................................................................... |
17 |
|
2. |
U ycie zgodne z przeznaczeniem .................................................... |
18 |
|
3. |
Wskazówki bezpiecze stwa ........................................................... |
19 |
|
4. |
Zakres dostawy ............................................................................. |
21 |
|
5. |
Uruchomienie ................................................................................. |
21 |
|
6. |
Wskazówki dotycz ce eksploatacji................................................. |
21 |
|
7. |
Obs uga ......................................................................................... |
22 |
|
|
7.1 |
W czanie i wy czanie....................................................................... |
22 |
|
7.2 |
Wska niki........................................................................................... |
22 |
|
7.3 |
Programy ............................................................................................ |
23 |
|
7.4 |
Zbiornik na wod ................................................................................ |
24 |
|
7.5 |
Timer.................................................................................................. |
24 |
8. |
Odprowadzanie wody z w a........................................................ |
24 |
|
9. |
Czyszczenie i wymiana filtra........................................................... |
25 |
|
10. Czyszczenie .................................................................................... |
25 |
||
11. Ochrona przed przegrzaniem ......................................................... |
25 |
||
12. Przechowywanie ............................................................................ |
26 |
||
13. Rozwi zywanie problemów ........................................................... |
26 |
||
14. Utylizacja ....................................................................................... |
27 |
||
15. Dane techniczne.............................................................................. |
27 |
||
16. Gwarancja firmy HOYER Handel GmbH .......................................... |
28 |
||
16 PL

__RP89301_B4.book Seite 17 Freitag, 19. April 2013 7:28 19
1. Przegl d
1 Ruchoma klapa wylotu powietrza
2Panel obs ugi
3R czka
4 Uchwyt do zbiornika na wod
5Zbiornik na wod (5 l)
6Wa ki
7 Okienko wziernikowe do kontroli poziomu wody
8Kratka wlotu powietrza (zdejmowana)
9Haki do nawijania przewodu zasilaj cego
10Przewód zasilaj cy z wtyczk ze stykiem ochronnym
11Tabliczka znamionowa
12 |
TANK FULL |
Dioda LED wieci si , gdy zbiornik na wod jest pe ny |
13 |
(ZBIORNIK PE NY) |
|
HIGH/MID./LOW |
|
|
|
(WYS./ R./NIS.) |
Wy wietlacz do wskazywania wybranej wilgotno ci |
14 |
|
powietrza i czasu wy czenia |
Programy |
Diody LED sygnalizuj aktywny program |
|
15 |
OPERATION |
|
|
(DZIA ANIE) |
Dioda LED wieci si w czasie pracy |
16 |
STAND-BY |
|
|
(GOTOWO ) |
W cza i wy cza urz dzenie |
17 |
MODE (TRYB) |
Prze cza pomi dzy 4 programami |
18RH%HR/ SETTING
(RH%HR/ USTAWIENIE) Programowanie wilgotno ci powietrza i timera
19 |
TIMER |
W czanie i wy czanie zegara steruj cego |
20 |
TIMER |
Dioda LED wieci si , gdy timer jest w czony |
21Zamkni cie przy cza w a (zamkni cie zdejmuje si rubokr tem; wyj korek i pod czy w )
22W
23Korek
24Filtr z tworzywa sztucznego
25Filtr w glowy
PL 17
__RP89301_B4.book Seite 18 Freitag, 19. April 2013 7:28 19
Serdecznie dzi kujemy za zaufanie!
Gratulujemy Pa stwu zakupu nowego osuszacza powietrza.
Aby móc bezpiecznie pos ugiwa si produktem i pozna ca y zakres jego mo liwo-ci:
•Przed pierwszym uruchomieniem nale y dok adnie przeczyta niniejsz instrukcj obs ugi.
•Nale y przede wszystkim przestrzega wskazówek bezpiecze stwa!
•Urz dzenie wolno obs ugiwa wy cznie w sposób opisany w niniejszej instrukcji.
•Instrukcj nale y zachowa do pó niejszego u ycia.
•W przypadku dalszego przekazania urz dzenia nale y do czy do niego instrukcj obs ugi.
yczymy Pa stwu du o zadowolenia z nowego osuszacza powietrza!
2.U ycie zgodne z przeznaczeniem
Osuszacz powietrza jest przeznaczony wy-cznie do osuszania pomieszcze mieszkalnych, piwnic i magazynów o temperaturze od 5 °C do 35 °C.
Z urz dzenia mo na korzysta wy cznie w pomieszczeniach zamkni tych.
Niniejsze urz dzenie nie mo e by u ywane do celów przemys owych.
Przewidywalne u ycie niezgodne z przeznaczeniem
NIEBEZPIECZE STWO wywo ania choroby!
Zgromadzona woda jest niezdatna do picia ani podlewania ro lin. Istnieje zagro enie dla zdrowia.
NIEBEZPIECZE STWO pora enia pr dem elektrycznym!
Nie wolno wstawia urz dzenia do wody, ani te stawia w ka u-ach wody.
OSTRZE ENIE przed szkodami materialnymi!
•Nie wolno u ywa urz dzenia na basenach, w a niach lub podobnych pomieszczeniach.
•Urz dzenie nie jest przeznaczone do osuszania izolacji. Je li wskutek p kni - cia rury dojdzie do zawilgocenia izolacji lub materia u izoluj cego, nale y na wszelki wypadek zasi gn opinii specjalisty.
•Nigdy nie wolno wystawia urz dzenia na dzia anie temperatur poni ej 0 stopni Celsjusza. Woda pozostaj ca w przewodach mog aby zamarzn i uszkodzi uk ad.
•Nie wolno stosowa urz dzenia w rodowisku zapylonym ani zawieraj cym chlor.
18 PL
__RP89301_B4.book Seite 19 Freitag, 19. April 2013 7:28 19
3.Wskazówki bezpiecze stwa
Ostrze enia
Je eli jest to konieczne, w niniejszej instrukcji pracy stosuje si nast puj ce ostrze enia:
NIEBEZPIECZE STWO! Wysokie ryzyko: Nieprzestrzeganie tego ostrze enia mo e by przyczyn szkód na zdrowiu i yciu.
OSTRZE ENIE! rednie ryzyko: Nieprzestrzeganie tego ostrze enia mo e by przyczyn obra e lub strat materialnych.
OSTRO NIE: Niskie ryzyko: Nieprzestrzeganie tego ostrze enia mo e by przyczy- n lekkich obra e lub strat materialnych.
WSKAZÓWKA: Cechy i sposób zachowania, na które nale y zwraca uwag podczas pracy z urz dzeniem.
Wskazówki dotycz ce bezpiecznej pracy
•Opisywane urz dzenie nie jest przeznaczone do obs ugi przez osoby (w tym równie dzieci) o ograniczonych zdolno ciach fizycznych, sensorycznych lub umys owych lub nieposiadaj cych wystarczaj cego do wiadczenia i/lub wiedzy; chyba e b d one korzysta y z niego pod nadzorem osoby odpowiedzialnej za ich bezpiecze stwo lub te otrzymaj od niej stosowne wskazówki dotycz ce jego prawid owej obs ugi.
•Dzieci musz pozostawa pod sta ym nadzorem, by wykluczy mo liwo zabawy urz dzeniem.
•Ponownie zamontowa urz dzenie. Po bokach i z ty u nale y zostawi minimalny odst p ok. 20 cm oraz 10 cm z przodu i 30 cm od góry.
•Urz dzenie mo e pracowa w pomieszczeniach o temperaturze od 5 °C do 35 °C.
•Urz dzenie wolno stosowa tylko w pomieszczeniach o maks. powierzchni 20 m2.
•Wtyczk pod cza wy cznie do prawid owo zainstalowanego,atwo dost pnego gniazdka z zestykami ochronnymi, którego napi cie odpowiada danym zawartym na tabliczce znamionowej.
Gniazdko sieciowe musi by atwo dost pne tak e po pod czeniu urz dzenia.
•Urz dzenie nale y zamontowa zgodnie z krajowymi przepisami dotycz cymi instalowania.
PL 19
__RP89301_B4.book Seite 20 Freitag, 19. April 2013 7:28 19
NIEBEZPIECZE STWO – zagro enie dla dzieci
•Materia opakowania nie jest zabawk dla dzieci. Dzieci nie mog bawi si workami z tworzywa sztucznego. Istnieje niebezpiecze stwo uduszenia.
•Nieu ywane urz dzenie nale y zabezpieczy przed dost pem dzieci.
NIEBEZPIECZE STWO wybuchu
•Urz dzenie nie mo e pracowa w otoczeniu zawieraj cym aerozole lub zagro o- nym eksplozj .
NIEBEZPIECZE STWO poraenia pr dem spowodowane wilgoci
•Urz dzenia nigdy nie wolno u ywa w pobli u wanny, prysznica, nape nionej wod umywalki itp.
•Urz dzenie, przewód zasilaj cy oraz wtyczka sieciowa nie powinny by zanurzane w wodzie i w innych cieczach.
•Urz dzenie nale y chroni przed kapi c lub rozbryzgow wod .
•Je li do urz dzenia (oprócz zbiornika na wode) dostanie si jakakolwiek ciecz, natychmiast wyj wtyczk sieciow . Przed ponownym uruchomieniem nale y zleci sprawdzenie urz dzenia.
•Urz dzenia nie wolno obs ugiwa mokrymi d o mi.
•Je li urz dzenie wpadnie do wody, nale y natychmiast wyci gn wtyczk sieciow z gniazdka. Dopiero pó niej wyj urz dzenie z wody.
NIEBEZPIECZE STWO poraenia pr dem elektrycznym
•Nale y zwróci uwag na to, aby przewód zasilaj cy nie uleg uszkodzeniu w wyniku kontaktu z ostrymi kraw dziami lub gor cymi elementami. Przewodu zasilaj cego nie wolno owija wokó urz dzenia.
•Po wy czeniu za pomoc wy cznika urz dzenie nadal znajduje si pod napi ciem. W celu ca kowitego od czenia od sieci nale y wyci gn wtyczk sieciow z gniazdka.
•Podczas u ywania urz dzenia zwróci uwag , aby przewód zasilaj cy nie by zakleszczony lub zgnieciony.
•Przy wyci ganiu wtyczki sieciowej z gniazdka ze stykiem ochronnym nale-y zawsze ci gn za wtyczk , w adnym wypadku nie wolno ci gn za kabel.
•Wtyczk ze stykiem ochronnym nale y wyci gn z gniazdka ze stykiem ochronnym, ...
…kiedy wyst pi usterka,
…kiedy urz dzenie nie jest u ywane,
…przed czyszczeniem urz dzenia, oraz
…w przypadku burzy.
•Urz dzenia nie wolno u ywa w przypadku stwierdzenia widocznych uszkodze samego urz dzenia lub przewodu zasilaj cego.
•W urz dzeniu nie wolno wprowadzaadnych zmian, co pozwoli wykluczy ewentualne zagro enia. Nie wolno równie samodzielnie wymienia przewodu zasilaj cego. Naprawy nale y przeprowadza wy cznie w specjalistycznej firmie lub w centrum serwisowym.
OSTRZE ENIE przed szkodami materialnymi
•Nie stawia na urz dzeniu przedmiotów nape nionych ciecz , np. wazonów.
•Na urz dzeniu nie wolno stawia ci - kich przedmiotów.
•Chroni urz dzenie przed dzia aniem wysokiej temperatury.
•Urz dzenia nie wolno przykrywa (np. gazetami, poduszkami lub kocami).
•Nie wolno wsuwa adnych przedmiotów do szczelin wentylacyjnych.
20 PL

__RP89301_B4.book Seite 21 Freitag, 19. April 2013 7:28 19
•Na urz dzeniu ani tu obok niego nie wolno ustawia otwartych róde ognia, np. p on cych wieczek.
•Urz dzenie nale y ustawi w taki sposób, by nie sta o w bezpo rednim zasi - gu dzia ania promieni s onecznych.
•Ustawi urz dzenie na twardej i równej powierzchni.
•Filtr powietrza nale y czy ci zanim zostanie silnie zabrudzony.
•W przypadku odprowadzania wody przez w nale y uwa a , by nie zablokowa w a i by otwarty koniec w a znajdowa si ni ej ni urz dzenie.
•Urz dzenie mo e pracowa tylko z pod-czonym zbiornikiem na wod lub zainstalowanym w em. Koniec w a musi znajdowa si nad odp ywem.
•Wolno stosowa wy cznie oryginalne akcesoria.
•Nie wolno u ywa ostrych ani szoruj - cych rodków czyszcz cych.
•Urz dzenie nale y czy ci lekko zwil-on ciereczk .
5. Uruchomienie
•Zdj ca e opakowanie.
•Zdj wszystkie zabezpieczenia transportowe.
•ci gn foli z panelu obs ugi.
•Sprawdzi , czy s wszystkie cz ci i czy nie s one uszkodzone.
1.Ustawi urz dzenie na równym, suchym i twardym pod o u.
2.Odstawi urz dzenie na ok. 30 minut w pozycji roboczej, aby mog a osi ciecz ch odz ca.
3.Nale y sprawdzi , czy p ywak po lewo w zbiorniku na wod 5 mo e si swobodnie porusza .
4.Sprawdzi , czy zbiornik na wod 5 jest prawid owo zamocowany. W przypadku nieprawid owej pozycji lub od czenia zbiornika na wod , zapala si dioda LED 12 TANK FULL (ZBIORNIK PE NY).
5.Wpi wtyczk sieciow 10 do gniazdka ze stykiem ochronnym.
4. Zakres dostawy
1osuszacz powietrza ze zbiornikiem na wod 5
1w 22
1instrukcja obs ugi
6.Wskazówki dotycz ce eksploatacji
•Je li w pomieszczeniach mieszkalnych utrzymuje si stale zbyt wysoka wzgl d- na wilgotno powietrza, nale y znale i usun przyczyn (ci gle – przez lata – odpowietrzanie z regu y nie przynosi efektu).
•Optymalna temperatura otoczenia do obni enia wilgotno ci powietrza wynosi od 5 °C do 35 °C. U ywanie osuszacza powietrza poni ej 5 °C jest bezskuteczne, bowiem zawarto wilgoci w powietrzu jest niewielka.
•W trakcie eksploatacji temperatura w pomieszczeniu mo e wzrosn , w zale no ci od jego wielko ci, od 1 °C do 4 °C. To normalne zjawisko.
PL 21
PL_RP89301_Luftentfeuchter.fm Seite 22 Montag, 22. April 2013 8:14 08
Automatyczne odladzanie
Aby unikn oblodzenia w trakcie pracy ci - g ej, urz dzenie odladza si automatycznie. Programuje si wówczas osuszanie, a silnik ustawia si na najwy szy poziom.
Ró na jest cz stotliwo tego zabiegu.
Warunki |
Odladzanie |
|
|
|
|
Temperatura: |
brak odladzania |
|
powy ej 20 °C |
||
|
||
|
|
|
Temperatura: |
po 40 minutach osu- |
|
szania, |
||
od 12 °C do 20 °C |
||
8 minut odladzania |
||
|
|
|
Temperatura: |
po 25 minutach osu- |
|
szania, |
||
od 5 °C do 12 °C |
||
10 minut odladzania |
||
|
|
|
Temperatura: |
urz dzenie nie mo e |
|
poni ej 5 °C |
pracowa |
|
|
|
7. Obs uga
7.1 W czanie i wy czanie
•Urz dzenie w cza si i wy cza przyciskiem 16 STAND-BY (GOTOWO ). Zapalaj si i gasn odpowiednie diody LED.
-Urz dzenie w cza si z ostatnio wybranym ustawieniem.
-Po awarii pr du, je li urz dzenie zosta o od czone od sieci lub po wy - czeniu przez uk ad ochrony przez przegrzaniem, urz dzenie w cza si w programie AUTOMATIC (TRYB AUTOMATYCZNY).
•Po zaprogramowaniu timera urz dzenie wy czy si na sta e po up ywie konkretnego czasu (1–12 godzin).
•Je eli w programie CONTINUOUS (TRYB CI G Y) zaprogramuje si warto wzgl dnej wilgotno ci powietrza, urz dzenie wy czy si po osi gni ciu tej warto ci i w czy znów po jej ponownym przekroczeniu.
•Urz dzenie wy czy si po nape nieniu si lub od czeniu zbiornika na wod .
Klapa otworu wylotu powietrza
Ilustracja B: Niezale nie od programu, w którym urz dzenie pracuje, nale y otworzy górn klap 1. Blokuje si ona w czterech pozycjach.
Je li nie otworzy si klapy, uk ad ochrony przed przegrzaniem wy czy urz dzenie po pewnym czasie na ok. 3 minuty.
7.2 Wska niki
Dioda LED programu 14 i wy wietlacz 13 wskazuj wybrane funkcje i zakres wilgotno ci powietrza.
Dioda LED programu
Dioda LED wieci si |
Znaczenie |
|
|
|
|
TANK FULL |
Zbiornik na wod |
|
jest pe ny lub nie |
||
(ZBIORNIK PE NY) |
||
zamontowany. |
||
|
||
|
|
|
TIMER |
Uaktywniony jest |
|
czas wy czenia. |
||
|
||
|
|
|
AIR CLEAN (CZYSZ- |
|
|
CZENIE POWIETRZA) |
|
|
DRY CLOTHES |
|
|
CONTINUOUS |
Wybrany program |
|
(TRYB CI G Y) |
||
|
||
AUTOMATIC |
|
|
(TRYB AUTOMA- |
|
|
TYCZNY) |
|
|
|
|
|
OPERATION |
Urz dzenie jest |
|
(DZIA ANIE) |
w czone. |
|
|
|
22 PL
PL_RP89301_Luftentfeuchter.fm Seite 23 Montag, 22. April 2013 8:14 08
Wy wietlacz
Wska nik |
Znaczenie |
|
|
|
Ten wska nik pozostaje |
|
|
HIGH |
stale widoczny podczas |
|
|
pracy. Wy wietla zakres |
|
|
|
MID. |
|
|
|
||
|
|
LOW |
wilgotno ci powietrza w |
|
|
||
|
|
|
|
|
|
HIGH |
pomieszczeniu: |
|
|
MID. |
LOW (NIS): poni ej 65% |
|
|
||
|
|
LOW |
MID. (R): od 65% do |
|
|
||
|
|
|
|
|
|
HIGH |
75% |
|
|
MID. |
HIGH (WYS): powy ej |
|
|
|
|
|
|
LOW |
75% |
|
|
||
|
|
|
|
|
|
|
|
|
|
|
Timer wszystkich progra- |
|
|
|
mów: |
1 - 12 |
|
|
te warto ci (1– |
|
|
12 godzin) migaj |
|
Migaj 5 sek. |
przez 5 sekund, kiedy za |
||
|
|
|
pomoc przycisków ze |
|
|
|
strza kami ustala si |
|
|
|
czas wy czenia. |
|
|
|
|
|
|
|
Programowanie wzgl d- |
|
|
|
nej wilgotno ci powie- |
|
|
|
trza w trybie ci g ym. |
30–80 lub CO |
Warto ci mi dzy 30 i 80 |
||
lub CO s wy wietlane |
|||
Migaj 5 sek. |
przy programowaniu na |
||
|
|
|
5 sekund wiat em miga- |
|
|
|
j cym. |
|
|
|
CO: urz dzenie osusza |
|
|
|
powietrze ci gle. |
7.3 Programy
WSKAZÓWKA: Zaprogramowane warto-ci wzgl dnej wilgotno ci powietrza (rF%) s wykrywane z odchy k ok. 3% w gór i w dó . Jest to niezb dne, aby urz dzenie stale si nie w cza o i wy cza o.
•Urz dzenie dysponuje 4 ró nymi programami.
•Naci ni cie przycisku 17 MODE (TRYB) powoduje prze czanie programów.
•Dioda LED programu 14 wieci si przed aktywnym programem.
AUTOMATIC (TRYB AUTOMATYCZNY) Wzgl dna wilgotno powietrza (rF), która ma zosta uzyskana, jest zaprogramowana na 55%. Spr arka osusza powietrze do chwili osi gni cia tej warto ci, a nast pnie si wy cza. Kiedy wzgl dna wilgotno powietrza znów wzro nie, uruchomi si ponownie spr arka.
W tym programie urz dzenie pracuje w 3 ró nych stopniach:
-rF powy ej 70%: urz dzenie osusza powietrze z maksymaln moc .
-rF mi dzy 55% i 70%: urz dzenie osusza powietrze z normaln moc .
-rF poni ej 55%: osuszanie nie dzia a, pracuje jedynie wentylator.
WSKAZÓWKA: Warto ci rF trybu automatycznego nie s identyczne z warto ciami HIGH/MID./LOW (WYS./ R./NIS.) na wy wietlaczu 13.
Program u ywany jest do ci g ego osuszania powietrza do przyjemnego poziomu wzgl dnej wilgotno ci 55%.
CONTINUOUS (TRYB CI G Y)
W programie CONTINUOUS (TRYB CI - G Y) mo na wybiera wzgl dn wilgotno powietrza mi dzy 30% a 80% w stopniach co 5%. Urz dzenie osusza powietrze na niskim poziomie do osi gni cia zaprogramowanej warto ci, a nast pnie wy cza si . Kiedy wzgl dna wilgotno powietrza znów wzro nie, urz dzenie uruchomi si ponownie.
-30-80%: ustawienie danej wzgl dnej wilgotno ci powietrza w pomieszczeniu.
-CO: Urz dzenie osusza powietrze ci gle.
PL 23
PL_RP89301_Luftentfeuchter.fm Seite 24 Montag, 22. April 2013 8:14 08
Ten program u ywany jest do ci g ego osuszania powietrza lub do osuszania do warto ci okre lonej przez u ytkownika.
DRY CLOTHES
Ten program pomaga szybciej wysuszy wilgotne pranie lub buty. Urz dzenie osusza powietrze z maksymaln moc . Nale y umie ci klap wylotu powietrza 1 w takiej pozycji, aby strumie powietrza by skierowany na osuszan odzie .
AIR CLEAN (CZYSZCZENIE POWIETRZA) Ten program nie przewiduje osuszania powietrza. Powietrze z pomieszczenia jest zasysane przez filtr przed otworem wlotowym powietrza i podlega tam oczyszczeniu.
7.4 Zbiornik na wod
•Zbiornik na wod 5 ma pojemno 5 litrów.
•Poziom wody mo na kontrolowa z przodu w okienku wziernikowym 7.
•Urz dzenie mo e pracowa tylko z zamontowanym zbiornikiem na wod .
•Kiedy zbiornik na wod 5 jest pe ny, dioda LED 12 TANK FULL (ZBIORNIK PE NY) zaczyna miga . Urz dzenie wy-cza si po kilku sekundach. Na ok. 20 sekund rozbrzmiewa d wi k alarmu. Dioda LED 12 TANK FULL (ZBIORNIK PE NY) miga dopóki nie opró ni si zbiornika.
1.Ilustracja A: Aby opró ni zbiornik na wod 5, wyci ga si go nieco z lewej i prawej strony, a nast pnie podnosi si za r czka 3.
2.Wylewa si wod i ponownie wk ada si zbiornik.
7.5 Timer
•Timer mo e wspó pracowa ze wszystkimi 4 programami.
•Mo na wybiera spo ród 12 czasów wy czenia od 1 do 12 godzin.
•Po up ywie zaprogramowanego czasu urz dzenie zostaje wy czone na sta e i program timera jest zako czony.
1.W czasie pracy nale y nacisn przycisk TIMER 19. Dioda LED 20 TIMER miga.
2.Za pomoc przycisków ze strza kami 18 wybierany jest czas wy czenia od 1 do 12 godzin. Wybrany czas miga przez 5 sekund na wy wietlaczu 13, a nast pnie zostaje zapisany w pami ci.
•Aby zako czy program timera przed czasem, trzeba dwukrotnie wcisn TIMER 19 lub wy czy urz dzenie przyciskiem STAND-BY (GOTOWO ) 16.
8.Odprowadzanie wody z w a
W bardzo wilgotnych pomieszczeniach cz sto lepszym rozwi zaniem nie jest zbieranie wody w zbiorniku lecz natychmiastowe jej odprowadzanie przy u yciu w a.
OSTRZE ENIE! Podczas odprowadzania wody z w a urz dzenie pracuje w trybie ci g ym. Oznacza to, e odci gni ta z powietrza woda musi mie mo liwo bezpiecznego odp ywu, aby na pod odze nie tworzy y si ka u e.
1.Ilustracja C: Za pomoc rubokr tu nale y zdj zamkni cie 21 w tylnej cz ci.
2.Wyj korek 23.
3.Ilustracja C: Na otwór nasadzi za-czony do urz dzenia w 22.
24 PL
__RP89301_B4.book Seite 25 Freitag, 19. April 2013 7:28 19
4.Urz dzenie ustawi tak, aby koniec w a znalaz si nad odp ywem. Jednocze nie otwarty koniec w a musi by usytuowany pod wylotem w urz - dzeniu (w musi mie zatem spadek).
5.Urz dzenie w czy jest jak zwykle i wybra program.
6.Chc c ponownie odprowadza wod do zbiornika 5, wystarczy wy czy urz dzenie od czy w ž 22 i wetkn korek 23 z powrotem w otwór.
9.Czyszczenie i wymiana filtra
Wydajno urz dzenia zale y te od czysto ci filtrów.
•Filtr w glowy 25 powinno si czy ci co 2 tygodnie i wymienia co 6 miesi - cy. Filtr si szczotkuje i odsysa.
•Normalny filtr z tworzywa sztucznego 24 nale y my co 2 tygodnie.
1.Nale y wy czy urz dzenie i wyj wtyczk 10.
2.Ilustracja D: Nale y z apa za górny otwór w kratce 8 i odci gn j .
3.Obróci kratk 8 i w razie potrzeby nacisn kciukami jej rodek.
4.Filtr z tworzywa sztucznego 24 i filtr w glowy 25 nale y oderwa od kratki. Na koniec wystarczy je zdj z kratki 8.
5.Oba filtra myje si pod letni wod (filtr w glowy 25 nale y wymieni po ok. 6 miesi cach).
6.Oba filtry musz si ca kowicie wysuszy .
7.Filtry nale y przytwierdzi do kratki 8.
8.Kratk nasadza si na urz dzenie.
WSKAZÓWKA: Nowe filtry w glowe mo na kupi prawie we wszystkich sklepach AGD. Wystarczy tylko przyci maty.
10. Czyszczenie
Urz dzenie nale y wyczy ci przed pierwszym u yciem!
NIEBEZPIECZE STWO pora enia pr dem!
•Przed czyszczeniem urz dzenia wyci gn wtyczk 10 z gniazdka ze stykiem ochronnym.
•Urz dzenie, przewód zasilaj cy oraz
wtyczka sieciowa 10 nie powinny by zanurzane w wodzie i w innych cieczach.
OSTRZE ENIE przed szkodami materialnymi! Nie wolno u ywa ostrych ani szoruj cych rodków czyszcz cych.
•W razie potrzeby obudow oraz przewód zasilaj cy 10 mo na przetrze lekko zwil on ciereczk .
•Nale y zdemontowa zbiornik na wod 5, wyla wod i dobrze osuszy zbiornik przed za o eniem od rodka i z zewn trz.
11.Ochrona przed przegrzaniem
Urz dzenie jest wyposa one w stycznik chroni cy silnik przed przegrzaniem.
•Uk ad chroni cy przed przegrzaniem automatycznie wy cza urz dzenie w razie niebezpiecze stwa.
•Nast pnie przez 3 minuty nie b dzie mo na uruchomi urz dzenia.
•Po ok. 3 minutach urz dzenie w czy si automatycznie.
•Nale y sprawdzi , czy to warunki zewn trzne wyzwoli y uk ad ochronny, np. temperatury powy ej 35 °C lub zamkni ta klapa 1 nad wylotem powietrza.
PL 25
__RP89301_B4.book Seite 26 Freitag, 19. April 2013 7:28 19
12. Przechowywanie
NIEBEZPIECZE STWO – zagro enie dla dzieci!
Nieu ywane urz dzenie nale y zabezpieczy przed dost pem dzieci.
•Urz dzenie magazynuje si tylko w pozycji pionowej.
•Nale y wybra takie miejsce, w którym urz dzenie nie b dzie nara one na wysokie temperatury i wilgo .
13.Rozwi zywanie problemów
W przypadku nieprawid owej pracy urz - dzenia nale y je w pierwszej kolejno ci sprawdzi wed ug poni szej listy kontrolnej. Mo e okaza si , e nie jest to du y problem i mo na go usun samodzielnie.
NIEBEZPIECZE STWO pora enia pr dem! W adnym wypadku urz dzenia nie wolno naprawia samodzielnie.
B d |
Mo liwe przyczyny/ |
|
|
dzia ania |
|
|
|
|
|
|
|
|
• |
Czy zapewnione jest |
|
|
zasilanie pr dem elek- |
|
|
trycznym? |
|
• Prosz sprawdzi stan |
|
|
|
zbiornika na wod 5. |
Brak dzia a- |
• |
Prosz sprawdzi po- |
|
zycj zbiornika na |
|
nia. |
|
|
|
wod . |
|
|
|
|
|
• Uk ad chroni cy |
|
|
|
przed przegrzaniem |
|
|
wy czy urz dzenie. |
|
|
Odczeka ok. 3 mi- |
|
|
nut. |
|
|
|
B d |
Mo liwe przyczyny/ |
|
|
dzia ania |
|
|
|
|
|
|
|
|
• Czy filtry 24, 25 nie |
|
|
|
s zabrudzone? |
|
• Czy wlot powietrza 8 |
|
|
|
nie jest zablokowany? |
|
• |
Temperatura jest niska. |
Osuszanie po- |
• |
Czy urz dzenie pra- |
wietrza wyda- |
|
cuje w programie AIR |
|
CLEAN? W takim |
|
je si |
|
|
|
przypadku nie przewi- |
|
niewielkie. |
|
|
|
duje si osuszania po- |
|
|
|
|
|
|
wietrza. |
|
• Mo e otwarte jest |
|
|
|
okno lub w pomiesz- |
|
|
czeniu wytwarzana |
|
|
si para? |
|
|
|
Urz dzenie |
• |
Czy urz dzenie stoi |
nadmiernie |
|
na równym, twardym |
ha asuje. |
|
pod o u? |
|
|
|
|
• |
Czy temperatura w |
Funkcja wy - |
|
pomieszczeniu prze- |
|
kracza 35 °C? |
|
cza si od |
• |
Czy temperatura w |
czasu do |
|
pomieszczeniu nie |
czasu. |
|
przekracza 5 °C? |
|
• |
Aktywna jest funkcja |
|
|
odladzania. |
|
|
|
|
• Czy strumie powie- |
|
|
|
trza z urz dzenia jest |
Wilgotne ubra- |
|
skierowany bezpo- |
nie nie schnie |
|
rednio na wilgotne |
wcale lub |
|
ubranie? |
schnie powoli. |
• |
Czy temperatura w |
|
|
pomieszczeniu nie jest |
|
|
za niska? |
|
|
|
26 PL
__RP89301_B4.book Seite 27 Freitag, 19. April 2013 7:28 19
14. Utylizacja
Symbol przekre lonego kontenera na mieci na kó kach oznacza, e na terenie Unii Europejskiej produkt musi zosta dostarczony do specjalnego miejsca sk adowania odpadów. Dotyczy to
zarówno produktu, jak i wszystkich jego elementów oznaczonych tym symbolem. Tak oznaczone produkty nie mog by utylizowane cznie ze zwyk ymi odpadami komunalnymi, lecz nale y je odda do specjalnego punktu recyklingu urz dze elektrycznych i elektronicznych. Recykling pomaga zredukowa zu ycie surowców oraz odci y rodowisko naturalne.
Opakowanie
W przypadku utylizacji opakowania nale y przestrzega odpowiednich przepisów dotycz cych ochrony rodowiska w danym kraju.
15. Dane techniczne
Model: |
SLE 420 A1 |
|||||||
Napi cie siecio- |
|
|
|
|
|
|
|
|
we: |
220 - 240 V ~ 50 Hz |
|||||||
|
|
|
|
|
|
|
|
|
Klasa ochrony: |
I |
|
|
|
|
|
|
|
|
||||||||
|
|
|
|
|
|
|||
|
|
|
|
|
|
|||
|
|
|
|
|
|
|
|
|
Moc wej ciowa: |
320 W (27 °C 60%) |
|||||||
|
|
|
|
|
|
|
|
|
Moc maks.: |
420 W (35 °C 90%) |
|||||||
|
|
|
|
|
|
|
|
|
Pr d znamiono- |
|
|
|
|
|
|
|
|
wy: |
1,39 A (27 °C 60%) |
|||||||
|
|
|
|
|
|
|
|
|
Pobór pr du: |
maks. 1,82 A (35 °C |
|||||||
|
90%) |
|||||||
|
|
|
|
|
|
|
|
|
Wydajno osu- |
20 l /dzie (30 °C 80%) |
|||||||
szania: |
11 l /dzie (27 °C 60%) |
|||||||
|
|
|
|
|
|
|
|
|
Przep yw powie- |
|
|
|
|
|
|
|
|
trza: |
195 m3/h |
|||||||
Ch odziwo/ |
R134a/190 g |
|||||||
Ilo : |
||||||||
|
|
|
|
|
|
|
||
|
|
|
|
|
|
|
|
|
Grupa ch odziw: |
L1 |
|||||||
|
|
|
|
|
|
|
|
|
Zbiornik na wod : |
5 l |
|||||||
|
|
|
|
|
|
|
|
|
Maks. wielko |
20 m2‚ (Rh. 2,3 m) |
|||||||
pomieszczenia: |
||||||||
Temperatura w |
|
|
|
|
|
|
|
|
pomieszczeniu: |
5–35 °C |
|||||||
|
|
|
|
|
|
|
|
|
Ci ar: |
12,5 kg |
|||||||
|
|
|
|
|
|
|
|
|
Wymiary: |
360 x 230 x 610 |
|||||||
|
(szer. x g . x wys.) |
|||||||
|
|
|
|
|
|
|
|
|
Poziom emitowa- |
<48 dB(A) |
|||||||
nego ha asu: |
|
|
|
|
|
|
|
|
Ci nienie zasysa- |
|
|
|
|
|
|
|
|
nia: |
0,5 MPa |
|||||||
|
|
|
|
|
|
|
|
|
Ci nienie wy- |
|
|
|
|
|
|
|
|
dmuchiwania: |
1,5 MPa |
|||||||
|
|
|
|
|
|
|
|
|

 Zmiany techniczne zastrze one.
PL 27

__RP89301_B4.book Seite 28 Freitag, 19. April 2013 7:28 19
16.Gwarancja firmy HOYER Handel GmbH
Drogi Kliencie,
Na niniejsze urz dzenie jest udzielana 3 -let- nia gwarancja obowi zuj ca od dnia jego zakupu. W przypadku usterek niniejszego produktu kupuj cemu przys uguj wobec jego sprzedawcy stosowne ustawowe prawa gwarancyjne. Poni ej opisana gwarancja nie ogranicza tych ustawowych praw przy- s uguj cych kupuj cemu.
Warunki gwarancyjne
Okres obowi zywania gwarancji rozpoczyna w dniu zakupu produktu. Orygina dokumentu zakupu nale y przechowywa w bezpiecznym miejscu. Ten dokument b dzie potrzebny, jako potwierdzenie dokonanego zakupu.
Je eli w przeci gu trzech lat od daty zakupu niniejszego produktu pojawi usterka w produkcie lub usterka produkcyjna, to produkt, wg naszego wyboru, zostanie bez- p atnie naprawiony lub wymieniony. Niniejsze wiadczenie gwarancyjne zak a- da, e uszkodzone urz dzenie oraz dokument potwierdzaj cy zakup (paragon kasowy) zostan przed o one w przeci gu trzech lat. Do urz dzenia i dowodu zakupu nale y do czy tak e krótki opis usterki oraz poda moment jej wyst pienia. Je eli usterka jest obj ta nasz gwarancj ,
to kupuj cy otrzyma z powrotem naprawiony lub nowy produkt. Wraz z napraw lub wymian produktu nie rozpoczyna si nowy okres gwarancyjny.
Okres obowi zywania gwarancji i prawne roszczenia zwi zane z wyst pieniem usterki
wiadczenie gwarancyjne nie przed u a okresu obowi zywania gwarancji. To dotyczy tak e wymienionych i naprawionych cz ci. Ewentualne stwierdzone przy zakupie uszkodzenia i usterki nale y zg osi na-
tychmiast po rozpakowaniu produktu. Naprawy dokonywane po up ywie okresu obowi zywania gwarancji p atne.
Zakres gwarancji
Urz dzenie wyprodukowano zgodnie surowymi przepisami dotycz cymi jako ci i do- k adnie skontrolowano przed opuszczeniem zak adu produkcyjnego.
wiadczenie gwarancyjne obejmuje zarówno usterki materia owe, jak i usterki powsta e podczas produkcji. Gwarancja nie obejmuje cz ci produktu, które s poddane procesowi normalnego zu ycia i dlatego mog by traktowane jako cz ci eksploatacyjne, lub uszkodze amliwych elementów, np. prze-czniki, akumulatory lub elementy wykonane ze szk a.
Niniejsza gwarancja traci swoj wa no w przypadku nieprawid owego u ytkowania lub serwisowania produktu. W celu zagwarantowania prawid owego u ytkowania produktu nale y dok adnie stosowa si do wszystkich wskazówek zawartych w instrukcji obs ugi. Nale y bezwzgl dnie unika sposobów u y- cia oraz dzia a , które si odradza lub przed którymi ostrzega si w instrukcji obs ugi. Produkt jest przeznaczony wy cznie do prywatnego u ytkowania i nie jest przeznaczony do specjalistycznych zastosowa . Gwarancja wygasa w przypadku niezgodnego z przeznaczeniem i nieprawid owego u ytkowania, stosowania si y oraz w przypadku ingerencji w produkt, których nie przeprowadzi o nasze autoryzowane centrum serwisowe.
Post powanie w przypadku gwarancji
Aby zapewni szybkie za atwienie zg aszanego przypadku, nale y stosowa si do poni szych wskazówek:
•W przypadku wszystkich zapyta nale-y mie przygotowany numer artyku u IAN: 89301 oraz paragon kasowy potwierdzaj cy dokonanie zakupu.
28 PL
 Loading...