


3536.qxd 30.08.2004 14:48 Page 2
3536.qxd 30.08.2004 14:48 Page 3
ИНСТРУКЦИЯ ПО ЭКСПЛУАТАЦИИ MANUAL INSTRUCTION
ALARM CLOCK / WIRELESS WEATHER STATION
ЧАСЫ - БУДИЛЬНИК / БЕСПРОВОДНАЯ МЕТЕОСТАНЦИЯ С
ОТОБРАЖЕНИЕМ ДАННЫХ О ПОГОДЕ
МОДЕЛЬ VT-3536
3536.qxd 30.08.2004 14:48 Page 2
ENGLISH
Wireless Weather Station with weather report
Congratulations on your purchase of this weather station. Please take the time to read and understand this manual so you can begin to enjoy the convenience and features this product has to offer.
The unit is a weather station device that has several weather related functions. The main features are:
FEATURES
Main Display Unit:
•dual clock and dual alarm
•calendar (month/day/date)
•local temperature display
•receives and displays temperature and humidity readings from
up to 3 remote transmitters via RF technology of 433MHz
• minimum and maximum temperature and humidity memory
•temperature and humidity trend indicator
•temperature history (bar graph for past 12 hours)
•weather icons
•user-selectable C or F
•table stand or wall mountable
•battery type: 2 x AA
Remote Transmitter
•drip-proof design with LCD
•socket of external sensor probe
•temperature display in user-selectable °C or °F
•humidity display
•transmission range: up to 40 meters in open area
•battery type: 2 x AA size
VT-3536 transmitter
VT-3536 receiver
2

3536.qxd 30.08.2004 14:48 Page 3
ENGLISH
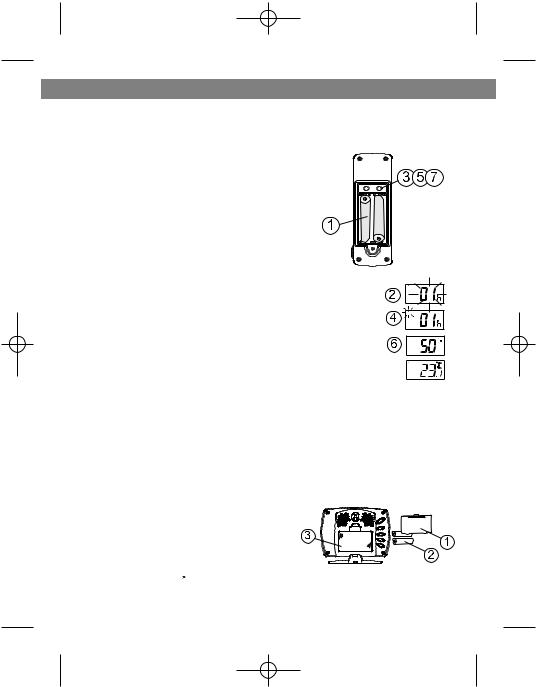
GETTING STARTED
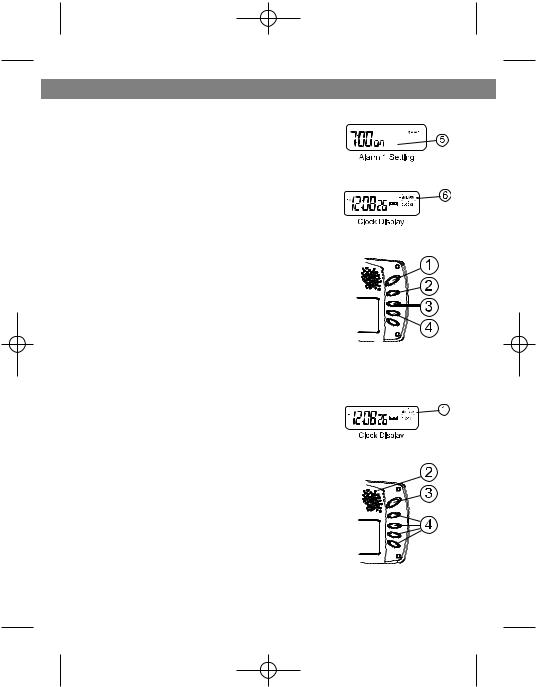
1. MIN/-/MIN: shows minimum temper-
Button placement
ature & humidity; adjusts clock, alarm, date and temperature alarm values
2. ON/OFF: toggles between °C and °F,
12 and 24 hour format, Alarm 1 & 2
on and off, and bar graph indoor and outdoor selection; scrolls through
temperature alarm settings (off/high/low)
3.CHN: scrolls through remote channels (1 to 3); adjusts time and date values
4.HOUR/+/MAX: shows maximum temperature & humidity; adjusts clock, alarm, date and temperature alarm values
5.SNOOZE/MODE: scrolls through Clock 1 & 2, Alarm 1 & 2, Date and Temperature Alarm mode; snooze for alarm
6.LCD display
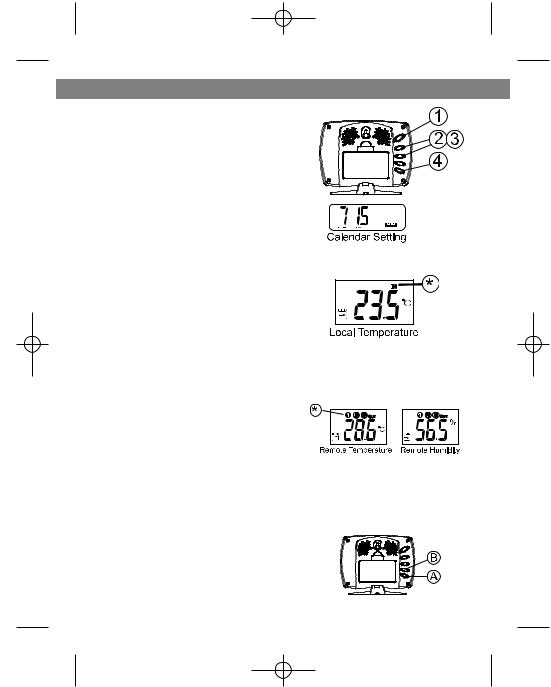
7.SET: enter to House code and Channel setting mode
8.C/F: change between °C or °F, change channel and house code
9.Battery compartment
10.Socket for external sensor probe.
11.Wall Mount Holder & Table Stand
3
3536.qxd 30.08.2004 14:48 Page 4
ENGLISH
SETTING UP
Set up the transmitter(s) before setting up the Setting up transmitter(s) receiver
1. Remove battery cover and insert batteries to start setup
AA size batteries (included) Insert batteries into compartment observing proper polarity
2. HOUSE CODE will flash for 8 seconds 3. Select HOUSE CODE (1-15) by pressing
C/F and pressing SET to CHANNEL setting
If you have multiple transmitters for a single
receiver, set each transmitter to the same House code
4. CHANNEL will flash for 8 seconds
5. Select CHANNEL(1-3) by pressing C/F
If you have multiple transmitters for a single receiver, set each transmitter to a different Channel code
6. Humidity & Temperature will alternatively display on LCD screen
7. Select °C or °F of Temperature by pressing C/F
•Use a different house code if your weather station detects other signals from neighboring sources
•Factory default: house code = 01 and channel = 01
1. Remove battery cover |
Setting up receiver |
|
2.2 AA size batteries (included)
3.Insert batteries into compartment,
observing proper polarity; replace cover
LOW BATTERY INDICATION:
Receiver: Low battery indicator will display continuously when batteries need replac-
ing. On transmitter,  will be displayed
4
3536.qxd 30.08.2004 14:48 Page 5
ENGLISH
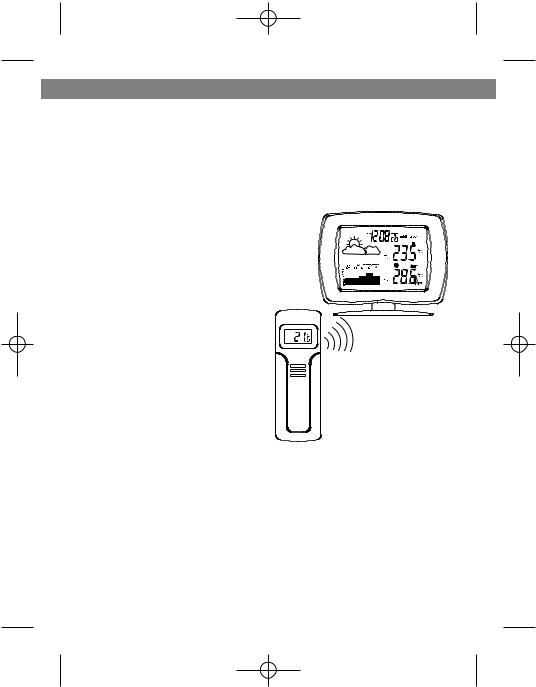
WIRELESS TRANSMISSION
Automatic Learn Function:
The learn function starts automatically and runs for approximately 3 minutes when batteries are first installed in the receiver.
Within these 3 minutes, the receiver will pick up the temperature and humidity signals from the remote transmitter and display the reading.
Manual Learn Function (Remote Signal Search):
If a new remote transmitter is added or if signal is lost (outdoor read out on the receiver is blinking), the learn function must be executed again.
1.Press and hold CHN for 3 seconds to start.
2.Unit will beep to indicate that learn function has started.
3.Channel symbol will blink and unit will continue to beep as each remote transmitter is detected.
4.Within 3 minutes, the temperature and humidity reading of the remote transmitter will display on the receiver.
5

3536.qxd 30.08.2004 14:48 Page 6
ENGLISH
WIRELESS TRANSMISSION
Environmental factors and signals from other household devices, such as remote entry controls, security systems, and computers, may interfere with the wireless transmission of this product and cause temporary reception loss. This is normal and does not affect the general performance of this product. Stable reception will resume once the interference ends.
For optimal performance:
•Place the receiver and remote transmitter side by side about 1 metre apart, and allow the receiver and remote transmitter to synchronize for 10 minutes before you place the remote transmitter outdoors.
•The remote transmitter should be placed in a dry shaded area. NOTE: Fog andmist will not harm the remote transmitter but direct rain must be avoided.
•Mount the remote transmitter upright avoiding metallic objects and frames, such as window sills. Verify that there are no obstacles like a transmission tower or steep hill that can cause interference and blockage between the remote transmitter and receiver.
•Place the receiver unit at least 2 metres away from any electrical devices, such as your television set, computer, cordless phone, or any radio controlled equipment.
•1Replace unit(s) with fresh batteries when the Low Battery Indicator lights up.
•Refer to the SETTING UP section.
•You may need to reposition the remote transmitter to a different location and/or closer to the receiver for the best transmission.
6

3536.qxd 30.08.2004 14:48 Page 7
ENGLISH
CLOCK SETTING
Manual clock setting Clock 1 Setting:
1. Press and hold MODE for 3 seconds to enter the clock setting mode (the CLOCK 1 symbol appears and the time will flash)
2.Press HOUR to set the hour and MINUTE to set the minute;
3.Press ALARM/(C/F) during clock setting, to change between 12 and 24 hour display. This also will end clock setting.
4.Press MODE or do not press any key for 1 minute to finish clock setting.
Clock 2 Setting:
5.Scroll to Clock 2 mode using MODE
6.Press + or - key to change the hour (in one hour increments/decrements relative to Clock 1)
7
3536.qxd 30.08.2004 14:48 Page 8
ENGLISH
ALARM SETTING
Alarm 1 and Alarm 2 Setting:
1. Scroll to Alarm 1 using MODE. The  ALARM 1 symbol will appear.
2.Press HOUR to set hour.
3.Press MIN to set minute.
4. Press ON/OFF to toggle alarm on and off.
5. When the alarm is set ON, the 'on' symbol will appear.
6. In the normal clock display, if the alarm is set ON, the  ALARM 1 symbol will also appear on the display.
• To set Alarm 2, scroll to Alarm 2 using MODE.
•The  ALARM 2 symbol will appear. Follow the same steps as above to set. In normal clock dis-
play, if the alarm is set ON, the  ALARM 2 symbol will also appear on the display.
NOTE: Both Alarm 1 and Alarm 2 are based on the time set on Clock 1.
When the Alarm Sounds:
•  ALARM 1 or
  ALARM 2 symbol will blink.
• The crescendo alarm will gradually increase in loudness.
•Press SNOOZE to snooze the alarm for 5 minutes.
• After that the alarm will sound again.
• Press ANY other key to stop the alarm. Or without interruption, the alarm will automatically stop after one minute.
8
3536.qxd 30.08.2004 14:48 Page 9
ENGLISH
CALENDAR SETTING
1. Scroll to Date mode using MODE
2. Press HOUR/+/MAX to set month
3. Press MIN/-/MIN to set date
4. Press CHN to set day
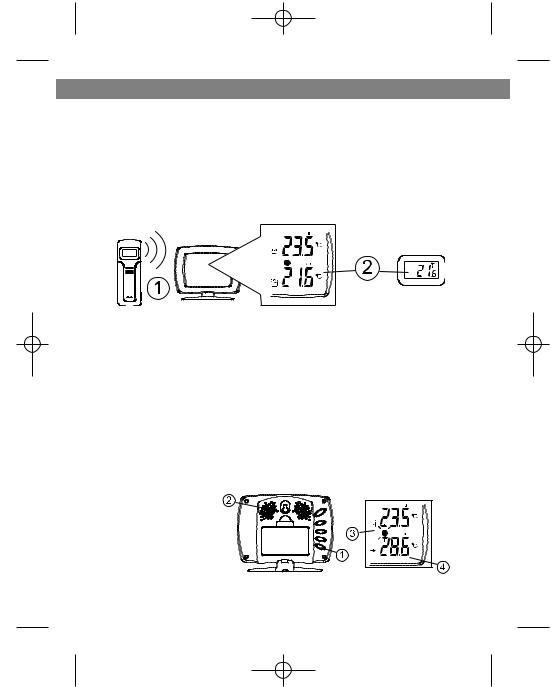
TEMPERATURE & HUMIDITY
DISPLAY
Local (Indoor) Temperature
The local (indoor) temperature will display instantly after batteries are inserted into the receiver.
Remote (Outdoor) Temperature and Humidity
If the Learn Function is performed successfully (refer to the WIRELESS TRANSMISSION section), the remote (outdoor)
temperature and humidity will display in the bottom-right corner of the LCD screen. Press CHN to toggle between Channels
1, 2 and 3.
NOTE: The temperature and humidity data will alternate on the LCD screen.
Selecting °C or °F Temperature Display
Toggle between °C and °F by pressing
ON/OFF in either Clock 1 or Clock 2 mode.
9
 Loading...