


WET & DRY VACUUM CLEANER PNTS 1300 C3
WET & DRY VACUUM CLEANER
Translation of original operation manual
SZÁRAZ-NEDVES PORSZÍVÓ Az originál használati utasítás fordítása
NASS - / TROCKENSAUGER
Originalbetriebsanleitung
ODKURZACZ DO PRACY NA MOKRO I SUCHO
Tłumaczenie oryginalnej instrukcji obsługi
VYSAVAČ NA SUCHÉ A MOKRÉ VYSÁVÁNÍ
Překlad originálního provozního návodu
IAN 102791

Before reading, unfold the page containing the illustrations and familiarise yourself with all functions of the device.
Przed przeczytaniem proszę rozłożyć stronę z ilustracjami, a następnie proszę zapoznać się z wszystkimi funkcjami urządzenia.
Olvasás előtt kattintson az ábrát tartalmazó oldalra és végezetül ismerje meg a készülék mindegyik funkcióját.
Před čtením si otevřete stranu s obrázky a potom se seznamte se všemi funkcemi přístroje.
Klappen Sie vor dem Lesen die Seite mit den Abbildungen aus und machen Sie sich anschließend mit allen Funktionen des Gerätes vertraut.
GB |
Translation of original operation manual |
Page |
4 |
|
PL |
Tłumaczenie oryginalnej instrukcji obsługi |
Strona |
15 |
|
HU |
Az originál használati utasítás fordítása |
Oldal |
27 |
|
CZ |
Překlad originálního provozního návodu |
Strana |
39 |
|
DE / AT / CH |
Originalbetriebsanleitung |
Seite |
50 |
|

1 |
2 |
3 |
|
|
12 |
|
|
4 |
11 |
|
|
10 |
|
5 |
|
|
|
9a |
|
13 |
9 |
|
6 |
|
|
|
8 |
|
|
|
|
14 |
|
7 |
15 |
|
|
|
|
|
20 |
|
|
16 |
|
|
19 |
|
|
17 |
|
|
18 |

GB |
|
Contents |
|
Introduction.................................. |
4 |
Application................................... |
5 |
General description...................... |
5 |
Contents.......................................... |
5 |
Overview......................................... |
5 |
Functional description........................ |
6 |
Pictograms regarding the use of |
|
nozzles and filters............................. |
6 |
Technical data............................... |
6 |
Safety information........................ |
6 |
Symbols used in the instructions.......... |
6 |
General notes on safety..................... |
7 |
Assembly..................................... |
8 |
Operation..................................... |
8 |
Switching on/off............................... |
8 |
Nozzle usage................................... |
8 |
Wet vacuuming................................. |
8 |
Dry vacuuming................................. |
9 |
Blowing........................................... |
9 |
Cleaning/Maintenance................ |
10 |
Cleaning the appliance.................... |
10 |
Storage...................................... |
10 |
Disposal/Environmental |
|
protection................................... |
10 |
Replacement parts/Accessories... |
11 |
Trouble shooting......................... |
12 |
Guarantee.................................. |
13 |
Repair Service............................ |
14 |
Service-Center............................ |
14 |
Importer..................................... |
14 |
Translation of the original EC |
|
declaration of conformity............ |
62 |
Exploded Drawing...................... |
65 |
4
This appliance can be used by children aged from 8 years and above and persons with reduced physical, sensory or mental capabilities or lack of experience and knowledge if they have been given supervision or instruction concerning use of the appliance in a safe way and understand the hazards involved. Children shall not play with the appliance. Cleaning and user maintenance shall not be made by children without supervision.
Introduction
Congratulations on the purchase of your new device. With it, you have chosen a high quality product.
During production, this equipment has been checked for quality and subjected to a final inspection. The functionality of your equipment is therefore guaranteed. It
cannot be ruled out that residual quantities of water or lubricants will remain on or in the equipment/hose lines in isolated cases.
This is not a fault or defect and it represents no cause for concern.
The operating instructions constitute part of this product. They contain important information on safety, use and disposal. Before using the product, familiarise yourself with all of the operating and safety instructions. Use the product only as described and for the applications specified.
Keep this manual safely and in the event that the product is passed on, hand over all documents to the third party.

Application
The appliance is intended for domestic wet and dry vacuuming in, for example, the house, work room, car or garage. The appliance can also be used as a blower or to suction up water. This equipment is not suitable for commercial use.
Vacuuming of flammable or explosive materials or those which endanger health is prohibited. The manufacturer will not be held responsible for injuries resulting from use which does not comply with the directions, or from incorrect use.
General description
The illustration of the principal functioning parts can be found on the front and back foldout pages.
Contents
Unpack the appliance and check that it is complete. The appliance is supplied with the motor head fitted ( 1). To remove the motor head, open the securing clips (
 10). Dispose of the packaging material properly.
1Motor housing
2Carrying handle
6Waste container
74 feet with castors and accessory fittings
9a Cable clip
123-part vacuum tube
13Vacuum hose with handle
15Foam filter
16Material filter (already mounted)
17Paper filter bag
18Floor nozzle with
20Crevice nozzle
6 cross-head screws Instruction Manual
GB
Overview
Housing
1Motor housing
2Carrying handle
3On/off switch
44 attachment ports for accessories
5Suction connection
6Waste container
74 feet with castors and accessory fittings
8Cable holder
9Mains cable
9a Cable clip
102 locking clips
11Blower connection
Accessories
123-part vacuum tube
13Vacuum hose with
14Handle component
Filter
15Foam filter for wet vacuuming
16Material filter for dry vacuuming (already mounted)
17Paper filter bag to vacuum coarse dirt
Nozzles
18Floor nozzle with
19Turnable insert attachment with brush and rubber lip, for vacuuming carpets and smooth surfaces
20Crevice nozzle
21Filter basket
22Flaps on the paper filter bag
23Intake connections
24Sealing ring
25Lip on the suction pipe
5
GB
Functional description
The wet and dry vacuum cleaner is equipped with a robust plastic container for waste collection. The castors make the appliance very easy to manoeuvre. The suction flow is switched off by a float during wet vacuuming once the waste tank is full. The appliance is also equipped with a blower function.
The following describes the function of the operating parts.
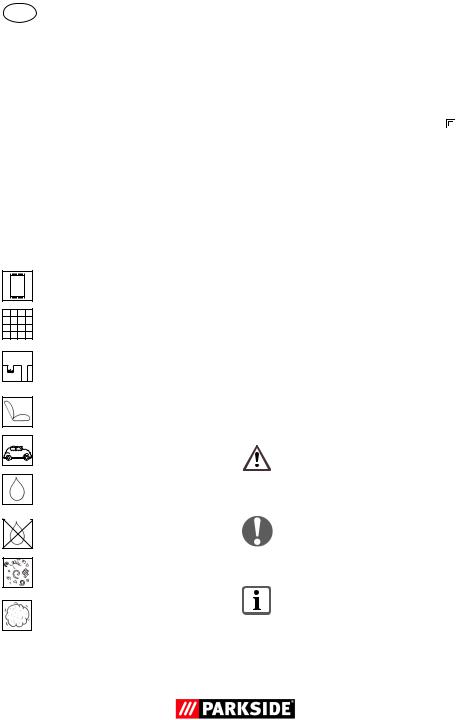
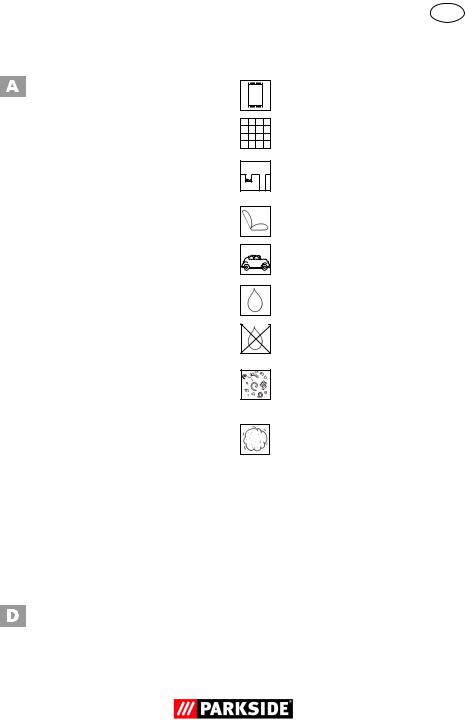
Pictograms regarding the use of nozzles and filters
Nozzle to vacuum carpets.
Nozzle to vacuum smooth surfaces and hard floor surfaces.
Nozzle to vacuum dust and dirt from joints and cracks.
Specific nozzle to vacuum cushions and mattresses.
Specific nozzle to clean the car.
Filter to absorb liquids.
Filter not suitable to absorb liquids.
Filter to absorb dry dirt from the house, garage and workshop.
Filter to absorb fine dust e.g. stone dust or wood dust.
Technical data
Rated voltage...... |
220-240 V~, 50/60 Hz |
|
Rated power input |
|
|
(Power consumption) ................. |
1300 W |
|
Safety class....................................... |
|
II |
Protection category........................... |
IPX4 |
|
Suction force.............. |
15 kPA (150 mbar) |
|
Mains cable length........................... |
4 m |
|
Waste tank capacity (gross)............... |
20 l |
|
Usable container volume (water)......... |
12 l |
|
Weight (incl. all accessories)... approx. 4.6 kg
Technical and visual modifications may be carried out due to further development without prior notice. All dimensions, information and statements provided in these
Operating Instructions are therefore subject to amendment. Legal claims which are based on the Operating Instructions can therefore not be recognised.
Safety information
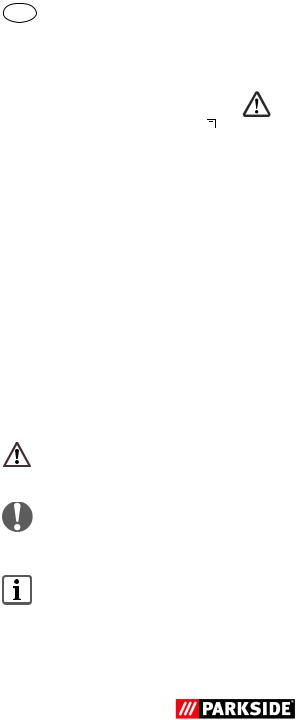
Symbols used in the instructions
Hazard symbols with information on prevention of personal injury and property damage.
Precaution symbol (explanation of precaution instead of exclamation mark) with information on prevention of harm/damage.
Notice symbol with information on how to handle the device properly.
6

General notes on safety
Please read the following safety guidelines in order to avoid risk of fire, electric shock, personal injury and damage to objects:
To avoid accidents and injuries:
•Never leave a machine which is ready for operation unattended at the workplace.
•People and animals must not be vacuumed with the machine.
•Do not aim the suction hose and nozzle at yourself or others during use, particularly not at the eyes and ears; there is a risk of injury.
•Do not vacuum any hot, incandescent, flammable, explosive materials, or those which endanger health. This includes hot ashes, petrol, solvents, acids or caustic solutions. Personal injury could occur.
•Nozzles and suction tubes must not reach head level whilst in use. Personal injury could occur.
To avoid accidents and injuries from electric shocks:
•Ensure that the mains cable is not damaged by being pulled over sharp edges, by jamming, or by pulling on the cable.
•Before each use, check the power supply lead and the extension cable for damage and ageing. Do not use the equipment if the cable is damaged or worn. Danger of electric shock hazard.
•If the power cable for this equipment is damaged, it must be replaced by the manufacturer, a customer service agent of the same or a similarly qualified person in order to prevent hazards.
•Switch the machine off and pull the
GB
plug under the following circumstances:
-when you are not using the device,
-transporting it or leaving it unattended;
-when you are checking the device, cleaning it or removing blockages;
-when you are carrying out cleaning or maintenance work or replacing accessories;
-when the power or extension cable is damaged; after contact with foreign bodies or in case of abnormal vibration.
•Never use the mains lead to pull the plug out of the socket or to pull the appliance. Protect the mains lead from heat, oil and sharp edges.
•Make sure that the mains voltage corresponds with the information on the rating plate.
•Only plug the appliance into a socket which is safeguarded by at least 16 A.
•The device must only be connected to a mains socket via a residual-current circuit breaker (RCD) with a rated leakage current of not more than 30 mA.
The following states how damage to the appliance and possible injury to people can be avoided:
•Ensure that the machine is correctly assembled and the filters are in the correct position.
•Do not use without the filter. This could damage the machine.
•Only use original spare parts and accessories delivered and recommended by our Service Centre (see “Spare parts/Accessories”). The use of parts by other manufacturers immediately renders the guarantee void.
•Only have repairs carried out at our authorised customer service points.
•Observe the instructions for cleaning
7

GB
and maintenance of the machine.
•Store the appliance in a dry place and out of reach of children.
Assembly
Pull out the mains plug.
This will prevent danger of injury from electric shock.
The appliance is supplied with the textile filter bag (  16) fitted.
1.Attach the carrying handle
(2)firmly using the cross-head screws (2a) supplied.
2.Attach the feet (7) and secure the feet using the cross-head screws
(7a) supplied.
3.Insert the filter:
-Foam filter for wet vacuuming (  15),
15),
-Material filter (  16) for dry vacuuming,
-Paper filter bag (  17).
17).
Never vacuum without a filter!
4.Place the motor housing (1) on top of the dirt collector (6) and close it with the clip (10).
5.Connect the vacuum hose (13) (bayonet fixing) and the accessories.
Operation
Fully unwind the suction hose ( 
13) before commencing work.
Switching on/off
Connect the mains plug.
8
Switching on the vacuum:
On/off switch (  3) in position “I”
Switching off the vacuum:
On/off switch (  3) in position “O”
Nozzle usage
Floor nozzle (  18) with insert attachment (
 19):
19):
for wet and dry vacuuming of smooth surfaces and fitted carpets.
Floor nozzle (  18) without insert attachment (
 19):
19):
for wet and dry vacuuming of fitted carpets and for removing persistent dirt.
•Press the clips on the right and left side
of the floor nozzle (  18) and remove the insert attachment (
  19).
19).
Mind that sensitive surfaces might get scratched if the insert attachment is not used.
Crevice nozzle ( 20):
20):
for vacuuming gaps, corners and radiators.
Wet vacuuming
1.For wet vacuuming or to vacuum water, fit the foam filter (15) to the filter basket (21).
To avoid tearing the foam filter (15):
-Use only a dry filter;
-Before inserting, twist the edge of the filter slightly and then roll it back.
2.Suctioning up (draining) water: place
the suction hose (  13) on the handle
(  14) into the water tank and suction up the water.
3.Empty the waste container immediately after vacuuming because it is not de-

signed to store liquids (see “Cleaning/
Maintenance”).
Never reach into the water to be suctioned up. Danger of electric shock.
If the waste container is full, a float closes the suction opening, and the vacuum operation is interrupted.
Switch off the machine and empty the waste tank.
If foam or liquid exits, switch off the machine immediately.
Dry vacuuming
The appliance is supplied with the textile filter bag (  16) fitted.
For dry vacuuming, pull the material filter (16) over the filter basket (21).
A fluted filter, which can be used instead of the fabric filter included in delivery, is optionally available
(see „Replacement parts/Accessories“).
Vacuuming with the paper filter bag:
To avoid the fluted filter becoming clogged, we recommend the additional use of a paper filter bag.
Insert the material filter
1.Pull the material filter (16) over the filter basket (21).
Insert the paper filter bag
2.Fold down the side flaps (22) on the paper filter bag (17) at the perforation.
GB
3.Fit the paper filter bag (17) with the short flap (22) upwards over the intake
connections (23) (see arrow ). The sealing ring (24) at the filter bag opening must completely surround the lip
(25) on the suction pipe.
A fine dust filter bag made of micro filter fleece is also optionally available, which can be used in place of the included paper filter bag (see “Replacement parts/Accessories”).
Vacuuming fine dust:
Specific suction processes (e.g. grinding of paints and lacquers, milling or drilling walls, grinding or drilling hard wood) can pose a risk from hazardous dust.
We recommend using the following optional filter combination, which is available, for fine dust (see “Spare parts/Accessories”):
1.Folded filter which is used in stead of the textile filter bag(16) included in the scope of delivery.
2.Fine dust filter bag made of fleece, which is used in stead of the paper filter bag (17) included in the scope of delivery.
Blowing
Operation without the use of a filter is recommended.
To blow, plug the suction hose (13) onto the connection (11) on the motor head.
9

GB
Cleaning/Maintenance
Pull out the mains plug.
This will prevent danger of injury from electric shock.
Always check the appliance before use for any obvious faults such as a defective mains cable, and have these repaired or replaced.
Cleaning the appliance
Never hose the appliance down with water. Never use aggressive cleaning agents or solvents. This could damage the appliance.
•After use, empty the waste tank (  6).
6).
•Clean the waste tank with a damp cloth.
•Wash the foam filter (  15) with lukewarm water and soap, and allow to dry. If necessary, wash with lukewarm water and soap and allow to dry.
•Beat out the material filter (  16).
16).
•Replace the paper filter bag (  17) when full (see “Replacement parts/Accessories” for reordering).
•Tap the optionally available folded filter and clean it with a brush or handbrush.
Storage
-For storage, wind the power cord (9) around the retaining bracket (8) on the back of the device.
Fix the power supply cable using the cable clip supplied (9a).
-Insert the separated vacuum tubes (12) into the accessory holder on the appliance feet (7).
-The attachment ports on the motor part serve as nozzle storage
( 4) or on the feets (7).
-Wind the vacuum hose (13) around the device and plug the handle section (14) into a vacuum tube (12).
-Store the appliance in a dry place and out of reach of children.
Disposal/Environmental protection
Be environmentally friendly. Return the tool, accessories and packaging to a recycling centre when you have finished with them.
Machines must not be disposed of with household refuse.
Take the machine to a recycling point. The waste plastic and metal parts can be separated, accurately graded and passed on for recycling. Contact our Service Centre for more details.
Defective units returned to us will be disposed of for free.
10
GB
Replacement parts/Accessories
Spare parts and accessories can be obtained at www.grizzly-service.eu
If you do not have internet access, please contact the Service Centre via telephone
(see “Sercice-Center” Page 14). Please have the order number mentioned below ready.
Position |
Position |
Description |
Use |
|
|
|
|
Order No. |
||||||||
instruction |
exploded |
|
|
|
|
|
|
|
|
|
|
|
|
|
||
manual |
drawing |
|
|
|
|
|
|
|
|
|
|
|
|
|
||
|
|
1 |
2.1 |
Motor housing |
|
|
|
|
|
|
|
91096873 |
||||
|
|
|
|
|
|
|
|
|||||||||
|
|
|
|
|
|
|
|
|
|
|
|
|
|
|
|
|
|
|
2 |
1 |
Carrying handle |
|
|
|
|
|
|
|
91096886 |
||||
|
|
|
|
|
|
|
|
|||||||||
|
|
|
|
|
|
|
|
|
|
|
|
|
|
|
|
|
|
|
6 |
5 |
Waste container |
|
|
|
|
|
|
|
91096878 |
||||
|
|
|
|
|
|
|
|
|||||||||
|
|
|
|
|
|
|
|
|
|
|
|
|
|
|
|
|
|
|
7 |
7 |
Foot with castor and scres |
|
|
|
|
|
|
|
72800092 |
||||
|
|
|
|
|
|
|
|
|||||||||
|
|
|
|
|
|
|
|
|
|
|
|
|
|
|
|
|
|
|
10 |
3 |
Locking clip |
|
|
|
|
|
|
|
91096877 |
||||
|
|
|
|
|
|
|
|
|||||||||
|
|
|
|
|
|
|
|
|
|
|
|
|
|
|
|
|
|
|
12 |
11 |
3-part vacuum tube |
|
|
|
|
|
|
|
91099439 |
||||
|
|
|
|
|
|
|
|
|||||||||
|
|
|
|
|
|
|
|
|
|
|
|
|
|
|
|
|
|
|
13/14 |
10 |
Vacuum hose with handle |
|
|
|
|
|
|
|
72800218 |
||||
|
|
|
|
|
|
|
|
|||||||||
|
|
|
|
|
|
|
|
|
|
|
|
|
|
|
|
|
|
|
15 |
12 |
Foam filter (wet filter), pack of 3 |
|
|
|
|
|
|
|
30250130 |
||||
|
|
|
|
|
|
|
|
|
||||||||
|
|
|
|
|
|
|
|
|||||||||
|
|
|
|
|
|
|
|
|
|
|
|
|
|
|
|
|
|
|
|
|
|
|
|
|
|
|
|
|
|
|
|
|
|
|
|
16 |
14 |
Material filter, 20 l (blue) |
|
|
|
|
|
|
|
|
30250135 |
|||
|
|
|
|
|
|
|
|
|
|
|||||||
|
|
|
|
|
|
|
|
|||||||||
|
|
|
|
|
|
|
|
|
|
|
|
|
|
|
|
|
|
|
17 |
13 |
Paper filter bags, 20 l, pack of 5 |
|
|
|
|
|
|
|
|
|
|
|
|
|
|
|
|
|
|
|
|
|
|
30250132 |
||||||
|
|
|
|
|
|
|
|
|||||||||
|
|
|
|
|
|
|
|
|
|
|
|
|
|
|
|
|
|
|
18/19 |
8 |
Floor nozzle with |
|
|
|
|
|
|
|
|
|
|
|
|
|
|
|
|
turnable insert attachment |
|
|
|
|
|
|
|
|
|
|
|
72800217 |
|
|
|
|
|
|
|
|
|
|
|
|
|
|
|
|
|
|
|
20 |
9 |
Crevice nozzle |
|
|
|
|
|
|
|
|
||||
|
|
|
|
|
|
|
|
|
72800039 |
|||||||
|
|
|
|
|
|
|
|
|
|
|
|
|
|
|
|
|
Optionally available: |
|
|
|
|
|
|
|
|
|
|
|
|
|
|||
|
Description |
|
Design |
Use |
|
|
|
|
Order No. |
|||||||
|
Fine dust filter bag 20 l, |
2-layer micro filter fleece, white |
|
|
|
|
|
|
|
30250111 |
||||||
|
|
|
|
|
|
|
|
|||||||||
|
pack of 5 |
|
|
|
|
|
|
|
|
|||||||
|
|
|
|
|
|
|
|
|
|
|
|
|
|
|
||
|
|
|
|
|
|
|
|
|
|
|
|
|
|
|
||
|
Fluted filter with filter |
Without steel inner mesh |
|
|
|
|
|
|
|
91092030 |
||||||
|
|
|
|
|
|
|
|
|||||||||
|
cover |
|
|
|
|
|
|
|
|
|||||||
|
|
|
|
|
|
|
|
|
|
|
|
|
|
|
||
|
|
|
|
|
|
|
|
|
|
|
|
|
|
|
||
|
Fluted filter without filter |
With steel inner mesh |
|
|
|
|
|
|
|
91099009 |
||||||
|
|
|
|
|
|
|
|
|||||||||
|
cover |
|
|
|
|
|
|
|
|
|||||||
|
|
|
|
|
|
|
|
|
|
|
|
|
|
|
||
|
|
|
|
|
|
|
|
|
|
|
|
|
|
|
||
|
|
|
|
|
|
|
|
|
|
|
|
|||||
|
Filter cover |
|
for fluted filter |
|
|
|
|
|
|
|
91092036 |
|||||
|
|
|
|
|
|
|
|
|
|
72800040 |
||||||
|
Cushion nozzle |
black |
|
|
|
|
|
|
|
|||||||
|
|
|
|
|
|
|
|
|
|
|
|
|
|
|
|
|
|
Car nozzle |
|
black |
|
|
|
|
|
|
|
91096445 |
|||||
|
|
|
|
|
|
|
|
|
||||||||
|
|
|
|
|
|
|
|
|
|
|
|
|
|
|
|
|
|
|
|
|
|
|
|
|
|
|
|
|
|
|
|
|
|
11

GB
Trouble shooting
Problem |
Possible cause |
|
|
|
|
|
|
Fault correction |
||||||||||||
|
|
|
|
|
|
|
|
|
|
|
|
|
|
|
|
|
|
|
|
|
|
|
|
|
|
|
|
|
|
|
|
|
|
|
|
|
|
|
|
|
Check plug socket, cable, line, |
|
Mains voltage is not present |
plug and fuse, where appropri- |
||||||||||||||||||
|
|
|
|
|
|
|
|
|
|
|
|
|
|
|
|
|
|
|
|
ate, repair through electrical |
|
|
|
|
|
|
|
|
|
|
|
|
|
|
|
|
|
|
|
|
specialist |
Device does not start |
|
|
|
|
|
|
|
|
|
|
|
|
|
|
|
|
|
|
||
Defective on/off switch |
|
|||||||||||||||||||
|
( |
|
|
3) |
|
|
|
|
|
|
|
|
|
|
|
|
|
Repair through customer service |
||
|
|
|
|
|
|
|
|
|
|
|
|
|
|
|||||||
|
|
|
|
|
|
|
|
|
|
|
|
|
|
|
|
|
|
|
|
|
|
Worn carbon brushes |
|||||||||||||||||||
|
|
|||||||||||||||||||
|
|
|
|
|
|
|
|
|
|
|
|
|
|
|
|
|
|
|
||
|
Defective motor |
|
||||||||||||||||||
|
|
|
|
|
|
|
|
|
|
|
|
|
|
|
|
|
|
|
|
|
|
Hose system ( |
|
|
|
13/14) or |
Remove obstructions and block- |
||||||||||||||
|
|
|
|
|||||||||||||||||
|
jets ( |
|
|
|
|
18/19) |
blocked |
ages |
||||||||||||
|
|
|
|
|||||||||||||||||
|
|
|
|
|
|
|
|
|
|
|
|
|
|
|
|
|
|
|
|
|
|
Suction pipe ( |
|
|
|
12) assem- |
Assemble suction pipe correctly |
||||||||||||||
|
|
|
|
|||||||||||||||||
|
bled incorrectly |
|||||||||||||||||||
|
|
|||||||||||||||||||
|
|
|
|
|
|
|
|
|
|
|
|
|
|
|
|
|
|
|
|
|
|
Container ( |
|
|
6) open |
Close container |
|||||||||||||||
|
|
|
||||||||||||||||||
|
|
|
|
|
|
|
|
|
|
|
|
|
|
|
|
|
|
|
|
|
Low or lack of suction |
Container ( |
|
|
6) full |
Empty container |
|||||||||||||||
|
|
|||||||||||||||||||
|
|
|
|
|
|
|
|
|
|
|
|
|
|
|
|
|
|
|
|
|
Filter ( |
|
|
|
|
15/16/17) full or |
Empty, clean or replace filter |
||||||||||||||
|
|
|
||||||||||||||||||
|
clogged |
|
|
|
|
|
|
|
|
|
|
|
||||||||
|
|
|
|
|
|
|
|
|
|
|
|
|
||||||||
|
|
|
|
|
|
|
|
|
|
|
|
|
|
|
|
|
|
|
||
|
Float in filter basket ( |
|
21) |
Switch off the equipment so the |
||||||||||||||||
|
|
|||||||||||||||||||
|
|
|||||||||||||||||||
|
incorrectly positioned (e.g. |
ball drops then switch on again |
||||||||||||||||||
|
due to jerky movements) |
|||||||||||||||||||
|
|
|||||||||||||||||||
|
|
|
|
|
|
|
|
|
|
|
|
|
|
|
|
|
|
|
||
|
Float in the filter basket |
Repair by Customer Care |
||||||||||||||||||
|
( |
|
|
21) faulty |
|
|
|
|
|
|
||||||||||
|
|
|
|
|
|
|
|
|
|
|||||||||||
|
|
|
|
|
|
|
|
|
|
|
|
|
|
|
|
|
|
|
|
|
|
Float in the filter basket |
Release float |
||||||||||||||||||
Float does not switch |
( |
|
21) does not move |
|||||||||||||||||
|
|
|||||||||||||||||||
|
|
|
|
|
|
|
|
|
|
|
|
|
|
|
|
|
|
|
|
|
the appliance off |
Float in the filter basket |
Repair by Customer Care |
||||||||||||||||||
|
||||||||||||||||||||
|
( |
|
|
21) faulty |
|
|
|
|
|
|
||||||||||
|
|
|
|
|
|
|
|
|
|
|||||||||||
|
|
|
|
|
|
|
|
|
|
|
|
|
|
|
|
|
|
|
|
|
Dust or dirt is blow |
Filter ( |
|
|
|
15/16/17) is not |
Use missing filters or check the |
||||||||||||||
|
|
|
||||||||||||||||||
out of the device |
or not |
correctly assembled |
correct position of the filter |
|||||||||||||||||
|
|
|
|
|
|
|
|
|
|
|
|
|
|
|
|
|
|
|
|
|
12

Guarantee
Dear Customer,
This equipment is provided with a 3-year guarantee from the date of purchase.
In case of defects, you have statutory rights against the seller of the product. These statutory rights are not restricted by our guarantee presented below.
Terms of Guarantee
The term of the guarantee begins on the date of purchase. Please retain the original receipt. This document is required as proof of purchase.
If a material or manufacturing defect occurs within three years of the date of purchase of this product, we will repair or replace – at our choice – the product for you free of charge. This guarantee requires the defective equipment and proof of purchase to be presented within the three-year period with a brief written description of what constitutes the defect and when it occurred.
If the defect is covered by our guarantee, you will receive either the repaired product or a new product. No new guarantee period begins on repair or replacement of the product.
Guarantee Period and Statutory Claims for Defects
The guarantee period is not extended by the guarantee service. This also applies for replaced or repaired parts. Any damages and defects already present at the time of purchase must be reported immediately after unpacking. Repairs arising after expiry of the guarantee period are chargeable.
GB
Guarantee Cover
The equipment has been carefully produced in accordance with strict quality guidelines and conscientiously checked prior to delivery.
The guarantee applies for all material and manufacturing defects. This guarantee does not extend to cover product parts that are subject to normal wear and may therefore be considered as wearing parts (e.g. filters or attachments) or to cover damage to breakable parts (e.g. switches, batteries, or parts made of glass).
This guarantee shall be invalid if the product has been damaged, used incorrectly or not maintained. Precise adherence to all of the instructions specified in the operating manual is required for proper use of the product. Intended uses and actions against which the operating manual advises or warns must be categorically avoided.
The product is designed only for private and not commercial use. The guarantee will be invalidated in case of misuse or improper handling, use of force, or interventions not undertaken by our authorised service branch.
Processing in Case of Guarantee
To ensure efficient handling of your query, please follow the directions below:
•Please have the receipt and identification number (IAN 102791) ready as proof of purchase for all enquiries.
•Please find the item number on the rating plate.
•Should functional errors or other defects occur, please initially contact the
service department specified below by telephone or by e-mail. You will then receive further information on the processing of your complaint.
13

GB
•After consultation with our customer service, a product recorded as defective can be sent postage paid to the service address communicated to you, with the proof of purchase (receipt) and specification of what constitutes the defect and when it occurred. In order to avoid acceptance problems and additional costs, please be sure to use only the address communicated to you. Ensure that the consignment is not sent carriage forward or by bulky goods, express or other special freight. Please send the equipment inc. all accessories supplied at the time of purchase and ensure adequate, safe transport packaging.
Repair Service
For a charge, repairs not covered by the guarantee can be carried out by our ser-
vice branch, which will be happy to issue a cost estimate for you.
We can handle only equipment that has been sent with adequate packaging and
postage.
Attention: Please send your equipment to our service branch in clean condition and with an indication of the defect.
Equipment sent carriage forward or by bulky goods, express or other special freight will not be accepted.
We will dispose of your defective devices free of charge when you send them to us.
Service-Center
Service Great Britain
Tel.: 0871 5000 720 (£ 0.10/Min.)
E-Mail: grizzly@lidl.co.uk
IAN 102791
Importer
Please note that the following address is not a service address. Please initially contact the service centre specified above.
Grizzly Tools GmbH & Co. KG
Stockstädter Straße 20
63762 Großostheim Germany www.grizzly-service.eu
14

Spis tresci |
|
Wstęp......................................... |
15 |
Przeznaczenie............................. |
16 |
Opis ogólny................................ |
16 |
Zawartość opakowania................... |
16 |
Opis działania............................... |
16 |
Przegląd........................................ |
17 |
Oznaczenia graficzne do |
|
zastosowania dysz i filtrów.............. |
17 |
Dane techniczne.......................... |
18 |
Zasady bezpieczeństwa.............. |
18 |
Symbole zawarte w instrukcji........... |
18 |
Ogólne zasady bezpieczeństwa....... |
18 |
Składanie................................... |
19 |
Uruchamianie............................. |
20 |
Włączanie i wyłączanie.................. |
20 |
Zastosowanie końcówek.................. |
20 |
Odkurzanie mokrych powierzchni..... |
20 |
Odkurzanie na sucho...................... |
21 |
Wydmuchiwanie............................. |
21 |
Oczyszczani/Konserwacja.......... |
21 |
Czyszczenie urządzenia.................. |
22 |
Przechowywanie........................ |
22 |
Utylizacja, ochrona środowiska... |
22 |
Części zamienne/Akcesoria......... |
23 |
Poszukiwanie błędów................ |
24 |
Gwarancja................................. |
25 |
Serwis naprawczy...................... |
26 |
Service-Center............................ |
26 |
Importer..................................... |
26 |
Tłumaczenie oryginalnej deklaracji |
|
zgodności WE.............................. |
62 |
Rysunek samorozwijający.......... |
65 |
PL
Urządzenie to mogą obsługiwać dzieci od 8 roku życia, a także osoby o zmniejszonych zdolnościach fizycznych, zmysłowych czy umysłowych, czy też osoby dysponujące niedostatecznym doświadczeniem oraz wiedzą, pod warunkiem, że praca odbywa się pod nadzorem albo po instruktażu w zakresie bezpiecznej eksploatacji urządzenia i ze zrozumieniem istniejących zagrożeń. Dzieciom nie wolno bawić się urządzeniem. Dzieciom nie wolno bez nadzoru wykonywać czyszczenia i konserwacji.
Wstęp
Gratulujemy zakupu nowego urządzenia. Zdecydowali się Państwo na zakup wartościowego produktu. Niniejsze urządzenie sprawdzono w trakcie produkcji pod kątem jakości, a także dokonano jego kontroli ostatecznej. W ten sposób zapewniona jest jego sprawność. Nie da się wykluczyć tego, że w pojedynczych przypadkach w urządzeniu lub przy nim wzgl. w wężach mogą się znaleźć pozostałości wody lub smaru. Nie jest to brakiem ani uszkodzeniem, czy powodem do troski o urządzenie.
Instrukcja obsługi jest częścią składową produktu. Zawiera ona ważne wskazówki dotyczące bezpie-
czeństwa, eksploatacji i utylizacji. Przed rozpoczęciem użytkowania produktu należy się zapoznać ze wszystkimi wskazówkami dotyczącymi obsługi i bezpieczeństwa. Produkt należy użytkować tylko zgodnie z opisem i podanym przeznaczeniem. Instruk-
15

PL
cję należy przechowywać starannie, a w przypadku przekazania produktu osobom trzecim należy dostarczyć nabywcy kompletną dokumentację.
Przeznaczenie
Urządzenie jest przeznaczone do odkurzania do pracy na sucho i mokro np. w pomieszczeniach gospodarstwa domowego, warsztatach do majsterkowania, w samochodach lub garażach. Urządzenie można stosować jako dmuchawę lub do odsysania wody.
To urządzenie nie jest przeznaczone do zastosowania komercyjnego. W przypadku użytkowania komercyjnego wygasają prawa z tytułu gwarancji.
Wciąganie odkurzaczem substancji palnych, wybuchowych lub szkodliwych dla zdrowia jest niedozwolone. Producent nie odpowiada za szkody wywołane niezgodnym z przeznaczeniem stosowaniem lub nieprawidłową obsługą urządzenia.
Opis ogólny
Ilustracje znajdują się na okładce przedniej i tylnej.
Zawartość opakowania
Rozpakuj urządzenie i sprawdź, czy jest ono kompletne. Urządzenie jest dostarczane z założoną głowicą silnikową ( 1). Aby zdjąć głowicę silnikową otwórz zatrzask (
  10).
10).
Prawidłowo posegreguj i usuń materiały opakowania.
1Obudowa silnika
2Uchwyt do przenoszenia
6Zbiornik na zabrudzenia
7 4 nogi z rolkami i wnękami na przystawki
9a Klips kablowy
12Trzyczęściowa rura ssąca
13Wąż ssący z uchwytem
15Filtr z pianki
16Filtr z materiału (już montowane)
17Worek z filtrem papierowych od odkurzania drobnego pyłu
18Końcówka do podłogi
20Końcówka do odkurzania fug
- 6 Śruby z gniazdem krzyżowym - Instrukcja obsługi
Opis działania
Odkurzacz do pracy na mokro i sucho jest wyposażony w stabilny pojemnik z tworzywa sztucznego i zbiornik na zabrudzenia. Rolki umożliwiają dużą zwrotność urządzenia. Przy odkurzaniu na mokro strumień powietrza zasysanego jest wyłączany przez specjalny pływak po napełnieniu zbiornika.
Poza tym urządzenie posiada funkcję wydmuchiwania powietrza. Funkcje elementów urządzenia są podane w poniższym opisie.
16
Przegląd
Obudowa
1Obudowa silnika
2Uchwyt do przenoszenia
3 Włącznik/ wyłącznik
4 4 gniazda dla urządzeń dodatkowych
5 Króciec ssący
6Zbiornik na zabrudzenia
7 4 nogi z rolkami i wnękami na przystawki
8Uchwyt kablowy na uchwycie
9Kabel sieciowy
9a Klips kablowy
102 zatrzask
11Króciec dmuchający
Wyposażenie
12Trzyczęściowa rura ssąca
13Wąż ssący z
14Uchwytem
Filtry
15Filtr z pianki do odkurzania na mokro
16Filtr z materiału do odkurzania na sucho (już montowane)
17Worek z filtrem papierowych do odkurzania dużych zanieczyszczeń
Końcówki
18Końcówka do podłogi z
19obracaną nasadką,
ze szczotką i listwą gumową do odkurzania dywanów i gładkich powierzchni
20Końcówka do odkurzania fug
21Kosz filtra
22Wypustki papierowego worka filtracyjnego
23Króciec ssący
24Pierścień uszczelniający
25Występ na króćcu zasysania
PL
Oznaczenia graficzne do zastosowania dysz i filtrów
Dysza do odkurzania dywanów.
Dysza do odkurzania gładkich powierzchni i twardych podłóg.
Dysza do odkurzania kurzu i brudu z fug i rowków.
Dysza specjalna do odkurzania poduszek i materaców.
Dysza specjalna do czyszczenia samochodu
Filtr do wchłaniania płynów.
Filtr nie jest przeznaczony do wchłaniania płynów.
Filtr do wchłaniania suchych zabrudzeń z gospodarstwa domowego, garażu i warsztatu.
Filtr do wchłaniania drobnego pyłu, np. pyłu kamiennego i drewnianego.
17
PL
Dane techniczne
Napięcie sieciowe... 220-240 V~, 50/60 Hz
Moc pobierana silnika |
|
|
(moc przyłączowa)..................... |
1300 W |
|
Klasa zabezpieczenia......................... |
|
II |
Typ zabezpieczenia.......................... |
|
IPX4 |
Siła ssania................... |
15 kPA (150 mbar) |
|
Długość kabla.................................... |
|
4 m |
Pojemność zbiornika na brud (brutto).... |
20 l |
|
Użyteczna pojemność zbiornika (woda)... |
12 l |
|
Ciężar (wł. z wszystkimi |
|
|
przystawkami)........................... |
ok. 4,6 kg |
|
Zmiany techniczne i optyczne mogą być dokonywane bez zapowiedzi w ramach procedur rozwoju technicznego. Wszelkie wymiary, wskazówki i dane tej instrukcji obsługi są w związku z tym niewiążące. W związku z tym wyklucza się wszelkie roszczenia prawne zgłaszane na podstawie tej instrukcji obsługi.
Zasady bezpieczeństwa
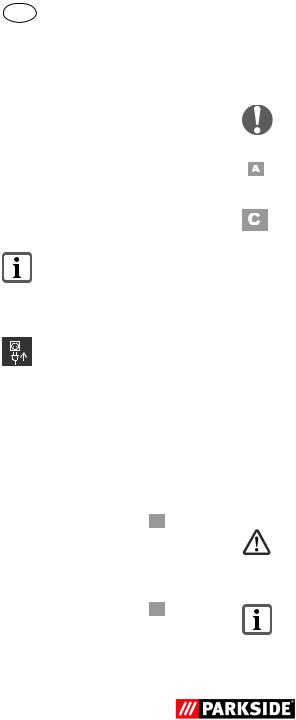
Symbole zawarte w instrukcji
Znaki niebezpieczeństwa z informacjami dot. zapobiegania wypadkom.
Znaki nakazowe (wyjaśnienie nakazu zamiast wykrzyknika) z informacjami dot. zapobiegania wypadkom.
Wskazówki zawierające informacje dot. lepszego użytkowania urządzenia.
18
Ogólne zasady bezpieczeństwa
Uwaga! Przy korzystaniu z narzędzi elektrycznych należy przestrzegać podanych poniżej podstawowych środków bezpieczeństwa, zabezpieczających przed porażeniem prądem elektrycznym, zranieniem i pożarem:
W ten sposób unikniesz wypadków
izranień:
•Nigdy nie zostawiaj gotowego do pracy urządzenia bez opieki w miejscu pracy.
•Urządzeniem nie wolno odkurzać ludzi ani zwierząt.
•Przewodu ssącego ani dysz nie kierować podczas pracy na siebie ani na inne osoby, a w szczególności nie w kierunku oczu ani uszu. Istnieje niebezpieczeństwo zranienia.
•Nie wciągaj gorących, żarzących się, wybuchowych ani szkodliwych dla zdrowia substancji. Do takich substancji zaliczają się np. gorący popiół, benzyna, rozpuszczalniki, kwasy i zasady
(ługi).
Niebezpieczeństwo zranienia.
•Podczas pracy dysza i rura ssąca nie mogą się znaleźć na wysokości głowy. Niebezpieczeństwo zranienia.
W ten sposób unikniesz wypadków i zranień wskutek porażenia prądem:
•Uważaj, by nie uszkodzić kabla prądowego przez przeciąganie go po ostrych krawędziach, zaciskanie między przedmiotami lub mocne pociąganie.
•Przed każdym użyciem sprawdzaj, czy przewód sieciowy i przedłużacz nie są

uszkodzone i nie wykazują objawów zużycia. Nie używaj urządzenia, jeżeli kabel jest uszkodzony lub zużyty. Niebezpieczeństwo zranienia.
•Jeżeli kabel zasilający tego urządzenia jest uszkodzony, to musi on zostać wymieniony przez producenta lub jego serwis albo osobę posiadającą podobne kwalifikacje - tylko w ten sposób można zapewnić bezpieczeństwo urządzenia.
•Wyłącz urządzenie i wyjmij wtyczkę kabla prądowego z gniazdka:
-Gdy nie używasz urządzenia, transportujesz je, pozostawiasz je bez opieki,
-kontrolujesz lub usuwasz blokady,
-wykonujesz prace konserwacyjne, oczyszczasz urządzenie lub wymieniasz akcesoria bądź jeżeli przewód sieciowy jest uszkodzony
-jeżeli kabel prądowy jest uszkodzony albo splątany,
-a także po zetknięciu się urządzenia z ciałami obcymi lub w razie stwierdzenia anormalnych wibracji
•Nie należy ciągnąć za przewód zasilający w celu wyjęcia wtyczki z gniazda sieciowego lub przesunięcia urządzenia. Przewód zasilający chronić przed wysokimi temperaturami, kontaktem z olejem i ostrymi krawędziami.
•Uważaj, by napięcie sieciowe było zgodne z danymi znajdującymi się na tabliczce znamionowej.
•Podłączaj wtyczkę urządzenia tylko do gniazdek, które są zabezpieczone bezpiecznikiem o wartości co najmniej
16A.
•Urządzenie podłączać do gniazda chronionego wyłącznikiem różnicowo- -prądowym o pomiarowym napięciu wyłączającym o wartości nie większej niż 30 mA.
PL
W ten sposób unikniesz uszkodzeń urządzenia i wynikających stąd szkód osobowych:
•Uważaj, by urządzenie było prawidłowo zmontowane; filtry muszą się znajdować w prawidłowej pozycji.
•Nie pracuj urządzeniem bez założonych filtrów. Mogłoby to spowodować uszkodzenie urządzenia.
•Używaj tylko dostarczonych i zalecanych przez nasze Centrum Serwisowe
(zob. „Części zamienne/Akcesoria”) części zamiennych i akcesoriów. Stosowanie części innych producentów prowadzi do natychmiastowej utraty uprawnień gwarancyjnych.
•Zlecaj naprawy wyłącznie autoryzowanym przez naszą firmę warsztatom serwisowym.
•Przestrzegaj wskazówek dotyczących oczyszczania oraz konserwacji urządzenia.
•Przechowuj urządzenie w suchym, zam- -kniętym i niedostępnym dla dzieci miejscu.
Składanie
Wyjmij wtyczkę urządzenia z gniazdka Niebezpieczeństwo porażenia prądem elektrycznym.
Urządzenie zostało dostarczone z zamontowanym już workiem z filtrem z materiału (  16).
16).
1.Zamocuj uchwyt (2) śrubami z gniazdem krzyżowym (2a).
2.Nałożyć nogi (7) i zamocować
je dołączonymi wkrętami z gniazdem krzyżowym (7a).
3.Nałożyć filtry:
- filtr z pianki do odkurzania na mokro (  15)
15)
19
PL
- filtr z materiału ( |
|
16) do od- |
• |
Nacisnąć języczki końcówki do podłogi |
||
|
||||||
kurzania na sucho |
|
|
|
(18) po prawej i lewej stronie i zdjąć |
||
- worek z filtrem papierowym |
|
nasadkę (19). |
||||
( |
|
17). |
|
|
|
Podczas pracy bez nasadki można |
|
|
|
|
|||
|
Nigdy nie odkurzaj bez założo- |
|
||||
nych filtrów. |
|
zarysować delikatne powierzchnie. |
||||
4. Załóż obudowę silnika (1) na |
Końcówka do odkurzania fug |
|||||
zbiornik (6) na brud i zamknij |
||||||
obudowę zatrzaskami (10). |
( |
20): |
||||
5.Podłącz wąż ssący (13) i przydo odkurzania fug, narożników i grzejników. stawki (zamknięcie bagnetowe).
Uruchamianie
Przed rozpoczęciem pracy odwinąć całkowicie wąż próżniowy (  13).
13).
Włączanie i wyłączanie
Włóż wtyczkę urządzenia do gniazdka.
Włączenie odkurzacza:
Włącznik/ wyłącznik (  3) w pozycję „I“.
Wyłączenie odkurzacza:
Włącznik/ wyłącznik (  3) w pozycję „O“.
Zastosowanie końcówek
Końcówka do podłogi (  18) z nasadką (
 19):
19):
do odkurzania na mokro i na sucho powierzchni gładkich i wykładzin dywanowych.
Końcówka do podłogi (  18) bez nasadki (
  19):
19):
do odkurzania na mokro i na sucho wykładzin dywanowych, do usuwania uporczywego brudu.
Odkurzanie mokrych powierzchni
1.Aby odkurzać na mokro proszę nałożyć filtr z pianki (15) na kosz filtra (21). Aby uniknąć rozerwania filtru piankowego (15), należy:
-używać tylko suchych filtrów piankowych;
-w celu włożenia filtra odwinąć nieco jego krawędź i następnie zwinąć ją z powrotem.
2.Wypompowywanie: Chwytając za
uchwyt ( 14) zanurzyć wąż próżniowy (
 13) w zbiorniku z wodą i wypompować wodę.
3.Zbiornik zanieczyszczeń opróżniać natychmiast po odkurzaniu, ponieważ nie jest on skonstruowany do przechowywania płynów (patrz „Czyszczenie/ konserwacja“).
Nie wchodzić do wypompowywanej wody. Niebezpieczeństwo porażenia prądem elektrycznym.
Gdy zbiornik na brud jest pełen, pływak zamyka otwór ssący, co powoduje przerwanie odkurzania.
Wyłącz urządzenie i opróżnij pojemnik na brud.
20
PL
Natychmiast wyłącz urządzenie, jeżeli zacznie z niego wypływać piana lub ciecz.
Odkurzanie na sucho
Urządzenie zostało dostarczone z zamontowanym już workiem z filtrem z materiału (16).
Do ssania na sucho należy nałożyć filtr włókninowy (16) na kosz filtra (21).
Opcjonalnie dostępny jest filtr fałdowany, którego można używać w miejsce dostarczonego w zestawie filtra z materiału (patrz „Części zamienne/Akcesoria”).
Odkurzanie z workiem papierowym:
Aby filtr fałdowany nie zapchał się zbyt szybko, zalecamy stosowanie worka papierowego.
Zakładanie filtra tkaninowego
1.Nałożyć filtr włókninowy (16) na kosz filtra (21).
Zakładanie filtra papierowego
używać w miejsce dostarczonego w zestawie worek papierowy (patrz „Części zamienne/Akcesoria”).
Odkurzanie drobnych pyłów:
Podczas niektórych procesów odsysania (np. szlifowanie farb i lakierów, frezowanie lub wiercenie w murach, szlifowanie lub wiercenie w twardym drewnie) mogą powstawać pyły szkodliwe dla zdrowia.
Przy takich drobnych pyłach zalecamy stosowanie poniższej dostępnej opcjonalnie kombinacji filtrów (patrz „Części zamienne/akcesoria“):
1.Filtr harmonijkowy, stosowany zamiast znajdującego się w zakresie dostawy worka z filtrem z materiału (16);
2.Worek z filtrem do drobnego pyłu z włókniny, stosowany zamiast znajdującego się w zakresie dostawy worka z filtrem papierowym (17).
Wydmuchiwanie
Funkcję przedmuchiwania zaleca się bez zastosowania filtra.
Do dmuchania podłączyć wąż (13) do króćca (11) głowicy silnika.Oczyszczanie, konser-wacja, przechowywanie
2.Odegnij boczne języki (22) worka filtra
papierowego (17) wzdłuż perforowanej Oczyszczani/Konserwacja linii na dół.
3.Załóż torbę filtra papierowego (17) z krótkim językiem (22) skierowanym na znajdujący się wewnątrz króciec ssący
(23) (patrz strzałka ). Pierścień uszczelniający (24) otworu worka filtra papierowego musi dokładnie zamykać mostek na króćcu ssącym.
Opcjonalnie dostępny jest worek filtracyjny do pyłów, którego można
Wyjmij wtyczkę urządzenia z gniazdka Niebezpieczeństwo porażenia prądem elektrycznym.
Przed każdym użyciem sprawdzaj, czy urządzenie nie wykazuje widocznych gołym okien uszkodzeń, jak np. uszkodzony kabel prądowy; natychmiast zlecaj naprawę lub wymianę uszkodzonych części.
21
 Loading...