


WET & DRY CLEANER PNTS 1500 B2
WET & DRY CLEANER |
ODKURZACZ DO PRACY NA |
Translation of original operation manual |
MOKRO I SUCHO |
|
Tłumaczenie oryginalnej instrukcji obsługi |
VYSAVAČ NA MOKRÉ A |
VYSÁVAČ NA MOKRÉ A |
SUCHÉ VYSÁVÁNÍ |
SUCHÉ VYSÁVANIE |
Překlad originálního provozního návodu |
|
Preklad originálneho návodu na obsluhu |
|
NASS - UND TROCKENSAUGER |
|
Originalbetriebsanleitung |
|
IAN 87778

Before reading, unfold the page containing the illustrations and familiarise yourself with all functions of the device.
Przed przeczytaniem proszę rozłożyć stronę z ilustracjami, a następnie proszę zapoznać się z wszystkimi funkcjami urządzenia.
Před čtením si otevřete stranu s obrázky a potom se seznamte se všemi funkcemi přístroje.
Pred čítaním si odklopte stranu s obrázkami a potom sa oboznámte so všetkými funkciami prístroja.
Klappen Sie vor dem Lesen die Seite mit den Abbildungen aus und machen Sie sich anschließend mit allen Funktionen des Gerätes vertraut.
GB |
Translation of original operation manual |
Page |
5 |
|
PL |
Tłumaczenie oryginalnej instrukcji obsługi |
Strona |
15 |
|
CZ |
Překlad originálního provozního návodu |
Strana |
26 |
|
SK |
Preklad originálneho návodu na obsluhu |
Strana |
36 |
|
DE / AT / CH |
Originalbetriebsanleitung |
Seite |
47 |
|

|
|
1 |
11a |
|
|
|
|
10 |
|
2 |
11b |
9 |
|
|
|
|
|
|
|
|
|
3 |
12 |
8 |
|
4 |
|
|
|
|
|
|
|
5 |
13 |
|
|
|
|
|
|
6a |
|
7 |
|
|
|
|
|
|
21 |
6b |
|
|
|
|
14 |
|
|
|
|
|
22 |
|
15 |
|
|
|
16 |
|
23 |
|
|
|
|
|
17 |
|
|
|
18 |
|
24 |
|
19 |
|
|
|
20 |
25 |
25 |
|
|
|
|
|
|
|
3 |
|
|
|
25 |
25 |
6a |
|
6a |
|
18 |
|
|
|
|
5 |
|
|
16 |
|
|
|
|
|
6a |
6a |
|
|
|
|
|
|
|
|
|
6b |
|
3 |
|
|
|
|
|
|
|
|
|
|
|
3 |
|
|
|
17 |
|
12 |
|
|
16 |
|
|
|
|
|
|
|
|
|
25 |
|
|
|
|
|
|
|
|
|
16 |
11a |
|
|
|
|
11b |
|

Contents |
|
Introduction.................................. |
5 |
Intended purpose......................... |
5 |
General description...................... |
6 |
Extent of the delivery......................... |
6 |
Overview........................................ |
6 |
Description of operation.................... |
7 |
Technical data............................... |
7 |
Safety information........................ |
7 |
Symbols used in the instructions.......... |
7 |
Symbols on the appliance.................. |
7 |
General notes on safety..................... |
7 |
Assembly..................................... |
9 |
Operation..................................... |
9 |
Switching on/off.............................. |
9 |
Work breaks.................................... |
9 |
Dry vacuuming................................. |
9 |
Wet vacuuming.............................. |
10 |
Blowing......................................... |
10 |
Powertool vacuuming...................... |
10 |
Cleaning/Maintenance................ |
10 |
Cleaning the filter insert................... |
11 |
Storage...................................... |
11 |
Disposal/Environmental |
|
protection................................... |
11 |
Trouble shooting......................... |
12 |
Replacement parts / Accessories... |
12 |
Guarantee.................................. |
13 |
Repair Service............................ |
14 |
Service-Center............................ |
14 |
Service Branch............................ |
14 |
Translation of the original |
|
EC declaration of conformity....... |
59 |
Exploded Drawing...................... |
61 |
GB
Introduction
Congratulations on the purchase of your new device. With it, you have chosen a high quality appliance.
During production, this equipment has been checked for quality and subjected to a final inspection. The functionality of your equipment is therefore guaranteed. It
cannot be ruled out that residual quantities of water or lubricants will remain on or in the equipment/hose lines in isolated cases.
This is not a fault or defect and it represents no cause for concern.
The operating instructions constitute part of this appliance. They contain important information on safety, use and disposal.
Before using the appliance, familiarise yourself with all of the operating and safety instructions. Use the appliance only as described and for the applications specified.
Keep this manual safely and in the event that the appliance is passed on, hand over all documents to the third party.
Intended purpose
The appliance is intended for domestic wet and dry vacuuming in, for example, the house, work room, car or garage.
This equipment is not suitable for commercial use. Commercial use will invalidate the guarantee.
Vacuuming of flammable or explosive materials or those which endanger health is prohibited. The manufacturer will not be held responsible for injuries resulting from use which does not comply with the directions, or from incorrect use.
5

GB
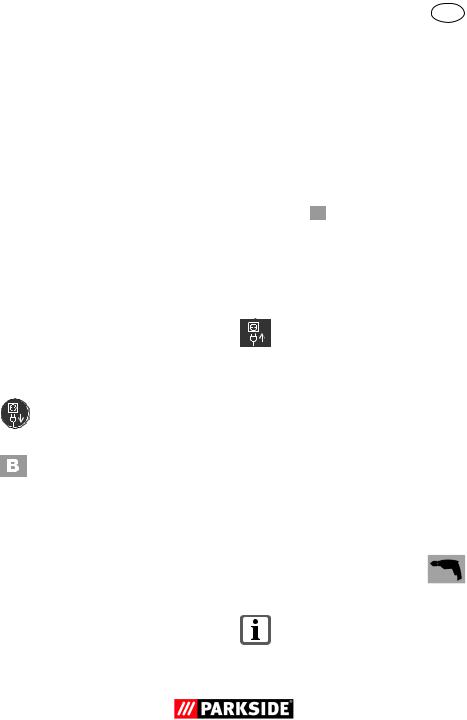
General description |
Overview |
|||||||||||||||||||||||||||||||
|
|
|
|
The illustration of the principal |
|
|
|
|
|
|
|
|
|
|
|
|
|
|
|
|
|
|
|
|
Housing |
|||||||
|
|
|
|
functioning parts can be found |
|
1 |
|
|
|
|
Carrying handle |
|||||||||||||||||||||
|
|
|
|
|||||||||||||||||||||||||||||
|
|
|
|
on the front and back foldout |
2 |
|
|
|
|
Mains power cable |
||||||||||||||||||||||
|
|
|
|
pages. |
3 |
|
|
|
|
Motor housing |
||||||||||||||||||||||
Extent of the delivery |
4 |
|
|
|
|
Sealing clip |
||||||||||||||||||||||||||
5 |
|
|
|
|
Collector |
|||||||||||||||||||||||||||
|
|
|
|
|
|
|
|
|
|
|
|
|
|
6a |
|
|
|
|
2 feet with wheels and acces- |
|||||||||||||
Carefully unpack the appliance and check |
|
|
|
|
|
|
|
|
|
|
|
|
|
|
|
|
|
|
|
|
sory fittings |
|||||||||||
that it is complete. |
|
|
|
|
|
6b |
|
|
|
|
2 feet with castors and acces- |
|||||||||||||||||||||
The appliance is supplied with the motor |
|
|
|
|
|
|
|
|
|
|
|
|
|
|
|
|
|
|
|
|
sory fittings |
|||||||||||
head fitted ( |
|
3). To remove the motor |
7 |
|
|
|
|
Drainage outlet |
||||||||||||||||||||||||
|
||||||||||||||||||||||||||||||||
head, open |
the |
sealing clips ( |
|
4). |
8 |
|
|
|
|
Suction connection |
||||||||||||||||||||||
|
||||||||||||||||||||||||||||||||
|
|
|
|
|
|
|
|
|
9 |
|
|
|
|
Appliance socket |
||||||||||||||||||
|
3 |
Motor housing |
10 |
|
|
|
|
On/off switch |
||||||||||||||||||||||||
|
||||||||||||||||||||||||||||||||
|
5 |
Collector |
|
|
|
|
|
|
|
|
|
|
|
|
|
|
|
|
|
|
|
|
Filter |
|||||||||
|
6a |
2 feet with wheels and acces- |
|
|
|
|
|
|
|
|
|
|
|
|
|
|
|
|
|
|
|
|
||||||||||
|
|
|
|
sory fittings |
11 |
|
|
|
|
Fluted filter (11a) and filter |
||||||||||||||||||||||
|
6b |
2 feet with castors and acces- |
|
|
|
|
|
|
|
|
|
|
|
|
|
|
|
|
|
|
|
|
cover (11b) for dry vacuuming |
|||||||||
|
|
|
|
sory fittings |
|
|
|
|
|
|
|
|
|
|
|
|
|
|
|
|
|
|
|
|
(already installed) |
|||||||
11 |
Fluted filter (11a) and filter |
12 |
|
|
|
|
Paper filter bag for fine dust |
|||||||||||||||||||||||||
|
|
|
|
cover (11b) (already installed) |
13 |
|
|
|
|
Foam filter for wet vacuuming |
||||||||||||||||||||||
12 |
Paper filter bag |
|
|
|
|
|
|
|
|
|
|
|
|
|
|
|
|
|
|
|
|
Accessories |
||||||||||
13 |
Foam filter |
|
|
|
|
|
|
|
|
|
|
|
|
|
|
|
|
|
|
|
|
|||||||||||
14 |
Accessory bag |
14 |
|
|
|
|
Accessory bag |
|||||||||||||||||||||||||
15 |
Handle with air regulation |
15 |
|
|
|
|
Handle with air regulation |
|||||||||||||||||||||||||
16 |
Telescopic suction tube |
16 |
|
|
|
|
Telescopic suction tube |
|||||||||||||||||||||||||
18 |
Vacuum hose |
17 |
|
|
|
|
Vacuum tube holder |
|||||||||||||||||||||||||
19 |
Powertool hose |
18 |
|
|
|
|
Vacuum hose |
|||||||||||||||||||||||||
20 |
Powertool reduction adaptor |
19 |
|
|
|
|
Powertool hose |
|||||||||||||||||||||||||
|
|
|
|
piece |
20 |
|
|
|
|
Powertool reduction adaptor |
||||||||||||||||||||||
21 |
Switchable household nozzle |
|
|
|
|
|
|
|
|
|
|
|
|
|
|
|
|
|
|
|
|
piece |
||||||||||
22 |
Crevice nozzle |
|
|
|
|
|
|
|
|
|
|
|
|
|
|
|
|
|
|
|
|
for connecting electrical equip- |
||||||||||
23 |
Cushion nozzle |
|
|
|
|
|
|
|
|
|
|
|
|
|
|
|
|
|
|
|
|
ment for dust extraction. |
||||||||||
24 |
Car nozzle |
|
|
|
|
|
|
|
|
|
|
|
|
|
|
|
|
|
|
|
|
Nozzles |
||||||||||
25 |
2 retaining brackets |
|
|
|
|
|
|
|
|
|
|
|
|
|
|
|
|
|
|
|
|
|||||||||||
|
|
|
|
4 cross recessed screws |
21 |
|
|
|
|
Switchable household nozzle |
||||||||||||||||||||||
|
|
|
|
Instruction Manual |
|
|
|
|
|
|
|
|
|
|
|
|
|
|
|
|
|
|
|
|
|
|
|
for vacuuming carpets |
||||
|
|
|
|
|
|
|
|
|
|
|
|
|
|
|
|
|
|
|
|
|
|
|
|
|
|
|
||||||
|
|
|
|
|
|
|
|
|
|
|
|
|
|
|
|
|
|
|
|
|
|
|
|
|
|
|
|
|
|
|
|
for vacuuming smooth surfaces |
|
|
|
|
|
|
|
|
|
|
|
|
|
|
|
|
|
|
|
|
|
|
|
|
|
|
|
|
|
|
|
|
|
Dispose of the packaging material cor- |
22 |
|
|
|
|
Crevice nozzle |
||||||||||||||||||||||||||
rectly. |
|
|
|
|
|
23 |
|
|
|
|
Cushion nozzle |
|||||||||||||||||||||
|
|
|
|
|
|
|
|
|
24 |
|
|
|
|
Car nozzle |
||||||||||||||||||
6
25 2 retaining brackets
26 Blow connection
27Filter insert cover
28Filter insert
29a Top cable holder
29b Bottom cable holder
Description of operation
The wet and dry vacuum cleaner is equipped with a robust stainless steel container for waste collection. The guiding wheels and castors make the appliance very easy to manoeuvre. The suction flow is switched off by a float during wet vacuuming once the waste tank is full. In addition, the machine has a blower function and a socket for the connection of a further electrical appliance.
The following describes the function of the operating parts.
Technical data
Wet and dry cleaner |
......PNTS 1500 B2 |
||
Mains voltage...... |
220-240 V~, 50/60 Hz |
||
Power consumption of motor........ |
1500 W |
||
Max. load on appliance socket |
|
||
(Pmax.)...................................... |
|
|
2200 W |
Power consumption of motor |
|
||
+ max. load on appliance socket |
|
||
(Psum.)......................................... |
|
|
3700 W |
Safety class........................................... |
|
|
I |
Protection category........................... |
|
IPX4 |
|
Cable length..................................... |
|
|
6 m |
Waste tank capacity (brutto).............. |
30 l |
||
Weight (incl. all accessories)........... |
9,5 kg |
||
Technical and visual modifications may be carried out due to further development
GB
without prior notice. All dimensions, information and statements provided in these Operating Instructions are therefore subject to amendment. Legal claims which are based on the Operating Instructions can therefore not be recognised.
Safety information
Symbols used in the instructions
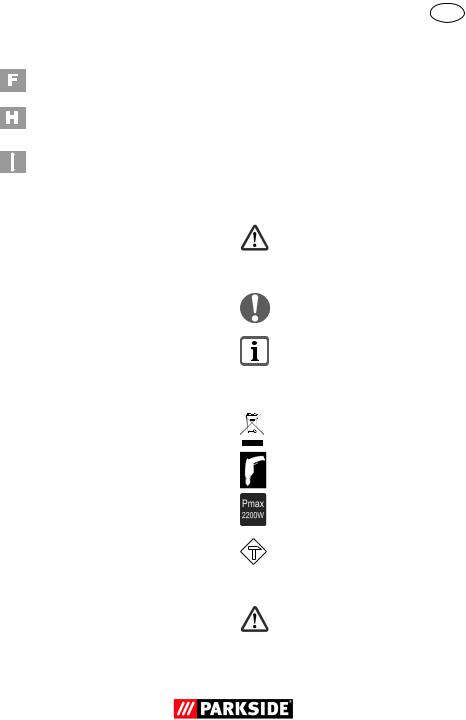
Hazard symbols with information on prevention of personal injury and property damage.
Precaution symbol with information on prevention of harm / damage.
Notice symbol with information on how to handle the device properly.
Symbols on the appliance
Electrical machines must not be disposed of with household refuse.
Switching between additional appliance + vacuum cleaner
Max. load on appliance socket
Device socket for power tools
General notes on safety
Caution! When using power tools, observe the following basic safety measures for the prevention of electric shocks and the risk of injury and fire:
7

GB
To avoid accidents and injuries:
•Children should only be allowed to use the appliance under supervision.
•Children should be supervised to ensure that they do not play with the appliance.
•Never leave a machine which is ready for operation unattended at the workplace.
•This appliance is not intended for use by persons (including children) with reduced physical, sensory or mental capabilities, or lack of experience and knowledge, unless they have been given supervision or instruction concerning use of the appliance by a person responsible for their safety.
•People and animals must not be vacuumed with the machine.
•Do not vacuum any hot, incandescent, flammable, explosive materials, or those which endanger health. This includes hot ashes, petrol, solvents, acids or caustic solutions. Personal injury could occur.
•Nozzles and suction tubes must not reach head level whilst in use. Personal injury could occur.
To avoid accidents and injuries from electric shocks:
•Ensure that the mains cable is not damaged by being pulled over sharp edges, by jamming, or by pulling on the cable.
•Before each use, check the power supply lead and the extension cable for damage and ageing. Do not use the equipment if the cable is damaged or worn. Danger of electric shock hazard.
•If the power cable for this equipment is damaged, it must be replaced by the manufacturer, a customer service agent of the same or a similarly qualified per-
8
son in order to prevent hazards.
•Switch the machine off and disconnect the mains plug:
-when the machine is not in use,
-before the machine is opened up,
-for all maintenance and cleaning work,
-if the connecting cable is damaged or tangled up.
•Only use replacement parts and accessories delivered and recommended by our Service Centre (see page 14). The use of parts by other manufacturers immediately renders the guarantee void.
•Do not use the cable to pull the plug out of the socket. Protect the cable from heat, oil, and sharp edges.
•Make sure that the mains voltage corresponds with the information on the rating plate.
•Only plug the appliance into a socket which is safeguarded by at least 16 A.
•The device must only be connected to a mains socket via a residual-current circuit breaker (RCD) with a rated leakage current of not more than 30 mA.
CAUTION! The following states how damage to the appliance and possible injury to people can be avoided:
•Ensure that the machine is correctly assembled and the filters are in the correct position.
•Do not use without the filter. This could damage the machine.
•Only have repairs carried out at our authorised customer service points.
•Observe the instructions for cleaning and maintenance of the machine.
•Store the appliance in a dry place and out of reach of children.
Assembly
Pull out the mains plug.
Danger of electric shock.
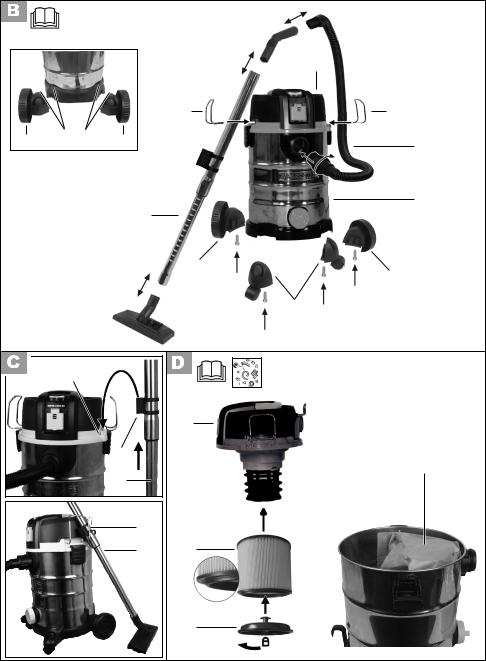
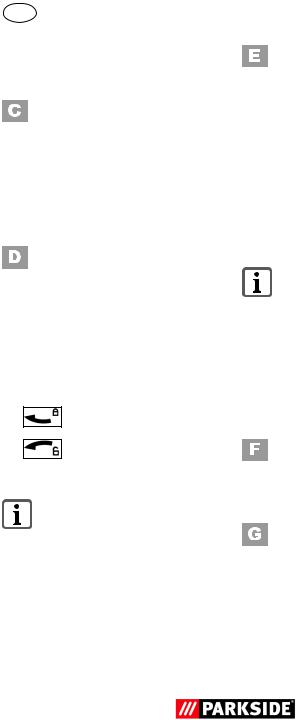
1.Attach the feet (6) to the housing:
-The feet with wheels (6a) num-
bered + must be fitted into the appropriate adaptors on the rear side of the waste collector (see  small picture).
-The feet with guide rollers (6b) must be fitted to the holders on the front side of the container (5).
2.Secure the feet with the Philips head screws supplied.
3.Place the motor housing (3) on top of the collector (5) and close it with the clip.
4.Lightly squeeze together the ends of the retaining bracket
(25) and click it into the motor housing (3).
5.Installing the accessories:
-Attach the vacuum hose (18).
-Install the telescopic suction tube (16). (Press the button on the telescopic suction pipe towards  and pull out to the desired length).
-Install the nozzle desired ( 
21/22/23/24).
Never vacuum without a filter!
Operation
Switching on/off
Connect the mains plug.
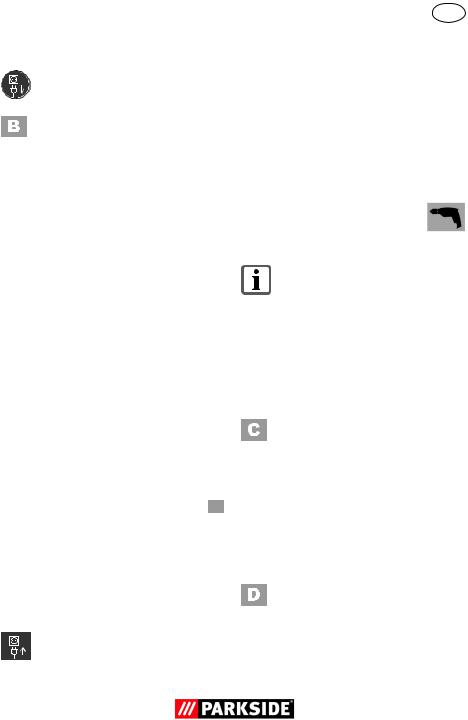
To vacuum dust, plug the electrical tool onto the mains socket on the vacuum (  9).
9).
GB
Only connect electrical appliances with a maximum power rating of 2200 W.
Switching on the vacuum cleaner (Permanent operation):
Move the On/Off switch (  10) to the “I” position.
Switch on electrical appliance + vacuum cleaner:
1.Move the On/Off switch (  10) to the position
2.Switch on electrical appliance.
Switching on the electrical appliance automatically switches on the vacuum cleaner. Once the electrical appliance has been switched off, the vacuum cleaner switches off following a time lapse.
Switching off the vacuum cleaner:
Move the On/Off switch (  10) to the “0” position.
Work breaks
To store the assembled suction set during a work break, the telescopic suction tube
(16) can be pushed
together and the suction tube holder
(17) plugged into the socket on the motor head (3);
Place the telescopic suction tube (16) in the retaining bracket (25).
Dry vacuuming
1.To vacuum dry, fit the fluted filter (11a) onto the filter cage on the motor housing (3). Here, the upward curved sealing lip must point away from the motor housing.
9
GB
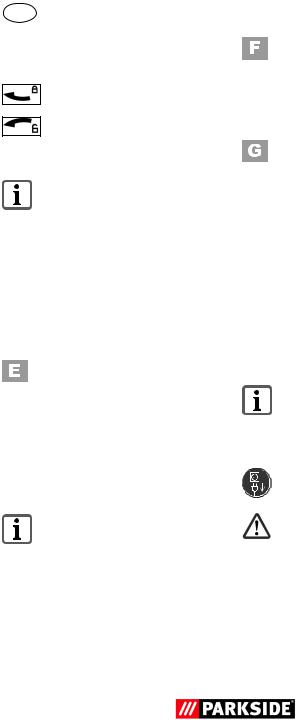
2.Fit the filter cover (11b) and turn it gently to lock it:
To lock the filter cover
To unlock the filter cover
Vacuuming fine dust:
While vacuuming fine dust, you may find dirt accumulating faster than usual. For this reason, we recommend the use of a paper filter bag for fine dust.
3.Fold the paper filter bag (12) up completely and turn it over the internal nozzle of the suction tube.
The sealing ring on the filter bag opening must completely enclosed the arm on the suction nozzle.
Wet vacuuming
For wet sucking or to suck up water, place the foam filter (13) on the filter box on the motor head (3).
To avoid tearing the foam filter (13):
-Use only a dry filter;
-Turn over the edge of the filter a little.
When the container is full, the suction opening is shut off by a float, and suction is then cut off. Switch the appliance off, remove the plug from the socket and empty the container (see Cleaning/maintenance).
If foam or liquid exits, switch off the machine immediately.
10
Blowing
To use the blower function, screw the vacuum hose (18) on to the nozzles on the engine housing (3) (operation without the use of filters).
Powertool vacuuming
The Powertool hose can be used for the following:
•Cleaning hard-to-reach places or sensitive equipment.
•Connecting powertools for vacuuming dust off.
Place the thicker end of the powertool hose
(19) straight onto the vacuum hose (18) and the other end onto the reduction adaptor (20) supplied. You can now fit vacuum nozzles or an electrical tool.
The reduction adaptor also fits onto the vacuum hose (dust vacuuming without the powertool hose).
Cleaning/Maintenance
Pull out the mains plug.
Danger of electric shock.
Never hose the appliance down with water. Never use aggressive cleaning agents or solvents. This could damage the appliance.
•After use, empty the waste tank ( 
5). Opening the drain plug to allow the vacuumed liquid to drain out ( 7).
7).
•Clean the waste tank with a damp cloth.
•Wash the foam filter with lukewarm water and soap, and allow to dry.
•Beat the dust out of the cloth filter
(  11) and clean it with a paint brush or hand brush.
•Replace the paper filter bag (  12) when full (see “replacement parts” for reordering)
•Always check the appliance before use for any obvious faults such as a defective mains cable, and have these repaired or replaced.
Cleaning the filter insert
Check the filter insert for dirt once or twice per year.
1. Open the cover (27) on the mo-
tor head (3): |
|
|
|
Closure upward in |
|
|
|
|
|
OPEN |
|
position |
|
|
|
|
|
|
|
|
|
||
|
|
|
|
Remove the cover. |
|
|
|
2.Take the filter insert (28) out of the cover (27).
3.Wash the filter insert (28) with lukewarm water and soap and leave it to dry.
4.Place the filter insert (28) in the cover (27) and reclose it:
Closure downward  CLOSE in position
Storage
1.To store the mains cable on the back of the device, pull out the top cable holder (29a) and turn the bottom cable holder (29b) outwards.
Wind the mains cable (2) around the cable holders (29a+b) on the back of the device.
GB
2.Wind the vacuum hose (18) around the motor head (3). The two retaining brackets (25) hold the vacuum hose in place.
3.Place the telescopic suction tube into the accessory holder on the unit’s feet (6a).
4.The bag provided is designed for storing the small accessories (14).
5.Store the appliance in a dry place and out of reach of children.
Disposal/Environmental protection
Be environmentally friendly. Return the tool, accessories and packaging to a recycling centre when you have finished with them.
Machines must not be disposed of with household refuse.
Take the machine to a recycling point. The waste plastic and metal parts can be separated, accurately graded and passed on for recycling. Contact our Service Centre for more details.
Defective units returned to us will be disposed of for free.
11

GB
Trouble shooting
Problem |
Possible cause |
Fault correction |
||||||||||
|
|
|
|
|
|
|
|
|
|
|
|
|
|
Mains voltage is not |
Check plug socket, cable, line, |
||||||||||
|
plug and fuse, where appropriate, |
|||||||||||
|
present |
|
|
|
|
|
|
|||||
|
|
|
|
|
|
|
repair through electrical specialist |
|||||
|
|
|
|
|
|
|
|
|
|
|
|
|
|
|
|
|
|
|
|
|
|
|
|||
Device does not start |
Defective on/off switch |
|
||||||||||
( |
|
10) |
|
|
|
|
|
|
Repair through customer service |
|||
|
|
|
|
|
|
|
||||||
|
|
|
|
|
|
|
|
|||||
|
|
|
|
|
|
|
|
|
|
|
|
|
|
Worn carbon brushes |
|||||||||||
|
|
|||||||||||
|
|
|
|
|
|
|
|
|
|
|||
|
Defective motor |
|
||||||||||
|
|
|
|
|
|
|
|
|
|
|||
|
Hose system ( |
|
18/19) or |
Remove obstructions and blockages |
||||||||
|
|
|||||||||||
|
|
|||||||||||
|
jets ( |
|
|
21-24) blocked |
||||||||
|
|
|
|
|||||||||
|
|
|
|
|
|
|
|
|
|
|
|
|
|
Air control on the handle |
Close the air control |
||||||||||
Low or lack of |
( |
|
15) open |
|
|
|
||||||
|
|
|
|
|||||||||
|
|
|
|
|
||||||||
|
|
|
|
|
|
|
|
|
|
|
|
|
|
|
|
|
|
|
|
|
|
|
|
Close collector |
|
suction |
Collector ( |
|
5) open |
|||||||||
|
||||||||||||
|
|
|
|
|
|
|
|
|
|
|
|
|
|
Collector ( |
|
5) full |
Empty collector |
||||||||
|
|
|||||||||||
|
|
|
|
|
|
|
|
|
|
|
|
|
|
Filter ( |
|
|
11/12/13) full or |
Empty, clean or replace filter |
|||||||
|
|
|
||||||||||
|
|
|
||||||||||
|
clogged |
|
|
|
|
|
|
|
||||
Replacement parts / Accessories
You can order replacement parts directly via our Service Centre (see page 14). Please state the appliance type when placing an order.
Item |
Description.......................................................... |
Product No. |
11 |
Fluted filter for dry vacuuming.............................................. |
91092030 |
12 |
Paper filter bags, pack of 5.................................................. |
30250110 |
13 |
Foam filter for wet vacuuming, pack of 3............................... |
30250100 |
15 |
Handle with air regulation................................................... |
72800038 |
16 |
Telescopic suction tube........................................................ |
91098090 |
18 |
Vacuum hose...................................................................... |
72800215 |
19 |
Powertool hose 1m.............................................................. |
72800211 |
20 |
Powertool reduction adaptor piece........................................... |
72800212 |
21 |
Switchable household nozzle............................................... |
72800214 |
22 |
Crevice nozzle................................................................... |
72800039 |
23 |
Cushion nozzle................................................................... |
72800040 |
12

Guarantee
Dear Customer,
This equipment is provided with a 3-year guarantee from the date of purchase.
In case of defects, you have statutory rights against the seller of the appliance.
These statutory rights are not restricted by our guarantee presented below.
Terms of Guarantee
The term of the guarantee begins on the date of purchase. Please retain the original receipt. This document is required as proof of purchase.
If a material or manufacturing defect occurs within three years of the date of purchase of this appliance, we will repair or replace – at our choice – the appliance for you free of charge. This guarantee requires the defective equipment and proof of purchase to be presented within the three-year period with a brief written description of what constitutes the defect and when it occurred.
If the defect is covered by our guarantee, you will receive either the repaired appliance or a new appliance. No new guarantee period begins on repair or replacement of the appliance.
Guarantee Period and Statutory Claims for Defects
The guarantee period is not extended by the guarantee service. This also applies for replaced or repaired parts. Any damages and defects already present at the time of purchase must be reported immediately after unpacking. Repairs arising after expiry of the guarantee period are chargeable.
GB
Guarantee Cover
The equipment has been carefully produced in accordance with strict quality guidelines and conscientiously checked prior to delivery.
The guarantee applies for all material and manufacturing defects. This guarantee does not extend to cover appliance parts that are subject to normal wear and may therefore be considered as wearing parts
(e.g. filters or attachments) or to cover damage to breakable parts (e.g. switches, batteries, or parts made of glass).
This guarantee shall be invalid if the appliance has been damaged, used incorrectly or not maintained. Precise adherence to all of the instructions specified in the operating manual is required for proper use of the appliance. Intended uses and actions against which the operating manual advises or warns must be categorically avoided.
The appliance is designed only for private and not commercial use. The guarantee will be invalidated in case of misuse or improper handling, use of force, or interventions not undertaken by our authorised service branch.
Processing in Case of Guarantee
To ensure efficient handling of your query, please follow the directions below:
•Please have the receipt and item number (e.g. IAN 12345) ready as proof of purchase for all enquiries.
•Please find the item number on the rating plate, an engraved plate on the front page of your manual (bottom left) or as a sticker on the back or bottom.
•Should functional errors or other defects occur, please initially contact the
service department specified below by telephone or by e-mail. You will then
13

GB
receive further information on the processing of your complaint.
•After consultation with our customer service, an appliance recorded as defective can be sent postage paid to the service address communicated to you, with the proof of purchase (receipt) and specification of what constitutes the defect and when it occurred. In order to avoid acceptance problems and additional costs, please be sure to use only the address communicated to you. Ensure that the consignment is not sent carriage forward or by bulky goods, express or other special freight. Please send the equipment inc. all accessories supplied at the time of purchase and ensure adequate, safe transport packaging.
Repair Service
For a charge, repairs not covered by the guarantee can be carried out by our service branch, which will be happy to issue a cost estimate for you.
We can handle only equipment that has been sent with adequate packaging and
postage.
Attention: Please send your equipment to our service branch in clean condition and with an indication of the defect.
Equipment sent carriage forward or by bulky goods, express or other special freight will not be accepted.
We will dispose of your defective devices free of charge when you send them to us.
Service-Center
Service Great Britain
Tel.: 0871 5000 720 (£ 0.10/Min.)
E-Mail: grizzly@lidl.co.uk
IAN 87778
Service Branch
Please note that the following address is not a service address. Please initially contact the service centre specified above.
DES UK Ltd.
Unit B7
Oxford Street Industrial Park
Vulcan Road
Bilston, West Midlands WV14 7LF
14

Spis tresci |
|
Wstęp......................................... |
15 |
Przeznaczenie............................. |
15 |
Opis ogólny................................ |
16 |
Zawartość opakowania................... |
16 |
Przegląd........................................ |
16 |
Opis działania............................... |
17 |
Dane techniczne.......................... |
17 |
Zasady bezpieczeństwa.............. |
17 |
Symbole zawarte w instrukcji........... |
17 |
Symbole na urządzeniu................... |
17 |
Ogólne zasady bezpieczeństwa....... |
17 |
Składanie................................... |
19 |
Uruchamianie............................. |
19 |
Włączanie i wyłączanie................. |
19 |
Przerwy w pracy............................... |
20 |
Odkurzanie na sucho...................... |
20 |
Odkurzanie mokrych powierzchni.... |
20 |
Wydmuchiwanie............................ |
20 |
Odkurzanie przy użyciu węża |
|
Powertool .......................................... |
20 |
Oczyszczanie, konserwacja........ |
21 |
Czyszczenie wkładu filtru................ |
21 |
Przechowywanie.......................... |
21 |
Utylizacja, ochrona środowiska... |
22 |
Poszukiwanie błędów................ |
23 |
Części zamienne / Wyposażenie |
|
dodatkowe................................. |
23 |
Gwarancja................................. |
24 |
Serwis naprawczy...................... |
25 |
Service-Center............................ |
25 |
Oddział serwisowy.................... |
25 |
Tłumaczenie oryginalnej deklaracji |
|
zgodności WE.............................. |
59 |
Rysunek samorozwijający.......... |
61 |
PL
Wstęp
Gratulujemy zakupu nowego urządzenia. Zdecydowali się Państwo na zakup wartościowego produktu. Niniejsze urządzenie sprawdzono w trakcie produkcji pod kątem jakości, a także dokonano jego kontroli ostatecznej. W ten sposób zapewniona jest jego sprawność. Nie da się wykluczyć tego, że w pojedynczych przypadkach w urządzeniu lub przy nim wzgl. w wężach mogą się znaleźć pozostałości wody lub smaru. Nie jest to brakiem ani uszkodzeniem, czy powodem do troski o urządzenie.
Instrukcja obsługi jest częścią składową produktu. Zawiera ona ważne wskazówki dotyczące bezpieczeństwa, eksploatacji i utylizacji. Przed rozpoczęciem użytkowania produktu należy się zapoznać ze wszystkimi wskazówkami dotyczącymi obsługi
i bezpieczeństwa. Produkt należy użytkować tylko zgodnie z opisem i podanym przeznaczeniem.
Instrukcję należy przechowywać starannie, a w przypadku przekazania produktu osobom trzecim należy dostarczyć nabywcy kompletną dokumentację.
Przeznaczenie
Urządzenie jest przeznaczone do odkurzania na sucho i na mokro np. w pomieszczeniach gospodarstwa domowego, warsztatach do majsterkowania, w samochodach lub garażach. To urządzenie nie jest przeznaczone do zastosowania komercyjnego.
W przypadku użytkowania komercyjnego wygasają prawa z tytułu gwarancji. Wciąganie odkurzaczem substancji palnych, wybuchowych lub szkodliwych dla zdrowia jest niedozwolone. Producent nie odpowiada za szkody wywołane niezgodnym z przeznaczeniem stosowaniem lub nieprawidłową obsługą urządzenia.
15

PL
Opis ogólny
Ilustracje znajdują się na okładce przedniej i tylnej.
Zawartość opakowania
Rozpakuj urządzenie i sprawdź, czy jest ono kompletne.
Urządzenie jest dostarczane wraz z nasadzoną głowicą napędową (  3). Aby zdjąć głowicę, otworzyć zatrzask (
  4).
4).
3 Obudowa silnika
5 Zbiornik
6a 2 nóżki z kółkami i wnękami na przystawki
6b 2 nóżki z rolkami sterującymi i wnękami na przystawki
11 Filtr składany (11a) i pokrywa filtra (11b) (zamontowane fabrycznie)
12 Worek papierowy
13 Filtr piankowy
14 Torba na przystawki
15 Uchwyt z elementem regulacji strumienia powietrza
16 Teleskopowa rura ssąca
18 Wąż ssący
19 Wąż Powertool
20 Reduktor Powertool
21 Regulowana końcówka domowa
22 Końcówka do odkurzania szczelin
23 Końcówka do odkurzania tapicerek i obić mebli
24 Końcówka samochodowa
25 2 pałąków mocujących
4 śruby z gniazdem krzyżowym Instrukcja obsługi
Prawidłowo posegreguj i usuń materiały opakowania.
16
Przegląd
Obudowa
1Uchwyt do przenoszenia
2Kabel sieciowy
3Obudowa silnika
4Zatrzask
5Zbiornik
6a 2 nóżki z kółkami i wnękami na przystawki
6b 2 nóżki z rolkami sterującymi i wnękami na przystawki
7 Śruba spustowa
8 Króciec ssący
9 Gniazdko urządzenia
10Włącznik-wyłącznik
Filtr
11Filtr składany (11a) i pokrywa filtra (11b) do odkurzania na sucho (zamontowane fabrycznie)
12Worek papierowy do odkurzania drobnego pyłu
13Filtr piankowy do odkurzania na mokro
Przystawki
14Torba na przystawki
15Uchwyt z elementem regulacji strumienia powietrza
16Teleskopowa rura ssąca
17Uchwyt rury ssącej
18Wąż ssący
19Wąż Powertool
20Reduktor Powertool
do podłączania urządzeń elektrycznych do odkurzania pyłu.
Dysze
21Regulowana końcówka domowa
do odkurzania dywanów


 do odkurzania gładkich powierzchni
22 Końcówka do odkurzania szczelin
23 Końcówka do odkurzania tapicerek i obić mebli
24 Końcówka samochodowa

25 2 pałąków mocujących 26 Przyłącze nadmuchowe
27 Pokrywa wkładu filtru
28 Wkład filtru
29a Górny uchwyt kabla
29b Dolny uchwyt kabla
Opis działania
Odkurzacz do odkurzania na sucho i na mokro jest wyposażony w stabilny pojemnik ze stali szlachetnej, przeznaczony do gromadzenia brudu. Kółka i rolki sterujące zapewniają dużą zwrotność urządzenia. Przy odkurzaniu na mokro strumień powietrza zasysanego jest wyłączany przez specjalny pływak po napełnieniu zbiornika. Urządzenie jest też wyposażone w funkcję wydmuchiwania oraz gniazdko pozwalające na podłączenie narzędzia elektrycznego. Funkcje elementów urządzenia są podane w poniższym opisie.
Dane techniczne
Odkurzacz na sucho i na mokro PNTS 1500 B2
Napięcie sieciowe....220-240V~, 50/60Hz
Moc pobierana silnika................. |
1500 W |
Maks. obciążenie gniazdka |
|
urządzenia (Pmax.)........................ |
2200 W |
Moc pobierana silnika + maks. obciążenie
gniazdka urządzenia (Psum.)........ |
3700 W |
Klasa zabezpieczenia............................ |
I |
Typ zabezpieczenia.......................... |
IPX4 |
Długość kabla................................... |
6 m |
Pojemność zbiornika (brutto).............. |
30 l |
Ciężar (wł. z wszystkimi przystawkami)..9,5kg
Zmiany techniczne i optyczne mogą być dokonywane bez zapowiedzi w ramach procedur rozwoju technicznego. Wszelkie wymiary, wskazówki i dane tej instrukcji
PL
obsługi są w związku z tym niewiążące. W związku z tym wyklucza się wszelkie roszczenia prawne zgłaszane na podstawie tej instrukcji obsługi.
Zasady bezpieczeństwa
Symbole zawarte w instrukcji
Znaki niebezpieczeństwa z informacjami dot. zapobiegania wypadkom.
Znaki nakazowe (wyjaśnienie nakazu zamiast wykrzyknika) z informacjami dot. zapobiegania wypadkom.
Wskazówki zawierające informacje dot. lepszego użytkowania urządzenia.
Symbole na urządzeniu
Maszyn nie należy wyrzucać razem z odpadami domowymi.
Przełączanie przystawki i odkurzacza
Maks. obciążenie gniazdka urządzenia
Gniazdko wtykowe w urządzeniu do podłączania elektronarzędzi
Ogólne zasady bezpieczeństwa
Uwaga! Przy korzystaniu z narzędzi elektrycznych należy przestrzegać podanych poniżej podstawowych środków bezpieczeństwa, zabezpieczających przed poraże-
17

PL
niem prądem elektrycznym, zranieniem i pożarem:
W ten sposób unikniesz wypadków i zranień:
•Dzieciom możesz pozwolić na używanie urządzenia tylko pod nadzorem.
•Trzymaj urządzenie z daleka od dzieci i zwierząt domowych. Dzieci należy nadzorować, aby wykluczyć zabawę urządzeniem.
•To urządzenie nie jest przeznaczone do używania przez osoby (włącznie z dziećmi) o ograniczonych zdolnościach fizycznych, zmysłowych lub umysłowych lub osoby nieposiadające odpowiedniej wiedzy i/lub odpowiedniego doświadczenia, chyba że będą one pracować pod nadzorem odpowiedzialnej za ich bezpieczeństwo osoby lub otrzymają od niej wskazówki, jak powinno być używane urządzenie.
•Nigdy nie zostawiaj gotowego do pracy urządzenia bez opieki w miejscu pracy.
•Urządzeniem nie wolno odkurzać ludzi ani zwierząt.
•Nie wciągaj gorących, żarzących się, wybuchowych ani szkodliwych dla zdrowia substancji. Do takich substancji zaliczają się np. gorący popiół, benzyna, rozpuszczalniki, kwasy i zasady (ługi).
Niebezpieczeństwo zranienia.
•Podczas pracy dysza i rura ssąca nie mogą się znaleźć na wysokości głowy. Niebezpieczeństwo zranienia.
W ten sposób unikniesz wypadków i zranień wskutek porażenia prądem:
•Uważaj, by nie uszkodzić kabla prądowego przez przeciąganie go po ostrych krawędziach, zaciskanie między przedmiotami lub mocne pociąganie.
18
•Przed każdym użyciem sprawdzaj, czy przewód sieciowy i przedłużacz nie są uszkodzone i nie wykazują objawów zużycia. Nie używaj urządzenia, jeżeli kabel jest uszkodzony lub zużyty. Niebezpieczeństwo zranienia.
•Jeżeli kabel zasilający tego urządzenia jest uszkodzony, musi on zostać wymieniony na specjalny kabel zasilający przez producenta lub jego serwis bądź osobę posiadającą podobne kwalifikacje - tylko w ten sposób można zapewnić bezpieczeństwo urządzenia.
•Wyłącz urządzenie i wyjmij wtyczkę kabla prądowego z gniazdka:
-gdy urządzenie nie jest używane,
-przed otwarciem urządzenia,
-przy wszelkich pracach konserwacyjnych i przy oczyszczaniu urządzenia,
-jeżeli kabel prądowy jest uszkodzony, splątany albo ma uszkodzoną izolację.
•Nie wyciągaj wtyczki z gniazdka, ciągnąc za kabel. Chroń kabel przed gorącem, olejem i ostrymi krawędziami.
•Uważaj, by napięcie sieciowe było zgodne z danymi znajdującymi się na tabliczce znamionowej.
•Podłączaj wtyczkę urządzenia tylko do gniazdek, które są zabezpieczone bezpiecznikiem o wartości co najmniej
16A.
•Urządzenie należy podłączać wyłącznie do gniazdek wyposażonych w ochronnik zabezpieczający przed prądem uszkodzeniowym (bezpiecznik fi) o wartości prądu uszkodzeniowego nie większej od 30 mA.
Ostrożnie! W ten sposób unikniesz uszkodzeń urządzenia i wynikających stąd szkód osobowych:
•Uważaj, by urządzenie było prawi-
dłowo zmontowane; filtry muszą się znajdować w prawidłowej pozycji.
•Nie pracuj urządzeniem bez założonych filtrów. Mogłoby to spowodować uszkodzenie urządzenia.
•Używaj tylko dostarczonych i zalecanych przez nasze Centrum Serwisowe
(zob. adres na stronie 25) części zamiennych i akcesoriów. Stosowanie części innych producentów prowadzi do natychmiastowej utraty uprawnień gwarancyjnych.
•Zlecaj naprawy wyłącznie autoryzowanym przez naszą firmę warsztatom serwisowym.
•Przestrzegaj wskazówek dotyczących oczyszczania oraz konserwacji urządzenia.
•Przechowuj urządzenie w suchym, zam-kniętym i niedostępnym dla dzieci miejscu.
Składanie
Wyjmij wtyczkę urządzenia z gniazdka. Niebezpieczeństwo porażenia prądem elektrycznym.
1.Załóż nóżki (6) na obudowę.
-Nóżki z kółkami (6a)
o numerach + należy przy tym włożyć do odpowiednich otworów w
tylnej części zbiornika na brud (zobacz  mały rysunek).
-Nóżki z rolkami sterującymi (6b) należy włożyć do otworów w przedniej części zbiornika (5).
2.Zamocuj nóżki dołączonymi wkrętami z gniazdem krzyżowym.
3.Załóż obudowę silnika (3) na zbiornik (5) i zamknij obudowę zatrzaskami.
PL
4.Lekko ściśnij końce pałąków mocujących (25) i zablokuj je w obudowie silnika (3).
5.Zmontować wyposażenie:
-Podłączyć wąż ssący (18).
-Zamontować teleskopową rurę ssącą (16). (nacisnąć przycisk na rurze teleskopowej w kierunku  i rozciągnąć rurę na żądaną długość).
-Zamontować żądaną dyszę
(  21/22/23/24).
Nigdy nie odkurzaj bez założonych filtrów.
Uruchamianie
Włączanie i wyłączanie
Włóż wtyczkę urządzenia do gniazdka.Aby rozpocząć odkurzanie, włóż wtyczkę narzędzia elektrycznego do gniazdka w urządzeniu (  9).
9).
Do urządzenia wolno podłączać tylko narzędzia elektryczne o mocy max. 2.200 W.
Włączanie odkurzacza (Praca ciągła):
Przechyl włącznik-wyłącznik ( 10) w położenie „I“
Włączanie narzędzia elektrycznego
+ odkurzacza:
1.Przechyl włącznik-wyłącznik (  10) w położenie
2.Włącz narzędzie elektryczne.
Przy włączaniu narzędzia elektrycznego włącza się też auto-ma- tycznie odkurzacz. Po wyłączeniu narzędzia elektrycznego odkurzacz wyłącza się z opóźnieniem.
19
PL
Wyłączanie odkurzacza:
Przechyl włącznik-wyłącznik ( 10) w położenie „0“
Przerwy w pracy
Do przechowywania zmontowanego zestawu na czas przerwy w pracy można
zsunąć rurę teleskopową (16) i włożyć jej uchwyt (17) do zaczepu w głowicy napędowej (3);
włożyć rurę teleskopową (16) do kabłąka mocującego (25).
Odkurzanie na sucho
1.Aby rozpocząć odkurzanie na sucho, załóż filtr składany (11a) na kosz filtra na obudowie silnika (3). Wywinięta na zewnątrz uszczelka wargowa musi przy tym wskazywać w kierunku przeciwnym do obudowy silnika.
2.Załóż pokrywę filtra (11b) i zablokuj ją przez lekkie obrócenie:
zablokowanie pokrywy filtra
odblokowanie pokrywy filtra
Odkurzanie drobnego pyłu:
Przy odkurzaniu bardzo drobnego pyłu możliwe jest szybsze niż normalnie zatkanie filtra fałdowanego. Zalecamy w związku z tym stosowanie dodatkowego papierowego worka na drobny pył.
3.Rozłóż całkowicie filtr papierowy (12) i go na zewnętrzny króciec rury ssącej. Pierścień uszczelniający przy otworze worka filtracyjnego musi całkowicie obejmować króciec ssawny.
20
Odkurzanie mokrych powierzchni
Do odkurzania mokrych powierzchni bądź odsysania wody należy używać filtru piankowego (13) zakładanego na kosz filtracyjny głowicy napędowej (3).
Aby uniknąć rozerwania filtru piankowego (13), należy:
-używać tylko suchych filtrów piankowych;
-nieco wywinąć brzeg filtru piankowego.
Gdy zbiornik jest pełen, pływak zamyka otwór ssący, co powoduje przerwanie odkurzania.
Wyłącz urządzenie, wyjmij wtyczkę urządzenia z gniazdka sieciowego i opróżnij zbiornik (patrz „Czyszczenie i konserwacja”).
Natychmiast wyłącz urządzenie, jeżeli zacznie z niego wypływać piana lub ciecz.
Wydmuchiwanie
Aby rozpocząć wydmuchiwanie, przykręć wąż ssący (18) do króćca w obudowie silnika (3) (praca bez filtra).
Odkurzanie przy użyciu węża Powertool
Wąż Powertool nadaje się
•do oczyszczania trudno dostępnych miejsc i wrażliwych urządzeń
•do przyłączania urządzeń elektrycznych do odsysania pyłu.
 Loading...