


en-GB, fr, de, it, es
INSTA-SHARE PROJECTOR
Moto Mods_GSG_EMEA_ 68018244002A.book Page 0 Thursday, Jun |
Moto Mods_GSG_EMEA_ 68018244002A.book Page 1 Thursday, Jun |
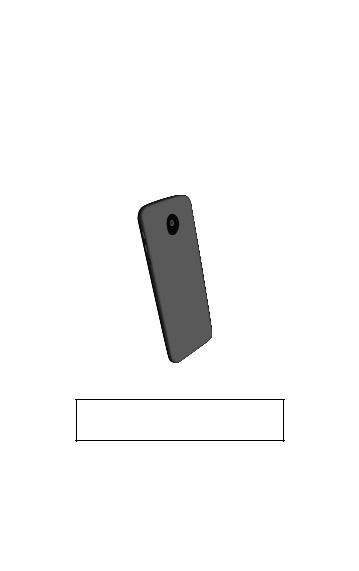
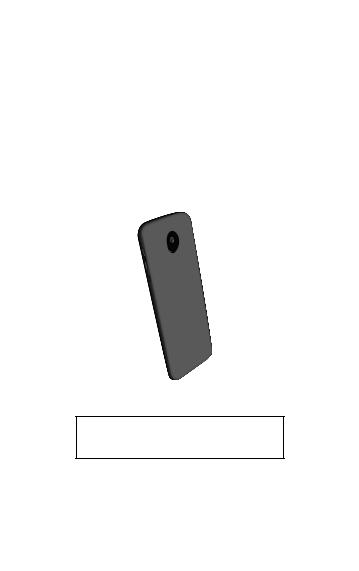
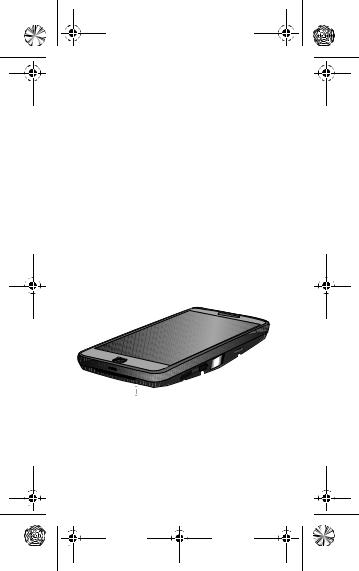
Attach your Moto Mod™
Align the camera lens on the back of your phone with the projector and then align the sides and bottom of the phone with the projector until they snap together.
Note: make sure that the connectors are clean and dry. Also, remove your phone case if you use one.
Moto Mod
Connectors
Caution: before using your device, please read the safety, regulatory and legal information at the back of this guide.
Attach your Moto Mod™ |
1 |
Moto Mods_GSG_EMEA_ 68018244002A.book Page 2 Thursday, Jun
Quick setup
When you attach the projector, your phone automatically guides you through setup. Follow the on-screen instructions to get started.
Start projecting
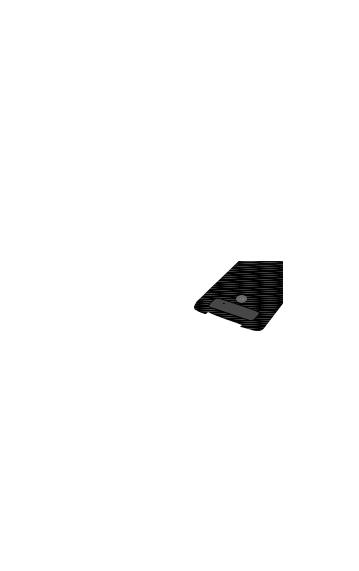
Aim the projector away from your eyes at a light-coloured wall or ceiling in a darkened room. Press and hold the projector's Power button until the projector turns on to begin projecting.
Tip: while projecting, press the Power button to adjust settings, such as brightness. See more settings on page 3.
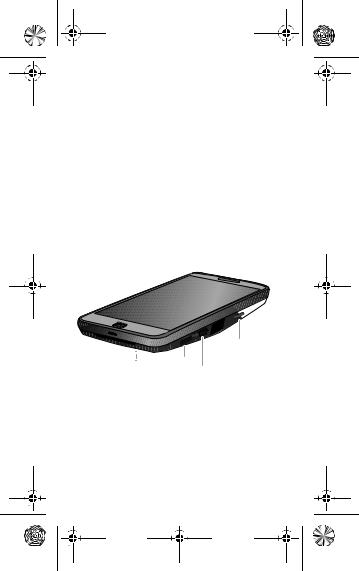
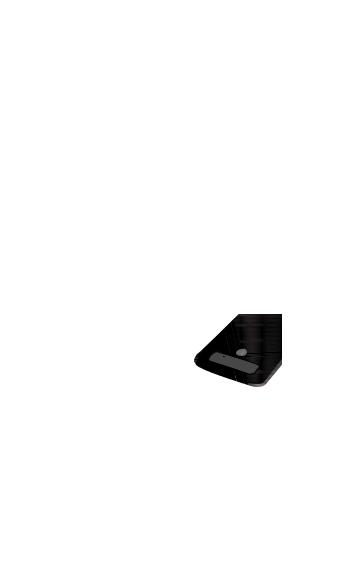
Focus wheel
Air vent
Air vent
(on back) Power button
Press & hold to start/stop projecting
Warning: avoid looking directly at the projector lamp. The bright light may damage your eyes.
2Quick setup
Moto Mods_GSG_EMEA_ 68018244002A.book Page 3 Thursday, Jun
Adjust settings
To focus the image, use the focus wheel next to the projector's lamp.
Or, with the projector on, press the Power button to adjust these settings on your phone screen:
•Keystone image correction: change the angle of the projection to make the image rectangular.
•Brightness: adjust the projection brightness (not your phone's brightness).
Remove it
To detach the projector from your phone, place your finger in the notch at the bottom of the projector and pull it away from your phone.
Note: be careful not to put your finger in the phone's USB charging port.
Adjust settings |
3 |

Moto Mods_GSG_EMEA_ 68018244002A.book Page 4 Thursday, Jun |
Charge it
Charge up fully before starting your projector.
Tip: if your phone is still attached to the projector, charging the phone is the best way to charge both at the same time.
Charging status lights
|
|
Press the button |
|
|
to check the |
|
|
battery level |
Charging |
|
slow blinking green |
|
||
Full charge |
|
rapid blinking green, or |
|
|
steady green when |
|
|
charging |
Partially charged: |
|
|
51-99% |
|
steady green, then off |
16-50% |
|
steady amber, then off |
6-15% |
|
steady red, then off |
Very low power |
|
rapid blinking red |
|
|
|
4Charge it

Moto Mods_GSG_EMEA_ 68018244002A.book Page 5 Thursday, Jun |
Use the kickstand
Pull out the kickstand and adjust the angle.
Project on a wall: |
Or project on a ceiling: |
Use the kickstand |
5 |
Moto Mods_GSG_EMEA_ 68018244002A.book Page 6 Thursday, Jun |
Tips & tricks
Looking for more?
•Air vent: keep the air vents on the projector side and back unblocked. (See page 2)
•Cleaning: to keep your projector lens clean and free of dust, use a soft, dry cloth.
•Connection vibration: when you successfully attach your Moto Mod to your phone, you feel a slight vibration.
•Reset: Press and hold the battery check button (see page 4) for seven seconds until the light blinks green.
Help & more
Everything Moto: for tutorials and helpful tips, visit www.motorola.com/mymotomods.
Get more Mods: Moto Mods™ are sold separately. View the complete collection at www.motomods.com. Or, visit us at www.moto.com/motomodsmobileapp
Help: for help and more on your phone, tap Apps  >
>  Settings > Moto Mods > Help.
News: get the latest news, apps, tips, and much more—join us on:
 www.youtube.com/motorola
 www.facebook.com/motorola
 www.twitter.com/moto
6Tips & tricks
Moto Mods_GSG_EMEA_ 68018244002A.book Page 7 Thursday, Jun |
Safety, regulatory & legal
Important: this product contains magnets and may damage magnetic information, such as credit card strips and ID cards.
Where is my legal, safety and regulatory information?
In order to provide you with better access to this important information, we've made the materials accessible from the phone's settings menu and on the web. Review these materials prior to using your device. To access the materials from a connected phone, go to Settings > Legal information and select a topic. To access the materials on the web, visit www.motorola.com/device-legal.
Battery safety
Before assembling, charging or using your mobile device for the first time, please read the important product safety and legal information provided with your product.
If your mobile device becomes unresponsive, try a reboot – press and hold the Power button until the screen goes dark and your device restarts.
For your safety, the battery in your mobile device should only be removed by a Motorola approved service centre or independent qualified professional. Don't try to remove or replace the battery yourself – doing so may damage the battery and could cause burning and injury. Don't crush, bend or expose your mobile device to heat or liquid. This may damage the battery and may cause burning and injury.
European Union directives conformance statement
This product complies with the applicable EU requirements and carries the CE mark.
The Technical Construction File (TCF) is available from the
Certifying Organisation at Motorola Mobility UK Ltd.,
Redwood, Crockford Lane, Chineham Business Park,
Basingstoke, RG24 8WQ, UNITED KINGDOM.
Safety, regulatory & legal |
7 |
Moto Mods_GSG_EMEA_ 68018244002A.book Page 8 Thursday, Jun |
FCC and IC compliance
This device complies with part 15 of the FCC rules. Operation is subject to the following two conditions: (1) this device may not cause harmful interference and (2) this device must accept any interference received, including interference that may cause undesired operation. This device complies with Industry Canada licence-exempt RSS standard(s).
Operation is subject to the following two conditions: (1) this device may not cause interference and (2) this device must accept any interference received, including interference that may cause undesired operation.
Disposal & recycling
Help do your part! Please don't dispose of mobile devices or electrical accessories (such as chargers, headsets or batteries)
with your household waste. Product packaging and product guides should only be disposed of in accordance with national collection and recycling requirements. For details on approved
national recycling schemes and Motorola recycling activities, go to: www.motorola.com/recycling.
Open source information
This Moto Mod accessory is intended to be interfaced with a Motorola mobile device and may include Open Source Software (the "Software") Copyrighted and distributed under an MIT licence and BSD-style licences, including a Modified BSD licence, a BSD-like licence and a
BSD-compatible licence.
The open source software is distributed WITHOUT ANY WARRANTY; without even the implied warranty of MERCHANTABILITY or FITNESS
FOR A PARTICULAR PURPOSE. See, for example, the disclaimer provisions in BSD Licences identified above.
To view the text of the licences, acknowledgments and required copyright notices for the open source software used on this Moto Mod, tap
Apps > Settings > Moto Mods > Legal Information > Open source licences on the Motorola mobile device after it is connected to this Moto Mod.
Warranty
This product is covered by Motorola's limited warranty. To review the warranty on your phone, go to Settings > Legal information >
Warranty, or visit motorola.com/device-legal. You may also obtain a copy of the warranty by contacting Motorola at: Motorola Mobility LLC,
Attention Customer Service – Warranty Request, 222 West Merchandise
Mart Plaza, Suite 1800, Chicago, IL 60654.
8Safety, regulatory & legal
Moto Mods_GSG_EMEA_ 68018244002A.book Page 9 Thursday, Jun |
Arbitration & opt-out
Any controversy or claim arising out of or relating to any Motorola product will be resolved by binding arbitration, instead of in court, unless you opt out. To opt out, send a written rejection notice within 30 days of purchase that includes your name, address, phone number, device and device serial number, and tells Motorola that you are rejecting this
Arbitration provision to: Motorola Mobility LLC, 222 West Merchandise Mart Plaza, Suite 1800, Attn: Arbitration Provision Opt-Out, Chicago, IL
60654 or arbitrat@motorola.com. For more information on this arbitration provision, on your phone, go to Settings > Legal information > Arbitration and Opt-out, or visit www.motorola.com/device-legal.
Copyright & trademarks
Motorola Mobility LLC
222 W. Merchandise Mart Plaza Chicago, IL 60654 www.motorola.com
Certain features, services and applications are network-dependent and may not be available in all areas; additional terms, conditions and/or charges may apply. Contact your service provider for details.
All features, functionality and other product specifications, as well as the information contained in this guide, are based upon the latest available information and believed to be accurate at the time of printing. Motorola reserves the right to change or modify any information or specifications without notice or obligation.
Note: the images in this guide are examples only.
MOTOROLA, the stylised M logo, MOTO and the MOTO family of marks are trademarks or registered trademarks of Motorola Trademark Holdings, LLC. All other product or service names are the property of their respective owners.
© 2016 Motorola Mobility LLC. All rights reserved. Product ID: Motorola Moto Mods (Model MD100P) Manual number: 68018244002-A
Safety, regulatory & legal |
9 |

Moto Mods_GSG_EMEA_ 68018244002A.book Page 0 Thursday, Jun |

fr
INSTA-SHARE PROJECTOR

Moto Mods_GSG_EMEA_ 68018244002A.book Page 0 Thursday, Jun |
Moto Mods_GSG_EMEA_ 68018244002A.book Page 1 Thursday, Jun |
Connexion de votre
Moto Mod™
Positionnez l'objectif de l'appareil photo à l'arrière de votre téléphone en face du projecteur, puis alignez les côtés et le bas du téléphone avec le projecteur jusqu'à ce qu'ils s'enclenchent.
Remarque : assurez-vous que les connecteurs sont propres et secs. Le cas échéant, veillez également à retirer l'étui de votre téléphone.
Connecteurs
Moto Mod
Attention : avant d'utiliser votre appareil, lisez les règles de sécurité ainsi que les informations réglementaires et légales au dos de ce guide.
Connexion de votre Moto Mod™ |
1 |
Moto Mods_GSG_EMEA_ 68018244002A.book Page 2 Thursday, Jun |
Configuration rapide
Une fois le projecteur connecté, votre téléphone vous guide automatiquement tout au long de la configuration. Suivez les instructions à l'écran pour commencer.
Démarrer la projection
Orientez le projecteur vers une surface de couleur claire (mur, plafond, etc.) dans une pièce sombre, sans jamais le diriger vers vos yeux. Appuyez de manière prolongée sur le bouton Marche/Arrêt du projecteur pour l'allumer et commencer la projection.
Conseil : pendant la projection, appuyez sur le bouton Marche/Arrêt pour régler les paramètres, tels que la luminosité. Consultez la page 3 pour en savoir plus sur les autres paramètres.
|
|
|
|
|
|
|
|
Molette de |
|
|
|
|
mise au point |
|
Entrée d'air |
Entrée d'air |
|
|
|
(au dos) |
Bouton Marche/Arrêt |
|||
|
Appuyez de manière |
|||
|
prolongée pour |
|||
|
démarrer/arrêter la projection. |
|||
Avertissement : évitez tout contact visuel direct avec le faisceau du projecteur. Une forte luminosité peut présenter un risque pour vos yeux.
2Configuration rapide
Moto Mods_GSG_EMEA_ 68018244002A.book Page 3 Thursday, Jun |
Réglage des paramètres
Pour mettre au point l'image, tournez la molette de mise au point située près du faisceau du projecteur.
Lorsque le projecteur est sous tension, vous pouvez également appuyer sur le bouton Marche/Arrêt pour régler ces paramètres sur l'écran de votre téléphone :
•Correction de la distorsion trapézoïdale : modifiez l'angle de projection pour obtenir une image rectangulaire.
•Luminosité : réglez la luminosité de projection (pas celle de votre téléphone).
Déconnexion du périphérique
Pour détacher le projecteur de votre téléphone, placez votre doigt dans l'encoche située en bas du projecteur, puis retirez-le de votre téléphone.
Remarque : veillez à ne pas placer votre doigt dans le port de chargement USB du téléphone.
Réglage des paramètres |
3 |

Moto Mods_GSG_EMEA_ 68018244002A.book Page 4 Thursday, Jun |
Chargement du périphérique
Chargez entièrement votre projecteur avant de le mettre sous tension.
Conseil : si le projecteur est encore connecté à votre téléphone, branchez votre téléphone pour recharger les deux appareils simultanément.
Voyants d'état de charge
|
|
Appuyez sur le |
|
|
bouton pour vérifier |
|
|
le niveau de batterie. |
Charge |
|
clignotement vert lent |
|
||
Charge terminée |
|
clignotement vert |
|
|
rapide, ou vert fixe lors |
|
|
du chargement |
|
|
|
4Chargement du périphérique

Moto Mods_GSG_EMEA_ 68018244002A.book Page 5 Thursday, Jun |
Partiellement chargé : |
|
51 à 99 % |
vert fixe, puis éteint |
16 à 50 % |
orange fixe, puis éteint |
6 à 15 % |
rouge fixe, puis éteint |
Batterie très faible |
clignotement rouge |
|
rapide |
|
|
Chargement du périphérique |
5 |

Moto Mods_GSG_EMEA_ 68018244002A.book Page 6 Thursday, Jun |
Utilisation de la béquille
Sortez la béquille et réglez l'angle.
Projection sur un mur : |
Projection sur un plafond : |
6Utilisation de la béquille
Moto Mods_GSG_EMEA_ 68018244002A.book Page 7 Thursday, Jun |
Trucs et astuces
Vous souhaitez profiter de fonctionnalités supplémentaires ?
•Ventilation : veillez à ne pas obstruer les entrées d'air sur le côté et à l'arrière du projecteur (voir page 2).
•Nettoyage : pour garder votre projecteur propre et éviter le dépôt de poussières, utilisez un chiffon doux et sec.
•Vibration de fixation : une légère vibration est émise une fois le Moto Mod correctement connecté à votre téléphone.
•Réinitialisation : appuyez sur le bouton de vérification de la batterie (voir page 4) pendant 7 secondes jusqu'à ce que le voyant clignote en vert.
Trucs et astuces |
7 |
 Loading...