


Congratulations for choosing the new MXV.
This motorbike has come to completely change the concept of a motocross bike; it is innovative, able to ensure high performance and fun under any condition of use. aprilia's main purpose is, in fact, to manufacture bikes featuring advanced technology, absolutely safe and capable of keeping its value along time.
IMPORTANT RECOMMENDATIONS ON HOW TO USE THE VEHICLE
aprilia MXV motorbikes have been conceived and manufactured to be used at professional racing. Therefore, they comply with the regulations and categories currently being used by the most important international motorcycle federations.
The MXV model is specially suitable for motocross racing mainly.
In order to prevent early wear and breaking, it is essential to respect the scheduled maintenance operations foreseen in the maintenance tables contained in this booklet. Observing maintenance operations and their frequency and carrying them out at an aprilia dealer or authorised workshop, or by a skilled mechanic at competition rings, will keep vehicle performance constant and prevent any serious damage.
For your safety, use original aprilia spare parts and accessories only. aprilia shall not be responsible for the use of non-original parts or any damage deriving from them.
APRILIA WOULD LIKE TO THANK YOU
for choosing one of its products. We have compiled this booklet to provide a comprehensive overview of your vehicle's quality features. Please, read it carefully before riding the vehicle for the first time. It contains information, tips and precautions for using your vehicle. It also describes features, details and devices to assure you that you have made the right choice. We believe that if you follow our suggestions, you will soon get to know your new vehicle well and that it will continue to give you satisfactory service for many years to come. This booklet is an integral part of the vehicle and must be handed over to the new owner in the event of sale.
Gefeliciteerd met de aankoop van de nieuwe MXV.
Het is een motor die de manier van opvatten van cross motoren radicaal wil veranderen. Het is een innovatief voertuig, en het is in staat hoge prestaties en plezier in alle gebruiksomstandigheden te garanderen. De primaire doelstelling van aprilia is dan ook het realiseren van motoren met een hoge technologische inhoud, die buitengewoon veilig zijn en in staat zijn om mettertijd hun waarde te behouden.
BELANGRIJKE WAARSCHUWINGEN BETREFFENDE HET GEBRUIK VAN HET VOERTUIG
De aprilia MXV motoren werden geproduceerd, ontworpen en ontwikkeld voor wedstrijdgebruik. Daarom moeten ze voldoen aan reglementen en de categorieën die actueel in gebruik zijn door de belangrijkste internationale motorbonden.
Het model MXV, in het bijzonder, is geschikt om voornamelijk gebruikt te worden om te crossen.
Om een voortijdige slijtage en het eventueel stukgaan te vermijden, moeten de vooraf bepaalde handelingen die aangeduid worden in de tabel van het onderhoud, in deze handleiding, absoluut noodzakelijk gerespecteerd worden. Door het respecteren van de intervals en de handelingen van het
Ed. 01 2009

onderhoud, uitgevoerd bij een dealer of erkende garage van aprilia of bij de wedstrijd door een gekwalificeerd mechanicus, zullen de prestaties van het voertuig behouden blijven en zal ernstige schade vermeden worden.
Voor uw veiligheid mogen enkele originele aprilia reserveonderdelen en accessoires gebruikt worden. Aprilia kan niet aansprakelijk gesteld worden voor beschadigingen als gevolg van het gebruik van niet-originele onderdelen.
APRILIA WIL U BEDANKEN
omdat u één van haar producten heeft gekozen. Wij hebben deze handleiding opgesteld opdat u de kwaliteiten ervan ten volle kan waarderen. Wij raden aan om deze handleiding geheel door te lezen, voordat u met het voertuig gaat rijden. Het bevat informatie, raadgevingen en waarschuwingen in verband met het gebruik van uw voertuig; daarnaast zal u eigenschappen, bijzonderheden en handigheidjes ontdekken die u ervan zullen overtuigen dat u een juiste keuze heeft gemaakt. Wij zijn er zeker van dat indien u hier rekening mee zal houden, u makkelijk zal wennen aan uw nieuw voertuig, waar u lang naar volle tevredenheid gebruik van zal kunnen maken. Deze uitgave is een integrerend deel van het voertuig, en bij verkoop van dit laatste moet het worden overhandigd aan de nieuwe eigenaar.
MXV 450
Ed. 01 2009
The instructions in this booklet have been compiled primarily to offer a simple and clear guide to using the vehicle; it also describes routine maintenance procedures and regular checks that should be carried out on the vehicle at an Aprilia Dealer or Authorised Workshop. This booklet also contains instructions for simple repairs. Any operations not specifically described in this booklet require the use of special tools and/or particular technical knowledge; for these operations, please take your vehicle to an Aprilia Dealer or Authorised Workshop.
De instructies in deze handleiding zijn voorbereid om vooral een eenvoudige en duidelijke leidraad te zijn voor het gebruik; men vindt eveneens de handelingen van het klein onderhoud en van de periodieke controles die bij een Dealer of Erkende aprilia Garage moeten uitgevoerd worden. De handleiding bevat tevens instructies voor een aantal eenvoudige herstellingen. De herstellingen die niet uitgebreid in deze uitgave zijn beschreven, vereisen dat men over speciale gereedschappen en/of specifieke technische kennis beschikt; voor het uitvoeren van deze herstellingen raadt men aan om zich te wenden tot een Dealer of Erkende aprilia Garage.
3

Personal safety |
Persoonlijke veiligheid |
Failure to completely observe these instructions will |
Indien deze voorschriften niet of niet volledig worden |
result in serious risk of personal injury. |
opgevolgd, kan dit ernstig letsel aan personen tot ge- |
|
volg hebben. |
Safeguarding the environment |
Bescherming van |
Sections marked with this symbol indicate the correct |
Geeft het juiste gedrag aan dat u aan moet houden |
use of the vehicle to prevent damaging the environ- |
zodat het gebruik van het voertuig geen schade aan- |
ment. |
richt aan de natuur. |
Vehicle intactness |
Staat van het voertuig |
The incomplete or non-observance of these regula- |
Indien deze voorschriften niet of niet volledig worden |
tions leads to the risk of serious damage to the vehi- |
opgevolgd kan dit ernstige schade aan het voertuig. |
cle. |
|
The sings above are very important. They are used to highlight those parts of the booklet that should be read with particular care. As you can see, each sign consists of a different graphic symbol, making it quick and easy to locate the various topics. Read this manual carefully before starting the engine. Your safety as well as other's does not only depend on the quickness of your reflexes and agility, but also on how well you know your vehicle and the state of maintenance/efficiency of the vehicle itself. For your safety, get to know your vehicle well so as to safely ride and master it given any riding condition. IMPORTANT This booklet is an integral part of the vehicle, and must be handed to the new owner in the event of sale.
Bovengenoemde signalen zijn erg belangrijk. Ze hebben namelijk tot doel om de delen van het boekje aan te geven die u aandachtig door moet lezen. Zoals u ziet, bestaat ieder teken uit een ander grafisch symbool, zodat de bijbehorende onderwerpen meteen duidelijk kunnen worden gevonden in de verschillende delen. Voordat de motor wordt gestart, moet deze handleiding aandachtig doorgelezen worden. Uw veiligheid en die van anderen hangt niet enkel af van uw reactiesnelheid en vlugheid, maar eveneens van de kennis van het voertuig en van de staat van efficiëntie van het voertuig. We raden daarom aan om vertrouwd te raken met het voertuig, zodat u zich in alle situaties veilig en beheersd kan bewegen. BELANGRIJK Deze handleiding moet beschouwd worden als integrerend deel van het voertuig, en moet worden overhandigd bij de verkoop ervan.
4
GENERAL RULES.......................................................................... |
7 |
Carbon monoxide..................................................................... |
8 |
Fuel.......................................................................................... |
8 |
Hot components....................................................................... |
9 |
Coolant..................................................................................... |
9 |
Used engine oil and gearbox oil............................................... |
11 |
Brake and clutch fluid............................................................... |
12 |
Reporting of defects that affect safety...................................... |
12 |
VEHICLE......................................................................................... |
19 |
Arrangement of the main components......................................... |
21 |
Dashboard................................................................................... |
22 |
Mapping selection.................................................................... |
0 |
Engine stop switch....................................................................... |
24 |
Opening the saddle.................................................................. |
25 |
Identification................................................................................. |
25 |
USE................................................................................................. |
27 |
Checks......................................................................................... |
28 |
Refuelling..................................................................................... |
30 |
Rear shock absorbers adjustment............................................... |
33 |
Rear shock absorbers setting.................................................. |
36 |
Front fork adjustment................................................................... |
37 |
Running in.................................................................................... |
40 |
Starting up the engine.................................................................. |
41 |
Stopping the engine..................................................................... |
43 |
Load............................................................................................. |
44 |
MAINTENANCE.............................................................................. |
45 |
Engine oil level............................................................................. |
46 |
Engine oil level check............................................................... |
46 |
Engine oil top-up...................................................................... |
48 |
Engine oil change..................................................................... |
49 |
Engine oil filter replacement..................................................... |
50 |
|
INDEX |
|
INDEX |
ALGEMENE NORMEN..................................................................... |
7 |
Koolmonoxide............................................................................. |
8 |
Brandstof.................................................................................... |
8 |
Warme onderdelen..................................................................... |
9 |
Koelvloeistof............................................................................... |
9 |
Gebruikte motorolie en koppelingsolie....................................... |
11 |
Remen koppelingsvloeistof...................................................... |
12 |
Communicatie van de defecten die invloed hebben op de vei- |
|
ligheid......................................................................................... |
12 |
VOERTUING..................................................................................... |
19 |
Plaats van de hoofdcomponenten................................................. |
21 |
Legenda......................................................................................... |
22 |
Selectie lokalisaties.................................................................... |
0 |
Stopschakelaar motor.................................................................... |
24 |
Zadel openen............................................................................. |
25 |
Identificatie..................................................................................... |
25 |
GEBRUIK.......................................................................................... |
27 |
Controles........................................................................................ |
28 |
Tanken........................................................................................... |
30 |
Regulering achterdempers............................................................. |
33 |
Instelling achterste schokdempers............................................. |
36 |
Regulering voorvorken................................................................... |
37 |
Inrijden........................................................................................... |
40 |
Starten des motors......................................................................... |
41 |
Stoppen van de motor.................................................................... |
43 |
Lading............................................................................................ |
44 |
ONDERHOUD................................................................................... |
45 |
Peil motorolie................................................................................. |
46 |
Controle van het peil van de motorolie....................................... |
46 |
Het bijvullen van motorolie......................................................... |
48 |
Vervanging van de motorolie...................................................... |
49 |
5
By-pass valve clearing............................................................. |
51 |
Gearbox oil level.......................................................................... |
53 |
Spark plug dismantlement........................................................... |
56 |
Removing the air filter.................................................................. |
60 |
Cooling fluid level......................................................................... |
61 |
Coolant check.......................................................................... |
63 |
Coolant top-up.......................................................................... |
64 |
Checking the brake oil level......................................................... |
66 |
Braking system fluid top up...................................................... |
72 |
Fuses........................................................................................... |
76 |
Front and rear disc brake............................................................. |
79 |
Periods of inactivity...................................................................... |
82 |
Cleaning the vehicle.................................................................... |
84 |
Transport..................................................................................... |
86 |
Transmission chain...................................................................... |
87 |
Chain backlash check.............................................................. |
88 |
Chain backlash adjustment...................................................... |
89 |
Checking wear of chain, front and rear sprockets.................... |
90 |
Chain lubrication and cleaning................................................. |
91 |
TECHNICAL DATA......................................................................... |
93 |
Kit equipment............................................................................... |
99 |
PROGRAMMED MAINTENANCE.................................................. |
101 |
Scheduled maintenance table..................................................... |
102 |
Vervanging van de oliefilter van de motor.................................. |
50 |
Reiniging klep by-pass............................................................... |
51 |
Versnellingsbak oliepeil................................................................. |
53 |
Demonteren van de bougie............................................................ |
56 |
Demonteren van het luchtfilter....................................................... |
60 |
Peil koelvloeistof............................................................................ |
61 |
Controle van de koelvloeistof..................................................... |
63 |
Bijvulling van de koelvloeistof..................................................... |
64 |
Controle van het oliepeil van de remmen...................................... |
66 |
Bijvullen van de remvloeistof...................................................... |
72 |
Zekeringen..................................................................................... |
76 |
Schijfrem voor en achter................................................................ |
79 |
Stilstand van het voertuig............................................................... |
82 |
Reinigen van het voertuig.............................................................. |
84 |
Vervoer.......................................................................................... |
86 |
Transmissieketting......................................................................... |
87 |
Controle van de speling van de ketting...................................... |
88 |
Regeling van de speling van de ketting...................................... |
89 |
Controle van het gebruik van de ketting, het tandrad en kroon |
|
................................................................................................... |
90 |
Smering en reiniging van de ketting........................................... |
91 |
TECHNISCHE GEGEVENS.............................................................. |
93 |
Bijgeleverd gereedschap............................................................... |
99 |
GEPLAND ONDERHOUD................................................................ |
101 |
Tabel gepland onderhoud.............................................................. |
102 |
6

MXV 450
Chap. 01 General rules
Hst. 01 Algemene normen
7

1 General rules / 1 Algemene normen
Carbon monoxide |
Koolmonoxide |
If you need to keep the engine running in order to perform a procedure, please ensure that you do so in an open or very well ventilated area. Never let the engine run in an enclosed area. If you do work in an enclosed area, make sure to use a smoke-extraction system.
CAUTION
EXHAUST EMISSIONS CONTAIN CARBON MONOXIDE, A POISONOUS GAS WHICH CAN CAUSE LOSS OF CONSCIOUSNESS AND EVEN DEATH.
Wanneer het nodig is om de motor te doen werken om een handeling uit te voeren, controleert men of dit in een open ruimte of in een goed geventileerd lokaal gebeurt. Laat de motor nooit werken in een gesloten ruimte. Wanneer men in een gesloten ruimte werkt, gebruikt men een evacuatiesysteem voor de uitlaatgassen.
LET OP
DE UITLAATGASSEN BEVATTEN KOOLMONOXIDE, EEN GIFTIG GAS DAT BEWUSTELOOSHEID EN OOK DE DOOD KAN VEROORZAKEN.
Fuel |
Brandstof |
CAUTION
FUEL USED TO POWER INTERNAL COMBUSTION ENGINES IS HIGHLY FLAMMABLE AND CAN BECOME EXPLOSIVE UNDER SPECIFIC CONDITIONS. IT IS THEREFORE RECOMMENDED TO CARRY OUT REFUELLING AND MAINTENANCE PROCE-
LET OP
DE BRANDSTOF DIE WORDT GEBRUIKT VOOR DE AANDRIJVING VAN DE ONTPLOFFINGSMOTOR IS UITERST BRANDBAAR EN KAN EXPLOSIEF WORDEN IN BEPAALDE OMSTANDIGHEDEN. VOER HET TANKEN EN DE ONDERHOUDSHANDELINGEN
8
DURES IN A VENTILATED AREA WITH THE ENGINE SHUT OFF. DO NOT SMOKE DURING REFUELLING AND NEAR FUEL VAPOURS, AVOID ANY CONTACT WITH NAKED FLAMES, SPARKS OR OTHER SOURCES WHICH MAY CAUSE THEM TO IGNITE OR EXPLODE.
DO NOT DISPOSE OF FUEL INTO THE ENVIRONMENT.
KEEP OUT OF THE REACH OF CHILDREN.
UIT IN EEN GEVENTILEERDE ZONE EN MET DE MOTOR UIT. ROOK NIET TIJDENS HET TANKEN EN IN DE NABIJHEID VAN BRANDSTOFDAMPEN, EN VERMIJD ABSOLUUT CONTACT MET VRIJE VLAMMEN, VONKEN EN ELKE ANDERE BRON DIE HET VLAM VATTEN OF EXPLODEREN ERVAN KAN VEROORZAKEN.
LOOS DE BRANDSTOF NIET IN HET MILIEU.
BUITEN BEREIK VAN KINDEREN HOUDEN
Hot components |
Warme onderdelen |
The engine and the exhaust system components get very hot and remain in this condition for a certain time interval after the engine has been shut off. Before handling these components, make sure that you are wearing insulating gloves or wait until the engine and the exhaust system have cooled down.
De motor en de onderdelen van de uitlaatinstallatie worden zeer warm en blijven lang warm, ook nadat de motor wordt uitgezet. Vooraleer men deze onderdelen hanteert, draagt men isolerende handschoenen, of wacht men tot de motor en de uitlaatinstallatie zijn afgekoeld.
Coolant |
Koelvloeistof |
The coolant contains ethylene glycol which, under certain conditions, can become flammable. When ethylene glycol burns, it produces an invisible flame which can nevertheless cause burns.
De koelvloeistof bevat ethyleenglycol, wat in sommige omstandigheden ontvlambaar is. Wanneer het brandt, produceert ethylglycol onzichtbare vlammen, die toch brandwonden veroorzaken.
normen Algemene 1 / rules General 1
9

1 General rules / 1 Algemene normen
CAUTION
PAY ATTENTION NOT TO POUR COOLANT ON HOT ENGINE OR EXHAUST SYSTEM COMPONENTS; IT MAY CATCH FIRE PRODUCING INVISIBLE FLAMES. IT IS ADVISABLE TO WEAR LATEX GLOVES WHEN SERVICING THE VEHICLE. EVEN IF IT IS TOXIC, THE COOLANT HAS A SWEET FLAVOUR WHICH MAKES IT VERY ATTRACTIVE TO ANIMALS. NEVER LEAVE THE COOLANT IN OPEN CONTAINERS IN AREAS ACCESSIBLE TO ANIMALS AS THEY MAY DRINK IT.
KEEP OUT OF THE REACH OF CHILDREN.
DO NOT REMOVE THE RADIATOR CAP WHEN THE ENGINE IS STILL HOT. THE COOLANT IS UNDER PRESSURE AND MAY CAUSE BURNS.
LET OP
LET OP OM GEEN KOELVLOEISTOF TE MORSEN OP DE HETE DELEN VAN DE MOTOR EN DE UITLAATINSTALLATIE; DEZE ZOU BRAND KUNNEN VATTEN MET ONZICHTBARE VLAMMEN. BIJ ONDERHOUDSHANDELINGEN RAADT MEN AAN OM LATEX HANDSCHOENEN TE GEBRUIKEN. DE KOELVLOEISTOF IS GIFTIG, MAAR HEEFT TOCH EEN ZOETE SMAAK, WAT HEM UITERST AANTREKKELIJK MAAKT VOOR DIEREN. LAAT DE KOELVLOEISTOF NOOIT IN GEOPENDE VERPAKKINGEN OF IN POSITIES DIE BEREIKBAAR ZIJN VOOR DIEREN, DIE ER ZOUDEN VAN KUNNEN DRINKEN.
BUITEN BEREIK VAN KINDEREN HOUDEN
VERWIJDER DE RADIATORDOP NIET WANNEER DE MOTOR NOG WARM STAAT. DE KOELVLOEISTOF STAAT ONDER DRUK, EN ZOU BRANDWONDEN KUNNEN VEROORZAKEN.
10
Used engine oil and gearbox oil
CAUTION
IT IS ADVISABLE TO WEAR LATEX GLOVES WHEN SERVICING THE VEHICLE.
ENGINE OR TRANSMISSION OIL MAY CAUSE SERIOUS INJURIES TO THE SKIN IF HANDLED FOR PROLONGED PERIODS OF TIME AND ON A REGULAR BASIS.
WASH YOUR HANDS CAREFULLY AFTER HANDLING OIL.
HAND THE OIL OVER TO OR HAVE IT COLLECTED BY THE NEAREST USED OIL RECYCLING COMPANY OR THE SUPPLIER.
DO NOT DISPOSE OF OIL INTO THE ENVIRONMENT
KEEP OUT OF THE REACH OF CHILDREN.
Gebruikte motorolie en koppelingsolie
LET OP
BIJ ONDERHOUDSHANDELINGEN RAADT MEN AAN OM LATEX HANDSCHOENEN TE GEBRUIKEN.
DE OLIE VAN DE MOTOR OF DE VERSNELLINGSBAK KAN ERNSTIGE SCHADE VEROORZAKEN AAN DE HUID, WANNEER HIJET LANG EN DAGELIJKS WORDT GEBRUIKT.
MEN RAADT AAN OM DE HANDEN ZORGVULDIG TE WASSEN NA HET HANTEREN VAN OLIE.
BEZORG HEM AAN OF LAAT HEM OPHALEN DOOR HET DICHTSTBIJZIJNDE RECYCLEBEDRIJF VAN GEBRUIKTE OLIES OF DOOR DE LEVERANCIER.
LOOS DE OLIE NIET IN HET MILIEU.
BUITEN BEREIK VAN KINDEREN HOUDEN
normen Algemene 1 / rules General 1
11

1 General rules / 1 Algemene normen
Brake and clutch fluid |
Remen koppelingsvloeistof |
THE BRAKE FLUID MAY DAMAGE PAINTED, PVC OR RUBBER SURFACES. WHEN SERVICING THE BRAKING SYSTEM PROTECT THESE COMPONENTS WITH A CLEAN CLOTH. ALWAYS WEAR PROTECTIVE GOGGLES WHEN SERVICING THE BRAKING SYSTEM. THE BRAKE FLUID IS EXTREMELY DANGEROUS TO THE EYES. IN THE EVENT OF ACCIDENTAL CONTACT WITH THE EYES, RINSE THEM IMMEDIATELY WITH ABUNDANT COLD, CLEAN WATER AND SEEK MEDICAL ADVICE.
KEEP OUT OF THE REACH OF CHILDREN.
DE REMVLOEISTOF KAN GELAKTE, PLASTIC OF RUBBEREN OPPERVLAKKEN BESCHADIGEN. WANNEER MEN HET ONDERHOUD VAN DE REMINSTALLATIE UITVOERT, BESCHERMT MEN DEZE ONDERDELEN MET EEN REIN DOEK. DRAAG STEEDS EEN BESCHERMENDE BRIL WANNEER MEN ONDERHOUD UITVOERT OP DE REMINSTALLATIE. DE REMVLOEISTOF IS UITERST SCHADELIJK VOOR DE OGEN. IN GEVAL VAN TOEVALLIG CONTACT MET DE OGEN, SPOELT MEN ONMIDDELLIJK MET OVERVLOEDIG KOUD EN REIN WATER, EN RAADPLEEGT MEN ONMIDDELLIJK EEN ARTS.
BUITEN BEREIK VAN KINDEREN HOUDEN
Reporting of defects that affect safety
GENERAL PRECAUTIONS AND INFORMATION
When repairing, disassembling and reassembling the vehicle, strictly follow the recommendations reported below.
Communicatie van de defecten die invloed hebben op de veiligheid
ALGEMENE VOORZORGSMAATREGELEN EN INFORMATIE
Wanneer men de herstelling, de demontage en hermontage van het voertuig uit-
12
|
voert, moet men zich nauwgezet aan het |
|
volgende advies houden. |
BEFORE DISASSEMBLING COMPO- |
VÓÓR DE DEMONTAGE VAN DE ON- |
NENTS |
DERDELEN |
∙Before disassembling components, remove dirt, mud, dust and foreign bodies from the vehicle. Use the special tools designed for this vehicle, as required.
COMPONENTS REMOVAL
∙Do not loosen and/or tighten screws and nuts using pliers or other tools other than the especially designed wrench.
∙Mark positions on all connection joints (pipes, cables etc.) before separating them, and identify them with distinctive symbols.
∙Each component needs to be clearly marked in order to be identified during assembly.
∙Clean and wash the dismantled components carefully using a low-flammability detergent.
∙Keep coupled parts together since they have "adjusted" to each other due to normal wear and tear.
∙Some components must be used together or replaced altogether.
∙Keep away from heat sources.
∙Verwijder vuil, modder, stof en vreemde voorwerpen van het voertuig, voordat men de demontage van de onderdelen uitvoert. Gebruik, waar voorzien, de speciale gereedschappen die voor dit voertuig ontworpen werden.
DEMONTAGE VAN DE ONDERDELEN
∙Los en/of sluit de bouten en de moeren niet met tangen of andere gereedschappen, maar gebruik steeds de speciale sleutel.
∙Merk de posities op alle verbindingskoppelingen (buizen, kabels, enz.) vooraleer men ze scheidt, en identificeer ze met verschillende onderscheidende tekens.
∙Elk stuk moet duidelijk gemerkt worden, zodat het tijdens de fase van de installatie geïdentificeerd kan worden.
∙Reinig en was de gedemonteerde onderdelen zorgvuldig met een reinigingsmiddel met lage ontvlambaarheidsgraad.
∙Houd de onderling gekoppelde delen bij elkaar, omdat het ene bij het andere "past" als gevolg van de normale slijtage.
normen Algemene 1 / rules General 1
13

1 General rules / 1 Algemene normen
∙Sommige onderdelen moeten samen gebruikt worden of volledig vervangen worden.
∙Houd ze ver van warmtebronnen.
REASSEMBLING COMPONENTS
CAUTION
BEARINGS MUST BE ABLE TO ROTATE FREELY, WITHOUT JAMMING AND/OR NOISE, OTHERWISE THEY NEED REPLACING.
HERMONTAGE VAN DE ONDERDELEN
LET OP
DE KUSSENTJES MOETEN VRIJ DRAAIEN, ZONDER WRIJVINGEN EN/ OF LAWAAI, ANDERS MOETEN ZE VERVANGEN WORDEN.
∙Only use ORIGINAL aprilia SPARE PARTS.
∙Comply with lubricant and consumables use guidelines.
∙Lubricate parts (whenever possible) before reassembling them.
∙When tightening nuts and screws, start from the ones with the largest section or from the internal ones, moving diagonally. Tighten nuts and screws in successive steps before applying the tightening torque.
∙Always replace self-locking nuts, washers, sealing rings, circlips, O-rings (OR), split pins and screws with new ones if their tread is damaged.
∙Gebruik enkel ORIGINELE RESERVEONDERDELEN van aprilia.
∙Gebruik de aanbevolen smeermiddelen en verbruiksmaterialen.
∙Smeer de delen (wanneer mogelijk) vooraleer men ze monteert.
∙Bij het sluiten van de bouten en de moeren, begint men met diegene met de grootste diameter of met de interne, en men werkt diagonaal. Voer het sluiten uit met opeenvolgende passages, vooraleer men het sluitingskoppel toepast.
∙Vervang steeds de zelfborgende moeren, de pakkingen, de dichtingsringen, de elastische
14
∙When assembling the bearings, make sure to lubricate them well.
∙Check that each component is assembled correctly.
∙After a repair or routine maintenance procedure, carry out preride checks and test the vehicle on private grounds or in an area with low traffic density.
∙Clean all coupling surfaces, oil guard rims and gaskets before refitting them. Smear a light layer of lithium-based grease on the oil guard rims. Reassemble bearings with the brand or lot number facing outward (visible side).
ringen, de O-ringen (OR), de splitpennen en de bouten door nieuwe, wanneer ze schade aan de schroefdraad vertonen.
∙Wanneer men de kussentjes monteert, smeert men ze overvloedig.
∙Controleer of elk onderdeel correct gemonteerd is.
∙Na een herstellingshandeling of periodiek onderhoud, voert men de voorafgaande controles uit en test men het voertuig in een privé-zone of in een zone met weinig verkeer.
∙Reinig alle koppelingsvlakken, de randen van de oliekeerringen en de pakkingen vóór de hermontage. Breng een laagje vet op basis van lithium aan op de randen van de oliekeerringen. Hermonteer de kussentjes met het merk of het fabricatienummer naar de buitenkant gericht
(zichtbare kant).
ELECTRIC CONNECTORS
Electric connectors must be disconnected as described below as non-compli- ance with the procedure so described causes irreparable damage to both the connector and the cable harness:
Press the relevant safety hooks, if any.
ELEKTRISCHE CONNECTORS
De elektrische connectors moeten als volgt worden losgemaakt, het niet respecteren van deze procedure leidt tot onherstelbare schade aan de connector en aan de bekabeling:
Indien aanwezig, drukt men op de speciale veiligheidskoppelingen.
normen Algemene 1 / rules General 1
15

1 General rules / 1 Algemene normen
∙Grip and disconnect the two connectors by pulling them in opposite directions.
∙If there are signs of dirt, rust, humidity, etc., clean the connector internal parts carefully using a pressurised air jet.
∙Make sure that the cables are correctly linked to the connector internal terminal ends.
∙Then insert the two connectors making sure that they couple correctly (if the relevant hooks are provided, you will hear them
"click" into place).
CAUTION
TO DISCONNECT THE TWO CONNECTORS, DO NOT PULL THE CABLES.
NOTE
THE TWO CONNECTORS CONNECT ONLY FROM ONE SIDE: CONNECT THEM THE RIGHT WAY ROUND.
∙Grijp de twee connectors vast en verwijder ze, door ze in de tegenovergestelde richting uit elkaar te trekken.
∙In aanwezigheid van vuil, roest, vochtigheid, enz., reinigt men zorgvuldig de binnenkant van de connector met gebruik van een persluchtstraal.
∙Controleer of de kabels correct vastgeklemd zijn aan de interne terminals van de connectors.
∙Plaats vervolgens de twee connectors, en controleer de correcte koppeling (wanneer tegenovergestelde koppelingen aanwezig zijn, hoort men een typische "klik").
LET OP
TREK NIET AAN DE KABELS OM DE TWEE CONNECTORS LOS TE MAKEN.
N.B.
DE TWEE CONNECTORS KUNNEN MAAR OP EEN WIJZE INGEBRACHT WORDEN, PLAATS ZE IN DE JUISTE RICHTING OP DE KOPPELING.
TIGHTENING TORQUE |
SLUITINGSKOPPELS |
16

CAUTION
DO NOT FORGET THAT TIGHTENING TORQUES FOR ALL FASTENING ELEMENTS ON WHEELS, BRAKES, WHEEL PINS AND ANY OTHER SUSPENSION COMPONENTS PLAY A KEY ROLE IN ENSURING THE VEHICLE'S SAFETY AND MUST COMPLY WITH SPECIFIED VALUES. CHECK THE TIGHTENING TORQUES OF FASTENING PARTS ON A REGULAR BASIS AND ALWAYS USE A TORQUE WRENCH TO REASSEMBLE THESE COMPONENTS. FAILURE TO OBSERVE THESE INSTRUCTIONS MAY CAUSE ONE OF THESE COMPONENTS TO BECOME LOOSE AND EVEN DETACHED, THUS BLOCKING A WHEEL, OR OTHERWISE COMPROMISING YOUR PROPERLY HANDLING THE VEHICLE. THIS CAN LEAD TO FALLS, WITH THE RISK OF SERIOUS PERSONAL INJURIES OR EVEN DEATH.
LET OP
VERGEET NIET DAT DE SLUITINGSKOPPELS VAN ALLE BEVESTIGINGSELEMENTEN OP WIELEN, REMMEN, WIELPINNEN EN ANDERE ONDERDELEN VAN DE OPHANGINGEN EEN FUNDAMENTELE ROL SPELEN VOOR HET GARANDEREN VAN DE VEILIGHEID VAN HET VOERTUIG, EN DAT ZE AAN DE VOORGESCHREVEN WAARDEN MOETEN GEHOUDEN WORDEN. CONTROLEER REGELMATIG DE SLUITINGSKOPPELS VAN DE BEVESTIGINGSELEMENTEN, EN GEBRUIK STEEDS EEN DYNAMOMETRISCHE SLEUTEL WANNEER MEN ZE HERMONTEERT. WANNEER MEN DEZE WAARSCHUWINGEN NIET RESPECTEERT, ZOU ÉÉN VAN DEZE ELEMENTEN KUNNEN LOSSEN EN LOSKOMEN EN EEN WIEL BLOKKEREN OF ANDERE PROBLEMEN VEROORZAKEN DIE DE MANOEUVREERBAARHEID NEGATIEF KUNNEN BEÏNVLOEDEN ZODAT MEN KAN VALLEN MET HET RISICO OP ERNSTIGE LETSELS OF DE DOOD.
normen Algemene 1 / rules General 1
17
1 General rules / 1 Algemene normen
18

MXV 450
Chap. 02
Vehicle
Hst. 02
Voertuing
19

02_01
2 Vehicle / 2 Voertuing
20

Voertuing 2 / Vehicle 2
02_02
Arrangement of the main |
Plaats van de |
||
components (02_02) |
hoofdcomponenten (02_02) |
||
KEY |
|
Legende |
|
1. |
Coolant left side radiator |
1. |
Linker radiator koelvloeistof |
2. |
Left rider footrest |
2. |
Linker voetensteun van de be- |
3. |
Fuel tank cap |
|
stuurder |
4. |
Fuel tank |
3. |
Dop van de brandstoftank |
5. |
Gear shift lever |
4. |
Brandstoftank |
6. |
Saddle |
5. |
Commandohendel voor het |
7. |
Fuse holder |
|
schakelen |
8. |
Rear fork |
6. |
Zadel |
9. |
Drive chain |
7. |
Zekeringenhouder |
10. |
Rear left side fairing |
8. |
Achtervork |
|
21 |
|
|
11.Air filter
12.Front left side fairing
13.Rear right side fairing
14.Pump with rear brake fluid reservoir
15.Right rider footrest
16.Front right side fairing
17.Coolant right side radiator
18.Kick-start pedal
19.Rear brake control lever
20.Air filter housing
9.Transmissieketting
10.Linker zijplaatje achteraan
11.Luchtfilter
12.Linker zijplaatje vooraan
13.Rechter zijplaatje achteraan
14.Pomp met vloeistoftank achterrem
15.Rechter voetensteun van de bestuurder
16.Rechter zijplaatje vooraan
17.Rechter radiator koelvloeistof
18.Start met pedaal
19.Commandohendel van de achterrem
20.Doos luchtfilter
Dashboard (02_03) |
Legenda (02_03) |
2 Vehicle / 2 Voertuing
22

Voertuing 2 / Vehicle 2
02_03
KEY |
|
Legende |
|
1. |
Throttle grip |
1. |
Gashandvat |
2. |
Clutch control lever |
2. |
Commandohendel van de kop- |
3. |
Mapping selection |
|
peling |
4. |
Engine stop switch |
3. |
Selectie van de lokalisatie |
5. |
Front brake lever |
4. |
SCHAKELAAR VOOR HET |
|
|
|
STILLEGGEN VAN DE MOTOR |
|
|
5. |
Hendel van de voorrem |
23

2 Vehicle / 2 Voertuing
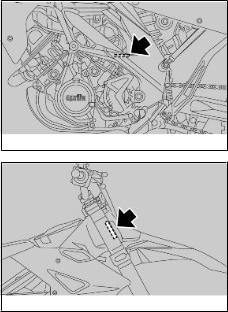
Mapping selection procedure (02_04)
Selects between the two ECU mappings.
If the key is pressed, the vehicle is used with the SOFT mapping; with the key held down, the vehicle is used with the HARD mapping.
02_04
Procedure van de selectie van de lokalisatie (02_04)
Dient voor de selectie tussen twee lokalisaties van de centrale.
Met de toets ingedrukt, wordt het voertuig met de lokalisatie SOFT gebruikt; met de toets niet ingedrukt, wordt het voertuig met de lokalisatie HARD gebruikt.
Engine stop switch (02_05)
It acts as an engine cut-off or emergency stop switch.
Press the button (1) and the engine stops.
CAUTION
02_05
DO NOT ACTIVATE THE ENGINE STOP SWITCH WHILE RIDING THE VEHICLE.
Stopschakelaar motor (02_05)
Dit is een veiligheidsschakelaar of een noodstopschakelaar.
Wanneer op de knop (1) wordt gedrukt, wordt de motor stilgelegd.
LET OP
RAAK DE STOPSCHAKELAAR VAN DE MOTOR NIET AAN TIJDENS HET RIJDEN.
24
02_06
02_07
Opening the saddle (02_06, 02_07)
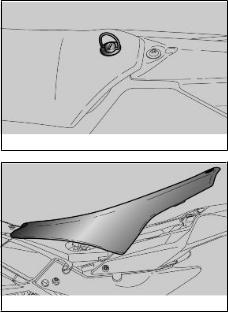
∙Turn the fastening clip.
∙Slide off the saddle backwards.
Zadel openen (02_06, 02_07)
∙Draai de bevestigingsclip.
∙Verwijder het zadel langs achter.
∙ Remove the saddle. |
∙ Verwijder het zadel. |
Identification (02_08, 02_09) |
Identificatie (02_08, 02_09) |
Write down the chassis and engine number in the specific space of this booklet. The chassis number can be used to order spare parts.
Het is goed om het framenummer en het motornummer op de speciale plaats in dit boekje te schrijven. Het framenummer kan gebruikt worden voor de aankoop van reserveonderdelen.
Voertuing 2 / Vehicle 2
25
ENGINE NUMBER
The engine number is stamped on the base of the left side engine crankcase.
Engine No ....................
02_08
MOTORNUMMER
Het motornummer is gedrukt op het onderstel van de motorcarter, op de linker kant.
Motor nr....................
CHASSIS NUMBER
The chassis number is stamped on the right side of the headstock.
Chassis No....................
FRAMENUMMER
Het framenummer is gedrukt op de kop van het stuur, rechter kant.
Frame nr....................
02_09
2 Vehicle / 2 Voertuing
26
MXV 450
Chap. 03
Use
Hst. 03
Gebruik
27

3 Use / 3 Gebruik
Checks |
Controles |
CAUTION
BEFORE SETTING-OFF, ALWAYS CARRY OUT A PRELIMINARY CHECK OF THE VEHICLE, FOR CORRECT AND SAFE OPERATION. FAILURE TO DO SO MAY LEAD TO SEVERE PERSONAL INJURY OR VEHICLE DAMAGE. DO NOT HESITATE TO CONTACT AN OFFICIAL aprilia DEALER IF YOU DO NOT UNDERSTAND HOW SOME CONTROLS WORK OR IF A MALFUNCTION IS DETECTED OR SUSPECTED. CHECKS DO NOT TAKE LONG AND RESULT IN SIGNIFICANTLY ENHANCED SAFETY.
LET OP
VOER VOOR HET WEGRIJDEN ALTIJD EEN CONTROLE VAN HET VOERTUIG UIT OM EEN CORRECTE EN VEILIGE WERKZAAMHEID TE GARANDEREN. HET NIET UITVOEREN VAN DEZE HANDELINGEN KAN ERNSTIGE LETSELS AAN UZELF OF SCHADE AAN HET VOERTUIG VEROORZAKEN. AARZEL NIET OM ZICH TE WENDEN TOT EEN Officiële aprilia Dealer, WANNEER MEN DE WERKING VAN BEPAALDE COMMANDO'S NIET BEGRIJPT OF WANNEER MEN ONREGELMATIGHEDEN IN DE WERKING MERKT OF VERMOEDT. DE NODIGE TIJD VOOR EEN CONTROLE IS UITERST BEPERKT, EN DE VEILIGHEID KOMT OP DE EERSTE PLAATS.
PRE-RIDE CHECKS
Front and rear disc brake |
Check |
operation. Check brake |
|
lever travel when stationary and |
|
|
brake fluid level. Check for leaks. |
|
|
Check |
brake pads for wear. If |
|
necessary top-up with brake fluid. |
|
|
|
|
VOORAFGAANDE CONTROLES
Voorste en achterste schijfrem |
Controleer de werking, de loze slag |
|
van de commandohendels, het peil |
|
van de vloeistof en eventuele |
|
lekken. Controleer de slijtage van |
|
de pastilles. Indien nodig vult men |
|
remvloeistof bij. |
|
|
28

Throttle grip |
Check that the throttle functions |
|||
|
smoothly and can be fully opened |
|||
|
and closed in all steering positions. |
|||
|
Adjust |
and/or |
lubricate |
if |
|
necessary. |
|
|
|
|
|
|
||
Engine oil |
Check and/or top-up as required. |
|
||
Gearbox oil |
Check and/or top-up as required. |
|
||
|
|
|||
Wheels/ tyres |
Check that tyres are in good |
|||
|
condition. Check inflation pressure |
|||
|
and check for tyre wear and |
|||
|
damage. |
|
|
|
|
Remove any foreign objects stuck |
|||
|
in the tread. |
|
|
|
|
|
|
||
Brake levers |
Check they function smoothly. |
|
||
|
Lubricate joints and adjust travel if |
|||
|
necessary. |
|
|
|
|
|
|||
Clutch |
Check the gear lever and the |
|||
|
empty travel for correct operation. |
|||
|
The clutch must work without |
|||
|
gripping and/or slipping. |
|
||
|
|
|||
Steering |
Check that the rotation is uniform, |
|||
|
smooth and there are no signs of |
|||
|
clearance or slackness. |
|
||
|
|
|||
Fastener elements |
Check that the fastener elements |
|||
|
are not loose. |
|
|
|
|
Adjust or tighten if necessary. |
|
||
|
|
|
||
Drive chain |
Check it for backlash. |
|
||
|
|
|
|
|
Gashendel |
Controleer of hij zacht werkt en of |
|||
|
men hem volledig kan openen en |
|||
|
sluiten, in alle posities van het |
|||
|
stuur. Registreer |
en/of |
smeer |
|
|
indien nodig. |
|
|
|
|
|
|||
Motorolie |
Controleer en/of vul bij indien |
|||
|
nodig. |
|
|
|
Olie van de versnellingsbak |
Controleer en/of vul bij indien |
|||
|
nodig. |
|
|
|
|
|
|||
Wielen/banden |
Controleer de conditie van de |
|||
|
rijvlakken van de banden, de |
|||
|
spanning, de slijtage en eventuele |
|||
|
schade. |
|
|
|
|
Verwijder |
eventueel aanwezige |
||
|
vreemde voorwerpen uit het profiel |
|||
|
van het rijvlak. |
|
|
|
|
|
|||
Remhendels |
Controleer of ze zacht werken. |
|||
|
Smeer de bewegingsplaatsen en |
|||
|
regel de slag indien nodig. |
|
||
|
|
|||
Koppeling |
Controleer de werking en de lege |
|||
|
loop van de commandohendel. De |
|||
|
koppeling moet zonder rukken en/ |
|||
|
of slippen werken. |
|
|
|
|
|
|
|
|
Stuur |
Controleer |
of |
het |
draaien |
|
homogeen en vloeiend, en zonder |
|||
|
speling of het lossen ervan |
|||
|
gebeurt. |
|
|
|
|
|
|
|
|
Gebruik 3 / Use 3
29

3 Use / 3 Gebruik
Fuel tank |
Check the level and refill if |
|
necessary. |
|
Check the circuit for leaks or |
|
obstructions. |
|
Check that the tank cover closes |
|
correctly. |
|
|
Coolant |
The coolant level in the radiator |
|
must be such as to cover the grids. |
|
|
ENGINE STOP SWITCH |
Check function. |
|
|
Bevestigingselementen |
Controleer |
of |
de |
|
bevestigingselementen niet gelost |
||
|
zijn. |
|
|
|
Stel ze af of sluit ze eventueel. |
|
|
|
|
|
|
Transmissieketting |
Controleer de speling. |
|
|
|
|
||
Brandstoftank |
Controleer het peil, en tank indien |
||
|
nodig. |
|
|
|
Controleer |
eventuele lekken |
of |
|
afsluitingen van het circuit. |
|
|
|
Controleer de correcte sluiting van |
||
|
de brandstofdop. |
|
|
|
|
||
Koelvloeistof |
Het peil in de radiator moet zodanig |
||
|
zijn dat de platen van de radiator |
||
|
bedekt zijn. |
|
|
|
|
|
|
Schakelaar voor het stilleggen van |
Controleer de correcte werking. |
|
|
de motor (ENGINE STOP) |
|
|
|
|
|
|
|
Refuelling (03_01)
Use premium unleaded petrol as per DIN 51 607, minimum octane rating of 95 (NORM) and 85 (NOMM).
To refuel:
∙Unscrew and remove the fuel tank cap (1).
∙Refuel.
03_01
Tanken (03_01)
Gebruik loodvrije superbenzine volgens
DIN 51 607, met een minimum octaangehalte van 95 (N.O.R.M.) en 85 (N.O.M.M.).
Voor het tanken, handelt men als volgt:
∙Draai de dop van de brandstoftank (1) los, en verwijder hem.
∙Voer het tanken van brandstof uit.
30
 Loading...