


RICE COOKER SRK 400 A2
RICE COOKER |
URZĄDZENIE |
Operating instructions |
DO GOTOWANIA RYŻU |
|
Instrukcja obsługi |
RIZSFŐZŐ |
VAŘIČ RÝŽE |
Használati utasítás |
Návod k obsluze |
VARIČ RYŽE |
REISKOCHER |
Návod na obsluhu |
Bedienungsanleitung |
IAN 109177
Before reading, unfold the page containing the illustrations and familiarise yourself with all functions of the device.
Przed przeczytaniem proszę rozłożyć stronę z ilustracjami, a następnie proszę zapoznać się z wszystkimi funkcjami urządzenia.
Olvasás előtt kattintson az ábrát tartalmazó oldalra és végezetül ismerje meg a készülék mindegyik funkcióját.
Před čtením si otevřete stranu s obrázky a potom se seznamte se všemi funkcemi přístroje.
Pred čítaním si odklopte stranu s obrázkami a potom sa oboznámte so všetkými funkciami prístroja.
Klappen Sie vor dem Lesen die Seite mit den Abbildungen aus und machen Sie sich anschließend mit allen Funktionen des Gerätes vertraut.
GB |
Operating instructions |
Page |
1 |
PL |
Instrukcja obsługi |
Strona |
17 |
HU |
Használati utasítás |
Oldal |
33 |
CZ |
Návod k obsluze |
Strana |
49 |
SK |
Návod na obsluhu |
Strana |
65 |
DE / AT / CH |
Bedienungsanleitung |
Seite |
81 |

A
B
Table of contents
GB
Introduction . . . . . . . . . . . . . . . . . . . . . . . . . . . . . . . . . . . . . . . . . . . . . . . . . . . 2
Copyright. . . . . . . . . . . . . . . . . . . . . . . . . . . . . . . . . . . . . . . . . . . . . . . . . . . . . . . . . . . . . . . 2
Intended use . . . . . . . . . . . . . . . . . . . . . . . . . . . . . . . . . . . . . . . . . . . . . . . . . . 2
Scope of delivery/Preparation . . . . . . . . . . . . . . . . . . . . . . . . . . . . . . . . . . . 3
Disposal of packaging. . . . . . . . . . . . . . . . . . . . . . . . . . . . . . . . . . . . . . . . . . . . . . . . . . . . . 3
Appliance description . . . . . . . . . . . . . . . . . . . . . . . . . . . . . . . . . . . . . . . . . . . 4
Technical details . . . . . . . . . . . . . . . . . . . . . . . . . . . . . . . . . . . . . . . . . . . . . . . 4
Safety instructions . . . . . . . . . . . . . . . . . . . . . . . . . . . . . . . . . . . . . . . . . . . . . 4
Using the rice cooker . . . . . . . . . . . . . . . . . . . . . . . . . . . . . . . . . . . . . . . . . . . 7
Preparing pretreated rice. . . . . . . . . . . . . . . . . . . . . . . . . . . . . . . . . . . . . . . . . . . . . . . . . . . 7 Preparing rice that has not been pretreated . . . . . . . . . . . . . . . . . . . . . . . . . . . . . . . . . . . . 8 Steam cooking . . . . . . . . . . . . . . . . . . . . . . . . . . . . . . . . . . . . . . . . . . . . . . . . . . . . . . . . . . 11
Fault rectification. . . . . . . . . . . . . . . . . . . . . . . . . . . . . . . . . . . . . . . . . . . . . . 13
Cleaning. . . . . . . . . . . . . . . . . . . . . . . . . . . . . . . . . . . . . . . . . . . . . . . . . . . . . 13
Storage . . . . . . . . . . . . . . . . . . . . . . . . . . . . . . . . . . . . . . . . . . . . . . . . . . . . . 15
Disposal of the appliance . . . . . . . . . . . . . . . . . . . . . . . . . . . . . . . . . . . . . . . 15
EC Declaration of Conformity information . . . . . . . . . . . . . . . . . . . . . . . . . 15
Importer. . . . . . . . . . . . . . . . . . . . . . . . . . . . . . . . . . . . . . . . . . . . . . . . . . . . . 15
Warranty . . . . . . . . . . . . . . . . . . . . . . . . . . . . . . . . . . . . . . . . . . . . . . . . . . . . 16
Service . . . . . . . . . . . . . . . . . . . . . . . . . . . . . . . . . . . . . . . . . . . . . . . . . . . . . . 16
Read the operating instructions thoroughly, particularly the safety instructions.
SRK 400 A2 |
1 |

Introduction
GB |
Congratulations on the purchase of your new appliance. |
|
|
|
You have decided to purchase a high-quality product. These operating instruc- |
|
tions are a constituent of this product. They contain important information with |
|
regard to safety, use and disposal. Before using the product, familiarise yourself |
|
with all operating and safety instructions. Use this appliance only as described |
|
and only for the specified areas of application. In addition, pass these operating |
|
instructions on to whoever might acquire the appliance at a future date. |
Copyright
This documentation is subject to copyright protection.
Any copying or reproduction of it, including as extracts, as well as the reproduction of images, also in an altered state, is only permitted with the written authorisation of the manufacturer.
Intended use
This appliance is used for cooking rice and steaming food such as vegetables or fish.
This appliance is intended exclusively for use in domestic households. Do not use it for commercial applications!
 WARNING
Risks from non-intended use
Risks can arise if the appliance is used for non-intended purposes and/or other types of usage.
► Only use the appliance for its intended purpose.
► Observe the procedures described in these operating instructions.
NOTE
►Risks can arise if the appliance is used for non-intended purposes and/ or other types of usage. Use the appliance exclusively for its intended purposes. Observe the procedures described in these operating instructions.
Claims of any kind for damage resulting from unintended use, incompetent repairs, unauthorised modification or the use of unauthorised spare parts will not be accepted. The operator alone bears liability.
2 |
SRK 400 A2 |

Scope of delivery/Preparation
This appliance is supplied with the following components as standard: |
GB |
|
|
||
Rice Cooker incl. cooking bowl and steam cooking insert |
|
|
|
Measuring cup |
|
|
Plastic spoon |
|
Power cord with safety plug |
|
|
|
Operating instructions |
|
1) |
Remove all parts of the appliance and the operating instructions from the |
|
|
carton. |
|
2) |
Remove all packaging materials as well as foils and stickers. |
|
3) |
Clean all parts of the appliance as described in the section “Cleaning”. |
|
NOTE
►Check the contents for completeness and for signs of visible damage.
►If the contents are not complete, or are damaged due to defective packaging or through transportation, contact the Service Hotline (see chapter Service).
Disposal of packaging
The packaging protects the appliance from transport damage. The packaging materials are selected according to their environmental friendliness and disposal attributes - and are therefore recyclable.
Recirculation of packaging into the material flow saves on raw material and reduces the amount of waste generated. Dispose of packaging material no longer  needed in line with applicable local regulations.
NOTE
►If possible, keep the appliance's original packaging during the warranty period so that, in the event of a warranty claim, you can pack the appliance properly for its return.
SRK 400 A2 |
3 |
Appliance description
GB |
Figure A: |
|
|
|
|
||
|
1 |
Steam cooking insert |
|
|
2 |
Release |
|
|
3 |
Steam outlet opening |
|
|
4 |
Condensation collector |
|
|
5 |
Power cable |
|
|
6 |
Orange control lamp “ |
” (Keep-warm) |
|
7 |
Function selector |
|
|
8 |
Socket for mains adapter |
|
|
9 |
Red control lamp “ |
” (Cooking) |
|
0 |
On/O switch |
|
|
q Bracket for the plastic spoon |
||
|
w Cooking bowl |
|
|
|
Figure B: |
|
|
|
e Measuring cup |
|
|
|
r Plastic spoon |
|
|
Technical details
Mains voltage |
220 - 240 V ~, 50 Hz |
Rated power |
400 W |
Keep-warm mode output |
45 W |
Safety instructions
 RISK OF ELECTRIC SHOCK
►Connect the rice cooker only to correctly installed and earthed power sockets supplying a voltage that corresponds with the details given on the appliance identification plate.
►Always remove the plug from the power socket when you move or fill the appliance, in the event of problems, before cleaning the appliance and when the cooker is not in use!
►Never disconnect the appliance by pulling the power cable from the power socket. Always disconnect the plug itself.
4 |
SRK 400 A2 |

RISK OF ELECTRIC SHOCK
GB
►Never touch the appliance plug with wet or moist hands.
►Should the appliance fall into liquid, IMMEDIATELY remove the power plug from the socket. Then, do not operate the appliance again until it has been inspected by an approved service company.
►Never subject the appliance to the e ects of moisture, and do not use it outdoors.
►Do not use the rice cooker if you are standing on a wet floor or if your hands and/or the appliance are wet.
►Position the power cable so that it does not come into contact with hot or sharp-edged objects.
►Do not kink or crush the power cable and do not wind it around the appliance.
►To avoid risks, arrange for defective plugs and/or power cables to be replaced at once by qualified technicians or our Customer Service Department.
 Never submerge the appliance in water or other liquids.
 WARNING! RISK OF INJURY!
►Never leave the appliance unattended during operation.
►This appliance may be used by children aged 8 years or over if they are supervised or have been told how to use the appliance safely and are aware of the potential risks. Cleaning and user maintenance tasks must not be carried out by children unless they are aged 8 years or more and are supervised. The appliance and its connecting cable must be kept away from children younger than 8 years old.
SRK 400 A2 |
5 |
WARNING! RISK OF INJURY!
GB
►This appliance can be used by persons with reduced physical, sensory or mental capabilities or lack of experience and knowledge if they have been given supervision or instruction concerning safe use of the appliance, and if they are aware of the potential risks.
►Children must not play with the appliance.
►Allow the appliance and accessories to cool completely before cleaning and storing them.
►Do not use an external timing switch or a separate remote control system to operate the appliance.
►The escaping water vapour is extremely hot! Risk of Burns!
 WARNING! RISK OF INJURY!
 CAUTION! Hot steam escapes from the steam outlet
  opening and upon opening the cover! Risk of scalding!
 WARNING! RISK OF INJURY!
Attention! Hot surface!
This symbol warns of hot surfaces on the appliance!
CAUTION - PROPERTY DAMAGE!
►Never cover the lid with a cloth or the like during cooking.
►Never place the appliance near sources of heat.
►Never open the housing. If you do, the safety concept of the appliance can no longer be assured and the warranty becomes void.
►Only use the accessory parts provided with the appliance and never use the appliance without first inserting the cooking bowl.
6 |
SRK 400 A2 |

Using the rice cooker
The appliance can be used to cook rice and steam other food at the same time. |
GB |
|
|
Experiment with finding the right quantity of water and the right cooking time for |
|
the various foods. |
|
NOTE
►Before first using the appliance, fill the cooking bowl w up as far as the CUP marking “4”, and allow to boil for around 30 min (see chapter entitled “Steam cooking” for operation). Now throw this water away, allow the appliance to cool down and then clean the cooking bowl w thoroughly.
Preparing pretreated rice
You will find pretreated rice on the retail market under the name “Quick cook rice”, “Easy cook rice” or the like.
NOTE
►Coat the inside of the cooking bowl w evenly with a little fat or vegetable oil to achieve a better cooking result.
►Never exceed the 5 CUP/1 Litre scale in the cooking bowl w. If you do, the water may overflow!
1)Open the lid by pressing the release 2 and lifting the lid simultaneously.
2)Remove the cooking bowl w.
3)Pour the rice and the amount of water specified on the rice packet into the cooking bowl w.
NOTE
►Always prepare at least enough rice so that the when the water is added it reaches at least the CUP marking “2”. Failure to do so could lead to poor cooking results!
4)Place the cooking bowl w in the appliance. Ensure that...
–... there is no moisture or rice on the outside of the cooking bowl w - this will prevent soiling of the cooking area. If necessary, wipe the outside with a clean cloth.
–... the cooking bowl w is not skewed or tilted when being placed in the rice cooker housing. Always insert the cooking bowl w correctly and precisely into the rice cooker housing. Otherwise, the safety shut-o of the appliance may trigger and the appliance will not allow itself to be switched on.
SRK 400 A2 |
7 |
|
GB |
|
5) |
Now close the lid. |
|
|
|
6) Connect the power cable 5 to the socket 8 and insert the mains plug into |
|||
|
|
|
|
the power socket. |
|
|
|
|
7) |
Switch the appliance on using the On/O switch 0. The orange control |
|
|
|
|
|
lamp “ |
”6 lights up. |
|
|
|
8) |
Press down the function selector switch 7 and cook the rice for the amount |
|
|
|
|
|
of time specified on the rice packet. |
|
|
|
|
9) |
When the rice is ready: |
|
|
|
|
|
– If you want to eat the rice immediately, disconnect the plug from the |
|
|
|
|
|
mains power socket. |
|
– If you wish to keep the rice warm (max. 2 hours), press the function selector switch 7 upwards.
10) When you have removed the rice, switch the device o at the On/O switch 0 and pull the power plug out of the mains power socket.
NOTE
►Some types of easy-cook rice still have to swell after cooking. Always follow the preparation instructions on the packaging of the rice.
CAUTION - PROPERTY DAMAGE!
►Use only the supplied plastic spoon to remove the rice r. Other spoons may cause damage to the anti-stick coating of the cooking bowl w.
NOTE
►You can insert the plastic spoon r into the bracket q at the edge of the rice cooker. This is always ready to hand!
Preparing rice that has not been pretreated
NOTE
►Coat the inside of the cooking bowl w evenly with a little fat or vegetable oil to achieve a better cooking result.
1)Open the lid by pressing the release 2 and lifting the lid simultaneously.
8 |
SRK 400 A2 |

2) Remove the cooking bowl w.
|
GB |
|
NOTE |
||
|
||
|
|
►If the cooking bowl w is damaged, do not continue to use it! The damage may have caused the safety shut-o of the appliance to activate, and the appliance will not allow itself to be switched on.
3)Measure the desired quantity of rice with the help of the supplied measuring cup e.
As a general rule: A level measuring cup e filled with rice is a portion for one person. Determine the right quantity of rice and water for yourself by making a few cooking attempts.
4)Thoroughly wash and drain the rice. This may remove some of the nutrition, but not washing the rice could lead to poor cooking results and increased foam and steam formation in the cooking bowl w. Always pay attention to the rice manufacturer’s preparation instructions
5)After washing the rice, pour it rice into the cooking bowl w and smooth it out.
6)Then add water up to the relevant CUP markings in the cooking bowl w.
–2 Measuring cups of rice = Water up to CUP marking “2”
–3 Measuring cups of rice = Water up to CUP marking “3”
–4 Measuring cups of rice = Water up to CUP marking “4”
–5 Measuring cups of rice = Water up to CUP marking “5”
Subject to taste preferences, salt can also be added to the rice.
NOTE
►Never exceed the 5 CUP/1 Litre scale in the cooking bowl w. If you do, the water may overflow!
►Always prepare at least 2 portions of rice. Failure to do so could lead to poor cooking results!
►The cooking time can be shortened by using hot water. However, if you do this use a little less water than is indicated by the CUP marking in the cooking bowl w.
►Subject to the type/sort of rice being prepared, it could be that you may have to insert a little more or less water to achieve an optimal cooking result. Vary the amount of water in accordance with your individual experiences and personal preference.
SRK 400 A2 |
9 |
NOTE
GB
► If you would like to use a di erent container than the measuring cup e that is provided, the "Litre scale" in the cooking bowl w can be used for orientation. For example, if you want to cook 0.6 litres of rice, you must measure out this quantity using a measuring cup and put the rice into the cooking bowl w. Then put water into the cooking bowl w, so that the water is up to the "0.6 l" mark.
The scaling represents the value that results from the total quantity of rice with the water added.
For this reason, do not use the scale to measure out liquids or food, since it only applies to the rice cooker!
7) After filling the cooking bowl w, put it back into the rice cooker housing.
Ensure that...
–... there is no moisture or rice on the outside of the cooking bowl w - this will prevent soiling of the cooking area. If necessary, wipe the outside with a clean cloth.
–... the cooking bowl w is not skewed or tilted when being placed in the rice cooker housing. Always insert the cooking bowl w correctly and precisely into the rice cooker housing. Otherwise, the safety shut-o of the appliance may trigger and the appliance will not allow itself to be switched on.
8)Now close the lid.
9)Connect the power cable 5 to the socket 8 and insert the mains plug into the mains socket.
10)Switch the appliance on using the On/O switch 0. The orange control lamp “

 ” 6 lights up.
 WARNING! RISK OF INJURY!
►During the cooking process steam is emitted from the steam outlet opening 3. NEVER hold your hands or other parts of the body over the steam outlet opening 3 during the cooking process. Risk of scalding!
11)Press the function selector switch 7 downwards. The orange control lamp “

 ” 6 goes out and the red control lamp “

 ” 9 lights up.
NOTE
►If the cooking bowl w is not correctly positioned, the function selector switch 7 cannot be moved to the "Cook" setting.
10 |
SRK 400 A2 |

As soon as the rice is cooked, the rice cooker switches itself automatically
back to the keep-warm setting. The red control lamp “

 ” 9 goes out and the GB orange control lamp “

 ” 6 lights up again.
NOTE
►You can keep the rice warm for approx. 2 hours if you like. However, the taste and the degree of cooking of the rice may change the longer it is kept warm.
12) Open the lid. The rice is now ready to eat.
CAUTION - PROPERTY DAMAGE!
►Use only the supplied plastic spoon to remove the rice r. Other spoons may cause damage to the anti-stick coating.
NOTE
►You can insert the plastic spoon r into the bracket q at the edge of the rice cooker. This way it is always ready to hand!
If you do not eat the rice immediately:
–Do not remove the lid whilst keeping the rice warm.
–Do not keep the rice warm for longer than 2 hours.
 WARNING! RISK OF ELECTRIC SHOCK!
►Always pull the power plug out of the power socket when no longer using the rice cooker. Risk of electric shock!
13)When you have removed the rice, switch the device o at the On/O switch 0 and pull the power plug out of the mains power socket.
Steam cooking
 WARNING! RISK OF INJURY!
Do not lift up the steam cooking insert 1 during the steaming process - risk of scalding from escaping steam. The steam cooking insert 1 becomes hot during the steaming process. When taking hold of the steam cooking insert 1, use oven cloths or something similar to lift it from the cooking bowl w.
SRK 400 A2 |
11 |
NOTE
GB |
|
|
|
|
► Ensure that the cooking bowl w is also inserted correctly when it is used |
||||
|
||||
|
for steaming. The cooking bowl w must not be damaged. Otherwise, the |
|||
|
safety shut-o of the appliance may be activated and the appliance will |
|||
|
not allow itself to be switched on. |
|
||
|
1) Pour the desired quantity of water into the cooking bowl w. |
|||
|
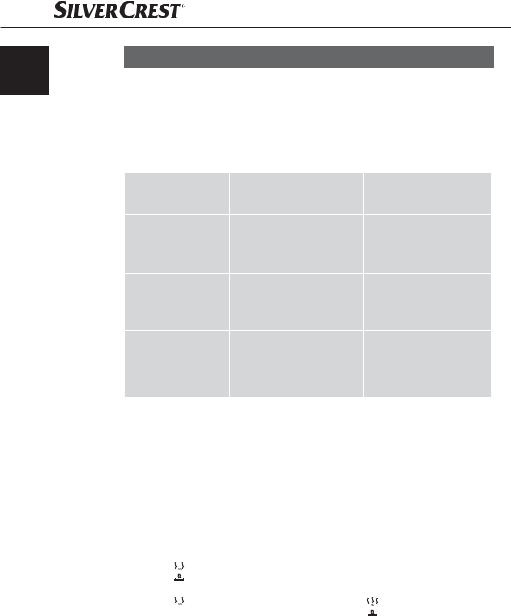
Take note of the examples given in the following table. |
|||
|
Vegetables |
Quantity of water |
Steaming time |
|
|
Green beans, |
1 Measuring cup e |
25 minutes |
|
|
cabbage, carrots |
|||
|
|
|
||
|
Zucchini |
1 Measuring cup e |
10 minutes |
|
|
Kidney beans, |
|
|
|
|
brown beans, |
1 Measuring cup e |
15 minutes |
|
|
asparagus, spinach |
|
|
|
2)Cut the food into small pieces so that it will fit into the steam cooking insert 1 without problems. Cut the carrots into small pieces and divide up the florets of the cauliflower or broccoli.
3)Place the food to be steamed in the steam cooking insert 1.
4)Place the steam cooking insert 1 onto the cooking bowl w.
5)Now close the lid.
6)Connect the power cable 5 to the socket 8 and insert the mains plug into the mains socket.
7)Switch the appliance on using the On/O switch 0. The orange control lamp “

 “ 6 lights up.
8)Press the function selector switch 7 downwards. The orange control
lamp “

 ” 6 goes out and the red control lamp “

 ” 9 lights up. The steaming process begins.
9)Once the specified time has elapsed, press the function selector switch 7 upwards. The appliance does not switch o automatically or switch to keepwarm mode.
10)Switch the device o at the On/O switch 0 and pull the power plug out of the mains power socket.
12 |
SRK 400 A2 |

Fault rectification
|
|
GB |
Defect |
Cause |
Rectification |
|
The rice cooker is not |
Insert the plug into a |
Appliance not |
plugged in. |
mains power socket. |
|
|
|
working. |
|
Use a di erent wall |
|
The mains power socket is |
|
|
defective. |
power socket. |
The function selector |
The cooking bowl w is |
Insert the cooking |
switch 7 keeps |
not seated/not seated |
bowl w correctly into |
springing up again. |
correctly. |
the rice cooker. |
Cleaning
 WARNING - RISK OF ELECTRIC SHOCK!
►Always remove the plug from the mains power socket before you clean the appliance.
► Under no circumstances must the rice cooker be submerged in water or held under running water.
►No liquid must be allowed to penetrate the inside of the rice cooker or the onto the heating plate!
 WARNING - RISK OF INJURY!
► Allow the appliance to cool down before cleaning it.
CAUTION - PROPERTY DAMAGE!
►Do not clean the attachments of your hand blender in the dishwasher, as it may cause damage to them.
►Do not use aggressive, chemical or abrasive cleaning agents! They could irreparably damage the upper surfaces!
SRK 400 A2 |
13 |

|
■ Always empty the condensation collector after use 4. |
|||
GB |
■ Clean the rice cooker casing and the heating plate with a dry cloth. Remove |
|||
|
stubborn soiling with a moderately damp, well wrung-out cloth. |
|||
|
■ Remove the closure of the steam outlet opening 3 for cleaning and give the |
|||
|
closure a thorough cleaning with water. When replacing the closure, ensure |
|||
|
that it is correctly inserted. The closure must be pressed down completely so |
|||
|
that it sits firmly in the intended recess. |
|||
|
|
|
|
|
|
|
|
|
|
|
|
|
|
|
■Clean the cooking bowl w, the steam cooking insert 1, the plastic spoon r and the measuring cup e in water containing a mild detergent. Then rinse all parts with plenty of clean water to remove all residual detergent.
■Dry everything with a dry cloth and ensure that the appliance is completely dry before using it again.
TIP FOR EASY CLEANING
►Pour a cup of water containing a mild detergent into the cooking bowl w before cleaning the cooking bowl w.
►Insert the cooking bowl w into the rice cooker.
►Switch the rice cooker to "

 " and wait until the water boils.
►Disconnect the plug from the power socket and wait until the appliance has cooled down.
If you now wash the cooking bowl w, soiling will be much easier to remove.
14 |
SRK 400 A2 |

Storage
Store the cleaned rice cooker in a dry and dust-free location. |
GB |
|
Disposal of the appliance
Never dispose of the appliance in your normal domestic waste. This product is subject to the provisions of European Directive 2012/19/EU.
Dispose of the appliance through an approved disposal centre or at your community waste facility. Please observe currently applicable regulations. Please contact your waste disposal centre should you be in any doubt.
EC Declaration of Conformity information
With regard to conformity with essential requirements and other relevant provisions, this appliance complies with the requirements of the Electromagnetic Compatibility Directive 2004/108/EC, the ErP Guidelines 2009/125/EC and the Low Voltage Directive 2006/95/EC.
The full original Declaration of Conformity is available from the importer.
Importer
KOMPERNASS HANDELS GMBH
BURGSTRASSE 21
44867 BOCHUM GERMANY www.kompernass.com
SRK 400 A2 |
15 |
Warranty
GB |
The warranty provided for this appliance is 3 years from date of purchase. This |
|
|
|
appliance has been manufactured with care and inspected meticulously prior to |
|
delivery. |
|
Please retain your receipt as proof of purchase. In the event of a warranty claim, |
|
please contact the Customer Service by telephone. This is the only way to guar- |
|
antee free dispatch of your goods. |
NOTE
►This warranty is valid only for material or manufacturing faults, not for transport damage, parts subject to wear and tear or for damage to fragile parts, e.g. switches.
This appliance is intended solely for private use and not for commercial purposes. The warranty is deemed void if this product has been subjected to improper or inappropriate handling, abuse or modifications not carried out by one of our authorised service centres.
Your statutory rights are not restricted in any way by this warranty.
The warranty period is not prolonged by repairs made under the warranty.
This also applies to replaced and repaired parts.
Damage and defects present at the time of purchase must be reported immediately after unpacking, or no later than two days after the date of purchase.
Repairs made after expiry of the warranty period are chargeable.
Service
 Service Great Britain
Tel.: 0871 5000 720 (£ 0.10/Min.)
E-Mail: kompernass@lidl.co.uk
IAN 109177
Hotline availability: Monday to Friday 08:00 - 20:00 (CET)
16 |
SRK 400 A2 |
Spis treści
. . . . . . . . . . . . . . . . . . . . . . . . . . . . . . . . . . . . . . . . . . . . . . . . . . . . . . .Wstęp |
18 |
|
Prawo autorskie . . . . . . . . . . . . . . . . . . . . . . . . . . . . . . . . . . . . . . . . . . . . . . . . . . . . . . . . . |
18 |
PL |
|
|
Użytkowanie zgodne z przeznaczeniem . . . . . . . . . . . . . . . . . . . . . . . . . . 18
Zakres dostawy/Czynności przygotowawcze . . . . . . . . . . . . . . . . . . . . . 19
Utylizacja opakowania . . . . . . . . . . . . . . . . . . . . . . . . . . . . . . . . . . . . . . . . . . . . . . . . . . . 19
Opis urządzania . . . . . . . . . . . . . . . . . . . . . . . . . . . . . . . . . . . . . . . . . . . . . . 20
Dane techniczne . . . . . . . . . . . . . . . . . . . . . . . . . . . . . . . . . . . . . . . . . . . . . . 20
Wskazówki dotyczące bezpieczeństwa . . . . . . . . . . . . . . . . . . . . . . . . . . . 20
Korzystanie z urządzenia do gotowania ryżu. . . . . . . . . . . . . . . . . . . . . . 23
Gotowanie wstępnie przygotowanego ryżu . . . . . . . . . . . . . . . . . . . . . . . . . . . . . . . . . . . 23 Gotowanie nieprzygotowanego wstępnie ryżu. . . . . . . . . . . . . . . . . . . . . . . . . . . . . . . . . 24 Gotowanie na parze . . . . . . . . . . . . . . . . . . . . . . . . . . . . . . . . . . . . . . . . . . . . . . . . . . . . . 27
Usuwanie usterek . . . . . . . . . . . . . . . . . . . . . . . . . . . . . . . . . . . . . . . . . . . . . 29
Czyszczenie . . . . . . . . . . . . . . . . . . . . . . . . . . . . . . . . . . . . . . . . . . . . . . . . . . 29
Przechowywanie . . . . . . . . . . . . . . . . . . . . . . . . . . . . . . . . . . . . . . . . . . . . . 31
Utylizacja urządzenia . . . . . . . . . . . . . . . . . . . . . . . . . . . . . . . . . . . . . . . . . 31
Wskazówki dotyczące deklaracji zgodności WE . . . . . . . . . . . . . . . . . . . . 31
Importer. . . . . . . . . . . . . . . . . . . . . . . . . . . . . . . . . . . . . . . . . . . . . . . . . . . . . 31
Gwarancja. . . . . . . . . . . . . . . . . . . . . . . . . . . . . . . . . . . . . . . . . . . . . . . . . . . 32
Serwis . . . . . . . . . . . . . . . . . . . . . . . . . . . . . . . . . . . . . . . . . . . . . . . . . . . . . . 32
Przeczytaj uważnie instrukcję obsługi, w szczególności wskazówki bezpieczeństwa.
SRK 400 A2 |
17 |
Wstęp
Gratulujemy zakupu naszego urządzenia.
Wybrany produkt charakteryzuje się wysoką jakością. Instrukcja obsługi stanowi PL element składowy produktu. Zawiera ona ważne wskazówki na temat bez-
pieczeństwa, użytkowania i utylizacji. Przed przystąpieniem do użytkowania produktu zapoznaj się ze wszystkimi wskazówkami dotyczącymi obsługi i bezpieczeństwa. Produkt należy użytkować wyłącznie zgodnie z zamieszczonym tu opisem oraz w podanym zakresie zastosowań. W przypadku przekazania urządzenia następnej osobie, nie zapomnij dołączyć również instrukcji obsługi.
Prawo autorskie
Niniejsza dokumentacja jest prawnie chroniona.
Wszelkie rozpowszechnianie, wzgl. każdy przedruk, także we fragmentach, jak również odtwarzanie ilustracji, także w zmienionym stanie, jest dozwolone wyłącznie za pisemną zgodą producenta.
Użytkowanie zgodne z przeznaczeniem
Niniejsze urządzenie służy wyłącznie do gotowania ryżu i gotowania na parze artykułów spożywczych, jak np. warzywa lub wryby.
Urządzenie to przeznaczone jest wyłącznie do zastosowania w gospodarstwach domowych. Nie należy go używać do celów komercyjnych!
 OSTRZEŻENIE
Niebezpieczeństwo związane z użytkowaniem niezgodnym z przeznaczeniem!
Użytkowanie urządzenia niezgodnie z jego przeznaczeniem i/lub inne wykorzystanie urządzenia może wiązać się z różnymi zagrożeniami.
►Urządzenie należy użytkować wyłącznie zgodnie z jego przeznaczeniem.
►Należy przestrzegać opisanych w niniejszej instrukcji obsługi metod postępowania.
WSKAZÓWKA
►Użytkowanie urządzenia niezgodnie z jego przeznaczeniem i/lub inne wykorzystanie urządzenia może wiązać się z różnymi zagrożeniami. Wykorzystywać urządzenie wyłącznie do celów zgodnych z jego przeznaczeniem. Należy przestrzegać opisanych w niniejszej instrukcji obsługi metod postępowania. Roszczenia wszelkiego rodzaju, wynikające z szkód powstałych wskutek użytkowania niezgodnie z przeznaczeniem, przeprowadzenia niefachowych napraw, zmian wprowadzonych bez zezwolenia lub wskutek zastosowania niedopuszczonych części zamiennych, są wykluczone. Wszelkie ryzyko ponosi wyłącznie użytkownik.
18 |
SRK 400 A2 |

Zakres dostawy/Czynności przygotowawcze
Urządzenie jest wyposażone standardowo w następujące elementy:
urządzenie do gotowania ryżu, z pojemnikiem do gotowania i wkładką
|
do gotowania na parze |
PL |
|
miarka |
|||
|
|||
plastikowa łyżka |
|
||
przewód przyłączeniowy z wtyczką z uziemieniem |
|
||
instrukcja obsługi |
|
||
1) |
Wyjmij wszystkie elementy urządzenia oraz instrukcję obsługi z kartonu. |
|
|
2) |
Usuń wszelkie opakowania oraz folie i naklejki. |
|
|
3) |
Wyczyść dokładnie wszystkie elementy urządzenia w sposób opisany w |
|
|
|
rozdziale „Czyszczenie”. |
|
|
WSKAZÓWKA
►Po rozpakowaniu nowego urządzenia sprawdź, czy w środku są wszystkie części.
►W przypadku niekompletnej dostawy lub wystąpienia uszkodzeń wskutek wadliwego opakowania lub poprzez transport należy skontaktować się infolinią serwisową (patrz rozdział Serwis).
Utylizacja opakowania
Opakowanie chroni urządzenie przed uszkodzeniami podczas transportu.
W trosce o ochronę środowiska, wszystkie zastosowane elementy opakowania nadają się do ponownego przetworzenia.
Zwracanie opakowania do obiegu materiałów oszczędza surowce naturalne i zmniejsza zanieczyszczenie odpadami. Zbędne materiały opakowania utylizuj  zgodnie z obowiązującymi przepisami.
WSKAZÓWKA
►W miarę możliwości zachowaj oryginalne opakowanie na czas trwania gwarancji, by w razie odsyłania urządzenia móc je prawidłowo zapakować.
SRK 400 A2 |
19 |
Opis urządzania
|
Ilustracja A: |
|
|
1 |
wkładka do gotowania na parze |
PL |
2 |
odblokowanie |
3otwór wylotowy pary
4naczynie zbiorcze na skroploną parę wodną
5kabel sieciowy
6pomarańczowa lampka kontrolna „

 “ (podtrzymywanie temperatury)
7przełącznik wyboru funkcji
8gniazdo do kabla sieciowego
9czerwona lampka kontrolna „

 “ (gotowanie)
0 włącznik/wyłącznik
q uchwyt łyżki z tworzywa sztucznego w pojemnik do gotowania
Ilustracja B:
e pojemnik z miarką r plastikowa łyżka
Dane techniczne
Napięcie sieciowe |
220 - 240 V ~, 50 Hz |
|
Moc znamionowa |
400 W |
|
Moc w trybie podtrzymywania |
45 W |
|
temperatury |
||
|
Wskazówki dotyczące bezpieczeństwa
 NIEBEZPIECZEŃSTWO PORAŻENIA
PRĄDEM ELEKTRYCZNYM
►Urządzenie do gotowania ryżu podłączaj wyłącznie do prawidłowo zainstalowanych i uziemionych gniazdek wtykowych o napięciu takim, jakie podano na tabliczce znamionowej urządzenia.
►Przy zmianie miejsca ustawienia, napełnianiu, w wypadku usterki, przed rozpoczęciem czyszczenia, w czasie przerwy w użytkowaniu zawsze wyjmuj wtyczkę z gniazdka zasilania!
►Wyciągając wtyczkę z gniazdka zasilania nigdy nie ciągnij za sam kabel. Ciągnij zawsze za wtyczkę.
20 |
SRK 400 A2 |

 NIEBEZPIECZEŃSTWO PORAŻENIA
PRĄDEM ELEKTRYCZNYM
► Nie dotykać wtyczki mokrymi rękoma.
► Jeśli że do urządzenie dostanie się woda, natychmiast wyjąć |
PL |
|
|
wtyczkę z gniazdka. Po tym zdarzeniu nie włączaj urządzenia w |
|
normalny sposób, lecz zwróć się do serwisu w celu stwierdzenia |
|
ewentualnych usterek. |
|
►Unikaj przedostania się wilgoci do środka urządzenia. Nie używaj urządzenia w warunkach podwyższonej wilgotności ani na wolnym powietrzu.
►Nie włączaj urządzenia do gotowania ryżu stojąc na wilgotnym podłożu lub mając mokre ręce.
►Kabel sieciowy ułożyć w taki sposób, aby nie stykał się on w żaden sposób z ostro zakończonymi częściami.
►Kabla sieciowego nie wolno zginać, zgniatać ani owijać wokół urządzenia.
►Naprawę uszkodzonej wtyczki lub kabla sieciowego zleć niezwłocznie wykwalifikowanemu specjaliście lub serwisowi.
Nigdy nie zanurzaj urządzenia w wodzie ani żadnej innej cieczy.
 OSTRZEŻENIE! ZAGROŻENIE ODNIESIENIEM OBRAŻEŃ!
►Nie pozostawiaj pracującego urządzenia bez odpowiedniego nadzoru.
►To urządzenie może być używane przez dzieci od 8. roku życia wyłącznie pod nadzorem lub po przeszkoleniu w zakresie bezpiecznego używania urządzenia oraz wynikających z niego zagrożeń. Czyszczenia ani konserwacji przez użytkownika nie mogą wykonywać dzieci, chyba że mają 8 lat lub więcej i są
pod nadzorem. Urządzenie oraz jego przewód zasilający należy trzymać poza zasięgiem dzieci w wieku poniżej 8 lat.
SRK 400 A2 |
21 |
 OSTRZEŻENIE! ZAGROŻENIE ODNIESIENIEM OBRAŻEŃ!
►To urządzenie może być używane przez osoby o zmniejszonych zdolnościach fizycznych, sensorycznych lub umysłowych lub też
PL |
osoby nieposiadające odpowiedniego doświadczenia i/lub wiedzy, |
|
wyłącznie pod nadzorem lub po przeszkoleniu w zakresie bezpiecz- |
|
nego używania urządzenia oraz wynikających z niego zagrożeń. |
►Dzieci nie mogą bawić się urządzeniem.
►Przed rozpoczęciem czyszczenia urządzenia i akcesoriów odczekaj do całkowitego ostygnięcia wszystkich części.
►Do sterowania pracą urządzenia nie próbuj używać żadnych zewnętrznych zegarów sterujących ani żadnego innego systemu zdalnego sterowania.
►Wydostająca się para wodna jest bardzo gorąca! Niebezpieczeństwo poparzenia!
 OSTRZEŻENIE! ZAGROŻENIE ODNIESIENIEM OBRAŻEŃ!
OSTROŻNIE! Z otworu wylotowego pary oraz przy otwieraniu  pokrywy wydobywa się gorące powietrze!
Niebezpieczeństwo poparzenia!
 OSTRZEŻENIE! ZAGROŻENIE ODNIESIENIEM OBRAŻEŃ!
Uwaga! Gorąca powierzchnia!
Symbol ten ostrzega przed gorącymi powierzchniami w urządzeniu!
UWAGA – SZKODY MATERIALNE!
►Nigdy podczas gotowania nie zakrywaj pokrywy żadną ścierką ani inną rzeczą.
►Nigdy nie ustawiaj urządzenia w pobliżu źródeł ciepła.
►Nigdy nie otwieraj obudowy. W takim wypadku nie można zapewnić należytego bezpieczeństwa i następuje wygaśnięcie gwarancji.
►Stosuj wyłącznie dołączone do zestawu akcesoria oraz nigdy nie włączaj urządzenia bez włożonego pojemnika do gotowania.
22 |
SRK 400 A2 |

Korzystanie z urządzenia do gotowania ryżu
Urządzenie nadaje się idealnie do gotowania zarówno ryżu, jak również w |
|
do gotowania na parze innych składników. Na podstawie prób należy ustalić |
|
stosunek ilości wody i rzeczywistego czasu gotowania w zależności od zastoso- |
PL |
wanych artykułów spożywczych. |
WSKAZÓWKA
►Przed pierwszym użyciem napełnij urządzenie wodą do poziomu do oznaczenia CUP „4” w pojemniku do gotowania w i gotuj wodę przez ok.
30 minut (instrukcja obsługi, patrz „Gotowanie na parze”). Wylej resztę wody, odczekaj na schłodzenie urządzenia, następnie dokładnie wyczyść pojemnik do gotowania w.
Gotowanie wstępnie przygotowanego ryżu
Wstępnie przygotowany ryż można znaleźć w handlu pod nazwą „Ryż błyskawiczny" lub podobną.
WSKAZÓWKA
►W celu uzyskania lepszych efektów kulinarnych wnętrze pojemnika na ryż w posmaruj lekko warstwą tłuszczu lub oleju roślinnego.
►Nigdy nie przekraczać skali 5 CUP/1 litr w pojemniku do gotowania w. W przeciwnym razie dojdzie do przelania się wody!
1)Otwórz pokrywę przez wciśnięcie przycisku odblokowania 2 i jednoczesne pociągnięcie pokrywki do góry.
2)Wyciągnij pojemnik do gotowania w.
3)Napełnij pojemnik do gotowania w odpowiednią ilością ryżu i wody, wskazaną na opakowaniu ryżu.
WSKAZÓWKA
►Przygotowuj zawsze taką ilość ryżu, aby nalana woda sięgała co najmniej do oznaczenia CUP „2”. W przeciwnym razie wyniki gotowania mogą być niezadowalające!
4)Włóż ponownie pojemnik do gotowania w do urządzenia. Uważaj przy tym na to, by
–... wilgoć i ryż ze środka nie przedostały się na zewnątrz pojemnika w i nie zabrudziły obszaru gotowania. W razie konieczności zewnętrzną część pojemnika wytrzeć czystą szmatką.
–... pojemnik do gotowania w nie został włożony do obudowy urządzenia do gotowania ryżu ukosem lub krzywo. Pojemnik do gotowania w wkładaj zawsze do obudowy urządzenia do gotowania ryżu prawidłowo i prosto. W przeciwnym razie może dojść do wyłączenia awaryjnego urządzenia i nie będzie możliwe jego ponowne uruchomienie.
SRK 400 A2 |
23 |
5)Zamknij pokrywę.
6)Podłącz kabel sieciowy 5 do gniazdka 8 i włóż wtyczkę do gniazda sieciowego.
7)Włącz urządzenie za pomocą włącznika/wyłącznika 0. Świeci się poma-
PL |
rańczowa kontrolka „ |
“ 6. |
|
8)Wciśnij przełącznik wyboru funkcji 7 do dołu i gotuj ryż tak długo, jak wskazane jest to na opakowaniu ryżu.
9)Gdy ryż będzie gotowy:
–Jeśli chcesz ryż spożyć od razu, to wyciągnij wtyczkę z gniazdka sieciowego.
–Jeśli ryż ma być utrzymywany w stanie ciepłym (maks. 2 godziny), przyciśnij przycisk wyboru funkcji 7 do góry.
10)Po wyjęciu ryżu wyłącz urządzenie za pomocą włącznika/wyłącznika 0 i wyciągnij wtyk sieciowy z gniazda.
WSKAZÓWKA
►Niektóre rodzaje ryżu błyskawicznego muszą zostać pozostawione po gotowaniu jeszcze do napęcznienia. Należy zawsze stosować się do wskazówek zawartych na opakowaniu ryżu.
UWAGA – SZKODY MATERIALNE!
►Do wyjmowania ryżu należy używać wyłącznie dostarczonej wraz z urządzeniem plastikowej łyżki r. Przy użyciu innej łyżki można uszkodzić warstwę pojemnika w zapobiegającą przywieraniu.
WSKAZÓWKA
►Plastikową łyżkę r można włożyć w uchwyt znajdujący q się na krawędzi naczynia do gotowania ryżu. W ten sposób łyżka będzie zawsze pod ręką!
Gotowanie nieprzygotowanego wstępnie ryżu
WSKAZÓWKA
►W celu uzyskania lepszych efektów kulinarnych wnętrze pojemnika na ryż w posmaruj lekko warstwą tłuszczu lub oleju roślinnego.
1)Otwórz pokrywę przez wciśnięcie przycisku odblokowania 2 i jednoczesne pociągnięcie pokrywki do góry.
24 |
SRK 400 A2 |

2) Wyciągnij pojemnik do gotowania w.
WSKAZÓWKA
► Gdy pojemnik do gotowania w jest uszkodzony, nie wolno z niego dalej
korzystać! Wskutek uszkodzenia może dojść do wyłączenia awaryjnego |
PL |
|
urządzenia i nie będzie możliwe jego ponowne uruchomienie. |
||
|
3)Odmierz dostarczoną wraz z urządzeniem miarką e odpowiednią ilość ryżu. Ilość orientacyjna: Miarka po kreskę e - wypełniona ryżem - to odmierzona porcja dla jednej osoby. Poprzez odpowiednią liczbę prób gotowania ustalić właściwą ilość ryżu / wody.
4)Luźny ryż obmyć starannie i odsączyć na sitku. Wprawdzie traci się w ten sposób część substancji odżywczych, jednak zastosowanie ryżu bez uprzedniego umycia może spowodować gorsze wyniki w gotowaniu i nadmierne tworzenie się piany i pary pojemniku do gotowania w. Stosować się zawsze do zaleceń producenta ryżu odnośnie do jego przygotowania.
5)Dodaj wypłukany ryż do pojemnika do gotowania w i rozłóż równomiernie po całej powierzchni.
6)Następnie wlej wodę do odpowiedniego zaznaczenia CUP w pojemniku gotowania w:
–2 miarki ryżu = woda do zaznaczenia CUP „2”
–3 miarki ryżu = woda do zaznaczenia CUP „3”
–4 miarki ryżu = woda do zaznaczenia CUP „4”
–5 miarek ryżu = woda do zaznaczenia CUP „5”
Ryż można posolić do smaku.
WSKAZÓWKA
►Nigdy nie przekraczać skali 5 CUP/1 litr w pojemniku do gotowania w. W przeciwnym razie dojdzie do przelania się wody!
►Zawsze przygotowuj co najmniej 2 porcje ryżu. W przeciwnym razie wyniki gotowania mogą być niezadowalające!
►Gdy naleje się do gotowania ciepłej wody, można skrócić czas gotowania. Należy wtedy użyć nieco mniej wody, niż do zaznaczenia CUP w pojemniku do gotowania w.
►W zależności od różnych gatunków ryżu może się zdarzyć, że do uzyskania optymalnego wyniku gotowania potrzebne będzie nalanie nieco więcej lub nieco mniej wody. Stosuj ilość wody wedle własnego doświadczenia i smaku.
SRK 400 A2 |
25 |
WSKAZÓWKA
► Jeśli będziesz używać do napełniania innego naczynia, niż dostarczona z urządzeniem miarka e, „skala litrowa” w pojemniku do gotowania w pozwala zachować odpowiednią orientację. Gdy chcesz na przykład
PL ugotować 0,6 litra ryżu, odmierz tę ilość za pomocą miarki i wsyp ryż do pojemnika do gotowania w. Następnie do pojemnika do gotowania w dodaj wody, aby woda sięgała do zaznaczenia „0,6 l“.
Wskazanie na skali oznacza zawsze wartość, która wynika z łącznej ilości ryżu i dodanej wody.
Dlatego nie należy korzystać ze skali do odmierzania cieczy lub artykułów spożywczych, ponieważ wskazania dotyczą wyłącznie zastosowania w urządzeniu do gotowania ryżu!
7)Po napełnieniu pojemnika do gotowania w, wstaw go do obudowy urządzenia do gotowania ryżu.
Uważaj przy tym na to, by
–... wilgoć i ryż ze środka nie przedostały się na zewnątrz pojemnika w i nie zabrudziły obszaru gotowania. W razie konieczności zewnętrzną część pojemnika wytrzeć czystą szmatką.
–... pojemnik do gotowania w nie został włożony do obudowy urządzenia do gotowania ryżu ukosem lub krzywo. Pojemnik do gotowania w wkładaj zawsze do obudowy urządzenia do gotowania ryżu prawidłowo i prosto. W przeciwnym razie może dojść do wyłączenia awaryjnego urządzenia i nie będzie możliwe jego ponowne uruchomienie.
8)Zamknij pokrywę.
9)Podłącz kabel sieciowy 5 do gniazdka 8 i włóż wtyczkę do gniazda sieciowego.
10)Włącz urządzenie za pomocą włącznika/wyłącznika 0. Świeci się pomarańczowa kontrolka „


 “ 6.
“ 6.
 OSTRZEŻENIE! ZAGROŻENIE ODNIESIENIEM OBRAŻEŃ!
►W czasie trwania gotowania, z otworu 3 wydostaje się para. Nigdy nie trzymaj rąk ani żadnych innych części ciała nad otworem wylotowym pary 3 w czasie gotowania. Zagrożenie odniesieniem oparzeń!
11)Naciśnij przełącznik wyboru funkcji 7 do dołu. Pomarańczowa lampka kon-
troln „

 “ 6 gaśnie i zapala się czerwona lampka kontrolna „

 ” 9. Rozpoczyna się gotowanie.
WSKAZÓWKA
►Gdy chwilowo nie używa się pojemnika do gotowania w i jest on pusty, nie ustawiać przełącznika wyboru funkcji 7 w położeniu „gotowanie”.
26 |
SRK 400 A2 |
Gdy tylko ryż zostanie ugotowany, urządzenie do gotowania ryżu automatycznie przełącza się na funkcję podtrzymywania temperatury. Czerwona lampka kontrolna „

 ” 9gaśnie i ponownie zapala się pomarańczowa lampka kontrolna „

 ” 6.
” 6.
Odczekaj 5 minut.
PL
WSKAZÓWKA
►Można podtrzymywać ciepło ryżu przez ok. 2 godziny, jeśli jest taka potrzeba. Może się jednak zdarzyć, że smak i stopień ugotowania ryżu się będą zmieniać, im dłużej będzie podtrzymywana temperatura ryżu.
12) Otworzyć pokrywkę. Ryż jest gotowy spożycia.
UWAGA – SZKODY MATERIALNE!
►Do wyjmowania ryżu należy używać wyłącznie dostarczonej wraz z urządzeniem plastikowej łyżki r. Przy użyciu innej łyżki można uszkodzić warstwę zapobiegającą przywieraniu.
WSKAZÓWKA
►Plastikową łyżkę r można włożyć w uchwyt znajdujący q się na krawędzi naczynia do gotowania ryżu. W ten sposób łyżka będzie zawsze pod ręką!
Jeśli ryż nie będzie spożywany od razu:
–W czasie podtrzymywania temperatury ryżu nie otwierać nigdy pokrywy.
–Nie pozostawiać ryżu w funkcji podtrzymywania temperatury przez okres dłuższy niż 2 godziny.
 OSTRZEŻENIE! NIEBEZPIECZEŃSTWO PORAŻENIA PRĄDEM!
►Pamiętaj, aby zawsze wyjmować wtyczkę z gniazdka jeśli urządzenie nie jest używane. Istnieje zagrożenie porażenia prądem elektrycznym!
13)Po wyjęciu ryżu wyłącz urządzenie za pomocą włącznika/wyłącznika 0 i wyciągnij wtyk sieciowy z gniazda.
Gotowanie na parze
 OSTRZEŻENIE! ZAGROŻENIE ODNIESIENIEM OBRAŻEŃ!
W trakcie gotowania na parze nie podnoś wykorzystywanej do tego celu wkładki 1, ponieważ wydostająca się para może spowodować poparzenia. Wkładka 1 nagrzewa się w trakcie gotowania na parze. Wkładkę do gotowania na parze 1 zdejmuj z pojemnika w trzymając ją przez szmatkę lub rękawicę kuchenną.
SRK 400 A2 |
27 |
 Loading...