


Operating Instructions
DVD Stereo System
Model No. SC-VK680
Before connecting, operating or adjusting this product, please read the instructions completely.


 Please keep this manual
 for future reference.


 Your unit may not look exactly the same as illustrated.
Region number |
|
|
|
|
|
|
Operations in these instructions are described using |
||
The player plays DVD-Video marked with labels |
||||
the remote control, but you can do the operations on |
||||
containing the region number or “ALL”. |
|
|
||
|
|
the main unit if the controls are the same. |
||
|
|
|
||
Region |
Number |
|
||
|
||||
|
|
|
|
|
Southeast Asia and Thailand |
3 |
|
|
|
Australia and New Zealand

 4
4 


 Example: Southeast Asia and Thailand


 3
3  ALL
ALL  235
235
|
|
|
RQTX0282-1L |
GA |
GN |

Accessories
ENGLISH
RQTX0282
2
|
|
Dear customer |
|
System |
SC-VK680 |
||
Thank you for purchasing this product. |
|||
|
|
||
Main unit |
SA-VK680 (1 unit) |
||
For optimum performance and safety, please read these |
|||
|
|
||
Front speakers |
SB-PF680 (2 units) |
instructions carefully. |
|
|
|
|
|
Subwoofer |
SB-WAK780 (1 unit) |
|
|
|
|
|
|
|
|
|
|
|
|
|
CAUTION!
•DO NOT INSTALL OR PLACE THIS UNIT IN A BOOKCASE, BUILT-IN CABINET OR IN ANOTHER CONFINED SPACE. ENSURE THE UNIT IS WELL VENTILATED. TO PREVENT RISK OF ELECTRIC SHOCK OR FIRE HAZARD DUE TO OVERHEATING, ENSURE THAT CURTAINS AND ANY OTHER MATERIALS DO NOT OBSTRUCT THE VENTILATION VENTS.
•DO NOT OBSTRUCT THE UNIT’S VENTILATION OPENINGS WITH NEWSPAPERS, TABLECLOTHS, CURTAINS, AND SIMILAR ITEMS.
•DO NOT PLACE SOURCES OF NAKED FLAMES, SUCH AS LIGHTED CANDLES, ON THE UNIT.
•DISPOSE OF BATTERIES IN AN ENVIRONMENTALLY FRIENDLY MANNER.
CAUTION!
THIS PRODUCT UTILIZES A LASER.
USE OF CONTROLS OR ADJUSTMENTS OR PERFORMANCE OF PROCEDURES OTHER THAN THOSE SPECIFIED HEREIN MAY RESULT IN HAZARDOUS RADIATION EXPOSURE.
DO NOT OPEN COVERS AND DO NOT REPAIR YOURSELF. REFER SERVICING TO QUALIFIED PERSONNEL.
WARNING:
TO REDUCE THE RISK OF FIRE, ELECTRIC SHOCK OR PRODUCT DAMAGE,
•DO NOT EXPOSE THIS APPARATUS TO RAIN, MOISTURE, DRIPPING OR SPLASHING AND THAT NO OBJECTS FILLED WITH LIQUIDS, SUCH AS VASES, SHALL BE PLACED ON THE APPARATUS.
•USE ONLY THE RECOMMENDED ACCESSORIES.
•DO NOT REMOVE THE COVER (OR BACK); THERE ARE NO USER SERVICEABLE PARTS INSIDE. REFER SERVICING TO QUALIFIED SERVICE PERSONNEL.
The socket outlet shall be installed near the equipment and easily accessible.
The mains plug of the power supply cord shall remain readily operable.
To completely disconnect this apparatus from the AC Mains, disconnect the power supply cord plug from AC receptacle.
This product may receive radio interference caused by mobile telephones during use. If such interference is apparent, please increase separation between the product and the mobile telephone.
For Southeast Asia and Thailand
THIS UNIT IS INTENDED FOR USE IN TROPICAL CLIMATES.
For Australia and N.Z
THIS UNIT IS INTENDED FOR USE IN MODERATE CLIMATES.
(Inside of product)
For Southeast Asia and Thailand
CAUTION!
The AC voltage is different according to the area.
Be sure to set the proper voltage in your area before use. (For details, please refer to page 10.)
– If you see this symbol –
Information on Disposal in other Countries outside the European Union
This symbol is only valid in the European Union. If you wish to discard this product, please contact
your local authorities or dealer and ask for the correct method of disposal.
Accessories
Please check and identify the supplied accessories.
1 AC mains lead |
1 AM loop antenna |
||
For Southeast Asia |
|
|
|
(K2CQ2CA00007) |
1 |
FM indoor antenna |
|
1 AC mains lead |
2 Batteries |
||
For Thailand |
|||
|
|
||
(K2CP2CA00001) |
1 |
Video cable |
|
|
|||
1 AC mains lead |
|
|
|
For Australia and N.Z |
1 |
Remote control |
|
(K2CJ2DA00008) |
(N2QAYB000423) |
||

Table of contents |
GETTING STARTED |
|
Accessories ................................................................. |
2 |
Safety precautions ...................................................... |
4 |
Discs information........................................................ |
5 |
Tips for making data discs......................................... |
6 |
ABOUT DIVX VIDEO-ON-DEMAND............................. |
7 |
Tray/disc handling procedure.................................... |
7 |
Control reference guide.............................................. |
8 |
Remote control..................................................................... |
8 |
Main unit............................................................................... |
9 |
DISC OPERATIONS |
|
Discs — Basic play.................................................... |
15 |
Using the main unit............................................................ |
15 |
Using the remote control .................................................. |
16 |
Discs — Convenient functions................................. |
17 |
Disc information................................................................. |
17 |
All CDs play........................................................................ |
17 |
Repeat play......................................................................... |
17 |
Muting the volume ............................................................. |
17 |
Dimming the display.......................................................... |
17 |
Program and Random play ............................................... |
18 |
Program play..................................................................... |
18 |
Random play ..................................................................... |
18 |
Discs — Using navigation menus............................ |
19 |
Playing data discs.............................................................. |
19 |
Playing items in order........................................................ |
19 |
Playing from the selected item .......................................... |
19 |
Select the picture in thumbnails menu .............................. |
19 |
OTHER OPERATIONS |
|
The radio .................................................................... |
24 |
Manual tuning..................................................................... |
24 |
Preset tuning...................................................................... |
24 |
Cassette tapes — Play and Recording.................... |
24 |
Play...................................................................................... |
24 |
Recording........................................................................... |
25 |
USB — Play and Recording...................................... |
26 |
Play...................................................................................... |
26 |
Recording........................................................................... |
26 |
Enjoying karaoke....................................................... |
28 |
Basic play........................................................................... |
28 |
Microphone volume adjustment....................................... |
28 |
Adding an echo effect ....................................................... |
28 |
Using karaoke mode.......................................................... |
28 |
To record your karaoke performance .............................. |
28 |
Sound field and sound quality................................. |
29 |
Surround............................................................................. |
29 |
REFERENCE |
|
Troubleshooting guide.............................................. |
34 |
Language code list.................................................... |
37 |
Memory reset (Initialization)..................................... |
37 |
Simple setup.............................................................. |
10 |
Television, antenna and AC mains lead connections .... |
10 |
Other television connection.............................................. |
11 |
Placement of speakers...................................................... |
12 |
Preparing the remote control............................................ |
12 |
DEMO function................................................................... |
13 |
EASY SETUP...................................................................... |
13 |
Setting the time.................................................................. |
13 |
Smart control............................................................. |
14 |
Playing RAM and DVD-R/RW (DVD-VR) discs................. |
19 |
Playing the programs ........................................................ |
19 |
Playing the playlist............................................................. |
19 |
Discs — Using on-screen menus............................. |
20 |
On-Screen Menu 1 (Disc/Play).......................................... |
20 |
On-Screen Menu 2 (Video) ................................................ |
21 |
On-Screen Menu 3 (Audio)................................................ |
21 |
On-Screen Menu 4 (Karaoke)............................................ |
21 |
Discs — Changing the player settings.................... |
22 |
“DISC” menu...................................................................... |
22 |
“VIDEO” menu.................................................................... |
22 |
“AUDIO” menu................................................................... |
23 |
“DISPLAY” menu ............................................................... |
23 |
“OTHERS” menu................................................................ |
23 |
Changing the sound quality.............................................. |
29 |
Preset EQ.......................................................................... |
29 |
Manual EQ ........................................................................ |
29 |
Enhancing the bass........................................................... |
29 |
Adjusting the subwoofer.................................................... |
29 |
Adding an echo effect........................................................ |
29 |
Using the timers ........................................................ |
30 |
The play/record timer ........................................................ |
30 |
Auto-off function ....................................................... |
31 |
Using the sleep timer/Auto-off function .......................... |
31 |
Using other equipment ............................................. |
31 |
Using the Music Port ......................................................... |
31 |
Using an external unit ....................................................... |
32 |
Home Theater — Enjoying more powerful sound........... |
32 |
Operating a Panasonic television .................................... |
33 |
Changing the main unit and remote control mode......... |
33 |
Maintenance............................................................... |
37 |
Glossary..................................................................... |
38 |
Specifications............................................................ |
39 |
Table of contents ENGLISH
RQTX0282
3

Safety precautions
Placement
|
Set the unit up on an even surface away from direct |
|
|
sunlight, high temperatures, high humidity, and excessive |
|
ENGLISH |
vibration. These conditions can damage the cabinet and other |
|
components, thereby shortening the unit’s service life. |
||
Place it at least 15 cm away from wall surfaces to avoid |
||
|
||
|
distortion and unwanted acoustical effects. |
|
|
Do not place heavy items on the unit. |
|
|
AC mains lead protection |
|
|
Ensure the AC mains lead is connected correctly and not |
|
precautions |
damaged. Poor connection and lead damage can cause fire or |
|
electric shock. Do not pull, bend, or place heavy items on the |
||
|
||
|
lead. |
|
|
Grasp the plug firmly when unplugging the lead. Pulling the |
|
|
AC mains lead can cause electric shock. Do not handle the plug |
|
Safety |
with wet hands. This can cause electric shock. |
|
Voltage |
||
|
||
|
Do not use high voltage power sources. This can overload the |
|
|
unit and cause a fire. |
|
|
Do not use a DC power source. Check the source carefully |
|
|
when setting the unit up on a ship or other place where DC is |
|
|
used. |
Foreign matter
Do not let metal objects fall inside the unit. This can cause electric shock or malfunction.
Do not let liquids get into the unit. This can cause electric shock or malfunction. If this occurs, immediately disconnect the unit from the power supply and contact your dealer.
Do not spray insecticides onto or into the unit. They contain flammable gases which can ignite if sprayed into the unit.
Service
Do not attempt to repair this unit by yourself. If sound is interrupted, indicators fail to light, smoke appears, or any other problem that is not covered in these instructions occurs, disconnect the AC mains lead and contact your dealer or an authorized service center. Electric shock or damage to the unit can occur if the unit is repaired, disassembled or reconstructed by unqualified persons.
Extend operating life by disconnecting the unit from the power source if it is not to be used for a long time.
RQTX0282
4

Discs information
Commercial discs
Disc |
Logo |
Indicated in these |
Remarks |
|
instructions by |
||||
|
|
|
||
|
|
|
|
|
DVD-Video |
|
DVD-V |
High quality movie and music discs. |
|
|
|
|
|
|
Video CD |
|
VCD |
Music discs with video. |
|
|
Including SVCD (Conforming to IEC62107). |
|||
|
|
|
||
|
|
|
|
|
CD |
|
CD |
Music discs. |
|
|
|
|
|
Recorded discs (: Playable, −: Not playable)
|
|
Recorded on a DVD |
Recorded on a personal computer, etc. |
|
|||||
|
|
video recorder, etc. |
|
||||||
|
|
|
|
|
|
|
|
||
Disc |
Logo |
|
|
|
|
|
|
|
Finalizing8 |
|
|
|
|
|
|
|
|||
|
|
DVD-VR 2 |
DVD-V 4 |
WMA |
MP3 |
JPEG |
MPEG4 6 |
DivX 7 |
|
|
|
|
|
|
|
|
|
|
|
DVD-RAM |
|
|
− |
− |
|
|
|
|
Not |
|
necessary |
||||||||
|
|
|
|
|
|
|
|
|
|
|
|
|
|
|
|
|
|
|
|
DVD-R/RW |
|
|
|
− |
|
|
|
|
Necessary |
|
|
|
|
|
|
|
|
|
|
DVD-R DL |
|
3 |
|
− |
− |
− |
− |
− |
Necessary |
|
|
|
|
|
|
|
|
|
|
4R/4RW |
− |
− |
()5 |
− |
− |
− |
− |
− |
Necessary |
4R DL |
− |
− |
()5 |
− |
− |
− |
− |
− |
Necessary |
CD-R/RW1 |
− |
− |
− |
|
|
|
|
|
Necessary 9 |
Discs information ENGLISH
•It may not be possible to play all the above-mentioned discs in some cases due to the type of disc, the condition of the recording, the recording method, or how the files were created ( page 6, Tips for making data discs).
1 This unit can play CD-R/RW recorded with CD-DA or Video CD format.
2 Discs recorded on DVD video recorders or DVD video cameras, etc. using Version 1.1 of the Video Recording Format (a unified video recording standard).
3 Discs recorded on DVD video recorders or DVD video cameras using Version 1.2 of the Video Recording Format (a unified video recording standard).
4 Discs recorded on DVD video recorders or DVD video cameras using DVD-Video Format.
5 Recorded using a format different from DVD-Video Format, therefore, some functions cannot be used.
6 MPEG4 data recorded with the Panasonic SD multi cameras or DVD video recorders [conforming to SD VIDEO specifications (ASF standard)/MPEG4 (Simple Profile) video system/G.726 audio system].
7 Functions added with DivX Ultra are not supported.
8 A process that allows play on compatible equipment. To play a disc that is displayed as “Necessary” on this unit, the disc must first be finalized on the device it was recorded on.
9 Closing the session will also work.
Note about using a DualDisc
The digital audio content side of a DualDisc does not meet the technical specifications of the Compact Disc Digital Audio (CD-DA) format so playback may not be possible.
Video systems
•This unit can play PAL and NTSC, but your television must match the system used on the disc.
•PAL discs cannot be correctly viewed on an NTSC television.
•This unit can convert NTSC signals to PAL 60 for viewing on a PAL television ( page 23, “NTSC DISC OUT” in “VIDEO” menu).
Discs that cannot be played
Blu-ray, HD DVD, AVCHD discs, DVD-RW version 1.0, DVD-Audio, DVD-ROM, CD-ROM, CDV, CD-G, SACD, Photo CD, DVD-RAM that cannot be removed from their cartridges, 2.6-GB and 5.2-GB DVD-RAM, and “Chaoji VCD” available on the market including CVD, DVCD and SVCD that do not conform to IEC62107.
RQTX0282
5

Tips for making data discs |
|
• When there are more than eight groups, the eighth group |
||||||||||
|
onwards will be displayed on one vertical line in the menu |
||||||||||
|
screen. |
|
|
|
|
|
|
|
|
|
|
|
• There may be differences in the display order on the menu |
||||||||||
ENGLISH |
screen and computer screen. |
|
|
|
|
|
|
|
|
|
|
• This unit cannot play files recorded using packet write. |
|||||||||||
|
|||||||||||
|
DVD-RAM |
|
|
|
|
|
|
|
|
|
|
|
• Discs must conform to UDF 2.0. |
|
|
|
|
|
|
|
|
|
|
|
DVD-R/RW |
|
|
|
|
|
|
|
|
|
|
|
• Discs must conform to UDF bridge (UDF 1.02/ISO9660). |
||||||||||
|
• This unit does not support multi-session. Only the default |
||||||||||
discs |
session is played. |
|
|
|
|
|
|
|
|
|
|
• Discs must conform to ISO9660 level 1 or 2 (except for |
|||||||||||
|
CD-R/RW |
|
|
|
|
|
|
|
|
|
|
data |
extended formats). |
|
|
|
|
|
|
|
|
|
|
• This unit supports multi-session but if there are many |
|
||||||||||
making |
sessions it takes more time for play to start. Keep the number |
||||||||||
Naming folders and files |
Example: MP3 |
||||||||||
|
of sessions to a minimum to avoid this. |
|
|
|
|
|
|
|
|
|
|
for |
Files are treated as contents and folders |
root |
|
||||||||
are treated as groups on this unit. |
|
|
group |
|
|||||||
Tips |
|
|
|
||||||||
At the time of recording, prefix folder and |
|
|
|
|
|
|
|
|
|
||
|
|
|
|
|
|
|
|
|
|
||
|
file names. This should be with numbers |
|
|
|
|
|
|
track |
|
||
|
|
|
|
|
|
|
|
||||
|
|
|
|
|
|
|
|||||
|
that have an equal number of digits, and |
|
|
|
|
|
|
track |
|
||
|
|
|
|
|
|
|
|||||
|
should be done in the order you want to |
|
|
|
|
|
|
track |
|
||
|
|
|
|
|
|
group |
|||||
|
play them (this may not work at times). |
|
|
|
|
|
|
|
|
|
|
|
|
|
|
|
|
|
|
|
|
||
|
Files must have the extension ( below). |
|
|
group |
|
|
track |
||||
|
|
|
|
|
|||||||
|
|
|
|
|
|
||||||
|
WMA (Extension: “.WMA” or “.wma”) |
|
|
|
|
track |
|||||
|
|
|
|
||||||||
|
|
|
|
|
|
|
|
|
track |
||
|
|
|
|
|
|
|
|
|
|||
|
• Compatible compression rate: |
|
|
|
|
|
|
|
|
track |
|
|
|
|
|
|
|
|
track |
||||
|
|
|
|
|
|
|
|||||
|
between 48 kbps and 320 kbps. |
|
|
|
|
|
|
|
|||
|
|
|
|
|
|
|
|
||||
|
• You cannot play WMA files that are |
|
|
|
|
|
|
track |
|
||
|
|
|
|
|
|
|
|
||||
|
|
|
|
|
|
|
track |
|
|||
|
|
|
|
|
|
|
|
||||
copy-protected.
• This unit does not support Multiple Bit Rate (MBR).
MP3 (Extension: “.MP3” or “.mp3”)
•This unit does not support ID3 tags.
•Sampling frequency and compression rate:
– DVD-RAM, DVD-R/RW: 11.02, 12, 22.05,
24 kHz (8 to 160 kbps), 44.1 and 48 kHz (32 to 320 kbps)
–CD-R/RW: 8, 11.02, 12, 16, 22.05, 24 kHz (8 to 160 kbps), 32, 44.1 and 48 kHz (32 to 320 kbps)
JPEG (Extension: “.JPG”, “.jpg”, “.JPEG” or “.jpeg”)
•JPEG files taken on a digital camera that conform to DCF Standard (Design rule for Camera File system) Version 1.0 are displayed. Files that have been altered, edited or saved with computer picture editing software may not be displayed.
•This unit cannot display moving pictures, MOTION JPEG and other such formats, and still pictures other than JPEG (Example: TIFF), or play pictures with attached audio.
MPEG4 (Extension: “.ASF” or “.asf”)
•You can play MPEG4 data [conforming to SD VIDEO specifications (ASF standard)/MPEG4 (Simple Profile) video system/G.726 audio system] recorded with Panasonic SD multi cameras or DVD video recorders with this unit.
•The recording date may differ from that of the actual date.
DivX (Extension: “.DIVX”, “.divx”, “.AVI” or “.avi”)
•You can play all versions of DivX® video (including DivX®6) [DivX video system/MP3, Dolby Digital or MPEG audio system] with standard playback of DivX® media files. Functions added with DivX Ultra are not supported.
•DivX files greater than 2 GB or have no index may not be played properly on this unit.
•This unit supports all resolutions up to maximum of 720 x 480 (NTSC)/720 x 576 (PAL).
•You can select up to eight types of audio and subtitles on this unit.
RQTX0282
This product is licensed under the MPEG-4 Visual patent portfolio license for the personal and non-commercial use of a consumer for (i) encoding video in compliance with the MPEG-4 Visual Standard (“MPEG-4 Video”) and/or
(ii) decoding MPEG-4 Video that was encoded by a consumer engaged in a personal and non-commercial activity and/or was obtained from a video provider licensed by MPEG LA
to provide MPEG-4 Video. No license is granted or shall be implied for any other use. Additional information including that relating to promotional, internal and commercial uses and licensing may be obtained from MPEG LA, LLC. See http://www.mpegla.com.
U.S. Patent Nos. 6,836,549; 6,381,747; 7,050,698; 6,516,132; and 5,583,936.
This product incorporates copyright protection technology that is protected by U.S. patents and other intellectual property rights. Use of this copyright protection technology must be authorized by Macrovision, and is intended for home and other limited viewing uses only unless otherwise authorized by Macrovision. Reverse engineering or disassembly is prohibited.
Windows Media, and the Windows logo are trademarks, or registered trademarks of Microsoft Corporation in the United States and/or other countries.
This product is protected by certain intellectual property rights of Microsoft Corporation and third parties. Use or distribution of such technology outside of this product is prohibited without a license from Microsoft or an authorized Microsoft subsidiary and third parties.
Manufactured under license from Dolby Laboratories. Dolby and the double-D symbol are trademarks of Dolby Laboratories.
Manufactured under license under U.S. Patent #’s: 5,451,942; 5,956,674; 5,974,380; 5,978,762; 6,487,535 & other U.S. and worldwide patents issued & pending. DTS and DTS 2.0 + Digital Out are registered trademarks and the DTS logos and Symbol are trademarks of DTS, Inc. © 1996-2008 DTS, Inc. All Rights Reserved.
Plays DivX® video
DivX® is a registered trademark of DivX, Inc., and is used under license.
6
ABOUT DIVX VIDEO-ON-DEMAND |
This DivX® Certified device must be registered in order to play DivX Video-on-Demand (VOD) content.
First generate the DivX VOD registration code for your device and submit it during the registration process. [Important: DivX VOD content is protected by a DivX DRM (Digital Rights Management) system that restricts playback to registered DivX Certified devices. If you try to play DivX VOD content not authorized for your device, the message “Authorization Error” will be displayed and your content will not play.] Learn more at www.divx.com/vod.
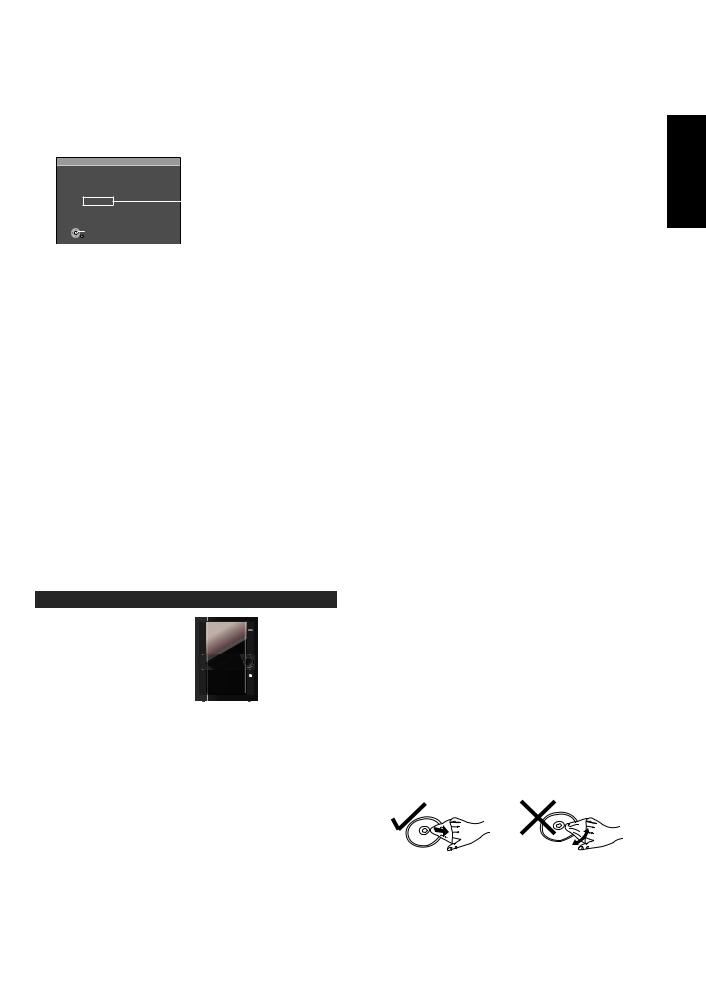
Display the unit’s registration code ( page 23, “REGISTRATION” in “OTHERS” menu)
OTHERS-REGISTRATION (DIVX)
DIVX(R) VIDEO ON DEMAND |
|
||
YOUR REGISTRATION CODE IS |
8 alphanumeric characters |
||
XXXXXXXX |
|
||
MORE VISIT |
|||
TO LEARN |
|
||
www.divx.com/vod |
|
||
SET |
RETURN |
•We recommend that you make a note of this code for future reference.
•After playing DivX VOD content for the first time, another registration code is then displayed in “REGISTRATION (DIVX)”. Do not use this registration code to purchase DivX VOD content. If you use this code to purchase DivX VOD content, and then play the content on this unit, you will no longer be able to play any content that you purchased using the previous code.
•If you purchase DivX VOD content using a registration code different from this unit’s code, you will not be able to play this content. (“AUTHORIZATION ERROR” is displayed.)
Regarding DivX content that can only be played a set number of times
Some DivX VOD content can only be played a set number of times. When you play this content, the remaining number of plays is displayed. You cannot play this content when the number of remaining plays is zero. (“RENTED MOVIE EXPIRED” or “RENTAL EXPIRED” is displayed.)
When playing this content
•The number of remaining plays is reduced by one if
–you press [^] or press [SETUP].
–you press [g]. [Press [h] (pause) to pause play.]
–you press [u, i] (skip) or [t, y] (search) etc. and arrive at another content or the start of the content being played.
•The “RESUME” function ( page 16, Stop) does not work.
Tray/disc handling procedure |
Adhere to the following to avoid problems.
Removing the power plug
Press [8] to turn off the unit and remove the power plug only after all the displays have disappeared.
Tray caution |
Inserting a disc |
ABOUT DIVX VIDEO-ON-DEMAND/Tray/disc handling procedure ENGLISH
OPEN/ CLOSE
•Always press [;, OPEN/CLOSE] to insert or remove a disc.
•Do not push or pull out the tray by hand as this will cause an accident.
Disc handling precautions
•Do not attach labels or stickers to discs (This may cause disc warping, rendering it unusable).
•Do not write on the label side with a ball-point pen or other hard writing instrument.
•Do not use record cleaning sprays, benzine, thinner, static electricity prevention liquids or any other solvent.
•Do not use scratch-proof protectors or covers.
•Do not use the following discs:
-Discs with exposed adhesive from removed stickers or labels (rented discs, etc).
-Discs that are badly warped or cracked.
-Irregularly shaped discs, such as heart shapes.
•Place the disc label up in the center of the tray.
•Insert only one disc into each tray.
Cleaning discs
Wipe with a damp cloth and then wipe dry.
RQTX0282
7

Control reference guide
Control reference guide
ENGLISH
RQTX0282
Remote control
1 Turn the unit on/off (13, 30)
2Show disc information/Select a disc (16, 17)
Play loaded discs in order (17)
3Select channels and title numbers etc./Enter numbers (16, 20, 22, 33)
4Random play, Program play (18) Tape: Reverse mode selection (24, 25) Radio: Band mode selection (24)
5Source select
[q, USB] selector and playback (14, 26, 27)
[7, TAPE] Tape playback and direction (14, 24, 25)
EXT-IN, FM/AM:
FM/AM selection (14, 24) MUSIC PORT/AUX selection (14, 31, 32)
6Basic operations for play (13, 14, 16 to 19, 24 to 30)
7 Select surround sound effects (29)
8 Show START menu (14)
9Show a disc top menu or program list (16, 19)
10 Show a disc menu or playlist (16, 19, 26)
11 Tape and USB recording functions (25, 26, 27)
12 Change the player settings (13, 22, 27)
13 Repeat play (17)
Dim the display panel (17)
|
14 |
TV operations |
14 |
|
(Aim the remote control to a |
|
|
|
|
|
|
1 |
|
Panasonic TV and press the button. |
|
2 |
|
Only works with some models) |
|
|
[^]: turn the TV on/off |
|
|
|
|
[AV]: change the TV’s video input |
|
|
|
mode |
|
3 |
15 |
[4, 3, VOL]: adjust the TV volume |
|
|
|
(33) |
|
|
|
Adjust the volume of the main unit |
15 |
|
(16, 28) |
|
|
|
16 |
|
|
4 |
|
|
|
|
Mute the sound (17) 16 |
||
|
|
||
5 |
|
|
|
|
17 |
Slow motion, search, tuning 17 |
|
|
(16, 24) |
|
|
|
|
|
|
6 |
|
Skip, rewind, fast forward, Tape |
18 |
|
18 |
||
|
Program Sensor, sound quality |
|
|
|
|
|
|
|
|
adjustment, preset channel selection, |
|
|
|
time adjustment |
|
7 |
19 |
(13, 16, 19, 24, 29, 30) |
|
|
|
||
8 |
20 |
Select sound mode (29) |
19 |
|
|
||
|
|
Show on-screen menu (20) 20 |
|
9 |
|
|
|
|
21 |
Frame-by-frame/Select or register 21 |
|
10 |
|
menu items |
|
|
(13, 14, 16, 18, 20, 22, 24, 26, 27, 29) |
|
|
|
22 |
|
|
11 |
23 |
Return to previous screen |
22 |
|
(16, 20, 22) |
|
|
|
|
|
|
12 |
24 |
Cancel an item (16, 18) |
23 |
|
25 |
||
13 |
Deleting an item (27) |
|
|
|
|
||
Clock and timer setting (13, 30) 24
PLAY/REC timer on/off (30)
Changes the unit’s display (16) 25 Sleep timer, Auto off operation setting
(31)
8

Main unit
1 supply indicator
(AC IN)
This indicator lights when the unit is connected to the AC mains supply.
2Standby/on switch (8)
Press to switch the unit from on to standby mode or vice versa.
In standby mode, the unit is still consuming a small amount of power.
|
(15, 37) |
2 |
3 |
REC, USB] |
3 |
|
(26, 27, 31, 32) |
|
|
|
|
|
|
4 |
4 Using surround effect (29)
6
5Adjusting subwoofer level (29)
6 |
[* REC, TAPE] |
7 |
|
|
|||
|
(25, 28, 31, 32) |
|
|
7 |
USB port (26) |
|
|
|
|
|
8 |
8 |
Deck [;, OPEN] (24, 25) |
|
|
9 |
MUSIC PORT jack (31) |
9 |
|
10 |
Headphone jack |
10 |
|
|
Reduce the volume |
|
|
|
level and connect the |
|
|
|
headphones. Headphones |
|
|
|
plug type: Ø3.5 mm |
|
|
|
stereo (not included). |
|
|
|
• |
Avoid listening for |
|
|
|
prolonged periods of |
|
|
|
time to prevent hearing |
|
|
|
damage. |
|
|
• |
Excessive sound |
|
|
|
pressure from |
|
|
|
earphones and |
|
|
|
headphones can cause |
|
|
|
hearing loss. |
|
1925 Skip, rewind, fast forward, Tape Program Sensor, sound quality adjustment, time adjustment
(13, 16, 19, 24, 29, 30)
20USB selector and playback
(14, 27)
21Tape playback and direction (14, 24)
22MUSIC PORT/AUX selection (31, 33)
SURROUND
19
20
21
22
23
24
25
26
27
28
Remote control signal sensor |
|
ENGLISH |
|
|
|
||
11 |
Disc trays (7, 15) |
11 |
guide |
|
|||
|
|
|
|
|
[;, OPEN/CLOSE] (7, 15) |
12 |
reference |
12 |
[1 q] to [5 q] |
|
|
|
[;, EXCHANGE] (15) |
13 |
|
13 |
(disc direct play) (15) |
|
Control |
|
Enhancing bass sound |
14 |
|
|
|
||
|
(29) |
|
|
|
Selecting Manual EQ, |
15 |
|
|
adjusting its BASS level |
|
|
14 |
(29) |
|
|
[MIN, MIC VOL, MAX] |
16 |
|
|
15 |
|
||
(28) |
|
|
|
|
|
|
|
|
Microphone |
17 |
|
16 |
(MIC 1, MIC 2) jacks (28) |
|
|
|
Cassette holder (24, 25) |
18 |
|
17 |
|
|
|
18 |
|
|
|
[– VOLUME +] (28) 23 |
|
|
[MANUAL EQ] (29) 24 |
|
|
DVD/CD selector and 26 |
|
|
playback |
|
|
(15) |
|
RQTX0282 |
Stop, DEMO function |
28 |
|
FM/AM selection (24) |
27 |
|
(13, 24, 25) |
|
9 |
|
|
|

Simple setup
Simple setup
ENGLISH
Television, antenna and AC mains lead connections
Connect the AC mains lead after all other connections are complete. Conserving power
The unit consumes power (approx. 0.4 W) even when it is turned off with [^] (main unit: [8]). To save power when the unit is not to be used for a long time, unplug it from the household AC power socket. You will need to reset some memory items after plugging in the unit.
Speaker connections
Connect the speakers to the main unit with the terminals of the same colour.
Speaker |
Terminal/connector colour |
|
|
Front speaker (L) |
White |
|
|
Front speaker (R) |
White |
|
|
Subwoofer |
Purple |
|
|
FM indoor antenna
Tape the antenna where reception is best.
Adhesive tape
Please refer to “Using an external unit” on page 32 for more information on AUX connection.
Insert fully
For Southeast Asia and Thailand
Before connecting the AC mains lead, set the voltage.
Voltage Selector
Use a flat-head screwdriver to set the voltage selector on the back of the main unit to the appropriate position for the area in which this system is used.
AC mains lead
To household mains socket
RQTX0282
e.g. Front speaker (L)
Insertion of Connector
Even when the connector is perfectly inserted, depending on the type of inlet used, the front part of the connector may jut out as shown in the drawing. However there is no problem using the unit.
Connector |
Appliance inlet |
 Approx. 3.5 mm
 Note
Note

•The included AC mains lead is for use with this unit only. Do not use it with other equipment.
•Do not use an AC mains lead from other equipment.
Please refer to “Home Theater— Enjoying more powerful sound” on page 32 for more information on COAXIAL connection.
10

Other television connection
Connecting a television with a VIDEO IN terminal
Rear panel of this unit |
Television |
|
(not included) |
VIDEO OUT terminal
Do not connect the unit through a video cassette recorder, because the picture may not be displayed correctly due to copy guard protection.
Turn the television off before connecting, and refer to the television’s operating instructions.
Connecting a television with COMPONENT VIDEO IN terminals
COMPONENT
Antenna connections
AM loop antenna
 White
White
Black
Red
Click!
•Stand the antenna up on its base.
•Place the antenna where reception is best.
Simple setup ENGLISH
|
B |
|
R |
Rear panel of this unit |
Television |
|
(not included) |
COMPONENT VIDEO OUT terminals |
|
|
These terminals can be used for either interlace or |
|
|
progressive output. Connection using these terminals |
FM outdoor antenna |
|
outputs the colour difference signals (PB/PR) and |
||
|
||
luminance signal (Y) separately in order to achieve |
|
|
high fidelity in reproducing colours. The description of |
|
|
the component video input terminals depends on the |
|
|
television or monitor (e.g. Y/PB/PR,Y/B- Y/R-Y, Y/CB/CR). |
|
|
Connect to terminals of the same colour. |
|
FM outdoor antenna (not included)
75 Ω coaxial cable (not included)
To enjoy progressive video
1.Connect to a progressive output compatible television.
2.Set “VIDEO OUT (I/P)” to “PROGRESSIVE”, then follow the instructions on the menu screen
( page 23, “VIDEO” menu).
Optional antenna connections
AM outdoor antenna
 AM outdoor antenna (not included)
5 to |
12 m |
Use outdoor antenna if radio reception is poor.
 Note
Note

•Disconnect the outdoor antenna when the unit is not in use.
•Do not use the outdoor antenna during a lightning storm.
Connect the AM loop antenna
•Run a piece of vinyl wire horizontally across a window or other convenient location.
•Leave the loop antenna connected.
RQTX0282
11

Simple setup (continued)
Placement of speakers
ENGLISH |
Front speaker |
Subwoofer |
Front speaker |
|
(left) |
(right) |
|
|
|
||
setup |
|
Main unit |
|
|
|
|
|
Simple |
|
|
|
Front speakers
Speakers are designed identically so that no left or right channel orientation is necessary.
Subwoofer
The subwoofer can be placed in any position as long as it is at a reasonable distance from the TV.
Use only the supplied speakers
•Using other speakers can damage the unit and sound quality will be negatively affected.
•Set the speakers up on an even surface to prevent them from falling. Take proper precautions to prevent the speakers from falling if you cannot set them up on an even surface.
Positioning for best effect
How you set up your speakers can affect the bass and the sound field. Note the following points.
•Place speakers on flat secure bases.
•Placing speakers too close to floors, walls, and corners can result in excessive bass. Cover walls and windows with a thick curtain.
If irregular colouring occurs on your television
The supplied speakers are designed to be used close to a television, but the picture may be affected with some televisions and setup combinations.
If this occurs, turn the television off for about 30 minutes.
The television’s demagnetizing function should correct the problem. If it persists, move the speakers further away from the television.
Note
•You cannot take the front net off the speakers
•Keep your speakers at least 10 mm away from the system for proper ventilation.
•You can damage your speakers and shorten their useful life if you play sound at high levels over extended periods.
•Reduce the volume in the following cases to avoid damage.
−When playing distorted sound.
−When the speakers emit strange noise (howling) from a microphone or record player, noise from FM broadcasts, or continuous signals from an oscillator, test disc, or electronic instrument.
−When adjusting the sound quality.
−When turning the unit on or off.
Caution
•Use the speakers only with the recommended system. Failure to do so can damage the amplifier and speakers, and can cause fire. Consult a qualified service person if damage occurs or if a sudden change in performance is apparent.
•Do not attach these speakers to walls or ceilings.
Preparing the remote control
Press on the tab to open
|
R6/LR6, AA |
|
|
Insert this side first when closing |
|
|
Use |
|
|
Aim at the remote control signal sensor ( page 9), avoiding |
|
|
obstacles, at a maximum range of 7 m directly in front of the unit. |
|
|
|
|
|
CAUTION |
|
|
Danger of explosion if battery is incorrectly replaced. Replace |
|
RQTX0282 |
only with the same or equivalent type recommended by the |
|
instructions. |
|
|
|
manufacturer. |
|
|
Dispose of used batteries according to the manufacturer’s |
|
|
|
|
Batteries
•Use a manganese dry battery or an alkaline dry battery
•Insert so the poles (+ and –) match those in the remote control.
•Remove if the remote control is not going to be used for a long period of time.
•Store in a cool, dark place.
•Do not heat or expose to flame.
•Do not leave the batteries in an automobile exposed to direct sunlight for a long period of time with doors and windows closed.
•Mishandling of batteries can cause electrolyte leakage which can severely damage the remote control.
Do not:
•mix old and new batteries.
•use different types of the batteries at the same time.
•take apart or short circuit the batteries.
•attempt to recharge alkaline or manganese batteries.
•use batteries if the covering has been peeled off.
12
 Loading...