


MBP20
Table of contents
 Loading...
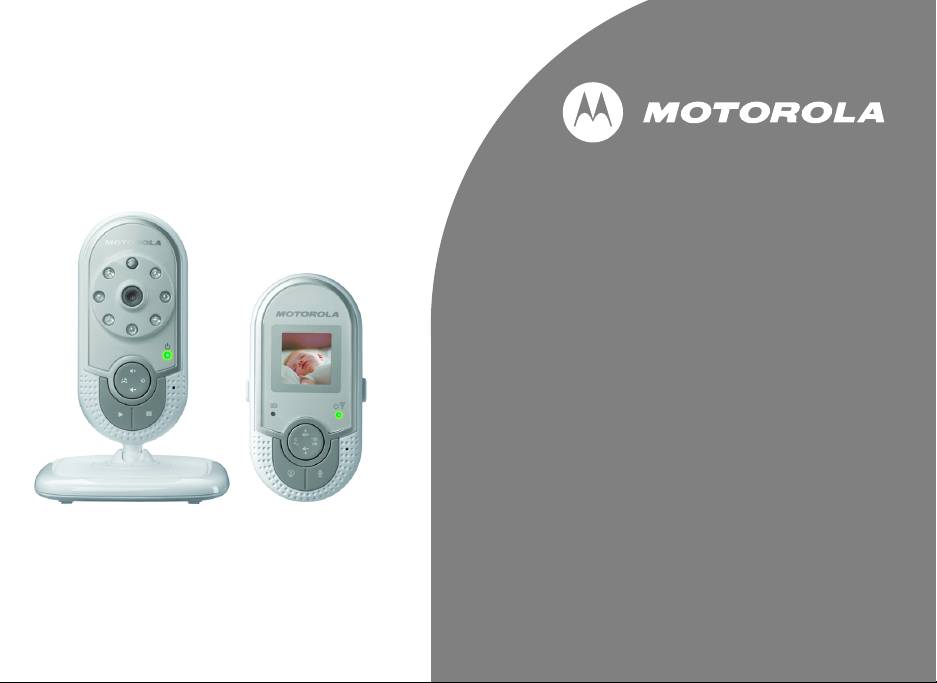
User’s Guide
MBP20
Baby Monitor
The features described in this user's
guide are subject to modifications
without prior notice.

Welcome...
to your new Motorola Baby Monitor!
Thank you for purchasing the MBP20. Now you can see and hear your baby sleeping in another room or you can
monitor your older children in their play room.
Please retain your original dated sales receipt for your records. For warranty service of your Motorola product, you
will need to provide a copy of your dated sales receipt to confirm warranty status. Registration is not required for
warranty coverage.
For product-related questions, please call:
US and Canada 1-888-331-3383
On the Web: www.motorola.com
This User's Guide provides you with all the information you need to get the
most from your product.
Before you can use the baby monitor, you MUST insert the battery in the parent
unit, and we recommend you fully charge the battery so that it continues to
work if you disconnect it from the mains power to carry it to another location.
Please read the Safety Instructions on page 8 before you install the units.
Got everything?
• 1 x Parent unit (MBP20PU)
• 1 x Baby unit (MBP20BU)
• 1 x Rechargeable Ni-MH battery pack for the Parent unit
• 1 x Belt clip / stand for parent unit (already attached)
• 1 x Battery door for parent unit (already attached)
• 1 x Power adapter for the parent unit
• 1 x Power adapter for the baby unit
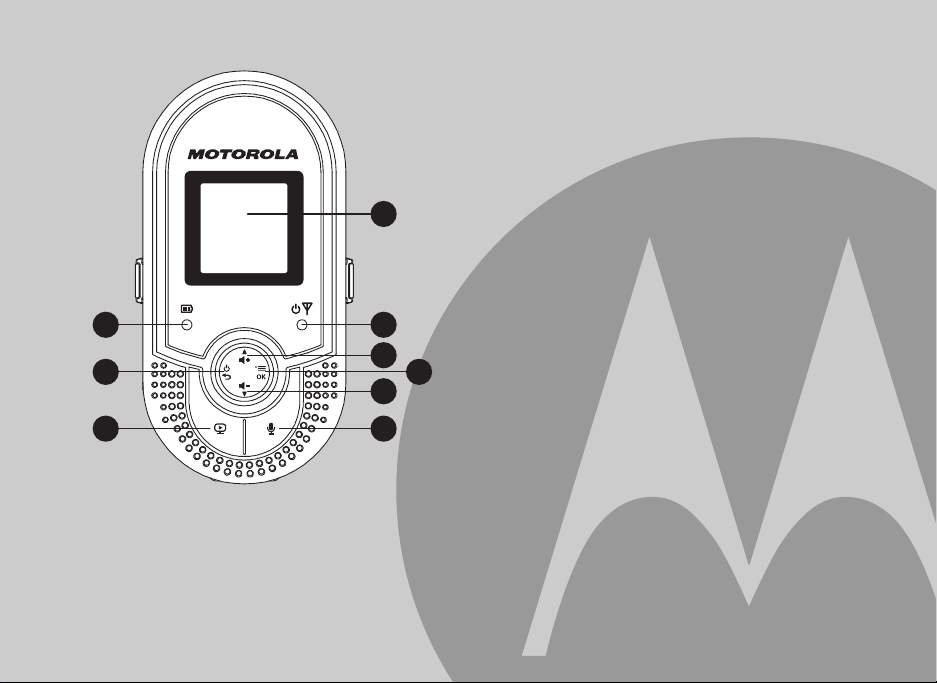
Overview of your Parent unit
1 LCD Display
2 Link Indicator
On when the parent unit is powered on and linked to
the baby unit.
Flashes when the parent unit is out of range of the
baby unit.
Off when the parent unit is powered off.
7
8
9
6
5
4
3
2
1
3 UP / Volume +
In idle mode: Press to increase the speaker volume.
In menu mode: Press to move up the menu list.
4Menu / OK
In idle mode: Press to access the main menu.
In menu mode: Press to access the sub-menu, or
confirm the settings.
5 DOWN / Volume -
In idle mode: Press to decrease the speaker volume.
In menu mode: Press to move down the menu list.
6
Talk
Press and hold to talk back through the baby unit.
Release to quit the talk mode.
7 Video On / Off
Press to deactivate/activate the video feed and turn
on/off the LCD display.
8 Power / Back
In idle or menu mode: Press and hold to power on/off
the parent unit.
In menu mode: Press to cancel settings or go back to
the previous level.
9 Charging Indicator
On steadily when in charging mode.
Flashes when low battery is detected.
NOTE
Off if the battery pack is not installed, even if the
power adapter is connected.
Parent Unit Display
Menu Structure of the Parent Unit
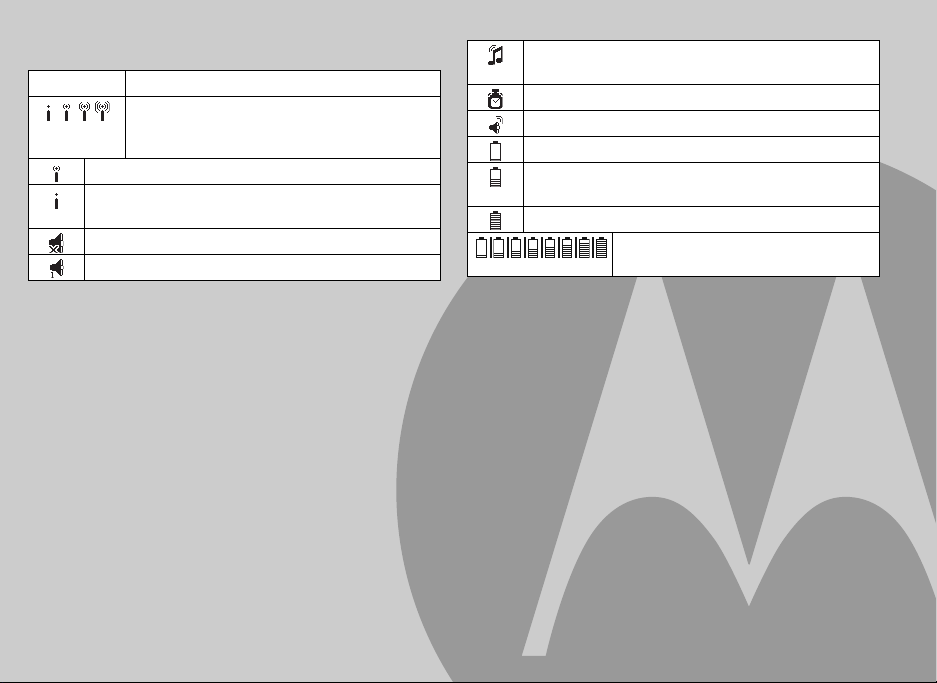
Icons Behaviors Description
Indicates the signal strength between baby
unit and parent unit. The more blocks, the
stronger connection signal.
Flashes when parent unit is out of range.
Indicates no connection between the baby unit
and parent unit.
Indicates when speaker of parent unit is muted.
Indicates the speaker volume level of parent unit.
Indicates when parent unit or baby unit is playing
lullaby.
Indicates when timer alarm is activated.
Indicates when the sound alert is set on.
Low battery, needs charging.
1/2 battery level. More internal bars mean high
battery level.
Full battery level.
Animation in cycle. Battery is in
charging.
MAIN MENU LANGUAGE TIMER BRIGHTNESS SOUND ALERT ALERT TONES RESET
SUB MENU English
Français
Español
Deutsch
Italiano
Português
Activation
Set Timer
Level 1 ~ 5 On
Off
Low Battery
No Link

Overview of your Baby unit
6
5
4
8
9
10
2
7
3
1
1 Infrared Light
4 x Infra-red LEDs for night vision illumination
2 Camera Lens
3 Power Indicator
On when the baby unit is switched on.
Off when the baby unit is switched off.
4 UP / Volume +
Press to increase the speaker volume.
5Power
Press and hold to power on/off the baby unit.
6
DOWN / Volume -
Press to decrease the speaker volume.
7Stop
Press to stop the lullaby playing.
8Play
Press to start playing the selected lullaby.
9 Lullaby
Press to start playing the selected lullaby.
During lullaby playing, press to select and play the
other lullabies.
10 Photo sensor
Light sensor to detect when night vision required.

Important guidelines for installing your Baby Monitor
• To use your baby unit and parent unit together, you must be able to establish a radio link between them, and the range
will be affected by environmental conditions.
• Any large metal object, like a refrigerator, a mirror, a filing cabinet, metallic doors or reinforced concrete, between the
baby and parent unit may block the radio signal.
• The signal strength may also be reduced by other solid structures, like walls, or by radio or electrical equipment, such
as TV's, computers, cordless or mobile phones, fluorescent lights or dimmer switches.
• If the signal is poor, try moving the parent and/or the baby unit to different positions in the rooms.

7
1. SAFETY INSTRUCTIONS ................................... 8
2. GETTING STARTED............................................ 9
2.1 Baby unit power supply.......................................9
2.2 Parent unit battery installation.............................9
2.3 Belt clip on parent unit ......................................10
3. USING YOUR BABY MONITOR........................ 11
3.1 Power on/off the parent unit..............................11
3.2 Power on/off the baby unit ................................11
3.3 Adjust speaker volumes of the parent unit
and baby unit ....................................................11
3.4 Talk Back ..........................................................11
3.4.1 Adjust talk back volume ......................... 12
3.5 Temperature .....................................................12
3.6 Lullaby...............................................................12
3.7 Monitoring management for multi-parent
system............................................................... 12
4. Parent unit settings .......................................... 13
4.1 Set the language...............................................13
4.2 Timer.................................................................13
4.2.1 Turn on the timer ...................................13
4.2.2 Set the timer ..........................................14
4.3 Set the brightness ............................................. 14
4.4 Sound alert........................................................14
4.5 Alert tones.........................................................14
4.6 Reset.................................................................15
5. DISPOSAL OF THE DEVICE
(ENVIRONMENT)............................................... 15
6. CLEANING......................................................... 16
7. TROUBLESHOOTING ....................................... 16
8. GENERAL INFORMATION................................ 18
9. TECHNICAL SPECIFICATIONS........................ 22
Loading...