


Livarno LED Tube Light User Manual [en, cs, de]

LED TUBE LIGHT
LED TUBE LIGHT
Operation and Safety Notes
LED TRUBICE
Pokyny pro obsluhu a bezpečnostní pokyny
IAN 31724
LED-CEVI
Navodila za upravljanje in varnostna opozorila
LED-RÖHRE
Bedienungs- und Sicherheitshinweise
Before reading, unfold the page containing the illustrations and familiarise yourself with all functions of the
device.
Pred branjem odprite stran s slikami in se nato seznanite z vsemi funkcijami naprave.
Před čtením si otevřete stranu s obrázky a potom se seznamte se všemi funkcemi přístroje.
Klappen Sie vor dem Lesen die Seite mit den Abbildungen aus und machen Sie sich anschließend mit allen
Funktionen des Gerätes vertraut.
GB Operation and Safety Notes Page 5
SI Navodila za upravljanje in varnostna opozorila Stran 9
CZ Pokyny pro obsluhu a bezpečnostní pokyny Strana 15
DE / AT / CH Bedienungs- und Sicherheitshinweise Seite 19
1
2
3
4
5

Introduction / Safety
LED Tube Light
Introduction
Congratulations on your new product.
You have selected a high quality prod-
uct. Please be sure to carefully read the
complete operating instructions. Fold out the page
with the illustrations. These instructions are part of
the product and contain important information on
setup and handling. Always follow all safety instructions. Before using this product for the first time
verify the correct voltage and that all parts are
properly installed. Should you have any questions
or you are unsure about operating the product,
please contact the dealer or service centre. Please
keep these instructions in a safe place and pass
them on third parties as applicable.
Intended use
The LED tubes are suitable for indoor use at an
ambient temperature of -20 °C to +40 °C. Only
use the LED tubes outdoors with an IP-certified
lamp. The LED tubes are suitable to directly replace
fluorescent tubes with starting electrodes (single- or
twin circuit). Not suitable for electronic ballasts.
4
LED blind starting electrode
5
LED tube
Technical Data
Item no.: 0507–010L
Wattage: 10 W
Lumens: 850 lm
Kelvin: 4000 K
Ra: ≥ 80
Socket: G13
V: 220–240 V∼
Hz: 50 Hz
mA: 50 mA
Beam angle: 150°
T(h): 25,000 h
ON / OFF: 15,000 x
Quick light: <1s = 60 % light
Hg: 0 mg
Dimensions: L 600 mm; D 30 mm
Ambient temperature: -20 °C to +40 °C
Non-dimmable
Safety
Scope of delivery
Check immediately after unpacking that the parts
are complete and that the product is in proper
condition.
1 LED T8 tube, model 0507-010L
1 Blind starting electrode
1 Instructions for assembly and use
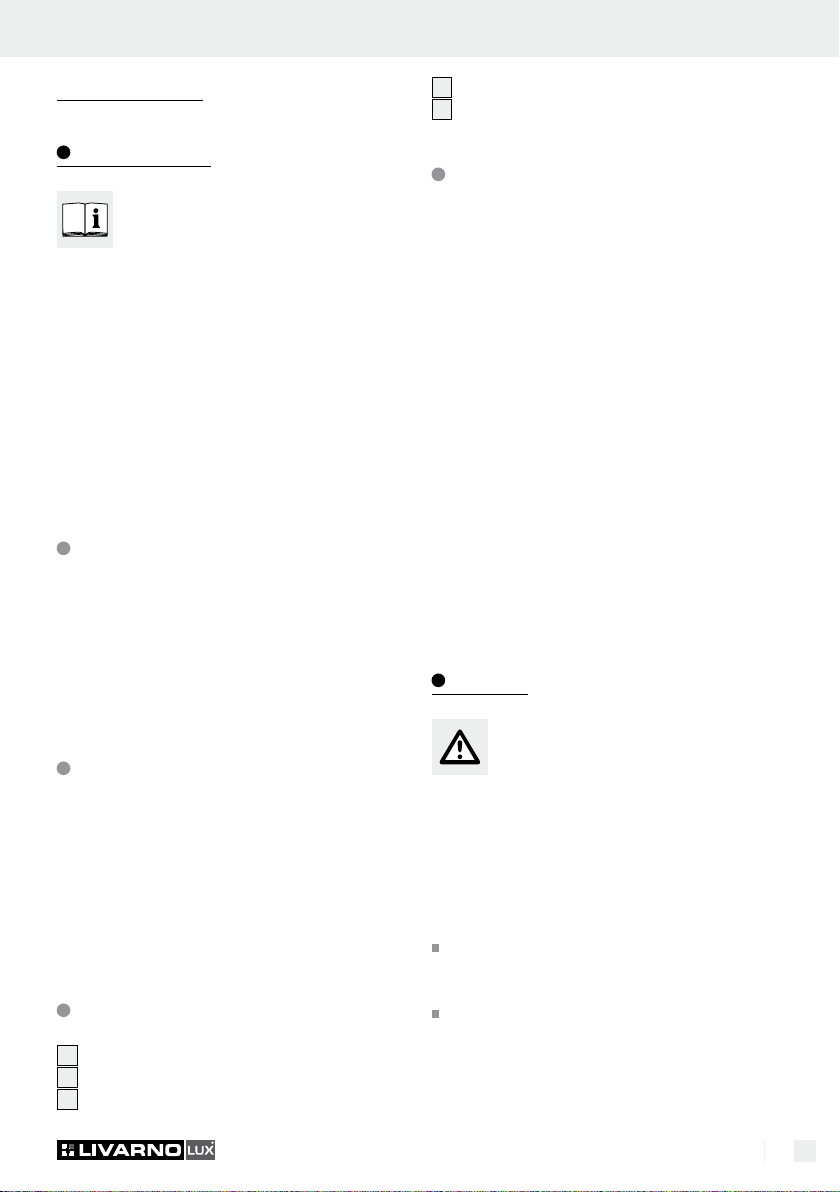
Parts description
1
ON / OFF switch
2
Fluorescent tube
3
Starting electrode
Safety information
Damage due to failure to comply with these operating instructions will invalidate the guarantee! We
assume no liability for consequential damage! We
assume no liability for material damage or personal
injury due to improper handling or failure to
comply with the safety instructions!
Cut off the current before installation to prevent
electric shock. Check local electrical requirements
and ordinances.
Never use the LED tube if any damage is
detected. A damaged LED tube means danger
of death from electric shock.
5 GB

Safety / Installation notices
The LED tube cannot be repaired. If the LED
tube is damaged, the product must be disposed of.
Remove the fuse or switch off the circuit breaker
in the fuse box before installation. Set the light
switch to the „OFF“ position.
Verify the mains voltage on site corresponds
with the operating voltage required for the light
(220–240 V∼) before installation.
Only use the individual parts supplied, other-
wise all warranty claims will become invalid.
Only operate the LED tube with the included
LED blind starting electrode.
Protect the LED tube from moisture. Never
allow the LED tube to come into contact with
water or other liquids.
Never open any of the components of the elec-
trical equipment or insert any objects into the
same components. This will pose a risk of fatal
injury from electric shock.
Not suitable for direct current!
When replacing conventional fluorescent lights
with LED lights, check for possible regulations
on the illuminance required which may apply.
Do not look directly into the light source
(LED mp).
The LED tube is not suitable for dimmer- or
electric switches.
Not suitable for electronic ballasts!
The total energy efficiency and light distribution
of your lighting system depends on the con-
struction of the system.
Installation notices
twin circuit replacement
Single circuit before conversion
Ballast
230 V∼
230 V∼
Fluorescent tube
Starting electrode
Single circuit after conversion
Ballast
LED tube
Blind starting electrode
twin circuit replacement
Twin circuit before conversion
Ballast
230 V∼
230 V∼
Fluorescent tube
Starting electrode
Twin circuit after conversion
Ballast
LED tube
Blind starting electrode
Ballast
Capacitor
Fluorescent tube
Starting electrode
Ballast
Capacitor
LED tube
Blind starting electrode
The LED tubes are suitable to directly replace fluorescent tubes with starting electrodes. Only operate
the LED tube
starting electrode
5
with the included LED blind
4
.
Note: Note suitable for electronic ballasts!
LED tubes are suitable for lamps with single- or twin
circuit:
6 GB
Remove the starting electrode 3 and replace
it with the included LED blind starting electrode
4
.
Note: Not suitable for lights with tandem circuits

Installation notices / Installation / Disposal / Information
twin circuit before conversion
Ballast
230 V∼
230 V∼
Fluorescent tube
110–130
V
Series starting electrode
Tadem circuitry cannot be
converted with LED tubes
Ballast
LED tube
Blind starting electrode
Fluorescent tube
110–130
V
Series starting electrode
LED tube
Blind starting electrode
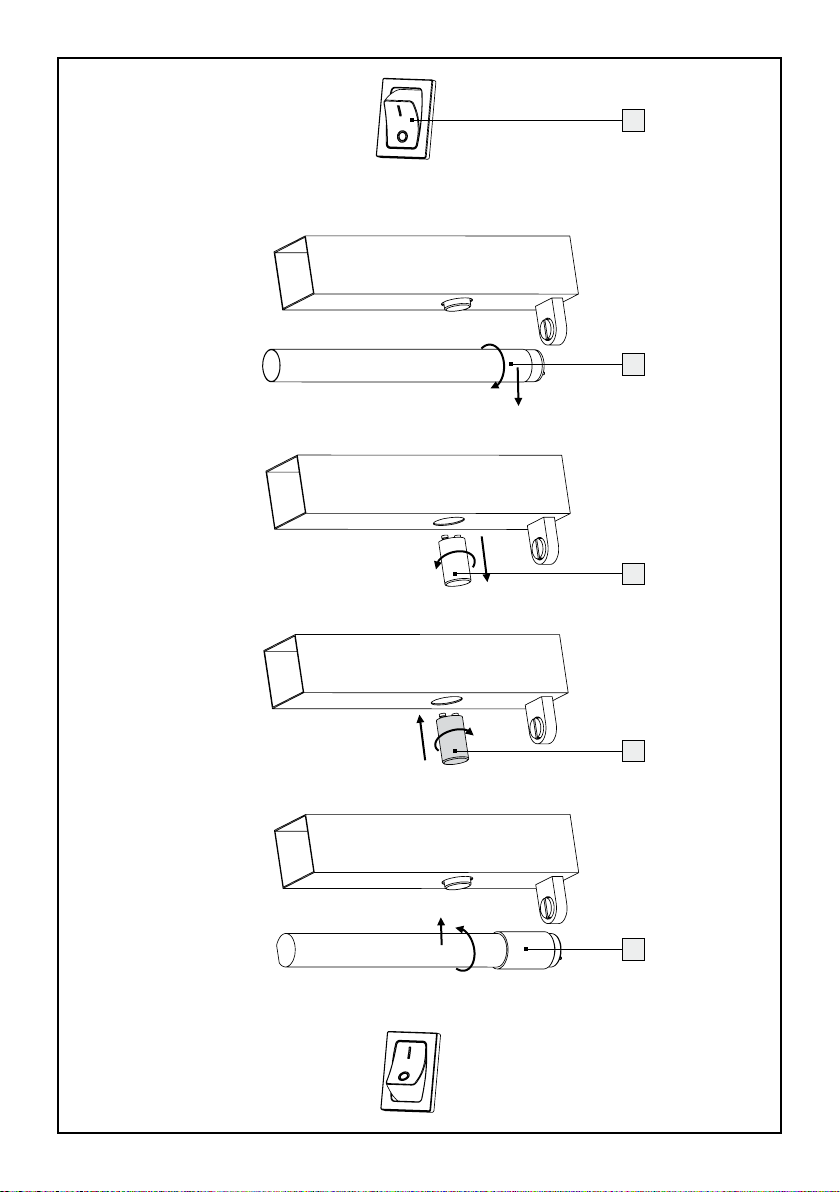
Installation
Remove the fuse or switch off the circuit
breaker in the fuse box before installation.
Set the light switch to the Off/0 position.
Remove the fluorescent tube 2.
Remove the starting electrode 3.
Insert the LED blind starting electrode 4.
Insert the LED tube 5.
Reinsert the fuse or switch on the circuit breaker
in the fuse box.
Set the light switch to the On/I position.
Disposal
The package and packaging materials
consist entirely of environmentally
friendly materials. They can be disposed
of in local recycling containers.
The icon showing the crossed out
wheelie bin means within the European
Union the product must be disposed of
through separate refuse collection. This applies to
the product and to all components bearing this
symbol. Do not dispose of products bearing this
symbol in your normal household waste, but
instead they must be taken for recycling to a collection site for electrical and electronic appliances.
Recycling helps to reduce the consumption of raw
materials and protects the environment. Do not
dispose of in the household waste.
Information
Warranty
You receive a 36 month warranty on this product,
valid from the date of purchase. The appliance has
been carefully produced under strict quality control. Within the warranty period we shall rectify
without charge all material and manufacturing
defects. In the event of a defect arising during the
warranty period, please send the device to the
listed Service Centre address, making reference to
the following article number: 0507-010L. Damage
caused by improper handling, non-observance of
the operating instructions or unauthorised interference are excluded from the warranty. The performance of services under the warranty does not
extend or renew the warranty period.
Declaration of Conformity
This product fulfils the requirements of the applicable
European and national directives (Electromagnetic
Compatibility 2004/108/EC, Low Voltage Directive
2006/95/EC, Ecodesign Directive 2009/125/EC,
RoHS Directive 2011/65/EU). Conformity has
been demonstrated. The relevant declarations and
documents are held by the manufacturer.
Manufacturer / Service
Briloner Leuchten GmbH
Im Kissen 2,
59929 Brilon,
Germany
Tel.: +49 (0) 29 61 / 97 12–0
Fax: +49 (0) 29 61 / 97 12–199
E-mail: Info@briloner.de
www.briloner.de
IAN 31724
7 GB
 Loading...