


LED RECESSED LIGHTS
LED RECESSED LIGHTS
Assembly, operating and safety instructions
SPOTS ENCASTRABLES A LED
Instructions de montage, d‘utilisation et consignes
de sécurité
LED-EINBAULEUCHTEN
Montage-, Bedienungs- und Sicherheitshinweise
IAN102542
LED-INDBY GNINGSLAMPER
Monterings-, betjenings- og sikkerhedshenvisninger
LED-INBOUWLAMPEN
Montage-, bedienings- en veiligheidsinstructies

Before reading, unfold both pages containing illustrations and familiarise yourself with all functions of the
device.
Før du læser, vend begge sidene med billeder frem og bliv bekendt med alle apparatets funktioner.
Avant de lire le mode d‘emploi, ouvrez les deux pages contenant les illustrations et familiarisez-vous ensuite
avec toutes les fonctions de l‘appareil.
Vouw vóór het lezen de beide pagina‘s met de afbeeldingen open en maak u vertrouwd met alle functies
van het apparaat.
Klappen Sie vor dem Lesen die beiden Seiten mit den Abbildungen aus und machen Sie sich anschließend
mit allen Funktionen des Gerätes vertraut.
GB / IE Assembly, operating and safety instructions Page 5
DK Monterings-, betjenings- og sikkerhedshenvisninger Side 11
FR / BE Instructions de montage, d‘utilisation et consignes de sécurité Page 17
NL / BE Montage-, bedienings- en veiligheidsinstructies Pagina 23
DE / AT / CH Montage-, Bedienungs- und Sicherheitshinweise Seite 29

A B
68 mm
C D
E F
4
G
5
21 3
4
8
7
6

H
I
9
4
J
L
K
4 4
M
min. 10 cm
min. 10 cm min. 10 cm
Table of Contents
Introduction
Proper use ............................................................................................................................................ Page 6
Included items .....................................................................................................................................Page 6
Description of Parts ............................................................................................................................. Page 6
Technical Data ....................................................................................................................................Page 6
Safety
Safety advice ....................................................................................................................................... Page 6
Preparation
Required tools and materials .............................................................................................................. Page 8
Before installation ................................................................................................................... Page 8
Installation ..................................................................................................................................... Page 8
Changing the bulbs ................................................................................................................. Page 9
Maintenance and Cleaning .............................................................................................. Page 9
Disposal ............................................................................................................................................ Page 9
Warranty and Service
Warranty Declaration ......................................................................................................................... Page 9
Service address ................................................................................................................................... Page 9
Declaration of conformity ................................................................................................................... Page 10
Manufacturer ....................................................................................................................................... Page 10
5 GB/IE

Introduction / Safety
LED Recessed lights
Q
Introduction
We congratulate you on the purchase of
your new device. You have chosen a
high quality product. Please read carefully and completely through these operating instructions. Fold out both pages with the illustrations.
These instructions form part of the product and
contain important information about bringing the
product into use and its handling. Always observe
all the safety advice. Check that the correct mains
voltage is available and that all the parts have
been properly assembled before bringing into use.
Should you have any questions or be uncertain as
to how to operate the device, please get in touch
with your dealer or service point. Please keep these
instructions in a safe place and hand them on to a
third party if necessary.
Q
Proper use
This light is suitable only for interior use, in dry and
enclosed spaces. This lamp is intended for use only
in a domestic environment. The light can be fitted to
all normally inflammable surfaces.
3
Spring ring
4
Retaining spring
5
Cover
6
Terminal block
7
Cable holder
8
Mains socket
9
Fitting
Q
Technical Data
Model no.: 7226
Operating voltage: 230 V∼, 50/60 Hz
Bulbs: 230 V∼, 50/60 Hz,
LED GU10, 5 W
Power consumption: 3 x 5 W
Dimensions of
each bulb: ø 85 mm
Installation opening: ø 68 mm
Protection class: II /
For the cable harness (not supplied) a minimum
cross-section of 2 x 0.75 mm
2
is to be used. The
corresponding cable is to be provided with wire
end ferrules.
Q
Safety
Q
Included items
Check that all the items and accessories are present
and that the lamp is in perfect condition immediately after unpacking.
3 Installation spotlights
3 Mains sockets
6 Retaining springs
1 Operating instructions
Q
Description of Parts
1
Lamp housing
2
Bulb
6 GB/IE
Safety advice
The right to claim under the guarantee shall be rendered invalid in respect of damage caused by the
non-observance of these operating instructions!
No liability is accepted for consequent damage!
No liability is accepted for damage to property or
persons caused by improper handling or non-observance of the safety advice!
To avoid danger to life
from electric shock
J Ensure that a qualified electrician or a person
trained to carry out electrical installations performs
the electrical installation.

Safety
J Every time before connecting the lamp the mains,
check it and the mains lead for damage. Never
use your light if you find it is damaged in any way.
CAUTION! A damaged mains lead presents
a serious danger to life from electric shock. In
the event of damage, repairs or other problems
with the lamp please contact the service centre
or an electrician.
J Before installation, remove the fuse for this circuit
or switch off at the circuit breaker (0 setting) in
the fuse box.
J Before assembly, ensure that the mains voltage
available corresponds to the operating voltage
necessary of the light (230 V∼).
J Never let the lamp come into contact with
water or other liquids.
J Never open or insert anything into electrical
fittings or equipment. Doing this sort of thing can
lead to a serious danger to life from electric shock.
J Do not install the lamp on damp or conducting
surfaces.
To avoid danger of
fire and injury
J RISK OF INJURY! Check every bulb and
lampshade for damage immediately upon unpacking. Do not fit the light if the bulbs and / or
lampshades are faulty. If they are, contact the
service point for a replacement.
J RISK OF INJURY FROM BURNS! Ensure
the lamp has been switched off and allowed to
cool before you touch it. In this way you will
avoid the danger of burns. Bulbs give off a lot
of heat around the top of the lamp.
J Replace any faulty bulbs with new ones imme-
diately. Before replacing the bulb, always remove the fuse or switch the automatic cutout off.
J
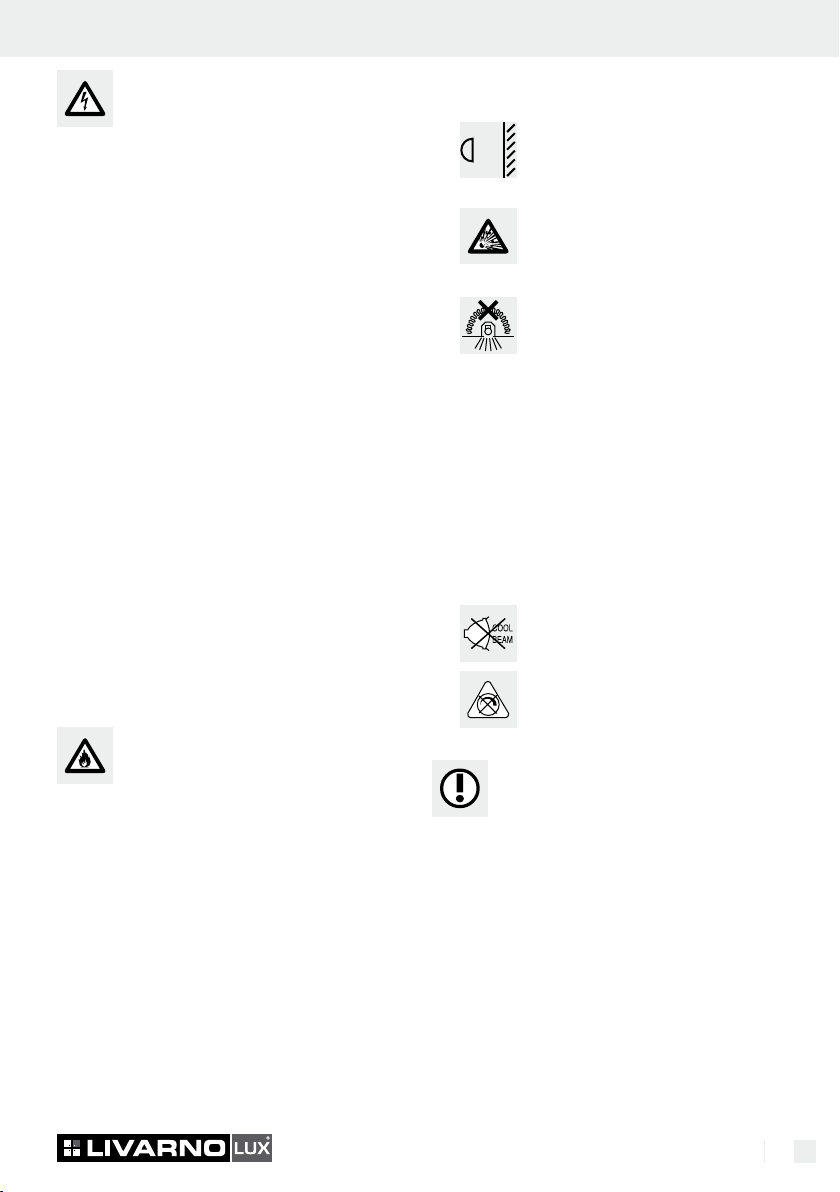
FIRE HAZARD! Fit the light so that
it is at least 0.3 m away from the
0.3 m
material illuminated.
J
DANGER OF EXPLOSION!
Never use the product in rooms or
in the vicinity of easily inflammable
or explosive liquids, gases, vapours or dusts.
J
CAUTION! DANGER OF FIRE!
Never cover the downlights with
thermally insulative covers or similar
materials.
J Please ensure there is adequate cooling! The
maximum temperature in the downlight installation area of 90 °C must not be exceeded.
J Use the downlight set only with the supplied
accessories. Do not interconnect downlight sets.
Failure to observe this advice invalidates your
rights under the warranty.
J Do not allow the lamp or the packaging materi-
als to lie around unattended. Plastic film or bags,
Styrofoam etc. can turn into dangerous toys for
children.
J
Do not use cold light lamps with
reflector.
J
Not dimmable! The LED lamp
installed is not suitable for dimmers
or electronic switches.
Working safely
J Install the light so that it is protected from mois-
ture, dirt and the build-up of excessive heat. Do
not install the downlights in bathrooms or similar
rooms.
J Use only 230 V∼ bulbs with a GU10 socket
and a maximum power of 5 watts.
J The distance between two installation spotlights
must be at least 20 cm.
J The clearance above and to the sides of the
lamp fitting must be at least 10 cm (see Fig. M).
J Make careful preparations for the assembly
and take sufficient time. Clearly lay out all components and any additional tools or materials
that might be required so that they are readily
to hand.
J Remain alert at all times and always watch what
you are doing. Always proceed with caution
and do not assemble the lamp if you cannot
concentrate or feel unwell.
7 GB/IE
Preparation / Before installation / Installation
Q
Preparation
Q
Required tools and materials
The tools and materials mentioned are not included
in the delivery. The details and values given are
non-binding and for guidance only. The nature of
the material depends on the individual circumstances
on site.
– Cable H03VV-2F of the required length with
wire-end sleeves (minimum diameter 2 x
0.75 mm2)
– Pencil /marking tool
– Voltage tester
– Screwdriver
– Electric drill
– Hole saw
– Edge cutter
– Ladder
Q
Before installation
Important: The electrical connection must be
carried out by a qualified electrician or someone
trained to perform electrical installations. This person
must be familiar with the features of the light and
the connection requirements.
j Familiarise yourself with all instructions and
diagrams in this manual as well as with the
light before installation.
j Before installation, ensure that the cable that
the light is to be attached to is not live. Remove
its fuse or switch off the automatic cutout in the
fuse box (0 position, see Fig. A).
j Use the voltage tester to check that there is no
voltage.
Q
Installation
Mark the position of the built-in spotlights. Saw
3 holes into the place you wish to install the spotlight with a keyhole saw (ø 68 mm) (fig. B). Please
take into account the distance between two in-
stallation spotlights. This must be at least 20 cm.
Guide the power cord (external) through the
installation opening (see Fig. C).
Insert the retaining springs 4 into the spot-
lights (see fig. E and F). The small nib of the
retaining springs
the lamp‘s housing
j Open the mains socket
5
cover
with a screwdriver (see Fig. G).
j Release the cable holder
4
must lie on the outside of
1
.
8
by unscrewing the
7
using a screwdriver.
Connect the power cord (external) to the termi-
nal block
holder
6
(see Fig. G) and tighten the cable
7
using a screwdriver. Pay attention
to the L / N marking (L = black or brown,
N = blue) of the connected wires. Any possibly
present green/yellow wire present is not connected. As the light is Protection Class II, earthing of the lamp is not required. Use a cable of
type H03VV-2F with a minimum cross-section
of 2 x 0.75 mm² and wire end ferrules.
j Seal the mains socket
the cover
5
with a screwdriver.
j Fit the mains connection box
8
again by tightening
8
back into the
installation opening.
j Pull the socket
9
with its connection cable out
of each opening.
j Place the fitting
the bulb
and turn the bulb
9
of the mains socket 8 on
2
including the lamp housing 1
2
with a ¼ turn in a clock-
wise direction until it is tight (see Fig. H).
j Before using the downlight spots remove any
insulation from around the area of the mains
connection box
8
and the downlight spots
(see Fig. I).
Fold the two retaining springs 4 upwards and
guide the spotlight with the connection cable
into the installation opening (see fig. J). The
little nib of the retaining springs must be on the
outside of the installation opening (see fig. J).
After pushing in, the retaining springs
4
unfold
and in doing so fix the recessed spotlights in
place.
j The downlights are now ready for use.
j Now switch on the power supply (see Fig. L).
8 GB/IE
Changing … / Maintenance and Cleaning / Disposal / Warranty and Service
Q
Changing the bulbs
CAUTION! DANGER OF ELECTRIC
SHOCK! When changing the bulbs,
first disconnect the light from the mains
supply. Remove its fuse or switch off the automatic
cutout in the fuse box (0 position).
j Allow the lamp to cool down completely.
j Remove the spring washer
housing
1
.
j Pull the defective bulb
slightly out of the lamp housing
3
from the lamp
2
with the socket 9
1
. Use a clean,
fluff-free cloth when you are replacing a bulb.
j Hold the socket
¼-turn anticlockwise out of the socket
9
firmly and turn the bulb 2
9
.
j Use only 230 V∼ bulbs with a GU10 socket
and a maximum power of 5 watts.
j Insert the new bulb
the socket
9
j Fix the bulb
with the spring washer
2
. Carefully insert it into
and turn it ¼-turn clockwise.
2
in place in the lamp housing 1
3
. Check that it is cor-
rectly seated (see Fig. D).
Q
Maintenance and Cleaning
CAUTION! DANGER OF ELECTRIC
SHOCK! Before cleaning the lamp
make sure that it is isolated from the mains
supply. Remove its fuse or switch off the automatic
cutout in the fuse box (0 position).
CAUTION! DANGER OF ELECTRIC
SHOCK! For reasons of electrical safety,
the light must never be cleaned with water
or other fluids or be immersed in water.
Q
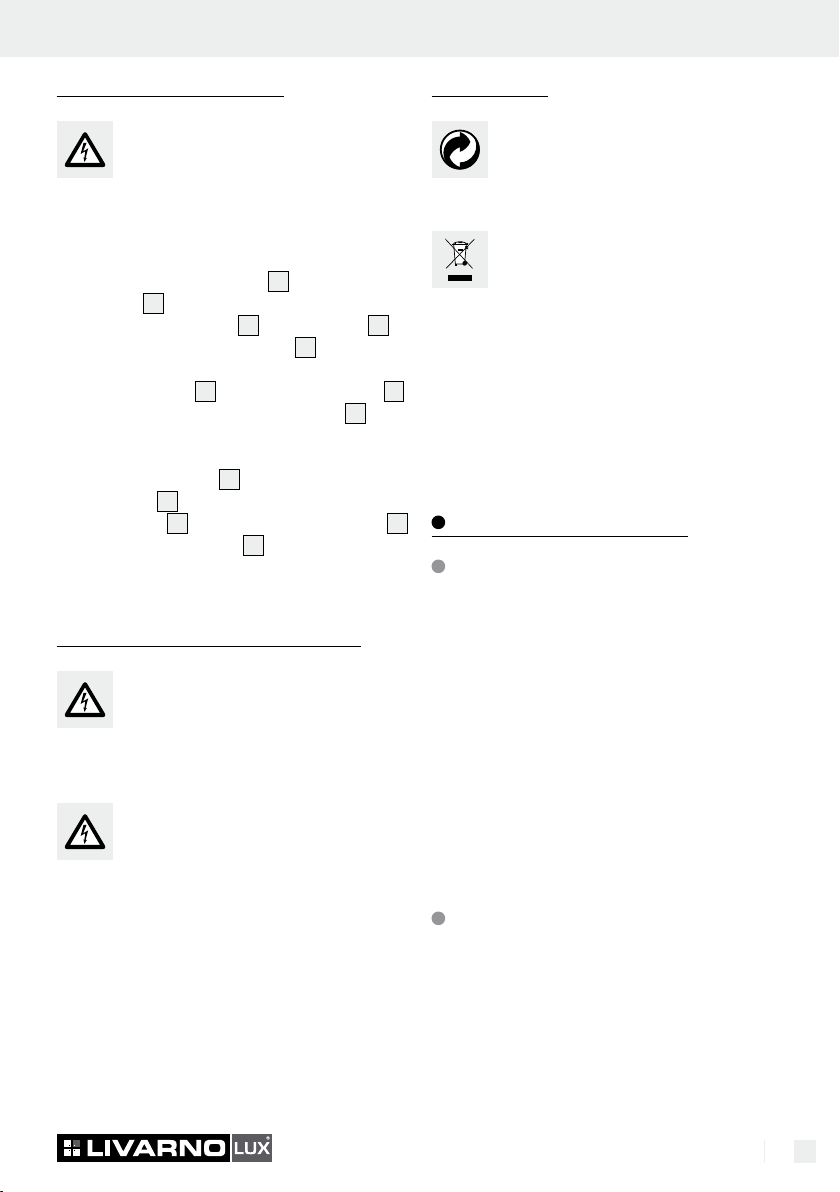
Disposal
The packaging and ancillary packing
consist entirely of environmentally-friendly
materials. They can be disposed of at
your local recycling facility.
The symbol of the wheelie bin with the
line through it means that, in the European
Union, the product has to be disposed
of in a separate refuse collection. This applies to
the product and to all components bearing this
symbol. Products marked in this way may not be
disposed of along with normal domestic waste but
have to be handed in at a recycling collection point
for electrical and electronic appliances. Recycling
helps to reduce the consumption of raw materials
and to ease the burden on the environment.
Warranty and Service
Warranty Declaration
This product has a 3-year warranty from the date of
purchase; the warranty is only valid for the original
purchaser and is not transferable. Please keep your
receipt as proof of purchase. The warranty applies
to material or manufacturing defects only. It does not
cover wear parts or damage caused by improper
use. The guarantee lapses in cases of unauthorized
tampering. Your statutory rights are not restricted in
any way by this warranty. Please contact the service
centre by telephone. In the event of any claims under
the warranty. This is the only way to ensure that your
instrument can be returned free of charge.
J Do not use any solvents, petrol or similar. This
would cause damage to the light.
j Allow the lamp to cool down completely.
j When cleaning, only use a dry, lint-free cloth.
Service address
Briloner Leuchten GmbH
Im Kissen 2, 59929 Brilon, Germany
Phone: +49 (0) 29 61 / 97 12–0
Fax: +49 (0) 29 61 / 97 12–199
E-Mail: Info@briloner.de
www.briloner.de
9 GB/IE

Warranty and Service
IAN 102542
Please have your receipt and the product number
(e.g. IAN 12345) available for all queries as proof
of purchase.
Declaration of conformity
This product fulfils the requirements of the applicable
European and national directives (Electromagnetic
Compatibility 2004 / 108 / EC, Low Voltage Directive
2006 / 95 / EC, Ecodesign Directive 2009 / 125 / EC,
RoHS Directive 2011 / 65 / EU). Conformity has
been demonstrated. The relevant declarations and
documents are held by the manufacturer.
Manufacturer
Briloner Leuchten GmbH
Im Kissen 2
59929 Brilon
Germany
10 GB/IE

Indholdsfortegnelse
Indledning
Formålsbestemt anvendelse ................................................................................................................Side 12
Leverancens indhold ............................................................................................................................Side 12
Beskrivelse af delene ...........................................................................................................................Side 12
Tekniske specifikationer .......................................................................................................................Side 12
Sikkerhed
Af hensyn til Deres sikkerhed ..............................................................................................................Side 12
Forberedelse
Nødvendigt værktøj og materiale .......................................................................................................Side 14
Før installationen .......................................................................................................................Side 14
Montering ........................................................................................................................................Side 14
Udskiftning af glødelamperne .......................................................................................Side 15
Pasning og rengøring ............................................................................................................Side 15
Bortskaffelse .................................................................................................................................Side 15
Garanti og service
Garantierklæring ..................................................................................................................................Side 15
Serviceadresse .....................................................................................................................................Side 16
Konformitetserklæring ..........................................................................................................................Side 16
Producent ..............................................................................................................................................Side 16
11 DK

Indledning / Sikkerhed
LED-indbygningslamper
Q
Indledning
Vi ønsker dig til lykke med købet af din
nye lampe. Du har besluttet dig for et
produkt af høj kvalitet. Nærværende
betjeningsvejledning bør læses fuldstændigt og omhyggeligt. Siden med illustrationerne kan slås ud.
Vejledningen hører med til dette produkt og indeholder vigtige bemærkninhger om ibrugtagningen
og behandling. Vær altid opmærksom på alle
sikkerhedsbemærkninger. Forud for ibrugtagningen
skal det sikres at spændingen er korrekt, og at alle
dele er monteret rigtigt. Hvis De har spørgsmål eller
føler Dem usikker med hensyn til behandling af
lampen, bedes De sætte Dem i forbindelse med forhandleren eller servicekontoret. Denne vejledning
skal opbevares og følge med lampen, hvis den gives
videre til andre.
Q
Formålsbestemt anvendelse
Denne lampe er udelukkende beregnet til anvendelse
inden døre, i tørre og lukkede rum. Denne lampe er
kun beregnet til anvendelse i private husholdninger.
Lampen kan fastgøres til alle normalt flammesikre
overflader.
Q
Beskrivelse af delene
1
Lampehus
2
Lyskilde
3
Fjederring
4
Holdefjeder
5
Afdækning
6
Kronemuffe
7
Kabelholder
8
Strømtilslutningsdåse
9
Fatning
Q
Tekniske specifikationer
Modelnr.: 7226
Driftsspænding: 230 V∼, 50/60 Hz
Lyskilde: 230 V∼, 50/60 Hz,
LED GU10, 5 W
Optaget effekt: 3 x 5 W
Mål per lampe: ø 85 mm
Indbygningsåbning: ø 68 mm
Beskyttelsesklasse: II /
Til ledningsnettet (ikke indeholdt i den samlede levering) anvendes et minimumstværsnit på 2 x 0,75 mm
Det pågældende kabel forsynes med åreendekapper.
Q
Sikkerhed
2
.
Q
Leverancens indhold
Umiddelbart efter udpakningen skal indholdet
kontrolleres for fuldstændigt indhold samt for den
fejlfrie tilstand.
3 indbygningsspots
3 strømtilslutningsdåser
6 holdefjedre
1 betjeningsvejledning
12 DK
Af hensyn til
Deres sikkerhed
I tilfælde af skader som følge af misagtelse af denne
betjeningsvejledning bortfalder garantikravet! For
følgeskader påtager vi os intet ansvar! Ved skader
på genstande eller personer der forårsages af ukorrekt
behandling eller misagtelse henvisningerne til sikkerheden, påtager vi os intet ansvar!
Sikkerhed
Udsæt Dem ikke for fare
fra elektriske stød
J Lad elektroinstallationen udføre af en uddannet
elektriker eller en person der har modtaget
instruktion i elektriske installationer.
J Forud for enhver tilslutning til lysnettet skal lam-
pen og ledningen kontrolleres for eventuelle
beskadigelser. Benzt aldrig lampen hvis der er
beskadigelser på den.
FORSIGTIG! Beskadigede ledninger kan
være årsag til livsfarlige elektriske stød. Er der
tale om beskadigelser, reparationer eller andre
problemer med lampen, bør De kontakte serviceafdelingen eller en faglært elektriker.
J Før montagen fjernes sikringen, eller kredsløbs-
kontakten målerskabet slås fra (sættes i 0-stilling).
J Sørg inden montagen for at spændingen passer
sammen med den nødvendige spænding til
lampen (230 V∼).
J Det skal undgås at lampen kommer i berøring
med vand eller andre vædsker.
J
De strømførende dele af lampen må aldrig luk-
kes op, og der må ikke stikkes nogen genstande
ind i disse. Sådanne indgreb fører til livsfarlige
elektriske stød.
J Lampen må ikke installeres på fugtige eller
ledende overflader.
Undgå faren for brand
og tilskadekomst
J RISIKO FOR TILSKADEKOMST! Umiddel-
bart efter udpakningen skal hver glødelampe og
hvert lampeglas kontrolleres for beskadigelser.
Anvend ikke lampen med defekte lyskilder og /
eller defekt lampeglas. I givet fald kan De rette
henvendelse til serviceafdelingen med henblik
på ombytning.
J RISIKO FOR FORBRÆNDING! Lampen
skal være slukket og afkølet, før den må berøres.
På den måde undgår De forbrændinger. Lyskilderne udvikler stærk varme.
J Defekte glødelamper skal straks udskiftes med
nye. Før glødelampen udskiftes, skal forinden
altid sikringen fjernes eller ledningssikkerhedskontakten slås fra.
J
BRANDFARE! Lampen skal monte-
res mindst en 0,3 meter fra materiale
0,3 m
der bliver bestrålet fra den. En vold-
som varmeudvikling kan bevirke brandudvikling.
J
EKSPLOSIONSFARE! Anvend
ikke produktet i værelser med eller i
omgivelser af let antændelige eller
eksplosive væsker, gasser, dampe eller støv.
J
ADVARSEL! BRANDFARE! Dæk
under ingen omstændigheder indbygningslampen af med varmedæm-
mende afdækninger eller lignende materialer.
J Sørg for tilstrækkelig køling. Den maksimale
temperatur på 90 °C i indbygningsområdet må
ikke overskrides.
J Anvend indbygningslampesettet kun sammen
med det medleverede tilbehør. Foretag ingen
sammenslutning af flere indbygningslampeset,
ellers forfalder enhver garanti.
J Lad ikke lampen eller emballagen henligge
uden opsyn. Plastikfolier og – poser, kunststofdele osv. kan for børn være et farligt legetøj.
J
Ikke nogen anvendelse af koldlysreflektor-lyskilder.
J
Kan ikke dæmpes! Den fast indbyggede lyskilde er ikke egnet til
dæmper og elektriske kontakter.
Sådan gøres det rigtigt
J Monter lampen, så den er beskyttet mod fugt,
snavs og stærk opvarmning. Undgå indbygning
i badeværelser eller lignende værelser.
J Brug udelukkende 230 V∼ lyskilder med
GU10-sokkel og en maksimal ydelse på 5 Watt.
J Afstanden mellem to indbygningsspots skal
være mindst 20 cm.
J Indbygningsområdet over lampefatningen skal
være mindst 10 cm og afstanden til siden skal
være mindst 10 cm (se billede M).
J Montagen skal forberedes omhyggeligt. Brug
den tid De har brug for. Læg alle enkeltdele til
rette sammen med det værktøj eller materiale
13 DK

Sikkerhed / Forberedelse / Før installationen / Montering
De ellers for brug for på en overskuelig og tilgængelig måde.
J Vær hele tiden koncentreret! Vær altid opmærk-
som på hvad De foretager Dem og bevar den
sunde fornuft. De bør ikke montere lampe hvis
De føler Dem ukoncentreret eller dårligt tilpas.
Q
Forberedelse
Q
Nødvendigt værktøj
og materiale
Det nævnte værktøj og materiale følger ikke med
lampen. Der er tale om uforpligtende angivelser og
værdier til Deres orientering. Materialets beskaffenhed retter sig efter de individuelle forhold på stedet.
– Kabel H03VV-2F i påkrævet længde med åreen-
dehylstre (minimumstværsnit 2 x 0,75 mm
– Blyant / markeringsstift
– Spændingskontrollør
– Skruetrækker
– Boremaskine
– Stiksav
– Skævbider
– Stige
Q
Før installationen
Vigtigt: Den elektriske tilslutning skal etableres af
en faglært elektriker eller en person der er instrueret
i elektriske installationer. Han skal have kendskab til
lampens egenskaber og bestemmelserne for tilslutningen.
Før installationen bør De sætte Dem nøje ind
anvisninger og tegninger i nærværende vejledning samt i selve lampens konstruktion.
Før installationen bør De sikre Dem at der ikke
er spænding på den ledning som lampen skal
sluttes til. Til sikring heraf kan De fjerne sikringen
eller slå sikkerhedskontakten i målerskabet fra
(0-stilling, se illust. A).
Tilslutningsstedet kontrolleres med en spæn-
dingsprøver.
2
)
Q
Montering
Markér positionerne for indbygningsspottene.
Sav de 3 huller med en stiksav (ø 68 mm) ind i
montagestedet (se afbildning B). Vær herved
opmærksom på afstanden mellem to indbygningsspots. Denne skal være mindst 20 cm.
Før netledningen (ekstern) gennem montage-
åbningen (se afbildning C).
Indsæt holdefjedrene 4 i spottene (se afbild-
ning E og F). Holdefjedrenes
derved ligge på lampekabinettets
4
lille næse skal
1
yderside.
Strømtilslutningsdåsen 8 åbnes, idet afdæk-
5
ningen
skrues af ved hjælp af en skruetrækker
(se illust. G).
Kabelholderen 7 løsnes ved hjælp af skrue-
trækkeren.
Forbind netledningen (ekstern) med lysterklem-
6
men
(se afbildning G) og skru kabelholde-
7
ren
fast ved hjælp af en skruetrækker. Vær
også opmærksom på L / N-mærkningen (L =
sort eller brun, N = blå) af de tilsluttede ledninger.En eventuel eksisterende grøn/gulv leder
bliver ikke tilsluttet. En jordforbindelse er ikke
nødvendig, da det hos lampen drejer sig om
sikringsklasse II. Brug et kabel af typen
H03VV-2F med et minimumstværsnit på 2 x
0,75 mm² og åreendekappe.
Strømtilslutningsdåsen 8 lukkes igen, idet af-
dækningen
5
spændes fast ved hjælp af en
skruetrækker (se illust. G).
Nettilslutninsdåsen 8 føres tilbage i monte-
ringsåbningen.
En fatning 9 trækkes nu med tilslutningskabel
ud af hver monteringsåbning.
Sæt strømtilslutningsdåsens 8 fatning 9 på
lyskilden
den
2
inkl. lampehus 1 og drej lyskil-
2
med en ¼-omdrejning fast i retning
med uret (se illust. H).
Før indsætningen af indbugningsspotten fjernes
eventuelt forhåndenværende dæmmatriale i
nærheden af nettilslutningsdåsen
8
og ind-
bygningsspotten (se billede I).
Klap begge holdefjedre 4 opad og før
indbygningsspotten med tilslutningskablet ind i
montageåbningen (se afbildning J). Holdefjederens lille næse skal ligge på montageåbnin-
14 DK

... / Udskiftning af … / Pasning og rengøring / Bortskaffelse / Garanti og service
gens yderside (se afbildning J). Efter indskubningen klapper holdefjedrene
dermed indbygningsspottene.
Indbygningslamperne er nu driftsklare.
Nu tændes strømforsyningen (se billede L).
Q
Udskiftning af glødelamperne
FORSIGTIG! RISIKO FOR ELEKTRISK STØD!
Når der skal udskiftes glødelamper, skal lampen
først adskilles fra lysnettet. Sikringen kan man fjerne, eller man kan slå ledningsbeskytterkontakten i
måleskabet fra (0-stilling).
Lad lampen køle fuldstændigt af.
Fjederringen 3 løsnes ud af lampekabinettet 1.
Den defekte lyskilde 2 trækkes med fatnin-
9
gen
lidt ud af lampekabinettet 1. Til ud-
skiftningen anvendes en ren, fnugfri klud.
Fatningen 9 holdes fast og lyskilden 2 drejes
med en ¼-omdrejning mod uret ud af fatnin-
9
gen
.
Brug udelukkende 230 V∼ lyskilder med GU10-
sokkel og en maksimal ydelse på 5 Watt.
Den nye lyskilde 2 monteres. Den stikkes for-
sigtigt i fatningen
drejning med uret.
Lyskilden 2 fikseres med fjederringen 3 i
lampekabinettet
sidder rigtigt (se illust. D).
Q
Pasning og rengøring
FORSIGTIG! RISIKO FOR ELEKTRISK STØD! Når der skal udskiftes
glødelamper, skal lampen først adskilles
fra lysnettet. Sikringen kan man fjerne, eller man
kan slå ledningsbeskytterkontakten i måleskabet fra
(0-stilling).
9
og drejes med en ¼-om-
1
. Det kontrolleres, om den
4
op og fiksere
J Der må ikke anvendes opløsningsmidler, benzin
eller lignende. Dette kan beskadige lampen.
Lad lampen køle fuldstændigt af.
Til rengøring må der kun anvendes et tørt, ikke-
fnuggende stykke stof.
Q
Bortskaffelse
Emballagen og indpakningsmaterialet
består udelukkende af miljøvenlige
materialer. Det kan smides i de lokale
genbrugsbeholdere.
Tegningen af den gennemstregede af-
faldstønde på hjul betyder at produktet
inden for EU skal bortskaffes via en
særlig affaldsindsamling. Det gælder for sleve produktet og for alt tilbehør der er forsynet med dette
symbol. Markerede produkter må ikke bortskaffes
som normalt husholdningsaffald, men skal afleveres
på et indsamlings-sted til genindvinding af elektriske
og elektroniske apparater. Genindvinding hjælper til
at nedsætte råstofsforbruget og til at aflaste miljøet.
Garanti og service
Garantierklæring
På dette apparat gives der 3 års garanti fra købsdato,
gælder kun for den første køber, kan ikke overdra
Venligst opbevar kassekvitteringen som dokumentation. Garantien gælder kun for materiale- eller
produktionsfejl, men ikke for sliddele eller beskadigelser på skrøbelige dele, som f.eks. kontakter eller
akkuer. Garantien mistes ved fremmed indgreb.
Dine lovlige rettigheder indskrænkes ikke af denne
garanti. I garantitilfælde kontaktes serviceafdelingen telefonisk. Kun på denne måde kan en gratis
indsendelse af din vare garanteres.
ges.
FORSIGTIG! RISIKO FOR ELEKTRISK STØD! Af hensyn til den elektri-
ske sikkerhed må lampen under ingen
omstændigheder rengøres med vand eller andre
vædsker og slet ikke neddyppes i vand.
15 DK

Garanti og service
Serviceadresse
Briloner Leuchten GmbH
Im Kissen 2, 59929 Brilon, Tyskland
Tel.: +49 (0) 29 61 / 97 12–0
Fax: +49 (0) 29 61 / 97 12–199
E-mail: Info@briloner.de
IAN 102542
Opbevar kassebon og artikelnummer (f.eks. IAN
12345) som købsdokumentation, så disse kan
fremlægges på forespørgsel.
Konformitetserklæring
Dette produkt opfylder kravene i de gældende
europæiske og nationale direktiver (Elektromagnetik
fordragelighed 2004 / 108 / EC, Lavspændingsdirektivet 2006 / 95 / EC). Konformiteten er påvist.
Tilsvarende erklæringer og dokumenter er deponeret
hos producenten.
Producent
Briloner Leuchten GmbH
Im Kissen 2
59929 Brilon
Tyskland
16 DK

Table des matières
Introduction
Utilisation conforme ............................................................................................................................Page 18
Fourniture ............................................................................................................................................. Page 18
Description des pièces ........................................................................................................................ Page 18
Caractéristiques...................................................................................................................................Page 18
Sécurité
Consignes de sécurité ......................................................................................................................... Page 18
Préparation
Outils et matériels nécessaires ...........................................................................................................Page 20
Avant l‘installation .................................................................................................................. Page 20
Montage ........................................................................................................................................... Page 20
Changer l‘ampoule ................................................................................................................. Page 21
Entretien et nettoyage..........................................................................................................Page 21
Mise au rebut ............................................................................................................................... Page 21
Garantie et S.A.V.
Déclaration de garantie .....................................................................................................................Page 22
Adresse du service après-vente .......................................................................................................... Page 22
Déclaration de conformité .................................................................................................................. Page 22
Fabricant .............................................................................................................................................. Page 22
17 FR/BE
Introduction / Sécurité
Spots encastrables a LED
Q
Introduction
Félicitations pour l’achat de ce nouvel
appareil. Vous avez opté pour un pro-
duit de grande qualité. Veuillez lire ce
mode d‘emploi intégralement et attentivement. Ouvrez les deux pages contenant les illustrations. Le
manuel accompagne ce produit et contient des instructions essentielles pour la mise en service et la
manipulation. Toujours respecter les consignes de
sécurité. Avant l‘installation, vérifiez si la tension est
correcte et si toutes les pièces sont correctement
montées. Si vous avez des questions ou des doutes
concernant la manipulation de l‘appareil, veuillez
contacter votre revendeur ou le S.A.V. Veuillez
conserver soigneusement ce manuel et le remettre
aux autres utilisateurs.
Q
Utilisation conforme
Cette lampe est exclusivement conçue pour un
usage intérieur, dans des locaux secs et fermés.
Cet appareil est uniquement destiné à un usage
domestique. La lampe peut être fixée sur toutes les
surfaces normalement inflammables.
Q
Description des pièces
1
Boîtier de lampe
2
Ampoule
3
Bague ressort
4
Ressort de fixation
5
Cache
6
Domino
7
Porte-câble
8
Boîtier de branchement secteur
9
Douille
Q
Caractéristiques
N° du modèle : 7226
Tension nominale : 230 V∼, 50/60 Hz
Ampoule : 230 V∼, 50/60 Hz,
LED GU10, 5 W
Puissance : 3 x 5 W
Dimensions de
chaque lampe : ø 85 mm
Orifice d’encastrement : ø 68 mm
Classe de protection : II /
Pour le faisceau de câble (non compris dans la
fourniture), il faut utiliser un diamètre minimum de
2 x 0,75 mm
2
. Le câble respectif doit être muni de
cosses.
Q
Fourniture
Immédiatement après le déballage, veuillez toujours
contrôler que la fourniture est au complet et que
l‘appareil se trouve en parfait état.
3 Spots encastrables
3 Boîtiers de branchement secteur
6 Ressorts de fixation
1 Mode d’emploi
18 FR/BE
Q
Sécurité
Consignes de sécurité
Les dommages causés par le non respect des instructions de ce mode d‘emploi sont exclus de la
garantie ! Le fabricant décline toute responsabilité
pour les dommages indirects ! De même, toute responsabilité est déclinée pour les dommages matériels ou personnels causés par une manipulation
incorrecte ou le non respect des consignes de
sécurité !
Sécurité
Prévention de risques
mortels par électrocution
J Confier l‘installation électrique à un électricien
professionnel ou à une personne instruite pour
exécuter une installation électrique.
J Avant chaque raccordement au secteur, contrôler
le bon état de l‘ampoule et du cordon secteur.
Ne jamais utiliser la lampe si vous détectez le
moindre endommagement.
ATTENTION ! Un câble secteur endommagé
représente un risque mortel d‘électrocution.
En cas d‘endommagements, de réparations ou
d‘autres problèmes, veuillez contacter la filiale
S.A.V. ou un électricien.
J Avant le montage, retirez le fusible ou coupez
le disjoncteur (position 0).
J Avant d‘effectuer le montage, vérifiez que la
tension secteur corresponde à la tension de
service requise de la lampe (230 V∼).
J Absolument éviter tout contact de la lampe
avec de l‘eau ou d‘autres liquides.
J Ne jamais ouvrir les composants électriques,
ni insérer des objets quelconques dans ceux-ci.
Ce type d‘intervention représente un danger
mortel d‘électrocution.
J Ne pas installer la lampe sur des surfaces
humides ou conductrices.
une ampoule, toujours retirer le fusible ou
désactiver le disjoncteur.
J
RISQUE D‘INCENDIE ! La lampe
doit être montée à une distance
0,3 m
d‘au moins 0,3 m des objets illuminés.
J
RISQUE D’EXPLOSION! Ne
pas utiliser le produit dans des
pièces ou dans un environnement
où se trouvent des liquides, des gaz, des vapeurs
ou des poussières facilement inflammables ou
explosifs.
J
ATTENTION! Risque d’incendie !
Ne couvrir en aucun cas les luminaires encastrés avec des recouvre-
ments isolants ou des matériaux similaires.
J Veiller à un refroidissement suffisant. Ne pas
dépasser la température maximale de 90 °C
dans la zone d’encastrement.
J N’utiliser le kit de luminaires encastrés qu’avec
les accessoires livrés. Ne pas démonter les kits
de luminaires encastrés, ce qui rendrait caduque
toute garantie.
J Ne pas laisser la lampe ou le matériel d‘em-
ballage traîner négligemment. Les films et les
sachets en plastique, les éléments en matières
synthétiques, etc. peuvent devenir des jouets
dangereux dans les mains des enfants.
J
Ne pas utiliser de lampes à
réflecteurs de lumière froide.
Prévention de risque
d‘incendies et de blessures
J RISQUE DE BLESSURES ! Immédiatement
après le déballage, contrôler le parfait état de
chaque ampoule et verre de lampe. Ne pas
monter la lampe avec des ampoules et / ou
des verres de lampe défectueux. Veuillez dans
ce cas contacter la filiale de service pour une
pièce de rechange.
J RISQUE DE BRÛLURE ! Afin d‘éviter toutes
brûlures, vérifiez que la lampe est éteinte et
suffisamment froide avant de la manipuler.
L‘ampoule dégage une forte chaleur dans la
tête de la lampe.
J Immédiatement remplacer toute ampoule dé-
fectueuse par une neuve. Avant de remplacer
J
Intensité non réglable ! La lampe à
LED intégrée n’est pas compatible
avec des variateurs ou interrupteurs
électroniques.
Pour travailler en toute sécurité
J Monter le luminaire de façon qu’il soit protégé
contre l’humidité, l’encrassement et un trop fort
échauffement. Eviter de les installer dans des
salles de bain ou des pièces similaires.
J Uniquement utiliser une ampoule de 230 V∼
avec un culot GU10 et une puissance maximale de 5 watts.
J L’écart entre deux spots encastrés doit être
d’au moins 20 cm.
19 FR/BE

Sécurité / Préparation / Avant l‘installation / Montage
J L’espace de montage au-dessus de la douille
de la lampe doit être au moins de 10 cm et
l’écart sur le côté de 10 cm minimum (voir
illustr. M).
J Soigneusement préparer le montage et l‘effec-
tuer sans hâte. Préparez toutes les pièces détachées et l‘outillage requis et posez-les à portée
de main.
J Toujours être vigilant ! Toujours travailler
concentré et procéder avec prudence. Ne jamais effectuer le montage de la lampe si vous
n‘êtes pas concentré ou vous sentez mal.
Q
Préparation
Q
Outils et matériels nécessaires
Les outils et matériels indiqués ne sont pas compris
dans la fourniture. Il s‘agit d‘informations sans
caractère obligatoire et de valeurs données à titre
indicatif. Les caractéristiques du matériel dépendent
des conditions spécifiques sur place.
– Câble H03VV-2F de longueur requise avec
cosses (section minimale 2 x 0,75 mm
2
)
– Crayon à papier/outil de marquage
– Détecteur de tension
– Tournevis
– Perceuse
– Scie cloche
– Pince coupante
– Escabeau
Q
Avant l‘installation
Important : Le raccordement électrique doit être
réalisé par un électricien professionnel ou une
personne instruite pour exécuter une installation
électrique. Cette personne doit être informée des
caractéristiques de la lampe et des spécifications
de raccordement.
j Avant d‘effectuer l‘installation, veuillez vous
familiariser avec toutes les instructions et les
illustrations de ce manuel et la lampe.
j Avant d‘effectuer l‘installation, vérifier que la
ligne à laquelle la lampe doit être raccordée
ne soit pas sous tension. Il faut pour cela retirer
le fusible ou désactiver le disjoncteur dans le
boîtier de fusible (position 0, voir ill. A).
j Contrôler l‘absence de tension au moyen du
détecteur de tension.
Q
Montage
Marquez les positions des spots encastrables.
Sciez les 3 trous à l‘emplacement de montage
à l‘aide d‘une scie cloche (ø 68 mm) (voir fig. B).
Respecter l’écart requis entre les spots. Celui-ci
doit être d’au moins 20 cm.
Passez le câble secteur (externe) à travers l‘ori-
fice de montage (voir ill. C).
Placez les ressorts de maintien 4 dans les
spots (voir Fig. E et F). La petite languette des
ressorts de fixation
externe du boîtier de lampe
j Ouvrir le boîtier de branchement secteur
dévissant le cache
4
doit reposer sur le côté
1
.
5
à l’aide d’un tournevis
8
(voir ill. G).
j Desserrer le porte-câble
7
à l’aide d’un
tournevis.
Connectez le câble secteur (externe) au domi-
6
no
(voir ill. G) et vissez le support de câble
7
avec un tournevis. Respecter les marquages
L / N (L = noir ou marron, N = bleu) des câbles
raccordés. Un conducteur vert / jaune n’est
éventuellement pas branché. Une mise à la
terre n’est pas nécessaire car la lampe est
dans la classe de protection II. Utiliser un câble
de type H03VV-2F avec une section minimale
de 2 x 0,75 mm² et muni de cosses.
j Refermer le boîtier de branchement secteur
en revissant le cache
5
à l’aide d’un tournevis.
j Replacer le boîtier de raccordement au
8
réseau
j Tirer une douille
dans l’ouverture de montage.
9
avec câble de raccordement
pare chaque ouverture de montage.
j Monter la douille
8
secteur
1
lampe
9
du boîtier de branchement
sur l’ampoule 2 avec le boîtier de
et tourner l’ampoule 2 d’un quart
de tour à droite pour la fixer (voir ill. H).
en
8
20 FR/BE

… / Changer l‘ampoule / Entretien et nettoyage / Mise au rebut
j Avant de placer les spots encastrés, enlever le
matériel d’isolation se trouvant éventuellement
à proximité du boîtier de raccordement au ré-
8
seau
et des spots encastrés (voir illustr. I).
Rabattez les deux ressorts de maintien 4 vers
le haut et faites passer avec le câble de raccordement le spot dans l‘ouverture de montage
(voir Fig. J). La petite languette du ressort de
fixation doit reposer sur le côté externe de l‘ouverture de montage (voir Fig. J). Après l‘insertion, les ressorts de maintien
4
se rabattent et
fixent ainsi les spots.
j Les luminaires sont maintenant prêts à fonctionner.
j Mettre l’alimentation en électrique en service
(voir ill. L).
Q
Changer l‘ampoule
ATTENTION ! RISQUE D’ÉLECTROCUTION ! Commencer par couper la
lampe du réseau secteur avant de remplacer une ampoule. Il faut pour cela retirer le fusible ou
désactiver le disjoncteur dans le boîtier de fusibles
(position 0).
j Laisser la lampe refroidir complètement.
j Desserrer la bague souple
de luminaire
1
.
j Retirer légère la lampe défectueuse
9
douille
hors du caisson de luminaire 1.
3
hors du caisson
2
avec la
Pour le remplacement, utiliser un chiffon propre
ne faisant pas de peluche.
j Bien tenir la douille
9
et tourner la lampe 2
sur ¼ de tour dans le sens contraire des aiguilles
d’une montre pour la retirer de la douille
9
.
j Uniquement utiliser une ampoule de 230 V∼
avec un culot GU10 et une puissance maximale de 5 watts.
j Installer la nouvelle lampe
caution dans la douille
2
. Placer avec pré-
9
et tourner sur ¼ de
trou dans le sens des aiguilles d’une montre.
j Fixer la lampe
dans le caisson du luminaire
2
avec la bague souple 3
1
. Contrôler que
l’installation soit correcte (voir ill. D).
Q
Entretien et nettoyage
ATTENTION ! RISQUE D’ÉLECTROCUTION ! Débrancher la lampe du
courant secteur avant de la nettoyer. Il faut
pour cela retirer le fusible ou désactiver le disjoncteur
dans le boîtier de fusibles (position 0).
ATTENTION ! RISQUE D’ÉLECTRO-
CUTION ! Uniquement utiliser un chiffon
sec anti-effilochant pour le nettoyage. Pour
motifs de sécurité électrique, la lampe ne doit jamais
être nettoyée avec de l‘eau ou d‘autres liquides, ni
être immergée.
J Ne pas utiliser de solvants, essence ou autres
ceci endommage la lampe.
j Laisser la lampe refroidir complètement.
j Uniquement utiliser un chiffon sec anti-effilo-
chant pour le nettoyage.
Q
Mise au rebut
L’emballage et les matériaux d’embal-
lage se composent exclusivement de
matières recyclables. Vous pouvez les
mettre au rebut dans les conteneurs de recyclage
locaux.
Le symbole de poubelle rayé sur les roues
signifie que dans l’Union Européenne, ce
produit doit être mis au rebut séparément.
Ceci s’applique au produit ainsi qu’à tous les accessoires portant ce symbole. Les produits ainsi signalés
ne doivent pas être mis au rebut dans les ordures
ménagères, mais dans un centre de collecte pour le
recyclage des appareils électriques et électroniques.
Le recyclage aide à réduire la consommation en
matières premières et à préserver l’environnement.
21 FR/BE

Garantie et S.A.V.
Garantie et S.A.V.
Déclaration de garantie
Indépendamment de la garantie commerciale souscrite, le vendeur reste tenu des défauts de conformité
du bien et des vices rédhibitoires dans les conditions
prévues aux articles L211-4 et suivants du Code de
la consommation et aux articles 1641 et suivants
du Code Civil.
Ce produit bénéficie d‘une garantie de 3ans à
compter de la date d‘achat, valable uniquement
pour le premier acheteur, non transmissible. Conservez le ticket de caisse en tant que justificatif. La garantie porte uniquement sur les défauts matériels ou
de fabrication, et non sur les pièces d‘usure ou sur
l
es dommages résultant d‘une utilisation non conforme
La garantie est annulée en cas d‘intervention externe.
Cette garantie ne constitue pas une restriction de
vos droits légaux. Veuillez contacter le S.A.V. par
téléphone pour toute réclamation. Il est autrement
impossible d‘assurer l‘envoi gratuit de votre appareil.
Adresse du service après-vente
Déclaration de conformité
Ce produit est conforme aux exigences des directives
européennes et nationales applicables (compatibilité électromagnétique 2004 / 108 / CE, directive
basse tension 2006 / 95 /CE, directive
sign2009 / 125 / CE, directive RoHS2011 / 65 / UE)
La conformité a été attestée. Les déclarations et documents respectifs sont en possession du fabricant.
écode-
Fabricant
Briloner Leuchten GmbH
Im Kissen 2
59929 Brilon
Allemagne
.
.
Briloner Leuchten GmbH
Im Kissen 2, 59929 Brilon, Allemagne
Tél. : +49 (0) 29 61 / 97 12–0
Fax : +49 (0) 29 61 / 97 12–199
Courriel : Info@briloner.de
www.briloner.de
IAN 102542
Veuillez conserver le ticket de caisse et le numéro
de référence de l’article (par ex. IAN 12345) afin
de les produire à titre de preuves d’achat pour
toute demande.
22 FR/BE

Inhoudsopgave
Inleiding
Doelmatig gebruik........................................................................................................................... Pagina 24
Leveringsomvang ............................................................................................................................ Pagina 24
Onderdelenbeschrijving ................................................................................................................. Pagina 24
Technische gegevens ...................................................................................................................... Pagina 24
Veiligheid
Veiligheidsinstructies ....................................................................................................................... Pagina 24
Voorbereiding
Vereist gereedschap en materiaal ................................................................................................. Pagina 26
Vóór de installatie ............................................................................................................... Pagina 26
Montage ....................................................................................................................................... Pagina 26
Gloeilampen vervangen ................................................................................................ Pagina 27
Onderhoud en reiniging ................................................................................................. Pagina 27
Afvoer ............................................................................................................................................ Pagina 27
Garantie en service
Garantieverklaring .......................................................................................................................... Pagina 27
Serviceadres .................................................................................................................................... Pagina 28
Conformiteitsverklaring ................................................................................................................... Pagina 28
Fabrikant .......................................................................................................................................... Pagina 28
23 NL/BE

Inleiding / Veiligheid
LED-Inbouwlampen
Q
Inleiding
Gefeliciteerd met de koop van uw nieu-
we apparaat. U hebt voor een hoog-
waardig product gekozen. Lees deze
gebruiksaanwijzing en de veiligheidsinstructies volledig en zorgvuldig door. Vouw de pagina met de
afbeeldingen open. Deze gebruiksaanwijzing
hoort bij dit product en bevat belangrijke aanwijzingen voor de ingebruikname en de bediening.
Neem altijd de veiligheidsinstructies in acht. Controleer vóór de ingebruikname of de juiste spanning beschikbaar is en of alle onderdelen goed gemonteerd zijn. Wanneer u vragen hebt of onzeker
bent in verband met de bediening van het apparaat, kunt u contact opnemen met uw leverancier of
met het servicepunt. Bewaar deze handleiding op
een veilige plaats en geef ze evt. aan derden door.
Q
Doelmatig gebruik
Deze lamp is uitsluitend bedoeld voor gebruik
binnenshuis, in droge en gesloten ruimten. Dit product
is bestemd voor het gebruik in privé-huishoudens.
De lamp kan op alle normaal ontvlambare oppervlakken bevestigd worden.
Q
Onderdelenbeschrijving
1
Lampbehuizing
2
Verlichtingsmiddel
3
Veerring
4
Borgveer
5
Afdekking
6
Kroonsteentje
7
Kabelhouder
8
Netaansluitdoos
9
Fitting
Q
Technische gegevens
Modelnr.: 7226
Bedrijfsspanning: 230 V∼, 50/60 Hz
Verlichtingsmiddelen: 230 V∼, 50/60 Hz,
LED GU10, 5 W
Opgenomen vermogen: 3 x 5 W
Afmetingen per lamp: ø 85 mm
Inbouwopening: ø 68 mm
Beschermingsklasse: II /
Voor de kabelboom (niet bij de levering inbegrepen) is een minimumdiameter van 2 x 0,75 mm²
vereist. De dienovereenkomstige kabel moet worden
voorzien van adereindhulzen.
Q
Veiligheid
Q
Leveringsomvang
Controleer de levering altijd direct na het uitpakken
op volledigheid en de optimale staat van het product.
3 inbouwspots
3 netaansluitdozen
6 borgveren
1 gebruiksaanwijzing
24 NL/BE
Veiligheidsinstructies
Bij schade die ontstaat door het negeren van deze
gebruiksaanwijzing komt de garantieverlening te
vervallen. Voor volgschade zijn wij niet aansprakelijk! Wij zijn niet aansprakelijk in geval van materiële
schade of persoonlijk letsel als gevolg van ondes
gebruik of het negeren van de veiligheidsinstructies!
Levensgevaar door
elektrische schok
J Laat de installatie uitvoeren door een opgeleide
elektricien of een voor elektro-installaties bevoegde persoon.
kundig

Veiligheid
J Controleer vóór ieder gebruik de lamp en de
aansluitkabel op eventuele beschadigingen.
Gebruik de lamp nooit wanneer u ongeacht
welke beschadiging ook hebt geconstateerd.
VOORZICHTIG! Bij beschadigde netkabels
bestaat levensgevaar door elektrische schokken.
Neem in geval van beschadigingen, reparaties
of andere problemen aan de lamp contact op
met de klantenservice of een elektricien.
J Verwijder de zekering of schakel de desbetref-
fende stroomkring in de zekeringkast uit
(0-stand) voordat u met de montage begint.
J Overtuig u er vóór de montage van dat de
bestaande netspanning overeenstemt met de
vereiste bedrijfsspanning van de lamp
(230 V∼).
J Vermijd elk contact van de lamp met water of
andere vloeistoffen.
J Open nooit een van de elektrische bedrijfsmid-
delen en steek ook geen voorwerpen in deze
onderdelen. Bij dergelijke ingrepen bestaat
levensgevaar door elektrische schokken.
J Installeer de spot niet op vochtige of geleiden-
de ondergronden.
Vermijd brand- en
verwondingsgevaar
J
EXPLOSIEGEVAAR! Gebruik het
product niet in vertrekken met of in
de omgeving van licht ontvlambare
of explosieve vloeistoffen, gassen, dampen of
stoffen.
J
VOORZICHTIG! BRANDGE-
VAAR! Dek de inbouwlampen in
geen geval af met warmte-isolerende
afdekkingen of soortgelijke materialen.
J Zorg voor voldoende koeling! De maximale
temperatuur van 90 °C in het inbouwbereik
mag niet worden overschreden.
J Gebruik de set inbouwlampen alleen in combi-
natie met het bijgeleverde toebehoren. Schakel
nooit meerdere sets inbouwlampen achter elkaar.
Hierdoor komt het recht op garantieverlening
te vervallen.
J Laat de lamp of het verpakkingsmateriaal niet
achteloos liggen. Plasticfolie / -zakken, kunststofdelen enz. kunnen een gevaarlijk speelgoed
vormen voor kinderen.
J
Geen gebruik van koudlichtreflector
verlichting.
J
Niet dimbaar! Het ingebouwde
LED-verlichtingsmiddel is niet
geschikt voor dimmers en
elektronische schakelaars.
J VERWONDINGSGEVAAR! Controleer na
het uitpakken elke lamp en elk lampglas onmiddellijk op schade. Monteer de lamp niet
met defecte lampen of lampglaasjes. Neem in
dit geval voor vervangende levering contact
op met de klantenservice.
J GEVAAR VOOR VERBRANDINGEN!
Voorkom brandwonden en waarborg dat de
lamp uitgeschakeld en afgekoeld is voordat u
hem aanraakt. Tijdens het bedrijf worden de
lampen rond de kop zeer heet.
J Vervang defecte gloeilampen onmiddellijk
door nieuwe. Verwijder vóór het vervangen
van lampen altijd eerst de zekering of schakel
de stroomkring uit.
J
BRANDGEVAAR! Monteer de
lamp op een afstand van minstens
0,3 m
0,3 m van de beschenen materialen.
Zo handelt u correct
J Monteer de lamp zodanig dat hij beschermd
wordt tegen vocht, verontreiniging en te sterke
verwarming. Vermijd de montage in badkamers
of dergelijke ruimten.
J Gebruik alléén 230 V∼ verlichtingsmiddelen
met een GU10-sokkel en een maximaal vermogen van 5 watt.
J De afstand tussen twee inbouwspots moet mini-
maal 20 cm bedragen.
J Het inbouwbereik boven de lampfitting en de
zijdelingse afstand moeten telkens minimaal
10 cm bedragen (zie afb. M).
J Bereid de montage zorgvuldig voor en neem
daarvoor voldoende tijd. Leg alle onderdelen
en het benodigde gereedschap of materiaal
25 NL/BE

Veiligheid / Voorbereiding / Vóór de installatie / Montage
tevoren overzichtelijk en binnen handbereik klaar.
J Wees steeds opmerkzaam! Let altijd op wat u
doet en ga steeds met overleg te werk.
Monteer de lamp in geen geval wanneer u
ongeconcentreerd bent of zich niet goed voelt.
Q
Voorbereiding
Q
Vereist gereedschap
en materiaal
De genoemde gereedschappen en materialen zijn
niet bij de leveringsomvang inbegrepen. Het gaat
hierbij om niet-bindende gegevens en waarden ter
oriëntatie. De hoedanigheid van het materiaal is afhankelijk van de individuele voorwaarden ter plekke.
– Kabel H03VV-2F in vereiste lengte met adereind-
hulzen (minimale diameter 2 x 0,75 mm
– Potlood/markeerstift
– Spanningstester
– Schroevendraaier
– Boormachine
– Stootzaag
– Zijsnijder
– Geleider
Q
Vóór de installatie
Belangrijk: Laat de installatie uitvoeren door een
opgeleide elektricien of een voor elektro-installaties
bevoegde persoon. Deze persoon moet op de hoogte zijn van de eigenschappen van de lamp en van
de aansluitbepalingen.
j Maak u vóór de montage vertrouwd met alle
aanwijzingen en afbeeldingen in deze handleiding en met de lamp zelf.
j Waarborg vóór de montage dat er geen span-
ning staat op de netkabel waarop de lamp moet
worden aangesloten. Verwijder daartoe de zekering of schakel de betreffende stroomkring in
de zekeringenkast uit (0-stand, zie afb. A).
j Controleer de spanningsvrijheid met een span-
ningzoeker.
2
)
Q
Montage
Markeer de posities van de inbouwspotjes.
Zaag met een gatenzaag (ø 68 mm) de 3 gaten
in de montageplek (zie afb. B). Let daarbij op
de afstand tussen twee inbouwspots. De afstand
moet minimaal 20 cm bedragen.
Voer de stroomkabel (extern) door de monta-
geopening (zie afb. C).
Plaats de borgveren 4 in de spots (zie afb. E
en F). De kleine neus van de borgveren
4
moeten hierbij aan de buitenkant van de lampbehuizing
j Open de netaansluitdoos
king
1
liggen.
8
door de afdek-
5
met behulp van een schroevendraaier
af te schroeven (zie afb. G).
j Draai de kabelhouder
7
los met behulp van
een schroevendraaier.
Verbind de stroomkabel (extern) met het kroon-
steentje
houder
6
(zie afb. G) en schroef de kabel-
7
met behulp van een schroevendraaier vast. Let ook op de L / N-kenmerking
(L = zwart of bruin, N = blauw) van de aangesloten leidingen. Een eventueel aanwezige
groen/gele geleider wordt niet aangesloten.
Het aarden is niet noodzakelijk, omdat het bij
de lamp om beschermingsklasse II gaat. Gebruik een kabel van type H03VV-2F met een
minimale diameter van 2 x 0,75 mm² en adereindhulzen.
j Sluit de netaansluitdoos
afdekking
5
met behulp van een schroeven-
8
weer door de
draaier vast te schroeven.
j Schuif de netaansluitdoos
8
terug in de
montageopening.
j Trek door iedere montageopening een fitting
9
met aansluitkabel eruit.
j Plaats de fitting
op het verlichtingsmiddel
huizing
9
van de netaansluitdoos 8
2
incl. de lampbe-
1
en draai het verlichtingsmiddel 2
een ¼-slag met de klok mee vast (zie afb. H).
j Verwijder vóór het plaatsen van de inbouwspot
eventueel voorhanden isolatiemateriaal in de
buurt van de netaansluitdoos
8
en de inbouw-
spots (zie afb. I).
Klap beide borgveren 4 naar boven en
bevestig de inbouwspot met de aansluitkabel
26 NL/BE

… / Gloeilampen … / Onderhoud en reiniging / Afvoer / Garantie en service
in de montage-opening (zie afb. J). De kleine
neus van de borgveer moet aan de buitenkant
van de montage-opening liggen (zie afb. J).
Na het inschuiven klappen de borgveren
4
uit
elkaar en fixeren zodoende de inbouwspotjes.
j De inbouwlampen zijn nu gereed voor gebruik.
j Schakel nu stroomvoorziening in (zie afb. L).
Q
Gloeilampen vervangen
VOORZICHTIG! GEVAAR VOOR
ELEKTRISCHE SCHOK! Onderbreek
altijd de stroomtoevoer voordat u de
gloeilampen vervangt. Verwijder daartoe de zekering
of schakel de betreffende stroomkring in de zekeringenkast uit (0-stand).
j Laat de lamp volledig afkoelen.
j Draai de veerring
j Trek de defecte gloeilamp
iets uit de lampbehuizing
3
uit de lampbehuizing 1.
2
met de fitting 9
1
. Gebruik voor de
vervanging een schone, pluisvrije doek.
j Houd de fitting
2
een kwartslag tegen de klok in uit de fitting.
9
vast en draai de gloeilamp
j Gebruik alléén 230 V∼ verlichtingsmiddelen
met een GU10-sokkel en een maximaal
vermogen van 5 watt.
j Monteer de nieuwe gloeilamp
gloeilamp voorzichtig in de fitting
2
. Steek de
9
en draai
hem een kwartslag met de klok mee vast.
j Fixeer de gloeilamp
de lampbehuizing
2
met de veerring 3 in
1
. Controleer de juiste mon-
tage (zie afb. D).
VOORZICHTIG! GEVAAR VOOR
ELEKTRISCHE SCHOK! Omwille van
de elektrische veiligheid mag de lamp
nooit met water of andere vloeistoffen gereinigd en
zeker niet daarin ondergedompeld worden.
J Gebruik geen oplosmiddelen, benzine e.d.
Hierdoor wordt de lamp beschadigd.
j Laat de lamp volledig afkoelen.
j Gebruik voor de reiniging alleen een droge,
pluisvrije doek.
Q
Afvoer
De verpakking is uitsluitend vervaardigd
van milieuvriendelijk materiaal. Dit kan
in de lokale recyclingcontainers worden
afgevoerd.
Het symbool van de doorgestreepte
afvalbak op wielen betekent dat het pro-
duct binnen de Europese Unie van het
huisafval gescheiden moet worden afgevoerd. Dit
geldt voor het product en alle met dit symbool gekenmerkte toebehoren. Gekenmerkte producten
mogen niet via het normale huisafval worden
afgevoerd, maar moeten worden afgegeven bij
inzamelpunten voor de recycling van elektrische
en elektronische apparaten. Recycling helpt het
verbruik van grondstoffen te verminderen en het
milieu te ontlasten.
Garantie en service
Q
Onderhoud en reiniging
VOORZICHTIG! GEVAAR VOOR
ELEKTRISCHE SCHOK! Onderbreek
altijd de stroomtoevoer voordat u de
lamp reinigt. Verwijder daartoe de zekering of
schakel de betreffende stroomkring in de zekeringenkast uit (0-stand).
Garantieverklaring
3 jaar garantie vanaf koopdatum op dit apparaat,
geldt alléén tegenover de eerste koper en is niet
overdraagbaar. Gelieve de kassabon als koopbewijs
te bewaren. De garantie geldt alléén voor materiaalof productiefouten, echter niet voor aan slijtage
onderhevige onderdelen of beschadigingen die terug
te voeren zijn op ondoelmatig gebruik. De garantieverlening komt te vervallen bij ingrepen door derden.
Uw wettelijke rechten worden door deze garantie
27 NL/BE

Garantie en service
niet beperkt. In geval van garantie kunt u telefonisch
contact opnemen met de service-desk. Alleen dan
kan een kosteloze inzending van uw apparaat
gewaarborgd worden.
Serviceadres
Briloner Leuchten GmbH
Im Kissen 2, 59929 Brilon, Duitsland
Tel.: +49 (0) 29 61 / 97 12–0
Fax: +49 (0) 29 61 / 97 12–199
E-Mail: Info@briloner.de
www.briloner.de
IAN 102542
Houd a.u.b. bij alle aanvragen de kassabon en het
artikelnummer (bijv. IAN 12345) als bewijs voor
de aankoop bij de hand.
Conformiteitsverklaring
Dit product voldoet aan de eisen van de van
toepassing zijnde Europese en nationale richtlijnen
(elektromagnetische compatibiliteit 2004 / 108 / EC,
laagspanningsrichtlijn 2006 / 95 / EC, ecol ogische
richtlijn 2009 / 125 / EG, RoHS-richtlijn 2011 / 65 / EU).
De conformiteit werd aangetoond. Desbetreffende
verklaringen liggen ter inzage bij de fabrikant.
Fabrikant
Briloner Leuchten GmbH
Im Kissen 2
59929 Brilon
Duitsland
28 NL/BE

Inhaltsverzeichnis
Einleitung
Bestimmungsgemäße Verwendung .................................................................................................... Seite 30
Lieferumfang ........................................................................................................................................ Seite 30
Teilebeschreibung ............................................................................................................................... Seite 30
Technische Daten ................................................................................................................................ Seite 30
Sicherheit
Sicherheitshinweise ............................................................................................................................. Seite 30
Vorbereitung
Benötigtes Werkzeug und Material ................................................................................................... Seite 32
Vor der Installation ................................................................................................................. Seite 32
Montage ........................................................................................................................................... Seite 32
Leuchtmittel auswechseln .................................................................................................Seite 33
Wartung und Reinigung ..................................................................................................... Seite 33
Entsorgung ..................................................................................................................................... Seite 33
Garantie und Service
Garantieerklärung ............................................................................................................................... Seite 34
Serviceadresse ....................................................................................................................................Seite 34
Konformitätserklärung ......................................................................................................................... Seite 34
Hersteller .............................................................................................................................................. Seite 34
29 DE/AT/CH
Einleitung / Sicherheit
LED-Einbauleuchten
Einleitung
Wir beglückwünschen Sie zum Kauf Ihres
neuen Gerätes. Sie haben sich damit für
ein hochwertiges Produkt entschieden.
Bitte lesen Sie diese Bedienungsanleitung vollständig
und sorgfältig durch. Klappen Sie die beiden Seiten
mit den Abbildungen aus. Diese Anleitung gehört zu
diesem Produkt und enthält wichtige Hinweise zur
Inbetriebnahme und Handhabung. Beachten Sie
immer alle Sicherheitshinweise. Prüfen Sie vor der
Inbetriebnahme, ob die korrekte Spannung vorhanden
ist und ob alle Teile richtig montiert sind. Sollten Sie
Fragen haben oder unsicher in Bezug auf die Handhabung des Gerätes sein, setzen Sie sich bitte mit
Ihrem Händler oder der Servicestelle in Verbindung.
Bewahren Sie diese Anleitung bitte sorgfältig auf
und geben Sie sie ggf. an Dritte weiter.
Bestimmungsgemäße
Verwendung
Diese Leuchte ist ausschließlich für den Betrieb im
Innenbereich, in trockenen und geschlossenen Räumen
geeignet. Dieses Gerät ist nur für den Einsatz in
privaten Haushalten vorgesehen. Die Leuchte kann
auf allen normal entflammbaren Oberflächen
befestigt werden.
Teilebeschreibung
1
Leuchtengehäuse
2
Leuchtmittel
3
Federring
4
Haltefeder
5
Abdeckung
6
Lüsterklemme
7
Kabelhalter
8
Netzanschlussdose
9
Fassung
Technische Daten
Modell-Nr.: 7226
Betriebsspannung: 230 V∼, 50/60 Hz
Leuchtmittel: 230 V∼, 50/60 Hz,
LED GU10, 5 W
Leistungsaufnahme: 3 x 5 W
Abmessungen
je Leuchte: ø 85 mm
Einbauöffnung: ø 68 mm
Schutzklasse: II /
Für den Kabelbaum (nicht im Lieferumfang enthalten)
ist ein Mindestquerschnitt von 2 x 0,75 mm
2
zu verwenden. Das entsprechende Kabel ist mit Aderendhülsen zu versehen.
Sicherheit
Lieferumfang
Kontrollieren Sie unmittelbar nach dem Auspacken
immer den Lieferumfang auf Vollständigkeit sowie
den einwandfreien Zustand des Gerätes.
3 Einbauspots
3 Netzanschlussdosen
6 Haltefedern
1 Bedienungsanleitung
30 DE/AT/CH
Sicherheitshinweise
Bei Schäden, die durch Nichtbeachtung dieser
Bedienungsanleitung verursacht werden, erlischt der
Garantieanspruch! Für Folgeschäden wird keine
Haftung übernommen! Bei Sach- oder Personenschäden, die durch unsachgemäße Handhabung
oder Nichtbeachtung der Sicherheitshinweise verursacht werden, wird keine Haftung übernommen!

Sicherheit
Vermeiden Sie Lebensgefahr
durch elektrischen Schlag
Lassen Sie die Elektroinstallation durch einen
ausgebildeten Elektriker oder eine für Elektroinstallationen eingewiesene Person durchführen.
Überprüfen Sie vor jedem Netzanschluss die
Leuchte und das Netzanschlusskabel auf etwaige
Beschädigungen. Benutzen Sie Ihre Leuchte
niemals, wenn Sie irgendwelche Beschädigungen
feststellen.
VORSICHT! Beschädigte Netzkabel bedeuten
Lebensgefahr durch elektrischen Schlag. Wenden
Sie sich bei Beschädigungen, Reparaturen oder
anderen Problemen an der Leuchte an die
Servicestelle oder eine Elektrofachkraft.
Entfernen Sie vor der Montage die Sicherung
oder schalten Sie den Leitungsschutzschalter im
Sicherungskasten aus (0-Stellung).
Vergewissern Sie sich vor der Montage, dass die
vorhandene Netzspannung mit der benötigten
Betriebsspannung der Leuchte übereinstimmt
(230 V∼).
Vermeiden Sie unbedingt die Berührung der
Leuchte mit Wasser oder anderen Flüssigkeiten.
Öffnen Sie niemals eines der elektrischen Betriebs-
mittel oder stecken irgendwelche Gegenstände
in dieselben. Derartige Eingriffe bedeuten Lebensgefahr durch elektrischen Schlag.
Installieren Sie die Leuchte nicht auf feuchten
oder leitenden Unterlagen.
Vermeiden Sie Brand- und
Verletzungsgefahr
VERLETZUNGSGEFAHR! Überprüfen Sie
unmittelbar nach dem Auspacken jedes Leuchtmittel und Lampenglas auf Beschädigungen.
Montieren Sie die Leuchte nicht mit defekten
Leuchtmitteln und / oder Lampenglas. Setzen
Sie sich in diesem Fall für Ersatz mit der Servicestelle in Verbindung.
VERBRENNUNGSGEFAHR! Stellen Sie
sicher, dass die Leuchte ausgeschaltet und abgekühlt ist, bevor Sie diese berühren, um Verbren-
nungen zu vermeiden. Leuchtmittel entwickeln
im Bereich des Lampenkopfes eine starke Hitze.
Ersetzen Sie defekte Leuchtmittel sofort durch
neue. Entfernen Sie vor dem Leuchtmittelwechsel
immer zuerst die Sicherung oder schalten Sie
den Leitungsschutzschalter aus.
BRANDGEFAHR! Montieren Sie
die Leuchte mit einer Entfernung von
0,3 m
mindestens 0,3 m zu angestrahlten
Materialien.
EXPLOSIONSGEFAHR! Verwen-
den Sie das Produkt nicht in Räumen
oder in der Umgebung leicht entzündbarer oder explosiver Flüssigkeiten, Gase,
Dämpfe oder Stäube.
VORSICHT! BRANDGEFAHR!
Decken Sie die Einbauspots auf keinen
Fall mit wärmedämmenden Materialien oder ähnlichem ab.
Sorgen Sie für eine ausreichende Kühlung. Die
maximale Temperatur von 90 °C im Einbaubereich darf nicht überschritten werden.
Verwenden Sie das Einbauspots-Set nur mit
dem mitgelieferten Zubehör. Nehmen Sie keine
Aneinanderschaltung von Einbauspots-Sets vor,
ansonsten erlöschen jegliche Gewährleistungsansprüche.
Lassen Sie die Leuchte oder Verpackungsmaterial
nicht achtlos liegen. Plastikfolien / -tüten, Kunststoffteile, etc. könnten für Kinder zu einem
gefährlichen Spielzeug werden.
J
Keine Verwendung von Kaltlicht-
Reflektor-Leuchtmitteln.
J
Nicht dimmbar. Das verbaute LED-
Leuchtmittel ist nicht geeignet für
Dimmer und elektronische Schalter.
So verhalten Sie sich richtig
Montieren Sie die Leuchte so, dass sie vor
Feuchtigkeit, Verschmutzung und zu starker
Erwärmung geschützt ist. Vermeiden Sie den
Einbau in Badezimmern oder ähnlichen Räumen.
31 DE/AT/CH

Sicherheit / Vorbereitung / Vor der Installation / Montage
Verwenden Sie nur 230 V∼ Leuchtmittel mit
einem GU10-Sockel und einer Höchstleistung
von 5 Watt.
Der Abstand zwischen zwei Einbauspots muss
mindestens 20 cm betragen.
Der Einbaubereich über der Lampenfassung
muss mind. 10 cm und der seitliche Abstand
mind. 10 cm betragen (siehe Abb. M).
Bereiten Sie die Montage sorgfältig vor und
nehmen Sie sich ausreichend Zeit. Legen Sie
alle Einzelteile und zusätzlich benötigtes Werkzeug oder Material vorher übersichtlich und
griffbereit zurecht.
Seien Sie stets aufmerksam! Achten Sie immer
darauf, was Sie tun und gehen Sie stets mit Vernunft vor. Montieren Sie die Leuchte in keinem
Fall, wenn Sie unkonzentriert sind oder sich
unwohl fühlen.
Vorbereitung
Benötigtes Werkzeug
und Material
Die genannten Werkzeuge und Materialien sind
nicht im Lieferumfang enthalten. Es handelt sich
hierbei um unverbindliche Angaben und Werte zur
Orientierung. Die Beschaffenheit des Materials
richtet sich nach den individuellen Gegebenheiten
vor Ort.
– Kabel H03VV-2F in benötigter Länge mit
Aderendhülsen (Mindestquerschnitt 2 x 0,75 mm
– Bleistift / Markierwerkzeug
– Spannungsprüfer
– Schraubendreher
– Bohrmaschine
– Lochsäge
– Seitenschneider
– Leiter
Vor der Installation
Wichtig: Der elektrische Anschluss muss durch
einen ausgebildeten Elektriker oder eine für Elektro-
2
installationen eingewiesene Person erfolgen. Diese
muss Kenntnis über die Eigenschaften der Leuchte
und Anschlussbestimmungen haben.
Machen Sie sich vor der Installation mit allen
Anweisungen und Abbildungen in dieser Anleitung sowie mit der Leuchte selbst vertraut.
Stellen Sie vor der Installation sicher, dass an
der Leitung, an der die Leuchte angeschlossen
werden soll, keine Spannung vorliegt. Entfernen
Sie hierfür die Sicherung oder schalten Sie den
Leitungsschutzschalter im Sicherungskasten aus
(0-Stellung, siehe Abb. A).
Überprüfen Sie die Spannungsfreiheit mittels
Spannungsprüfer.
Montage
Markieren Sie die Positionen der Einbauspots.
Sägen Sie mit einer Lochsäge (ø 68 mm) die
3 Löcher in die Montagestelle (siehe Abb. B).
Beachten Sie dabei den Abstand zwischen
zwei Einbauspots. Dieser muss mindestens
20 cm betragen.
Führen Sie die Netzleitung (extern) durch die
Montageöffnung (siehe Abb. C).
Setzen Sie die Haltefedern 4 in die Spots ein
(siehe Abb. E und F). Die kleine Nase der
Haltefedern
des Leuchtengehäuses
4
muss dabei auf der Außenseite
1
liegen.
Öffnen Sie die Netzanschlussdose 8, indem
Sie die Abdeckung
)
drehers abschrauben (siehe Abb. G).
5
mittels eines Schrauben-
Lösen Sie den Kabelhalter 7 mittels eines
Schraubendrehers.
Verbinden Sie die Netzleitung (extern) mit der
Lüsterklemme
ben Sie den Kabelhalter
6
(siehe Abb. G) und schrau-
7
mittels eines
Schraubendrehers fest. Achten Sie auch auf
die L / N-Kennzeichnung (L = schwarz oder
braun, N = blau) der angeschlossenen Leitungen. Ein eventuell vorhandener grün / gelber
Leiter wird nicht angeschlossen. Ein Erdungsanschluss ist nicht notwendig, da es sich bei der
Leuchte um Schutzklasse II handelt. Verwenden
Sie ein Kabel des Typs H03VV-2F mit einem
32 DE/AT/CH

Montage / Leuchtmittel auswechseln / Wartung und Reinigung / Entsorgung
Mindestquerschnitt von 2 x 0,75 mm² und
Aderendhülsen.
Verschließen Sie wieder die Netzanschluss-
8
dose
, indem Sie die Abdeckung 5 mittels
eines Schraubendrehers festschrauben.
Führen Sie die Netzanschlussdose 8 in die
Montageöffnung zurück.
Ziehen Sie durch jede Montageöffnung eine
Fassung
9
mit Anschlusskabel heraus.
Setzen Sie die Fassung 9 der Netzanschluss-
8
dose
auf das Leuchtmittel 2 inkl. Leuchten-
gehäuse
2
1
auf und drehen Sie das Leuchtmittel
mit einer ¼-Umdrehung im Uhrzeigersinn
fest (siehe Abb. H).
Entfernen Sie vor dem Einsetzen der Einbauspots
eventuell vorhandenes Dämmmaterial in der
Nähe der Netzanschlussdose
8
und der Ein-
bauspots (siehe Abb. I).
Klappen Sie die beiden Haltefedern 4 nach
oben und führen Sie den Einbauspot mit dem
Anschlusskabel in die Montageöffnung (siehe
Abb. J). Die kleine Nase der Haltefeder muss
auf der Außenseite der Montageöffnung liegen
(siehe Abb. J). Nach dem Einschieben klappen
die Haltefedern
4
auf und fixieren somit die
Einbauspots.
Die Einbauspots sind jetzt betriebsbereit.
Schalten Sie jetzt die Stromversorgung an (siehe
Abb. L).
Leuchtmittel auswechseln
VORSICHT! STROMSCHLAGGEFAHR! Trennen Sie zum Auswechseln
von Leuchtmitteln die Leuchte zuerst vom
Stromnetz. Entfernen Sie hierfür die Sicherung oder
schalten Sie den Leitungsschutzschalter im Sicherungskasten aus (0-Stellung).
Lassen Sie die Leuchte vollständig abkühlen.
Lösen Sie den Federring 3 aus dem Leuchten-
gehäuse
1
.
Ziehen Sie das defekte Leuchtmittel 2 mit der
Fassung
9
etwas aus dem Leuchtengehäuse 1.
Benutzen Sie zum Auswechseln ein sauberes,
fusselfreies Tuch.
Halten Sie die Fassung 9 fest und drehen Sie
das Leuchtmittel
2
durch eine ¼-Umdrehung
entgegen dem Uhrzeigersinn aus der Fassung
Verwenden Sie nur 230 V∼ Leuchtmittel mit ei-
nem GU10-Sockel und einer Höchstleistung
von 5 Watt.
Montieren Sie das neue Leuchtmittel 2. Vor-
sichtig in die Fassung
9
einstecken und mit
einer ¼-Umdrehung im Uhrzeigersinn drehen.
Fixieren Sie das Leuchtmittel 2 mit dem Feder-
3
ring
im Leuchtengehäuse 1. Überprüfen
Sie den richtigen Sitz (siehe Abb. D).
Wartung und Reinigung
VORSICHT! STROMSCHLAGGEFAHR! Trennen Sie zur Reinigung die
Leuchte zuerst vom Stromnetz. Entfernen
Sie hierfür die Sicherung oder schalten Sie den
Leitungsschutzschalter im Sicherungskasten aus
(0-Stellung).
VORSICHT! STROMSCHLAGGE-
FAHR! Aus Gründen der elektrischen
Sicherheit darf die Leuchte niemals mit
Wasser oder anderen Flüssigkeiten gereinigt oder
gar in Wasser getaucht werden.
Benutzen Sie keine Lösungsmittel, Benzin o.ä.
Die Leuchte würde hierbei Schaden nehmen.
Lassen Sie die Leuchte vollständig abkühlen.
Verwenden Sie zur Reinigung nur ein trockenes,
fusselfreies Tuch.
Entsorgung
Die Verpackung und das Verpackungs-
material bestehen ausschließlich aus
umweltfreundlichen Materialien. Sie können in den örtlichen Recyclingbehältern entsorgt
werden.
Das Symbol der durchgestrichenen Ab-
falltonne auf Rädern bedeutet, dass das
Produkt in der Europäischen Union einer
9
.
33 DE/AT/CH

Entsorgung / Garantie und Service
getrennten Müllsammlung zugeführt werden muss.
Dies gilt für das Produkt und alle mit diesem Symbol
gekennzeichneten Zubehörteile. Gekennzeichnete
Produkte dürfen nicht über den normalen Hausmüll
entsorgt werden, sondern müssen an einer Annahmestelle für das Recycling von elektrischen und elektronischen Geräten abgegeben werden. Recycling
hilft, den Verbrauch von Rohstoffen zu reduzieren
und die Umwelt zu entlasten.
Garantie und Service
Garantieerklärung
3 Jahre Garantie ab Kaufdatum auf dieses Gerät, gilt
nur gegenüber dem Ersteinkäufer, nicht übertragbar.
Bitte Kassenbon als Nachweis aufbewahren. Die
Garantieleistung gilt nur für Material- oder Fabri kations
fehler, nicht aber für Verschleißteile oder für Beschädigungen durch unsachgemäßen Gebrauch.
Die Garantie erlischt bei Fremdeingriff. Ihre gesetzlichen Rechte werden durch diese Garantie nicht
eingeschränkt. Im Garantiefall mit der Servicestelle
telefonisch in Verbindung setzen. Nur so kann eine
kostenlose Einsendung Ihres Geräts gewährleistet
werden.
Konformitätserklärung
Dieses Produkt erfüllt die Anforderungen der geltenden
europäischen und nationalen Richtlinien (Elektromagnetische Verträglichkeit 2004 / 108 / EC ,
Niederspannungsrichtlinie 2006 / 95 / EC, Ökodesign Richtlinie 2009 / 125 / EG, RoHS-Richtlinie
2011 / 65 / EU). Die Konformität wurde nachgewiesen. Entsprechende Erklärungen und Unterlagen
sind beim Hersteller hinterlegt.
Hersteller
Briloner Leuchten GmbH
Im Kissen 2
59929 Brilon
Deutschland
-
Serviceadresse
Briloner Leuchten GmbH
Im Kissen 2, 59929 Brilon, Deutschland
Tel.: +49 (0) 29 61 / 97 12 - 0
Fax: +49 (0) 29 61 / 97 12 - 199
E-Mail: Info@briloner.de
www.briloner.de
IAN 102542
Bitte halten Sie für alle Anfragen den Kassenbon
und die Artikelnummer (z. B. IAN 12345) als
Nachweis für den Kauf bereit.
34 DE/AT/CH

Briloner Leuchten GmbH
Im Kissen 2
59929 Brilon (Germany)
Last Information Update · Tilstand af information
Version des informations · Stand van de informatie
Stand der Informationen: 08 / 2014
Ident.-No.: 7226082014-GB/IE/DK/BE/NL
IAN 102542
IAN102542
3
 Loading...