


English .................................................................................................................................................................. 2
Polski .................................................................................................................................................................. 11
Slovenščina ........................................................................................................................................................ 20
Deutsch .............................................................................................................................................................. 29
V 1.25

LED spotlight LLS 06 A1
Contents
Introduction .......................................................................................................................................................... 3
Intended use ........................................................................................................................................................ 3
Package contents ................................................................................................................................................ 3
Technical specifications ...................................................................................................................................... 4
Safety Instructions ................................................................................................................................................ 4
Before you start ................................................................................................................................................... 5
Mounting ......................................................................................................................................................... 6
Getting started ..................................................................................................................................................... 6
Aligning the movement sensor ....................................................................................................................... 6
Adjusting the light time (TIME) ....................................................................................................................... 7
Adjusting the sensor sensitivity (SENS) ......................................................................................................... 7
Adjusting the light sensitivity (LUX) ................................................................................................................ 7
Maintenance/Cleaning ...................................................................................................................................... 8
Maintenance ................................................................................................................................................... 8
Cleaning .......................................................................................................................................................... 8
Environmental regulations and disposal information ........................................................................................ 8
Conformity ........................................................................................................................................................... 8
Guarantee terms .................................................................................................................................................. 9
2 - English

LED spotlight LLS 06 A1
Introduction
Thank you for buying a LivarnoLux product.
The LED spotlight is suitable for inside and outside use. The 6 long-life, high-efficiency Samsung branded
LEDs provide excellent lighting. The movement sensor records movements and automatically switches the
LED beam on and off.
Intended use
The LED spotlight is not intended for commercial use. The device fulfils all relevant norms and standards
relating to CE conformity. Any modifications to the LED spotlight which are not approved by the
manufacturer may result in these directives no longer being met.
Package contents
LED spotlight LLS 06 A1
Fitting materials (2 x screws and 2 x dowels)
Operating instructions with safety instructions
These operating instructions have a fold-out cover. On the inside of the cover is a diagram of the LED
spotlight with all parts numbered. The meaning of the numbers is as follows:
1 LED spotlight
2 Connection box
3 Cable connection
4 Mounting bracket
5 Fixing screw
6 Movement sensor
7 Power cable
8 Terminal block
9 TIME controller
10 SENS controller
11 LUX controller
English - 3

LED spotlight LLS 06 A1
Technical specifications
Brand: LivarnoLux
Model name: LLS 06 A1
Operating voltage: 220 – 240 V
Degree of protection: I (with ground wire connection)
Degree of protection IP44 (splashproof)
Lights 6 LEDs (Samsung)
Light current: 290 lm +/-5%
Output: approx. 0.5 W (per LED)
Colour temperature: 6000 K +/-500 K
LED emitter angle: approx. 120°
Movement sensor:
Recording angle: approx. 180°
Recording range: max. 12 m
Light sensitivity: adjustable
Swivel: horizontal / vertical
Light duration: approx. 10 s to 4 min
Dimensions (H x W x D): approx. 218 x 152 x 133 mm
Weight: approx. 675 g
Tested safety:
, 50/60 Hz
~
Safety Instructions
Before you use this device for the first time, please read and comply with these instructions and warnings,
even if you are familiar with handling electronic devices! Keep these operating instructions in a safe place
for future reference. If you sell the device or give it away, pass on the operating instructions at the same
time.
4 - English

LED spotlight LLS 06 A1
Any safety covers which come off must be replaced.
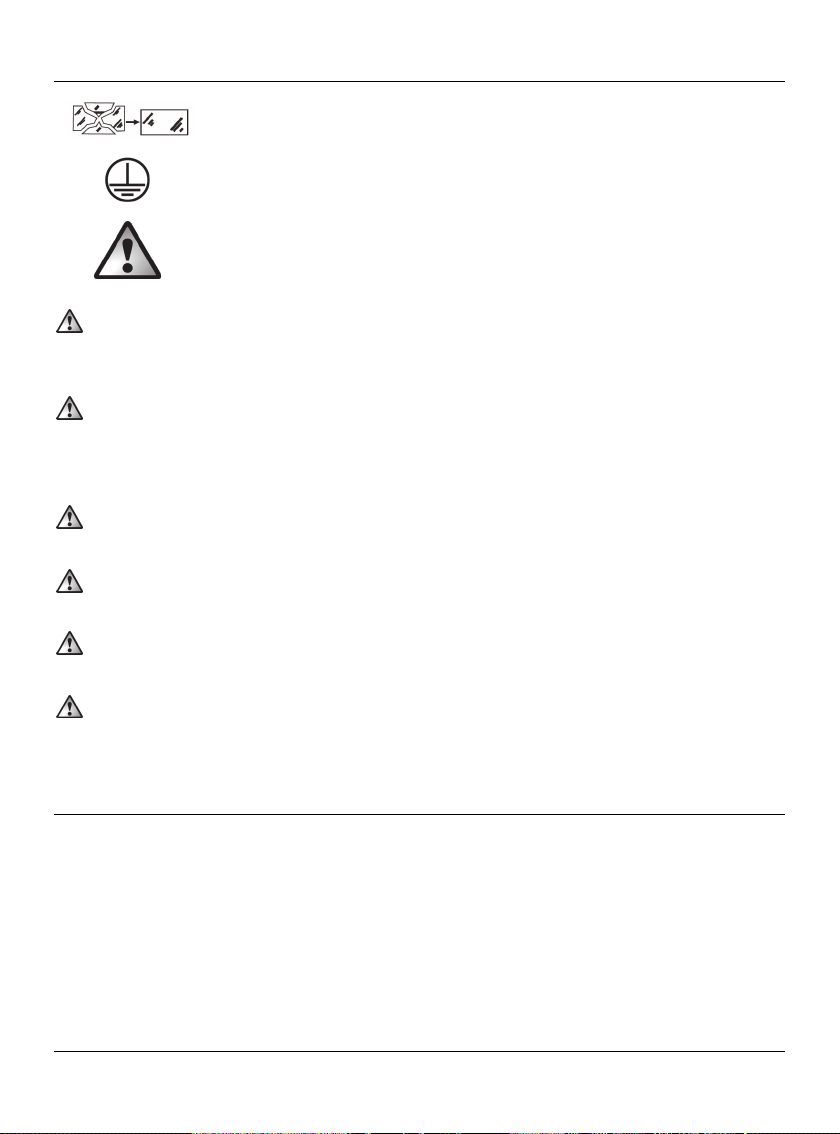
The LED spotlight has a ground wire connection. The ground wire (yellow/green) must
be connected to the terminal shown:
This symbol indicates important instructions for the safe operation of the device and the
protection of the user.
Electrical devices are not suitable for children. Never allow children use electrical devices
unsupervised. Children may not understand that they can be dangerous. Keep the packaging
materials out of the reach of children. Risk of suffocation!
If you notice any smoke, unusual noises or strange smells, switch the device off immediately. If this
occurs the device should no longer be used and should be inspected by authorised service
personnel. Never inhale smoke from a possible device fire. If you do inadvertently inhale smoke,
seek medical attention. Smoke inhalation can be damaging to your health.
The casing of the LED spotlight must not be damaged. If the casing is damaged, there is a risk of
electric shock.
Never open the casing of the LED spotlight as there are no components inside which require
maintenance. If the casing is opened, there is a risk of electric shock.
Do not hang anything off the LED spotlight. The casing is not designed to support weights. This could
damage the LED spotlight.
Never use optical instruments such as a magnifying glass to look directly into the beam. This could
damage your eyes. If you suspect you have damaged your eyes, seek medical attention.
Before you start
Remove the LED spotlight and fitting materials from the packaging.
Test the LED spotlight for damage. If the LED emitter with movement sensor is damaged, do not use it.
English - 5
LED spotlight LLS 06 A1
Mounting
The unit must only be mounted by an authorised electrical engineer.
Power must be switched off during the mounting process!
Use suitable tools for mounting.
When drilling holes, make sure there are no cables in the walls.
Remove the mounting bracket [4] from the LED spotlight [1].
Use the mounting bracket [4] as a template to mark the two outside drill holes.
Now drill the two holes and fix the mounting bracket [4] into place using the dowels and screws
provided.
Open the connection box [2] by undoing the four screws and removing the cover.
Guide the power cable through the cable gland [3]
making sure it is not strained.
Connect the power cable [7] using the terminal block [8].
Make sure that the individual wires of the power cable [7]
are correctly connected.
Close the connection box [2] by replacing the cover and retightening the four screws you removed
earlier.
Now attach the LED spotlight to the mounting bracket [4]. Use the screws, nuts and washers you
removed earlier.
Switch the mains power on.
Wire Symbol Name
black or
brown
blue N neutral
yellow/
green
L Phase
Ground wire
Getting started
Aligning the movement sensor
Make sure that there is no movement within the recording range of the movement sensor [6] which
you do not wish to be recorded (e.g. footpaths, roads).
The best time to set the light sensitivity for the movement sensor [6] is when the lighting conditions are
the same as they will be when the LED sensor is active.
Align the movement sensor [6] so it can cover the desired area as well as possible. It must not be
blocked by objects or similar.
6 - English

LED spotlight LLS 06 A1
You can align the movement sensor [6] horizontally by twisting it.
To align the movement sensor [6] vertically, you need to loosen the fixing screw [5] first. Once the
movement sensor [6] is in the desired position, tighten the fixing screw [5] again.
Adjusting the light time (TIME)
You can adjust the light time using the TIME controller [9] on the underside of the movement sensor [6]
(approx. 10 s to 4 min). Turn the TIME controller [9] clockwise to increase the light time and anticlockwise
to reduce the light time.
Adjusting the sensor sensitivity (SENS)
You can adjust the sensor sensitivity using the SENS controller [10] on the underside of the movement
sensor [6]. Turn the SENS controller [10] clockwise to increase the sensitivity and anticlockwise to reduce
the sensitivity. The higher the sensitivity, the larger the recording range.
Adjusting the light sensitivity (LUX)
You can adjust the light sensitivity using the LUX controller [11] on the underside of the movement sensor
[6]. This allows you to define the light conditions in which the movement sensor reacts and the LED
spotlight switches on.
Turn the LUX controller [11] clockwise (direction ) if you wish the movement sensor to react in relatively
bright light conditions.
Turn the LUX controller [11] anticlockwise (direction ) if you wish the movement sensor to react in
relatively poor light conditions.
English - 7

LED spotlight LLS 06 A1
Maintenance/Cleaning
Maintenance
The LED spotlight uses long-life LEDs. These are not replaceable and require no maintenance.
Cleaning
Make sure that no liquids can penetrate into the casing as this could create the risk of an electric
shock.
Clean the LED spotlight with a soft, dry cloth. Never use solvents or cleaners which could damage plastic.
For more stubborn dirt, use a slightly damp cloth.
Environmental regulations and disposal information
A symbol depicting a crossed-out rubbish bin on a product means it is subject to
European Directive 2002/96/EC. All electrical and electronic devices must be
disposed of separately from household waste at official disposal centres. Lighting
equipment must also be disposed of properly.
Do not dispose of the device in household waste or bulky waste collections.
Information on collection points and pick-up times can be obtained from your local
council or waste disposal company.
Dispose of all packaging in an environmentally-friendly manner. Boxes can be recycled with waste paper
collections or handed in to public collection points. Films and plastics included in the original packaging
can be disposed of via your local waste disposal company in an environmentally-friendly way.
Conformity
8 - English
This device complies with the basic and other relevant requirements of EMC Directive
2004/108/EC and the Low Voltage Directive 2006/95/EC.

LED spotlight LLS 06 A1
Guarantee terms
Warranty of Targa GmbH
Dear Customer,
This device is sold with three years warranty from the date of purchase. In the event of product defects,
you have legal rights towards the seller. These statutory rights are not restricted by our warranty as
described below.
Warranty conditions
The warranty period commences upon the date of purchase. Please keep the original receipt in a safe
place as it is required as proof of purchase. If any material or manufacturing faults occur within three
years of purchase of this product, we will repair or replace the product free of charge as we deem
appropriate.
Warranty period and legal warranty rights
The warranty period is not extended in the event of a warranty claim. This also applies to replaced and
repaired parts. Any damage or defects discovered upon purchase must be reported immediately when the
product has been unpacked. Any repairs required after the warranty period will be subject to charge.
Scope of warranty
The device was carefully manufactured in compliance with stringent quality guidelines and subjected to
thorough testing before it left the works. The warranty applies to material and manufacturing faults. This
warranty does not cover product components which are subject to normal wear and which can therefore
be regarded as wearing parts, or damage to fragile components such as switches, rechargeable batteries
or components made of glass. This warranty is void if the product is damaged, incorrectly used or
serviced. To ensure correct use of the product, always comply fully with all instructions contained in the
user manual. The warnings and recommendations in the user manual regarding correct and incorrect use
and handling of the product must always be observed and complied with. The product is solely designed
for private use and is not suitable for commercial applications. The warranty is rendered void in the event
of incorrect handling and misuse, if it is subjected to force, and also if any person other than our
authorised service technicians interfere with the device. No new warranty period commences if the
product is repaired or replaced.
Submitting warranty claims
To ensure speedy handling of your complaint, please note the following:
- Before using your product for the first time, please read the enclosed documentation or online
help carefully. Should any problems arise which cannot be solved in this way, please call our
hotline.
English - 9

LED spotlight LLS 06 A1
- Always have your receipt, the product article number as well as the serial number (if available)
to hand as proof of purchase.
- If it is not possible to solve the problem on the phone, our hotline support staff will initiate further
servicing procedures depending on the fault.
Service
E-Mail: service.GB@targa-online.com
E-Mail: service.IE@targa-online.com
E-Mail: service.MT@targa-online.com
E-Mail: service.CY@targa-online.com
Phone: 0207 – 36 50 744
Phone: 01 – 242 15 83
Phone: 800 – 62 175
Phone: 800 – 92 496
Please note that the following address is not a service address. First contact the service point stated above.
TARGA GmbH
10 - English
IAN: 78528
Manufacturer
Postfach 22 44
D-59482 Soest
www.targa.de

Zewnętrzny reflektor LED LLS 06 A1
Spis treści
Wprowadzenie ................................................................................................................................................. 12
Przeznaczenie ................................................................................................................................................... 12
Zawartość opakowania .................................................................................................................................... 12
Dane techniczne ................................................................................................................................................ 13
Instrukcja bezpieczeństwa ................................................................................................................................ 13
Czynności przygotowawcze ............................................................................................................................ 14
Montaż.......................................................................................................................................................... 15
Przygotowanie do użytkowania....................................................................................................................... 15
Ustawianie czujnika ruchu ........................................................................................................................... 15
Regulacja czasu świecenia (TIME) ............................................................................................................. 16
Regulacja czułości czujnika ruchu (SENS) ................................................................................................. 16
Regulacja czułości na światło (LUX) ........................................................................................................... 16
Konserwacja i czyszczenie............................................................................................................................... 17
Konserwacja ................................................................................................................................................. 17
Czyszczenie .................................................................................................................................................. 17
Przepisy dotyczące ochrony środowiska i informacje o utylizacji zużytego sprzętu ................................... 17
Zgodność ........................................................................................................................................................... 17
Warunki gwarancji ........................................................................................................................................... 18
Polski - 11

Zewnętrzny reflektor LED LLS 06 A1
Wprowadzenie
Dziękujemy za zakup produktu firmy LivarnoLux.
Zewnętrzny reflektor LED nadaje się do użytku wewnątrz i na zewnątrz. 6 długowiecznych,
wysokowydajnych diod LED firmy Samsung zapewnia doskonałe oświetlenie. Czujnik ruchu rejestruje
ruchy i automatycznie włącza i wyłącza zewnętrzny reflektor LED.
Przeznaczenie
Ten zewnętrzny reflektor LED nie jest przeznaczony do zastosowań komercyjnych. Urządzenie spełnia
wymagania wszystkich stosownych norm i dyrektyw dotyczących zgodności CE. Wszelkie modyfikacje
zewnętrznego reflektora LED, inne niż zmiany zalecane przez producenta, mogą spowodować, że
wymagania tych dyrektyw przestaną być spełniane.
Zawartość opakowania
Zewnętrzny reflektor LED LLS 06 A1
Elementy montażowe (2 wkręty i 2 kołki)
Instrukcja użytkowania oraz instrukcja bezpieczeństwa
Niniejsza instrukcja użytkowania ma rozkładaną okładkę. Na wewnętrznej stronie okładki zamieszczono
rysunek zewnętrznego reflektora LED z numerowym oznaczeniem części. Poniżej podano znaczenie
poszczególnych numerów:
1 Zewnętrzny reflektor LED
2 Skrzynka przyłączeniowa
3 Przyłącze przewodu elektrycznego
4 Uchwyt montażowy
5 Śruba mocująca
6 Czujnik ruchu
7 Przewód zasilania
8 Łączówka
9 Regulator czasu (TIME)
10 Regulator czułości czujnika ruchu (SENS)
11 Regulator czułości na światło (LUX)
12 - Polski

Zewnętrzny reflektor LED LLS 06 A1
Dane techniczne
Nazwa firmowa: LivarnoLux
Nazwa modelu: LLS 06 A1
Napięcie robocze: 220 – 240 V
Stopień ochrony: I (z podłączonym przewodem ochronnym)
Stopień ochrony obudowy: IP44 (obudowa bryzgoszczelna)
Źródło światła: 6 diod LED (Samsung)
Strumień świetlny: 290 lm +/-5%
Moc: ok. 0,5 W (każda dioda LED)
Temperatura barwowa: 6000 K +/-500 K
Kąt rozwarcia wiązki światła: ok. 120°
Czujnik ruchu:
Kąt działania czujnika: ok. 180°
Zasięg działania czujnika: maks. 12 m
Czułość na światło: regulowana
Mocowanie obrotowe: z regulacją w poziomie i w pionie
Czas trwania oświetlenia:
Wymiary (wys. x szer. x gł.): ok. 218 x 152 x 133 mm
Masa: ok. 675 g
Sprawdzone bezpieczeństwo:
ok. 10 s do 4 min
, 50/60 Hz
~
Instrukcja bezpieczeństwa
Przed pierwszym włączeniem urządzenia należy przeczytać poniższe instrukcje zawarte w niniejszym
podręczniku i zastosować się do wszystkich ostrzeżeń. Dotyczy to również osób, które mają już
doświadczenie w korzystaniu z urządzeń elektronicznych. Niniejszą instrukcję użytkowania należy
przechowywać w bezpiecznym miejscu do przyszłego wykorzystania. W razie sprzedaży lub
przekazania urządzenia należy również przekazać instrukcję użytkowania.
Polski - 13

Zewnętrzny reflektor LED LLS 06 A1
Wszelkie oderwane osłony bezpieczeństwa muszą zostać wymienione.
Zewnętrzny reflektor LED jest wyposażony w zacisk do podłączenia przewodu
ochronnego. Przewód ochronny (żółto-zielony) należy podłączyć do pokazanego
obok zacisku:
Tym symbolem oznaczono ważne wskazówki dotyczące bezpiecznego użytkowania
urządzenia oraz bezpieczeństwa użytkownika.
Urządzenia elektryczne nie są przeznaczone dla dzieci. W żadnym wypadku nie wolno pozwalać
dzieciom na korzystanie z urządzeń elektrycznych bez nadzoru. Dzieci mogą nie rozumieć
związanego z tym zagrożenia. Materiały opakowaniowe należy przechowywać w miejscu
niedostępnym dla dzieci. Istnieje niebezpieczeństwo uduszenia!
W przypadku zauważenia dymu, nietypowych odgłosów lub dziwnych zapachów urządzenie
należy natychmiast wyłączyć. Takiego urządzenia nie należy dalej użytkować, lecz należy je
przekazać do sprawdzenia przez specjalistę. W żadnym wypadku nie wolno wdychać dymu
wydobywającego się z urządzenia. Jeśli dym nieumyślnie przedostał się do płuc, należy skorzystać
z pomocy medycznej. Wdychanie dymu może być szkodliwe dla zdrowia.
Obudowa zewnętrznego reflektora LED nie może być w żadnym wypadku uszkodzona. W
przypadku uszkodzenia obudowy istnieje niebezpieczeństwo porażenia prądem elektrycznym.
W żadnym wypadku nie należy otwierać obudowy zewnętrznego reflektora LED, gdyż wewnątrz
urządzenia nie ma żadnych elementów wymagających konserwacji. W przypadku otwarcia
obudowy istnieje niebezpieczeństwo porażenia prądem elektrycznym.
Nie wolno wieszać żadnych przedmiotów na zewnętrznym reflektorze LED. Obudowa nie została
zaprojektowana do wytrzymywania obciążeń. Mogłoby to spowodować uszkodzenie
zewnętrznego reflektora LED.
W żadnym wypadku nie wolno używać przyrządów optycznych, takich jak lupa, do
bezpośredniego patrzenia w wiązkę światła. Mogłoby to spowodować uszkodzenie oczu. W
przypadku podejrzenia uszkodzenia wzroku należy skorzystać z pomocy medycznej.
Czynności przygotowawcze
Wyjąć zewnętrzny reflektor LED i elementy montażowe z opakowania.
Sprawdzić, czy zewnętrzny reflektor LED nie jest uszkodzony. W przypadku stwierdzenia uszkodzenia
zewnętrznego reflektora LED nie należy go używać.
14 - Polski

Zewnętrzny reflektor LED LLS 06 A1
Montaż
Montaż urządzenia musi zostać wykonany wyłącznie przez technika elektryka posiadającego
stosowne uprawnienia.
Podczas wykonywania montażu zasilanie musi być wyłączone!
Montaż należy wykonać przy użyciu odpowiednich narzędzi.
W przypadku wiercenia otworów należy się upewnić, że w ścianach nie ma przewodów.
Zdemontować uchwyt montażowy [4] z zewnętrznego reflektora LED [1].
Użyć uchwytu montażowego [4] jako szablonu do zaznaczenia dwóch zewnętrznych punktów
wiercenia otworów.
Wywiercić dwa otwory i zamocować uchwyt montażowy [4] przy użyciu dostarczonych wkrętów i
kołków.
Otworzyć skrzynkę przyłączeniową [2], odkręcając cztery wkręty i zdejmując pokrywkę.
Wprowadzić przewód zasilania przez dławik kablowy
[3], uważając aby przewód nie był naciągnięty.
Podłączyć przewód zasilania [7] do łączówki [8]. Zwrócić
uwagę na prawidłowe podłączenie poszczególnych żył
przewodu zasilania [7].
Zamknąć skrzynkę przyłączeniową [2], umieszczając pokrywkę i wkręcając cztery wykręcone
wcześniej wkręty.
Zamocować zewnętrzny reflektor LED w uchwycie montażowym [4]. Użyć wymontowanych wcześniej
śrubek, nakrętek i podkładek.
Włączyć zasilanie sieciowe.
Żyła Symbol Nazwa
czarna
lub
brązowa
niebieska N Zero
żółto-
zielony
L Faza
Przewód
ochronny
Przygotowanie do użytkowania
Ustawianie czujnika ruchu
Upewnić się, że w zakresie działania czujnika ruchu [6] nie występują żadne ruchy, które nie
powinny być wykrywane (np. ścieżki, drogi itp.).
Regulację czułości czujnika ruchu [6] na światło najlepiej wykonać w porze dnia, podczas której
warunki oświetleniowe są takie same, jakie będą podczas użytkowania zewnętrznego reflektora
LED.
Polski - 15

Zewnętrzny reflektor LED LLS 06 A1
Ustawić czujnik ruchu [6] tak, aby możliwie jak najlepiej pokrywał swoim zasięgiem wymagany obszar.
Czujnik nie może być blokowany przez żadne przedmioty.
Aby ustawić czujnik ruchu [6] w płaszczyźnie poziomej, należy go odpowiednio obrócić.
Aby ustawić czujnik ruchu [6] w płaszczyźnie pionowej, należy najpierw poluzować śrubę mocującą.
Po ustawieniu czujnika ruchu [6] w wymaganym położeniu należy ponownie dokręcić śrubę mocującą
[5].
Regulacja czasu świecenia (TIME)
Czas świecenia można regulować za pomocą regulatora TIME [9], umieszczonego na spodzie czujnika
ruchu [6] (zakres regulacji od ok. 10 s do 4 min). W celu wydłużenia czasu świecenia należy obracać
regulator TIME [9] w prawo, zaś w celu skrócenia czasu świecenia — w lewo.
Regulacja czułości czujnika ruchu (SENS)
Czułość czujnika można regulować za pomocą regulatora SENS [10], umieszczonego na spodzie
czujnika ruchu [6]. W celu zwiększenia czułości należy obracać regulator SENS [10] w prawo, zaś w
celu zmniejszenia czułości — w lewo. Im wyższa czułość, tym większy zakres wykrywania ruchu.
Regulacja czułości na światło (LUX)
Czułość na światło można regulować za pomocą regulatora LUX [11], umieszczonego na spodzie
czujnika ruchu [6]. Umożliwia to określenie warunków oświetleniowych, przy których reaguje czujnik
oświetlenia i włącza się zewnętrzny reflektor LED.
Jeśli czujnik ruchu powinien reagować w stosunkowo jasnych warunkach oświetleniowych, należy
obrócić regulator LUX [11] w prawo (w stronę symbolu ).
Jeśli czujnik ruchu powinien reagować w stosunkowo słabych warunkach oświetleniowych, należy
obrócić regulator LUX [11] w lewo (w stronę symbolu ).
16 - Polski
Zewnętrzny reflektor LED LLS 06 A1
Konserwacja i czyszczenie
Konserwacja
W zewnętrznym reflektorze LED zastosowano długowieczne diody LED. Nie podlegają one wymianie ani
nie wymagają żadnej konserwacji.
Czyszczenie
Dbać o to, aby do wnętrza obudowy nie przedostały się żadne płyny. Przedostanie się do wnętrza
obudowy płynów stwarza zagrożenie porażenia prądem elektrycznym.
Do czyszczenia zewnętrznego reflektora LED należy używać suchej szmatki. Nie stosować
rozpuszczalników ani środków czyszczących, ponieważ mogą one uszkodzić plastikową obudowę. W
przypadku trudniejszych do usunięcia zabrudzeń użyć lekko wilgotnej szmatki.
Przepisy dotyczące ochrony środowiska i informacje o utylizacji
zużytego sprzętu
Produkty oznaczone symbolem przekreślonego pojemnika na śmieci podlegają
zapisom dyrektywy europejskiej 2002/96/EC. Urządzeń elektrycznych i
elektronicznych nie wolno wyrzucać ze zwykłymi śmieciami; należy je składować w
oficjalnie wyznaczonych do tego celu miejscach. Zużytego sprzętu oświetleniowego
należy również pozbywać się we właściwy sposób.
Tego urządzenia nie można wyrzucać wraz ze zwykłymi odpadami domowymi. Informacje na temat
punktów zbiórki i dat odbioru odpadów można uzyskać u lokalnych władz lub w przedsiębiorstwie usług
komunalnych.
Wszelkich materiałów opakowaniowych należy pozbywać się w sposób przyjazny dla środowiska.
Pudełka można przekazać do punktów zbiórki makulatury lub do publicznych punktów zbiórki odpadów
w celu recyklingu. Folii i tworzyw sztucznych wchodzących w skład oryginalnego opakowania można
pozbyć się w sposób bezpieczny dla środowiska, przekazując je do lokalnego przedsiębiorstwa usług
komunalnych.
Zgodność
Niniejsze urządzenie spełnia podstawowe i inne odnośne wymagania dyrektywy
kompatybilności elektromagnetycznej 2004/108/EC oraz dyrektywy
niskonapięciowej 2006/95/EC.
Polski - 17

Zewnętrzny reflektor LED LLS 06 A1
Warunki gwarancji
Gwarancja firmy Targa GmbH
Szanowni Państwo,
Niniejszy produkt jest objęty trzyletnią gwarancją od daty zakupu. W przypadku stwierdzenia wad tego
produktu przysługują Państwu ustawowe uprawnienia w stosunku do sprzedawcy tego produktu. Nasza
przedstawiona poniżej gwarancja w niczym nie ogranicza tych praw.
Warunki gwarancji
Bieg gwarancji rozpoczyna się od daty zakupu. Prosimy zachować oryginalny dowód zakupu. Ten
dokument będzie potrzebny jako dowód zakupu. Jeżeli w ciągu trzech lat od daty zakupu tego produktu
wystąpi w nim wada materiałowa lub produkcyjna, naprawimy go bezpłatnie lub wymienimy na nowy –
wedle naszego swobodnego uznania.
Czas gwarancji i ustawowe roszczenia z tytułu wad
Świadczenie gwarancyjne nie powoduje przedłużenia gwarancji. Dotyczy to także wymienionych i
naprawionych części. Szkody i wady istniejące już w chwili zakupu należy zgłosić niezwłocznie po
rozpakowaniu. Po upływie gwarancji wszelkie naprawy są płatne.
Zakres gwarancji
Urządzenie zostało wyprodukowane z zachowaniem surowych norm jakościowych i przed dostawą
zostało dokładnie sprawdzone. Gwarancja obejmuje wady materiałowe lub produkcyjne. Gwarancja nie
obejmuje tych części produktu, które ulegają normalnemu zużyciu i dlatego należy je traktować jako
części normalnie zużywające się i nie obejmuje uszkodzeń części łamliwych, jak np. wyłączniki,
akumulatory lub części wykonane ze szkła. Gwarancja traci ważność w razie uszkodzenia produktu,
niewłaściwego użytkowania lub naprawy produktu. Prawidłowe użytkowanie produktu wymaga
dokładnego przestrzegania wszystkich wskazówek wymienionych w instrukcji obsługi. Należy
bezwzględnie unikać przeznaczeń i sposobów użytkowania, które nie są zalecane lub przed którymi
ostrzega instrukcja obsługi. Produkt jest przeznaczony wyłącznie do użytku domowego i nie jest
przeznaczony do użytku komercyjnego. W przypadku nieprawidłowej obsługi, aktów przemocy lub
ingerencji, które nie zostały wykonane przez autoryzowaną filię serwisu, gwarancja wygasa. Naprawa
lub wymiana produktu nie powoduje rozpoczęcia nowego okresu gwarancyjnego.
Postępowanie w przypadku objętym gwarancją
Aby umożliwić szybkie załatwienie reklamacji, prosimy przestrzegać następujących wskazówek:
- Przed uruchomieniem produktu prosimy dokładnie zapoznać się z załączoną dokumentacją lub
pomocą online. W razie wystąpienia problemu, którego nie można rozwiązać w ten sposób,
prosimy skontaktować się z naszą infolinią pomocy technicznej.
18 - Polski

Zewnętrzny reflektor LED LLS 06 A1
- Przy każdym kontakcie z infolinią pomocy technicznej należy mieć pod ręką dowód zakupu i
numer artykułu lub numer seryjny, jeśli jest dostępny, jako dowód zakupu.
- W przypadku, gdy rozwiązanie problemu przez telefon nie będzie możliwe, w zależności od
przyczyny usterki nasza infolinia pomocy technicznej zorganizuje inną formę serwisowania.
Serwis
Telefon: 00800 – 44 11 481
E-Mail: service.PL@targa-online.com
Producent
IAN: 78528
Należy pamiętać, że poniższy adres nie jest adresem serwisu. Najpierw należy skontaktować się z
podanym powyżej punktem serwisowym.
TARGA GmbH
Postfach 22 44
D-59482 Soest
www.targa.de
Polski - 19

Zunanja LED svetilka LLS 06 A1
Vsebina
Uvod ................................................................................................................................................................... 21
Namenska uporaba .......................................................................................................................................... 21
Vsebina paketa ................................................................................................................................................. 21
Tehnični podatki ................................................................................................................................................ 22
Varnostna navodila ........................................................................................................................................... 22
Pred začetkom uporabe ................................................................................................................................... 23
Montaža ....................................................................................................................................................... 24
Začetek uporabe ............................................................................................................................................... 24
Poravnava senzorja gibanja ........................................................................................................................ 24
Nastavitev časa osvetlitve (TIME) ............................................................................................................... 25
Nastavitev občutljivosti senzorja (SENS) ................................................................................................... 25
Nastavitev svetlobne občutljivosti (LUX) ..................................................................................................... 25
Vzdrževanje/čiščenje ....................................................................................................................................... 26
Vzdrževanje .................................................................................................................................................. 26
Čiščenje ......................................................................................................................................................... 26
Okoljski predpisi in informacije glede odstranjevanja .................................................................................... 26
Skladnost ........................................................................................................................................................... 26
Garancijski pogoji ............................................................................................................................................. 27
20 - Slovenščina

Zunanja LED svetilka LLS 06 A1
Uvod
Zahvaljujemo se vam za nakup izdelka podjetja LivarnoLux.
Zunanja LED svetilka je primerna za notranjo in zunanjo uporabo. 6 visoko učinkovitih svetlečih diod
(LED) blagovne znamke Samsung z dolgo življenjsko dobo zagotavlja odlično osvetlitev. Senzor gibanja
zaznava gibanje ter samodejno vklopi in izklopi zunanjo LED svetilko.
Namenska uporaba
Zunanja LED svetilka ni namenjena za komercialno uporabo. Naprava izpolnjuje zahteve vseh
standardov, ki so potrebni za oznako skladnosti CE. Spremembe na zunanji LED svetilki, ki niso v skladu s
priporočili proizvajalca, lahko povzročijo, da te direktive niso več izpolnjene.
Vsebina paketa
Zunanja LED svetilka LLS 06 A1
Pritrdilni elementi (2 vijaka in 2 vložka)
Navodila za uporabo z varnostnimi navodili
Ta navodila za uporabo imajo prepognjeno platnico. Na notranji strani platnice je prikazana zunanja
LED svetilka s številkami posameznih delov. Pomen posameznih številk:
1 Zunanja LED svetilka
2 Priključna omarica
3 Priključitev kabla
4 Montažni nosilec
5 Pritrdilni vijak
6 Senzor gibanja
7 Napajalni kabel
8 Priključni blok
9 Regulator TIME
10 Regulator SENS
11 Regulator LUX
Slovenščina - 21

Zunanja LED svetilka LLS 06 A1
Tehnični podatki
Blagovna znamka: LivarnoLux
Ime modela: LLS 06 A1
Delovna napetost: 220 – 240 V
Stopnja zaščite: I (z ozemljitvenim vodnikom)
Stopnja zaščite IP44 (zaščita pred brizgajočo vodo)
Luči 6 svetlečih diod (Samsung)
Svetlobni tok: 290 lm +/-5%
Moč: pribl. 0,5 W (posamezna LED)
Barvna temperatura: 6000 K +/-500 K
Odprtina za svetlobo: približno 120°
Senzor gibanja:
Kot senzorja: približno 180°
Doseg senzorja: Maks. 12 m
Svetlobna občutljivost: prilagodljiva
Vrtenje: vodoravno/navpično
Čas osvetlitve:
Dimenzije (V x Š x G): pribl. 218 x 152 x 133 mm
Masa: približno 675 g
Preverjena varnost:
približno 10 s do 4 min
, 50/60 Hz
~
Varnostna navodila
Pred prvo uporabo naprave preberite naslednje opombe v tem priročniku ter upoštevajte vsa opozorila,
tudi če ste dobro seznanjeni z upravljanjem elektronskih naprav. Navodila za uporabo shranite na
varnem mestu za kasnejšo uporabo. Ko napravo prodate ali izročite drugi osebi, istočasno priložite tudi
navodila za uporabo.
22 - Slovenščina
Zunanja LED svetilka LLS 06 A1
Razbite varnostne pokrove obvezno zamenjajte.
Zunanja LED svetilka ima ozemljitveni vodnik. Ozemljitveni vodnik (rumeno-zelen) mora
biti priključen na prikazan priključek:
S tem simbolom so označena pomembna navodila za varno delovanje naprave in
zaščito uporabnika.
Električne naprave niso primerne za otroke. Otrokom nikoli ne dovolite uporabljati električnih naprav
brez nadzora. Otroci morda ne razumejo, da so lahko nevarne. Embalažni material shranite izven
dosega otrok. Obstaja nevarnost zadušitve!
Če opazite dim, nenavaden zvok ali nepričakovane vonjave, napravo takoj izklopite. V tem primeru
naprave ne uporabljajte več. Pregleda naj jo strokovno usposobljena oseba. Nikoli ne vdihavajte
dima, ki nastane pri morebitnem gorenju naprave. Če pride do nehotenega vdihavanja dima,
poiščite zdravniško pomoč. Vdihavanje dima je lahko škodljivo za vaše zdravje.
Ohišje zunanje LED svetilke ne sme biti poškodovano. Če je ohišje poškodovano, obstaja nevarnost
električnega udara.
Nikoli ne odpirajte ohišja zunanje LED svetilke, kajti v notranjosti ni nobene komponente, ki zahteva
vzdrževanje. Če je ohišje odprto, obstaja nevarnost električnega udara.
Na zunanjo LED svetilko ni dovoljeno obešati nobenih predmetov. Ohišje ni načrtovano za
prenašanje obremenitev. To lahko poškoduje zunanjo LED svetilko.
Z optičnimi instrumenti, kot so npr. povečevalna stekla, nikoli ne glejte neposredno v žarek. To lahko
poškoduje vaše oči. Če domnevate, da je prišlo do poškodbe oči, poiščite zdravniško pomoč.
Pred začetkom uporabe
Zunanjo LED svetilko in pritrdilne elemente odstranite iz embalaže.
Preverite zunanjo LED svetilko glede poškodb. Če je zunanja LED svetilka poškodovana, je ne
uporabljajte.
Slovenščina - 23

Zunanja LED svetilka LLS 06 A1
Montaža
Enoto lahko montira samo pooblaščen električar.
Med postopkom montaže mora biti naprava izklopljena!
Za montažo uporabite ustrezno orodje.
Pri vrtanju lukenj se prepričajte, da na mestih vrtanja ni kablov v steni.
Z zunanje LED svetilke [1] odstranite montažni nosilec [4].
Montažni nosilec [4] uporabite kot šablono za označitev dveh zunanjih izvrtin.
Nato izvrtajte dve izvrtini in montažni nosilec [4] pritrdite na svoje mesto s priloženima vijakoma in
vložkoma.
Odprite priključno omarico [2] - odvijte štiri vijake in odstranite pokrov.
Napajalni kabel napeljite skozi kabelsko uvodnico [3] in
zagotovite, da kabel ni napet.
Napajalni kabel [7] priključite na priključni blok [8].
Zagotovite, da so posamezni vodniki napajalnega kabla
[7] pravilno priključeni.
Zaprite priključno omarico [2] - ponovno namestite pokrov in privijte štiri predhodno odstranjene vijake.
Nato zunanjo LED svetilko pritrdite na montažni nosilec [4]. Uporabite predhodno odstranjene vijake,
matice in podložke.
Vklopite napajalno napetost.
Vodnik Simbol Ime
Črn ali
rjav
Moder N Nevtralni vodnik
Rumeno-
zelen
L Faza
Ozemljitveni
vodnik
Začetek uporabe
Poravnava senzorja gibanja
Prepričajte se, da znotraj dosega zaznavanja senzorja gibanja [6] ne bo nobenega neželenega
premikanja (npr. po stezah, cestah).
Najboljši čas za nastavitev svetlobne občutljivosti za senzor gibanja [6] je, ko so pogoji osvetlitve
enaki, kot bodo pri aktivirani zunanji LED svetilki.
Senzor gibanja [6] poravnajte tako, da v čim večji meri pokriva želeno območje. Ne sme biti blokiran s
predmeti ali drugimi ovirami.
24 - Slovenščina

Zunanja LED svetilka LLS 06 A1
Senzor gibanja [6] lahko vodoravno poravnate tako, da ga zavrtite.
Za navpično poravnavo senzorja gibanja [6] je potrebno najprej sprostiti pritrdilni vijak. Ko je senzor
gibanja [6] v želenem položaju, ponovno privijte pritrdilni vijak [5].
Nastavitev časa osvetlitve (TIME)
Čas osvetlitve lahko nastavite z uporabo regulatorja TIME [9] na spodnji strani senzorja gibanja [6]
(pribl. 10 s do 4 min). Za podaljšanje časa osvetlitve zavrtite regulator TIME [9] v smer urinega kazalca,
za skrajšanje časa pa regulator zavrtite v nasprotno smer urinega kazalca.
Nastavitev občutljivosti senzorja (SENS)
Občutljivost senzorja lahko nastavite z uporabo regulatorja SENS [10] na spodnji strani senzorja gibanja
[6]. Za povišanje občutljivosti zavrtite regulator SENS [10] v smer urinega kazalca, za znižanje
občutljivosti pa v nasprotno smer urinega kazalca. Višja kot je občutljivost, večji je doseg zaznavanja.
Nastavitev svetlobne občutljivosti (LUX)
Svetlobno občutljivost lahko nastavite z uporabo regulatorja LUX [11] na spodnji strani senzorja gibanja
[6]. To omogoča določitev svetlobnih pogojev, v katerih reagira svetlobni senzor in vklopi zunanjo LED
svetilko.
Če želite, da senzor gibanja reagira v razmeroma svetlih svetlobnih pogojih, zavrtite regulator LUX [11] v
smer urinega kazalca (smer ).
Če želite, da senzor gibanja reagira v razmeroma slabih svetlobnih pogojih, zavrtite regulator LUX [11] v
nasprotno smer urinega kazalca (smer ).
Slovenščina - 25

Zunanja LED svetilka LLS 06 A1
V
Vzdrževanje/čiščenje
Vzdrževanje
Zunanja LED svetilka uporablja svetleče diode (LED) z dolgo življenjsko dobo . Teh ni možno zamenjati in
ne potrebujejo vzdrževanja.
Čiščenje
Zagotovite, da v ohišje ne zaide tekočina.
možnosti udara električnega toka.
Za čiščenje zunanje LED svetilke uporabljajte suho krpo. Nikoli ne uporabljajte topil ali čistilnih sredstev, ki
bi lahko poškodovala plastično ohišje. V primeru trdovratne umazanije uporabite rahlo vlažno krpo.
nasprotnem primeru ste v smrtni nevarnosti zaradi
Okoljski predpisi in informacije glede odstranjevanja
Simbol s prekrižanim znakom smetnjaka na izdelku pomeni, da za ta izdelek velja
evropska direktiva 2002/96/EC. Vse električne in elektronske naprave je potrebno
odstraniti ločeno od gospodinjskih odpadkov na uradnih odlagališčih. Poskrbite za
ustrezno odstranitev svetlobne opreme.
Te naprave ni dovoljeno odlagati med gospodinjske odpadke. Za informacije o
zbirnih mestih in časih zbiranja odpadkov se obrnite na pristojni občinski urad oz. na
komunalno podjetje.
Ves embalažni material odstranite na okolju prijazen način. Škatle se lahko reciklirajo na zbirališčih
starega papirja oz. jih odpeljite na javna zbirališča. Če je v embalaži vključena folija ali plastika, pokličite
lokalno komunalno podjetje, ki bo poskrbelo za odstranjevanje na okolju prijazen način.
Skladnost
Naprava v celoti izpolnjuje osnovne in druge ustrezne zahteve direktive za
elektromagnetno združljivost 2004/108/EC in nizkonapetostne direktive
2006/95/EC.
26 - Slovenščina

Zunanja LED svetilka LLS 06 A1
Garancijski pogoji
36 mesecev garancije od dneva nakupa
1. S tem garancijskim listom jamčimo TARGA GmbH, da bo izdelek v garancijskem roku ob normalni in
pravilni uporabi brezhibno deloval in se zavezujemo, da bomo ob izpolnjenih spodaj navedenih
pogojih odpravili morebitne pomanjkljivosti in okvare zaradi napak v materialu ali izdelavi oz. po
svoji presoji izdelek zamenjali ali vrnili kupnino.
2. Garancija je veljavna na ozemlju Republike Slovenije.
3. Garancijski rok za proizvod je 36 mesecev od dneva nabave. Upoštevajte, da je garancijska doba
za baterije, ki se lahko polnijo,12 mesecev.
4. Kupec je dolžan okvaro javiti pooblaščenemu servisu oz. se informirati o nadaljnih postopkih na
zgoraj navedeni telefonski številki. Svetujemo vam, da pred tem natančno preberete navodila o
sestavi in uporabi izdelka.
5. Kupec je dolžan pooblaščenemu servisu predložiti garancijski list in račun, kot potrdilo in dokazilo o
nakupu.
6. V primeru, da proizvod popravlja nepooblaščeni servis ali oseba, kupec ne more uveljavljati
zahtevkov iz te garancije.
7. Vzroki za okvaro oz. nedelovanje izdelka morajo biti lastnosti stvari same, in ne vzroki, ki so zunaj
proizvajalčeve oz. prodajalčeve sfere. Kupec ne more uveljavljati zahtevkov iz te garancije, če se ni
držal priloženih navodil za sestavo in uporabo izdelka ali, če je izdelek kakorkoli spremenjen ali
nepravilno vzdrževan.
8. Jamčimo servisiranje in rezervne dele za dobo, ki je minimalno zahtevana s strani zakonodaje.
9. Obrabni deli oz. potrošni material so izvzeti iz garancije.
10. Vsi potrebni podatki za uveljaljanje garancije se nahajajo na dveh ločenih dokumentih (garancijski
list, račun).
11. Ta garancija proizvajalca ne izključuje pravic potrošnika, ki izhajajo iz odgovornosti prodajalca za
napake na blagu.
Ta garancija velja za Slovenijo.
Poleg te garancije lahko brez omejitve naše garancije uveljavljate tudi pravice iz garancije zoper
prodajalca.
Slovenščina - 27

Zunanja LED svetilka LLS 06 A1
Service
Telefon: 0800 – 80 88 7
E-pošto: service.SI@targa-online.com
IAN: 78528
Proizvajalec
TARGA GmbH
Postfach 22 44
D-59482 Soest
www.targa.de
Prodajalec:
Lidl d.o.o.k.d., Žeje pri Komendi 100, SI-1218 Komenda
28 - Slovenščina

LED-Aussenstrahler LLS 06 A1
Inhalt
Einleitung ............................................................................................................................................................ 30
Bestimmungsgemäße Verwendung .................................................................................................................. 30
Lieferumfang ...................................................................................................................................................... 30
Technische Daten .............................................................................................................................................. 31
Sicherheitshinweise ........................................................................................................................................... 31
Vor der Inbetriebnahme .................................................................................................................................... 32
Montage ....................................................................................................................................................... 33
Inbetriebnahme ................................................................................................................................................. 33
Bewegungsmelder ausrichten ...................................................................................................................... 33
Leuchtdauer einstellen (TIME) ...................................................................................................................... 34
Sensorempfindlichkeit einstellen (SENS) .................................................................................................... 34
Lichtempfindlichkeit einstellen (LUX) ............................................................................................................ 34
Wartung/Reinigung .......................................................................................................................................... 35
Wartung ........................................................................................................................................................ 35
Reinigung ...................................................................................................................................................... 35
Umwelthinweise und Entsorgungsangaben ..................................................................................................... 35
Konformität ........................................................................................................................................................ 35
Garantiehinweise .............................................................................................................................................. 36
Deutsch - 29

LED-Aussenstrahler LLS 06 A1
Einleitung
Vielen Dank, dass Sie sich für ein LivarnoLux Produkt entschieden haben.
Der LED-Aussenstrahler ist für den Betrieb im Außen- und Innenbereich geeignet. Die 6 langlebigen und
hocheffizienten Marken-LEDs von Samsung sorgen für eine gute Ausleuchtung. Der Bewegungsmelder
erfasst Bewegungen und läßt den LED-Aussenstrahler automatisch ein- und ausschalten.
Bestimmungsgemäße Verwendung
Der LED-Aussenstrahler ist nicht für den gewerblichen Einsatz bestimmt. Das Gerät erfüllt alle, im
Zusammenhang mit der CE-Konformität, relevanten Normen und Standards. Bei einer nicht mit dem
Hersteller abgestimmten Änderung des LED-Aussenstrahlers ist die Einhaltung dieser Normen nicht mehr
gewährleistet.
Lieferumfang
LED-Aussenstrahler LLS 06 A1
Montagematerial (2 x Schrauben und 2 x Dübel)
Bedienungsanleitung mit Sicherheitshinweisen
Diese Bedienungsanleitung ist mit einem ausklappbaren Umschlag versehen. In der Innenseite des
Umschlags ist der LED-Aussenstrahler mit einer Bezifferung abgebildet. Die Ziffern haben folgende
Bedeutung:
1 LED-Aussenstrahler
2 Anschlussdose
3 Kabelverschraubung
4 Montagebügel
5 Feststellschraube
6 Bewegungsmelder
7 Stromkabel
8 Lüsterklemme
9 Regler TIME
10 Regler SENS
11 Regler LUX
30 - Deutsch

LED-Aussenstrahler LLS 06 A1
Technische Daten
Marke: LivarnoLux
Modellbezeichnung: LLS 06 A1
Betriebsspannung: 220 – 240 V
Schutzklasse: I (mit Schutzleiteranschluss)
Schutzart: IP44 (Spritzwasserschutz)
Leuchtmittel: 6 LEDs (Samsung)
Lichtstrom: 290 lm +/-5%
Leistung: ca. 0,5 W (je LED)
Farbtemperatur: 6000 K +/-500 K
LED-Abstrahlwinkel: ca. 120°
Bewegungsmelder:
Erfassungswinkel: ca. 180°
Erfassungsreichweite: max. 12 m
Lichtempfindlichkeit: einstellbar
Schwenkbar: horizontal / vertikal
Leuchtdauer: ca. 10 s bis 4 min
Abmessungen (H x B x T): ca. 218 x 152 x 133 mm
Gewicht: ca. 675 g
Geprüfte Sicherheit:
, 50/60 Hz
~
Sicherheitshinweise
Vor der ersten Verwendung des Gerätes lesen Sie bitte die folgenden Anweisungen genau durch und
beachten Sie alle Warnhinweise, selbst wenn Ihnen der Umgang mit elektronischen Geräten vertraut ist.
Bewahren Sie diese Bedienungsanleitung sorgfältig als zukünftige Referenz auf. Wenn Sie das Gerät
verkaufen oder weitergeben, händigen Sie unbedingt auch diese Bedienungsanleitung aus.
Deutsch - 31

LED-Aussenstrahler LLS 06 A1
Jede zersprungene Schutzabdeckung ist zu ersetzen.
Der LED-Aussenstrahler hat einen Schutzleiteranschluss. Der Schutzleiter (gelb/grün)
muss an die gekennzeichnete Klemme angeschlossen werden.
Dieses Symbol kennzeichnet wichtige Hinweise für den sicheren Betrieb des Gerätes
und zum Schutz des Anwenders.
Elektrische Geräte gehören nicht in Kinderhände. Lassen Sie Kinder niemals unbeaufsichtigt
elektrische Geräte benutzen. Kinder können mögliche Gefahren nicht immer richtig erkennen. Halten
Sie auch die Verpackungsfolien von Kindern fern. Es besteht Erstickungsgefahr.
Falls Sie Rauchentwicklung, ungewöhnliche Geräusche oder Gerüche feststellen, schalten Sie das
Gerät sofort aus. In diesen Fällen darf das Gerät nicht weiter verwendet werden, bevor eine
Überprüfung durch einen Fachmann durchgeführt wurde. Atmen Sie keinesfalls Rauch aus einem
möglichen Gerätebrand ein. Sollten Sie dennoch Rauch eingeatmet haben, suchen Sie einen Arzt
auf. Das Einatmen von Rauch kann gesundheitsschädlich sein.
Das Gehäuse des LED-Aussenstrahlers darf nicht beschädigt werden. Bei beschädigtem Gehäuse
besteht Gefahr durch einen elektrischen Schlag.
Öffnen Sie niemals das Gehäuse des LED-Aussenstrahlers, da dieser keine zu wartenden Teile
enthält. Bei geöffnetem Gehäuse besteht Gefahr durch einen elektrischen Schlag.
Es dürfen keine Gegenstände an den LED-Aussenstrahler gehängt werden. Das Gehäuse ist nicht
zum Tragen von Lasten geeignet. Andernfalls könnte der LED-Aussenstrahler beschädigt werden.
Benutzen Sie keinesfalls optische Instrumente, wie zum Beispiel ein Vergrößerungsglas, um direkt in
den Lichtstrahl zu schauen. Dies kann zu Augenschäden führen. Bei dem Verdacht auf
Augenschäden suchen Sie einen Arzt auf.
Vor der Inbetriebnahme
Entnehmen Sie den LED-Aussenstrahler und das Montagematerial aus der Verpackung.
Prüfen Sie den LED-Aussenstrahler auf Beschädigungen. Bei Beschädigungen darf der LED-Aussenstrahler
nicht im Betrieb genommen werden.
32 - Deutsch

LED-Aussenstrahler LLS 06 A1
Montage
Die Montage darf nur von einer autorisierten Elektrofachkraft durchgeführt werden!
Der Stromkreis muss während der Montage abgeschaltet sein!
Verwenden Sie geeignetes Werkzeug zur Montage.
Achten Sie beim Bohren der Bohrlöcher darauf, dass keine in der Wand liegenden Leitungen
beschädigt werden.
Lösen Sie den Montagebügel [4] vom LED-Aussenstrahler [1].
Nutzen Sie den Montagebügel [4] als Vorlage zum Anzeichnen der zwei äußeren Bohrlöcher.
Bohren Sie nun die zwei Bohrlöcher und befestigen Sie den Montagebügel [4] mittels der mitgelieferten
Dübel und Schrauben.
Öffnen Sie die Anschlussdose [2], indem Sie die vier Schrauben lösen und die Abdeckung abnehmen.
Führen Sie das Stromkabel durch die Kabelverschraubung
[3] mit Zugentlastung.
Schließen Sie das Stromkabel [7] mittels der Lüsterklemme
[8] an. Achten Sie darauf, dass die einzelnen Adern des
Stromkabels [7] korrekt angeschlossen werden.
Verschließen Sie die Anschlussdose [2], indem Sie die Abdeckung mit den zuvor entfernten vier
Schrauben wieder festschrauben.
Befestigen Sie nun den LED-Aussenstrahler an den Montagebügel [4]. Verwenden Sie dazu die zuvor
entfernten Schrauben, Muttern und Unterlegscheiben.
Schalten Sie den Stromkreis ein.
Ader Symbol Bezeichnung
schwarz
oder
braun
blau N Neutral
gelb/grün
L Phase
Schutzleiter
Inbetriebnahme
Bewegungsmelder ausrichten
Achten Sie darauf, dass im Erfassungsbereich des Bewegungsmelders [6] keine Bewegungen
vorkommen, die nicht erfasst werden sollen (z.B. Gehwege, Straßen).
Die Einstellung der Lichtempfindlichkeit des Bewegungsmelders [6] sollten Sie am besten zu dem
Zeitpunkt der Lichtverhältnisse vornehmen, bei welchen der LED-Aussenstrahler aktiv werden soll.
Deutsch - 33

LED-Aussenstrahler LLS 06 A1
Richten Sie den Bewegungsmelder [6] so aus, dass dieser den gewünschten Bereich möglichst gut
erfassen kann. Die Sicht darf nicht durch Gegenstände o. ä. behindert werden.
Sie können den Bewegungsmelder [6] horizontal durch Drehen ausrichten.
Um den Bewegungsmelder [6] vertikal auszurichten, müssen Sie zuerst die Feststellschraube [5] lösen.
Befindet sich der Bewegungsmelder [6] in der gewünschten Position, müssen Sie die Feststellschraube
[5] wieder fixieren.
Leuchtdauer einstellen (TIME)
Über den Regler TIME [9] an der Unterseite des Bewegungsmelders [6] stellen Sie die Leuchtdauer (ca.
10 s bis 4 min) ein. Drehen Sie den Regler TIME [9] im Uhrzeigersinn, um die Leuchtdauer zu verlängern
bzw. gegen den Uhrzeigersinn, um die Leuchtdauer zu verkürzen.
Sensorempfindlichkeit einstellen (SENS)
Über den Regler SENS [10] an der Unterseite des Bewegungsmelders [6] stellen Sie die
Sensorempfindlichkeit ein. Drehen Sie den Regler SENS [10] im Uhrzeigersinn, um die Empfindlichkeit zu
erhöhen bzw. gegen den Uhrzeigersinn, um die Empfindlichkeit zu verringern. Je höher die
Empfindlichkeit, desto größer der Erfassungsbereich.
Lichtempfindlichkeit einstellen (LUX)
Über den Regler LUX [11] an der Unterseite des Bewegungsmelders [6] stellen Sie die Lichtempfindlichkeit
ein. Hier legen Sie fest, bei welchen Lichtverhältnissen der Dämmerungssensor reagiert und somit der LEDAussenstrahler ein- bzw. ausgeschaltet wird.
Drehen Sie den Regler LUX [11] im Uhrzeigersinn (Richtung ), damit der Bewegungsmelder bei helleren
Lichtverhältnissen reagiert.
Drehen Sie den Regler LUX [11] gegen den Uhrzeigersinn (Richtung ), reagiert der Bewegungsmelder
erst bei dunkleren Lichtverhältnissen.
34 - Deutsch
LED-Aussenstrahler LLS 06 A1
Wartung/Reinigung
Wartung
Das Leuchtmittel des LED-Aussenstrahlers bestehen aus langlebigen LEDs. Diese sind nicht auswechselbar
und müssen nicht gewartet werden.
Reinigung
Stellen Sie sicher, dass keine Flüssigkeiten in das Gehäuse eindringen können. Es besteht die Gefahr
eines elektrischen Schlages.
Verwenden Sie zur Reinigung des LED-Aussenstrahlers ein weiches, trockenes Tuch und keinesfalls
Lösungsmittel oder Reiniger, die Kunststoff angreifen. Verwenden Sie bei stärkerer Verschmutzung nur ein
leicht angefeuchtetes Tuch.
Umwelthinweise und Entsorgungsangaben
Wenn dieses Symbol eines durchgestrichenen Abfalleimers auf einem Produkt
angebracht ist, unterliegt dieses Produkt der europäischen Richtlinie 2002/96/EC.
Alle Elektro- und Elektronikaltgeräte müssen getrennt vom Hausmüll über dafür
staatlich vorgesehene Stellen entsorgt werden. Auch das Leuchtmittel muss ebenso
fachgerecht entsorgt werden.
Das Gerät darf nicht mit dem Haus- oder Sperrmüll entsorgt werden. Informationen zu
Sammelplätzen oder Abholungsterminen erfahren Sie über Ihre Gemeindeverwaltung oder über Ihr
örtliches Entsorgungsunternehmen.
Führen Sie auch die Verpackung einer umweltgerechten Entsorgung zu. Kartonagen können bei
Altpapiersammlungen oder an öffentlichen Sammelplätzen zur Wiederverwertung abgegeben werden.
Folien und Kunststoffe des Lieferumfangs werden über Ihr örtliches Entsorgungsunternehmen eingesammelt
und umweltgerecht entsorgt.
Konformität
Dieses Gerät entspricht hinsichtlich Übereinstimmung mit den grundlegenden
Anforderungen und den anderen relevanten Vorschriften der EMV-Richtlinie
2004/108/EC und der Niederspannungsrichtlinie 2006/95/EC.
Deutsch - 35

LED-Aussenstrahler LLS 06 A1
Garantiehinweise
Garantie der Targa GmbH
Sehr geehrte Kundin, sehr geehrter Kunde,
Sie erhalten auf dieses Gerät 3 Jahre Garantie ab Kaufdatum. Im Falle von Mängeln dieses Produkts
stehen Ihnen gegen den Verkäufer des Produkts gesetzliche Rechte zu. Diese gesetzlichen Rechte werden
durch unsere im Folgenden dargestellte Garantie nicht eingeschränkt.
Garantiebedingungen
Die Garantiefrist beginnt mit dem Kaufdatum. Bitte bewahren Sie den original Kassenbon gut auf. Diese
Unterlage wird als Nachweis für den Kauf benötigt. Tritt innerhalb von drei Jahren ab dem Kaufdatum
dieses Produkts ein Material- oder Fabrikationsfehler auf, wird das Produkt von uns – nach unserer Wahl
– für Sie kostenlos repariert oder ersetzt.
Garantiezeit und gesetzliche Mängelansprüche
Die Garantiezeit wird durch die Gewährleistung nicht verlängert. Dies gilt auch für ersetzte und reparierte
Teile. Eventuell schon beim Kauf vorhandene Schäden und Mängel müssen sofort nach dem Auspacken
gemeldet werden. Nach Ablauf der Garantiezeit anfallende Reparaturen sind kostenpflichtig.
Garantieumfang
Das Gerät wurde nach strengen Qualitätsrichtlinien sorgfältig produziert und vor Anlieferung gewissenhaft
geprüft. Die Garantieleistung gilt für Material- oder Fabrikationsfehler. Diese Garantie erstreckt sich nicht
auf Produktteile, die normaler Abnutzung ausgesetzt sind und daher als Verschleißteile angesehen werden
können oder für Beschädigungen an zerbrechlichen Teilen, z. B. Schalter, Akkus oder die aus Glas
gefertigt sind. Diese Garantie verfällt, wenn das Produkt beschädigt, nicht sachgemäß benutzt oder
gewartet wurde. Für eine sachgemäße Benutzung des Produkts sind alle in der Bedienungsanleitung
aufgeführten Anweisungen genau einzuhalten. Verwendungszwecke und Handlungen, von denen in der
Bedienungsanleitung abgeraten oder vor denen gewarnt wird, sind unbedingt zu vermeiden. Das Produkt
ist lediglich für den privaten und nicht für den gewerblichen Gebrauch bestimmt. Bei missbräuchlicher und
unsachgemäßer Behandlung, Gewaltanwendung und bei Eingriffen, die nicht von unserer autorisierten
Service-Niederlassung vorgenommen wurden, erlischt die Garantie. Mit Reparatur oder Austausch des
Produkts beginnt kein neuer Garantiezeitraum.
Abwicklung im Garantiefall
Um eine schnelle Bearbeitung Ihres Anliegens zu gewährleisten, folgen Sie bitte den folgenden
Hinweisen:
36 - Deutsch

LED-Aussenstrahler LLS 06 A1
- Bitte lesen Sie vor Inbetriebnahme Ihres Produktes sorgfältig die beigefügte Dokumentation
bzw. Onlinehilfe. Sollte es mal zu einem Problem kommen, welches auf diese Weise nicht
gelöst werden kann, wenden Sie sich bitte an unsere Hotline.
- Bitte halten Sie für alle Anfragen den Kassenbon und die Artikelnummer bzw. wenn vorhanden
Seriennummer als Nachweis für den Kauf bereit.
- Für den Fall, dass eine telefonische Lösung nicht möglich ist, wird durch unsere Hotline in
Abhängigkeit der Fehlerursache ein weiterführender Service veranlasst.
Service
E-Mail: service.DE@targa-online.com
Telefon: 0049 (0) 211 - 547 69 93
Telefon: 0043 (0) 1 - 79 57 60 09
E-Mail: service.AT@targa-online.com
Telefon: 0041 (0) 44 - 511 82 91
E-Mail: service.CH@targa-online.com
Hersteller
IAN: 78528
Bitte beachten Sie, dass die folgende Anschrift keine Serviceanschrift ist. Kontaktieren Sie zunächst die
oben benannte Servicestelle.
TARGA GmbH
Postfach 22 44
D-59482 Soest
www.targa.de
Deutsch - 37

 Loading...