


HD Wi-Fi Camera
DCS-935LH
QUICK INSTALLATION GUIDE
КРАТКОЕ РУКОВОДСТВО ПО УСТАНОВКЕ
GUÍA DE INSTALACIÓN RÁPIDA
GUIA DE INSTALAÇÃO RÁPIDA
PETUNJUK PEMASANGAN CEPAT

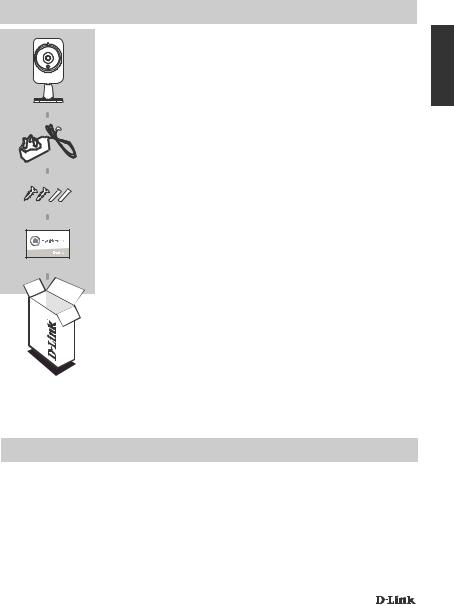
CONTENTS OF PACKAGING
HD Wi-Fi Camera
DCS-935LH
POWER ADAPTER
MOUNTING KIT
QUICK INSTALL CARD
If any of these items are missing from your packaging, contact your reseller.
ENGLISH
SYSTEM REQUIREMENTS
•802.11ac/n/g router
•A broadband Internet connection
•iPhone, iPad or Android smartphone or tablet (please refer to the mobile app's store page to check whether your device is compatible)
DCS-935LH |
3 |
|
|
ENGLISH
PRODUCT SETUP
SETTING UP YOUR CAMERA
Please follow the instructions below to set up your mydlink camera.
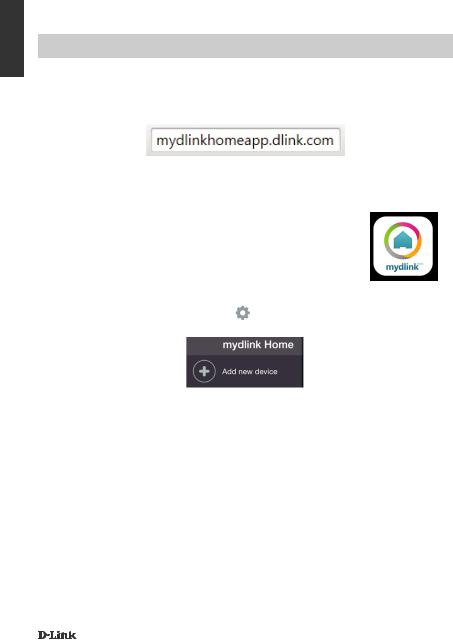
Step 1: On your mobile device, download mydlink Home by going to mydlinkhomeapp.dlink.com, or by searching for mydlink Home in the iTunes App Store or Google Play.
Step 2: Launch the mydlink Home app and create a new account or sign in to your existing account.
iOS: If you are asked about allowing the app to access your location, select Allow.
Android: Make sure location services are turned on in your phone’s settings.
Step 3: After logging in, tap the Settings icon |
in the top-left corner, select Add New Device, |
and follow the instructions. |
|
When you are asked to scan a QR code, use the code on the Quick Install Card in your package, or on the label attached to your device.
Congratulations, your DCS-935LH is now ready to use! Be sure to check the support.dlink.com website periodically for the latest firmware updates to keep your product secure and up to date with the latest features.
Note: If you experience issues registering this camera with your mydlink account, or if you purchased an open box or resold unit, perform a hard reset by pressing and holding the reset button on the device for 10 seconds while the device is powered on. If you are returning the device to the place of purchase, please perform the hard reset procedure to clear the device of any personal data.
4 |
DCS-935LH |
|
|
MOUNTING THE CAMERA
Please refer to the steps below to assist you with mounting the camera. It is recommended that you configure the camera before mounting.
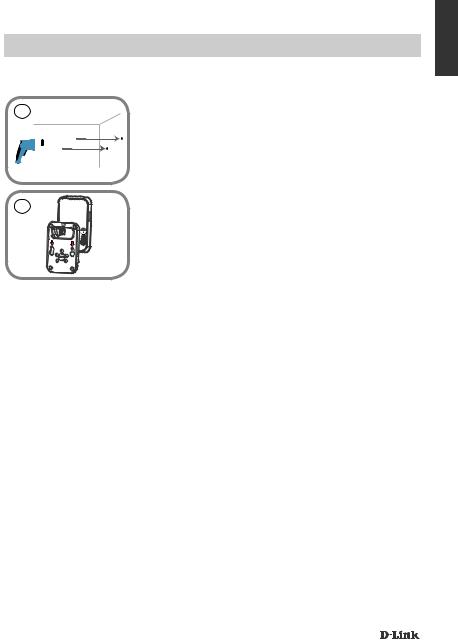
1 Step 1:
Depending on the material of the wall or ceiling, use proper tools to drill two holes 25mm deep, 40mm apart with a 6mm drill bit where you marked. Insert the screws into the holes. If the wall is made out of concrete, drill the holes first, then insert the plastic anchors to support the screws.
2 Step 2:
Place the mounting base over the screws that are mounted on the wall. Make sure to fit the screw-heads over the big holes and slide it downward to lock firmly. Lightly pull the base forward to make sure that it is locked. Adjust the angle of the camera as desired.
ENGLISH
DCS-935LH |
5 |
|
|

ENGLISH
TROUBLESHOOTING
SETUP AND CONFIGURATION PROBLEMS
1.HOW DO I CONNECT MY CAMERA USING WPS?
We recommend that you use the mydlink Home app as described earlier in this guide as it will configure your camera for your wireless network.
If you wish to use WPS to connect your camera, follow these steps:
•Press and hold the WPS button on the back of the camera for 3 seconds. The Power LED will blink green.
•Press the WPS button on your wireless router or access point within 60 seconds. On some routers, you may need to log into the web interface and then click an onscreen button to activate the WPS feature. If you are not sure where the WPS button is on your router or access point, please refer to your router's user manual.
2.WHY IS THE CAMERA VIEW HAZY OR BRIGHT WHEN USING NIGHT VISION MODE?
The IR night vision lights on the camera may be reflecting off of a nearby surface or window. Try repositioning your camera to avoid reflections or glare.
3.WHAT CAN I DO IF I FORGET MY CAMERA PASSWORD?
If you forget your camera password, you will need to perform a hard reset of your camera. This process will change all your settings back to the factory defaults.
To reset your camera, please use an unfolded paperclip to press and hold the RESET button for at least 10 seconds while your camera is plugged in.
6 |
DCS-935LH |
|
|

TECHNICAL SUPPORT
You can find software updates and user documentation on the D-Link website.
Tech Support for customers in
Australia:
Tel: 1300-700-100 24/7 Technical Support
Web: http://www.dlink.com.au E-mail: support@dlink.com.au
India:
Tel: +91-832-2856000 Toll Free 1800-233-0000 Web: www.dlink.co.in
E-Mail: helpdesk@in.dlink.com
Singapore, Thailand, Indonesia, Malaysia, Philippines, Vietnam:
Singapore - www.dlink.com.sg Thailand - www.dlink.co.th Indonesia - www.dlink.co.id Malaysia - www.dlink.com.my Philippines - www.dlink.com.ph Vietnam - www.dlink.com.vn
Korea:
Tel : +82-2-2028-1810
Monday to Friday 9:00am to 6:00pm Web : http://d-link.co.kr
E-mail : g2b@d-link.co.kr
New Zealand:
Tel: 0800-900-900 24/7 Technical Support
Web: http://www.dlink.co.nz E-mail: support@dlink.co.nz
South Africa and Sub Sahara Region:
Tel: +27 12 661 2025
08600 DLINK (for South Africa only) Monday to Friday 8:30am to 9:00pm South Africa Time
Web: http://www.d-link.co.za E-mail: support@d-link.co.za
D-Link Middle East - Dubai, U.A.E.
Plot No. S31102,
Jebel Ali Free Zone South, P.O.Box 18224, Dubai, U.A.E. Tel: +971-4-8809022
Fax: +971-4-8809066 / 8809069 Technical Support: +971-4-8809033 General Inquiries: info.me@dlinkmea.com Tech Support: support.me@dlinkmea.com
Egypt
1, Makram Ebeid Street -
City Light Building - floor 5
Nasrcity - Cairo, Egypt
Tel.: +2 02 23521593 - +2 02 23520852 Technical Support: +2 02 26738470 General Inquiries: info.eg@dlinkmea.com Tech Support: support.eg@dlinkmea.com
Kingdom of Saudi Arabia
Office # 84 ,
Al Khaleej Building ( Mujamathu Al-Khaleej) Opp. King Fahd Road, Olaya
Riyadh - Saudi Arabia
Tel: +966 1121 70008 Technical Support: +966 1121 70009
General Inquiries: info.sa@ dlinkmea.com Tech Support: support.sa@ dlinkmea.com
Pakistan
Islamabad Office:
61-A, Jinnah Avenue, Blue Area,
Suite # 11, EBC, Saudi Pak Tower,
Islamabad - Pakistan
Tel.: +92-51-2800397, 2800398
Fax: +92-51-2800399
Karachi Office:
D-147/1, KDA Scheme # 1,
Opposite Mudassir Park, Karsaz Road, Karachi – Pakistan
Phone: +92-21-34548158, 34326649 Fax: +92-21-4375727
Technical Support: +92-21-34548310, 34305069 General Inquiries: info.pk@dlinkmea.com
Tech Support: support.pk@dlinkmea.com
ENGLISH
DCS-935LH |
7 |
|
|

ENGLISH
TECHNICAL SUPPORT
Iran
Unit 5, 5th Floor, No. 20, 17th Alley , Bokharest St. , Argentine Sq. ,
Tehran IRAN
Postal Code : 1513833817
Tel: +98-21-88880918,19 +98-21-88706653,54
General Inquiries: info.ir@dlinkmea.com Tech Support: support.ir@dlinkmea.com
Morocco
M.I.T.C
Route de Nouaceur angle RS et CT 1029 Bureau N° 312 ET 337
Casablanca , Maroc Phone : +212 663 72 73 24
Email: support.na@dlinkmea.com
Lebanon RMA center
Dbayeh/Lebanon
PO Box:901589
Tel: +961 4 54 49 71 Ext:14
Fax: +961 4 54 49 71 Ext:12
Email: taoun@dlinkmea.com
Bahrain
Technical Support: +973 1 3332904
Kuwait:
Technical Support: + 965 22453939 / +965 22453949
Türkiye
Büyükdere Cad. Ferro Plaza No:155 D: 1 K: 1 Zincirlikuyu / Istanbul
Tel: +90 (212) 289-56-59 Email: info.tr@dlink.com.tr
לארשי
רטנס ןולטמ 20 םימישגמה 'חר 7060 ד"ת ,49348 ת"פ ,ןולטמ תירק
03-9215173 :לט
073-7962797 :לט info@dlink.co.il :יללכ ל"אוד support@dlink.co.il :הכימת ל"אוד
8 |
DCS-935LH |
|
|
КОМПЛЕКТ ПОСТАВКИ
БЕСПРОВОДНАЯ HD-ВИДЕОКАМЕРА
DCS-935LH
АДАПТЕР ПИТАНИЯ
КОМПЛЕКТ ДЛЯ МОНТАЖА
КАРТОЧКА БЫСТРОЙ УСТАНОВКИ
Если что-либо из вышеперечисленного отсутствует, обратитесь к Вашему поставщику.
РУССКИЙ
СИСТЕМНЫЕ ТРЕБОВАНИЯ
•Беспроводной маршрутизатор 802.11ac/n/g
•Широкополосное интернет-соединение
•iPhone, iPad или Android Phone смартфон или планшетный ПК (пожалуйста, перейдите на страницу магазина мобильных приложений, чтобы проверить совместимость приложения с устройством)
DCS-935LH |
9 |
|
|
РУССКИЙ
УСТАНОВКА
НАСТРОЙКА КАМЕРЫ
Пожалуйста, следуйте приведенным ниже инструкциям, чтобы настроить камеру с поддержкой mydlink.
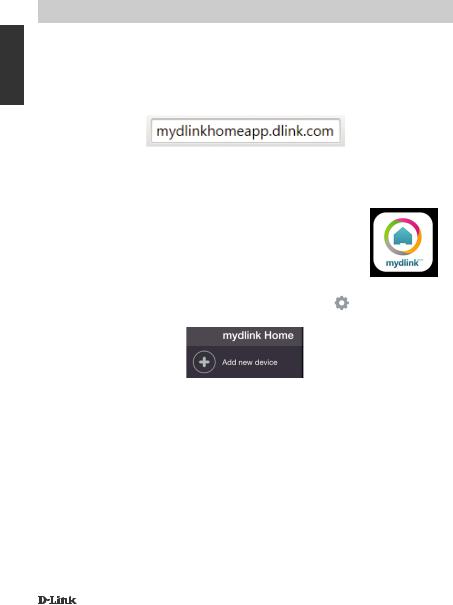
Шаг 1: Загрузите приложение mydlink Home на Ваше мобильное устройство с Web-сайта mydlinkhomeapp.dlink.com или с iTunes App Store или Google Play.
Шаг 2: Запустите приложение mydlink Home и создайте новую учетную запись или войдите под существующей учетной записью.
iOS: Если появится запрос на разрешение приложению доступа к Вашему местоположению, выберите Allow (Разрешить).
Android: Убедитесь, что сервисы определения местоположения включены в настройках Вашего телефона.
Шаг 3: После авторизации нажмите значок Settings (Настройки) в левом верхнем углу, выберите Add New Device (Добавить новое устройство) и следуйте инструкциям.
Когда появится запрос на сканирование QR-кода, используйте код, указанный на карточке быстрой установки из комплекта поставки или на этикетке устройства.
Поздравляем, теперь камера DCS-935LH готова к использованию! Периодически проверяйте наличие обновлений программного обеспечения на официальном Web-сайте D-Link, чтобы гарантировать безопасность устройства и поддержку новейших функций.
Примечание: Если в процессе регистрации камеры возникли проблемы, или Вы приобрели товар в открытой упаковке или перепроданный экземпляр, выполните полный сброс к заводским настройкам путем нажатия и удерживания кнопки Reset на устройстве в течение 10 секунд. Камера при этом должна быть включена. Если Вы возвращаете устройство
продавцу (в торговую точку), пожалуйста, выполните процедуру полного сброса, чтобы удалить с устройства любые персональные данные.
10 |
DCS-935LH |
|
|
МОНТАЖ КАМЕРЫ
Пожалуйста, обратитесь к нижеописанным шагам, которые помогут монтировать камеру. Рекомендуется выполнить настройку камеры до ее монтажа.
1 Шаг 1:
В зависимости от материала, из которого сделана стена или потолок, используйте подходящие инструменты, чтобы просверлить два отверстия глубиной 25 мм на расстоянии 40 мм сверлом 6 мм в размеченном месте. Если стена сделана из бетона, сначала просверлите отверстия, а затем вставьте пластмассовые анкеры для удержания винтов.
2 |
Шаг 2: |
Поместите основание поверх винтов, монтированных в стену. |
Убедитесь, что головки винтов подогнаны к большим отверстиям, и сдвиньте основание вниз, чтобы надежно закрепить его. Слегка потяните основание вперед, чтобы убедиться в том, что оно зафиксировано. Отрегулируйте положение камеры.
РУССКИЙ
DCS-935LH |
11 |
|
|
 Loading...