


 Loading...
User Manual
HD PoE Fixed Network Camera
DCS-3010

Preface
D-Link reserves the right to revise this publication and to make changes in the content hereof without obligation to notify any person or organization of such revisions or changes.
Manual Revisions
Revision |
Date |
Description |
1.1January 11, 2013 DCS-3010 Revision A1 with firmware version 1.10
Trademarks
D-Link and the D-Link logo are trademarks or registered trademarks of D-Link Corporation or its subsidiaries in the United States or other countries. All other company or product names mentioned herein are trademarks or registered trademarks of their respective companies.
Copyright © 2013 by D-Link Corporation.
All rights reserved. This publication may not be reproduced, in whole or in part, without prior expressed written permission from D-Link Corporation.
D-Link DCS-3010 User Manual |
2 |

Table of Contents
Product Overview......................................................... |
4 |
Package Contents.................................................... |
4 |
System Requirements.............................................. |
5 |
Introduction............................................................... |
6 |
Features................................................................... |
7 |
Hardware Overview.................................................. |
8 |
Front Panel......................................................... |
8 |
Rear Panel......................................................... |
9 |
Side Panel........................................................ |
10 |
Side Panel........................................................ |
10 |
Button Panel..................................................... |
11 |
Installation.................................................................. |
12 |
Hardware Installation.............................................. |
12 |
Configuration with Wizard...................................... |
13 |
Viewing Camera via Web Browser................ |
18 |
D-ViewCam Setup Wizard................................ |
20 |
Configuration.............................................................. |
22 |
Live Video............................................................... |
22 |
Client Setup............................................................ |
26 |
Setup...................................................................... |
27 |
Basic Setup...................................................... |
27 |
Advanced Setup............................................... |
28 |
System Overview................................................... |
29 |
Video................................................................ |
30 |
Video Settings............................................... |
30 |
Image Settings............................................... |
33 |
Audio Settings............................................... |
35 |
Network............................................................ |
36 |
IP Settings..................................................... |
36 |
Port and Access Name Settings.................... |
39 |
Dynamic DNS................................................ |
42 |
HTTPS........................................................... |
43 |
Access List.................................................... |
45 |
Advanced Settings......................................... |
47 |
Event Management.......................................... |
51 |
Motion Detection............................................ |
51 |
Tamper Detection.......................................... |
52 |
Event Settings............................................... |
53 |
Recording......................................................... |
60 |
Recording Settings........................................ |
60 |
Local Storage................................................ |
62 |
PTZ Control...................................................... |
63 |
Digital PTZ..................................................... |
63 |
System............................................................. |
64 |
User Settings................................................. |
64 |
Device Settings.............................................. |
65 |
Time and Date............................................... |
66 |
Maintenance.................................................. |
67 |
Parameter List............................................... |
69 |
Logs............................................................... |
70 |
Appendix A - Technical Specifications.................... |
71 |
Technical Specifications......................................... |
71 |
D-Link DCS-3010 User Manual |
3 |
Product Overview
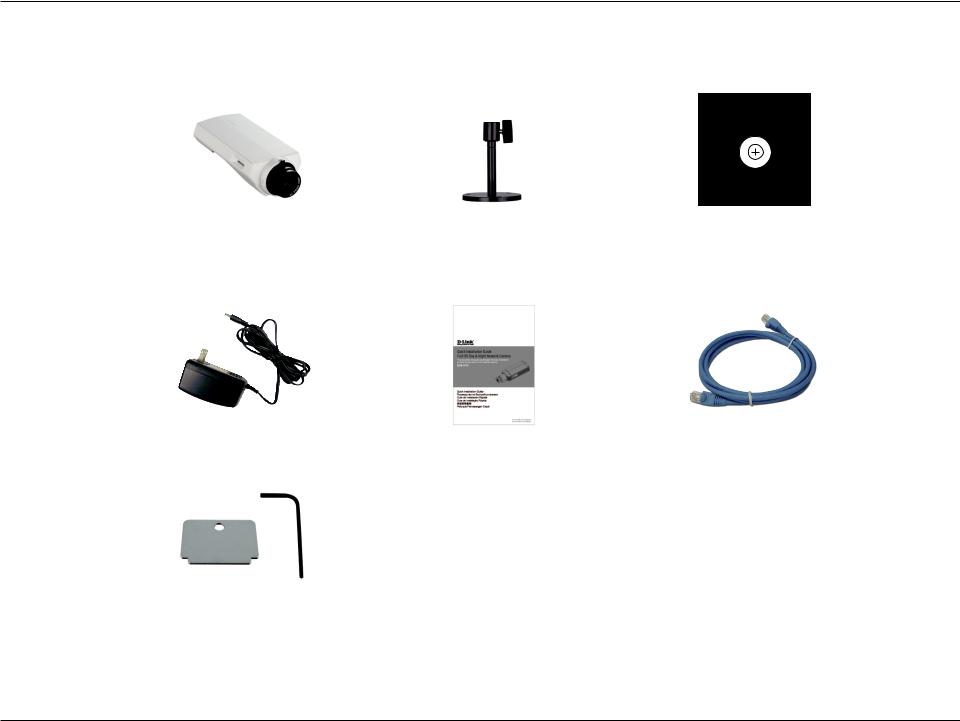
Package Contents
©2010
D-Link
Corporation/
L-Din
k
ySstems,
Inc.
AllRightsRese
DCS-3010 |
Mounting Bracket |
User Manual and Software |
||
HD PoE Fixed Network |
|
|
|
on CD-ROM |
Camera |
|
|
|
|
|
|
|
|
|
|
|
|
|
|
Power Adapter |
Quick Install Guide |
CAT5 Ethernet Cable |
Accessory wrench and lens ring fixture
If any of the above items are missing, please contact your reseller.
D-Link DCS-3010 User Manual |
4 |

Product Overview
System Requirements
Operating System: Microsoft Windows ®, 2000, XP, Vista, 7Memory : At least 256MB of memory (512MB recommended)
Web Browser: Internet Explorer 7 or higher, Firefox, Chrome, SafariVGA card resolution: SVGA or XGA (1024x768 or above)
CPU: 1.7GHz or above (2.8GHz plus processor with 512MB memory and a 32MB video card is required for multiple camera viewing and recording in IP surveillance program)
An available Ethernet connection
D-Link DCS-3010 User Manual |
5 |

Product Overview
Introduction
DCS-3010 is a HD, full frame rate network camera with H.264 compression. The DCS-3010 connects to a network to provide highquality live video over the Internet. With the vivid video quality and superb high resolution, it can provide most detail of the video which is useful to identify any suspected object. DCS-3010 provides multiple streaming and flexible viewing window settings for different purpose of surveillance, either for regular recording or mobile view. Built-in SD card slot can record important events in SD card as a local backup and it's very easy to retrieve.
The included D-Link D-ViewCam™ is sophisticated software which allows users to manage up to 32 network cameras, set e-mail alert notifications, create recording schedules, and use motion detection to record directly to a hard drive. D-ViewCam™ also allows users to upload a floor plan to create a realistic layout of the premises where cameras are located, further simplifying the management process.
D-Link DCS-3010 User Manual |
6 |

Product Overview
Features
HD Surveillance
DCS-3010 provides HD industral standard 16:9 wide screen video for IP surveillance. With the fixed lens, it is a high performance high quality network camera. To utilize the advantage of high resolution, the "viewing window" design can provide user a flexible settings to monitor multiple ROI(Region of Interest) by a single camera. And the "ePTZ" can also simulate wide area surveillance by digital zoom and pan, tilt control.
Flexible Connectivity
The DCS-3010 incorporates Power over Ethernet (PoE), allowing it to be easily installed in a variety of locations without the need for supplemental power cabling.
Advanced Web User Interface
The DCS-3010 features D-Link’s latest-generation graphical user interface. This freshly-designed web interface features a clean, compact, and professional home screen which dramatically increases usability. Menu navigation is simplified thanks to a tree view which logically groups functions, helping users to quickly find what they need. Likewise, intuitive graphic icons reduce the amount text and clutter within the browser window. New users will appreciate the convenient contextual help which offers an easy way to find assistance with camera management tasks.
3GPP Mobile Surveillance
Support for 3GPP Mobile Surveillance allows users to view a live video feed from a 3GPP compatible Internet-ready mobile device. This extends monitoring capability, allowing users to check the camera’s video feed while on the go without a computer.
D-Link DCS-3010 User Manual |
7 |
Product Overview
Hardware Overview
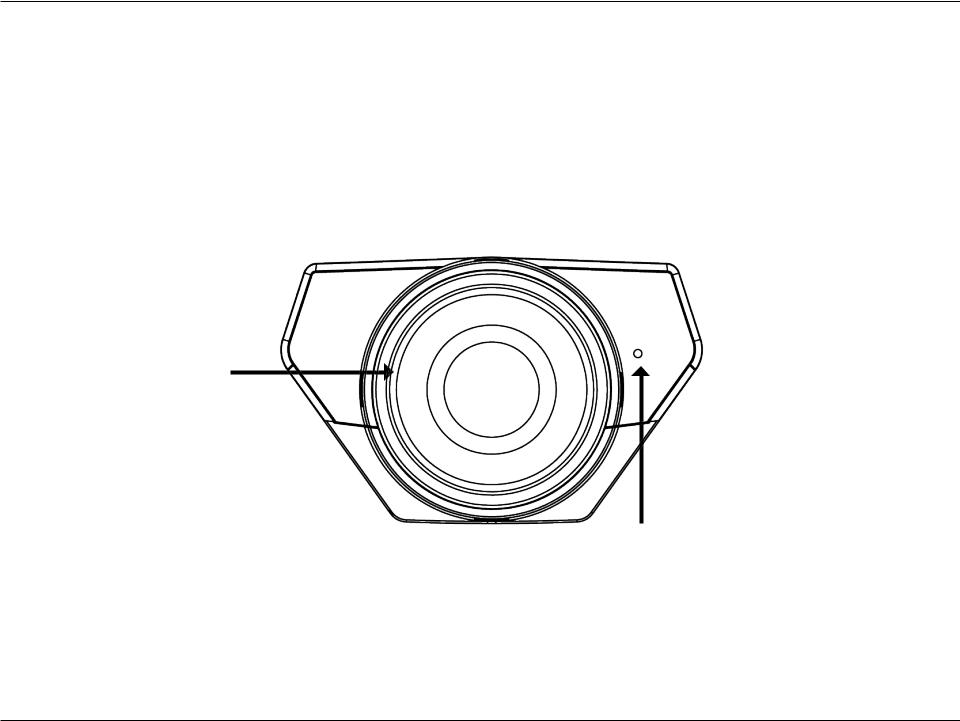
Front Panel
Lens Connector
Connect to a CS mount
Built-in MIC
Internal microphone
D-Link DCS-3010 User Manual |
8 |
Product Overview
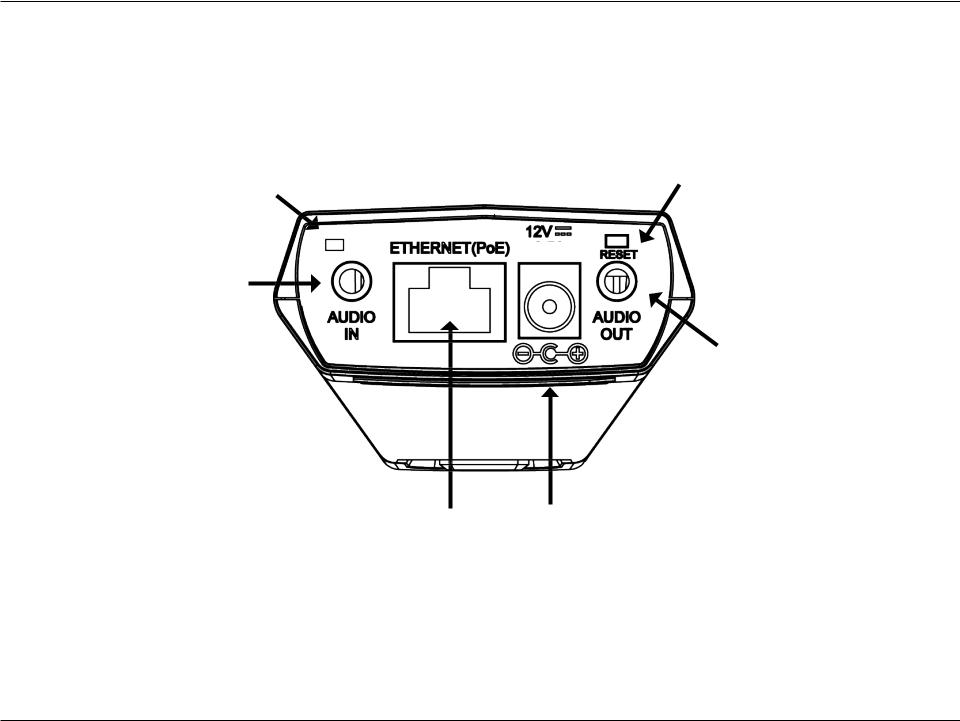
Rear Panel
LED
Power and network indicator
Microphone Port
Use to Connect an
External microphone
Ethernet (PoE)
RJ-45 connector for Ethernet which can also be used to power the camera using PoE
Reset
Press and hold this button for 10 seconds to reset the camera
1.25A
Speaker Port
Use to Connect an
External speaker
DC Power
12V DC
D-Link DCS-3010 User Manual |
9 |
Product Overview
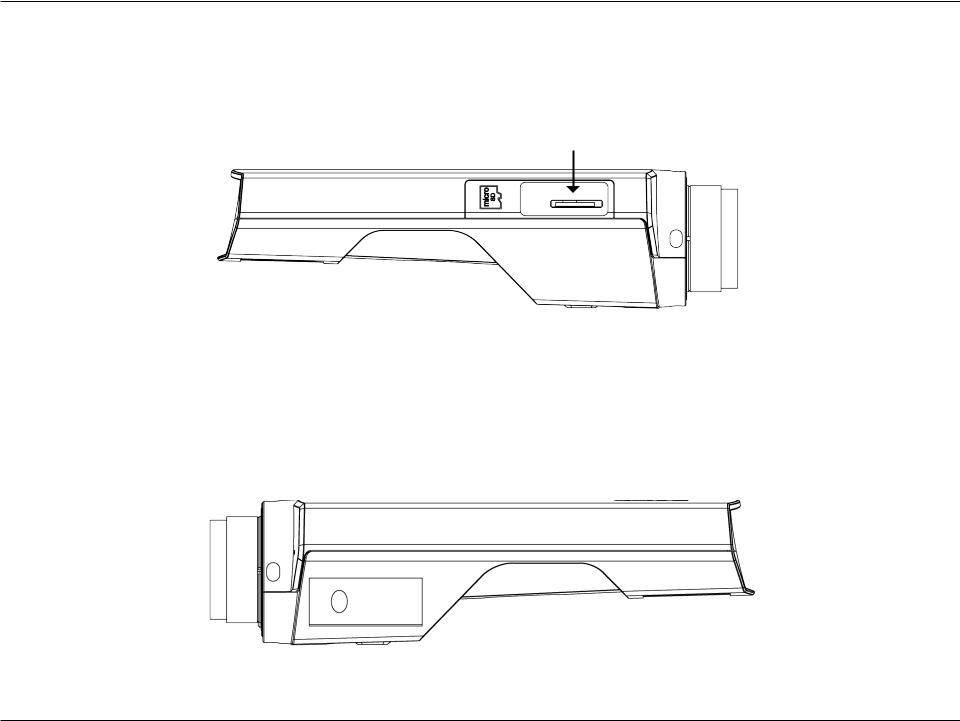
Side Panel
Micro SD Card Slot
Local Micro SD card for storing recorded images and video
Side Panel
D-Link DCS-3010 User Manual |
10 |
Product Overview
Button Panel
DC-Iris Connector
Connector for DC auto iris lens
D-Link DCS-3010 User Manual |
11 |
Installation
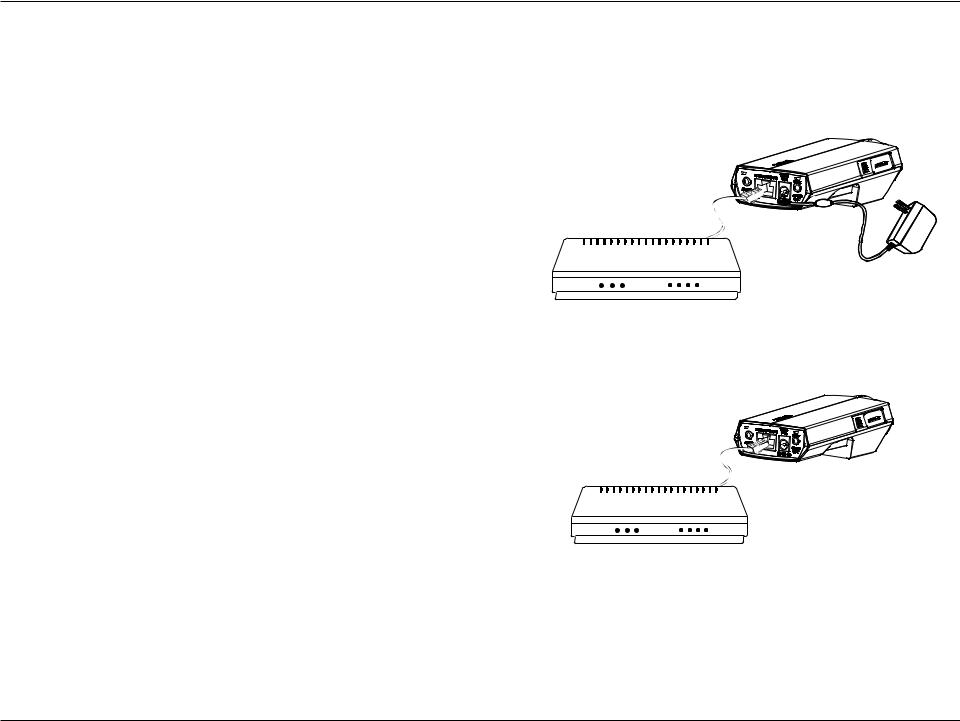
Hardware Installation
Basic Connection (without PoE)
Connect the camera to your switch or router via Ethernet cable.
Connect the supplied power cable from the camera to a power outlet.
Connection Using a PoE Switch
If using a PoE switch or router, connect the network camera via Ethernet cable.
PoE will transmit both power and data over a single cable.
Note: Once power has been established, the LED will turn red. When the device has obtained an IP address and is accessible, the LED will turn green.
D-Link DCS-3010 User Manual |
12 |
Installation
Configuration with Wizard
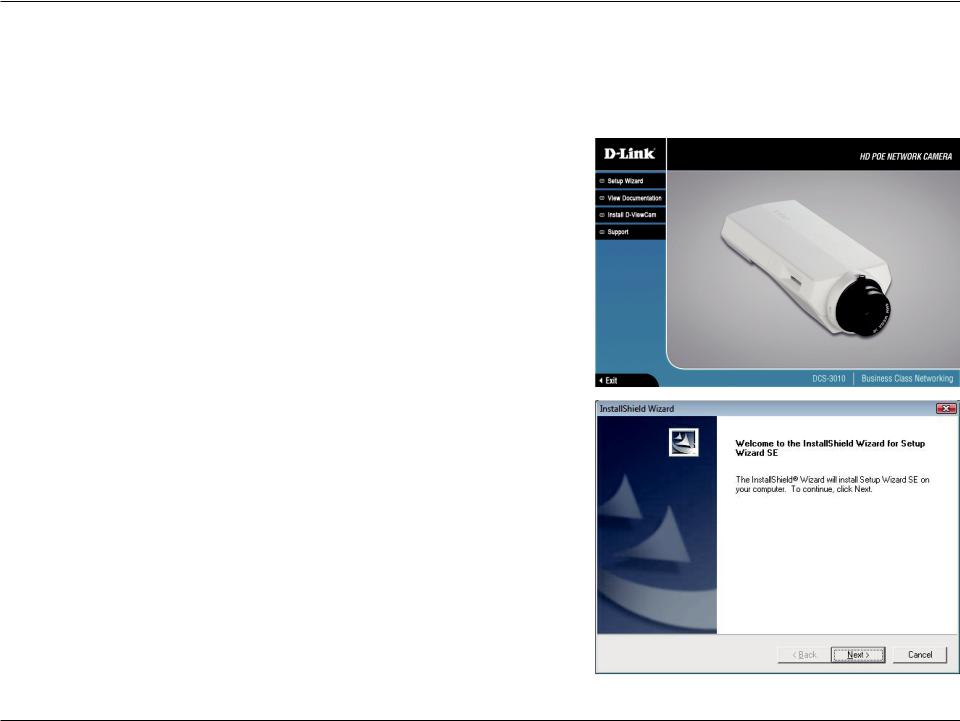
Insert the DCS-3010 CD into your computer's CD-ROM drive to begin the installation. If the Autorun function on your computer is disabled, or if the D-Link Launcher fails to start automatically, click Start > Run. Type D:\ autorun.exe, where D: represents the drive letter of your CD-ROM drive.
Click Setup Wizard to begin the installation.
After clicking Setup Wizard, the following window will open.
Click Next to continue.
D-Link DCS-3010 User Manual |
13 |
Installation
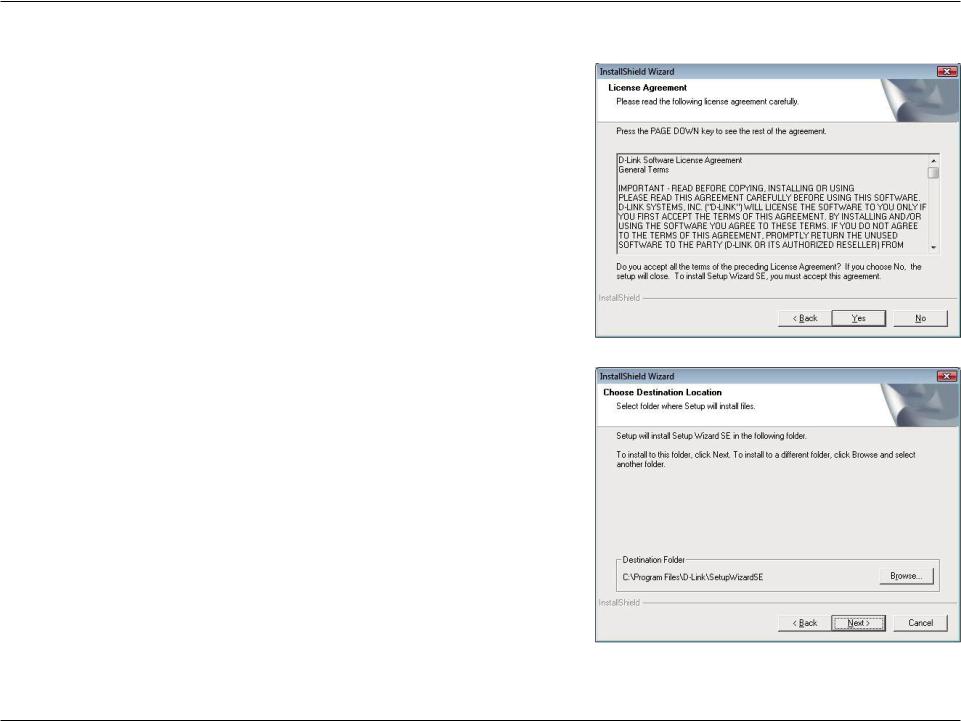
Click Yes to accept the License Agreement.
To start the installation process, click Next.
Note: The installation may take several minutes to finish.
D-Link DCS-3010 User Manual |
14 |
Installation
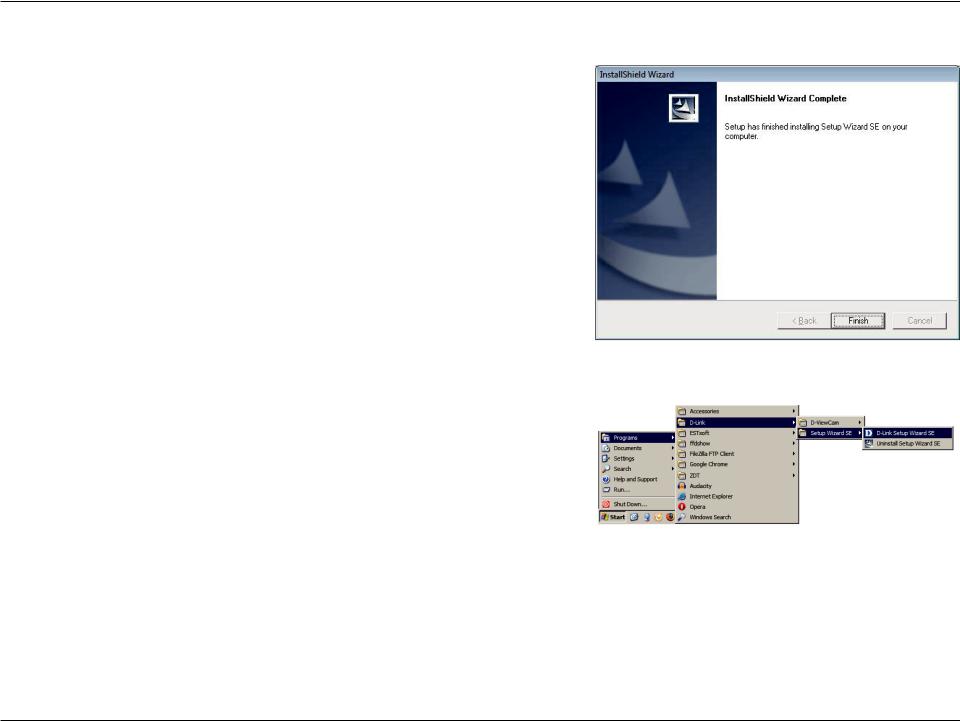
Click Finish to complete the installation.
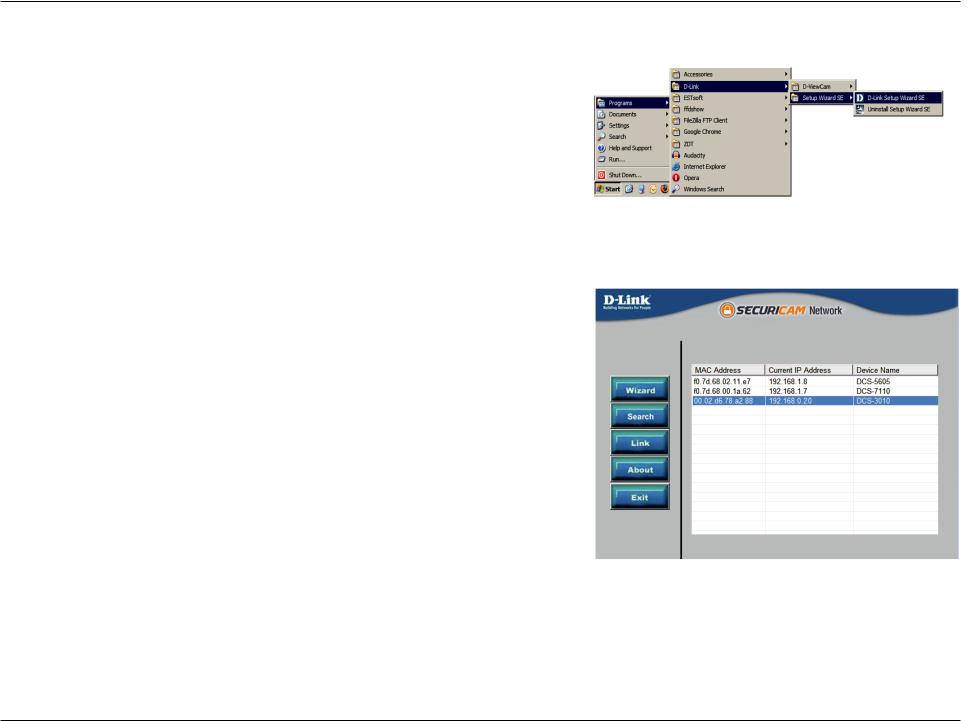
Click on the D-Link Setup Wizard SE icon that was created in your Windows Start menu.
Start > D-Link > Setup Wizard SE
D-Link DCS-3010 User Manual |
15 |

Installation
The Setup Wizard will appear and display the MAC address and IP address of your camera(s). If you have a DHCP server on your network, a valid IP Address will be displayed. If your network does not use a DHCP server, the network camera's default static IP 192.168.0.20 will be displayed.
Click the Wizard button to continue.
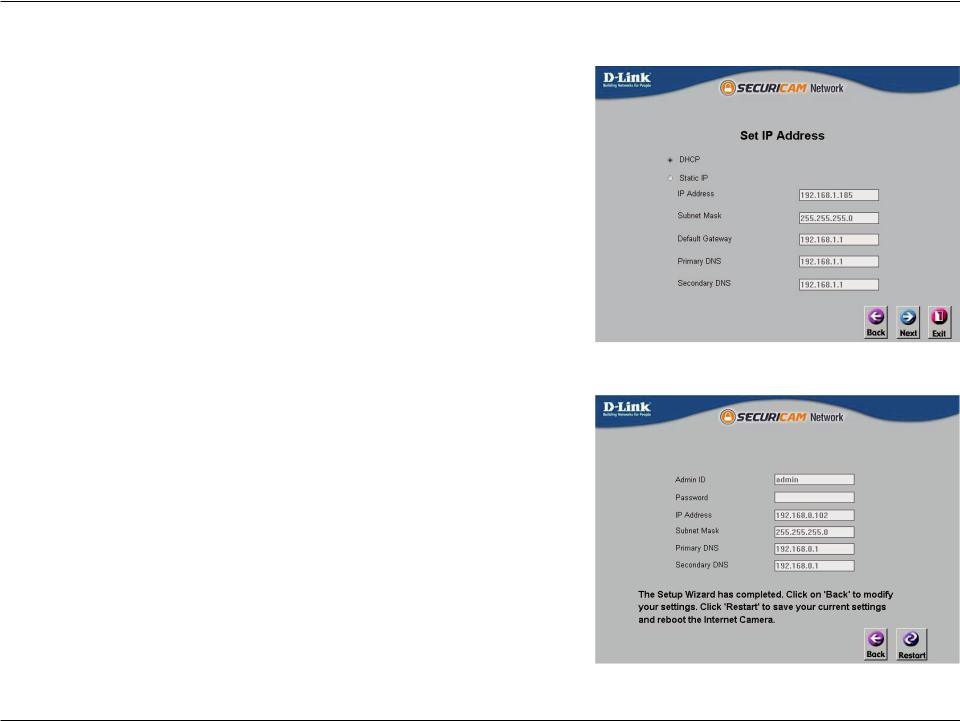
Enter the Admin ID and password. When logging in for the first time, the default Admin ID is admin with the password left blank.
Click Next, to proceed to the next page.
D-Link DCS-3010 User Manual |
16 |
Installation
Select DHCP if your camera obtains an IP address automatically when it boots up. Select static IP if the camera will use the same IP address each time it is started.
Click Next, to proceed to the next page.
Take a moment to confirm your settings and click Restart.
D-Link DCS-3010 User Manual |
17 |
Installation
Viewing Camera via Web Browser
Click on the D-Link Setup Wizard SE icon that was created in your Windows
Start menu.
Start > D-Link > Setup Wizard SE
Select the camera and click the button labeled "Link" to access the web configuration.
The Setup Wizard will automatically open your web browser to the IP address of the camera.
D-Link DCS-3010 User Manual |
18 |
Installation
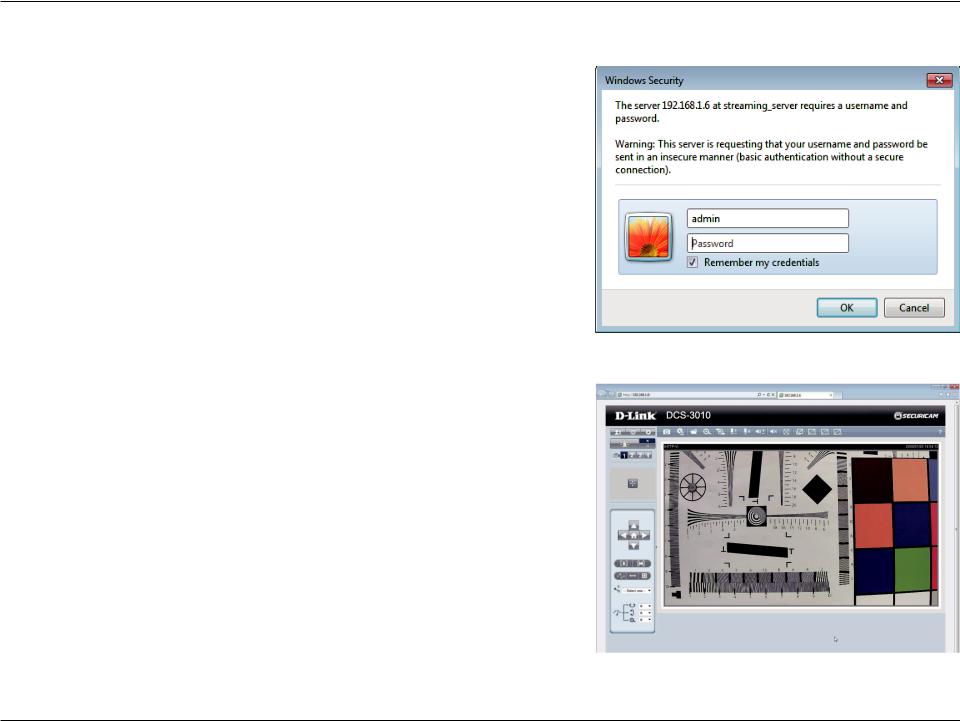
Enter admin as the default username and leave the password blank. Click OK to continue.
This section shows your camera’s live video. You can select your video profile and view or operate the camera. For additional information about web configuration, please refer to the user manual included on the CD-ROM or the D-Link website.
D-Link DCS-3010 User Manual |
19 |
Installation
D-ViewCam Setup Wizard
D-ViewCam software is included for the administrator to manage multiple D-Link IP cameras remotely. You may use the software to configure all the advanced settings for your cameras. D-ViewCam is a comprehensive management tool for IP surveillance.
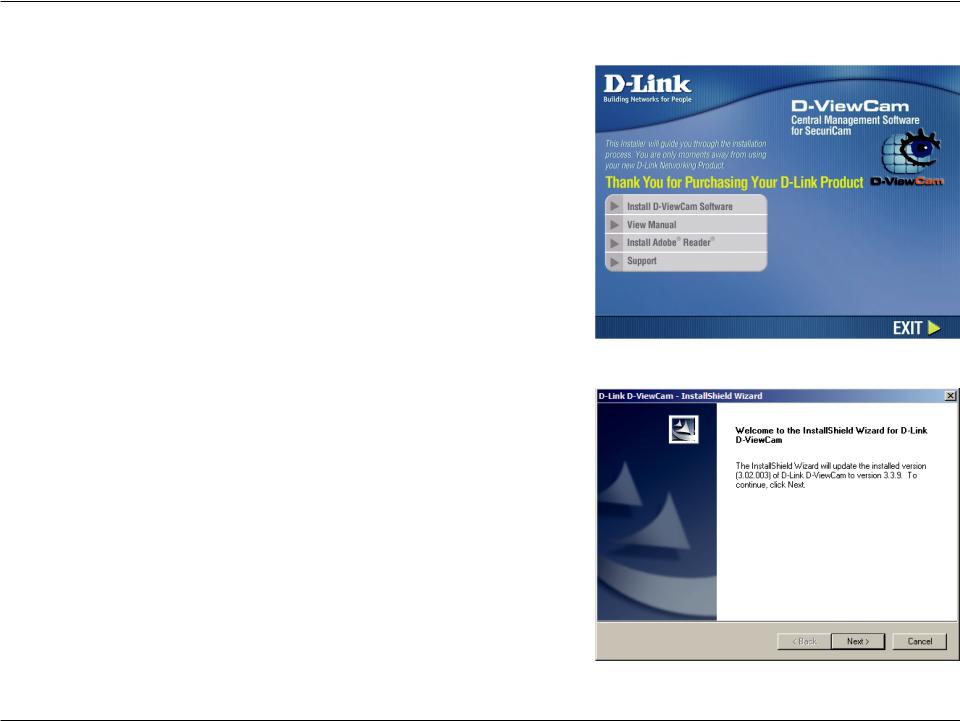
Insert the CD-ROM into the CD-ROM drive. A menu screen will appear as shown below.
Follow the Installation Wizard to install D-ViewCam.
D-Link DCS-3010 User Manual |
20 |
Installation
Click Finish to complete the installation.
To start D-ViewCam, select Start > All Programs > D-Link D-ViewCam > Main Console.
For more information about D-ViewCam, please refer to the documentation on the D-ViewCam CD-ROM.
D-Link DCS-3010 User Manual |
21 |

Configuration
Live Video
When you connect to the camera's web interface you will see the following page. This is the Live Video page which will allow you to view the camera's video feed and control basic camera functions using the icons on the screen. Please refer to the tables on the following pages for detailed information about the icons on this screen.
D-Link DCS-3010 User Manual |
22 |
Loading...