


PowerLine HD Day/Night Cloud Camera Kit
DCS-6045LKT
PowerLine HD Day/Night Cloud Camera
DCS-6045L
QUICK
INSTALLATION
GUIDE
INSTALLATIONSANLEITUNG
GUIDE D’INSTALLATION
GUÍA DE INSTALACIÓN
GUIDA DI INSTALLAZIONE
INSTALLATIEHANDLEIDING
INSTRUKCJA INSTALACJI
INSTALAČNÍ PŘÍRUČKA
TELEPÍTÉSI SEGÉDLET INSTALLASJONSVEILEDNING INSTALLATIONSVEJLEDNING
ASENNUSOPAS INSTALLATIONSGUIDE GUIA DE INSTALAÇÃO
ΟΔΗΓΟΣ ΓΡΗΓΟΡΗΣ ΕΓΚΑΤΑΣΤΑΣΗΣ
VODIČ ZA BRZU INSTALACIJU KRATKA NAVODILA ZA UPORABO GHID DE INSTALARE RAPIDĂ
ENGLISH
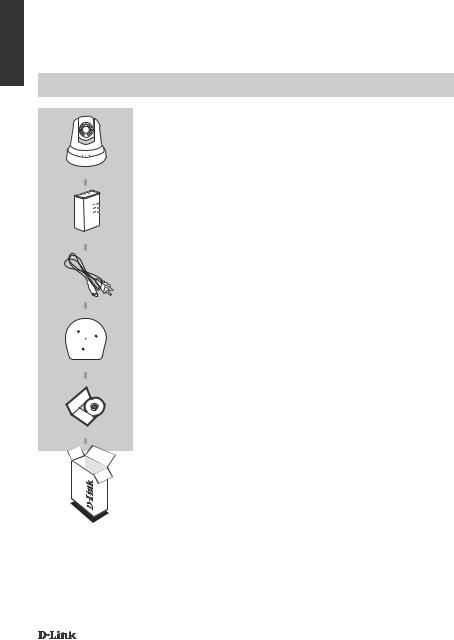
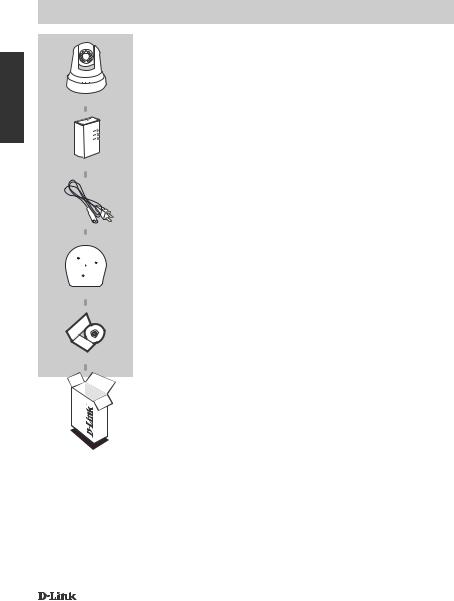
CONTENTS OF PACKAGING
PowerLine HD Day/Night Cloud Camera
DCS-6045L
DHP-308AV POWERLINE ADAPTER(kit only)
Camera power cord
Camera mounting bracket
includes Alignment guide and installation screws
Installation CD
Includes Setup Wizard & Technical Manuals
If any of these items are missing from your packaging, contact your reseller.
2 |
DCS-6045L |
|
|
System Requirements
•Computer with Microsoft Windows® 8/7/Vista/XP, or Mac with OS X 10.6 or higher
•PC with 1.3GHz or above and at least 128MB RAM
•Internet Explorer 7, Firefox 12, Safari 6, or Chrome 20 or higher version with Java installed and enabled
•Existing 10/100 Ethernet-based network
PRODUCT SETUP
Windows User
Step 1:
If you already have a PowerLine adapter on your existing network, continue to step 2. Plug in the PowerLine adapter to a wall outlet. Connect an Ethernet cable from the PowerLine adapter to your existing network.
Step 2:
Plug in the camera power cord into the DCS-6045L. Move the power switch to the ON position and wait for the PWR, PLC, and LNK LED to turn green. If you have an existing PowerLine adapter, you will need to press and hold the PLC button on the camera for 5 seconds.After the PLC LED on the camera begins blinking, press the PLC button on your existing Powerline adapter within the next 60 seconds.
Step 3:
Insert the DCS-6045L Driver CD in the CD-ROM drive. If the CD Autorun function does not automatically start on your computer, go to Start > Run. In the run box type D:\autorun.exe (where D: represents the drive letter of your CD-ROM drive) and click OK. When the autorun screen appears, click Set up your Cloud Camera and follow the on-screen instructions.
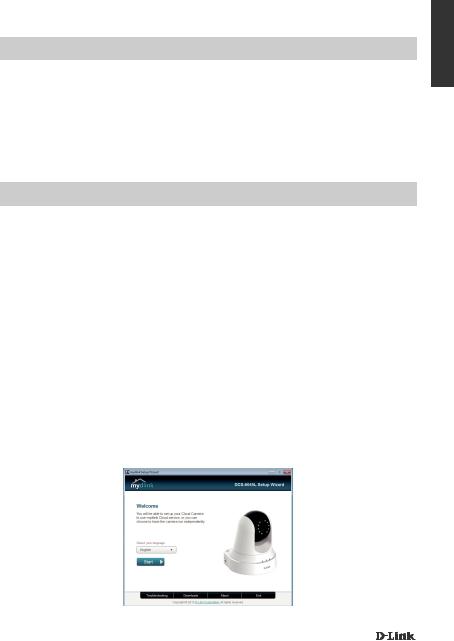
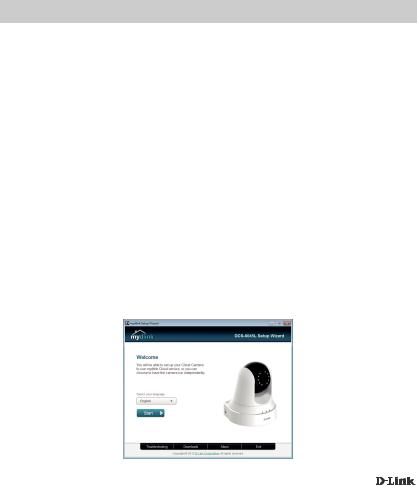
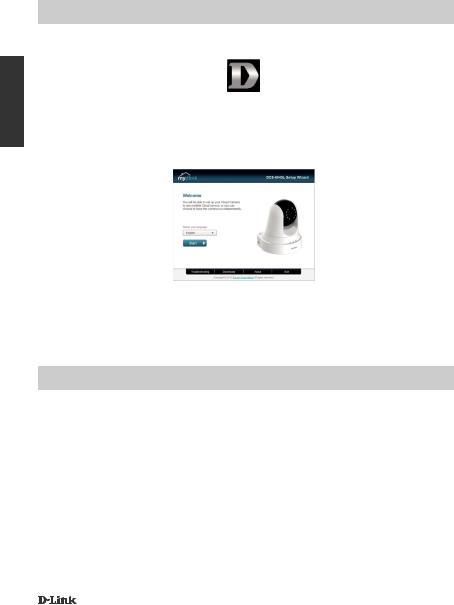
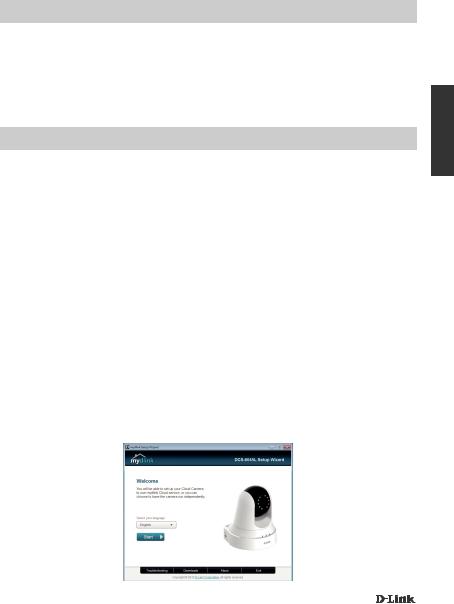
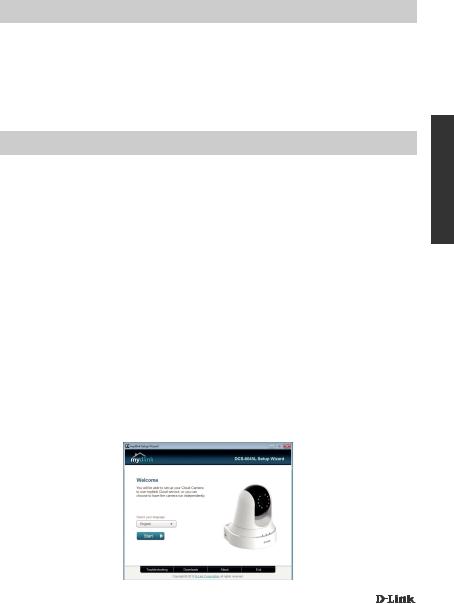
Step 4:
Click on the Start button to start the wizard, and follow the instructions from the Installation Wizard to finish setting up your camera.
ENGLISH
DCS-6045L |
3 |
|
|
ENGLISH
PRODUCT SETUP
Mac User
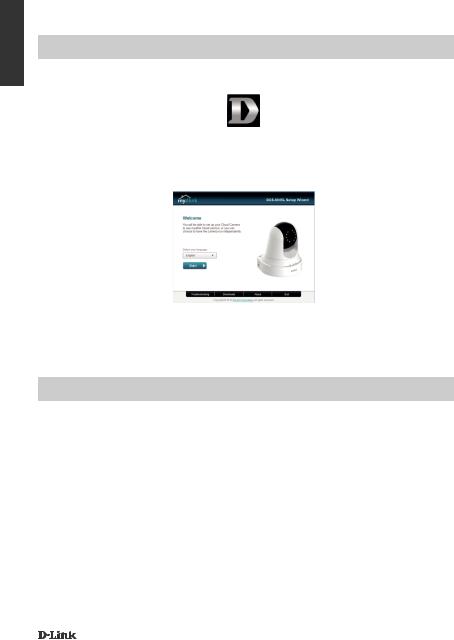
Insert the Installation CD-ROM into your computer’s CD drive. On the desktop, open your CD drive and double-click on the SetupWizard file.
SetupWizard
Within 20-30 seconds, the Setup Wizard will open, which will guide you step-by-step through the installation process from connecting your hardware to configuring your camera and registering it with your mydlink account.
Note: mydlink portal requires Java™ to function correctly.
For more guidelines, please refer to mydlink FAQ pages at https://eu.mydlink.com/faq/mydlink
PLC Setup
Alternatively, you may create a PLC connection. To create a PLC connection:
Step 1:
Press and hold the PLC button on the back of the camera for five seconds. The green PLC status LED above the button will blink.
Step 2:
Press the PLC button on the PowerLine adapter within the next 60 seconds.
4 |
DCS-6045L |
|
|

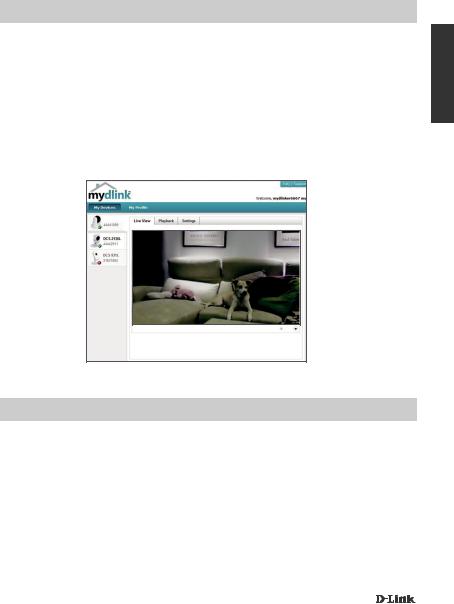
mydlink Portal
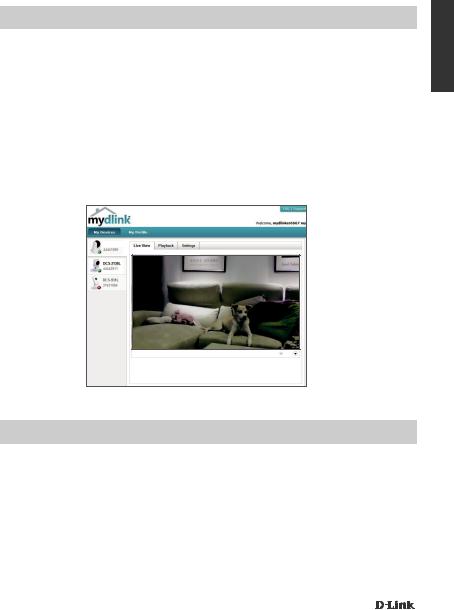
After registering your DCS-6045L camera with a mydlink account in the Camera Installation Wizard, you will be able to remotely access your camera from the www.mydlink.com website. After signing in to your mydlink account, you will see a screen similar to the following:
Step 1:
Open Internet Explorer and go to http://www.mydlink.com, then sign into mydlink.
Step 2:
Select your camera from the device list, and your camera’s Live View will appear.
ENGLISH
DCS-6045L
TECHNICAL SUPPORT
United Kingdom (Mon-Fri) , Website: http://www.dlink.com
Home Wireless/Broadband 0871 873 3000 (9.00am–06.00pm, Sat 10.00am-02.00pm) Managed, Smart, & Wireless Switches, or Firewalls 0871 873 0909 (09.00am05.30pm) (BT 10ppm, other carriers may vary.)
Ireland (Mon-Fri), Website: http://www.dlink.com
All Products 1890 886 899 (09.00am-06.00pm, Sat 10.00am-02.00pm) Phone rates: €0.05ppm peak, €0.045ppm off peak times
DCS-6045L |
5 |
|
|
DEUTSCH
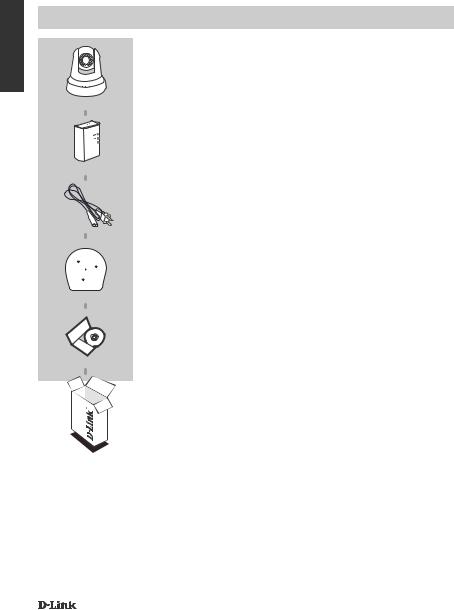
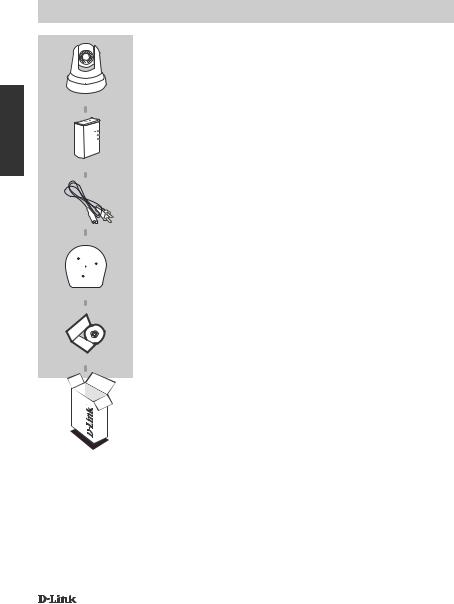
PACKUNGSINHALT
PowerLine HD Day/Night Cloud Camera
DCS-6045L
DHP-308AV POWERLINE ADAPTER (nur Set)
Kameranetzkabel
Kamerahalterung
umfasst Montageausrichthilfe und
Montageschrauben
Installations-CD
enthält Setup-Assistent und Technische Handbücher
Wenn eines dieser Elemente in Ihrer Packung fehlt, wenden Sie sich bitte an Ihren Fachhändler.
6 |
DCS-6045L |
|
|
Systemanforderungen
|
DEUTSCH |
|
|
|
|
• Vorhandenes 10/100 MBit/s Ethernet-Netzwerk |
||
• Computer mit Microsoft Windows® 8/7/Vista/XP oder Mac mit OS X 10.6 oder höher |
|
|
• PC mit 1,3 GHz oder höher und mindestens 128 MB RAM |
|
|
• Internet Explorer 7, Firefox 12, Safari 6 oder Chrome 20 oder höher mit Java (installiert und aktiviert) |
|
|
|
|
|
EINRICHTUNG DES PRODUKTS
Windows-Benutzer
Schritt 1:
Befindet sich bereits ein PowerLine-Adapter in Ihrem bestehenden Netzwerk, fahren Sie mit Schritt 2 fort. Stecken Sie den PowerLine-Adapter in eine Wandsteckdose. Schließen Sie ein Ethernet-Kabel vom PowerLine-Adapter an Ihr bestehendes Netzwerk.
Schritt 2:
Stecken Sie das Kameranetzkabel in die DCS-6045L. Schieben Sie den Netzschalter in die Position ON (Ein) und warten Sie, bis die PWR-, PLCund LNK-LED grün leuchten. Berfügen Sie über einen PowerLine-Adapter, müssen Sie auf die PLC-Taste der Kamera drücken und sie 5 Sekunden lang gedrückt halten. Sobald die PLC LED der Kamera zu blinken beginnt, drücken Sie innerhalb von 60 Sekunden auf die PLC-Taste Ihres vorhandenen Powerline-Adapters.
Schritt 3:
Legen Sie die DCS-6045L Treiber-CD in das CD-ROM-Laufwerk ein. Sollte die CD auf Ihrem Computer nicht automatisch ausgeführt werden, klicken Sie auf Start > Ausführen. Geben Sie im Feld 'Ausführen' D:\autorun.exe ein, wobei D: für den Laufwerkbuchstaben Ihres CD-ROM- Laufwerks steht), und klicken Sie auf OK. Wenn das Autorun-Fenster erscheint, klicken Sie auf Set up your Cloud Camera (Cloud-Kamera einrichten) und folgen Sie den Anweisungen auf dem Bildschirm.
Schritt 4:
Klicken Sie auf Start, um den Assistenten zu starten, und folgen Sie den Anweisungen des Installationsassistenten, um das Einrichten Ihrer Kamera fertig zu stellen.
DCS-6045L |
7 |
|
|
DEUTSCH
EINRICHTUNG DES PRODUKTS
Mac-Nutzer
Legen Sie die Installations-CD-ROM in das Laufwerk Ihres Computers. Öffnen Sie auf dem Desktop Ihr CD-Laufwerk und doppelklicken Sie auf die Datei SetupWizard.
Der Setup-Assistent
Innerhalb von 20-30 Sekunden wird der Setup-Assistent geöffnet. Er führt Sie schrittweise durch den Installationsprozess, vom Anschließen Ihrer Hardware und Konfiguration Ihrer Kamera bis zur Registrierung in Ihrem mydlink-Konto.
Hinweis: Das mydlink-Portal erfordert Java™, um funktionsgerecht verwendet werden zu können.
Weitere Informationen und Anleitungen finden Sie auf den mydlink-Seiten häufig gestellter Fragen (FAQ) unter https://eu.mydlink.com/faq/mydlink
PLC-Setup
Als Alternative können Sie auch eine PLC-Verbindung erstellen. So erstellen Sie eine PLCVerbindung:
Schritt 1:
Drücken Sie auf die PLC-Taste auf der Rückseite der Kamera und halten Sie sie 5 Sekunden lang gedrückt. Die grüne PLC-Status-LED über der Taste blinkt.
Schritt 2:
Drücken Sie innerhalb von 60 Sekunden auf die PLC-Taste auf dem PowerLine-Adapter.
8 |
DCS-6045L |
|
|
mydlink-Portal
Nach Registrierung Ihrer DCS-6045L Kamera in einem mydlink-Konto mithilfe des Assistenten zur Installation der Kamera können Sie aus der Ferne (remote) über die Website www.mydlink.com auf Ihre Kamera zugreifen. Sobald Sie sich in Ihrem mydlink-Konto angemeldet haben, wird ein Fenster, das dem folgenden ähnlich ist, angezeigt:
Schritt 1:
Öffnen Sie den Internet Explorer und rufen Sie die Webseite http://www.mydlink.com auf. Melden Sie sich dann in mydlink an.
Schritt 2:
Wählen Sie Ihre Kamera von der Geräteliste. Es erscheint die Live-Anzeige Ihrer Kamera.
DEUTSCH
DCS-6045L
TECHNISCHE UNTERSTÜTZUNG
Deutschland: Web: http://www.dlink.com
Telefon: +49(0)1805 2787 0,14 € pro Minute Zeiten: Mo. –Fr. 09:00 – 17:30 Uhr
Österreich: Web: http://www.dlink.com
Telefon: +43(0)820 480084 0,116 € pro Minute Zeiten: Mo. –Fr. 09:00 – 17:30 Uhr
Schweiz: Web: http://www.dlink.com
Telefon: +41(0)848 331100 0,08 CHF pro Minute Zeiten: Mo. –Fr. 09:00 – 17:30 Uhr
* Gebühren aus Mobilnetzen und von anderen Providern können abweichen.
DCS-6045L |
9 |
|
|

FRANÇAIS
CONTENU DE LA BOÎTE
PowerLine HD Day/Night Cloud Camera
DCS-6045L
Adaptateur CPL DHP-308AV (kit uniquement)
Cordon d'alimentation de la caméra
Support de montage de la caméra
Comprend le guide d'alignement et les vis pour l'installation
CD d'installation
Comprend l'Assistant de configuration et les manuels techniques
Contactez immédiatement votre revendeur s’il manque l’un de ces éléments de la boîte.
10 |
DCS-6045L |
|
|
Configuration système requise
•Ordinateur avec Microsoft Windows® 8/7/Vista/XP, ou Mac avec OS X 10.6 ou supérieur
•PC de 1,3 GHz ou plus et au moins 128 Mo de RAM
•Internet Explorer 7, Firefox 12, Safari 6 ou Chrome 20 ou supérieur avec Java installé et activé
•Réseau Ethernet 10/100
INSTALLATION DU PRODUIT
Utilisateur de Windows
Étape 1 :
Si vous avez déjà un adaptateur CPL sur votre réseau existant, passez à l'étape 2. Branchez l'adaptateur CPL dans une prise murale. Reliez votre adaptateur CPL à votre réseau existant à l'aide d'un câble Ethernet.
Étape 2 :
Branchez le cordon d'alimentation de la caméra dans la DCS-6045L. Faites glisser l'interrupteur d'alimentation sur la position marche et attendez que les voyants d'alimentation, de liaison et CPL s'allument en vert. Si vous avez déjà un adaptateur CPL, vous devez appuyez sur le bouton CPL de la caméra pendant 5 secondes. Lorsque le voyant CPL de la caméra commence à clignoter, appuyez sur le bouton CPL de votre adaptateur CPL dans les 60 secondes.
Étape 3 :
Insérez le CD contenant le pilote de la DCS-6045L dans le lecteur de CD-ROM. Si le CD ne démarre pas automatiquement, cliquez sur Start > Run (Démarrer > Exécuter). Dans la zone de saisie, tapez D:\autorun.exe (où D: représente la lettre de votre lecteur de CD-ROM) et cliquez sur OK. Quand l’écran d’exécution automatique apparaît, cliquez sur Set up your Cloud Camera (Configurer votre caméra Cloud) et suivez les instructions à l’écran.
Étape 4 :
Cliquez sur le bouton Start (Démarrer) pour lancer l'Assistant d'installation, puis suivez ses instructions pour terminer la configuration de votre caméra.
FRANÇAIS
DCS-6045L |
11 |
|
|
FRANÇAIS
INSTALLATION DU PRODUIT
Utilisateur Mac
Insérez le CD-ROM d'installation dans le lecteur CD de l'ordinateur. Sur le Bureau, ouvrez votre lecteur CD et double-cliquez sur le fichier SetupWizard.
Assistant de configuration
L'Assistant de configuration s'ouvre au bout de 20 à 30 secondes ; il vous guidera étape par étape tout au long du processus d'installation, de la connexion de votre matériel à la configuration de votre caméra et à son enregistrement sur votre compte mydlink.
Remarque : pour utiliser le portail mydlink, Java™ doit fonctionner correctement.
Pour en savoir plus, consultez les pages FAQ de mydlink à l'adresse suivante : https://eu.mydlink. com/faq/mydlink
Configuration du CPL
Alternativement, vous pouvez créer une connexion CPL. Pour créer une connexion CPL :
Étape 1 :
Appuyez pendant cinq secondes sur le bouton CPL situé à l'arrière de la caméra. Le voyant d'état CPL vert au-dessus du bouton clignote.
Étape 2 :
Appuyez sur le bouton CPL de l'adaptateur CPL dans les 60 secondes.
12 |
DCS-6045L |
|
|
Portail mydlink
Après avoir enregistré votre caméra DCS-6045L et créé un compte mydlink dans l'Assistant d'installation de la caméra, vous pourrez accéder à distance à votre caméra, sur le site Web www. mydlink.com. Après vous être connecté à votre compte mydlink, vous verrez un écran semblable au suivant :
Étape 1 :
Ouvrez Internet Explorer et allez sur http://www.mydlink.com, puis connectez-vous à mydlink.
Étape 2 :
Sélectionnez votre caméra dans la liste de périphériques et la vidéo en direct apparaît.
FRANÇAIS
DCS-6045L
ASSISTANCE TECHNIQUE
Assistance technique D-Link sur internet: http://www.dlink.com Assistance technique D-Link par téléphone : 01 76 54 84 17 Du lundi au vendredi de 9h à 19h (hors jours fériés)
DCS-6045L |
13 |
|
|
CONTENIDO DEL PAQUETE
ESPAÑOL
PowerLine HD Day/Night Cloud Camera
DCS-6045L
ADAPTADOR POWERLINE DHP-308AV (solo el kit)
Cable de alimentación de la cámara
Soporte de montaje de la cámara
incluye guía de alineación y tornillos de instalación
CD de instalación
Incluye asistente de configuración y manuales técnicos
Si falta cualquiera de estos componentes del paquete, póngase en contacto con el proveedor.
14 |
DCS-6045L |
|
|

Requisitos del sistema
•Ordenador con Microsoft Windows® 8/7/Vista/XP o Mac con OS X 10.6 o superior
•PC a 1,3 GHz o más y un mínimo de 128 MB de RAM
•Internet Explorer 7, Firefox 12, Safari 6 o Chrome 20 o versión superior con Java instalado y activado
•Red existente basada en Ethernet 10/100
CONFIGURACIÓN DEL PRODUCTO
Si utiliza Windows
Paso 1:
Si ya tiene un adaptador PowerLine en su red existente, vaya al Paso 2. Enchufe el adaptador PowerLine a una toma de pared. Conecte un cable Ethernet desde el adaptador PowerLine hasta su red existente.
Paso 2:
Enchufe el cable de alimentación de la cámara al DCS-6045L. Mueva el interruptor de alimentación a la posición de encendido y espere hasta que los LED de ALIMENTACIÓN, PLC y ENLACE
se iluminen en verde. Si tiene un adaptador PowerLine existente, necesitará pulsar y mantener pulsado el botón PLC de la cámara durante 5 segundos. Después de que el LED de PLC de la cámara empiece a parpadear, pulse el botón PLC en el adaptador PowerLine existente en un plazo aproximado de 60 segundos.
Paso 3:
Inserte el CD del controlador de la DCS-6045L en la unidad de CD-ROM. Si la función de ejecución automática del CD no se inicia automáticamente en su ordenador, vaya a Inicio > Ejecutar. En el cuadro que aparece, escriba D:\autorun.exe (donde D: representa la letra de unidad de su unidad de CD-ROM) y haga clic en Aceptar. Cuando aparezca la pantalla de ejecución automática, haga clic en Configurar la cámara Cloud y siga las instrucciones que aparecen en pantalla.
Paso 4:
Haga clic en el botón Inicio para iniciar el asistente y siga las instrucciones del asistente de instalación para finalizar la configuración de la cámara.
ESPAÑOL
DCS-6045L |
15 |
|
|
ESPAÑOL
CONFIGURACIÓN DEL PRODUCTO
Usuario de Mac
Inserte el CD-ROM de instalación en la unidad de CD del equipo. En el escritorio, abra la unidad de CD y haga doble clic en el archivo Asistente de configuración.
Asistente de configuración
Después de 20 a 30 segundos se abrirá el asistente de configuración, el cual le guiará paso a paso a través del proceso de instalación, desde la conexión del hardware hasta la configuración y el registro de la cámara con su cuenta de mydlink.
Nota: el portal de mydlink requiere Java™ para funcionar correctamente.
Para ver más directrices, consulte las páginas de preguntas más frecuentes de mydlink en https:// eu.mydlink.com/faq/mydlink
Configuración de PLC
Como alternativa, puede crear una conexión de PLC. Para crear una conexión PLC:
Paso 1:
Pulse y mantenga pulsado el botón PLC en la parte posterior de la cámara durante cinco segundos. El LED verde de estado de PLC situado sobre el botón parpadeará.
Paso 2:
Pulse el botón PLC en el adaptador PowerLine en los siguientes 60 segundos.
16 |
DCS-6045L |
|
|

Portal de mydlink
Después de registrar su cámara DCS-6045L con una cuenta mydlink en el asistente para la instalación de la cámara, podrá acceder remotamente a la cámara desde el sitio web www.mydlink. com. Una vez iniciada la sesión en la cuenta de mydlink, podrá ver una pantalla similar a la que se muestra a continuación:
Paso 1:
Abra Internet Explorer y vaya a http://www.mydlink.com, a continuación, regístrese en mydlink.
Paso 2:
Seleccione su cámara de la lista de dispositivos y aparecerá la visualización en directo de su cámara.
ESPAÑOL
DCS-6045L
ASISTENCIA TÉCNICA
http://www.dlink.com
Asistencia Técnica Telefónica de D-Link: +34 902 30 45 45 0,067 €/min De Lunes a Viernes de 9:00 a 19:00
DCS-6045L |
17 |
|
|
CONTENUTO DELLA CONFEZIONE
ITALIANO
PowerLine HD Day/Night Cloud Camera
DCS-6045L
DHP-308AV POWERLINE ADAPTER (solo kit)
Cavo di alimentazione della videocamera
Staffa per il montaggio della videocamera
Include la guida per l'allineamento e le viti per l'installazione
CD di installazione
Include Configurazione guidata e manuali tecnici
Se uno di questi articoli non sono inclusi nella confezione, rivolgersi al rivenditore.
18 |
DCS-6045L |
|
|
Requisiti di sistema
•Computer con Microsoft Windows® 8/7/Vista/XP, o Mac con OS X 10.6 o versione successiva
•PC con processore da 1,3 GHz o superiore e almeno 128 MB di RAM
•Internet Explorer 7, Firefox 12, Safari 6 oppure Chrome 20 o versioni successive con Java installato e abilitato
•Rete Ethernet 10/100 esistente
CONFIGURAZIONE DEL PRODOTTO
Utente Windows
Passaggio 1:
Se si dispone già di un adattatore PowerLine nella rete esistente, procedere con il passaggio 2. Collegare l'adattatore PowerLine a una presa a muro. Collegare con un cavo Ethernet l'adattatore PowerLine alla rete esistente.
Passaggio 2:
Collegare il cavo di alimentazione alla videocamera DCS-6045L. Portare l'interruttore di alimentazione sulla posizione ON e attendere finché i LED PWR, PLC e LNK non si illuminano in verde. Se si dispone già di un adattatore PowerLine, sarà necessario premere e tenere premuto per cinque secondi il pulsante PLC sulla videocamera. Una volta che il LED PLC sulla videocamera comincia a lampeggiare, premere il pulsante PLC sull'adattatore PowerLine entro i successivi 60 secondi.
Passaggio 3:
Inserire il CD del driver del dispositivo DCS-6045L nell'unità CD-ROM. Se la funzione di esecuzione automatica del CD non si avvia automaticamente sul computer, fare clic su Start > Esegui. Nella casella Esegui digitare U:\autorun.exe (dove U: rappresenta la lettera identificativa dell'unità CDROM) e fare clic su OK. Quando viene visualizzata la schermata dell'esecuzione automatica, fare clic su Configurazione della videocamera cloud ed attenersi alle istruzioni visualizzate.
Passo 4:
Fare clic sul pulsante Inizio per avviare la procedura guidata, quindi attenersi alle istruzioni dell'Installazione guidata per completare la configurazione della videocamera.
ITALIANO
DCS-6045L |
19 |
|
|

ITALIANO
CONFIGURAZIONE DEL PRODOTTO
Utente Mac
Inserire il CD-ROM di installazione nell'unità CD del computer. Sulla scrivania aprire l'unità CD e fare doppio clic sul file SetupWizard.
SetupWizard
Entro 20-30 secondi verrà aperta la Configurazione guidata che guiderà l'utente passo passo nel processo di installazione, dal collegamento dei dispositivi hardware fino alla configurazione della videocamera e alla registrazione con l'account mydlink.
Nota: per per il corretto funzionamento del portale mydlink è richiesto Java™.
Per ulteriori istruzioni, fare riferimento alle pagine delle domande frequenti su mydlink all'indirizzo https://eu.mydlink.com/faq/mydlink
Configurazione PLC
In alternativa, è possibile creare una connessione PLC. Per creare una connessione PLC:
Passaggio 1:
Premere e tenere premuto il pulsante PLC sul retro della videocamera per cinque secondi. Il LED di stato PLC verde sopra il pulsante lampeggia.
Passaggio 2:
Premere il pulsante PLC presente sull'adattatore PowerLine entro i successivi 60 secondi.
20 |
DCS-6045L |
|
|
Portale mydlink
Dopo aver registrato la videocamera DCS-6045L con un account mydlink nell'Installazione guidata videocamera, sarà possibile accedere in remoto alla videocamera dal sito Web www.mydlink.com. Dopo aver effettuato l'accesso all'account mydlink, verrà visualizzata una schermata simile alla seguente:
Passo 1:
Aprire Internet Explorer e passare a http://www.mydlink.com, quindi eseguire l'accesso a mydlink.
Passo 2:
Selezionare la videocamera nell'elenco dei dispositivi per accedere alla visualizzazione in diretta della videocamera.
ITALIANO
DCS-6045L
SUPPORTO TECNICO
http://www.dlink.com
Supporto Tecnico dal lunedì al venerdì dalle ore 9.00 alle ore 19.00 con orario continuato Telefono: 02 87366396
DCS-6045L |
21 |
|
|

INHOUD VAN VERPAKKING
NEDERLANDS
PowerLine HD Day/Night Cloud Camera
DCS-6045L
DHP-308AV POWERLINE ADAPTER (alleen kit)
Camera netsnoer
Camera montagesteun inclusief Uitlijningsgids en installatieschroeven
Installatie-cd
Inclusief Installatiewizard en Technische handleidingen
Neem contact op met uw verkoper wanneer items uit uw verpakking ontbreken.
22 |
DCS-6045L |
|
|
Systeemvereisten
•Computer met Microsoft Windows® 8/7/Vista/XP, of Mac met OS X 10.6 of hoger
•PC met 1.3GHz of hoger en minstens 128MB RAM
•Internet Explorer 7, Firefox 12, Safari 6, of Chrome 20 of hogere versie met Java geïnstalleerd en geactiveerd
•Bestaand 10/100 Ethernet-gebaseerd netwerk
PRODUCTINSTALLATIE
Windows gebruiker
Stap 1:
Indien u al een PowerLine adapter op uw bestaande netwerk hebt, gaat u verder naar stap 2. Steek de PowerLine adapter in een wandstopcontact. Sluit een Ethernet-kabel van de PowerLine adapter aan op uw bestaande netwerk.
Stap 2:
Steek het netsnoer van de camera in de DCS-6045L. Schuif de aan/uit-schakelaar op de ON-stand en wacht totdat de PWR, PLC en LNK LED's groen worden. Indien u een bestaande PowerLine adapter hebt, moet u de PLC knop de camera gedurende 5 seconden ingedrukt houden. Nadat het PLC LED op de camera begint te knipperen, drukt u binnen de 60 seconden op de PLC knop uw bestaande Powerline adapter.
Stap 3:
Plaats de DCS-6045L stuurprogramma-cd in het cd-rom-station. Ga naar Start > Uitvoeren wanneer de functie voor automatisch opstarten cd niet automatisch start op uw computer. In het vak uitvoeren typt u D:\autorun.exe (waarbij D: de stationsletter van uw cd-rom-station vertegenwoordigt) en klik op OK. Wanneer het autorunscherm verschijnt klikt u op uw Cloud Camera installeren en volg de instructies op het scherm.
Stap 4:
Klik op de knop Start om de wizard te starten en volg de instructies van de Installatiewizard om de instelling van uw camera te voltooien.
NEDERLANDS
DCS-6045L |
23 |
|
|

NEDERLANDS
PRODUCTINSTALLATIE
Mac-gebruiker
Plaats de installatie-cd-rom in het cd-station van uw computer. Op het bureaublad opent u uw cdstation en dubbelklik op het bestand SetupWizard.
InstallatieWizard
Binnen 20-30 seconden opent de Installatiewizard die u stap-voor-stap doorheen het installatieproces zal begeleiden, van bij het aansluiten van uw hardware, tot het configureren van uw camera en de registratie onder uw mydlink account.
Opgelet: mydlink portal vereist Java™ om correct te functioneren.
Voor meer richtlijnen raadpleegt u mydlink FAQ pagina's op https://eu.mydlink.com/faq/mydlink
PLC installatie
Of u kunt een PLC-verbinding maken. Om een PLC-verbinding te maken:
Stap 1:
Houd de PLC-knop op de achterkant van de camera gedurende vijf seconden ingedrukt. Het groene PLC-statuslampje boven de knop gaat knipperen.
Stap 2:
Druk binnen de 60 seconden op de PLC-knop op de PowerLine adapter.
24 |
DCS-6045L |
|
|
 Loading...