


 Loading...
xStack® DES-3528/DES-3552 Series Layer 2 Managed Stackable Fast Ethernet Switch CLI Reference Guide
Table of Contents |
|
Introduction.................................................................................................................................... |
5 |
Using the Console CLI................................................................................................................... |
7 |
Command Syntax......................................................................................................................... |
10 |
Basic Switch Commands ............................................................................................................ |
13 |
Modify Banner and Prompt Commands..................................................................................... |
28 |
Switch Port Commands............................................................................................................... |
31 |
Port Security Commands ............................................................................................................ |
35 |
Stacking Commands ................................................................................................................... |
40 |
Network Management (SNMP) Commands................................................................................ |
44 |
Switch Utility Commands............................................................................................................ |
64 |
Network Monitoring Commands................................................................................................. |
71 |
Multiple Spanning Tree Protocol (MSTP) Commands .............................................................. |
87 |
Forwarding Database Commands .............................................................................................. |
98 |
Traffic Control Commands........................................................................................................ |
105 |
QoS Commands ......................................................................................................................... |
110 |
Port Mirroring Commands......................................................................................................... |
120 |
VLAN Commands....................................................................................................................... |
123 |
Voice VLAN Commands ............................................................................................................ |
140 |
Subnet-based VLAN Commands .............................................................................................. |
146 |
Asymmetric VLAN Commands ................................................................................................. |
149 |
Link Aggregation Commands ................................................................................................... |
151 |
IP–MAC-Port Binding (IMPB) Commands................................................................................ |
156 |
Limited IP Multicast Address Commands................................................................................ |
172 |
Basic IP Commands .................................................................................................................. |
177 |
Multicast VLAN Commands ...................................................................................................... |
183 |
IGMP / MLD Snooping Commands ........................................................................................... |
198 |
DHCP Relay Commands............................................................................................................ |
231 |
802.1X Commands (Including Guest VLANs).......................................................................... |
244 |
Access Control List (ACL) Commands .................................................................................... |
262 |
Safeguard Engine Commands .................................................................................................. |
284 |
Filter Commands (DHCP Server / NetBIOS)............................................................................. |
287 |
Layer 3 CPU Filter Commands.................................................................................................. |
292 |
Loop-back Detection Commands ............................................................................................. |
294 |
Traffic Segmentation Commands............................................................................................. |
299 |
sFlow Commands ...................................................................................................................... |
301 |
ii

xStack® DES-3528/DES-3552 Series Layer 2 Managed Stackable Fast Ethernet Switch CLI Reference Guide
Time and SNTP Commands ...................................................................................................... |
309 |
ARP and Gratuitous ARP Commands...................................................................................... |
315 |
Routing Table Commands......................................................................................................... |
322 |
MAC Notification Commands.................................................................................................... |
324 |
Access Authentication Control Commands ............................................................................ |
327 |
Secure Shell (SSH) Commands ................................................................................................ |
348 |
Secure Sockets Layer (SSL) Commands................................................................................. |
355 |
D-Link Single IP Management Commands .............................................................................. |
360 |
JWAC Commands...................................................................................................................... |
369 |
Link Layer Discovery Protocol (LLDP) Commands ................................................................ |
386 |
Q-in-Q Commands ..................................................................................................................... |
405 |
RSPAN Commands.................................................................................................................... |
411 |
Static MAC-Based VLAN Commands....................................................................................... |
415 |
Simple RED Commands ............................................................................................................ |
417 |
MAC-based Access Control Commands.................................................................................. |
424 |
Web-based Access Control Commands .................................................................................. |
435 |
Power over Ethernet (PoE) Commands ................................................................................... |
444 |
PPPoE Circuit ID Insertion Commands.................................................................................... |
449 |
DNS Relay Commands .............................................................................................................. |
451 |
Policy Route Commands........................................................................................................... |
454 |
BPDU Attack Protection Commands........................................................................................ |
457 |
Ethernet OAM Commands......................................................................................................... |
461 |
DHCP Server Commands .......................................................................................................... |
471 |
Cable Diagnostics Commands ................................................................................................. |
484 |
Connectivity Fault Management Commands........................................................................... |
485 |
Command History Commands.................................................................................................. |
505 |
ARP Spoofing Prevention Commands..................................................................................... |
507 |
Auto-Configuration Commands................................................................................................ |
509 |
Compound Authentication Commands.................................................................................... |
512 |
Debug Software Commands ..................................................................................................... |
520 |
DHCPv6 Client Commands ....................................................................................................... |
525 |
DHCPv6 Relay Commands........................................................................................................ |
527 |
D-Link Unidirectional Link Detection (DULD) Commands...................................................... |
533 |
Ethernet Ring Protection Switching (ERPS) Commands ....................................................... |
535 |
IPv6 Neighbor Discover Commands ........................................................................................ |
545 |
IPv6 Route Commands.............................................................................................................. |
549 |
Layer 2 Protocol Tunneling (L2PT) Commands ...................................................................... |
551 |
iii

xStack® DES-3528/DES-3552 Series Layer 2 Managed Stackable Fast Ethernet Switch CLI Reference Guide
Local Route Commands............................................................................................................ |
554 |
MSTP Debug Enhancement Commands.................................................................................. |
556 |
Ping Commands......................................................................................................................... |
560 |
Show Technical Support Commands....................................................................................... |
562 |
Trace Route Commands............................................................................................................ |
565 |
VLAN Counter Commands........................................................................................................ |
567 |
Power Saving Commands......................................................................................................... |
570 |
Digital Diagnostic Monitoring (DDM) Commands ................................................................... |
578 |
Command Logging Commands................................................................................................ |
585 |
UDP Helper Commands............................................................................................................. |
587 |
Appendix A - Password Recovery Procedure ......................................................................... |
591 |
Appendix B - System Log Entries ............................................................................................ |
592 |
Appendix C - Trap Entries......................................................................................................... |
598 |
Appendix D - RADIUS Attributes Assignment......................................................................... |
603 |
iv
xStack® DES-3528/DES-3552 Series Layer 2 Managed Stackable Fast Ethernet Switch CLI Reference Guide
Introduction
The Switch can be managed through the Switch’s serial port, Telnet, or the Web-based management agent. The Command Line Interface (CLI) can be used to configure and manage the Switch via the serial port or Telnet interfaces.
The DES-3528/DES-3552 Series Layer 2 stackable Fast Ethernet Switch Series are members of the D-Link xStack® family. Ranging from 10/100Mbps edge Switches to core gigabit Switches, the xStack Switch family has been futureproof designed to provide a stacking architecture with fault tolerance, flexibility, port density, robust security and maximum throughput with a user-friendly management interface for the networking professional.
This manual provides a reference for all of the commands contained in the CLI for the xStack® DES-3528, DES3528P, DES-3528DC, DES-3552 and DES-3552P series of Switches. Configuration and management of the Switch via the Web-based management agent is discussed in the User’s Guide.
NOTE: For the remainder of this manual, all versions of the DES-3528, DES-3528P, DES-3528DC, DES-3552 and DES-3552P Switches will be referred to as simply the Switch or the DES-3528/52 Series.
Accessing the Switch via the Serial Port
The Switch’s serial port’s default settings are as follows:
•115200 baud
•no parity
•8 data bits
•1 stop bit
A computer running a terminal emulation program capable of emulating a VT-100 terminal and a serial port configured as above are then connected to the Switch’s serial port via an RS-232 DB-9 cable.
With the serial port properly connected to a management computer, the following screen should be visible.
DES-3528 Fast Ethernet Switch
Command Line Interface
Firmware: Build 3.00.012
Copyright(C) 2013 D-Link Corporation. All rights reserved.
UserName:
There is no initial username or password. Just press the Enter key twice to display the CLI input cursor − DES3528:admin# . This is the command line where all commands are input.
Setting the Switch’s IP Address
Each Switch must be assigned its own IP Address, which is used for communication with an SNMP network manager or other TCP/IP application (for example BOOTP, TFTP). The Switch’s default IP address is 10.90.90.90. Users can change the default Switch IP address to meet the specification of your networking address scheme.
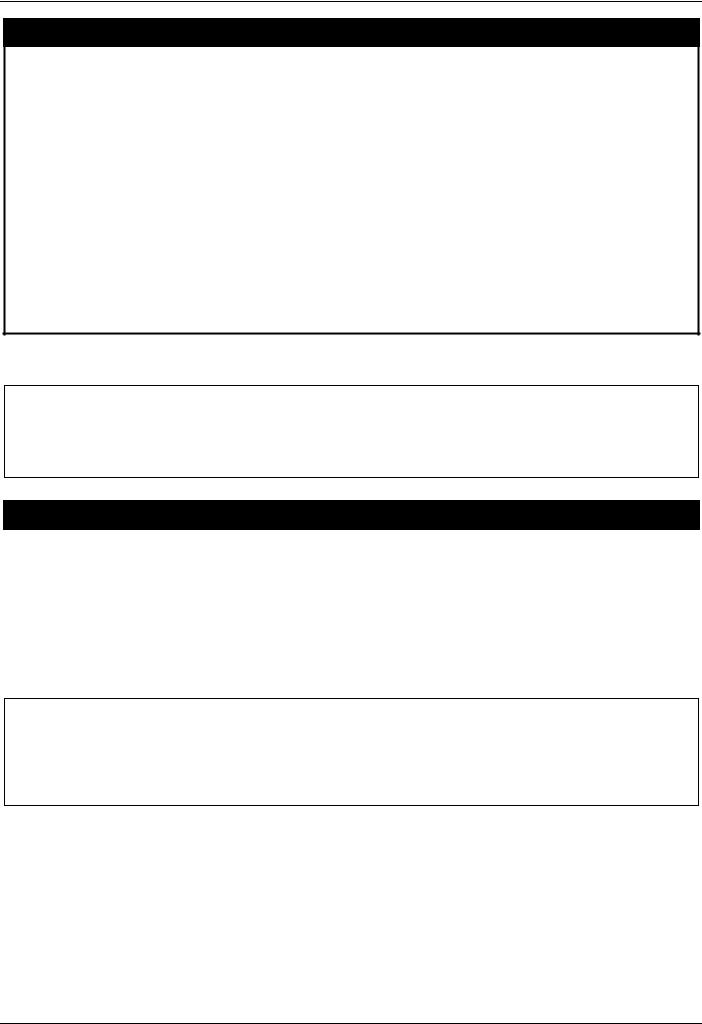
The Switch is also assigned a unique MAC address by the factory. This MAC address cannot be changed, and can be found on the initial boot console screen – shown below.
5
xStack® DES-3528/DES-3552 Series Layer 2 Managed Stackable Fast Ethernet Switch CLI Reference Guide
Boot Procedure |
|
|
V1.00.B008 |
------------------------------------------------------------------------------- |
|||
Power On Self |
Test ........................................ |
100 |
% |
MAC Address |
: 00-22-B0-10-8A-00 |
|
|
H/W Version |
: A2 |
|
|
Please wait, loading V3.00.012 Runtime image ............. |
100 % |
||
UART init ................................................. |
|
100 |
% |
Device Discovery .......................................... |
100 |
% |
|
Configuration |
init ........................................ |
|
| |
|
|
|
|
The Switch’s MAC address can also be found in the Web management program on the Switch Information (Basic Settings) window on the Configuration menu.
The IP address for the Switch must be set before it can be managed with the Web-based manager. The Switch IP address can be automatically set using BOOTP or DHCP protocols, in which case the actual address assigned to the Switch must be known.
The IP address may be set using the Command Line Interface (CLI) over the console serial port as follows:
1.Starting at the command line prompt, enter the commands config ipif System ipaddress xxx.xxx.xxx.xxx/yyy.yyy.yyy.yyy. Where the x’s represent the IP address to be assigned to the IP interface named System and the y’s represent the corresponding subnet mask.
2.Alternatively, users can enter config ipif System ipaddress xxx.xxx.xxx.xxx/z. Where the x’s represent the IP address to be assigned to the IP interface named System and the z represents the corresponding number of subnets in CIDR notation.
The IP interface named System on the Switch can be assigned an IP address and subnet mask which can then be used to connect a management station to the Switch’s Telnet or Web-based management agent.
DES-3528:admin# config ipif System ipaddress 10.24.73.21/8
Command: config ipif System ipaddress 10.24.73.21/8
Success.
DES-3528:admin#
In the above example, the Switch was assigned an IP address of 10.24.73.21 with a subnet mask of 255.0.0.0. The system message Success indicates that the command was executed successfully. The Switch can now be configured and managed via Telnet, SNMP MIB browser and the CLI or via the Web-based management agent using the above IP address to connect to the Switch.
6

xStack® DES-3528/DES-3552 Series Layer 2 Managed Stackable Fast Ethernet Switch CLI Reference Guide
Using the Console CLI
The DES-3528/52 Series supports a console management interface that allows the user to connect to the Switch’s management agent via a serial port and a terminal or a computer running a terminal emulation program. The console can also be used over the network using the TCP/IP Telnet protocol. The console program can be used to configure the Switch to use an SNMP-based network management software over the network.
This chapter describes how to use the console interface to access the Switch, change its settings, and monitor its operation.
NOTE: Switch configuration settings are saved to non-volatile RAM using the save command. The current configuration will then be retained in the Switch’s NV-RAM, and reloaded when the Switch is rebooted. If the Switch is rebooted without using the save command, the last configuration saved to NV-RAM will be loaded.
Connecting to the Switch
The console interface is used by connecting the Switch to a VT100-compatible terminal or a computer running an ordinary terminal emulator program (e.g., the HyperTerminal program included with the Windows operating system) using an RS-232C serial cable. Your terminal parameters will need to be set to:
•VT-100 compatible
•115200 baud
•8 data bits
•No parity
•One stop bit
•No flow control
Users can also access the same functions over a Telnet interface. Once users have set an IP address for your Switch, users can use a Telnet program (in VT-100 compatible terminal mode) to access and control the Switch. All of the screens are identical, whether accessed from the console port or from a Telnet interface.
After the Switch reboots and users have logged in, the console looks like this:
DES-3528 Fast Ethernet Switch
Command Line Interface
Firmware: Build 3.00.012
Copyright(C) 2013 D-Link Corporation. All rights reserved.
UserName:
Commands are entered at the command prompt, DES-3528:admin# ..
There are a number of helpful features included in the CLI. Entering the ? command will display a list of all of the toplevel commands.
?
cable_diag ports cfm linktrace cfm loopback clear
clear address_binding dhcp_snoop binding_entry ports clear address_binding nd_snoop binding_entry ports clear arptable
clear attack_log clear cfm pkt_cnt clear counters clear dhcp binding
clear dhcp conflict_ip clear ethernet_oam ports clear fdb
7
xStack® DES-3528/DES-3552 Series Layer 2 Managed Stackable Fast Ethernet Switch CLI Reference Guide
clear igmp_snooping data_driven_group clear igmp_snooping statistics counter clear jwac auth_state
clear log
clear mac_based_access_control auth_state clear mld_snooping data_driven_group
CTRL+C ESC q Quit SPACE n Next Page ENTER Next Entry a All
When users enter a command without its required parameters, the CLI will prompt users with a Next possible completions: message.
DES-3528:admin# config account
Command: config account
Next possible completions: <username>
DES-3528:admin#
In this case, the command config account was entered with the parameter <username>. The CLI will then prompt users to enter the <username> with the message, Next possible completions:. Every command in the CLI has this feature, and complex commands have several layers of parameter prompting.
In addition, after typing any given command plus one space, users can see all of the next possible sub-commands, in sequential order, by repeatedly pressing the Tab key.
To re-enter the previous command at the command prompt, press the up arrow cursor key. The previous command will appear at the command prompt.
DES-3528:admin# config account
Command: config account Next possible completions: <username>
DES-3528:admin# config account Command: config account
Next possible completions: <username>
DES-3528:admin#
In the above example, the command config account was entered without the required parameter <username>, the CLI returned the Next possible completions: <username> prompt. The up arrow cursor control key was pressed to re-enter the previous command (config account) at the command prompt. Now the appropriate username can be entered and the config account command re-executed.
All commands in the CLI function in this way. In addition, the syntax of the help prompts are the same as presented in
this manual − angle brackets < > indicate a numerical value or character string, braces { } indicate optional parameters or a choice of parameters, and brackets [ ] indicate required parameters.
If a command is entered that is unrecognized by the CLI, the top-level commands will be displayed under the
Available commands: prompt.
DES-3528:admin#the
Available commands:
.. |
? |
cable_diag |
cfm |
clear |
config |
create |
debug |
delete |
disable |
download |
enable |
login |
logout |
no |
ping |
ping6 |
reboot |
reconfig |
reset |
save |
show |
telnet |
traceroute |
traceroute6 |
upload |
|
|
8

xStack® DES-3528/DES-3552 Series Layer 2 Managed Stackable Fast Ethernet Switch CLI Reference Guide
DES-3528:admin#
The top-level commands consist of commands such as show or config. Most of these commands require one or more parameters to narrow the top-level command. This is equivalent to show what? or config what? Where the what? is the next parameter.
For example, if users enter the show command with no additional parameters, the CLI will then display all of the possible next parameters.
DES-3528:admin# show
Command: show
Next possible completions: |
access_profile |
account |
|
802.1p |
802.1x |
||
accounting |
acct_client |
address_binding |
asymmetric_vlan |
arp_spoofing_prevention |
arpentry |
||
attack_log |
auth_client |
auth_diagnostics |
authen |
auth_session_statistics |
auth_statistics |
||
authen_enable |
authen_login |
authen_policy |
authentication |
authorization |
autoconfig |
bandwidth_control |
bpdu_protection |
cfm |
command_history |
config |
cpu |
cpu_filter |
current_config |
device_status |
dhcp |
dhcp_local_relay |
dhcp_relay |
dhcp_server |
dhcpv6_relay |
dnsr |
dot1v_protocol_group |
error |
dscp |
duld |
erps |
ethernet_oam |
|
fdb |
filter |
firmware |
flow_meter |
gratuitous_arp |
greeting_message |
gvrp |
hol_prevention |
igmp_snooping |
ipfdb |
ipif |
ipv6 |
ipif_ipv6_link_local_auto |
iproute |
||
ipv6route |
jumbo_frame |
jwac |
l2protocol_tunnel |
lacp_port |
limited_multicast_addr |
link_aggregation |
|
lldp |
local_route |
log |
log_save_timing |
log_software_module |
|
loopdetect |
|
mac_based_access_control |
mac_based_access_control_local |
||
mac_based_vlan |
mac_notification |
max_mcast_group |
|
mcast_filter_profile |
|
mef_l2_protocols |
mld_snooping |
mef_vlan_preservation |
mirror |
||
multicast |
multicast_fdb |
packet |
per_queue |
poe |
policy_route |
port |
port_security |
port_security_entry |
pvid |
port_vlan |
ports |
pppoe |
qinq |
radius |
|
rmon |
router_ports |
rspan |
safeguard_engine |
scheduling |
scheduling_mechanism |
sim |
serial_port |
session |
sflow |
snmp |
|
sntp |
sred |
ssh |
ssl |
stack_device |
stack_information |
stacking_mode |
stp |
subnet_vlan |
switch |
syslog |
system_severity |
tech_support |
terminal |
time |
time_range |
traffic |
traffic_segmentation |
vlan |
trap |
trusted_host |
utilization |
vlan_counter |
|
vlan_precedence |
vlan_translation |
vlan_trunk |
voice_vlan |
wac |
|
|
|
DES-3528:admin#
In the above example, all of the possible next parameters for the show command are displayed. At the next command prompt, the up arrow was used to re-enter the show command, followed by the account parameter. The CLI then displays the user accounts configured on the Switch.
9

xStack® DES-3528/DES-3552 Series Layer 2 Managed Stackable Fast Ethernet Switch CLI Reference Guide
Command Syntax
The following symbols are used to describe how command entries are made and values and arguments are specified in this manual. The online help contained in the CLI and available through the console interface uses the same syntax.
NOTE: All commands are case-sensitive. Be sure to disable Caps Lock or any other unwanted function that changes text case.
<angle brackets>
Purpose |
Encloses a variable or value that must be specified. |
|
|
Syntax |
config command_history <value 1-40> |
|
|
Description |
In the above syntax example, users must supply the number of command history entries in |
|
the <value 1-40> space. Do not type the angle brackets. |
|
|
Example Command |
config command_history 20 |
|
|
[square brackets]
Purpose |
Encloses a required value or set of required arguments. One value or argument can be |
|
specified. |
|
|
Syntax |
create account [admin | operator | power_user | user] <username 15> {encrypt |
|
[plain_text | sha_1] <password>} |
Description |
In the above syntax example, users must specify either an admin-, operator-, power |
|
user-, or a user-level account to be created. Do not type the square brackets. |
Example Command |
create account admin Tommy |
|
|
| vertical bar
Purpose |
Separates two or more mutually exclusive items in a list, one of which must be entered. |
|
|
Syntax |
create account [admin | operator | power_user | user] <username 15> {encrypt |
|
[plain_text | sha_1] <password>} |
Description |
In the above syntax example, users must specify either an admin-, operator-, power |
|
user-, or a user-level account to be created. Do not type the vertical bar. |
Example Command |
create account admin Tommy |
|
|
10
xStack® DES-3528/DES-3552 Series Layer 2 Managed Stackable Fast Ethernet Switch CLI Reference Guide
{braces}
Purpose |
Encloses an optional value or set of optional arguments. |
|
|
Syntax |
reset {[config | system]} force_agree |
|
|
Description |
In the above syntax example, users have the option to specify config or system. It is not |
|
necessary to specify either optional value, however the effect of the system reset is |
|
dependent on which, if any, value is specified. Therefore, with this example there are three |
|
possible outcomes of performing a system reset. See the following chapter, Basic |
|
Commands for more details about the reset command. Do not type the braces. |
Example command |
reset config |
|
|
(parentheses)
Purpose |
Indicates at least one or more of the values or arguments in the preceding syntax |
|
enclosed by braces must be specified. |
|
|
Syntax |
config dhcp_relay {hops <value 1-16> | time <sec 0-65535>}(1) |
|
|
Description |
In the above syntax example, users have the option to specify hops or time or both of |
|
them. The "(1)" following the set of braces indicates at least one argument or value within |
|
the braces must be specified. Do not type the parentheses. |
Example command |
config dhcp_relay hops 3 |
|
|
Line Editing Key Usage
Delete |
Deletes the character under the cursor and then shifts the remaining characters in the line |
|
to the left. |
|
|
Backspace |
Deletes the character to the left of the cursor and then shifts the remaining characters in |
|
the line to the left. |
|
|
Left Arrow |
Moves the cursor to the left. |
|
|
Right Arrow |
Moves the cursor to the right. |
|
|
Up Arrow |
Repeats the previously entered command. Each time the up arrow is pressed, the |
|
command previous to that displayed appears. This way it is possible to review the |
|
command history for the current session. Use the down arrow to progress sequentially |
|
forward through the command history list. |
|
|
Down Arrow |
The down arrow will display the next command in the command history entered in the |
|
current session. This displays each command sequentially as it was entered. Use the up |
|
arrow to review previous commands. |
|
|
Tab |
Shifts the cursor to the next field to the left. |
|
|
11

xStack® DES-3528/DES-3552 Series Layer 2 Managed Stackable Fast Ethernet Switch CLI Reference Guide
Multiple Page Display Control Keys
Space |
Displays the next page. |
|
|
CTRL+c |
Stops the display of remaining pages when multiple pages are to be displayed. |
|
|
ESC |
Stops the display of remaining pages when multiple pages are to be displayed. |
|
|
n |
Displays the next page. |
|
|
p |
Displays the previous page. |
|
|
q |
Stops the display of remaining pages when multiple pages are to be displayed. |
|
|
r |
Refreshes the pages currently displayed. |
|
|
a |
Displays the remaining pages without pausing between pages. |
|
|
Enter |
Displays the next line or table entry. |
|
|
12

xStack® DES-3528/DES-3552 Series Layer 2 Managed Stackable Fast Ethernet Switch CLI Reference Guide
Basic Switch Commands
The basic Switch commands in the Command Line Interface (CLI) are listed (along with the appropriate parameters) in the following table.
Command |
Parameters |
|
|
create account |
[admin | operator | power_user | user] <username 15> {encrypt [plain_text | sha_1] |
|
<password>} |
config account |
<username> {encrypt [plain_text | sha_1] <password>} |
|
|
show account |
|
|
|
delete account |
<username> |
|
|
enable password |
|
encryption |
|
|
|
disable password |
|
encryption |
|
|
|
show session |
|
|
|
show switch |
|
|
|
show device_status |
|
|
|
show serial_port |
|
|
|
config serial_port |
{baud_rate [9600 | 19200 | 38400 | 115200] | auto_logout [never | 2_minutes | 5_minutes | |
|
10_minutes | 15_minutes]}(1) |
|
|
enable clipaging |
|
|
|
disable clipaging |
|
|
|
telnet |
<ipaddr> {tcp_port <value 1-65535>} |
|
|
enable telnet |
<tcp_port_number 1-65535> |
|
|
disable telnet |
|
|
|
enable web |
<tcp_port_number 1-65535> |
|
|
disable web |
|
|
|
save |
{[config <config_id 1-2> | log | all]} |
|
|
reboot |
{force_agree} |
|
|
reset |
{[config | system]} {force_agree} |
|
|
login |
|
|
|
logout |
|
|
|
clear |
|
|
|
config terminal width |
[default | <value 80-200>] |
|
|
show terminal width |
|
|
|
config temperature |
[trap | log] state [enable | disable] |
|
|
config temperature |
{high <temperature -500-500> | low <temperature -500-500>} |
threshold |
|
show environment |
|
|
|
13

xStack® DES-3528/DES-3552 Series Layer 2 Managed Stackable Fast Ethernet Switch CLI Reference Guide
Each command is listed, in detail, in the following sections.
create account
Purpose |
Used to create user accounts. |
Syntax |
create account [admin | operator | power_user | user] <username 15> {encrypt |
|
[plain_text | sha_1] <password>} |
Description |
This command is used to create user accounts that consist of a username of 1 to 15 |
|
characters and a password of 0 to 15 characters. Up to 8 user accounts can be created. |
Parameters |
admin - Specify the name of the admin account. |
|
operator - Specify the name for a operator user account. |
|
power_user – Specify the name for a Power-user account. |
|
user - Specify the name of the user account. |
|
<username 15> - Enter the username used here. This name can be up to 15 characters long. |
|
encrypt - (Optional) Specify the encryption applied to the account. |
|
plain_text - Select to specify the password in plain text form. |
|
sha_1 - Select to specify the password in the SHA-I encrypted form. |
|
<password> - The password for the user account. The length for of password in plain-text |
|
form and in encrypted form are different. For the plain-text form, passwords must have a |
|
minimum of 0 character and can have a maximum of 15 characters. For the encrypted form |
|
password, the length is fixed to 35 bytes long. The password is case-sensitive. |
Restrictions |
Only Administrator-level users can issue this command. |
|
Usernames can be between 1 and 15 characters. |
|
Passwords can be between 0 and 15 characters. |
|
|
Example usage:
To create an administrator-level user account with the username “dlink”.
DES-3528:admin# create account admin dlink
Command: create account admin dlink
Enter a case-sensitive new password:****
Enter the new password again for confirmation:****
Success.
DES-3528:admin#
NOTICE: In case of lost passwords or password corruption, please refer to the D-Link website and the White Paper entitled “Password Recovery Procedure”, which will guide you through the steps necessary to resolve this issue.
14

xStack® DES-3528/DES-3552 Series Layer 2 Managed Stackable Fast Ethernet Switch CLI Reference Guide
config account
Purpose |
Used to configure user accounts |
Syntax |
config account <username> {encrypt [plain_text | sha_1] <password>} |
Description |
When the password information is not specified in the command, the system will prompt the |
|
user to input the password interactively. For this case, the user can only input the plain text |
|
password. |
|
If the password is present in the command, the user can select to input the password in the |
|
plain text form or in the encrypted form. The encryption algorithm is based on SHA-I. |
Parameters |
<username> − Name of the account. The account must already be defined. |
|
plain_text − Select to specify the password in plain text form. |
|
sha_1 − Select to specify the password in the SHA-I enacrpted form. |
|
password − The password for the user account. |
|
The length for of password in plain-text form and in encrypted form are different. For the |
|
plain-text form, passwords must have a minimum of 0 character and can have a maximum of |
|
15 characters. For the encrypted form password, the length is fixed to 35 bytes long. The |
|
assword is case-sensitive. |
Restrictions |
Only Administrator-level users can issue this command. |
|
Usernames can be between 1 and 15 characters. |
|
Passwords can be between 0 and 15 characters. |
|
|
Example usage:
To configure the user password of “dlink” account:
DES-3528:admin# config account dlink
Command: config account dlink
Enter a old password:****
Enter a case-sensitive new password:****
Enter the new password again for confirmation:****
Success.
DES-3528:admin#
show account
Purpose |
Used to display user accounts. |
Syntax |
show account |
Description |
This command is used to display all user accounts created on the Switch. Up to 8 user |
|
accounts can exist at one time. |
Parameters |
None. |
Restrictions |
Only Administrator-level users can issue this command. |
|
|
Example usage:
To display the accounts that have been created:
DES-3528:admin# show account
Command: show account
Current Accounts: |
Access Level |
Username |
|
--------------- |
------------ |
dlink |
Admin |
Total Entries: 1 |
|
DES-3528:admin# |
|
15
xStack® DES-3528/DES-3552 Series Layer 2 Managed Stackable Fast Ethernet Switch CLI Reference Guide
delete account
Purpose |
Used to delete an existing user account. |
Syntax |
delete account <username> |
Description |
This command is used to delete an existing entry. |
Parameters |
<username> − Name of the user who will be deleted. |
Restrictions |
Only Administrator-level users can issue this command. |
|
|
Example usage:
To delete the user account “System”:
DES-3528:admin# delete account System
Command: delete account System
Success.
DES-3528:admin#
enable password encryption
Purpose |
Used to enable password encryption. |
Syntax |
enable password encryption |
Description |
The user account configuration information will be stored in the configuration file, and can be |
|
applied to the system later. |
|
If the password encryption is enabled, the password will be in encrypted form. |
|
When password encryption is diabled, if the user specifies the password in plain text form, |
|
the password will be in plain text form. However, if the user specifies the password in |
|
encrypted form, or if the password has been converted to encrypted form by the last enable |
|
password encryption command, the password will still be in the encrypted form. It cannot be |
|
reverted to the plaintext. |
Parameters |
None. |
Restrictions |
Only Administrator-level users can issue this command. |
|
|
Example usage:
To enable password encryption:
DES-3528:admin# enable password encryption
Command: enable password encryption
Success.
DES-3528:admin#
16
xStack® DES-3528/DES-3552 Series Layer 2 Managed Stackable Fast Ethernet Switch CLI Reference Guide
disable password encryption
Purpose |
Used to disable password encryption. |
Syntax |
disable password encryption |
Description |
The user account configuration information will be stored in the configuration file, and can be |
|
applied to the system later. |
|
If the password encryption is enabled, the password will be in encrypted form. |
|
When password encryption is disabled, if the user specifies the password in plain text form, |
|
the password will be in plan text form. However, if the user specifies the password in |
|
encrypted form, or if the password has been converted to encrypted form by the last enable |
|
password encryption command, the password will still be in the encrypted form. It cannot be |
|
reverted to the plaintext. |
Parameters |
None. |
Restrictions |
Only Administrator-level users can issue this command. |
|
|
Example usage:
To disable password encryption:
DES-3528:admin# disable password encryption
Command: disable password encryption
Success.
DES-3528:admin#
show session
Purpose |
Used to display a list of currently logged-in users. |
Syntax |
show session |
Description |
This command displays a list of all the users that are logged-in at the time the command is |
|
issued. |
Parameters |
None. |
Restrictions |
Only Administrator and Operator-level users can issue this command. |
|
|
Example usage:
To display the way that the users logged in:
DES-3528:admin# show session
Command: show session
ID |
Live Time |
From |
Level |
Name |
--- |
--------- |
------------ |
----- |
------- |
8 |
00:00:16.250 |
Serial Port |
admin |
Anonymous |
Total Entries: 1
CTRL+C ESC q Quit SPACE n Next Page p Previous Page r Refresh
17

xStack® DES-3528/DES-3552 Series Layer 2 Managed Stackable Fast Ethernet Switch CLI Reference Guide
show switch
Purpose |
Used to display general information about the Switch. |
Syntax |
show switch |
Description |
This command displays information about the Switch. |
Parameters |
None. |
Restrictions |
None. |
|
|
Example usage:
To display the Switch’s information:
DES-3528:admin# show switch |
|
Command: show switch |
|
Device Type |
: DES-3528 Fast Ethernet Switch |
MAC Address |
: 1C-AF-F7-AD-33-20 |
IP Address |
: 10.90.90.90 (Manual) |
VLAN Name |
: default |
Subnet Mask |
: 255.0.0.0 |
Default Gateway |
: 0.0.0.0 |
Boot PROM Version |
: Build 1.00.B008 |
Firmware Version |
: Build 3.00.012 |
Hardware Version |
: A4 |
Serial Number |
: P1UQ3A4000012 |
System Name |
: |
System Location |
: |
System Uptime |
: 0 days, 0 hours, 3 minutes, 58 seconds |
System Contact |
: |
Spanning Tree |
: Disabled |
GVRP |
: Disabled |
IGMP Snooping |
: Disabled |
MLD Snooping |
: Disabled |
VLAN Trunk |
: Disabled |
Telnet |
: Enabled (TCP 23) |
Web |
: Enabled (TCP 80) |
SNMP |
: Disabled |
CTRL+C ESC q Quit SPACE n Next Page ENTER Next Entry a All
show device_status
Purpose |
Used to display the current Switch’s power and fan status. |
Syntax |
show device_status |
Description |
This command displays status of both the Switch’s internal and external power and the fan |
|
status. |
Parameters |
None. |
Restrictions |
None. |
|
|
Example usage:
To display the Switch’s device status:
DES-3528:admin# show device_status
Command: show device_status
Internal Power: Active
External Power: Fail
DES-3528:admin#
18
xStack® DES-3528/DES-3552 Series Layer 2 Managed Stackable Fast Ethernet Switch CLI Reference Guide
show serial_port
Purpose |
Used to display the current serial port settings. |
Syntax |
show serial_port |
Description |
This command displays the current serial port settings. |
Parameters |
None. |
Restrictions |
None |
|
|
Example usage:
To display the serial port setting:
DES-3528:admin#show serial_port
Command: show serial_port
Baud Rate |
: 115200 |
||
Data |
Bits |
: 8 |
|
Parity Bits |
: None |
||
Stop |
Bits |
: |
1 |
Auto-Logout |
: |
Never |
|
DES-3528:admin#
config serial_port
Purpose |
Used to configure the serial port. |
Syntax |
config serial_port {baud_rate [9600 | 19200 | 38400 | 115200] | auto_logout [never | |
|
2_minutes | 5_minutes | 10_minutes | 15_minutes]}(1) |
Description |
This command is used to configure the serial port’s baud rate and auto logout settings. |
Parameters |
baud_rate [9600 | 19200 | 38400 | 115200] − The serial bit rate that will be used to |
|
communicate with the management host. There are four options: 9600, 19200, 38400, |
|
115200. Factory default setting is 115200. |
|
never − No time limit on the length of time the console can be open with no user input. |
|
2_minutes − The console will log out the current user if there is no user input for 2 minutes. |
|
5_minutes − The console will log out the current user if there is no user input for 5 minutes. |
|
10_minutes − The console will log out the current user if there is no user input for 10 |
|
minutes. |
|
15_minutes − The console will log out the current user if there is no user input for 15 |
|
minutes. |
Restrictions |
Only Administrator and Operator-level users can issue this command. |
Example usage:
To configure baud rate:
DES-3528:admin# config serial_port baud_rate 115200
Command: config serial_port baud_rate 115200
Success.
DES-3528:admin#
NOTE: If a user configures the serial port’s baud rate, the baud rate will take effect and save immediately. Baud rate settings will not change even if the user resets or reboots the Switch. The Baud rate will only change when the user configures it again. The serial port’s baud rate setting is not stored in the Switch’s configuration file. Resetting the Switch will not restore the baud rate to the default setting.
19
xStack® DES-3528/DES-3552 Series Layer 2 Managed Stackable Fast Ethernet Switch CLI Reference Guide
enable clipaging
Purpose |
Used to pause the scrolling of the console screen when a command displays more than one |
|
page. |
Syntax |
enable clipaging |
Description |
This command is used when issuing a command which causes the console screen to rapidly |
|
scroll through several pages. This command will cause the console to pause at the end of |
|
each page. The default setting is enabled. |
Parameters |
None. |
Restrictions |
Only Administrator and Operator-level users can issue this command. |
|
|
Example usage:
To enable pausing of the screen display when the show command output reaches the end of the page:
DES-3528:admin# enable clipaging
Command: enable clipaging
Success.
DES-3528:admin#
disable clipaging
Purpose |
Used to disable the pausing of the console screen scrolling at the end of each page when a |
|
command displays more than one screen of information. |
Syntax |
disable clipaging |
Description |
This command is used to disable the pausing of the console screen at the end of each page |
|
when a command would display more than one screen of information. |
Parameters |
None. |
Restrictions |
Only Administrator and Operator-level users can issue this command. |
|
|
Example usage:
To disable pausing of the screen display when show command output reaches the end of the page:
DES-3528:admin# disable clipaging
Command: disable clipaging
Success.
DES-3528:admin#
telnet
Purpose |
Used to login the remote device system through the network. |
Syntax |
telnet <ipaddr> {tcp_port <value 1-65535>} |
Description |
This command is used when the manager want to manage the device system which isn’t on |
|
local. So can use this command to login in the remote system which is located on other side. |
|
If connect successful, some actions can be done as local. |
Parameters |
<ipaddr> − The network ip address. This is the destination which wants to login. |
|
<value 1-65535> − The TCP port number. TCP ports are numbered between 1 and 65535. |
|
The “well-known” TCP port for the Telnet protocol is 23. |
Restrictions |
Only Administrator and Operator-level users can issue this command. |
|
|
Example usage: |
|
20
xStack® DES-3528/DES-3552 Series Layer 2 Managed Stackable Fast Ethernet Switch CLI Reference Guide
Telnet to the remote Switch:
DES-3528:admin# telnet 172.18.168.12 tcp_port 50
Command: telnet 172.18.168.12 tcp_port 50
Connecting to server,please wait....
DES-3528 Gigabit Ethernet Switch
Command Line Interface
Firmware: Build 3.00.012
UserName:
Copyright(C) 2013 D-Link Corporation. All rights reserved.
PassWord:
enable telnet
Purpose |
Used to enable communication with and management of the Switch using the Telnet |
|
protocol. |
Syntax |
enable telnet <tcp_port_number 1-65535> |
Description |
This command is used to enable the Telnet protocol on the Switch. The user can specify the |
|
TCP or UDP port number the Switch will use to listen for Telnet requests. |
Parameters |
<tcp_port_number 1-65535> − The TCP port number. TCP ports are numbered between 1 |
|
and 65535. The “well-known” TCP port for the Telnet protocol is 23. |
Restrictions |
Only Administrator and Operator-level users can issue this command. |
|
|
Example usage:
To enable Telnet and configure port number:
DES-3528:admin# enable telnet 23
Command: enable telnet 23
Success.
DES-3528:admin#
disable telnet
Purpose |
Used to disable the Telnet protocol on the Switch. |
Syntax |
disable telnet |
Description |
This command is used to disable the Telnet protocol on the Switch. |
Parameters |
None. |
Restrictions |
Only Administrator and Operator-level users can issue this command. |
|
|
Example usage:
To disable the Telnet protocol on the Switch:
DES-3528:admin# disable telnet
Command: disable telnet
Success.
DES-3528:admin#
21

xStack® DES-3528/DES-3552 Series Layer 2 Managed Stackable Fast Ethernet Switch CLI Reference Guide
enable web
Purpose |
Used to enable the HTTP-based management software on the Switch. |
Syntax |
enable web <tcp_port_number 1-65535> |
Description |
This command is used to enable the Web-based management software on the Switch. The |
|
user can specify the TCP port number the Switch will use to listen for Telnet requests. |
Parameters |
<tcp_port_number 1-65535> − The TCP port number. TCP ports are numbered between 1 |
|
and 65535. The “well-known” port for the Web-based management software is 80. |
Restrictions |
Only Administrator and Operator-level users can issue this command. |
|
|
Example usage:
To enable HTTP and configure port number:
DES-3528:admin# enable web 80
Command: enable web 80
Success.
DES-3528:admin#
disable web
Purpose |
Used to disable the HTTP-based management software on the Switch. |
Syntax |
disable web |
Description |
This command disables the Web-based management software on the Switch. |
Parameters |
None. |
Restrictions |
Only Administrator and Operator-level users can issue this command. |
|
|
Example usage:
To disable HTTP:
DES-3528:admin# disable web
Command: disable web
Success.
DES-3528:admin#
save
Purpose |
Used to save changes in the Switch’s configuration to non-volatile RAM. |
Syntax |
save {[config <config_id 1-2> | log | all]} |
Description |
This command is used to enter the current Switch configuration into non-volatile RAM. The |
|
saved Switch configuration will be loaded into the Switch’s memory each time the Switch is |
|
restarted. |
Parameters |
config <config_id 1-2> – Specify to save current settings to configuration file 1 or 2. |
|
log – Specify to save current Switch log to NV-RAM. |
|
all – Specify to save all configuration settings. If nothing is specified after “save”, the Switch |
|
will save all. |
Restrictions |
Only Administrator and Operator-level users can issue this command. |
|
|
Example usage:
To save the Switch’s current configuration to non-volatile RAM:
22
xStack® DES-3528/DES-3552 Series Layer 2 Managed Stackable Fast Ethernet Switch CLI Reference Guide
DES-3528:admin# save
Command: save
Saving all configurations to NV-RAM... Done.
DES-3528:admin#
reboot
Purpose |
Used to restart the Switch. |
Syntax |
Reboot {force_agree} |
Description |
This command is used to restart the Switch. |
Parameters |
force_agree − When force_agree is specified, the reboot command will be executed |
|
immediatedly without further confirmation. |
Restrictions |
Only Administrator-level users can issue this command. |
|
|
Example usage:
To restart the Switch:
DES-3528:admin# reboot
Command: reboot
Are you sure you want to proceed with the system reboot? (y|n)y
Please wait, the switch is rebooting...
reset
Purpose |
Used to reset the Switch to the factory default settings. |
Syntax |
reset {[config | system]} {force_agree} |
Description |
This command is used to restore the Switch’s configuration to the default settings assigned |
|
from the factory. |
Parameters |
config − If the keyword ‘config’ is specified, all of the factory default settings are restored on |
|
the Switch including the IP address, user accounts, and the Switch history log. The Switch |
|
will not save or reboot. |
|
system − If the keyword ‘system’ is specified all of the factory default settings are restored on |
|
the Switch. The Switch will save and reboot after the settings are changed to default. |
|
Rebooting will clear all entries in the Forwarding Data Base. |
|
force_agree − When force_agree is specified, the reset command will be executed |
|
immediatedly without further confirmation. |
|
If no parameter is specified, the Switch’s current IP address, user accounts, and the Switch |
|
history log are not changed. All other parameters are restored to the factory default settings. |
|
The Switch will not save or reboot. |
|
NOTE: The serial port baud rate will not be changed by the reset command. |
|
It will not be restored to the factory default setting. |
Restrictions |
Only Administrator-level users can issue this command. |
|
|
Example usage: |
|
To restore all of the Switch’s parameters to their default values:
DES-3528:admin# reset config
Command: reset config
Are users sure to proceed with system reset?(y/n)y
Success.
DES-3528:admin#
23

xStack® DES-3528/DES-3552 Series Layer 2 Managed Stackable Fast Ethernet Switch CLI Reference Guide
login
Purpose |
Used to log in a user to the Switch’s console. |
Syntax |
login |
Description |
This command is used to initiate the login procedure. The user will be prompted for a |
|
Username and Password. |
Parameters |
None. |
Restrictions |
None. |
|
|
Example usage:
To initiate the login procedure:
DES-3528:admin# login
Command: login
UserName:
logout
Purpose |
Used to log out a user from the Switch’s console. |
Syntax |
logout |
Description |
This command terminates the current user’s session on the Switch’s console. |
Parameters |
None. |
Restrictions |
None. |
|
|
Example usage:
To terminate the current user’s console session:
DES-3528:admin# logout
clear
Purpose |
The command is used to clear screen. |
Syntax |
clear |
Description |
The command is used to clear screen. |
Parameters |
None. |
Restrictions |
None. |
|
|
Example usage:
To clear screen:
DES-3528:admin# clear
Command: clear
DES-3528:admin#
24
xStack® DES-3528/DES-3552 Series Layer 2 Managed Stackable Fast Ethernet Switch CLI Reference Guide
config terminal width
Purpose |
The command is used to set current terminal width. |
Syntax |
config terminal width [default | <value 80-200>] |
Description |
The usage is described as below: |
1.Users login and configure the terminal width to 120, this configuration take effect on this login section. If users implement “save” command, the configuration is saved. After users log out and log in again, the terminal width is 120.
2.If user did not save the configuration, another user login, the terminal width is default value.
3.If at the same time, two CLI sessions are running, once section configure to 120 width and save it, the other section will not be effected, unless it log out and then log in.
Parameters |
default - The default setting of terminal width. The default value is 80. |
|
<value 80-200> - The terminal width which will be configured. The width is between 80 and |
|
200 characters. |
Restrictions |
None. |
Example usage:
To configure the current terminal width:
DES-3528:admin# config terminal width 120
Command: config terminal width 120
Success.
DES-3528:admin#
show terminal width
Purpose |
The command is used to display the configuration of current terminal width. |
Syntax |
show terminal width |
Description |
The command is used to display the configuration of current terminal width. |
Parameters |
None. |
Restrictions |
None. |
|
|
Example usage:
To display the configuration of current terminal width:
DES-3528:admin#show terminal width |
||
Command: show terminal width |
||
Global terminal width |
: |
80 |
Current terminal width |
: |
80 |
DES-3528:admin#
25

xStack® DES-3528/DES-3552 Series Layer 2 Managed Stackable Fast Ethernet Switch CLI Reference Guide
config temperature
Purpose |
This command is used to configure the warning trap or log state of the system internal |
|
temperature. |
Syntax |
config temperature [trap | log] state [enable | disable] |
Description |
This command is used to configure the warning trap or log state of the system internal |
|
temperature. |
Parameters |
trap - Specify to configure the warning temperature trap. |
|
log - Specify to configure the warning temperature log. |
|
state - Enable or disable either the trap or log state for a warning temperature event. The |
|
default is enable. |
|
enable - Enable either the trap or log state for a warning temperature event. |
|
disable - Disable either the trap or log state for a warning temperature event. |
Restrictions |
Only Administrator and Operator-level users can issue this command. |
|
|
Example usage:
To enable the warning temperature trap state:
DES-3528:admin#config temperature trap state enable
Command: config temperature trap state enable
Success.
DES-3528:admin#
To enable the warning temperature log state:
DES-3528:admin#config temperature log state enable
Command: config temperature log state enable
Success.
DES-3528:admin#
config temperature threshold
Purpose |
This command is used to configure the warning temperature high threshold or low threshold. |
Syntax |
config temperature threshold {high <temperature -500-500> | low <temperature -500- |
|
500>} |
Description |
When temperature is above the high threshold or below the low threshold, SW will send |
|
alarm traps or keep the logs. |
Parameters |
high - Specify the high threshold value. The high threshold must bigger than the low |
|
threshold. |
|
<temperature -500-500> - Specify the high threshold value. This value must be between -500 |
|
and 500. |
|
low - Specify the low threshold value. |
|
<temperature -500-500> - Specify the low threshold value. This value must be between -500 |
|
and 500. |
Restrictions |
Only Administrator and Operator-level users can issue this command. |
|
|
Example usage:
To configure a warming temperature threshold high of 80:
26

xStack® DES-3528/DES-3552 Series Layer 2 Managed Stackable Fast Ethernet Switch CLI Reference Guide
DES-3528:admin#config temperature threshold high 80
Command: config temperature threshold high 80
Success.
DES-3528:admin#
show environment
|
Purpose |
|
This command is used to display the device’s internal and external power and internal |
||||
|
|
|
temperature status. |
|
|
||
|
Syntax |
|
show environment |
|
|
||
|
Description |
This command is used to display the device’s internal and external power and internal |
|||||
|
|
|
temperature status. |
|
|
||
|
Parameters |
None. |
|
|
|
|
|
|
Restrictions |
None. |
|
|
|
|
|
|
|
|
|
|
|
|
|
Example usage: |
|
|
|
|
|
||
|
To display the switch hardware status: |
|
|
||||
|
|
|
|
||||
|
DES-3528:admin#show environment |
|
|
||||
|
Command: show environment |
|
|
|
|
||
|
Temperature Trap State |
: |
Enabled |
|
|
||
|
Temperature Log State |
: |
Enabled |
: |
80 |
||
|
High Warning Temperature Threshold(Celsius) |
||||||
|
Low Warning Temperature Threshold(Celsius) |
: |
11 |
||||
|
Unit |
1 |
: Active |
|
|
|
|
|
Internal Power |
|
|
|
|||
|
External Power |
: Fail |
|
40 |
|
|
|
|
Current Temperature(Celsius) : |
|
|
||||
|
DES-3528:admin# |
|
|
|
|
|
|
27

xStack® DES-3528/DES-3552 Series Layer 2 Managed Stackable Fast Ethernet Switch CLI Reference Guide
Modify Banner and Prompt Commands
Administrator level users can modify the login banner (greeting message) and command prompt by using the commands described below.
Command |
Parameters |
|
|
config command_prompt |
[<string 16> | username | default] |
|
|
config greeting_message |
{default} |
|
|
show greeting_message |
|
|
|
The Modify Banner and Prompt commands in the Command Line Interface (CLI) are listed (along with the appropriate parameters) in the following table.
config command prompt
Purpose |
Used to configure the command prompt. |
Syntax |
config command_prompt [<string 16> | username | default] |
Description |
This command is used to change the command prompt. |
Parameters |
string 16 –The command prompt can be changed by entering a new name of no more that 16 |
|
characters. |
|
username – The command prompt will be changed to the login username. |
|
default – The command prompt will reset to factory default command prompt. |
Restrictions |
Only Administrator and Operator-level users can issue this command. Other restrictions |
|
include: |
|
• If the “reset” command is executed, the modified command prompt will remain |
|
modified. However, the “reset config/reset system” command will reset the |
|
command prompt to the original factory banner. |
|
|
Example usage:
To modify the command prompt to “AtYourService”:
DES-3528:admin#config command_prompt AtYourService
Command: config command_prompt AtYourService
Success.
AtYourService:admin#
28

xStack® DES-3528/DES-3552 Series Layer 2 Managed Stackable Fast Ethernet Switch CLI Reference Guide
config greeting _message
Purpose |
Used to configure the login banner (greeting message). |
|
Syntax |
config greeting _message {default} |
|
Description |
This command is used to modify the login banner (greeting message). |
|
Parameters |
default – If the user enters default to the modify banner command, then the banner will be |
|
|
reset to the original factory banner. |
|
|
To open the Banner Editor, click enter after typing the config greeting_message command. |
|
|
Type the information to be displayed on the banner by using the commands described on the |
|
|
Banner Editor: |
|
|
Quit without save: |
Ctrl+C |
|
Save and quit: |
Ctrl+W |
|
Move cursor: |
Left/Right/Up/Down |
|
Delete line: |
Ctrl+D |
|
Erase all setting: |
Ctrl+X |
|
Reload original setting: |
Ctrl+L |
Restrictions |
Only Administrator and Operator-level users can issue this command. Other restrictions |
|
|
include: |
|
•If the “reset” command is executed, the modified banner will remain modified. However, the “reset config/reset system” command will reset the modified banner to the original factory banner.
•The capacity of the banner is 6*80. 6 Lines and 80 characters per line.
•Ctrl+W will only save the modified banner in the DRAM. Users need to type the “save” command to save it into FLASH.
•Only valid in threshold level.
Example usage:
To modify the banner:
DES-3528:admin#config greeting_message
Command: config greeting_message
<Function Key> |
<Control Key> |
|
|
Ctrl+C |
Quit without save |
left/right/ |
Move cursor |
Ctrl+W |
Save and quit |
up/down |
|
Greeting Messages Editor |
Ctrl+D |
Delete line |
|
Ctrl+X |
Erase all setting |
||
Ctrl+L |
Reload original setting |
||
================================================================================ |
|||
|
DES-3528 Fast Ethernet Switch |
||
|
Command |
Line Interface |
|
|
Firmware: Build 3.00.012 |
||
|
Copyright(C) 2013 D-Link Corporation. All rights reserved. |
||
================================================================================ |
|||
--------------------------------------------------------------------------------
29

xStack® DES-3528/DES-3552 Series Layer 2 Managed Stackable Fast Ethernet Switch CLI Reference Guide
show greeting_message
Purpose |
Used to view the currently configured greeting message configured on the Switch. |
Syntax |
show greeting_message |
Description |
This command is used to view the currently configured greeting message on the Switch. |
Parameters |
None. |
Restrictions |
Only Administrator and Operator-level users can issue this command. |
|
|
Example usage:
To view the currently configured greeting message:
DES-3528:admin#show greeting_message
Command: show greeting_message
================================================================================
DES-3528 Fast Ethernet Switch
Command Line Interface
Firmware: Build 3.00.012
Copyright(C) 2013 D-Link Corporation. All rights reserved.
================================================================================
DES-3528:admin#
30
Loading...