Daikin FTXM18PVMK, FTXM24PVMK, FTKM18PVMK, FTKM24PVMK Operation manuals
<![endif]>English
DAIKIN ROOM AIR CONDITIONER
OPERATION MANUAL
Enjoy year-roun d comfort.
MODELS
FTXM18PVMK
FTXM24PVMK
FTKM18PVMK
FTKM24PVMK
Features
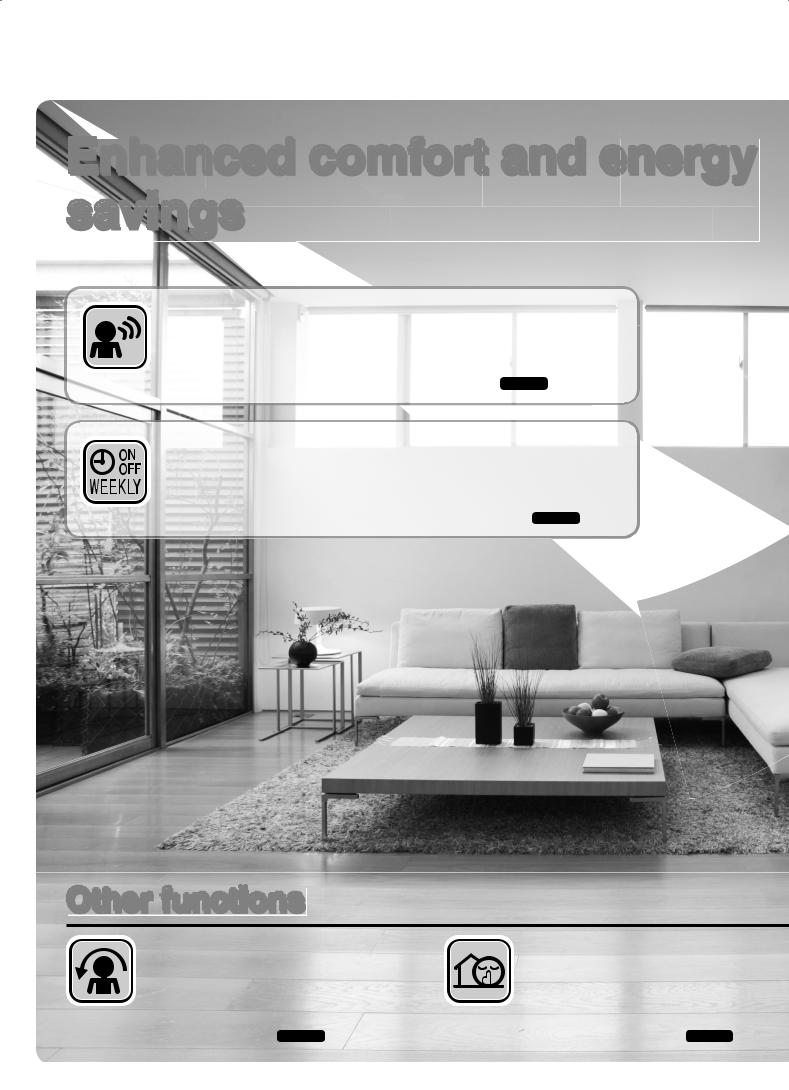
Enhanced comfort and energy savings
INTELLIGENT EYE
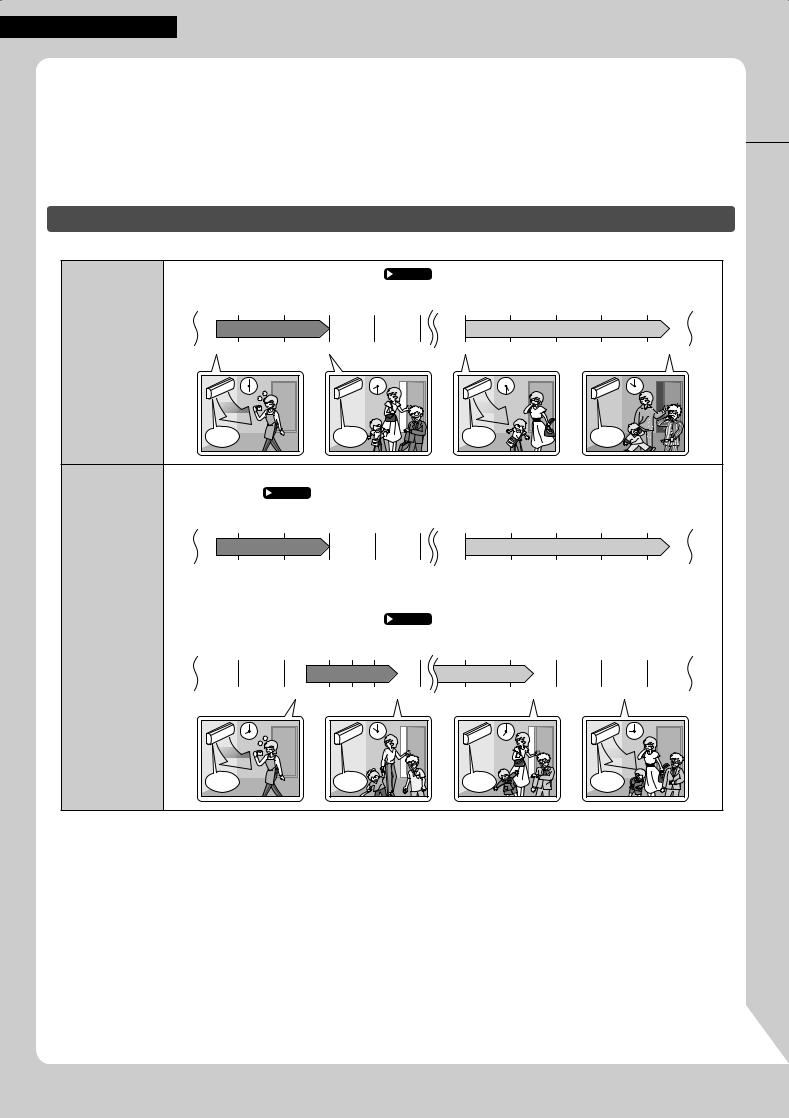
The INTELLIGENT EYE sensor detects human movement in a room. If no one is in the room for more than 20 minutes, the operation automatically changes to energy saving operation.  Page 15
WEEKLY TIMER
Up to 4 timer settings can be saved for each day of the week according to your family’s life style.The WEEKLY TIMER allows you to set on/off times and the desired temperature.  Page 21
Other functions
COMFORT AIRFLOW |
OUTDOOR UNIT QUIET |
The airfl ow direction is upward while in COOL operation, and downward while in HEAT operation.This function prevents cold or warm air from blowing directly on your body.  Page 15
OUTDOOR UNIT QUIET operation assures a low noise level of the outdoor unit.This function is useful to maintain a quiet neighbourhood.
 Page 18
1

ECONO
This function enables effi cient operation by limiting the maximum power consumption. It is useful when using the air conditioner and other electrical devices simultaneously on a shared electrical circuit.  Page 18
Contents |
|
Read Before Operation |
|
Safety Precautions.......................................... |
3 |
Names of Parts............................................... |
5 |
Preparation Before Operation......................... |
9 |
Basic Operation |
|
AUTO · DRY · COOL · HEAT · |
|
FAN Operation................................... |
11 |
Adjusting the Airflow Direction........... |
13 |
Adjusting the Airflow Rate.................. |
14 |
Useful Functions |
|
COMFORT AIRFLOW / |
|
INTELLIGENT EYE Operation........... |
15 |
POWERFUL Operation...................... |
17 |
ECONO / OUTDOOR UNIT QUIET |
|
Operation........................................... |
18 |
TIMER Operation |
|
ON/OFF TIMER Operation ................ |
19 |
WEEKLY TIMER Operation................ |
21 |
Care |
|
Care and Cleaning....................................... |
27 |
When the Need Arises |
|
FAQ.............................................................. |
32 |
Troubleshooting ........................................... |
33 |
Specifications .............................................. |
37 |
<![endif]>English
2

Read Before Operation
Safety Precautions
Read the precautions in this manual carefully before operating the unit.
This appliance is filled with R32.
•Keep this manual where the user can easily find it.
•The precautions described herein are classified as WARNING and CAUTION.They both contain important information regarding safety. Be sure to observe all precautions without fail.
 WARNING
Failure to follow these instructions properly may result in personal injury or loss of life.
 CAUTION
Failure to follow these instructions properly may result in property damage or personal injury, which may be serious depending on the circumstances.
Never attempt. |
Be sure to follow the |
Be sure to establish an earth |
|
instructions. |
connection. |
||
|
|||
|
|
|
•After reading, keep this manual in a convenient place so that you can refer to it whenever necessary. If the equipment is transferred to a new user, be sure also to hand over the manual.
 WARNING
•Do not use means to accelerate the defrosting process or to clean, other than those recommended by the manufacturer.
•The appliance must be stored in a room without continuously operating ignition sources (for example: open flames, an operating gas appliance or an operating electric heater).
•Do not pierce or burn.
•Be aware that refrigerants may not contain an odour.
•The appliance must be installed, operated and stored in a room with a floor area larger than 3.9m2.
•To avoid fire, explosion or injury, do not operate the unit when harmful gases (e.g.flammable or corrosive) are detected near the unit.
•Be aware that prolonged, direct exposure to cool or warm air from the air conditioner, or to air that is too cool or too warm, can be harmful to your physical condition and health.
•Do not place objects, including rods, your fingers, etc., in the air inlet or outlet. Product damage or personal injury may result due to contact with the air conditioner’s high-speed fan blades.
•Do not attempt to repair, dismantle, reinstall or modify the air conditioner yourself as this may result in water leakage, electric shocks or fire hazards.
•Do not use flammable spray near the air conditioner, or otherwise fire may result.
•Do not use a refrigerant other than the one indicated on the outdoor unit (R32) when installing, moving or repairing. Using other refrigerants may cause trouble or damage to the unit, and personal injury.
•To avoid electric shocks, do not operate with wet hands.
•Beware of fire in case of refrigerant leakage. If the air conditioner is not operating correctly, i.e. not generating cool or warm air, refrigerant leakage could be the cause. Consult your dealer for assistance.The refrigerant within the air conditioner is safe and normally does not leak.
However, in the event of a leakage, contact with a naked burner, heater or cooker may result in generation of noxious gas. Do not use the air conditioner until a qualified service person confirms that the leakage has been repaired.
•Do not attempt to install or repair the air conditioner yourself. Improper workmanship may result in water leakage, electric shocks or fire hazards. Please contact your local dealer or qualified personnel for installation and maintenance work.
•If the air conditioner is malfunctioning (giving off a burning odour, etc.), turn off power to the unit and contact your local dealer. Continued operation under such circumstances may result in a failure, electric shocks or fire hazards.
•Be sure to install an earth leakage circuit breaker.Failure to install an earth leakage circuit breaker may result in electric shocks or fire.
•Be sure to earth the unit. Do not earth the unit to a utility pipe, lightning conductor or telephone earth lead. Imperfect earthing may result in electric shocks.
 CAUTION
•Do not use the air conditioner for purposes other than those for which it is intended. Do not use the air conditioner for cooling precision instruments, food, plants, animals or works of art as this may adversely affect the performance, quality and/or longevity of the object concerned.
•Do not expose plants or animals directly to the airflow from the unit as this may cause adverse effects.
•Do not place appliances that produce naked flames in places exposed to the airflow from the unit as this may impair combustion of the burner.
3
Read Before Operation
<![if ! IE]><![endif]>English
 CAUTION
•Do not block the air inlets nor outlets. Impaired airflow may result in insufficient performance or trouble.
•Do not sit on the outdoor unit, put things on the unit, or pull the unit. Doing so may cause accidents, such as falling or toppling down, thus resulting in injury, product malfunctioning, or product damage.
•Do not place objects that are susceptible to moisture directly beneath the indoor or outdoor units. Under certain conditions, condensation on the main unit or refrigerant pipes, air filter dirt or drain blockage may cause dripping, resulting in fouling or failure of the object concerned.
•After prolonged use, check the unit stand and its mounts for damage. If they are left in a damaged condition, the unit may fall and cause injury.
•To avoid injury, do not touch the air inlet or aluminium fins of the indoor or outdoor units.
•The appliance is not intended for use by unattended young children or infirm persons. Impairment of bodily functions and harm to health may result.
•Children should be supervised to ensure that they do not play with the unit or its remote controller. Accidental operation by a child may result in impairment of bodily functions and harm health.
•Avoid impacts to the indoor and outdoor units, or otherwise product damage may result.
•Do not place flammable items, such as spray cans, within 1m of the air outlet. The spray cans may explode as a result of hot air from the indoor or outdoor units.
•Be careful not to let pets urinate on the air conditioner. Urination on the air conditioner may result in electric shocks or fire.
•Do not wash the air conditioner with water, as this may result in electric shocks or fire.
•Do not place water containers (vases, etc.) above the unit, as this may result in electric shocks or fire hazards if they should topple over.
•To avoid oxygen depletion, ensure that the room is adequately ventilated if equipment such as a burner is used together with the air conditioner.
•Before cleaning, be sure to stop unit operation and turn off the circuit breaker. Otherwise, an electric shock and injury may result.
•Only connect the air conditioner to the specified power supply circuit. Power supplies other than the one specified may result in electric shocks, overheating and fires.
•Arrange the drain hose to ensure smooth drainage. Imperfect drainage may cause wetting of the building, furniture, etc.
•Do not place objects in direct proximity of the outdoor unit and do not let leaves and other debris accumulate around the unit. Leaves are a hotbed for small animals which can enter the unit. Once inside the unit, such animals can cause malfunctions, smoke or fire if they come into contact with electrical parts.
•Do not place objects around the indoor unit.
Doing so may have an adverse influence on the performance, product quality, and life of the air conditioner.
P004
Installation site
To install the air conditioner in the following types of environments, consult your dealer.
•Places with an oily environment or where steam or soot occurs.
•Salty environments such as coastal areas.
•Places where sulphide gas occurs such as hot springs.
•Places where snow may block the outdoor unit.
Be sure to follow the instructions below.
•The indoor unit is at least 1m away from any television or radio set (unit may cause interference with the picture or sound).
•The drain from the outdoor unit must be discharged to a place of good drainage.
Consider nuisance to your neighbours from noises
For installation, choose a place as described below.
•A place solid enough to bear the weight of the unit and which does not amplify the operation noise or vibration.
•A place from where the air discharged from the outdoor unit or the operation noise will not annoy your neighbours.
Electrical work
For the power supply, be sure to use a separate power circuit dedicated to the air conditioner.
System relocation
Relocating the air conditioner requires specialized knowledge and skills. Please consult your dealer if relocation is necessary for moving or remodelling.
4
Read Before Operation
Names of Parts
Indoor Unit
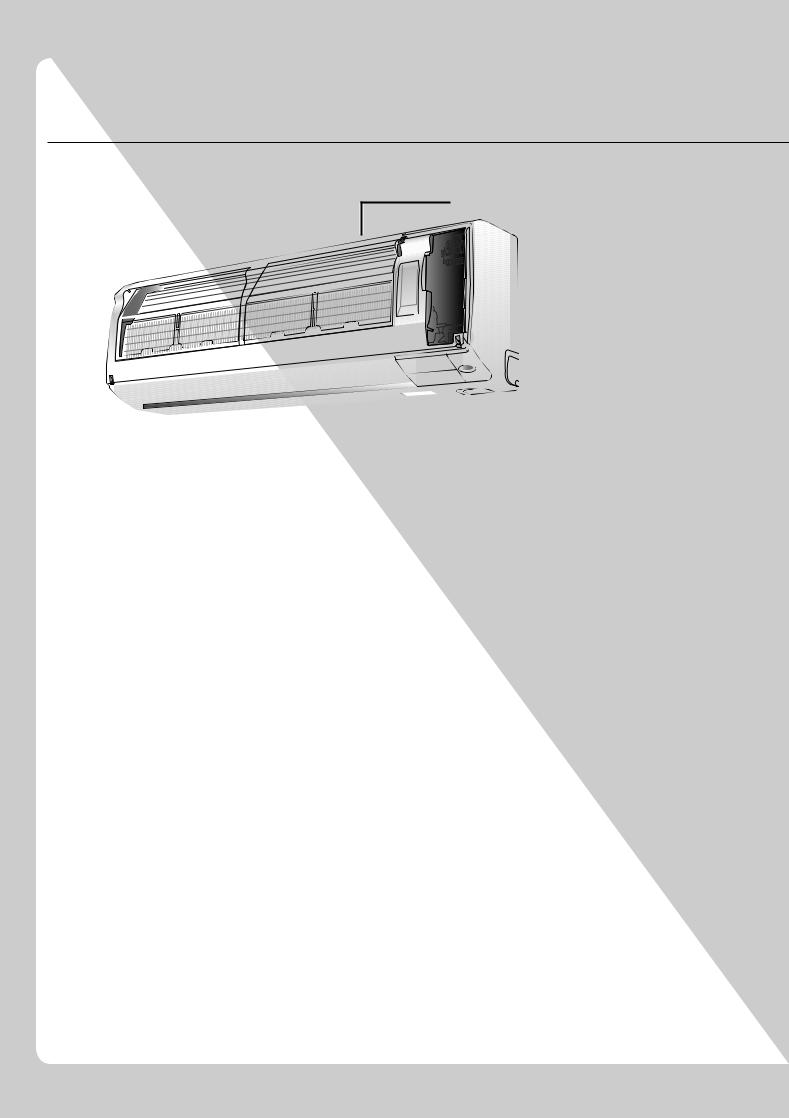
Front panel |
Air inlet |
|
Panel tab |
|
INTELLIGENT EYE |
|
sensor |
Model name Air outlet plate
Louvres (vertical blades)
•The louvres are inside of the air outlet.  Page 13
Flaps (horizontal blades)
•Detects the movements of people and automatically switches between normal operation and energy saving operation.  Page 15,16
Indoor temperature sensor
•Detects the air temperature around the unit.
 Page 13
Display
Signal receiver |
|
|
OPERATION lamp (green) |
|
|
||
|
|
|
• Receives signals from the remote |
TIMER lamp (orange) |
|||
controller. |
|
|||
• When the unit receives a signal, you |
|
Page 19,20,23,25 |
||
will hear a beep sound. |
|
|
||
Case |
Sound type |
INTELLIGENT EYE lamp |
||
Operation start |
beep-beep |
|||
(green) |
Page 15 |
|||
Setting changed |
beep |
|||
|
|
|||
Operation stop |
long beep |
|
|
|
Indoor unit ON/OFF switch
•Press this switch once to start operation. Press once again to stop it.
•For the operation mode setting, refer to the following table.
Model |
Mode |
Temperature setting |
Airfl ow rate |
|
|
|
|
HEAT PUMP |
AUTO |
25°C |
AUTO |
|
|
|
|
COOLING ONLY |
COOL |
22°C |
AUTO |
|
|
|
|
• This switch can be used when the remote controller is missing.
5

Read Before Operation
<![if ! IE]><![endif]>English
Open the front panel


 Air fi lter
|
Titanium apatite |
|
|
photocatalytic |
|
|
air-purifying fi lter |
|
Outdoor Unit |
|
|
• The appearance of the outdoor unit may differ between different models. |
|
|
Air inlet |
Outdoor temperature |
|
(back and side) |
sensor (back) |
|
|
Drain hose |
|
|
Earth terminal (inside) |
|
Air outlet |
Refrigerant pipes and |
|
inter-unit wire |
||
|
||
|
Model name plate |
6

Read Before Operation
Names of Parts
Remote Controller
Signal transmitter
Receiver
•To use the remote controller, aim the transmitter at the indoor unit. If there is anything blocking the signals between the unit and the remote controller, such as a curtain, the unit may not operate.
•The maximum transmission distance is about 7m.
FAN setting button
• Selects the airfl ow rate setting.
 Page 14
POWERFUL button
• POWERFUL operation.  Page 17
Display (LCD)
• Displays the current settings.  (In this illustration, each section is
shown with all its displays on for the purpose of explanation.)
TEMPERATURE adjustment button
• Changes the temperature setting.
 Page 12
ON/OFF button
•Press this button once to start operation.
Press once again to stop it.  Page 11
Front cover
• Open the front cover.  Page 8
HEAT PUMP model |
ARC466A24 |
|
|
COOLING ONLY model |
ARC466A25 |
|
|
7
Read Before Operation
<![if ! IE]><![endif]>English
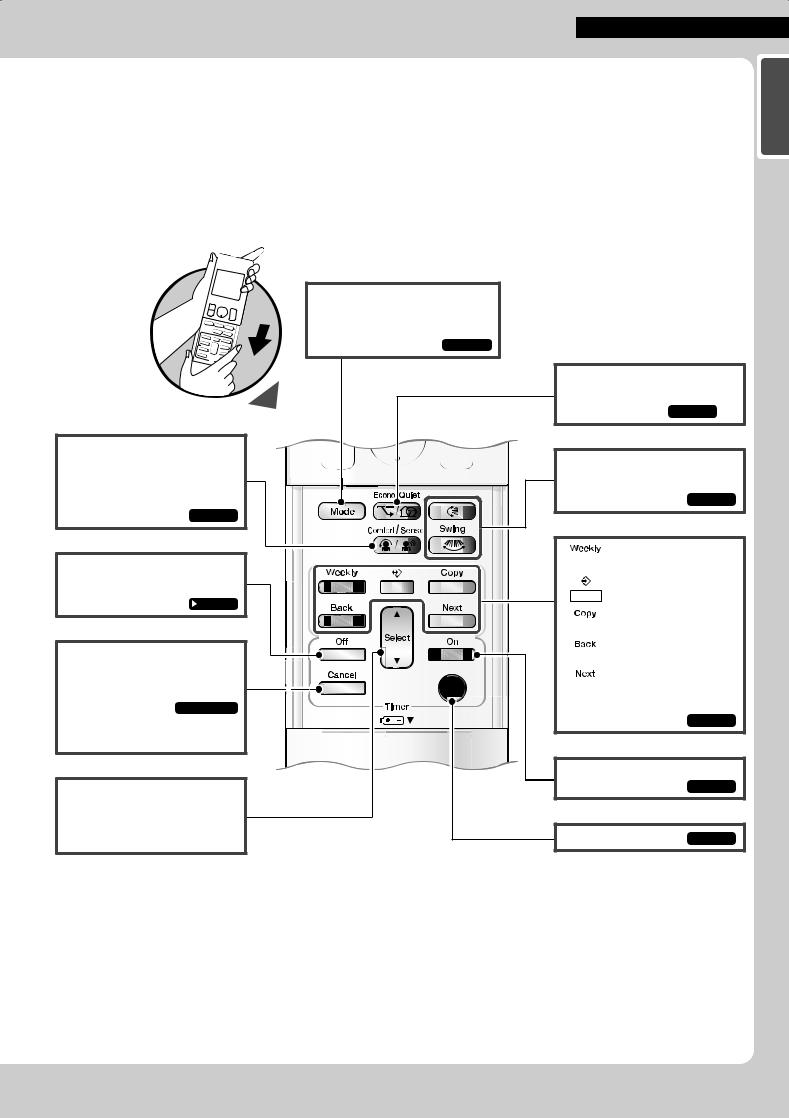
Open the front cover
COMFORT/SENSOR button
•COMFORT AIRFLOW and INTELLIGENT EYE operation.
 Page 15
MODE selector button
•Selects the operation mode. (AUTO/DRY/COOL/HEAT/FAN)
 Page 11
OFF TIMER button |
(NIGHT SET mode) |
Page 20 |
TIMER CANCEL |
button |
• Cancels the timer setting.
 Page 19,20
•Cannot be used for the WEEKLY TIMER operation.
SELECT button
•Changes the clock, ON/OFF TIMER and WEEKLY TIMER settings.
ECONO/QUIET button
•ECONO/OUTDOOR UNIT QUIET operation.  Page 18
SWING button
• Adjusts the airfl ow direction.
 Page 13
 : WEEKLY button
: PROGRAMME button
 : COPY button
 : BACK button
 : NEXT button
• WEEKLY TIMER operation.
 Page 21
ON TIMER button
 Page 19
CLOCK button  Page 10
8

Read Before Operation
Preparation Before Operation
2 

Position + and
– correctly!

 3 1
3 1

 Remote controller
Screws 
Remote  controller holder
NOTE
Notes on batteries
To insert the batteries
1. Slide the front cover to take it off.
2. Insert 2 dry batteries AAA.LR03 (alkaline).
3. Replace the front cover.
To fix the remote controller holder to a wall
1. Choose a place from where the signals reach the unit.
2. Fix the holder to a wall, a pillar, or similar location with the screws supplied with the holder.
3. Place the remote controller in the remote controller holder.
Turn on the circuit breaker
•After the power is turned on, the flaps of the indoor unit open and close once to set the reference position.
•When replacing the batteries, use batteries of the same type, and replace both old batteries together.
•The batteries will last for about 1 year. If the remote controller display begins to fade and the possible transmission range becomes shorter within a year, however, replace both batteries with new, size AAA.LR03 (alkaline).
•The batteries supplied with the remote controller are for initial operation.The batteries may run out in less than 1 year.
Note on remote controller
• Do not drop the remote controller. Do not get it wet.
9

Read Before Operation
<![if ! IE]><![endif]>English
To set the clock
1. Press  .
.
“ 


 ” is displayed on the LCD. “
 ” and “
  ” blink.
2. Press  to set the current day of the week.
3. Press  .
.
“  ” blinks.
4. Press  to set the clock to the present time.
• Holding down or
or rapidly increases or decreases the displayed time.
5. Press  .
.
•Point the remote controller at the indoor unit when pressing the buttons. 


 “
“  ” blinks.
NOTE
Note on setting the clock
• If the indoor unit’s internal clock is not set to the correct time, the ON/OFF TIMER and WEEKLY TIMER will not operate punctually.
10
Basic Operation

 AUTO · DRY · COOL · HEAT · FAN
Operation
The air conditioner operates with the operation mode of your choice.
From the next time on, the air conditioner will operate with the same operation mode.
To start operation
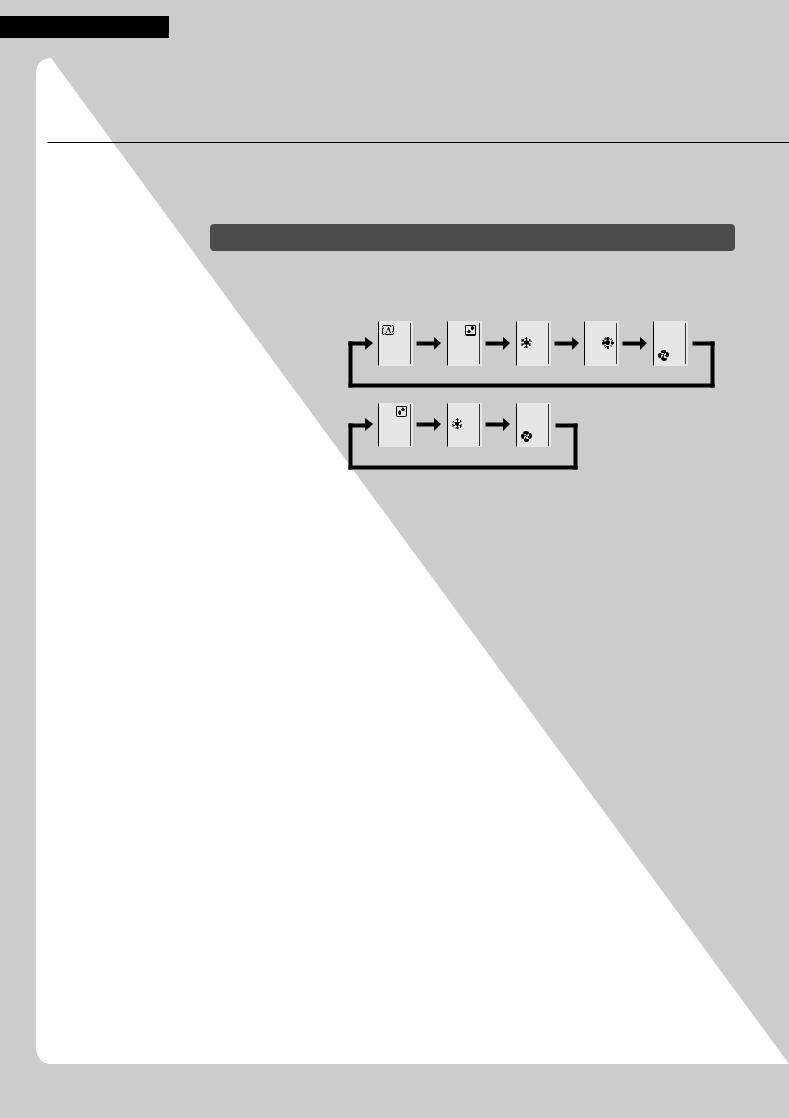
1. Press  and select a operation mode.
• Each pressing of the button changes the mode setting in sequence.
HEAT PUMP |
|
|
|
|
|
model |
AUTO |
DRY |
COOL |
HEAT |
FAN |
COOLING ONLY |
|
|
|
model |
DRY |
COOL |
FAN |
2. Press  .
.
• “  ” is displayed on the LCD.
• The OPERATION lamp lights green.
Display
To stop operation
 Press
Press  again.
•“  ” disappears from the LCD.
•The OPERATION lamp goes off.
NOTE
Notes on AUTO operation
•In AUTO operation, the system selects an appropriate operation mode (COOL or HEAT) based on the indoor temperature and starts the operation.
•The system automatically reselects setting at a regular interval to bring the indoor temperature to the user-setting level.
Note on DRY operation
•Eliminates humidity while maintaining the indoor temperature as much as possible. It automatically controls temperature and airfl ow rate, so manual adjustment of these functions is unavailable.
11

Basic Operation
<![if ! IE]><![endif]>English
To change the temperature setting
 Press
Press  .
.
• Press to raise the temperature and press
 to lower the temperature.
COOL operation |
HEAT operation |
AUTO operation |
DRY or FAN operation |
|
|
|
|
|
|
18 – 32°C |
10 – 30°C |
18 – 30°C |
The temperature setting cannot be |
|
changed. |
||||
|
|
|
||
|
|
|
|
Tips for saving energy
Keeping the temperature setting at a moderate level helps save energy.
•Recommended temperature setting
−For cooling: 26-28°C
−For heating: 20-24°C
Cover windows with a blind or a curtain.
• Blocking sunlight and air from outdoors increases the cooling (heating) effect.
Keep the air fi lters clean.
• Clogged air fi lters cause ineffi cient operation and waste energy. Clean them once in about every 2 weeks.  Page 29
If you are not going to use the air conditioner for a long period, for example in spring or autumn, turn off the circuit breaker.
• The air conditioner always consumes a small amount of electricity even while it is not operating.
12
Basic Operation
 Adjusting the Airfl ow Direction
You can adjust the airfl ow direction to increase your comfort.
 CAUTION
• Always use a remote controller to adjust the angles of the fl aps and louvres.
− If you attempt to move the fl aps and louvres forcibly by hand when they are swinging, the mechanism may be damaged.
− Inside the air outlet, a fan is rotating at a high speed.
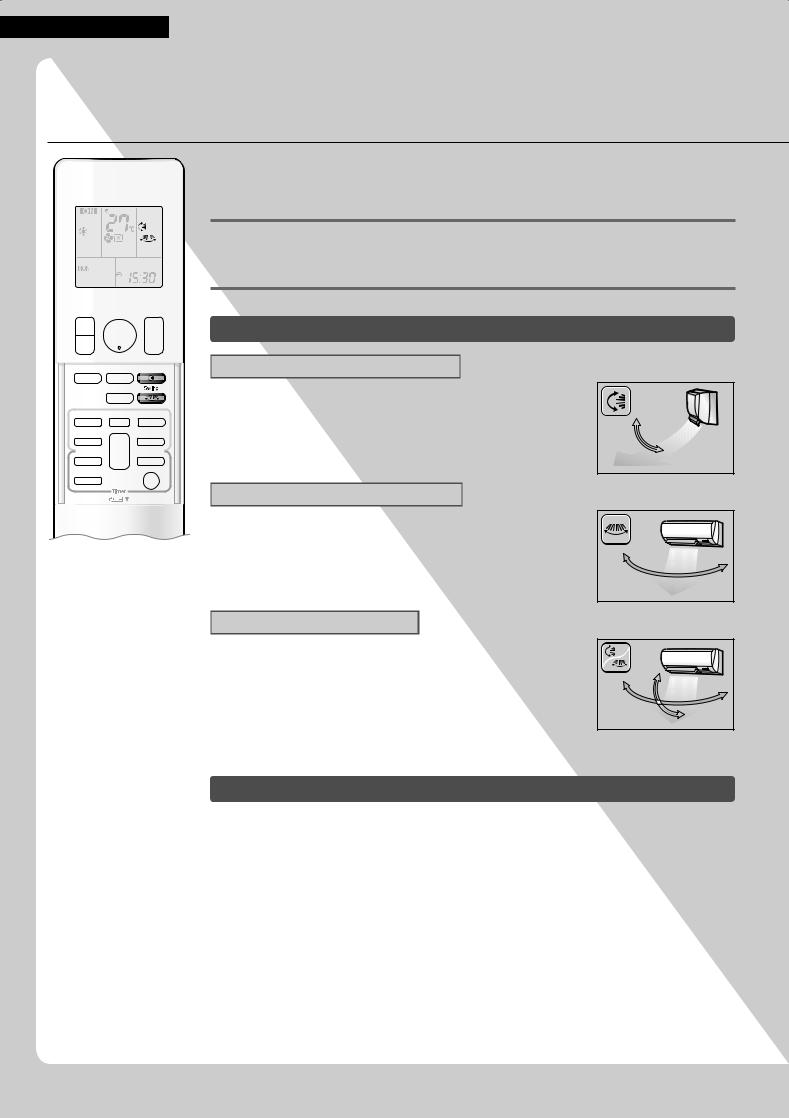
To start auto swing
Up and down airfl ow direction
 Press
Press  .
.
• “  ” is displayed on the LCD.
• The fl aps (horizontal blades) will begin to swing.
Right and left airfl ow direction
 Press
Press  .
.
• “  ” is displayed on the LCD.
• The louvres (vertical blades) will begin to swing.
The 3-D airfl ow direction
 Press
Press  and
and  .
.
• “  ” and “
  ” are displayed on the LCD.
• The fl aps and louvres move in turn.
•To cancel 3-D airfl ow, press either  or
or  again. The fl aps or louvres will stop moving.
To set the fl aps or louvres at the desired position
• This function is effective while the fl aps or louvres are in auto swing mode.
 Press
Press  and
and  when the fl aps or louvres reach the desired position.
•In the 3-D airfl ow, the fl aps and louvres move in turn.
•“  ” or “
  ” disappears from the LCD.
13

 Adjusting the Airfl ow Rate
Basic Operation
<![if ! IE]><![endif]>English
You can adjust the airfl ow rate to increase your comfort.
To adjust the airfl ow rate setting
 Press
Press  .
.
• Each pressing of  changes the airfl ow rate setting in sequence.
|
|
|
|
|
|
|
|
|
|
|
|
|
|
|
|
|
|
|
|
|
|
|
|
|
|
|
|
|
|
|
|
|
|
|
|
|
|
|
|
|
|
|
|
|
|
|
|
|
|
|
|
|
|
|
|
|
|
|
|
|
|
|
|
|
|
|
|
|
|
|
|
|
|
|
AUTO |
|
|
Indoor unit quiet |
|
|
Airflow rate 1-5 (Low to High) |
||||||||||||||||||
• When the airfl ow is set to “  ”, quiet operation starts and noise from the indoor unit will become quieter.
• In the quiet operation mode, the airfl ow rate is set to a weak level.
AUTO, COOL, HEAT and FAN operation |
DRY operation |
The airfl ow rate setting cannot be changed.
NOTE |
|
|
Note on airfl ow direction setting |
Movable range of the flaps |
|
• The movable range of the fl aps varies according to the operation mode. |
|
|
|
|
|
|
COOL / DRY |
|
|
FAN |
HEAT |
Note on 3-D airfl ow |
|
|
•Using 3-D airfl ow circulates cold air, which tends to collected at the bottom of the room, and hot air, which tends to collect near the ceiling, throughout the room, preventing areas of cold and hot developing.
Note on airfl ow rate setting
• At smaller airfl ow rates, the cooling (heating) effect is also smaller.
14
Useful Functions
COMFORT AIRFLOW /
 INTELLIGENT EYE Operation
COMFORT AIRFLOW operation: The airfl ow direction is upward while in COOL operation, and downward while in HEAT operation.This function prevents cold or warm air from blowing directly on the occupants in the room.
INTELLIGENT EYE operation: The INTELLIGENT EYE sensor detects human movement. If no one is in the room for more than 20 minutes, the operation automatically changes to energy saving operation.
 CAUTION
• Do not place large objects near the INTELLIGENT EYE sensor. Also keep heating units and humidifi ers outside the sensor’s detection area.This sensor can detect undesirable objects.
• Do not hit or violently push the INTELLIGENT EYE sensor.This can lead to damage and malfunction.
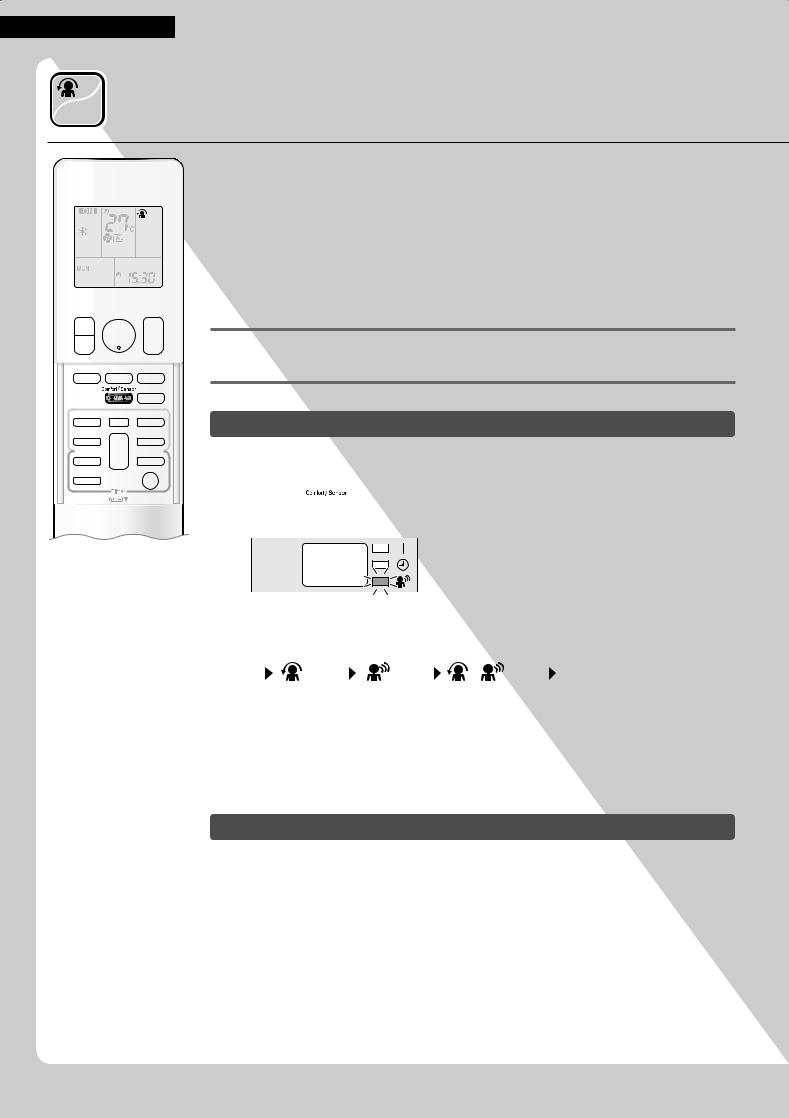
To start operation
 Press
Press 

 and select the desired mode.
• Each time  is pressed, a different setting option is displayed on the LCD.
• The INTELLIGENT EYE lamp lights green.
Display
•By selecting “ 
 ” from the following icons, the air conditioner will switch to COMFORT AIRFLOW operation combined with INTELLIGENT EYE operation.
|
|
|
|
|
|
|
|
blank |
|
|
|
|
|
|
|
|
|
|
|
COMFORT |
INTELLIGENT |
Combination |
No Setting |
||||||
AIRFLOW |
|
EYE |
|
|
|
|
|||
|
|
|
|
|
|
|
|
|
|
•When the fl aps (horizontal blades) are swinging, selecting any of the modes above will cause the fl aps (horizontal blades) to stop.
•The lamp lights when human movement is detected.
To cancel operation
 Press
Press 

 until no icon is displayed.
• The INTELLIGENT EYE lamp goes off.
15
Useful Functions
<![if ! IE]><![endif]>English
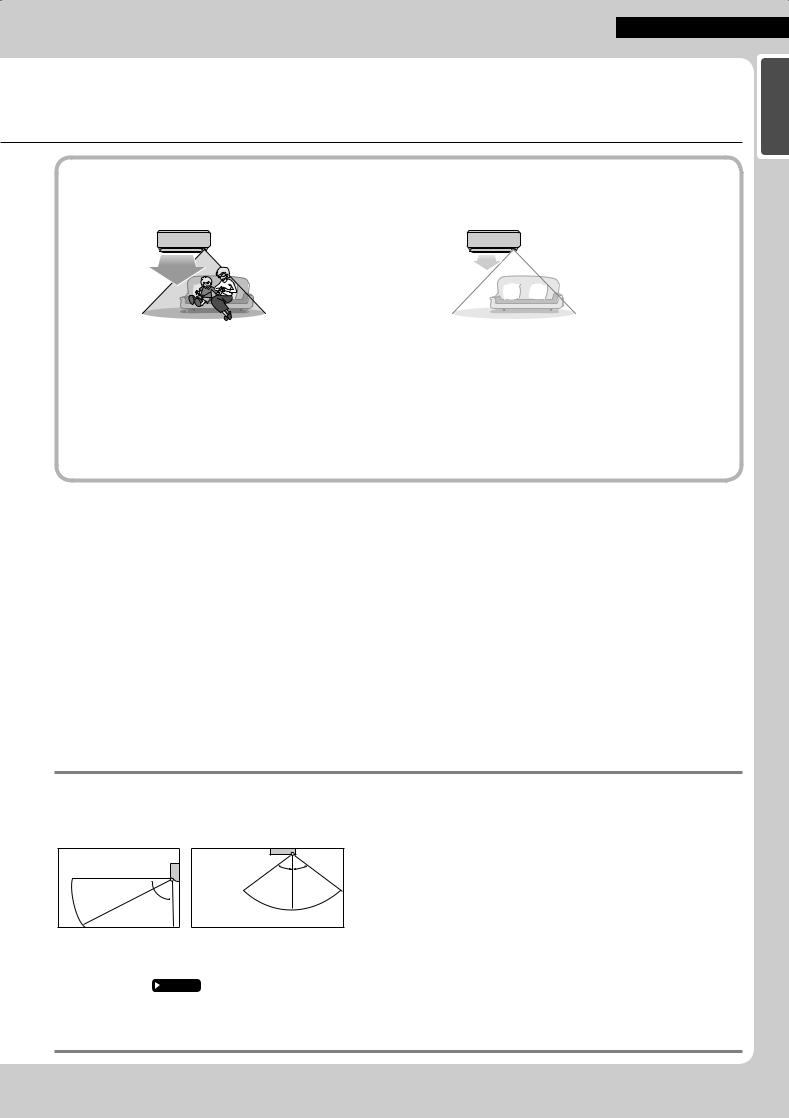
INTELLIGENT EYE operation is useful for energy saving
People is detected in the sensing area. |
No people are detected in the sensing area. |
||||
|
|
|
|
|
|
|
|
|
|
|
|
The air conditioner is in normal operation while the sensor is detecting human movement.
Energy saving operation
The air conditioner will switch to energy-saving mode after 20 minutes.
•If no presence detected in the room for 20 minutes, energy saving operation starts automatically.
•This operation changes the temperature by –2°C in HEAT / +2°C in COOL / +2°C in DRY operation from the set temperature.
When the room temperature exceeds 30°C, the operation changes the temperature by +1°C in COOL / +1°C in DRY operation from the set temperature.
•This operation decreases the airflow rate slightly in FAN operation only.
NOTE
Note on COMFORT AIRFLOW operation
• The airflow rate will be set to AUTO. If the up and down airflow direction is selected, COMFORT AIRFLOW operation will be cancelled.
Notes on INTELLIGENT EYE operation
• Application range is as follows.
Vertical angle 90° |
|
(Side view) |
|
7m |
90° |
Horizontal |
|
|
|
angle 110° |
55° |
55° |
|
(Top view) |
|||
| <![if ! IE]> <![endif]>7m |
|
||
|
|
•The sensor may not detect moving objects further than 7m away. (Please see the application range)
•Sensor detection sensitivity changes according to the indoor unit location, the speed of passers-by, temperature range, etc.
•The sensor could also mistakenly detect pets, sunlight, fluttering curtains and light reflected off of mirrors as passers-by.
• NIGHT SET mode Page 20 will not switch on during use of INTELLIGENT EYE operation.
Note on combination of COMFORT AIRFLOW operation and INTELLIGENT EYE operation
•The airflow rate will be set to AUTO. If the up and down airflow direction is selected, COMFORT AIRFLOW operation will be canceled. Priority is given to the function of whichever button is pressed last.
16
Useful Functions
 POWERFUL Operation
POWERFUL operation quickly maximizes the cooling (heating) effect in any operation mode. In this mode, the air conditioner operates at maximum capacity.
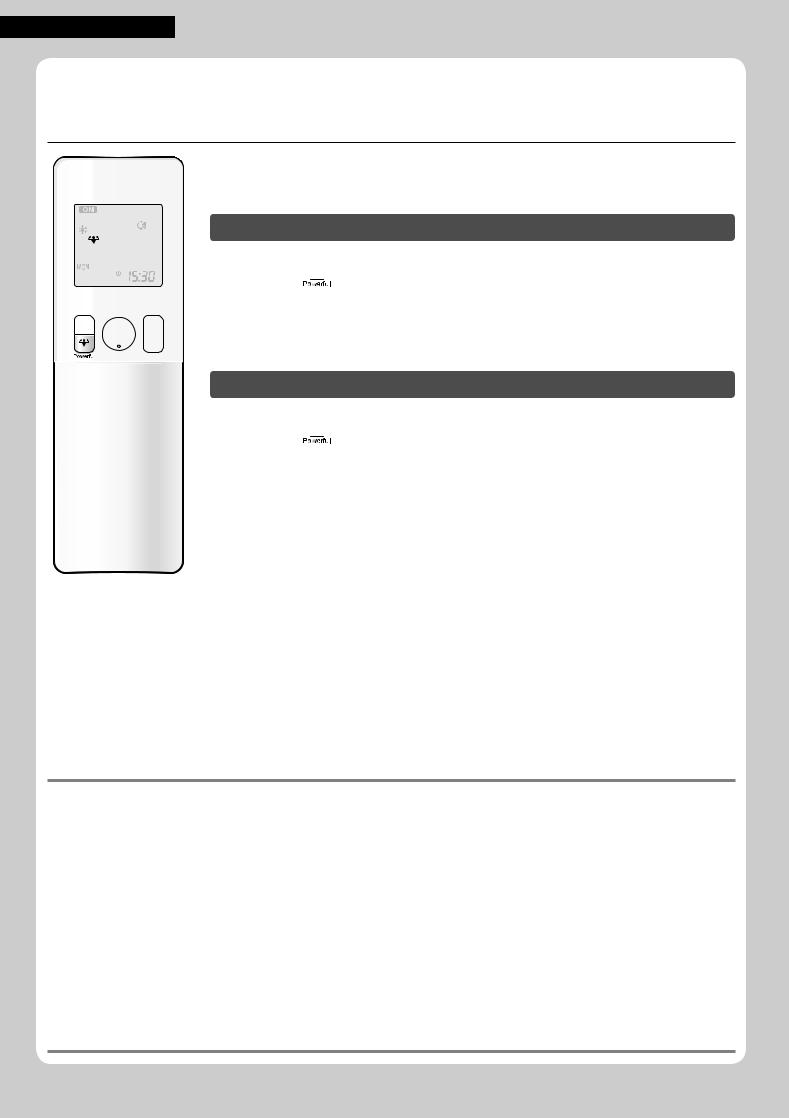
To start POWERFUL operation
 Press
Press  during operation.
•“  ” is displayed on the LCD.
•POWERFUL operation ends in 20 minutes.Then the system automatically operates again with the previous settings which were used before POWERFUL operation.
To cancel POWERFUL operation
 Press
Press  again.
• “  ” disappears from the LCD.
NOTE
Notes on POWERFUL operation
•Pressing  causes the settings to be cancelled, and “
  ” disappears from the LCD.
•POWERFUL operation will not increase the capacity of the air conditioner if the air conditioner is already in operation with its maximum capacity demonstrated.
−In COOL, HEAT and AUTO operation
To maximize the cooling (heating) effect, the capacity of outdoor unit increases and the airfl ow rate becomes fi xed at the maximum setting. The temperature and airfl ow settings cannot be changed.
−In DRY operation
The temperature setting is lowered by 2.5°C and the airfl ow rate is slightly increased.
−In FAN operation
The airfl ow rate is fi xed at the maximum setting.
Regarding the combination of POWERFUL and other operations
POWERFUL + COMFORT AIRFLOW |
|
|
POWERFUL + ECONO |
Not available* |
|
|
|
|
POWERFUL + OUTDOOR UNIT QUIET |
|
*Priority is given to the function of whichever button is pressed last. |
|
|
17
ECONO / OUTDOOR UNIT QUIET
 Operation
Useful Functions
<![if ! IE]><![endif]>English
ECONO operation enables efficient operation by limiting the maximum power consumption.
This function is useful to prevent the circuit breaker from tripping when the unit operates alongside other appliances on the same circuit.
OUTDOOR UNIT QUIET operation lowers the noise level of the outdoor unit by changing the frequency and fan speed of the outdoor unit.This function is convenient during the night-time operation.
To start operation
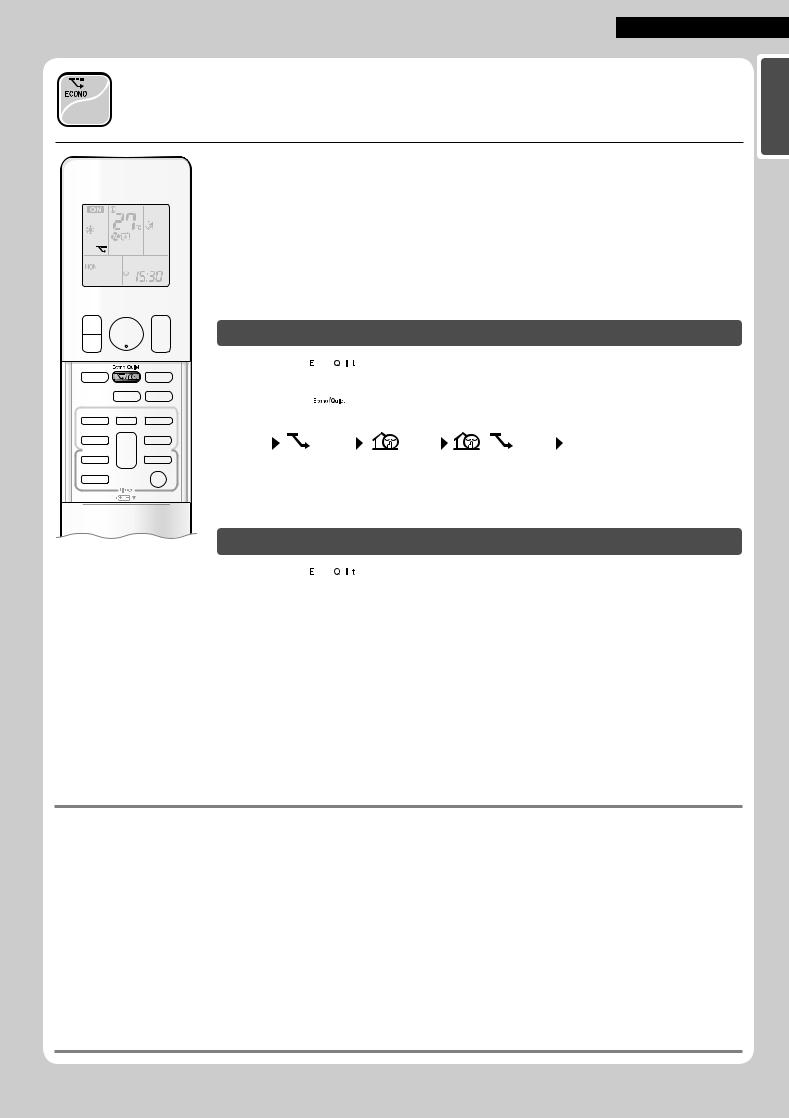
 Press
Press  and select the desired mode.
• Each time  is pressed, a different setting option is displayed on the LCD.
|
|
|
|
|
|
|
|
|
|
|
blank |
|
|
|
|
|
|
|
|
|
|
|
|
|
|
|
ECONO OUTDOOR UNIT Combination |
No Setting |
||||||||||
|
|
|
|
|
QUIET |
|
|
|
||||
|
|
|
|
|
|
|
|
|
|
|
|
|
To cancel operation
 Press
Press  until no icon is displayed.
NOTE
Notes on ECONO operation
•Pressing  causes the settings to be cancelled, and “
  ” disappears from the LCD.
•If the power consumption level is already low, switching to ECONO operation will not reduce the power consumption.
Notes on OUTDOOR UNIT QUIET operation
•Even if the operation is stopped by using the remote controller or the indoor unit ON/OFF switch when using OUTDOOR UNIT QUIET operation, “  ” will remain lit on the remote controller display.
•OUTDOOR UNIT QUIET operation will not reduce the frequency nor fan speed if they already are operating at reduced levels.
•This operation is performed with lower power and therefore may not provide a suffi cient cooling (heating) effect.
Possible combinations of ECONO / OUTDOOR UNIT QUIET operation and basic operations
Operation mode
AUTO |
DRY |
COOL |
HEAT |
FAN |
ECONO
OUTDOOR UNIT QUIET
18
TIMER Operation
 ON/OFF TIMER Operation
Timer functions are useful for automatically switching the air conditioner on or off at night or in the morning.You can also use the ON TIMER and OFF TIMER together.
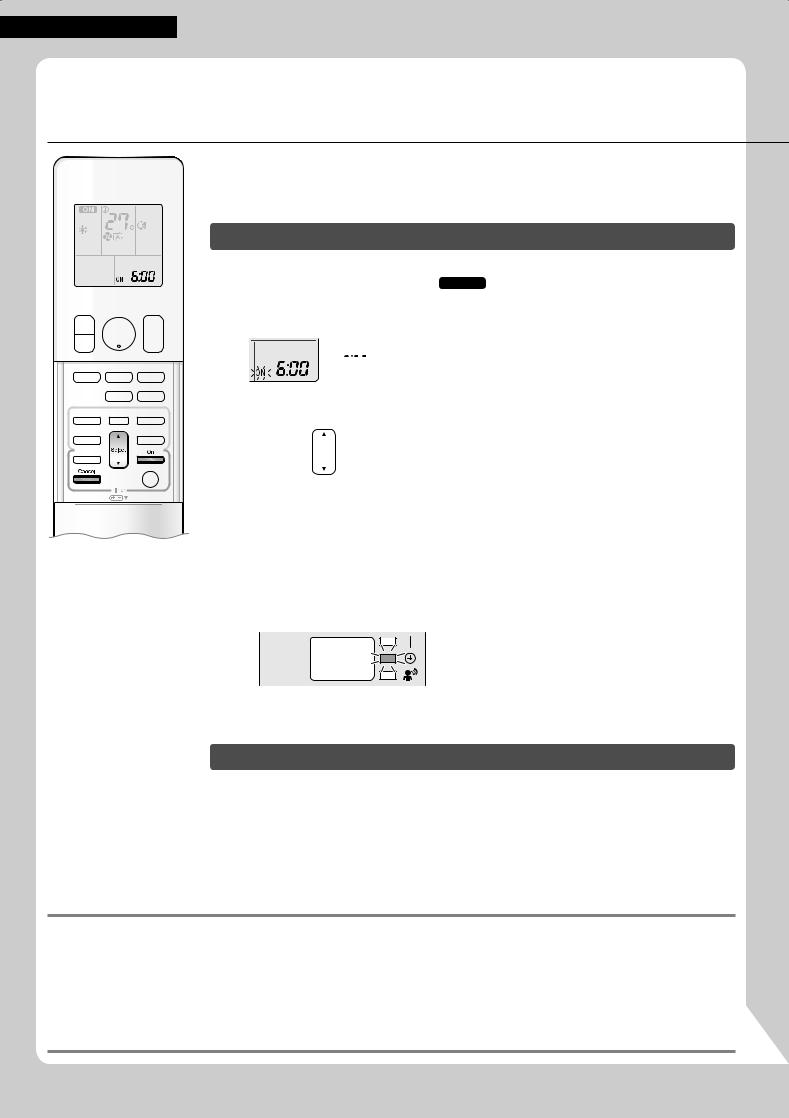
To use ON TIMER operation
• Check that the clock is correct.
If not, set the clock to the present time.  Page 10
1. Press  .
.
“ 


 ” is displayed on the LCD. “
  ” blinks.
• “  ” and day of the week disappear from the LCD.
2. Press  until the time setting reaches the point you like.
•Each pressing of either button increases or decreases the time setting by 10 minutes. Holding down either button changes the setting rapidly.
3.Press  again.
•“  ” and setting time are displayed on the LCD.
•The TIMER lamp lights orange.
Display
To cancel ON TIMER operation
 Press
Press  .
.
•“  ” and setting time disappear from the LCD.
•“  ” and day of the week are displayed on the LCD.
•The TIMER lamp goes off.
NOTE
Notes on TIMER operation
•When TIMER is set, the present time is not displayed.
•When operating the unit via the ON/OFF TIMER, the actual length of operation may vary from the time entered by the user. (Maximum about 10 minutes)
In the following cases, set the timer again.
•After the circuit breaker has turned off.
•After a power failure.
•After replacing the batteries in the remote controller.
19

TIMER Operation
<![if ! IE]><![endif]>English
To use OFF TIMER operation
•Check that the clock is correct.
If not, set the clock to the present time.  Page 10
1. Press  .
.
“ 


 ” is displayed on the LCD. “
 ” blinks.
• “  ” and day of the week disappear from the LCD.
2. Press  until the time setting reaches the point you like.
•Each pressing of either button increases or decreases the time setting by 10 minutes. Holding down either button changes the time setting rapidly.
3. Press  again.
•“ 
 ” and setting time are displayed on the LCD.
•The TIMER lamp lights orange.
Display
To cancel OFF TIMER operation
 Press
Press  .
.
•“ 
 ” and setting time disappear from the LCD.
•“  ” and day of the week are displayed on the LCD.
•The TIMER lamp goes off.
To combine ON TIMER and OFF TIMER operation
• A sample setting for combining the 2 timers is shown below.
(Example)
Present time: 23:00 (The unit operating)
OFF TIMER at 0:00 Combined
ON TIMER at 14:00
NOTE
NIGHT SET mode
•When the OFF TIMER is set, the air conditioner automatically adjusts the temperature setting (0.5°C up in COOL, 2.0°C down in HEAT) to prevent excessive cooling (heating) during sleeping hours.
20
TIMER Operation
 WEEKLY TIMER Operation
Up to 4 timer settings can be saved for each day of the week.This is convenient to adapt the WEEKLY TIMER to your family’s life style.
Setting example of theWEEKLYTIMER
The same timer settings are used from Monday through Friday, while different timer settings are used for the weekend.
[Monday] |
Make timer settings for programmes 1-4. |
Page 22 |
|
|
|
|
|
|||||||||
|
Programme 1 |
|
Programme 2 |
|
Programme 3 |
|
|
Programme 4 |
||||||||
|
|
ON |
|
|
OFF |
|
|
ON |
|
|
OFF |
|||||
|
|
|
|
|
25°C |
|
|
|
|
|
|
27°C |
|
|
|
|
|
|
|
|
|
|
|
|
|
|
|
|
|
|
|
|
|
|
|
6:00 |
8:30 |
|
17:30 |
|
22:00 |
|
||||||||
ON |
OFF |
ON |
OFF |
[Tuesday] |
Use the copy mode to make settings for Tuesday to Friday, because these settings are the same as |
|||||||||||||||
to |
those for Monday. |
Page 24 |
|
|
|
|
|
|
|
|
|
|
||||
[Friday] |
Programme 1 |
Programme 2 |
|
Programme 3 |
|
Programme 4 |
||||||||||
|
|
|
||||||||||||||
|
|
ON |
|
OFF |
|
|
ON |
|
OFF |
|||||||
|
|
|
|
25°C |
|
|
|
|
|
|
27°C |
|
|
|
|
|
|
|
|
|
|
|
|
|
|
|
|
|
|
|
|
|
|
|
|
6:00 |
8:30 |
|
|
|
17:30 |
|
|
|
22:00 |
|
||||
|
|
|
|
|
|
|
|
|
|
|
|
|
|
|
|
|
[Saturday] |
No timer settings |
|
|
|
|
|
|
|
|
|
|
|
|
|
||
|
|
|
|
|
|
|
|
|
|
|
|
|
|
|
|
|
[Sunday] |
Make timer settings for programmes 1-4. |
Page 22 |
|
|
|
|
|
|
|
|
||||||
|
|
|
|
Programme 1 Programme 2 |
|
Programme 3 |
Programme 4 |
|||||||||
|
|
|
|
ON |
OFF |
|
OFF |
ON |
||||||||
|
|
|
|
|
|
|
|
|
|
|
|
|
|
|
|
|
|
|
|
|
|
25°C |
|
|
27°C |
|
|
|
|
27°C |
|
||
|
|
|
|
8:00 |
|
10:00 |
19:00 |
|
21:00 |
|
|
|||||
ON |
OFF |
OFF |
ON |
•Up to 4 reservations per day and 28 reservations per week can be set using the WEEKLY TIMER.The effective use of the copy mode simplifies timer programming.
•The use of ON-ON-ON-ON settings, for example, makes it possible to schedule operating mode and set temperature changes. Furthermore, by using OFF-OFF-OFF-OFF settings, only the turn off time of each day can be set.This will turn off the air conditioner automatically if you forget to turn it off.
21

TIMER Operation
<![if ! IE]><![endif]>English
To use WEEKLY TIMER operation
Setting mode
•Make sure the day of the week and time are set. If not, set the day of the week and time.  Page 10
Programme 1 |
Programme 2 |
Programme 3 |
|
Programme 4 |
|
ON |
|
OFF |
ON |
|
OFF |
[Monday] |
25°C |
|
27°C |
|
|
6:00 |
|
8:30 |
17:30 |
|
22:00 |
Setting Displays |
|
|
|
|
|
Day and number |
|
ON/OFF |
|
Time |
Temperature |
1. Press |
. |
|
|
|
|
•The day of the week and the reservation number of the current day will be displayed.
•1 to 4 settings can be made per day.
2.Press  to select the desired day of the week and reservation number.
• Pressing  changes the reservation number and the day of the week.
3. Press  .
.
• The day of the week and reservation number will be set.
• “  ” and “
  ” blink.
4. Press  to select the desired mode.
• Pressing  changes the “
  ” or “
 ” setting in sequence.
blank
ON TIMER |
OFF TIMER |
No Setting |
•In case the reservation has already been set, selecting “ blank ” deletes the reservation.
•Proceed to STEP 9 if “ blank ” is selected.
• To return to the day of the week and reservation number setting, press  .
.
5. Press  .
.
•The ON/OFF TIMER mode will be set.
•“  ” and the time blink.
22
 Loading...