


PS 3005 D
PROGRAMMAB LE DC LAB POWER S UPPLY 0-30V/5A – DUAL LED DISP LAY
LABORATORIU MVOEDING 0-30V / 5A – DUB BELE LED DISPLAY ALIM ENTATION DE LABO RATOIRE 0-30V / 5 A –
DOUB LE AFFIC HEUR LED
FUENTE DE ALIMENTACIÓN PARA LABORAT ORIO 0-3 0V / 5A – DOBLE DISPLAY LED
LABORNETZGE RÄT 0-30V / 5A – L ED-DOPPE LANZEIGE
USER MANUAL |
3 |
GEBRUIKERSHAND LEIDING |
10 |
MODE D’EMPLOI |
17 |
MANUA L DEL USUA RIO |
24 |
BEDIE NUNGSANLEITUNG |
31 |

PS3005D
V. 01 – 06/08/2012 |
2 |
©Velleman nv |
|
|
|

PS300 5D
USER M ANUAL
1.I ntroduction
To all residents of the European Union
Importa nt environmental information about this product
This symbol on the device or the package indicates that disposal of the de vice after its life cycle could harm th e environment. Do not dispose of the unit (or batteries) as unsorted munici pal waste; it shou ld be taken to a specialized company for recycling. This device should be returned to y our distributor o r to a local rec ycling service. R espect the loca l environmental rules.
If in doubt, contact your l ocal waste disposal authori ties.
Thank yo u for choosing Velleman! Plea se read the ma nual thoroughly before bringing this device into service. If the device wa s damaged in transit, don't ins tall or use it an d contact your dealer.
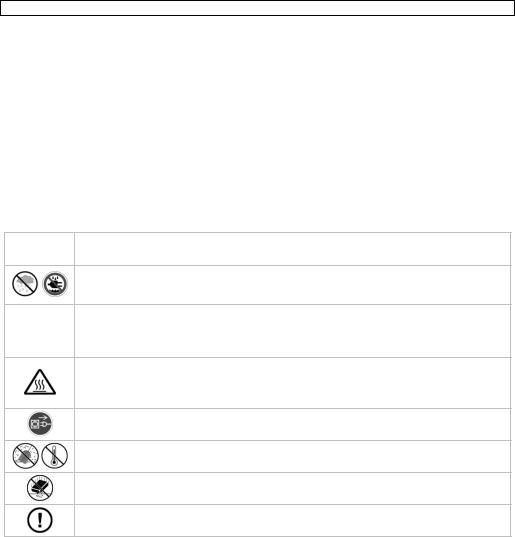
2.Safety Instructions
Keep this device away from children an d unauthorized users.
Indoor u se only. Keep this device awa y from rain, m oisture, splashi ng and dripping liquids. Never put objects filled with liqu ids on top of o r close to the d evice.
DO NOT disassemble or open the cover under any circumstances. Tou ching live wire s can cause life-threatening electroshocks. Th ere are no user -serviceable pa rts inside the device. Refer to an auth orized dealer for service and/or spare parts.
Always c onnect the device to an earthe d power socket.
Caution: device heats up during use. M ake sure the v entilation openi ngs are clear at all times. For sufficient air c irculation, leave at least 1” (±2.5 cm) in front of the opening s. Place the device on a flat, heat resistant surface, do no t place the device on carpets, fabrics…
Always di sconnect mains power when device not in use or when servic ing or maintenance activities are performed. Handle the po wer cord by the plug only.
Keep this device away from dust and ex treme temperatures.
Protect t is device from shocks and abu se. Avoid brute force when operating the device.
Do not u se the device when damage to housing or cables is noticed. D o not attempt t o service th e device yourself but contact an authorised dealer.
3.General Guidelines
Refer to the Velleman® Service and Quality Warranty on the last pages of this m anual.
• |
Familiarise yourself with the functio ns of the device before actually using it. |
• |
All m odifications of the device are forbidden for safety reasons. Damage caused by user modifications |
|
to the device is not covered by the warranty. |
• |
Only use the device for its intended purpose. Usin g the device in an unauthorised way will void t he |
|
warranty. |
•Damage caused by disregard of certain guidelines in this manual is not covered b y the warranty and
the d ealer will not accept responsibility for any ens uing defects or problems.
• Keep this manual for future reference.
V. 01 – 0 6/08/2012 |
3 |
©Velleman nv |
|
|
|

PS300 5D
4.Features
•dual LED display for voltage and current
• coar se and fine adju stments of voltage and current
•prote ction mode: vo ltage or current limiting
•outp ut connectors: 4mm banana plug
• organic glass front p anel / other panels made of steel
•mem ory: 5 program mable memori es
• com puter connectivity: pc remote c ontrol via USB or RS232
•softw are included for Windows XP, Vista and W7
•fuseprotected
•colou r: white-grey.
5.Description
The PS3 |
005D is a highly accurate, DC-r egulated powe r supply with an adjustable output. This output can |
be used |
for constant voltage (C.V.) and constant current (C.C.). |
The output voltage can be adjusted between 0V and 30V when the device is in the co nstant voltage mode. T he current-limiting point can be set arbitrarily in this mode.
The output current can be adjusted con tinuously betw een 0A and 5A i n the constant current mode. The output current and voltage are indicated on the LE D displays.
Refer to the illustrations on page 2 of this manual.
1 |
Off/On: output on/off |
13 |
M1-M5 indicator: active |
memory |
2 |
OVP: overvoltag e protection on/ off |
14 |
Adjust: adjustment kn |
b for voltage and |
|
|
|
current; selection of memory 5 |
|
|
|
|
|
|
3 |
OCP/Beep: over current protection / key |
15 |
< >: digit selection but ons for coarse/fine |
|
|
tones on/off |
|
tuning of voltage and cu rrent |
|
4 |
L ock/Unlock: lock/unlock panel keys |
16 |
Voltage/Current: select between voltage |
|
|
|
|
or curren t for adjustme nt |
|
5 |
M1-M4: memory save / recall |
17 |
Earth (gr ound) terminal, connected to the |
|
|
|
|
chassis a nd earth pin of the power sup ply |
|
|
|
|
socket |
|
6 |
C urrent display ( ampere) |
18 |
Output t erminals |
|
7 |
V oltage display ( volt) |
19 |
Power: on/off button |
|
|
|
|
|
|
8 |
OVP indicator: o vervoltage prot ection is |
20 |
RS232 port for remote c ontrol via pc |
|
|
ac tive |
|
|
|
9 |
OCP indicator: o vercurrent prot ection is |
21 |
USB port (type B) for remote control via pc |
|
|
ac tive |
|
|
|
10 |
C C indicator: constant current m ode |
22 |
Fan |
|
|
|
|
|
|
11 |
C V indicator: constant voltage m ode |
23 |
Power su pply socket |
|
|
|
|
|
|
12 |
OUT indicator: o utput is on |
24 |
Fuse hol der |
|
6.Operation
Switchi ng the Power Supply On or Off
1.Connect the includ ed power cord to the back of t he device [23] and plug the other end into a suitable, earthed power socket.
Always conne ct the device t o an earthed power socket.
2.Pre ss the Power button [19] to switch the power supply on.
The power supply a utomatically recalls the settin gs from memory 1. (See Setti ng Voltage and Current for more information.) Th e display shows the existing settings, the M1 indicator [13] lights.
At this moment, there is no output voltage or current on the output terminals.
V. 01 – 0 6/08/2012 |
4 |
©Velleman nv |
|
|
|

PS3005D
3.Press the Power button [19] to switch the power supply off.
Using the Power Supply in Constant Voltage Mode
If you want to use the power supply in constant voltage mode, you set up the desired output voltage between 0V and 30V. You also set up the desired current limit.
If the output current exceeds the limit, the power supply automatically goes into constant current mode.
Using the Power Supply in Constant Current Mode
If you want to use the power supply in constant current mode: you set up the desired output current between 0A and 5A. You also set up the desired voltage limit.
Setting Voltage and Current
You can save 4 different voltage/current settings using the memory keys M1~M4.
1.Press the memory key [5] of the memory for which you want to define the settings. The corresponding indicator M1~M4 [13] lights and the existing settings for voltage and current are displayed.
2.Press the Voltage/Current key [16] to set the voltage. The voltage readout flashes.
oFor use in constant voltage mode: this is the desired constant voltage.
oFor use in constant current mode: this is the desired voltage limit.
oIf you enable overvoltage protection, the output switches off automatically if the voltage exceeds this value.
3.Turn the adjustment knob [14] until you reach approximately the desired voltage. Press < or > [15] to select a digit in the voltage readout [7] and turn the adjustment knob to fine-tune.
4.Press the Voltage/Current key [16] again to set the current. The current readout flashes.
oFor use in constant voltage mode: this is the desired current limit.
o For use in constant current mode: this is the desired constant current.
oIf you enable overcurrent protection, the output switches off automatically if the current exceeds this value.
5.Turn the adjustment knob [14] until you reach approximately the desired current. Press < or > [15] to select a digit in the current readout [6] and turn the adjustment knob to fine-tune.
6.Press the memory key again (or wait until the display stops flashing). The settings are saved in the selected memory.
Recalling Settings
To recall one of the saved settings, press the corresponding memory key M1~M4 [5]. The corresponding indicator M1~M4 [13] lights and the corresponding voltage/current settings appear on the display.
Note: the output is switched off automatically when you press a memory key to recall a setup.
Using Memory 5
To use memory 5, proceed as follows:
1.Press memory key 4 and turn the adjustment knob until indicator M5 lights.
2.Set the voltage and current as desired. Wait until the display stops flashing. The settings are automatically stored in memory 5.
3.To recall the settings, press memory key 4 and turn the adjustment knob again until indictor M5 lights.
Connecting a Load
1.Connect the load’s positive terminal to the red + terminal [18] of the power supply.
2.Connect the load’s negative terminal to the black – terminal [18] of the power supply.
3.You can connect the + or – terminal to the green earth terminal [17] of the power supply to pin the voltage to 0V (earth potential) at that terminal.
If you leave the earth terminal unconnected, the output floats with respect to the ground.
Applying Voltage to the Load
1.Press the Off/On key [1] to apply the voltage to the load.
The OUT [12] and C.V. indicators [11] light. The power supply works in constant voltage (CV) mode; the display now shows the actual output voltage and current.
If the current exceeds the set current limit, the power supply automatically goes into constant current (CC) mode. The C.V. indicator goes out and the C.C. indicator [10] lights.
2.Press the Off/On key [1] to switch the output off.
V. 01 – 06/08/2012 |
5 |
©Velleman nv |
|
|
|

PS3005D
7.Panel Keys
Locking the Panel
To prevent unwanted operation of the panel keys, you can lock the front panel.
1.Press and hold the Lock/Unlock key [4] for about 2 seconds. You hear a short tone. The keys are now locked.
2.To unlock the panel, press and hold the button again. You hear a short tone.
Key Tones
Each time you press a key on the front panel, you hear a tone.
1.To switch off the tone, press and hold the OCP/Beep key [3] for about 2 seconds.
2.To switch the tone on again, press and hold the OCP/Beep key [3] for about 2 seconds.
8.Protection
Using Overvoltage Protection
1.To protect against overvoltage, set up the maximum voltage and then press the OVP button. The OVP indicator lights.
2.Press Off/On to apply the output to the load.
If the output voltage becomes higher than the set value, the power supply cuts off the output and the OVP indicator flashes.
3.Disconnect the load.
4.To recover, press the OVP key.
Using Overcurrent Protection
1.To protect against overcurrent, set up the maximum current and then press the OCP button. The OCP indicator lights.
2.Press Off/On to apply the output to the load.
If the output current becomes higher than the set value, the power supply cuts off the output and the OCP indicator flashes.
3.Disconnect the load.
4.To recover, press the OCP key.
9. Troubleshooting
• Nothing happens when you press the panel keys.
The keys are locked. Press and hold the Lock/Unlock key [4] about 2 seconds. You hear a tone when they keys are unlocked.
• Power is on and output is switched on, but there is no output. The load is not properly connected, or the current setup is 0.
• The output voltage rises slowly when the output is switched on. The current setup is too small.
10. Remote Control via PC
To operate the power supply via the included pc software, proceed as follows:
1.Install the software on your pc and launch the software.
2.Connect the power supply to the pc via the USB [21] or RS232 [20] port and switch it on.
The power supply connects automatically to the software. When connection is successful, you hear a tone. On the pc, the communication status [K] is indicated.
Note: the keys on the front panel are locked when the power supply is connected to a pc. You can only operate the power supply via the pc. The LED display and indicators work normally.
V. 01 – 06/08/2012 |
6 |
©Velleman nv |
|
|
|

PS3005D
Main Screen
The main screen of the remote control software:
A |
Current adjustment |
G |
Current graph: shows the current over time |
B |
Current display (ampere) |
H |
Log |
C |
Voltage adjustment |
I |
Output off |
|
|
|
|
D |
Voltage display (volt) |
J |
Output on |
E |
Overcurrent protection |
K |
Communication status |
F |
Voltage graph: shows the voltage over time |
|
|
|
|
|
|
Setting Voltage and Current
To set the voltage and current [A,C] you can:
•select a value from the list
•drag the sliders. Tip: you can click on the slider and use the scroll wheel of your mouse. The set value appears in the box to the right of the slider.
Applying Voltage to the Load
Press the ON key [J] to apply voltage to the load.
Press the OFF key [I] to switch the output off.
Using Overcurrent Protection
To protect against overcurrent, set up the maximum current and then select Output switch off in the
Current protection setup box [E].
To switch overcurrent protection off, select Overcurrent protection off.
V. 01 – 06/08/2012 |
7 |
©Velleman nv |
|
|
|

PS3005D
Running a Predefined Voltage/Current Programme
The software allows you to define a series of voltage/current settings for the output, and let them run automatically. To set up the programme:
1.Click the ProgramForm tab.
2.In the table, enter the desired voltages, currents, and time (in seconds).
3.In the loop box, select how many times the programme has to run:
oSelect infinite to let the programme run infinitely until you stop it manually.
o Select a number from the selection list.
oOr click in the loop box and type the required number.
4.Click the Run button to start the programme.
5.Click the Stop button to pause the programme. Click Run again and the programme continues where it was stopped.
6.Click the MainScreen tab to see the evolution of voltage and current in the graphs while the programme runs.
Exiting from PC Remote Control Mode
1.Close the remote control software.
2.Disconnect the USB/RS232 cable from the back of the power supply.
You hear a tone from the power supply to indicate that remote control mode is no longer active. The keys on the front panel are unlocked automatically (this may take a few seconds).
Troubleshooting
If you are experiencing problems, check if the pc’s COM port is set up correctly:
•bits per second: 9600
•parity bit: none
•data bits: 8
•stop bits: 1
•data flow control: none.
To check the functionality, run this query command via a terminal application such as MTTTY: *ldn?
This should return the identification information (model name, serial number) of the power supply.
11.Cleaning and Maintenance
•Disconnect the device from the mains prior to maintenance activities.
•The power supply cables must not show any damage. Have a qualified technician maintain the device.
•Wipe the device regularly with a moist, lint-free cloth. Do not use alcohol or solvents.
•There are no user-serviceable parts, apart from the fuse. Contact your dealer for spare parts if necessary.
•Store the device in a dry, well-ventilated, dust-free room.
Replacing the Fuse
Only replace the fuse by a fuse of the same type and rating.
1.Before replacing the fuse, unplug the mains lead.
2.Wedge the fuse holder out of its housing with a flat-head screwdriver.
3.Remove the damaged fuse from its holder and replace with the exact same type of fuse.
4.Insert the fuse holder back in its place and reconnect power.
V. 01 – 06/08/2012 |
8 |
©Velleman nv |
|
|
|

PS3005D
12.Technical Specifications
input voltage |
220VAC/50Hz |
fuse |
3A/250V |
output voltage |
0-30VDC |
|
|
output current |
0-5A |
|
|
source effect |
C.V. ≤ 0.01% + 3mV |
|
C.C. ≤ 0.1% + 3mA |
|
|
load effect |
C.V. ≤ 0.01% + 2mV |
|
C.C. ≤ 0.1% + 10mA |
|
|
setup resolution |
10mV |
|
1mA |
|
|
setup accuracy (25°C ± 5°C) |
≤ 0.5% + 20mV |
|
≤ 0.5% + 10mA |
|
|
ripple (20Hz-20MHz) |
≤ 2mVrms |
|
≤ 3mArms |
|
|
temperature coefficient |
≤ 100ppm + 10mV |
|
≤ 100ppm + 5mA |
|
|
read back accuracy |
10mV |
|
1mA |
read back temp. coefficient |
≤ 100ppm + 10mV |
|
≤ 100ppm + 5mA |
reaction time (10% rated load) |
voltage rise: ≤ 100ms |
|
voltage drop: ≤ 100ms |
dimensions |
110 (W) x 156 (H) x 260 (D) mm |
weight |
4.3kg |
|
|
autonomy |
8 hours of continuous use at maximum load |
Use this device with original accessories only. Velleman nv cannot be held responsible in the event of damage or injury resulting from (incorrect) use of this device.
For more info concerning this product and the latest version of this manual, please visit our website www.velleman.eu.
The information in this manual is subject to change without prior notice.
© COPYRIGHT NOTICE
The copyright to this manual is owned by Velleman nv. All worldwide rights reserved. No part of this manual may be copied, reproduced, translated or reduced to any electronic medium or otherwise without the prior written consent of the copyright holder.
V. 01 – 06/08/2012 |
9 |
©Velleman nv |
|
|
|
PS300 5D
GEBRUIKERSHANDLEI DING
1.I nleiding
Aan alle ingezetenen van de Europe se Unie Belangrijke milieu-informatie betreffende dit product
Dit symbool op het toestel of de verpakking geeft aan dat, als het na zijn l evenscyclus wordt weggeworpen, dit toestel schade kan toebrengen aan het m ilieu. Gooi dit toestel (en eventuele batterijen) nie t bij het gewone huishoudelijke afval; het moet bij een gespecialiseerd bedrijf terechtkomen voor recyclage. U moet dit toe stel naar uw v erdeler of naar een lokaal recyclagepunt brengen. Respecteer de plaatselijke milieuwe tgeving.
Hebt u vrage n, contacteer dan de plaats elijke autorit eiten betreffe nd de verwijd ering.
Dank u voor uw aankoo p! Lees deze handleiding grond ig voor u het t oestel in gebrui k neemt. Werd het toestel beschadigd tijde ns het transport, installeer het dan niet en raa dpleeg uw dealer.
2.Veiligheidsinstructies
Houd buiten het bereik v an kinderen en onbevoegden.
Gebruik h et toestel enk el binnenshuis . Bescherm teg en regen, vochtigheid en opspatte nde vloeistoffen. Plaats geen o bjecten gevuld met vloeistof o p of naast het toestel.
Demonteer of open dit t oestel NOOIT. Raak geen kab els aan die ond r stroom staan om dodelijke elektroshocks te vermijden. Er zijn geen door de gebruiker v ervangbare onderdel en in dit toestel. Voor onderho ud of reserveonderdelen, conta cteer uw dealer.
Sluit het toestel altijd aan op een geaard stopcontact.
Bij gebruik kan de behuizing opwarmen. Zorg dat de v erluchtingsopen ingen niet verstopt geraken. Voorzie een ruimte van minste ns 2,5 cm tussen het toestel e n elk ander object. Plaats het toestel op een effen en hitteb estendig oppervlak. Plaats het toestel nooit op (kamerbreed) tapijt, textiel…
Trek de stekker uit het stopcontact (trek niet aan de k abel!) voordat u het toestel reinigt en als u het niet gebruikt.
Bescherm tegen stof en extreme temperaturen.
Bescherm tegen schokke n. Vermijd brute kracht tijdens de bediening.
Gebruik h et toestel niet indien de behuizing of de kabels beschadigd is . Repareer het toestel niet zelf; neem contact op met e en erkende de aler.
3.Algemene r ichtlijnen
Raadplee g de Velleman ® serviceen kwaliteitsgarantie achteraan deze handleid ing.
•Leer eerst de functi es van het toest el kennen voor u het gaat gebruiken.
•Om veiligheidsreden en mag u geen wijzigingen aanbrengen. Scha de door wijzigi ngen die de
gebruiker heeft aan gebracht valt niet onder de gar antie.
• |
Gebruik het toestel enkel waarvoor het gemaakt is. Bij onoordeel kundig gebruik vervalt de garantie. |
• |
De garantie geldt niet voor schade door het neger en van bepaald e richtlijnen in d eze handleidin g en |
|
uw dealer zal de verantwoordelijkh eid afwijzen vo or defecten of problemen die hier rechtstreeks |
|
verb and mee houden. |
•Bew aar deze handleiding voor verdere raadpleging .
V. 01 – 0 6/08/2012 |
10 |
©Velleman nv |
|
|
|
PS300 5D
4.Eigenschappen
•LED-scherm met dubbele weergave van spanning en stroom
•fijnre geling van spa nning en stroom
•beveiligingsmode: spanningof str oombegrenzing
•uitgangsconnectore n: 4mm banaan plug
• voor paneel van orga nisch glas / andere panelen uit staal
•geheugen: 5 programmeerbare geh eugens
•connectiviteit: PC-b ediening op afst and via USB of RS232
•softw are inbegrepen voor Windows XP, Vista en W7
•beschermd d.m.v. zekering
•kleur: wit.
5.Omschrijvi ng
De PS30 05D is een zeer precieze, DC-gestuurde voeding met een regelbare uitgang. U kunt deze ui tgang gebruiken voor constante spanning (C. V.) of constante stroom (C.C.).
De uitga ngsspanning kan willekeurig w orden ingesteld tussen 0V en 3 0V wanneer het toestel zich in de "constante spanning"-mode bevindt. In deze mode ku nt u het stroombegrenzingspun t willekeurig instellen.
De uitga ngsstroom kan willekeurig worden ingesteld op 0 tot 5A in de "constante str oom"-mode. De uitga ngsstroom en de uitgangsspanning worden aangegeven d.m.v. LCD displays.
Raadplee g de afbeelding en op pagina 2 van deze hand leiding.
1 |
Off/On: uitgang aan/uit |
13 |
M1-M5-indicator: actief geheugen |
2 |
OVP: overspanningsbeveiliging aan/uit |
14 |
Adjust: instelknop voor spanning en |
|
|
|
stroomsterkte; selectie geheugen 5 |
3 |
OCP/Beep: over stroombeveiligi ng / |
15 |
< >: selectieknoppen voor grof-/fijnre geling |
|
toetstonen aan/uit |
|
spanning en stroomsterkte |
|
|
|
|
4 |
L ock/Unlock: p aneeltoetsen |
16 |
Voltage/Current: selectie spanningof |
|
ve rgrendelen/ontgrendelen |
|
stroomre geling |
5 |
M1-M4: geheuge n opslaan / op roepen |
17 |
Aardingsaansluiting, aa ngesloten op het |
|
|
|
chassis e n aardpen van de |
|
|
|
voedingsaansluiting |
6 |
Display weergave uitgangsstroo m (ampère) |
18 |
Uitgangsconnectoren |
|
|
|
|
7 |
Display weergave uitgangsspann ing (volt) |
19 |
Power: aan/uit-knop |
8 |
OVP-indicator: overspanningsbe veiliging is |
20 |
RS232-poort voor PC-be diening op afstand |
|
ac tief |
|
|
|
|
|
|
9 |
OCP indicator: o verstroombeveiliging is |
21 |
USB-poort (type B) voo r PC-bediening op |
|
ac tief |
|
afstand |
|
|
|
|
10 |
C C-indicator: con stante stroom modus |
22 |
Ventilator |
|
|
|
|
11 |
C V-indicator: con stante spanningsmodus |
23 |
Voedings aansluiting |
12 |
OUT-indicator: uitgang is actief |
24 |
Zekeringhouder |
|
|
|
|
6.Gebruik
De voeding inof uitschakelen
1. Sluit de meegeleverde voedingskabel aan op de a ansluiting aan de achterkant van het toestel [ 23] en s teek het andere uiteinde in een geschikt, geaard stopcontact .
Sluit het toestel altijd aan op een geaard stopcontact.
V. 01 – 0 6/08/2012 |
11 |
©Velleman nv |
|
|
|

PS3005D
2.Druk op Power [19] om de voeding in te schakelen.
De voeding roept automatisch de instellingen van geheugen 1 op. (Zie Setting Voltage and Current voor meer informatie.) Het display toont de bestaande instellingen, de M1-indicator [13] licht op.
Op dit ogenblik is er geen uitgangsspanning of –stroom op de uitgangsconnectoren.
3.Druk op Power [19] om de voeding uit te schakelen.
De voeding gebruiken in constante spanningsmodus
Indien u de voeding wenst te gebruiken in constante spanningsmodus, stel de gewenste uitgangsspanning in tussen 0V en 30V. U kunt eveneens het gewenste stroombegrenzingspunt instellen.
Indien de uitgangsspanning de ingestelde waarde overschrijdt, gaat het toestel automatisch over in constante stroommodus.
De voeding gebruiken in constante stroommodus
Indien u de voeding wenst te gebruiken in constante stroommodus: stel de gewenste uitgangsstroom in tussen 0A en 5A. U kunt eveneens de gewenste spanningsbegrenzing instellen.
Spanning en stroom instellen
U kunt tot 4 verschillende spanning-/stroominstellingen opslaan met de geheugentoetsen M1~M4.
1.Druk op de geheugentoets [5] van het geheugen waarvan u de instellingen wenst te definiëren. De overeenkomstige M1~M4-indicator [13] licht op en de bestaande spanningen stroominstellingen worden weergegeven.
2.Druk op de selectieknop Voltage/Current [16] om de spanning in te stellen. De spanningsuitlezing knippert.
o Voor gebruik in constante spanningsmodus: dit is de gewenste constante spanning.
oVoor gebruik in constant stroommodus: dit is het gewenste spanningsbegrenzingspunt.
oBij het deactiveren van de overspanningsbeveiliging, wordt de uitgang automatisch uitgeschakeld indien de spanning de ingestelde waarde overschrijdt.
3.Draai aan de instelknop [14] totdat u ongeveer de gewenste spanningswaarde hebt bereikt. Druk op < of > [15] om een digit te selecteren in de spanningsuitlezing [7] en draai aan de instelknop om te fijnregelen.
4.Druk nogmaals op de selectieknop Voltage/Current [16] om de stroom in te stellen. De stroomuitlezing knippert.
oVoor gebruik in constante spanningsmodus: dit is het gewenste stroombegrenzingspunt.
o Voor gebruik in constants stroommodus: dit is de gewenste constante stroom.
oBij het deactiveren van de overstroombeveiliging, wordt de uitgang automatisch uitgeschakeld indien de stroom de ingestelde waarde overschrijdt.
5.Draai aan de instelknop [14] totdat u ongeveer de gewenste stroomwaarde hebt bereikt. Druk op < of > [15] om een digit te selecteren in de stroomuitlezing [6] en draai aan de instelknop om te fijnregelen.
6.Druk nogmaals op de geheugentoets (of wacht totdat de display niet meer knippert). De instellingen zijn opgeslagen in het geselecteerde geheugen.
Oproepinstellingen
Om één van de opgeslagen instellingen op te roepen, druk op de overeenkomstige M1~M4geheugentoetsen [5]. De overeenkomstige M1~M4-indicator [13] licht op en de overeenkomstige spanningen stroominstellingen worden weergegeven op de display.
Opmerking: de uitgang wordt automatisch uitgeschakeld wanneer u een geheugentoets indrukt om een instelling op te roepen.
Geheugen 5 gebruiken
Om geheugen 5 te gebruiken, gaat u als volgt te werk:
1.Druk op de geheugentoets 4 en draai aan de instelknop totdat de M5-indicator oplicht.
2.Stel de gewenste spanning en stroom in. Wacht totdat de display niet meer knippert. De instellingen worden automatisch opgeslagen in geheugen 5.
3.Om de instellingen op te roepen, druk de op de geheugentoets 4 en draai nogmaals aan de instelknop totdat de M5-indicator oplicht.
V. 01 – 06/08/2012 |
12 |
©Velleman nv |
|
|
|
 Loading...