


VM116
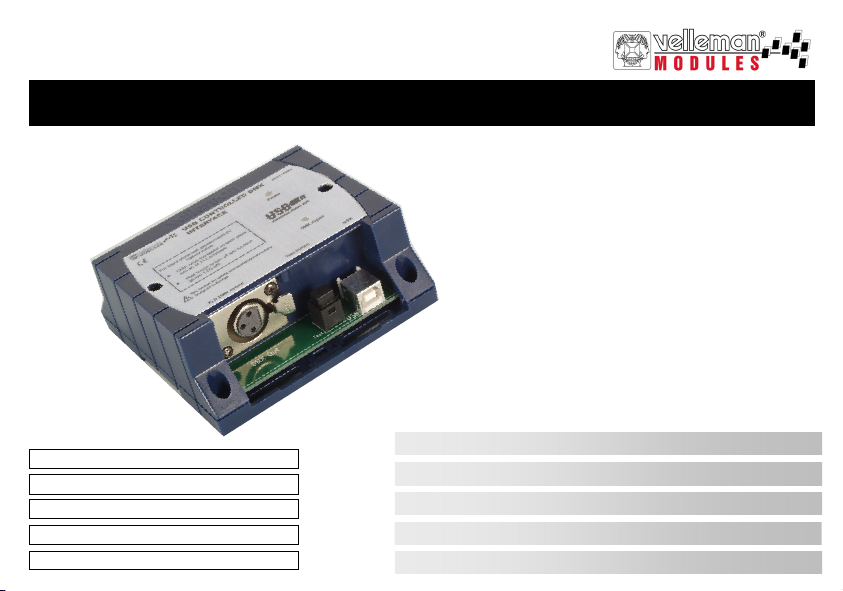
USB Controlled DMX interface
VM116
Belgium [Head office] +32(0)9 384 36 11
France +33(0)3 20 15 86 15
Netherlands +31(0)76 514 7563
USA +1(817)284-7785
Spain +32(0)9 384 36 11
USB Controlled DMX interface 4
USB gestuurde DMX interface 7
Interface DMX avec pilotage USB 10
DMX-Schnittstelle über USB 13
Interface DMX controlado por USB 16

Warnings and contents
Thank you for purchasing this module. Please read the instructions carefully to ensure correct and safe use of this device.
WARRANTY
This product is guaranteed against defects in components and construction from the moment it is purchased and for a period of ONE YEAR starting from the
date of sale. This guarantee is only valid if the unit is submitted together with the original purchase invoice. VELLEMAN Ltd limits its responsibility to the
reparation of defects or, as VELLEMAN Ltd deems necessary, to the replacement or reparation of defective components. Costs and risks connected to the
transport, removal or placement of the product, or any other costs directly or indirectly connected to the repair, will not be reimbursed by VELLEMAN Ltd.
VELLEMAN Ltd will not be held responsible for any damages caused by the malfunctioning of a unit.
CONTENTS :
FEATURES & SPECIFICATIONS .....................................................................................................................................................................3
PREPARATION & CONNECTION ...................................................................................................................................................................4
SOFTW ARE .........................................................................................................................................................................................................5
READ THE OPERATING AND MAINTENANCE INSTRUCTIONS IN
READ BOTH THE PDF-FILES AND THE MANUAL OF THE “DMX
THIS USER’S GUIDE CAREFULLY.
LIGHTPLAYER” SOFTWARE ON THE CD-ROM.
STAND-ALONE TEST ........................................................................................................................................................................................6
SAFETY & WARNING INSTRUCTIONS .........................................................................................................................................................7
2

Specifications & features
Specifications and features
FEATURES
This unit can control DMX fixtures using a PC and USB interface.
Test software and "DMX Light Player" software is included, a DLL is provided to write you own software.
Furthermore there is a stand-alone test function that outputs all 512 channels at a time, with adjustable levels.
SPECIFICATIONS*
Connected and powered through USB.
512 DMX channels with 256 levels each.
3 pin XLR—DMX output connector.
Windows 98SE or higher compatible.
DLL included to write your own software.
Optional 9V battery needed for stand alone test mode.
Solid state - fuse protection on DMX output.
Dimensions: 106 x 101 x 44.5mm (4.2" x 4.0" x 1.75").
*If a DMX terminator is used, you will also need a USB hub (e.g. our PCUSB3).
INCLUDES:
USB cable
CD with: test software, DLL for own developments, free DMX light player*
* If not included, check our website ‘www.velleman.be‘
3

Preparation & connection
Preparation & connection
You can also use the DMX interface as a stand-alone test tool, in
other words you do not have to connect the DMX interface with
your computer!
If you mean to use the stand-alone function (pag. 6), you should
take care to execute the following steps before installing the
software :
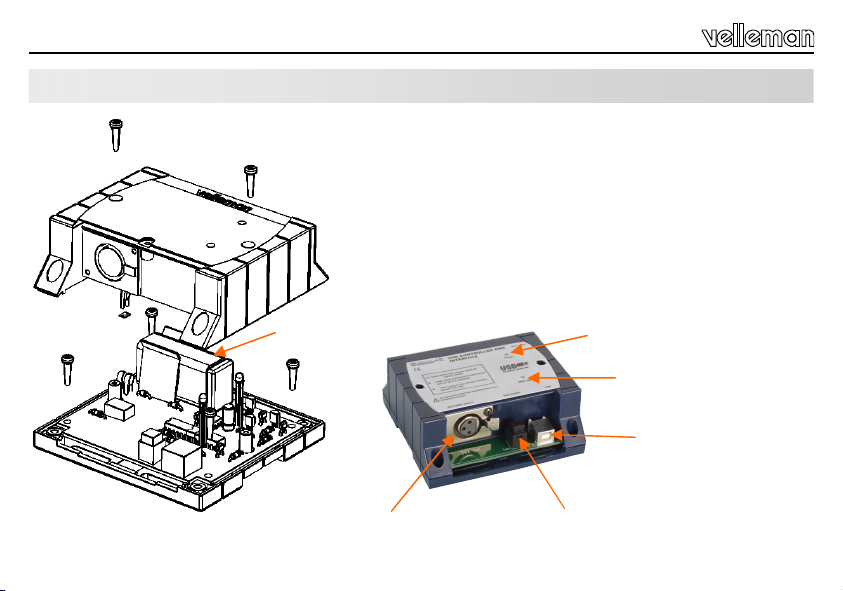
Open the housing.
Connect the battery with the batter y snap.
Insert the battery in the battery compartment.
Close the housing.
9V Battery
Power indication
DMX output indication
USB connection to computer
using USB cable
XLR - DMX output
Test button SW1
4

Software
Browse through the CD and open the K8062 - VM116 … folder.
Check the appropriate PDF files for further information.
The ‘light player’ software is installed in the folder by default: c:\program files\DMX
This is a screen shot of the DMX_demo software used to test the unit or to create s ome simple shows
You will find the latest version of the software on our website
Software
5

Stand - alone test
Stand - alone test
Test button SW1 is used to control the operation of the test mode.
Operation :
Do not connect the unit to the USB cable.
A short button press turns the unit on. - Power LED goes on and the unit starts to send DMX code "0" on all the 512 DMX
Next button press increments the code on all the channels to '1', next button press increments to '2' etc.
The "DMX signal" LED starts to light periodically when the test button is pressed for some times.
The LED's flashes are longer after pressing the button for several times.
Pressing the button 256 times the internal counter rolls back to 0 and the unit starts again to send code "0" on all the 512
If you use e.g. a dimmer as a test equipment you should see how the intensity of the light increases on every button
To turn the power off, keep pressing the button about 3 seconds until the power LED goes off.
channels.
DMX channels.
press.
6
Safety & warning instructions
WARNINGS
All repairs should be executed by qualified technicians.
Avoid the installation of the module in locations with standing or running water or excessive humidity. Indoor use only !
Handle the module gently and carefully. Dropping it can damage the circuit board and case.
SAFETY INSTRUCTIONS
Never exceed the protection limit values indicated in the specifications.
As safety requirement vary, please check with your local authorities.
No objects or liquids should be allowed to penetrate the housing.
Make sure that the ventilation slots are not blocked.
Wipe the device with a dry and clean cloth. Do not use detergents or other liquids that may dam age the housing.
Keep the device away from children.
Facilitate the operation of the device by familiarising yourself with its adjustments and indications.
Velleman modules are not suitable for use or as part of life suppo rt systems, or systems that might create hazardous situations of kind.
Repair under warranty is only possible with date and proof of purchase.
7
Waarschuwingen en inhoud
Hartelijk dank voor de aanschaf van deze dm x-interface. Lees de gebruiksaanwijzing aandachtig, zodat u het apparaat op de
juiste manier gebruikt.
WAARBORG
Dit produkt is gewaarborgd wat betreft gebreken in materialen en vakmanschap op het ogenblik van de aankoop en dit gedurende een periode van EEN JAAR
vanaf de aankoop. De waarborg geldt enkel indien het produkt voorgelegd wordt samen met het origineel aankoop bewijs. De ve rplic hti ngen van
VELLEMAN N.V. beperken zich tot het herstellen van defecten of, naar vrije keuze van VELLEMAN N.V., tot het vervangen of herstellen va n de fec te
onderdelen. Kosten en risico’s van transport; het wegnemen en terugplaatsen van het produkt, evenals om het e ven welke andere kosten die rechtstreeks of
onrechtstreeks verband houden met de herstelling, worden niet door VELLEMAN N.V. vergoed. VELLEMAN N.V. is niet verantwoordelijk voor schade van
gelijk welke aard, veroorzaakt door het falen van een product.
CONTENTS
KENMERKEN & SPECIFICATIES ....................................................................................................................................................................9
VOORBEREIDING & AANSLUITING ............................................................................................................................................................ 10
SOFTW ARE ...................................................................................................................................................................................................... 11
STAND-ALONE TESTMODE ......................................................................................................................................................................... 12
VEILIIGHEIDSAANWIJZINGEN EN W AARSCHUWINGEN ..................................................................................................................... 13
LEES DE GEBRUIKS - EN ONDERHOUDSAANWIJZINGEN VAN DE
GEBRUIKERSHANDLEIDING VAN DE DMX LIGHTPLAYER
HANDLEIDING ZORGVULDIG DOOR.
LEES DE BIJGELEVERDE PDF-FILES ALS OOK DE
SOFWTARE OP DEZE CD-ROM.
8

Specificaties en kenmerken
Specificaties en kenmerken
TECHNISCHE EIGENSCHAPPEN :
Dit toestel kan DMX-apparaten aansturen via een PC met USB interface.
Testsoftware en “DMX Light Player”-software zijn meegeleverd, met een DLL om uw eigen software te schrijven.
Bovendien is er een stand-alone testfunctie die alle 512 kanalen tegelijk aanstuurt op éénzelfde (regelbaar) niveau.
SPECIFICATIES* :
Aansturing en voeding via USB.
512 DMX-kanalen met elk 256 niveaus.
3 pin XLR - DMX uitgangconnector.
Compatibel met Windows 98SE of hoger.
DLL meegeleverd om uw eigen software te schrijven.
Optionele 9V batterij nodig voor stand-alone testfunctie.
Solid state zekeringbeveiliging op de DMX uitgang.
Afmetingen: 106 x 101 x 44.5mm.
*Indien u een DMX terminator gebruikt, dan heeft u ook een USB hub nodig (bv. onze PCUSB3).
KIT OMVAT :
USB-kabel
CD met: testsoftware, DLL voor eigen software-ontwikkeling, gratis DMX light player
* Bezoek onze website ‘www.velleman.be’ indien de software niet meegeleverd is.
9
Voorbereiding & aansluiting
Voorbereiding & aansluiting
U kunt de DMX interface ook gebruiken als een stand-alone test
tool, m.a.w. u hoeft de DMX interface niet aan te sluiten op uw
computer!
Indien u de stand-alone functie (pag. 12) gebruikt dan moet u
eerst de volgende stappen uitvoeren voor u de software
installeert :
Open de behuizing.
Sluit de batterij aan op de batterijclip.
Plaats de batterij in het batterijvak.
Sluit de behuizing.
9V Batterij
VoedingsLED
DMX uitgangsLED
USB aansluiting naar
computer.
10
XLR - DMX uitgang
Test drukknop SW 1
 Loading...