


For use with :
CONFIGURATION GUIDE FOR EXTERNAL CONTROL
OF THE ETHERNET RELAY CARD

CONFIGURATION GUIDE FOR EXTERNAL CONTROL OF THE ETHERNET
RELAY CARD
To use the Ethernet relay card from anywhere in the world, you must set up port forwarding on your router, and install the software on your pc or laptop.
You can download the software from our website. The software program allows you to control the relay card.
The manual for conguring the router to use the VM201 externally discusses only the most common routers on the market.
If your router is not mentioned, please refer to your router’s documentation. The internet can also provide you with information on setting up port forwarding.
- Log in to the router with your user
name and password.
- Click the “Port forwarding” or “Applications and Gaming” tab. (This may be different depending on your Linksys router type. If
you cannot nd these tabs, try via “Advanced settings” or look for a “Port forwarding” section.)
- Enter an Application name (for example VM201).
- Set the desired start and end port (standard port is 9760). If you only
want to open this port, ll in the same values for start and end port.
- Set Protocol to “Both”.
- Enter the last digits of the local IP address (IP address of the VM201, visible on the LCD screen).
- Place a checkmark in the “Enable” box.
- Save your conguration and reboot the router.
- Log in to the router with your user
name and password.
- Select “Setup tool”.
- Expand “Advanced setup” and select “NAT/Routing”.
- Under “NAT/Routing”, select “Port forwarding”.
- Set Rule Type to “User dened”.
- Enter a Rule name (for example VM201).
- In the LAN IP box, enter the local IP address (IP address of the VM201,
visible on the LCD screen).
- Set Protocol to “TCP”.
- In “External port”, set the desired start and end port (standard port is
9760). If you only want to open this port, ll in the same values for start
and end port.
- In “Internal port”, set the desired start and end port (standard port is 80).
If you only want to open this port, ll in the same values for start and end
port.
- Save the settings.
- Log in to the router with your user
name and password.
- Click “Advanced” or “Geavanceerd”.
- Select “Custom server” and choose a name (for example VM201).
- In the Server box, enter the local IP address (IP address of the VM201,
visible on the LCD screen).
- Set the desired start and end port (standard port is 9760). If you only
want to open this port, ll in the same values for start and end port.
- Set Protocol to “TCP/UDP”.
- Leave “Remote IP” blank.
- Click “Add/Apply” to save the settings.
- Go to www.telenet.be and log in via “Mijn Telenet” with
your user name and password.
- In the menu on the right-hand side, under “Draadloze
instellingen”, select “Geavanceerd”.
- Click the “Port forwarding” tab.
- Fill in the last digits of the local IP address (IP address of the VM201,
visible on the LCD screen).
- Set the desired start and end port (standard port is 9760). If you only
want to open this port, ll in the same values for start and end port.
- Set Protocol to “Beide” and Status to “Actief”.
- Now click the tab “Firewall”.
- Adjust the following settings:
- Set “Blokkeer gefragmenteerde IP pakketten” to “niet actief”.
- Set “Firewall bescherming” to “Actief”.
- Set “UpnP actief” to “Actief”.
- Click “Opslaan” to save the settings.
- Download the software from the productpage www.vellemanprojects.eu/support/downloads/?code=VM201 or
use the QR-code.
- Install it on the device(s) from where you want to control the relay card.
- Start the program by clicking the icon on your desktop.
- Fill in the IP-address of your router in the Host eld. (you can nd this IP address in your router’s
documentation or on the website of the router’s manufacturer).
For software, visit www.vellemanprojects.eu

CONFIGURATIEGIDS VOOR DE EXTERNE AANSTURING VAN DE
ETHERNET RELAISKAART
Om de Ethernet relaiskaart overal ter wereld te kunnen bedienen, moet u de “port forwarding” van de router instellen, en de software installeren op uw pc
of laptop. U kunt de software downloaden van onze website. Met het softwareprogramma kunt u de relaiskaart aansturen.
De handleiding voor het instellen van de router om de VM201 extern te gebruiken, behandelt slechts de meest courante routers op de markt.
Als uw type router niet vermeld wordt, gelieve dan de documentatie van uw router te raadplegen. Ook op internet vindt u informatie over het instellen van
port forwarding.
- Log in op de router met je gebruikersnaam en paswoord
- Kies voor “Port forwarding” of “Applications and Gaming tab” (Dit kan verschillen per type router van Linksys, indien u deze niet
kan vinden probeer via “Advanced settings” of zoek naar een “Port forwarding” sectie)
- Kies een Applicatienaam (bijvoorbeeld VM201)
- Kies een gewenste begin- en eindpoort (standaard poort is 9760). Wenst
u enkel deze poort open te zetten, vul bij begin- en eindpoort dezelfde
waardes in.
- Protocol op “Both”.
- Vul de laatste cijfers van het lokaal IP-adres in (IP-adres van de VM201,
zichtbaar op het LCD scherm).
- Vink “Enable” aan.
- Bewaar uw conguratie en herstart de router.
- Log in op de router met je gebruikersnaam en paswoord
- Kies voor “Setup tool”
- “Advaced setup” openklappen en kiezen voor “NAT/Routing”
- Onder “NAT/Routing” kiezen voor “Port forwarding”
- Bij rule type voor “User dened” kiezen
- Kies een Rule name (bijvoorbeeld VM201)
- Vul bij LAN IP het lokaal IP-adres in (IP-adres van de VM201, zichtbaar op
het LCD scherm)
- Kies bij protocol voor “TCP”
- Kies een gewenste begin- en eindpoort bij “External port” (standaard
poort is 9760). Wenst u enkel deze poort open te zetten, vul bij begin- en
eindpoort dezelfde waardes in.
- Kies een gewenste begin- en eindpoort bij “Internal port” (standaard
poort is 80). Wenst u enkel deze poort open te zetten, vul bij begin- en
eindpoort dezelfde waardes in.
- Sla de instellingen op
- Log in op de router met je gebruikersnaam en paswoord
- Klik op “Advanced” of “Geavanceerd”
- Kies voor “Custom server” en kies een naam (bijvoorbeeld VM201)
- Vul bij server het lokaal IP-adres in (IP-adres van de VM201, zichtbaar
op het LCD scherm)
- Kies een gewenste begin- en eindpoort (standaard poort is 9760).
Wenst u enkel deze poort open te zetten, vul bij begin- en eindpoort
dezelfde waardes in.
- Kies bij protocol voor “TCP/UDP”
- Laat “Remote IP” blanco.
- Klik op “Add/Apply” voor de instellingen op te slaan.
- Ga naar www.telenet.be en log in via “Mijn telenet” met
je gebruikersnaam en paswoord
- In rechtermenu onder “Draadloze instellingen” kiest u
“Geavanceerd”
- Kies tabblad “Port forwarding”
- Vul de laatste cijfers van het lokaal IP-adres in (IP-adres van de VM201,
zichtbaar op het LCD scherm)
- Kies een gewenste begin- en eindpoort (standaard poort is 9760).
Wenst u enkel deze poort open te zetten, vul bij begin- en eindpoort
dezelfde waardes in.
- Protocol op “BEIDE” en Status op “Actief” plaatsen
- Kies nu het tabblad “Firewall”
- Pas volgende instellingen aan:
- “Blokkeer gefragmenteerde IP pakketten” op “niet actief”
- “Firewall bescherming” op “Actief”
- “UpnP actief” op “Actief”
- Kies voor “Opslaan”
- Geef IP addres van BBOX2 in deWebbrowser: HTTP://192.168.1.1
- Geef het serienummer in van BBOX2 (staat op klever op BBOX2).
- Klik in rechter kolom op “Advanced Settings”.
- Klik op “LAN servers”.
- Klik op Icoon “New Entry” bij “action” .
• Server name: vul je naam in naar keuze.
• “Access activated” op “Yes” plaatsen.
• Public start port: 9760 (standaard poort VM201).
• Public end port: 9760 (standaard poort VM201).
• Protocol: TCP kiezen.
• Lan Port: 9760
• “Local IP address”: vul hierin het lokaal IP-adres in (IP-adres van de VM201, zichtbaar op het LCD scherm).
- Klik op “APPLY”.
- Maak nu nog een nieuwe regel aan exact zoals hierboven, maar dan voor het protocol UDP

- Download de software van de productpagina via www.vellemanprojects.eu/support/downloads/?code=VM201 of
gebruik de QR-code.
- Installeer deze op alle toestellen waarmee u de relaiskaart wenst te bedienen.
- Klik op het icoontje op uw bureaublad om het programma te starten.
- Voer in het veld Host het IP-adres van uw router in. Om dit IP-adres te vinden, raadpleeg de
documentatie van uw router of de website van de routerfabrikant.
For software, visit www.vellemanprojects.eu

GUIDE DE CONFIGURATION POUR LE CONTRÔLE EXTERNE DE LA
CARTE RÉSEAU ETHERNET
Pour utiliser la carte réseau Ethernet partout dans le monde, il faut congurer la redirection du port sur votre routeur, et installer le logiciel sur votre pc ou
ordinateur portable. Vous pouvez télécharger le logiciel depuis notre site web. Le logiciel vous permet de piloter la carte réseau.
Le manuel de conguration du routeur pour l’usage externe de la VM201 ne traite que les routeurs les plus courants.
Si le type de votre routeur n’est pas mentionné, veuillez consulter la documentation de votre routeur. L’Internet peut également vous fournir de
l’information sur le réglage de la redirection du port.
- Connectez-vous au routeur avec votre
nom d’utilisateur et mot de passe.
- Cliquez sur les onglets Port forwarding”
ou “Applications and Gaming tab” (Cela peut varier selon le type de routeur Linksys. Si
vous ne trouvez pas ces onglets, essayez via “Advanced settings” ou recherchez une section “Port
forwarding”).
- Saisissez un nom d’application (p.ex. VM201).
- Saisissez un port de début et de n (le port par défaut est 9760). Si vous
souhaitez seulement ouvrir ce port, saisissez le même numéro pour le
port début et de n.
- Réglez le protocole sur “Both”.
- Saisissez les derniers chiffres de l’adresse IP locale (adresse IP du VM201,
s’afche à l’écran LCD).
- Cochez l’option “Enable”.
- Sauvegardez votre conguration et réinitialisez le routeur.
- Connectez-vous au routeur avec votre nom d’utilisateur et mot de passe.
- Sélectionnez “Setup tool”.
- Ouvrez “Advanced setup” et sélectionnez “NAT/Routing”.
- Au-dessous de “NAT/Routing, sélectionnez “Port forwarding’.
- Réglez le type de règle sur “User dened”.
- Saisissez un nom de règle (p.ex. VM201).
- Saisissez l’adresse IP locale dans le champ LAN IP (adresse IP du VM201, s’afche à l’écran LCD).
- Réglez le protocole “TCP”.
- Dans “External port”, saisissez un port de début et de n (le port par défaut est 9760). Si vous souhaitez seulement ouvrir ce port, saisissez le même nu-
méro pour le port de début et de n.
- Dans “Internal port”, saisissez le port de début et de n (le port par défaut est 80). Si vous souhaitez seulement ouvrir ce port, saisissez le même numéro
pour le port de début et de n.
- Sauvegardez les réglages.
- Connectez-vous au routeur avec
votre nom d’utilisateur et mot de
passe.
- Cliquez sur “Advanced” ou “Geavanceerd”.
- Sélectionnez “Custom server” et choisissez un nom (p.ex. VM201).
- Saisissez l’adresse IP locale dans le champ serveur (adresse IP du
VM201, s’afche à l’écran LCD).
- Saisissez un port de début et de n (le port par défaut est 9760). Si
vous souhaitez seulement ouvrir ce port, saisissez le même numéro
pour le port de début et de n.
- Réglez le protocole sur “TCP/UDP”.
- Laissez “Remote IP” vide.
- Cliquez sur “Add/Apply” pour sauvegarder les réglages
- Téléchargez le logiciel depuis la che technique via www.vellemanprojects.eu/support/downloads/?code=VM201
ou utilisez le code QR.
- Installez-le sur tous les appareils depuis lesquels vous souhaitez piloter la carte réseau.
- Cliquez sur l’icône de votre bureau pour lancer le programme.
- Dans le champ Hôte, saisissez l’adresse IP de votre routeur. Pour trouver cette adresse IP, consultez la documentation de votre routeur ou le site web du fabricant du routeur.
For software, visit www.vellemanprojects.eu
KONFIGURATIONSHANDBUCH FÜR DIE EXTERNE
KONTROLLE DER ETHERNET-RELAISKARTE.
Um die Ethernet Relaiskarte von überall auf der Welt verwenden zu können, kongurieren Sie die Portweiterleitung im Router und installieren Sie die Software auf Ihrem PC oder Laptop. Laden Sie die Software von unserer Website herunter.
Mit dem Softwareprogramm können Sie die Relaiskarte programmieren..
Die Anleitung zum Kongurieren des Routers, um den VM201 extern zu verwenden, enthält nur die gängigsten Routers.
Lesen Sie die Bedienungsanleitung Ihres Routers wenn Ihr Typ nicht erwähnt wird. Im Internet nden Sie auch Informationen über Portweiterleitung.
- Geben Sie Ihren Benutzernamen und
Kennwort ein, um zur Login-Seite des
Routers zu geraten.
- Klicken Sie auf “Port forwarding” oder
“Applications and Gaming”. (Das hängt vom Routertyp von Linksys ab. Finden Sie ihn nicht, so
versuchen Sie es über “Advanced settings” oder suchen Sie einen“Port forwarding”-Punkt).
- Geben Sie im Feld “Application“ den Namen der Anwendung ein (z.B. VM201)
- Geben Sie in “Start” und “End” die gewünschte Anzahl der Ports ein (Standard-Port: 9760). Möchten Sie nur diesen Port öffnen, so tragen Sie bei Start
und Ende denselben Wert ein.
- Bei “Protocol” wählen Sie “Both” aus.
- Geben Sie die letzten Ziffern der lokalen IP-Adresse ein (IP-Adresse des
VM201, sichtbar im LCD-Display).
- Markieren Sie das Kästchen “Enable”.
- Speichern Sie die Einstellungen und starten Sie den Router neu.
- Geben Sie Ihren Benutzernamen und Kennwort ein, um zur Login-Seite des Routers zu geraten
- Wählen Sie “Setup tool” aus
- Wählen Sie “Advaced setup” aus und dann “NAT/Routing”
- In “NAT/Routing” wählen Sie “Port forwarding” aus
- Bei “rule type” wählen Sie “User dened” aus
- Wählen Sie einen Regelnamen bei “Rule name” (z.B. VM201)
- Geben Sie bei “LAN IP” die lokale IP-Adresse ein (IP-Adresse des VM201, sichtbar im LCD-Display)
- Bei “Protocol” wählen Sie “TCP”
- Geben Sie bei “External port” die gewünschte Anzahl der Ports ein (Standard-Port: 9760). Möchten Sie nur diesen Port öffnen, so tragen Sie bei Start und
Ende denselben Wert ein.
- Geben Sie bei “Internal port” die gewünschte Anzahl der Ports ein (Standard-Port: 80). Möchten Sie nur diesen Port öffnen, so tragen Sie bei Start und Ende
denselben Wert ein.
- Speichern Sie die Einstellungen
- Geben Sie Ihren Benutzernamen
und Kennwort ein, um zur LoginSeite des Routers zu geraten.
- Klicken Sie auf “Advanced” oder
“Geavanceerd”.
- Wählen Sie “Custom server” und dann einen Namen aus (z.B. VM201)
- Geben Sie die lokale IP-Adresse ein (IP-Adresse des VM201, sichtbar im
LCD-Display)
- Geben Sie in “Start” und “End” die gewünschte Anzahl der Ports ein
(Standard-Port: 9760). Möchten Sie nur diesen Port öffnen, so tragen
Sie bei Start und Ende denselben Wert ein.
- Bei “Protocol” wählen Sie “TCP/UDP”
- Lassen Sie “Remote IP” leer.
- Klicken Sie auf “Add/Apply” um die Einstellungen zu speichern.
- Laden Sie die Software von unserem Website herunter www.vellemanprojects.eu/support/
downloads/?code=VM201 oder verwenden Sie den QR-Code.
- Installieren Sie die die Software auf dem Gerät (den Geräten) mit dem (denen) Sie die Relaiskarte kontrollieren möchten.
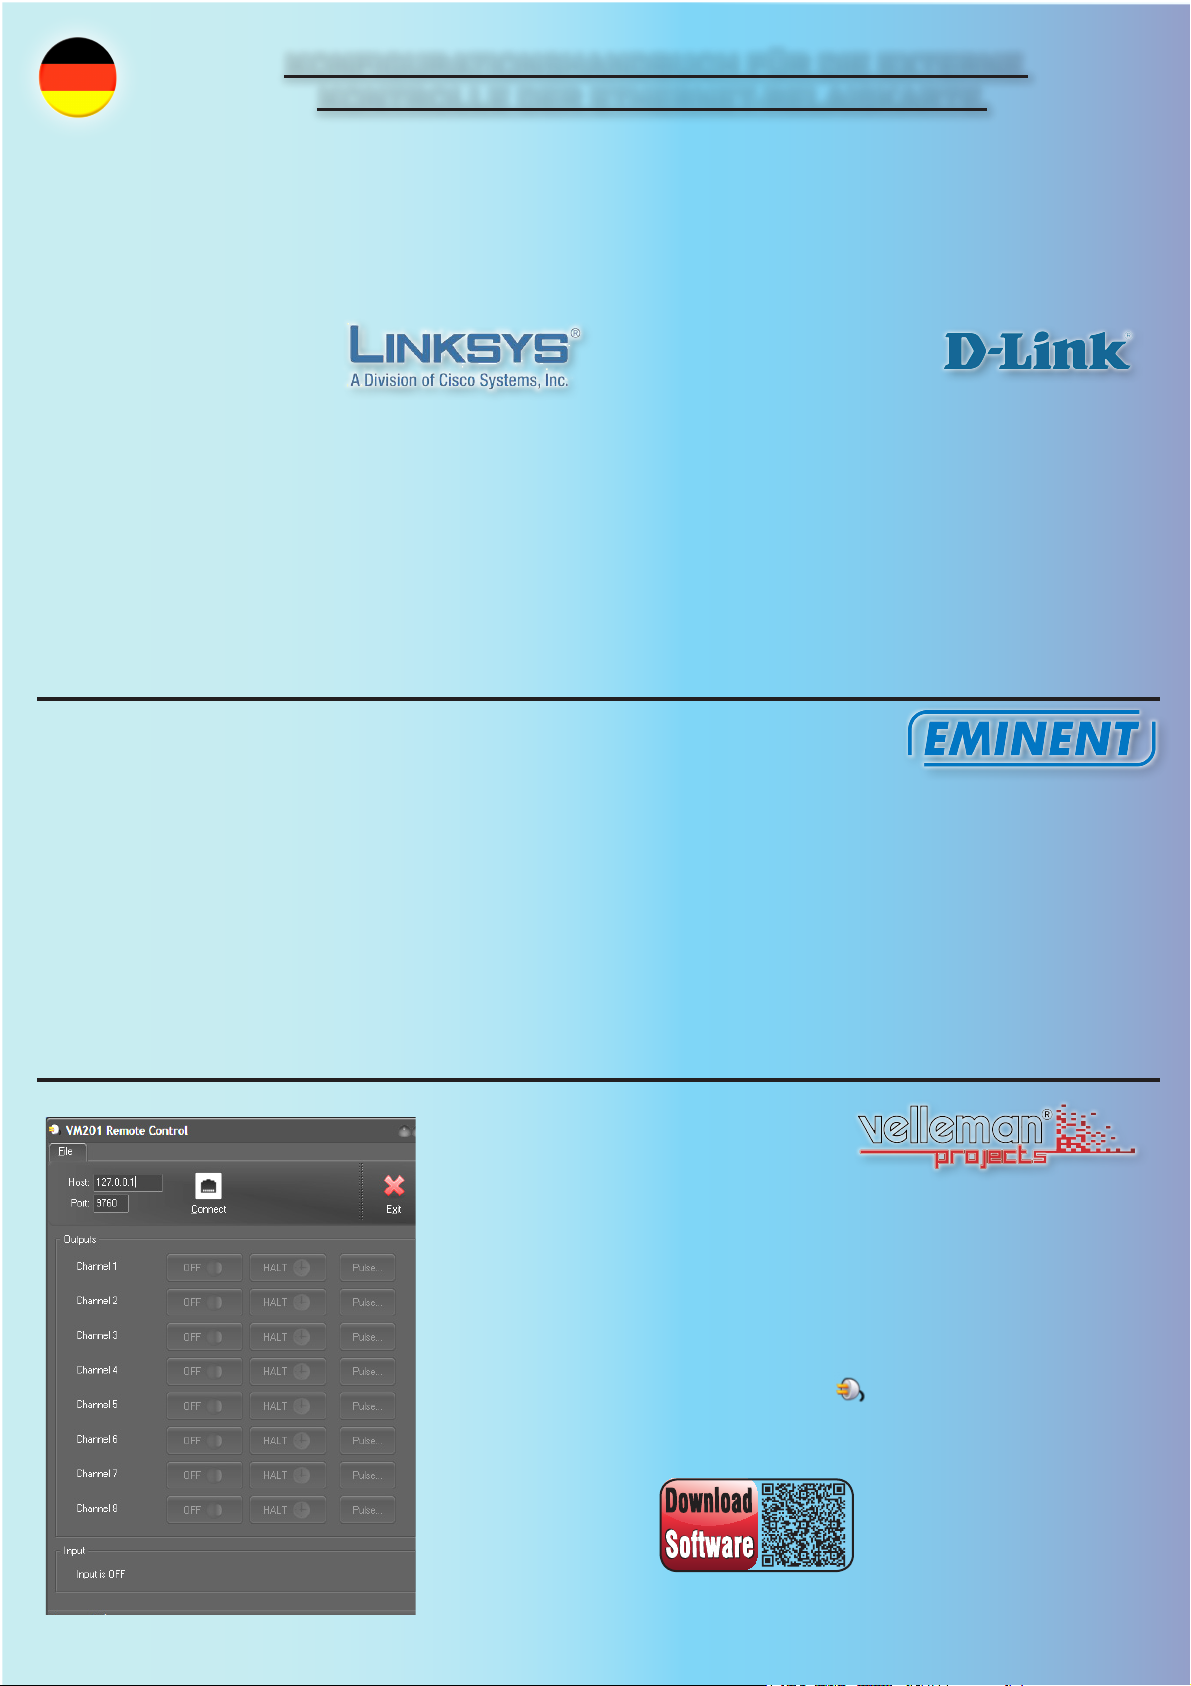
- Starten Sie das Programm, indem Sie auf die Ikone im Desktop klicken.
- Geben Sie die IP-Adresse vom Router im Host-Feld ein. Die IP-Adresse nden Sie in der Anlei-
tung des Routers oder auf der Website vom Hersteller der Router.
For software, visit www.vellemanprojects.eu

GUÍA DE CONFIGURACIÓN PARA EL CONTROL EXTERNO DE LA
TARJETA DE RELÉS ETHERNET.
Para poder utilizar la tarjeta de red Ethernet desde cualquier lugar del mundo, congure la redirección de puertos en el router e instale el software en el PC
o el ordenador portátil. Descargue el software de nuestra página web.
El programa de software le permite controlar la tarjeta de red.
El guía para congurar el router para el uso externo del VM201 sólo incluye los routers más corrientes.
Consulte el manual de su router si el guía no incluye su tipo. Puede también consultar internet para encontrar informaciones sobre la redirección de puertos en internet.
- Introduzca su contraseña y su nombre
de usuario para entrar en el router
- Seleccione el campo “Port forwarding” o
el campo “Applications and Gaming” (Esto
depende del tipo de router de Linksys. Si no puede encontrarlo, seleccione “Advanced settings” o
busque un apartado “Port forwarding”)
- Introduzca el nombre de la aplicación en el campo “Application“ (p.ej. VM201)
- Introduzca el número de puertos deseado en los campos “Start” y “End”
(puerto estándar: 9760). Si quiere abrir un sólo puerto, introduzca el
mismo valor en ambas casillas
- Seleccione “Both” en el campo “Protocol”
- Introduzca las últimas cifras de la dirección IP local (dirección IP del
VM201, visible en la pantalla LCD)
- Marque la casilla “Enable”
- Introduzca su contraseña y su nombre de usuario para entrar en el router
- Seleccione “Setup tool”
- Seleccione “Advaced setup” y luego “NAT/Routing”
- Seleccione “Port forwarding” en “NAT/Routing”
- Seleccione “User dened” en “rule type”
- Seleccione un nombre en “Rule name” (p.ej. VM201)
- Introduzca la dirección IP local en “LAN IP” (dirección IP del VM201, visible en la pantalla LCD)
- Seleccione “TCP” en el campo “Protocol”
- Introduzca el número de puertos deseado en el campo “External port” (puerto estándar: 9760). Si quiere abrir un sólo puerto, introduzca el mismo valor en
ambas casillas.
- Introduzca el número de puertos deseado en el campo “Internal port” (puerto estándar: 80). Si quiere abrir un sólo puerto, introduzca el mismo valor en
ambas casillas.
- Guarde las conguraciones
- Introduzca su contraseña y su
nombre de usuario para entrar en
el router
- Haga clic en “Advanced”
- Seleccione “Custom server” y luego un nombre (p.ej. VM201)
- Introduzca la dirección IP local (la dirección IP del VM201, se visualiza
en la pantalla LCD)
- Introduzca el número de puertos deseado en los campos “Start” y
“End” (puerto estándar: 9760). Si quiere abrir un sólo puerto, introduzca el mismo valor en ambas casillas.
- Seleccione “TCP/UDP” en el campo “Protocol”
- No introduzca nada en la casilla “Remote IP”
- Haga clic en “Add/Apply” para guardar las conguraciones.
- Descargue el software aquí www.vellemanprojects.eu/support/downloads/?code=VM201 o utilice el código QR.
- Instale el software en el(los) aparato(s) con que quiere controlar la tarjeta de red.
- Inicie el programa al hacer clic en el icono del escritorio.
- Introduzca la dirección IP del router en el campo ‘Host’. Puede encontrar la dirección IP en el
manual del router o en la página web del distribuidor de estos routers.
For software, visit www.vellemanprojects.eu

Forum
Forum
Participate our Velleman Projects Forum
Modications and typographical errors reserved - © Velleman nv. HVM201-extended.pdf (Rev.1)
Velleman NV, Legen Heirweg 33 - 9890 Gavere.
Subscribing our newsletter?, visit www.vellemanprojects.eu
 Loading...