


GIK 07-GIK08-G IK09
ELECTRIC INSECT KILLER
TUE-I NSECTES É LECTRIQUE ELEKTRISCHE INSECTENVERDELGER
REPELENTE ELECTRÓNICO PARA INSECTOS FLUGINSEKTENVERNICHTE R ELECTROCUTOR DE INSECTOS
USER MANUAL |
3 |
NOTIC E D’EMPLOI |
5 |
GEBRUIKERSHAND LEIDING |
7 |
MANUA L DEL USUA RIO |
9 |
BEDIE NUNGSANLEITUNG |
12 |
MANUA L DO UTILI ZADOR |
14 |
GIK07 |
2 x 6 W |
|
|
GIK08 |
2 x 10W |
|
|
GIK09 |
2 x 15W |
|
|

GIK07-GIK0 8-GIK09
|
A |
ON/OFF switc h |
|
B |
high voltage grid |
|
C |
insect collect or |
|
D |
UV-lamp (2x) |
|
E |
starter (2x) |
|
A |
interrupteur marche/arrêt |
|
B grille à haute tension |
|
|
C |
casier de réc upération |
|
D |
tube UV (2x) |
|
E |
starter (2x) |
|
A aan-uitschak elaar |
|
|
B |
hoogspannin gsrooster |
|
C |
opvangbakje voor insecten |
|
D |
UV-lamp (2x) |
|
E |
starter (2x) |
|
A |
interruptor ON/OFF |
|
B rejilla de alta tensión |
|
|
C |
cajón |
|
D |
tubo UV (2x) |
|
E |
arrancador (2 x) |
A EIN /AUS-Schalte r |
A |
interruptor ON/OFF |
B Hochspannungsgitter |
B |
grada de alta tansão |
C Schublade |
C |
bandeja |
D UV-Lampe (2x) |
D |
lâmpada UV (2x) |
E Star ter (2x) |
E |
arrancador (2 x) |
Rear view
Vue arrière
Achteraanzic ht
Vista posterior
Hint eransicht
Vista posterior
17.11.2009 |
2 |
©Vellem an nv |
GIK07-GIK0 8-GIK09
User manual
1. Int roduction
To all r esidents of th e European Union
Import ant environmental information about this product
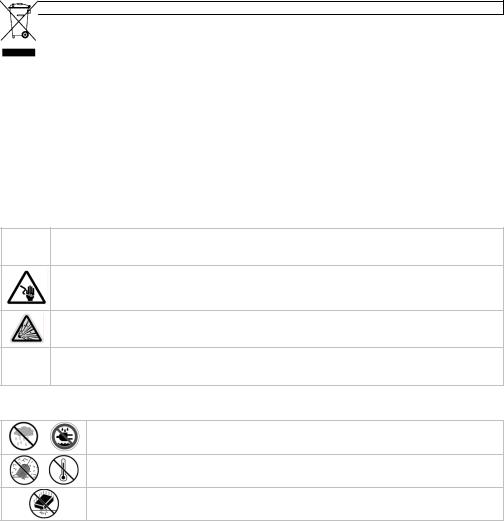
This symbol on the device or the package indicates that disposal of th e device after its lifecycle could harm the environment.
Do not dispose of the unit (or batteries) as unsorted m unicipal waste ; it should be taken to a specializ ed company f or recycling.
This device should be returned to your distributor or to a local recycling service. Respect the local environmental rules.
If in doubt, contact your local wa ste disposal authorities.
Thank y ou for choosing the Perel! Ple ase read the manual thoroug hly before brin ging this device into service. If the device was damaged in transit, don't install or use it and contact y our dealer.
2. Sa fety Instructions
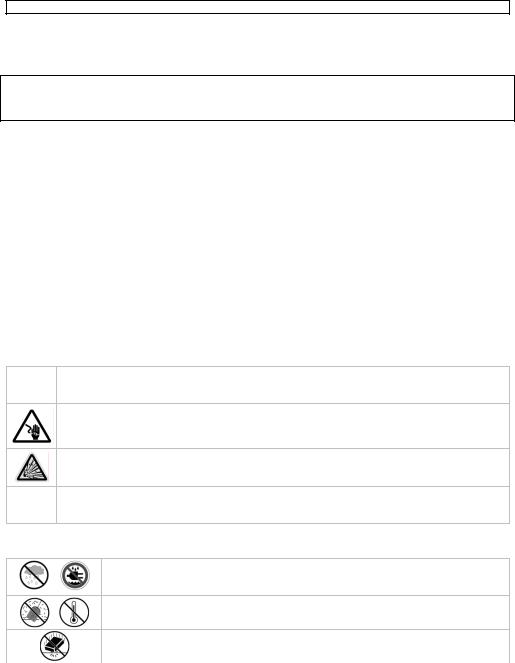
Keep the de vice away from children and unauthorised u sers.
Never insert metal obje cts into the device: risk of electroshock. Touching live wires can cause life-threat ening electros hocks.
Do not use in areas wher e explosive gas ses reside.
Do not stare into the UV l amp or perma nent eye damage might occur.
3. General Guide lines
Refer to the Velleman® Service and Quality Warranty on the last pages of this manual.
Indo or use only. Keep this device away form rain, moisture, s plashing and dripping liquids. Never put object filled with liquid on top.
Keep this device aw ay from dust a nd extreme he at.
Prote ct this device from shocks an d abuse. Avoi d brute force w hen operating the devic e.
• Familiarise yourself with the functio ns of the devic e before actually using it.
•All mo difications of the device are forbidden for sa fety reasons. Damage caused by user modifications to the device is not covered by the warranty.
•Only u se the device for its intended purpose. Using the device in an unauthorised way will void the warranty.
•Damage caused by d isregard of cer tain guidelines in this manual is not covered by the warra nty and th e dealer will not accept respo nsibility for any ensuing defects or problems.
4. Fe atures
• no ch emical substan ces so no poll ution
•odourless, noiseless and safe
•easy to clean alumin ium alloy scratch-resistant h ousing
• |
suitable for wall mo unting, ceiling suspension (c hain included) or free standin g |
• |
remov e the bottom to dispose of d ead insects |
17.11.2009 |
3 |
©Vellem an nv |

GIK07-GIK08-GIK09
5. Use
Refer to the illustrations on page 2 of this manual.
•Flying insects are attracted by the UV light [D] which is mounted behind a high voltage electrical grid [B]. When touching the grid, the insects are electrocuted and fall into the collector [C].
•Place or hang the insect killer in a dry location. Make sure the ON/OFF switch [A] is in the OFF position and plug the power cord into a suitable mains outlet.
•Switch on the insect killer by moving the ON/OFF switch [A] into the ON position.
6. Cleaning and maintenance
IMPORTANT: Never touch the metal grid with your bare hands! If you need to clean the tray, follow the safety instructions carefully.
a. Discharging the device before maintenance
• Unplug the device from the mains.
• Use a screwdriver with an insulated handle. Make sure you only hold the screwdriver by the handle.
• Short-circuit the 2 wires of the inner metal grid by gently touching them simultaneously with the metal shaft of the screwdriver. A spark may arise. Repeat this manipulation until no more sparks arise.
b. Cleaning the device
• Make sure the power switch [A] is in the OFF-position and the power plug is disconnected from the mains outlet before starting any maintenance activity.
• Discharge the device (see a.)
• Slide the insect collector draw [C] out of the device to dispose of dead insects.
• Clean the insect killer regularly with a dry, clean cloth. Do not submerge into any liquid.
• Make sure no dust accumulates on the UV lamps as this will greatly reduce their effectiveness.
• Only use a plastic brush to clean the high-voltage grid. Brush gently to avoid damage. c. Replacing lamps and starters
•When the lamps are worn, they must be replaced with a similar type (see technical specifications)
•Make sure the power switch [A] is in the OFF-position and the power plug is disconnected from the mains outlet before starting any maintenance activity.
•Discharge the device (see a.)
•Remove the two screws on the back of the device (refer to the illustration on page 2, see arrows).
•Gently pull the outer grid; it will rotate around the screws at the bottom.
•Remove a UV-lamp by gently turning it a quarter turn and pull it upwards out of the sockets.
•Place a new UV-lamp into the socket and turn it a quarter turn to secure it.
•To replace a starter, turn it a quarter turn and pull it out of the socket. Insert a new starter with the same specifications into the socket and turn it a quarter turn to secure it.
•Close the outer grid and secure the two screws.
7. Technical specifications
|
GIK07 |
GIK08 |
GIK09 |
|
|
|
|
input voltage |
|
230VAC / 50Hz |
|
|
|
|
|
grid voltage |
|
1800-3000V |
|
|
|
|
|
effective area |
30m² |
80m² |
100m² |
|
|
|
|
dimensions |
275 x 105 x 265mm |
400 x 105 x 315mm |
510 x 105 x 315mm |
|
|
|
|
weight |
1.6kg |
2.5kg |
3kg |
|
|
|
|
lamp |
UV-A tube 2 x 6W |
UV-A tube 2 x 10W |
UV-A tube 2 x 15W |
|
(GIK07LAMP) |
(GIK08LAMP) |
(GIK09LAMP) |
|
|
|
|
17.11.2009 |
4 |
©Velleman nv |
GIK07-GIK0 8-GIK09
Use thi s device with original acce ssories only . Velleman nv cannot be held responsi ble in the event of dama ge or injury resulted from (incorrect) use of this device. For mo re info co ncerning this product, ple ase visit our website www .perel.eu. Th e information in this manual is subject to change without prio r notice.
© COPY RIGHT NOTICE
This man ual is copyrighte d. The copyrigh t to this manu al is owned by Velleman nv. All worldwide rights reserved. No part of this manual may be copied, reproduced, translated or reduced to any electronic medium or otherwise without the prio r written consent of the copyrigh t holder.
N OTICE D’EMPLOI
1. Int roduction
Aux résidents de l'Union europée nne
Des inf ormations environnementales importantes concernant ce produit
Ce symbole sur l'appareil ou l'emballage indique que l’élimination d’ un appareil en fin de vie peut polluer l'environnement. Ne pas jeter un appareil électri que ou électro nique (et des piles éventuelles) parmi les déch ets municipau x non sujets au tri sélectif ; une déchèterie traitera l’appar eil en questio n. Renvoyer le s équipements usagés à votre fournisseur ou à un servic e de recyclage local. Il convient de respect er la réglementation locale rela tive à la protection de l’environnement.
En cas de questions, contacter les autorités lo cales pour é limination.
Nous vous remercions de votre achat ! Lire la prés ente notice attentivement avant la mise en service de l’appareil. Si l’appareil a été endommag é pendant le transport, ne pa s l’installer et consulter votre revendeur.
2. Consignes de sécurité
Garder hors de la portée d es enfants et d es personnes non autorisées .
Ne jamais insérer un objet métallique dans le tue-insectes : ri sque d’électrocut ion. Toucher un câble sous tension peut c auser des élec trochocs morte ls.
Éviter l’usag e du tue-insec tes à proximité d’un gaz explosif.
Ne pas fixer les ampoules UV du regard a fin d’éviter les lésions oculaires permanentes.
3. Directives gé nérales
Se reporter à la garantie de service et de qualité Velleman® à la fin de cette notice.
Utiliser cet appare il uniquemen t à l'intérieur. Protéger de la pluie, de l’humidité et des projections d’eau. Ne jamais placer d’objet contenant un liquide sur l’appareil.
Prot éger contre la poussière. Protéger contre la chaleur extrê me.
Pro téger contre les chocs et le traiter avec circ onspection pendant l’opération.
|
• |
Se fam iliariser avec le fonctionnem ent avant l’em ploi. |
|
|
|
• |
Toute modification est interdite po ur des raisons de sécurité. L es dommages occasionnés pa r |
||
|
|
des modifications par le client ne t ombent pas sous la garantie. |
|
|
|
• |
N’utiliser qu’à sa fonc tion prévue. Un usage impro pre annule d'office la garantie. |
|
|
|
|
|
|
|
17.11.2009 |
5 |
©Vellem an nv |
||

GIK07-GIK08-GIK09
•La garantie ne s’applique pas aux dommages survenus en négligeant certaines directives de cette notice et votre revendeur déclinera toute responsabilité pour les problèmes et les défauts qui en résultent.
4. |
Caractéristiques |
|
• |
sans produits chimiques et donc pas de pollution |
|
• |
inodore, silencieux et sans risque |
|
• |
boîtier en aluminium anti-rayures facile à nettoyer |
|
• |
convient pour montage au plafond (chaine incl.) ou au mur, ou pose libre |
|
• |
retirer le casier inférieur pour jeter les insectes morts |
|
5. |
Emploi |
|
Se référer à l’illustration à la page 2 de cette notice.
•Les insectes volants sont attirés par la lumière bleue des tubes UV [D] montés derrière la grille à haute tension [B]. Les insectes qui viennent se poser sur cette grille sont électrocutés. Le petit casier au bas du tue-insectes [C] les récupère.
•Placer ou suspendre le tue-insectes dans un endroit sec. Placer l’interrupteur [A] en position OFF et brancher le tue-insectes sur le secteur.
•Allumer le tue-insectes en plaçant l’interrupteur [A] en position ON.
6. Nettoyage et entretien
IMPORTANT : Ne pas toucher la grille métallique avec les mains ! Suivre les instructions avec précision en cas de nettoyage du casier.
a. Déchargement de l’appareil avant l’entretien
• Débrancher l’appareil du réseau.
• Utiliser un tournevis isolé. Ne tenir le tournevis que par le manche.
• Court-circuiter les 2 câbles de la grille métallique interne en les touchant simultanément avec la lame du tournevis. Une étincelle se produira. Répéter cette procédure jusqu’à ce qu’il n’y ait plus d’étincelles.
b. Nettoyage du tue-insectes
• Placer l’interrupteur [A] en position OFF et débrancher le tue-insectes du le secteur.
• Décharger l’appareil. (voir a.)
• Retirer le casier [C] du tue-insectes et jeter les insectes.
• Nettoyer régulièrement le casier à l’aide d’un chiffon sec. Ne pas immerger le casier dans un liquide !
• Veiller à dépoussiérer régulièrement les tubes UV afin d’assurer une efficacité optimale.
• Nettoyer la grille avec une brosse à dents souple. c. Remplacement des tubes et des starters
•Remplacer un tube usagé avec un tube identique (voir les spécifications techniques).
•Placer l’interrupteur [A] en position OFF et débrancher le tue-insectes du le secteur.
•Décharger l’appareil. (voir a.)
•Desserrer les deux vis à l’arrière du tue-insectes (voir l’illustration en page 2).
•Retirer doucement la grille extérieure. Cette grille tourne autour des vis au bas de l’appareil.
•Tourner le tube UV un quart de tour sur son axe. Retirer le tube de son socle.
•Insérer un nouveau tube UV dans le socle et le fixer en le tournant un quart de tour.
•Retirer le starter en le tournant un quart de tour et en le retirant hors du socle. Insérer un nouveau starter et le fixer dans le socle.
•Replacer la grille sur le tue-insectes et la fixer avec les deux vis.
17.11.2009 |
6 |
©Velleman nv |
 Loading...