


 Loading...
Documentation
HiPath 4000
OpenStage SL4 professional on HiPath Cordless Enterprise
Operation
V1 R3.x
V1 R4.x
Siemens Enterprise Communications www.siemens-enterprise.com

Safety notes
Safety notes
Handset
Danger:
•Do not use the handset in potentially explosive atmospheres.
•To avoid mutual interference, do not operate the handset in the vicinity of electronic equipment.
•Do not use the handset in wet rooms! Devices are not splashproof.
•A transmitter signal is emitted by your handset. Please observe safety procedures for your area.
Caution:
The ringing tone, signal tones and handsfree talking (speakerphone mode) are played over the loudspeaker. Do not hold the telephone to your ear when it is ringing or if speakerphone mode is switched on. Otherwise you risk serious and permanent damage to your hearing.
Caution:
•Information for hearing aid users: Radio signals may interfere with hearing aids.
•If you give your handset to someone else, please include the operating instructions with it.
Batteries
Danger:
•Only use the approved battery.
•Avoid contact with fire and water.
•Only use the approved power supply unit to operate the charging shell.
2

Operating instructions
WEEE mark
Caution:
•All electrical and electronic products should be disposed of separately from the municipal waste stream via designated collection facilities appointed by the government or the local authorities.
•Proper disposal and separate collection of your
old appliance will help prevent potential damage to the environment and human health. It is a prerequisite for reuse and recycling of used electrical and electronic equipment.
•For more detailed information about disposal of your old appliance, please contact your city office, waste disposal service, the shop where you purchased the product or your sales representative.
•The statements quoted above are only fully valid for equipment which is installed and sold in the countries of the European Union and is covered by the European Directive 2002/96/EC. Countries outside the European Union may impose other regulations regarding the disposal of electrical and electronic equipment.
Operating instructions
These operating instructions describe your handset and its functions on your communications system.
All functions that can be performed via your handset are described here. If some of the required functions are not available on your handset, it may be due to one of the following:
•The function is not configured for you or your handset - please contact your system administrator.
•Your communications platform does not feature this function - please contact your Siemens contract partner to upgrade.
3

Overview of handset
Overview of handset
|
1 |
|
|
|
|
|
|
|
|
|
|
|
|
|
|
|
|
|
|
|
|
|
|
|
|
|
|
|
|
|
|
|
|
|
|
|
|
|
|
|
|
|
|||
|
2 |
|
|
|
|
|
|
|
|
|
|
|
|
|
|
|
|
|
|
|
|
|
|
|
|
|
|
|
|
|
|
|
|
|
|
|
|
|
|
|
|
|
|
||
|
3 |
|
|
|
|
|
|
|
|
|
|
|
|
|
|
|
|
|
|
|
|
|
|
|
|
|
|
|
|
|
|
|
|
|
|
|
|
|
|
|
|
|
|
||
|
4 |
|
|
|
|
|
|
|
|
|
|
|
|
|
|
|
|
|
|
|
|
16 |
|
|
|
|
|
|
|
|
|
|
|
|
|
|
|
|
|
|
|
|
|||
|
|
|
|
|
|
|
|
|
|
|
|
|
|
|
|
|
|
|
|
|||
|
5 |
|
|
|
|
|
|
|
|
|
|
|
|
|
|
|||||||
|
|
|
|
|
|
|
|
|
|
|
|
|
|
|||||||||
|
6 |
|
|
|
|
|
|
|
|
|
|
|
|
|
|
|
15 |
|||||
|
|
|
|
|
|
|
|
|
|
|
|
|
||||||||||
|
|
|
|
|
|
|
|
|
|
|
|
|
|
|
|
|
14 |
|||||
|
7 |
|
|
|
|
|
|
|
|
|
|
|
||||||||||
|
|
|
|
|
|
|
|
|
|
|
|
|||||||||||
|
|
|
|
|
|
|
|
|
|
|
|
|
|
|
|
|||||||
|
|
|
|
|
|
|
|
|
|
|
|
|
|
|
|
|
|
|
|
|
||
|
|
|
|
|
|
|
|
|
|
|
|
|
|
|
|
|
|
|
|
|
||
|
8 |
|
|
|
|
|
|
|
|
|
|
|
|
|
|
|
|
13 |
||||
|
|
|
|
|
|
|
|
|
|
|
|
|
|
|||||||||
|
9 |
|
|
|
|
|
|
|
|
|
|
|
|
|
|
|
|
|
|
|
12 |
|
|
|
|
|
|
|
|
|
|
|
|
|
|
|
|
|
|||||||
|
10 |
|
|
|
|
|
|
|
|
|
|
|
|
|
|
|
|
|
|
|
|
|
|
|
|
|
|
|
|
|
|
|
|
|
|
|
|
|
|
|
|
|
|
||
|
|
|
|
|
|
|
|
|
|
|
|
|
|
|
|
|
|
|
|
|
||
|
|
|
|
|
|
|
|
|
|
|
|
|
|
|
|
|
|
|
|
|
||
|
11 |
|
|
|
|
|
|
|
|
|
|
|
|
|
|
|
|
|
|
|
|
|
|
|
|
|
|
|
|
|
|
|
|
|
|
|
|
|
|
|
|
|
|
|
|
1 |
Earpiece |
10 |
Mini USB connection |
|||||||||||||||||||
2 |
Display |
11 |
|
Microphone |
||||||||||||||||||
3 |
Display keys |
12 |
Mute key |
|||||||||||||||||||
4 |
Control key |
13 |
Hash key |
|||||||||||||||||||
5 |
Speakerphone key |
14 |
Number keys |
|||||||||||||||||||
6 |
Talk key |
15 |
On-hook and on/off key |
|||||||||||||||||||
7 |
Headset connection |
16 |
Message key |
|||||||||||||||||||
8Star key
9R key
How to use the keys: Æ Page 9
4

Contents
Contents
Safety notes . . . . . . . . . . . . . . . . . . . . . . . . . . . . . . . . . . 2
Handset . . . . . . . . . . . . . . . . . . . . . . . . . . . . . . . . . . . . . . . . . . . . . . . . . . 2 Batteries . . . . . . . . . . . . . . . . . . . . . . . . . . . . . . . . . . . . . . . . . . . . . . . . . 2 WEEE mark . . . . . . . . . . . . . . . . . . . . . . . . . . . . . . . . . . . . . . . . . . . . . . . 3
Operating instructions . . . . . . . . . . . . . . . . . . . . . . . . . 3 Overview of handset . . . . . . . . . . . . . . . . . . . . . . . . . . . 4
Description of controls . . . . . . . . . . . . . . . . . . . . . . . . . 9
Function keys . . . . . . . . . . . . . . . . . . . . . . . . . . . . . . . . . . . . . . . . . . . . . 9 R key . . . . . . . . . . . . . . . . . . . . . . . . . . . . . . . . . . . . . . . . . . . . . . . . . . . 10 Control key . . . . . . . . . . . . . . . . . . . . . . . . . . . . . . . . . . . . . . . . . . . . . . 10 Display keys. . . . . . . . . . . . . . . . . . . . . . . . . . . . . . . . . . . . . . . . . . . . . . 11 Menu icons in the main menu. . . . . . . . . . . . . . . . . . . . . . . . . . . . . . . . 12
Putting the handset into service . . . . . . . . . . . . . . . . 14
Removing the protective cover . . . . . . . . . . . . . . . . . . . . . . . . . . . . . . . 14 Installing the charger . . . . . . . . . . . . . . . . . . . . . . . . . . . . . . . . . . . . . . . 14 Inserting the battery . . . . . . . . . . . . . . . . . . . . . . . . . . . . . . . . . . . . . . . 15 Charging and using the battery . . . . . . . . . . . . . . . . . . . . . . . . . . . . . . . 17 Fitting the attachment clip. . . . . . . . . . . . . . . . . . . . . . . . . . . . . . . . . . . 18 Connecting the USB data cable. . . . . . . . . . . . . . . . . . . . . . . . . . . . . . . 18 Connecting the headset . . . . . . . . . . . . . . . . . . . . . . . . . . . . . . . . . . . . 18 Setting the handset display language . . . . . . . . . . . . . . . . . . . . . . . . . . 19
Setting the handset . . . . . . . . . . . . . . . . . . . . . . . . . . . 20
Setting the speaker volume. . . . . . . . . . . . . . . . . . . . . . . . . . . . . . . . . . 20 During a call . . . . . . . . . . . . . . . . . . . . . . . . . . . . . . . . . . . . . . . . . . . 20 In idle status. . . . . . . . . . . . . . . . . . . . . . . . . . . . . . . . . . . . . . . . . . . 21 Setting a handsfree profile. . . . . . . . . . . . . . . . . . . . . . . . . . . . . . . . 21
Setting advisory tones . . . . . . . . . . . . . . . . . . . . . . . . . . . . . . . . . . . . . . 23 Activating/deactivating the vibration alert . . . . . . . . . . . . . . . . . . . . . . . 24 Setting the ringer. . . . . . . . . . . . . . . . . . . . . . . . . . . . . . . . . . . . . . . . . . 25 Setting ringing tones and pictures with resource directory . . . . . . . . . . 27 Viewing screensavers and caller pictures / Playing sounds . . . . . . . 27 Deleting/renaming a picture/sound . . . . . . . . . . . . . . . . . . . . . . . . . 28 Checking the available memory . . . . . . . . . . . . . . . . . . . . . . . . . . . . 29 Activating or deactivating the ringer . . . . . . . . . . . . . . . . . . . . . . . . . . . 30
5

Contents
Activating or deactivating the alerting tone . . . . . . . . . . . . . . . . . . . . . . 30 Activating/deactivating automatic call answering . . . . . . . . . . . . . . . . . 31 Setting the date and time . . . . . . . . . . . . . . . . . . . . . . . . . . . . . . . . . . . 32 Setting the display. . . . . . . . . . . . . . . . . . . . . . . . . . . . . . . . . . . . . . . . . 33 Setting the conversion list for vCard transfer . . . . . . . . . . . . . . . . . . . . 36 Setting the menu view . . . . . . . . . . . . . . . . . . . . . . . . . . . . . . . . . . . . . 37 Resetting the defaults . . . . . . . . . . . . . . . . . . . . . . . . . . . . . . . . . . . . . . 38
Conducting calls – the basic functions . . . . . . . . . .40
Activating/deactivating the handset. . . . . . . . . . . . . . . . . . . . . . . . . . . . 41 First seize the line, then dial . . . . . . . . . . . . . . . . . . . . . . . . . . . . . . . . . 42 Dial first, then seize the line . . . . . . . . . . . . . . . . . . . . . . . . . . . . . . . . . 43 Manual redial . . . . . . . . . . . . . . . . . . . . . . . . . . . . . . . . . . . . . . . . . . . . . 44 Callback . . . . . . . . . . . . . . . . . . . . . . . . . . . . . . . . . . . . . . . . . . . . . . . . . 45 Consultation. . . . . . . . . . . . . . . . . . . . . . . . . . . . . . . . . . . . . . . . . . . . . . 46 Activating and deactivating the microphone . . . . . . . . . . . . . . . . . . . . . 48 Answering or rejecting a call . . . . . . . . . . . . . . . . . . . . . . . . . . . . . . . . . 49 Ending a call. . . . . . . . . . . . . . . . . . . . . . . . . . . . . . . . . . . . . . . . . . . . . . 50 Activating or deactivating the keypad lock . . . . . . . . . . . . . . . . . . . . . . 50 After leaving the radio network . . . . . . . . . . . . . . . . . . . . . . . . . . . . . . . 50
Conducting calls – enhanced functions . . . . . . . . .51
Speakerphone mode . . . . . . . . . . . . . . . . . . . . . . . . . . . . . . . . . . . . . . . 51 Conducting calls with the headset . . . . . . . . . . . . . . . . . . . . . . . . . . . . 52 Corded headset . . . . . . . . . . . . . . . . . . . . . . . . . . . . . . . . . . . . . . . . 52 Cordless headset . . . . . . . . . . . . . . . . . . . . . . . . . . . . . . . . . . . . . . . 52 Switching to mute . . . . . . . . . . . . . . . . . . . . . . . . . . . . . . . . . . . . . . . . . 54 Number redial . . . . . . . . . . . . . . . . . . . . . . . . . . . . . . . . . . . . . . . . . . . . 55 Automatic redial. . . . . . . . . . . . . . . . . . . . . . . . . . . . . . . . . . . . . . . . 55 Deleting a redial entry or list . . . . . . . . . . . . . . . . . . . . . . . . . . . . . . 55 Adding a telephone number to the redial list. . . . . . . . . . . . . . . . . . 56 The handset's phonebook . . . . . . . . . . . . . . . . . . . . . . . . . . . . . . . . . . . 57 Saving an entry . . . . . . . . . . . . . . . . . . . . . . . . . . . . . . . . . . . . . . . . 58 Finding and dialling an entry . . . . . . . . . . . . . . . . . . . . . . . . . . . . . . 59 Dialling an entry with the speed dialling digit. . . . . . . . . . . . . . . . . . 60 Viewing an entry . . . . . . . . . . . . . . . . . . . . . . . . . . . . . . . . . . . . . . . 60 Changing an entry . . . . . . . . . . . . . . . . . . . . . . . . . . . . . . . . . . . . . . 60 Deleting an entry or phonebook . . . . . . . . . . . . . . . . . . . . . . . . . . . 61 Displaying available memory . . . . . . . . . . . . . . . . . . . . . . . . . . . . . . 61 Sending an entry or phonebook to the handset or system . . . . . . . 62 Central directories (group directory) . . . . . . . . . . . . . . . . . . . . . . . . . . . 64 Making calls using project assignment (cost billing) . . . . . . . . . . . . . . . 65 Using a different telephone in the same way as your own . . . . . . . . . . 66 Caller ID suppression. . . . . . . . . . . . . . . . . . . . . . . . . . . . . . . . . . . . . . . 67 Activating/deactivating do not disturb . . . . . . . . . . . . . . . . . . . . . . . . . . 68
6

Contents
Call tracing . . . . . . . . . . . . . . . . . . . . . . . . . . . . . . . . . . . . . . . . . . . . . . . 69 Call forwarding. . . . . . . . . . . . . . . . . . . . . . . . . . . . . . . . . . . . . . . . . . . . 70 Using call forwarding . . . . . . . . . . . . . . . . . . . . . . . . . . . . . . . . . . . . 70 Delayed call forwarding . . . . . . . . . . . . . . . . . . . . . . . . . . . . . . . . . . 79 Forwarding calls for a different terminal . . . . . . . . . . . . . . . . . . . . . 79 Entering commands via tone dialling (DTMF suffix dialling) . . . . . . . . . 81 Parking/activating calls. . . . . . . . . . . . . . . . . . . . . . . . . . . . . . . . . . . . . . 81
Conducting calls – with multiple users. . . . . . . . . . 83
Call waiting . . . . . . . . . . . . . . . . . . . . . . . . . . . . . . . . . . . . . . . . . . . . . . 83 Busy override. . . . . . . . . . . . . . . . . . . . . . . . . . . . . . . . . . . . . . . . . . . . . 84 Transferring a call . . . . . . . . . . . . . . . . . . . . . . . . . . . . . . . . . . . . . . . . . 85 Toggling (switching between calls) . . . . . . . . . . . . . . . . . . . . . . . . . . . . 85 Conducting a conference. . . . . . . . . . . . . . . . . . . . . . . . . . . . . . . . . . . . 86
Setting up a conference. . . . . . . . . . . . . . . . . . . . . . . . . . . . . . . . . . 87 Expanding a conference. . . . . . . . . . . . . . . . . . . . . . . . . . . . . . . . . . 88 Transferring the conference. . . . . . . . . . . . . . . . . . . . . . . . . . . . . . . 90 During the conference . . . . . . . . . . . . . . . . . . . . . . . . . . . . . . . . . . . 90 Using the camp-on function . . . . . . . . . . . . . . . . . . . . . . . . . . . . . . . . . 91
Message functions . . . . . . . . . . . . . . . . . . . . . . . . . . . 93
Using the mailbox . . . . . . . . . . . . . . . . . . . . . . . . . . . . . . . . . . . . . . . . . 93 Using the missed call list. . . . . . . . . . . . . . . . . . . . . . . . . . . . . . . . . . . . 94 Using the HiPath Xpressions mailbox function (optional) . . . . . . . . . . . 95
Additional functions . . . . . . . . . . . . . . . . . . . . . . . . . . 96
Handset alarm clock function . . . . . . . . . . . . . . . . . . . . . . . . . . . . . . . . 96 Handset appointment reminder function. . . . . . . . . . . . . . . . . . . . . . . . 98 System appointment function . . . . . . . . . . . . . . . . . . . . . . . . . . . . . . . 101 Selecting a base . . . . . . . . . . . . . . . . . . . . . . . . . . . . . . . . . . . . . . . . . 103 Setting the base . . . . . . . . . . . . . . . . . . . . . . . . . . . . . . . . . . . . . . . . . 104 Speed dialling . . . . . . . . . . . . . . . . . . . . . . . . . . . . . . . . . . . . . . . . . . . 105 Speed access to functions . . . . . . . . . . . . . . . . . . . . . . . . . . . . . . . . . 106 Data communication with the PC . . . . . . . . . . . . . . . . . . . . . . . . . . . . 107 Bluetooth interface . . . . . . . . . . . . . . . . . . . . . . . . . . . . . . . . . . . . . . . 108
Activating/deactivating Bluetooth mode . . . . . . . . . . . . . . . . . . . . 108 Registering Bluetooth devices . . . . . . . . . . . . . . . . . . . . . . . . . . . . 109 Editing the list of known (trusted) devices. . . . . . . . . . . . . . . . . . . 110 Phonebook transfer . . . . . . . . . . . . . . . . . . . . . . . . . . . . . . . . . . . . 112 System-wide speaker call . . . . . . . . . . . . . . . . . . . . . . . . . . . . . . . . . . 113
7

Contents
Telephone blocking. . . . . . . . . . . . . . . . . . . . . . . . . .115
Handset telephone lock. . . . . . . . . . . . . . . . . . . . . . . . . . . . . . . . . . . . 115 Locking the telephone line to prevent misuse . . . . . . . . . . . . . . . . . . 116
Accessing system functions . . . . . . . . . . . . . . . . . .118
Appendix . . . . . . . . . . . . . . . . . . . . . . . . . . . . . . . . . . .119
Troubleshooting. . . . . . . . . . . . . . . . . . . . . . . . . . . . . . . . . . . . . . . . . . 119 Cleaning the handset. . . . . . . . . . . . . . . . . . . . . . . . . . . . . . . . . . . . . . 121 Documentation . . . . . . . . . . . . . . . . . . . . . . . . . . . . . . . . . . . . . . . . . . 122 General specifications . . . . . . . . . . . . . . . . . . . . . . . . . . . . . . . . . . . . . 122 DECT . . . . . . . . . . . . . . . . . . . . . . . . . . . . . . . . . . . . . . . . . . . . . . . 122 Bluetooth . . . . . . . . . . . . . . . . . . . . . . . . . . . . . . . . . . . . . . . . . . . . 123 Battery . . . . . . . . . . . . . . . . . . . . . . . . . . . . . . . . . . . . . . . . . . . . . . 123 Handset operating times/charging times. . . . . . . . . . . . . . . . . . . . 124 Charging shells . . . . . . . . . . . . . . . . . . . . . . . . . . . . . . . . . . . . . . . . . . 124 Accessories . . . . . . . . . . . . . . . . . . . . . . . . . . . . . . . . . . . . . . . . . . . . . 125 EU guidelines. . . . . . . . . . . . . . . . . . . . . . . . . . . . . . . . . . . . . . . . . . . . 125 Writing and editing text . . . . . . . . . . . . . . . . . . . . . . . . . . . . . . . . . . . . 126 Setting upper/lower case or digits . . . . . . . . . . . . . . . . . . . . . . . . . 126 Writing names . . . . . . . . . . . . . . . . . . . . . . . . . . . . . . . . . . . . . . . . 127 Accessing additional functions via the PC interface . . . . . . . . . . . . . . 127 Declaration of conformity . . . . . . . . . . . . . . . . . . . . . . . . . . . . . . . . . . 127
Index. . . . . . . . . . . . . . . . . . . . . . . . . . . . . . . . . . . . . . .129
8

Description of controls
Description of controls
Function keys
The following function keys are available:
Key |
Name |
Usage |
|
|
|
|
|
a |
On-hook and |
• |
End a call |
|
on/off key |
• |
Cancel functions |
|
|
• Go back to the next menu level up |
|
|
|
• Activate or deactivate the handset |
|
|
|
|
|
c |
Talk key |
• |
Answer a call |
|
|
• Dial a phone number |
|
|
|
• Open the redial list |
|
|
|
• Access telephone system functions |
|
|
|
|
|
d |
Speakerphone |
• |
Answer a call |
|
key |
• Dial a phone number |
|
|
|
• Toggle between handset and speaker- |
|
|
|
|
phone mode |
|
|
• Access telephone system functions |
|
|
|
|
|
f |
Message list |
Access message lists |
|
* |
Star key |
Activate/deactivate the ringer |
|
# |
Hash key |
Activate/deactivate keypad lock |
|
h |
Mute key |
Mute the microphone |
|
S |
R key |
R key function Æ Page 10 |
|
9

Description of controls
R key
Pressing the R key briefly allows different functions to be performed depending on the current operating mode, for example:
•When dialling: insert a pause (for example, between the prefix and the phone number, or when checking a mailbox)
•When conducting a call: end the call
•When conducting a consultation call: end the consultation call.
•When conducting a consultation call, initiating a conference or forwarding a call: terminate the connection to a mailbox
Control key
The control key is assigned different functions depending on the operating situation:
|
t |
s |
u |
v |
Situation |
|
|
|
|
|
Press top of |
Press bottom |
Press left side |
Press right side |
|
key |
of key |
of key |
of key |
|
|
|
|
|
In idle status |
Call volume |
Open the |
Communica- |
Open the hand- |
|
|
handset's |
tion system |
set's main menu |
|
|
phonebook |
menu |
|
|
|
|
|
|
During a call |
Call volume |
Open the |
Communica- |
Select "Loud- |
|
|
handset's |
tion system |
speaker Vol", |
|
|
phonebook |
menu |
"GAP DTMF", |
|
|
|
|
"Base Settings" |
|
|
|
|
|
In the main |
Select a menu |
Select a menu |
Select a menu |
Select a menu |
menu |
icon |
icon |
icon |
icon |
|
|
|
|
|
In lists and |
Next-higher |
Next-lower |
Next menu lev- |
Select an entry |
menus |
item in the list |
item in the list |
el up, cancel |
(OK) |
|
|
|
|
|
In the input |
Move the cur- |
Move the cur- |
Move the cur- |
Move the cursor |
field |
sor up one line |
sor down one |
sor to the left |
to the right |
|
|
line |
|
|
|
|
|
|
|
Change values |
- |
- |
Reduce value |
Increase value |
|
|
|
|
|
10
Description of controls
Display keys
The handset has two display keys, each with one or two functions. When the key is allocated two functions, press the right or left side of the key to select the corresponding function. The display key assignment depends on the operating status.
|
|
|
|
Current display key |
Back |
Save |
|
|
|
|
|
|||
|
|
|
|
functions |
|
|
|||
|
|
|
|
Display keys |
|
|
|
|
Some important display keys include:
Icon Usage
Options Open a context-specific menu
OK |
Confirm your selection |
ÛDelete character by character/word by word from right to left
|
Back |
Go back one menu level/cancel operation |
|
|
|
|
Save |
Save input |
|
|
|
|
Þ |
Open redial list |
11

Description of controls
Menu icons in the main menu
v The handset's main menu can be opened by right-clicking the control key.
u v t s The menu icons are selected by pressing the left/right and top/bottom of the control key.
Alternatively, you can also press one of the numerical keys, e. g. 4 for "Alarm Clock" or O for "Settings".
Menu options that are only available in expert mode are marked with the
• icon. Expert mode can be set by switching the menu view from simplified to complete. To set, see Æ Page 37.
|
Icon |
Name |
Usage |
||
|
|
|
|
|
|
|
· |
|
Resource Directo- |
Manage images and tones: |
|
|
|
ry |
• |
Screensavers |
|
|
|
|
|
• |
Caller Pictures |
|
|
|
|
• |
Sounds |
|
|
|
|
• |
Capacity |
|
|
|
|
|
|
|
|
|
Bluetooth |
Configure Bluetooth interface: |
|
|
ò |
|
|||
|
|
|
• |
Activation |
|
|
|
|
|
• |
Search for Headset |
|
|
|
|
• |
Search Data Device |
|
|
|
|
• |
Known Devices |
|
|
|
|
• |
Own Device |
|
|
|
|
|
|
|
É |
|
Additional |
see Resource Directory |
|
|
|
Features |
|
|
|
|
|
|
|
||
|
|
|
|
|
|
|
ì |
|
Alarm Clock |
Configure alarm call function. |
|
|
|
|
|
|
|
|
|
|
|
|
|
|
Ê |
|
Call Lists |
Open call list if calls are available. |
|
|
|
|
|
|
|
|
|
|
|
|
|
|
Ì |
|
Voice Mail |
Call mailbox if voicemail calls are availa- |
|
|
|
|
ble on the network answering machine. |
||
|
|
|
|
|
|
|
á |
|
Organizer |
Manage appointments: |
|
|
|
|
• |
Calendar |
|
|
|
|
|
• |
Missed Alarms |
|
|
|
|
|
|
|
 |
|
Directory |
Manage phonebook. |
|
|
|
|
|
|
|
|
|
|
|
|
|
12
|
|
|
|
|
|
|
Description of controls |
|
|
|
|
|
|
|
|
|
|
|
Icon |
Name |
Usage |
||
|
|
|
|
|
|
|
|
|
|
|
Ï |
|
Settings |
Configure handset: |
|
|
|
|
|
|
• |
Date/Time |
|
|
|
|
|
|
|
• |
Audio Settings |
|
|
|
|
|
|
|
– Handset Volume |
|
|
|
|
|
|
|
– Freisprechprofile |
|
|
|
|
|
|
|
– • Advisory Tones |
|
|
|
|
|
|
|
– Silent Alert |
|
|
|
|
|
|
|
– Ringtones(Handset) |
|
|
|
|
|
|
• |
Display + Tastatur |
|
|
|
|
|
|
|
– Screensaver |
|
|
|
|
|
|
|
– Large Font |
|
|
|
|
|
|
|
– Colour Schemes |
|
|
|
|
|
|
|
– • Display-Beleucht. |
|
|
|
|
|
|
|
– Tastatur-Beleucht. |
|
|
|
|
|
|
• |
Language |
|
|
|
|
|
|
• |
Registration |
|
|
|
|
|
|
|
– Register Handset |
|
|
|
|
|
|
|
– De-reg. Handset |
|
|
|
|
|
|
|
– Select Base |
|
|
|
|
|
|
• |
• Telephony |
|
|
|
|
|
|
|
– Auto Answer |
|
|
|
|
|
|
|
– Area Codes |
|
|
|
|
|
|
• |
• System |
|
|
|
|
|
|
|
– Handset PIN |
|
|
|
|
|
|
|
– Handset Reset |
|
|
|
|
|
|
|
– Base Reset |
|
|
|
|
|
|
• |
Menu View |
|
|
|
|
|
|
|
– Simplified |
|
|
|
|
|
|
|
– Complete |
|
|
|
|
|
|
|
|
|
|
|
|
|
|
|
|
13

Putting the handset into service
Putting the handset into service
Removing the protective cover
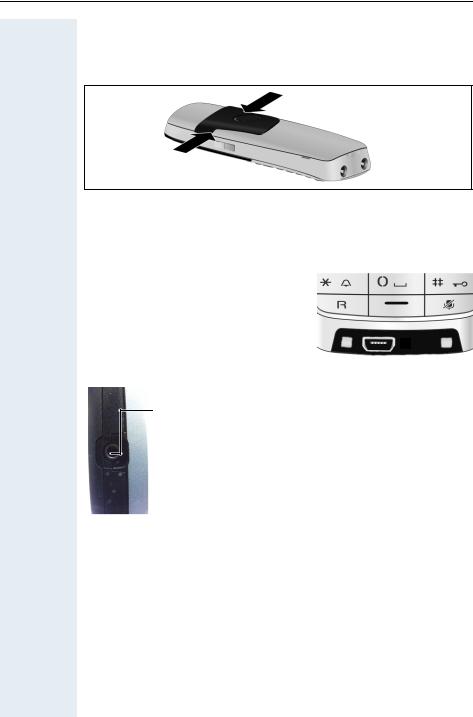
Remove the protective cover from the display before putting the handset into service.
Installing the charger
The charger is designed for operation in closed, dry rooms within a temperature range of +5 °C to +45 °C.
Install the charger on a level, non-slip surface.
The phone's feet do not usually leave any marks on surfaces. However, due to the multitude of different varnishes and polishes used on today's furnishings, the occurrence of marks on the surfaces cannot be completely ruled out.
Please note:
•Never expose the telephone to the influence of heat sources, direct sunlight or other electrical devices.
•Protect your OpenStage SL4 professional from moisture, dust, corrosive liquids and fumes.
|
• Connect the flat plug from |
2 |
the power adapter 1. |
• Plug the power adapter into the plug socket 2.
1
4
To disconnect the plug from the charger,
press the release button 3 and discon- 3 nect the plug 4.
14

Putting the handset into service
Inserting the battery
The handset is supplied with an approved battery. The battery is not charged when supplied. It is first charged in the handset.
Caution:
•Please observe the safety notes Æ Page 2!
•Only use approved batteries Æ Page 123!
•Open the battery compartment in a dust-free environment only.
•Your phonebook entries and all settings remain stored even if you remove the battery. The date and time settings will be reset.
•Only remove the battery if it is defective. The battery's life diminishes each time it is removed.
1.If installed: Remove the attachment clip
Insert a screwdriver between the attachment clip and the battery cover (1) and force the attachment clip outward (2) until it dislodges.
1
2
Likewise dislodge the clip on the opposite side and then remove it.
15

Putting the handset into service
2. Open the battery compartment
Reach into the cavity on the housing and lift up the battery cover.
3. Insert the battery
Insert the battery ensuring that the contacts meet.
4. Close the battery compartment
First, align the protrusions on the side of the battery cover with the notches on the inside of the casing. Then press the cover until it clicks into place.
16

Putting the handset into service
Charging and using the battery
To charge the battery, insert the handset into the charging shell with the keypad facing forwards.
Important:
Only use the relevant approved power supply units for operating the charging shell (for order numbers see Æ Page 122).
The charging status is indicated by the charge status display:
{lighting white: charged over 66%
{lighting white: charged between 34% and 66% y lighting white: charged between 11% and 33% y lighting red: charged below 11%
y flashing red: battery almost empty (less than 10 minutes talktime) xyxy x{x{ lighting white: battery being charged
Note:
•Initial charging: Charge the battery for at least 3 hours without a break, regardless of the charging status icon. Without replacing it in the charging shell, use the handset until the "battery low" beep is heard. This action aligns the charge status display with the operating times of the battery.
•To attain full operating and charging times: After charging, remove the handset from the charger and only replace it when the battery is fully discharged.
•For future charging: you can replace your handset in the charging shell each time it has been used. Charging is electronically controlled which ensures that the battery is charged optimally.
17
Putting the handset into service
Fitting the attachment clip
Press the belt clip onto the back of the handset until the tabs on the clip engage in the recesses on the phone.
Connecting the USB data cable
You can connect a standard USB data cable with a mini-B connector to the underside of your handset in order to synchronise your handset with a PC Æ Page 107.
Connect the USB data cable to the USB jack (1).
1

Connecting the headset
You can connect a headset with a 2.5 mm jack plug to the left side of your handset.
The headset volume corresponds to the setting for the earpiece volume Æ Page 20.
18

Putting the handset into service
Step by Step
u v Ï |
Settings |
|
s t Language
s t DeutschEnglish
Francais
Italiano
Espanol
Portugues
Nederlands
Dansk
Norsk
Svenska
Suomi
Cesky
Polski
Turkce
Ellinika
Magyar
Russkij
Hrvatski
Slovenscina
Romana
Srpski
Catalan
Bulgarski
Bosanski
Ukrayinska
Arabic
Setting the handset display language
If your preferred language for handset display texts is not set as the default, you can set this yourself. The language of communication system display texts can only be set by the administrator.
Opening the main menu
v Open the handset's main menu.
Opening the first submenu
[ Select the menu icon and confirm.
Opening the second submenu
[ Select the menu item and confirm.
Selecting a language
[ Select and confirm the language you require. a Press the On-hook key to end the operation.
Caution:
•If you inadvertently set a display language that you do not understand, press "v O 5" and then select the correct language.
•If you want to reset the default display language: Æ Page 38.
19

Setting the handset
Step by Step
Setting the handset
You can change the standard settings of the handset if you are not happy with them.
Setting the speaker volume
During a call
You can adjust the speaker volume during a call via the earpiece or speakerphone using a menu function. The relevant volumes are adjustable depending on whether you are conducting the call via the earpiece or speakerphone.
p You are conducting a call.
t Press the control key to open the Handset Volume menu.
r Adjust the earpiece or speakerphone volume.
Save Save the settings.
or The setting will be saved automatically after approx. 3 seconds.
20
Setting the handset
Step by Step
u v Ï |
Settings |
|
s t Audio Settings
s t Handset Volume
s t EarpieceSpeaker
In idle status
You can change the speaker volume via the menu in idle mode.
v Open the handset's main menu.
[ Select the menu icon and confirm.
[ Select the menu item and confirm.
[ Select the menu item and confirm.
Handset Volume
Earpiece:
Speaker:
Back Save
[ Select the required menu item.
u v Define the setting. Save Press the display key.
Setting a handsfree profile
•Profile 1
The optimum setting for most connections and therefore set by default.
•Profile 2
Optimum volume in handsfree mode. However, this means that the participants cannot speak at the same time as the person speaking is given preferential transmission (making two-way conversations difficult).
•Profile 3
Optimises two-way conversations, both callers can hear each other, even if they talk at the same time.
21

Setting the handset
Step by Step |
|
|
|
|
|
|
• Profile 4 |
|
|
|
Optimised for special connections. If the default set- |
|
|
|
ting (profile 1) does not provide optimum sound, |
|
|
|
please give this a try. |
|
|
|
In idle status |
|
|
v Open the handset's main menu. |
|
u v |
|
[ Select the menu icon and confirm. |
|
Ï Settings |
|||
s t |
|
[ Select the menu item and confirm. |
|
Audio Settings |
|||
s t |
|
[ Select the menu item and confirm. |
|
Freisprechprofile |
|||
s t [ Select handsfree profile (1 to 4).
Selection Press the display key to save the setting.
22

Setting the handset
Step by Step
u v Ï |
Settings |
|
s t Audio Settings
s t Advisory Tones
s t Key Tones
Confirmation
Battery
|
|
|
Setting advisory tones |
||||
|
|
|
|
|
|
|
|
|
|
|
|
|
Caution: |
|
|
|
|
|
|
|
|
||
|
|
|
|
|
Can only be set if this menu item is visible. To set, |
||
|
|
|
|
|
|||
|
|
|
|
|
see Æ Page 37. |
||
|
|
|
|
|
|||
|
|
|
The advisory tones have the following meaning: |
||||
|
|
|
|
|
|
|
|
|
|
|
|
Advisory |
|
Explanation |
|
|
|
|
|
|
|
|
|
|
|
|
|
Key Tones |
|
Every key press is confirmed. |
|
|
|
|
|
|
|
|
|
|
|
|
|
Confirmation |
|
• Confirmation tone when saving |
|
|
|
|
|
|
|
|
inputs/settings and when plac- |
|
|
|
|
|
|
|
ing the handset in the charging |
|
|
|
|
|
|
|
shell |
|
|
|
|
|
|
|
• Error beep (decrescendo tone |
|
|
|
|
|
|
|
sequence) to signal incorrect |
|
|
|
|
|
|
|
inputs |
|
|
|
|
|
|
|
• End-of-menu beep at the menu |
|
|
|
|
|
|
|
end |
|
|
|
|
|
|
|
|
|
|
|
|
Battery |
|
The batteries must be charged. |
|
v |
|
|
|
||||
|
Open the handset's main menu. |
||||||
[ |
|
Select the menu icon and confirm. |
|||||
[ |
|
Select the menu item and confirm. |
|||||
[ |
|
Select the menu item and confirm. |
|||||
[ |
|
Select the required menu item. |
|||||
u v |
|
Activate or deactivate. |
|||||
|
|
|
Save the settings. |
|
|||
Save |
|
|
|||||
|
|
|
|
|
|
|
|
23

Setting the handset
Step by Step
|
|
|
|
|
|
|
Activating/deactivating the vibration |
|
|
|
|
|
|
|
alert |
|
|
|
|
|
|
|
Incoming calls and other messages are indicated by a |
|
|
|
|
|
|
|
silent alert. |
|
|
|
|
|
|
v Open the handset's main menu. |
|
u v |
|
|
|
|
[ Select the menu icon and confirm. |
||
Ï Settings |
|
||||||
s t |
|
|
|
|
[ Select the menu item and confirm. |
||
Audio Settings |
|
||||||
s t |
|
|
|
|
|
|
|
Silent Alert |
|
|
|
Select the menu item and confirm. |
|||
|
|
|
|
|
|
Press the display key. |
|
|
|
|
|
Edit |
|
||
|
|
|
|
|
|
v Activate or deactivate. |
|
24

Setting the handset
Step by Step
|
|
v |
u v |
|
[ |
Ï Settings |
||
s t |
|
[ |
Audio Settings |
||
s t |
|
[ |
|
||
Ringtones(Handset) |
||
s t |
|
[ |
|
||
MelodiesVolume |
||
|
Time Control |
|
|
Anon. Calls Silent ³ |
|
s t Volume [
s t For internal calls and appointments
For external calls
u v
Save
s t |
|
[ |
Melodies |
Setting the ringer
Tones and melodies are saved on your handset. If you select the menu items Volume and Melodies, the ringtone sounds at the current setting.
Open the handset's main menu.
Select the menu icon and confirm.
Select the menu item and confirm.
Select the menu item and confirm.
Select the required menu item and confirm.
Caution:
The "Anon. Calls Silent" function is not available on your communication system.
Setting the volume
Select the menu item and confirm.
You can choose between three ringer volumes, as well as a crescendo ring (volume increases gradually).
Volume For internal calls
and appointments:
For external calls:
Back Save
Select the required menu item.
Define the setting.
Press the display key.
Setting melodies
You can set ringing tones differently on your handset for different calls to help you differentiate between calls and appointments:
Select the menu item and confirm.
25

Setting the handset
Step by Step |
|
|
|
|
||
|
|
|
|
|
|
|
|
|
|
|
|
|
|
s t |
For internal calls |
Select the required menu item. |
||||
For external calls |
|
|||||
|
|
|
|
|
|
|
|
|
|
u v |
Define the setting. |
||
|
|
|
Save |
|
Press the display key. |
|
|
|
|
|
|
|
Setting time control for external calls |
|
|
|
|
|
|
Specify a time period when you do not want the tele- |
|
|
|
|
|
|
phone to ring, for example during the night. |
s t |
|
|
[ |
|
||
Time Control |
|
Select the menu item and confirm. |
||||
|
|
|
u v |
Specify On or Off. |
||
|
|
|
|
|
|
If active: |
|
|
|
|
|
||
s t |
Suspend ring. from |
Select the required menu item. |
||||
Suspend ring. until |
|
|||||
|
|
|
|
o |
|
Enter the time. |
|
|
|
Save |
|
Save the settings. |
|
|
|
|
|
|
|
|
26

Setting the handset
Step by Step
u v · Resource Di-
rectory
s t Screensavers
Caller Pictures
Sounds
Memory
Setting ringing tones and pictures with resource directory
The resource directory on the handset manages sounds that you can use as ringing tones and pictures that you can use as caller pictures or screensavers. Calling Line Identification Presentation (CLIP). The resource directory can manage the following media types:
Type |
Format |
|
|
Sounds: |
|
Ringtones |
Internal |
Monophonic |
Internal |
Polyphonic |
Internal |
Imported sounds |
WMA, MP3, WAV |
|
|
Pictures: |
BMP, JPG, GIF |
Caller picture |
128 x 86 pixels |
Screensaver |
128 x 160 pixels |
|
|
Your handset comes with a number of monoand polyphonic sounds and pictures pre-installed. You can listen to the available sounds and display the pictures.
You can download pictures and sounds from a PC
Æ Page 107. If there is not enough memory available, you must first delete one or more pictures or sounds.
Viewing screensavers and caller pictures / Playing sounds
v Open the handset's main menu.
[ Select the menu icon and confirm.
[ Select the required menu item and confirm.
s t Select the entry.
27

Setting the handset
Step by Step |
|
|
|
|
||
|
|
|
|
|
|
Screensavers/caller pictures |
|
|
|
|
|
|
Press the display key. |
|
|
|
Show |
|||
|
|
|
s t Toggle between the pictures. |
|||
|
|
|
|
|
|
If you have saved a picture in an invalid file format, you |
|
|
|
|
|
|
will see an error message after selecting the entry. |
|
|
|
|
a |
Press to exit the menu level. |
|
|
|
|
|
|
|
Sounds |
|
|
|
|
|
|
The selected sound is played immediately. |
|
|
|
s t Toggle between the sounds. |
|||
|
|
|
|
|
|
You can set the volume during playback. |
|
|
|
|
|
|
Press the display key. |
|
|
|
Options |
|||
s t |
|
|
[ Select the menu item and confirm. |
|||
Loudspeaker Vol |
|
|||||
|
|
|
|
|
||
|
|
|
u v Adjust the volume. |
|||
|
|
|
|
|
Save setting. |
|
|
|
|
Save |
|||
|
|
|
|
|
|
Deleting/renaming a picture/sound |
|
|
|
|
|
|
You selected an entry. |
|
|
|
|
|
v Open the handset's main menu. |
|
|
|
|
|
[ Select the menu icon and confirm. |
||
u v |
· |
Resource Di- |
|
|||
rectory |
|
|
||||
|
|
|
|
[ Select the required menu item and confirm. |
||
s t |
Screensavers |
|
|
|||
Caller Pictures |
|
|
||||
|
Sounds |
|
|
|
|
|
|
Memory |
|
|
|
|
|
|
|
|
|
s t Select the entry. |
||
|
|
|
|
Press the display key. If a picture/sound is blocked (è), |
||
|
|
|
Options |
|||
|
|
|
|
|
|
the options are not available. |
s t |
|
|
|
[ Select the menu item and confirm. The name of the en- |
||
Rename |
|
|
||||
|
|
|
|
|
|
try can be modified. Length: up to 15 characters. Then |
|
|
|
|
|
|
|
|
|
|
|
|
|
confirm your entry. |
|
|
|
|
|
or |
|
s t |
|
|
|
[ Select the menu item and confirm. The entry is deleted. |
||
Delete Entry |
|
|
||||
28

Setting the handset
Step by Step
|
|
|
|
Checking the available memory |
|
|
|
|
You can show how much memory is left. |
|
|
|
v |
Open the handset's main menu. |
|
|
|
[ |
|
u v |
· |
Resource Di- |
Select the menu icon and confirm. |
|
rectory |
||||
s t |
|
[ |
|
|
Available Memory |
Select the menu item and confirm. |
|||
|
|
|
|
|
29

Setting the handset
Step by Step
*
*
Silence
*
Beep on
ñ
*
Activating or deactivating the ringer
Deactivating the ringer
Hold down the key until a confirmation tone is emitted. The ó icon appears on the display.
Activating the ringer
Hold down the key until a confirmation tone is emitted.
Deactivating the ringer for the current call
Press the display key.
Activating or deactivating the alerting tone
You can activate an alerting tone instead of the ringing tone. A short beep sounds for a call instead of the ringing tone.
If the handset is in a call pickup group, a pickup call is also signalled by the alerting tone.
Activating the alerting tone
Hold down the key until a confirmation tone is emitted. Press the display key within three seconds.
The alerting tone is activated. The volume of the alerting tone is coupled with the volume of the external ringer.
Deactivating the alerting tone
Hold down the key until a confirmation tone is emitted.
30
Loading...