


Before connecting, operating or adjusting this product, please read the instructions completely.
Please keep this manual for future reference.
Antes de conectar, operar o ajustar este producto, sírvase leer estas instrucciones completamente. Guarde este manual para su consulta en el futuro.
Przed pod∏àczeniem, obs∏ugà lub regulacjà sprz´tu prosimy o dok∏adne zapoznanie si´ z treÊcià niniejszej instrukcji. Prosimy o zachowanie niniejszej instrukcji obs∏ugi.
Niniejsza instrukcja zosta∏a opracowana na podstawie oryginalnej publikacji firmy MATSUSHITA ELECTRIC INDUSTRIAL CO., LTD.
Dfiíve neÏ zaãnete jakékoli zapojování, provoz nebo nastavování tohoto v˘robku, prostudujte si prosím cel˘ tento návod. Uschovejte si prosím tento návod k obsluze.
Operating Instructions
Instrucciones de funcionamiento Instrukcja obs∏ugi Návod k obsluze
CD Stereo System
Sistema estéreo con reproductor de discos compactos
Zestaw stereo z CD Stereosystém s CD
Model No. SC-PM45
Operations in these instructions are described using remote control, but you can do the operations with the main unit if the controls are the same.
Your unit may not look exactly as illustrated.
Las operaciones de estas instrucciones se describen principalmente usando el mando a distancia, pero puede realizar las mismas operaciones en el aparato principal.
Es posible que su unidad no se parezca exactamente a la que se muestra.
W niniejszej instrukcji opisano przede wszystkim sposoby wykonywania operacji przy u˝yciu pilota, mo˝na je jednak wykonywaç tak˝e na urzàdzeniu g∏ównym, jeÊli sà na nim dost´pne identyczne elementy sterujàce.
Urzàdzenie mo˝e si´ nieznacznie ró˝niç od przedstawionego na ilustracji.
Operace v tûchto instrukcích jsou popsány vût‰inou pro pouÏití dálkového ovládání, ale mÛÏete je vykonat i na hlavní jednotce, pokud jsou ovládací prvky totoÏné.
Vzhled v˘robku nemusí pfiesnû odpovídat uveden˘m obrázkÛm.
|
|
|
|
|
|
|
|
|
|
E |
|
RQTV0177-2E |
||

Dear customer
Thank you for purchasing this product.
For optimum performance and safety, please read these instructions carefully.
These operating instructions are applicable to the following system.
System |
SC-PM45 |
|
|
Main unit |
SA-PM45 |
|
|
Speakers |
SB-PM45 |
|
|
Back of product
Inside of product
Tuotteen sisällä
Produktets innside
This product may receive radio interference caused by mobile telephones during use. If such interference is apparent, please increase separation between the product and the mobile telephone.
The socket outlet shall be installed near the equipment and easily accessible.
The mains plug of the power supply cord shall remain readily operable.
To completely disconnect this apparatus from the AC Mains, disconnect the power supply cord plug from AC receptacle.
THIS UNIT IS INTENDED FOR USE IN MODERATE CLIMATES.
RQTV0177
2
Table of contents |
|
Supplied accessories................................. |
3 |
Safety precautions ..................................... |
3 |
Placement of speakers............................... |
3 |
Getting started............................................ |
4 |
Overview of controls .................................. |
6 |
Discs............................................................ |
7 |
Cassette tape .............................................. |
9 |
FM/AM radio................................................ |
10 |
Timer............................................................ |
11 |
Sound adjustment ...................................... |
12 |
External unit................................................ |
13 |
Troubleshooting guide............................... |
14 |
Specifications ............................................. |
15 |
Maintenance................................................ |
15 |
CAUTION!
THIS PRODUCT UTILIZES A LASER.
USE OF CONTROLS OR ADJUSTMENTS OR PERFORMANCE OF PROCEDURES OTHER THAN THOSE SPECIFIED HEREIN MAY RESULT IN HAZARDOUS RADIATION EXPOSURE.
DO NOT OPEN COVERS AND DO NOT REPAIR YOURSELF. REFER SERVICING TO QUALIFIED PERSONNEL.
CAUTION!
•DO NOT INSTALL OR PLACE THIS UNIT IN A BOOKCASE, BUILT-IN CABINET OR IN ANOTHER CONFINED SPACE. ENSURE THE UNIT IS WELL VENTILATED. TO PREVENT RISK OF ELECTRIC SHOCK OR FIRE HAZARD DUE TO OVERHEATING, ENSURE THAT CURTAINS AND ANY OTHER MATERIALS DO NOT OBSTRUCT THE VENTILATION VENTS.
•DO NOT OBSTRUCT THE UNIT’S VENTILATION OPENINGS WITH NEWSPAPERS, TABLECLOTHS, CURTAINS, AND SIMILAR ITEMS.
•DO NOT PLACE SOURCES OF NAKED FLAMES, SUCH AS LIGHTED CANDLES, ON THE UNIT.
•DISPOSE OF BATTERIES IN AN ENVIRONMENTALLY FRIENDLY MANNER.
WARNING:
TO REDUCE THE RISK OF FIRE, ELECTRIC SHOCK OR PRODUCT DAMAGE,
•DO NOT EXPOSE THIS APPARATUS TO RAIN, MOISTURE, DRIPPING OR SPLASHING AND THAT NO OBJECTS FILLED WITH LIQUIDS, SUCH AS VASES, SHALL BE PLACED ON THE APPARATUS.
•USE ONLY THE RECOMMENDED ACCESSORIES.
•DO NOT REMOVE THE COVER (OR BACK); THERE ARE NO USER SERVICEABLE PARTS INSIDE. REFER SERVICING TO QUALIFIED SERVICE PERSONNEL.
2

Supplied accessories
Please check and identify the supplied accessories.
1 x Remote control |
|
1 x AC mains lead |
(N2QAYB000078) |
|
1 x AM loop antenna |
1 x FM indoor antenna |
2 x Remote control batteries
Safety precautions
Placement
Set the unit up on an even surface away from direct sunlight, high temperatures, high humidity, and excessive vibration. These conditions can damage the cabinet and other components, thereby shortening the unit’s service life.
Place it at least 15 cm away from wall surfaces to avoid distortion and unwanted acoustical effects.
Do not place heavy items on the unit.
Voltage
Do not use high voltage power sources. This can overload the unit and cause a fi re.
Do not use a DC power source. Check the source carefully when setting the unit up on a ship or other place where DC is used.
AC mains lead protection
Ensure the AC mains lead is connected correctly and not damaged. Poor connection and lead damage can cause fi re or electric shock. Do not pull, bend, or place heavy items on the lead.
Grasp the plug fi rmly when unplugging the lead. Pulling the AC mains lead can cause electric shock.
Do not handle the plug with wet hands. This can cause electric shock.
Foreign matter
Do not let metal objects fall inside the unit. This can cause electric shock or malfunction.
Do not let liquids get into the unit. This can cause electric shock or malfunction. If this occurs, immediately disconnect the unit from the power supply and contact your dealer.
Do not spray insecticides onto or into the unit. They contain fl ammable gases which can ignite if sprayed into the unit.
Service
Do not attempt to repair this unit by yourself. If sound is interrupted, indicators fail to light, smoke appears, or any other problem that is not covered in these instructions occurs, disconnect the AC mains lead and contact your dealer or an authorized service center. Electric shock or damage to the unit can occur if the unit is repaired, disassembled or reconstructed by unqualifi ed persons.
Extend operating life by disconnecting the unit from the power source if it is not to be used for a long time.
– If you see this symbol –
Information on Disposal for Users of Waste Electrical & Electronic Equipment (private households)
This symbol on the products and/or accompanying documents means that used electrical and electronic products should not be mixed with general household waste.
For proper treatment, recovery and recycling, please take these products to designated collection points, where they will be accepted on a free of charge basis. Alternatively, in some countries you may be able to return your products to your local retailer upon the purchase of an equivalent new product.
Disposing of this product correctly will help to save valuable resources and prevent any potential negative effects on human health and the environment which could otherwise arise from inappropriate waste handling. Please contact your local authority for further details of your nearest designated collection point.
Penalties may be applicable for incorrect disposal of this waste, in accordance with national legislation.
For business users in the European Union
If you wish to discard electrical and electronic equipment, please contact your dealer or supplier for further information.
Information on Disposal in other Countries outside the European Union
This symbol is only valid in the European Union.
If you wish to discard this product, please contact your local authorities or dealer and ask for the correct method of disposal.
Placement of speakers
Tweeter
Place the speakers so that the tweeter is on the outside.
Use only the supplied speakers.
The combination of the main unit and speakers provide the best sound. Using other speakers can damage the unit and sound quality will be negatively affected.
Note
•Keep your speakers at least 10 mm away from the system for proper ventilation.
•These speakers do not have magnetic shielding. Do not place them near televisions, personal computers or other devices easily infl uenced by magnetism.
•To avoid damage to the speakers, do not touch the speaker cones if you have taken the nets off.
Caution
•Use the speakers only with the recommended system. Failure to do so can damage the amplifier and speakers, and can cause fire. Consult a qualified service person if damage occurs or if a sudden change in performance is apparent.
•Do not attach these speakers to walls or ceilings.
ENGLISH
RQTV0177
3
3

Getting started
Step 1 - Making the connections
Connect the AC mains lead only after all other connections have been made.
RQTV0177
4
1 Connect the AM loop antenna.
AM loop antenna
Stand the antenna up on its base. Keep the loose antenna cord away from other wires and cords.
3 Connect the speaker cables.
Red (ª)
ª Black (·)
Red ( )
Black (·)
Incorrect connection can damage the unit.
2 Connect the FM indoor antenna.
 Adhesive
tape
FM indoor antenna
Tape the antenna to a wall or column, in a position with least amount of interference.
4 Connect the AC mains lead.
The included AC mains lead is for use with this unit only. Do not use it with other equipment.
Insertion of connector
Appliance inlet |
Connector |
|
Even when the connector is perfectly inserted, depending on the type of inlet used, the front part of the connector may jut out as shown in the drawing. However there is no problem using the unit.
4

Optional antenna connections
FM outdoor antenna |
AM outdoor antenna |
||||||||
FM outdoor antenna |
AM outdoor antenna |
||||||||
(not included) |
(not included) |
||||||||
|
|
|
|
|
|
|
|
|
|
|
|
|
|
|
|
|
|
|
|
|
|
|
|
|
|
|
|
|
|
|
|
|
|
|
|
|
|
|
|
AM loop antenna (included)
75 Ω coaxial cable (not included)
ENGLISH
•Never use an outdoor antenna during a lightning storm.
•You can connect the FM outdoor antenna for better reception. Please consult your dealer for installation.
•Disconnect the FM indoor antenna if an FM outdoor antenna is installed.
•Connect the AM outdoor antenna without removing the AM loop antenna. Run 5 to 12 m of vinyl-covered wire horizontally along a window or other convenient location.
Step 2 - Inserting batteries into the remote control
■ Batteries
•Insert so the poles (+ and –) match those in the remote control.
•Remove if the remote control is not going to be used for a long period of
time. Store in a cool, dark place.
• Do not use rechargeable type batteries.
• Mishandling of batteries in the remote control can cause electrolyte leakage, which may cause a fi re.
Do not:
•mix old and new batteries;
•use different types of batteries at the same time;
•heat or expose to fl ame;
•take apart or short-circuit;
• attempt to recharge alkaline or manganese batteries;
• use batteries if their covering has been peeled off.
■Use
Aim at the remote control sensor, avoiding obstacles, at a maximum range of 7 m directly in front of the unit.
Refer to page 6 for remote control signal sensor position.
Step 3 - DEMO function
When the unit is fi rst plugged in, a demonstration of its functions may be shown on the display.
If the demo setting is off, you can show a demonstration by selecting “DEMO ON”.
Press and hold [7, –DEMO].
The display changes each time the button is held down.
$%-/ /&& $%-/ /.
While in standby mode, select “DEMO OFF” to reduce power consumption.
RQTV0177
5
5
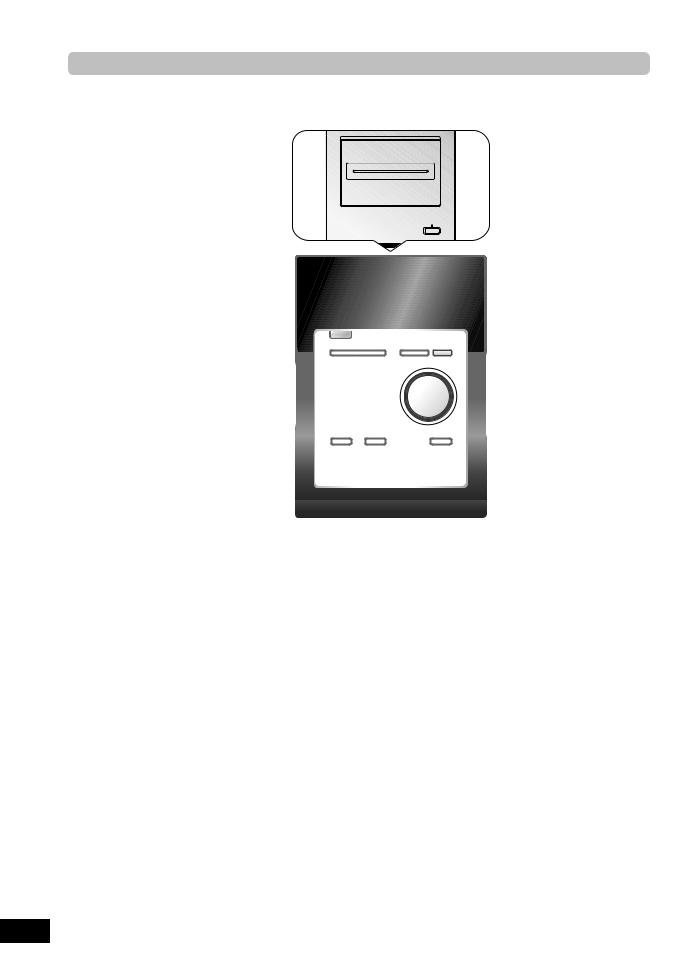
Overview of controls
Main unit
Refer to the numbers in parentheses for page reference.
Top of unit
Cassette lid
 Cassette lid open (9)
AC supply indicator (AC IN) 
This indicator lights when the unit is connected to the AC mains supply.
1 Standby/on switch (y/l) (7, 11) 
Press to switch the unit from on to standby mode or vice versa. In standby mode, the unit is still consuming a small amount of power.
Track skip/search, tape fast-forward/rewind, tune/preset channel selection, time adjustment, bass/treble adjustment
2 Disc play/pause (7, 8, 9) 

3Tuner/Band selection (10) 
Headphone jack ( l)
Avoid listening for prolonged periods of time to prevent hearing damage. Plug type: 3.5 mm stereo (not included)
Stop/Demo (5, 7, 8, 9, 13) 
Display panel
 Remote control sensor
 4 Bass/Treble selection (12)
 Recording start/pause (9)
 5Tape play (9)
  USB jack (13)
 6Volume control
 Music port jack (13)
 Disc tray open/close (7, 9)
7 USB play/pause (9,13)
Disc tray
8 Music port selection (13)
RQTV0177
6
6
Remote control
Buttons such as 1 function the same as the controls on the main unit.
Sleep timer (11)
1
Program (8, 10)
Play mode (7, 9, 10)
Repeat (8)
8
Stop/Clear (7, 8, 9, 13)
3
5
6
Album selection (7, 8, 13)
Enter (8)
Surround (12)
Display (7, 10, 13)
Dimmer
N |
CLEAR |
USB |
TAPE |
Clock/Timer (11)
Play timer/Record timer (11)
Numeric (7, 8, 10)
Delete (8)
2
7
Track skip/search, tape fastforward/rewind, tune/preset channel selection, time adjustment, bass/treble adjustment (7 to 13)
4
Preset EQ (12)
Muting
Auto off
This function allows you to turn off the unit in disc, tape or USB mode only after left unused for 10 minutes.
The setting is maintained even if the unit is turned off.
Dims the display panel.
Mutes the sound.
•Press the button to activate.
•Press again to cancel.

Discs |
|
|
|
|
N |
|
y |
|
PLAY MODE |
Numeric |
|
|
|
|
|
|
buttons |
CLEAR 7 |
CD 6 |
|
|
|
|
|
|
CLEAR |
|
|
USB |
|
|
TAPE |
VOL +, – |
|
|
ALBUM |
, |
/REW/4, |
|
|
/FF/¢ |
DISPLAY |
|
|
|
|
0 |
Basic play
CD MP3
1 |
Press [y] to turn the unit on. |
2 |
Press [0] to open the disc tray and then load the |
|
disc. Press [0] again to close the tray. |
Label must face upward
|
|
Disc tray |
|
|
3 |
Press [CD 6] to start play. |
|
|
|
4 |
Adjust the volume. |
|
|
|
|
|
|
|
|
To |
|
Action |
|
|
stop the disc |
Press [CLEAR 7]. |
|
|
|
|
|
|
|
|
pause play |
Press [CD 6]. |
|
|
|
|
|
Press again to resume play. |
||
|
|
|
||
skip tracks |
Press [ /REW/4] or [ |
/FF/¢]. |
||
|
|
|
||
search through |
Press and hold [ |
/REW/4] or[ /FF/¢] |
||
tracks |
during play or pause. |
|
||
CD |
|
|
|
|
|
|
|
|
|
skip album |
Press [ALBUM |
or |
] in the play mode. |
|
MP3 |
Press [ALBUM |
or |
] once and then the |
|
|
|
numeric buttons in the stop mode. |
||
|
|
|
|
|
Play Mode function
CD MP3
1 |
Press [CD 6]. |
|
|
|
2 |
Press [PLAY MODE] to select the desired mode. |
|||
|
|
|
|
|
Mode |
To play |
|
|
|
1-TRACK |
one selected track on the disc. |
|||
1TR |
|
Press the numeric buttons to select the |
||
|
|
track. |
|
|
1-ALBUM |
one selected album on the disc. |
|||
1ALBUM |
Press [ALBUM |
or |
] to select the |
|
MP3 |
album. |
|
|
|
|
|
|
|
|
RANDOM |
a disc randomly. |
|
|
|
RND |
|
|
|
|
|
|
|||
1-ALBUM RANDOM |
all tracks in one selected album randomly. |
|||
1ALBUM RND |
Press [ALBUM |
or |
] to select the |
|
MP3 |
album. |
|
|
|
|
|
|
|
|
Note
•During RANDOM or 1-ALBUM RANDOM play, you cannot skip to tracks that have been played.
•The current play mode is cleared when you open the disc tray.
CD
•During RANDOM play, you can search backward or forward only within the current track.
Display function
This function allows you to display the information of the current track.
Press [DISPLAY] repeatedly during play or pause mode.
CD
 Elapsed play time
  Remaining play time
MP3
 Elapsed time
  Album name
  Track name
ID3 (Artist)  ID3 (Track)
  ID3 (Album)
Note
•Maximum number of displayable characters: approximately 30
•This unit supports ver. 1.0 & 1.1 ID3 tags. Text data that is not supported will not be displayed.
•ID3 is a tag embedded in MP3 tracks to provide information about the track.
ENGLISH
RQTV0177
7
7

Discs (continued)
PROGRAM |
|
|
PLAY MODE |
Numeric |
|
|
|
|
REPEAT |
buttons |
|
|
|
DEL |
MUSIC PORT |
|
|
CLEAR 7 |
CD 6 |
|
|
|
|
|
CLEAR |
USB |
|
|
|
|
|
USB 6 |
|
TAPE |
TAPE 3 |
ALBUM |
, |
/REW/4, |
|
|
/FF/¢ |
|
ENTER |
|
|
|
¶ REC/8 |
Advanced play
Repeat play
You can repeat program play or other selected play mode.
CD MP3
Press [REPEAT] before or during play.
“REPEAT ON” and “  ” are displayed.
To cancel
Press [REPEAT] again.
“REPEAT OFF” is displayed and “  ” is cleared.
Program play
This function allows you to program up to 24 tracks.
CD
1 |
Press [CD 6] and then [CLEAR 7]. |
2 |
Press [PROGRAM]. |
3 |
Press the numeric buttons to select your desired |
|
track. |
|
Repeat this step to program other tracks. |
4 |
Press [CD 6] to start play. |
MP3
Press [CD 6] and then [CLEAR 7].
Press [PROGRAM].
Press [ALBUM  or
or  ] to select your desired album.
Press [ /FF/¢] once and then the numeric buttons to select your desired track.
5 Press [ENTER].
Repeat steps 3 to 5 to program other tracks.
6 Press [CD 6] to start play.
For two-digit track, press [h10] once then the two digit. For three-digit track, press [h10] twice then the three digit.
To |
Action |
cancel program mode |
Press [PROGRAM] in the stop mode. |
|
|
replay the program |
Press [PROGRAM] then [CD 6]. |
|
|
check program |
Press [ /REW/4] or [ /FF/¢] when |
contents |
“PGM” is displayed in the stop mode. |
|
To check while programming, press |
|
[PROGRAM] twice after “PGM” appears, |
|
then press [ /REW/4] or [ /FF/¢]. |
|
|
add to the program |
CD |
|
Repeat step 3 in the stop mode. |
|
MP3 |
|
Repeat steps 3 to 5 in the stop mode. |
|
|
clear the last track |
Press [DEL] in the stop mode. |
|
|
clear all programmed |
Press [CLEAR 7] in the stop mode. |
tracks |
“CLR ALL” is displayed. Within 5 seconds, |
|
press the button again to clear all tracks. |
|
|
Note
•When you try to program more than 24 tracks “PGM FULL” appears.
•The program memory is cleared when you open the disc tray.
CD
•During program play, you can search backward or forward only within the current track.
Note
•This unit can play MP3 fi les and CD-DA format audio CD-R/RW that have been fi nalized.
•It may not be able to play some CD-R/RW depending on the condition of the recording.
•Do not use irregularly shaped discs.
•Do not use discs with labels and stickers that are coming off or with adhesive exuding from under labels and stickers.
•Do not attach extra labels or stickers on the disc.
•Do not write anything on the disc.
CD
•This unit can access up to 99 tracks.
•Choose a CD with this mark:
MP3
•Files are treated as tracks and folders are treated as albums.
•This unit can access up to 999 tracks, 255 albums and 20 sessions.
•Files must have the extension: “.MP3” or “.mp3”
•Disc must conform to ISO9660 level 1 or 2 (except for extended formats).
•To play in a certain order, prefi x the folder and fi le names with the 3-digit numbers in the order you want to play them.
RQTV0177
8 |
|
Using DualDiscs |
|
The “CD” sides of DualDiscs do not meet the CD-DA standard so it |
|
8 |
may not be possible to play them on this unit. |
|

Cassette tape
Basic play
1 Press [0] on top of the unit.
0
2 Insert the cassette.
|
|
" |
Insert inside the |
|
|
|
|
|
|
|
guides |
|
|
Forward side |
|
3 |
Close the lid by hand. |
|
|
4 |
Press [TAPE 3] to start play. |
|
|
|
To play the other side of the cassette, turn the cassette |
||
|
over. |
|
|
To |
|
Action |
|
stop tape playback |
Press [CLEAR 7]. |
|
|
start one-touch play |
Press [TAPE 3] when the unit is OFF with |
||
|
|
the cassette loaded. |
|
fast-forward and |
Press [ /REW/4] or [ /FF/¢] in the |
||
rewind |
stop mode. |
|
|
Note
•Tapes exceeding 100 minutes are thin and can break or get caught in the mechanism.
•Endless tapes can get caught up in the deck’s moving parts if used incorrectly.
TPS (Tape Program Sensor)
This function enables you to search the beginning of a track, up to a maximum of 9.
Press [ /REW/4] or [ /FF/¢] during play.
Play resumes from the track found.
Note
TPS may not function properly:
•with short silent parts
•when noise occurs between tunes
•if silent parts are found within tunes
Recording
Use normal position tapes.
High position and metal position tapes can be used, but this unit will not be able to record or erase them correctly.
Preparation
Wind the leader tape so that recording can begin immediately.
1 |
Insert the cassette to be recorded. |
||
2 |
Select the source to be recorded. |
||
|
7 Radio recording: |
||
|
|
Tune in the station. ( page 10) |
|
|
7 Disc or USB recording: |
||
|
|
1 Disc |
|
|
|
Insert the disc you want to record. |
|
|
|
Press [CD 6] and then [CLEAR 7]. |
|
|
|
USB |
|
|
|
Connect the USB mass storage device. ( page 13) |
|
|
|
Press [USB 6] and then press [CLEAR 7] twice. |
|
|
|
2 Prepare the desired recording mode. |
|
|
|
|
|
|
|
To |
Action |
|
|
record |
Program the tracks you want. ( page 8) |
|
|
programmed |
|
|
|
tracks |
|
|
|
|
|
|
|
record |
Press [PLAY MODE] to select your desired |
|
|
specifi c tracks |
mode. ( page 7) |
|
|
|
|
7Music port recording:
Connect the portable audio equipment. ( page 13) Press [MUSIC PORT].
Play the portable audio equipment.
3 Press [¶ REC/8] to start recording.
To |
Action |
|
stop recording |
Press [CLEAR 7]. |
|
|
|
|
stop recording |
1) |
Press [¶ REC/8]. |
temporarily |
2) |
Press again to resume recording. |
|
|
|
record on the other |
Turn the cassette over and press |
|
side of the tape |
[¶ REC/8]. |
|
|
|
|
erase a recorded |
1) |
Insert the recorded cassette. |
sound |
2) |
Press [TAPE 3] and then [CLEAR 7]. |
|
3) |
Press [¶ REC/8]. |
|
|
|
Erasure prevention
The illustration shows how to remove the tabs to prevent recording. To record on the tape again, cover as shown.
Side A
Tab for side B Tab for side A
To re-record
Normal tape
Adhesive tape
ENGLISH
RQTV0177
9
9

RQTV0177
10
10
FM/AM radio
SLEEP |
CLOCK/ |
N |
TIMER |
y |
˚ PLAY/REC |
PROGRAM |
|
PLAY MODE |
Numeric |
|
|
|
buttons |
|
CLEAR |
TUNER/BAND |
USB |
|
|
|
TAPE |
|
/REW/4, |
|
/FF/¢ |
DISPLAY |
|
TUNER/BAND |
|
Manual tuning
1 |
Press [TUNER/BAND] to select “FM” or “AM”. |
||
2 |
Press [PLAY MODE] to select “MANUAL”. |
||
3 |
Press [ /REW/4] or [ /FF/¢] to select the |
||
|
frequency of the required station. |
||
|
|
|
|
|
|
|
|
“ ST ” is displayed when a stereo FM broadcast is being received.
To tune automatically
Press [ /REW/4] or [
 /FF/¢] for a moment until the frequency starts changing rapidly. The unit begins auto tuning, stopping when it fi nds a station.
•Auto tuning may not function when there is excessive interference.
•To cancel auto tuning, press [ /REW/4] or [
 /FF/¢] once again.
To improve FM sound quality
Press and hold [PLAY MODE] to display “MONO”.
To cancel
Press and hold [PLAY MODE] again until “MONO” disappears.
•MONO is also cancelled if the frequency is changed.
•Turn off “MONO” for normal listening.
RDS broadcasting
Enable you to display the name of a broadcasting station or a program type.
Press [DISPLAY] to display:
 Station Name (PS)
  Program Type (PTY)
Frequency display 
RDS displays may not be available if reception is poor.
Program type displays
NEWS |
VARIED |
FINANCE |
COUNTRY |
AFFAIRS |
POP M |
CHILDREN |
NATIONAL |
INFO |
ROCK M |
SOCIAL A |
OLDIES |
SPORT |
M.O.R.M |
RELIGION |
FOLK M |
EDUCATE |
LIGHT M |
PHONE IN |
DOCUMENT |
DRAMA |
CLASSICS |
TRAVEL |
TEST |
CULTURE |
OTHER M |
LEISURE |
ALARM |
SCIENCE |
WEATHER |
JAZZ |
|
 M.O.R.M = “Middle of the road music”
Memory preset
Up to 20 stations can be set in the FM band and 15 stations in the AM band.
Preparation
Press [TUNER/BAND] to select “FM” or “AM”.
Automatic presetting
Press and hold [PROGRAM] to start presetting.
Manual presetting
1 |
Press [PLAY MODE] to select “MANUAL”. |
2 |
Press [ /REW/4] or [ /FF/¢] to tune to the |
|
required station. |
3 |
Press [PROGRAM]. |
4 |
Press numeric buttons to select a channel. |
|
The station occupying a channel is erased if another |
|
station is preset in that channel. |
5 |
Repeat steps 2 to 4 to preset more stations. |
Selecting a preset station
Press numeric buttons to select the channel.
For two-digit channel, press [h10], then the two digits.
OR
1 |
Press [PLAY MODE] to select “PRESET”. |
2 |
Press [ /REW/4] or [ /FF/¢] to select the |
|
channel. |
AM allocation setting
By main unit only
This system can also receive AM broadcasts allocated in 10 kHz steps.
To change the step from 9 kHz to 10 kHz
1 Press and hold [TUNER/BAND].
After a few seconds the display changes to a fl ashing display of the current minimum frequency.
2 Continue to hold down [TUNER/BAND].
•When the minimum frequency changes, release the button. To return to the original step, repeat the above steps.
•After the setting is changed, any previously preset frequency will be cleared.
Timer
Setting the clock
This is a 24-hour clock.
1 Press [CLOCK/TIMER] to select “CLOCK”.
Each time you press the button:
CLOCK  ˚ PLAY
  ˚ REC
˚ REC
Original display
2 Within 5 seconds, press [ /REW/4] or [
 /FF/¢] to set the time
3 Press [CLOCK/TIMER] again to confirm.
Displaying the clock
Press [CLOCK/TIMER] to display the clock for few seconds.
Note
The clock may lose or gain minutes over a period of time. Readjust as necessary.
Using the sleep timer
This function enables you to turn off the unit automatically after the set time.
Press [SLEEP] repeatedly to select your desired time.
Sleep timer indicator
To cancel
Press [SLEEP] to select “OFF”.
Changing the remaining time
Press [SLEEP] to show the remaining time, and press [SLEEP] again to select your desired time.
Note
•The play and sleep timer or the record and sleep timer can be used together.
•The sleep timer always has priority. Be sure not to overlap timer settings.
Using the play or record timer
You can set the timer to come on at a certain time to wake you up (play timer) or to record from the radio or music port source (record timer).
Preparation
Turn the unit on and set the clock.
Timer |
Action |
Play timer |
Prepare the music source you want to |
|
listen to; cassette, disc, radio, USB or |
|
music port source, and set the volume. |
|
|
Record timer |
Check the cassette’s erasure prevention |
|
tabs ( page 9), insert the cassette ( |
|
page 9) and tune to the radio station ( |
|
page 10) or select the music port source |
|
( page 13). |
|
|
1 |
Press [CLOCK/TIMER] repeatedly to select your |
||||
|
desired timer. |
|
|
|
|
|
CLOCK |
|
˚ PLAY |
|
˚ REC |
|
|
|
|||
|
|
Original display |
|
||
2 |
Within 5 seconds, press [ /REW/4] or [ /FF/¢] |
||||
|
to set the starting time. |
|
|||
Start time
Play timer indicator Record timer indicator
3 |
Press [CLOCK/TIMER] to confirm. |
4 |
Repeat steps 2 and 3 to set the finishing time. |
|
Finish time |
|
|
|
|
|
|
|
|
|
To activate the timer |
|
|
||||||
5 |
Press [˚PLAY/REC] to turn on your desired timer. |
|
||||||
|
|
|
˚ PLAY |
|
|
˚ REC |
|
|
|
|
|
|
|
||||
|
|
|
no display (off) |
|
||||
6 |
Press [y] to turn off the unit. |
|
|
|||||
|
The unit must be off for the timers to operate. |
|
||||||
|
|
|
|
|
|
|||
To |
|
|
Action |
|
|
|||
|
|
|
||||||
change the settings |
Repeat steps 1 to 4 and 6. |
|
||||||
|
|
|
||||||
change the source |
1) Press [˚PLAY/REC] to clear the timer |
|
||||||
or volume |
indicator from the display. |
|
||||||
2)Make changes to the source or volume.
3)Perform steps 5 and 6.
check the settings |
Press [CLOCK/TIMER] repeatedly to select |
(when the unit is on |
˚PLAY or ˚REC. |
or in standby mode) |
|
|
|
cancel |
Press [˚PLAY/REC] to clear the timer |
|
indicators from the display. |
|
|
Note
•The play timer and record timer cannot be used together.
•The play timer will start at the preset time, with the volume increasing gradually to the preset level.
•The record timer will start 30 seconds before the set time, with the volume muted.
•The timer comes on at the set time every day if the timer is on.
•The unit must be in the standby mode for the timer to function.
•If you turn the unit off and on again while a timer is functioning, the fi nish time setting will not be activated.
•If MUSIC PORT is selected as the source when the timer comes on, the system turns on and engages MUSIC PORT as the source. If you wish to playback or record from the portable audio equipment, activate the equipment’s play mode and increase the volume. (See the portable audio equipment’s instruction manual.)
ENGLISH
RQTV0177
11
11

Sound adjustment
MUSIC PORT |
|
|
|
CLEAR 7 |
|
|
|
|
|
CLEAR |
|
|
|
USB |
USB 6 |
|
|
|
|
|
|
TAPE |
|
VOL +, – |
|
|
|
ALBUM |
, |
|
/REW/4, |
|
|
|
/FF/¢ |
|
|
|
BASS/TREBLE |
DISPLAY |
|
PRESET EQ |
|
|
|
|
|
SURROUND |
|
|
|
Enjoying surround sound
Enable you to add natural width and depth to the stereo sound.
To activate
Press [SURROUND] to display “ 


 ” indicator.
To cancel
Press [SURROUND] again to clear “ 


 ” indicator.
Note
•Surround sound is less discernible when listening through headphones.
•If interference in FM stereo reception increases, cancel the surround sound effect.
Selecting sound effects
You can change the sound effect by selecting Preset EQ or adjusting the bass or treble effect.
Preset EQ
Press [PRESET EQ] repeatedly to select your desired setting.
HEAVY → CLEAR → SOFT → VOCAL → EQ-OFF
Setting |
Effect |
HEAVY |
Adds punch to rock |
|
|
CLEAR |
Clarifi es higher frequencies |
|
|
SOFT |
For background music |
|
|
VOCAL |
Adds gloss to vocal |
|
|
EQ-OFF |
No effect |
|
|
Bass or treble
Enable you to enjoy the lower or higher pitch sound.
1 |
Press [BASS/TREBLE] repeatedly to select your |
|||
|
desired setting. |
|
|
|
|
|
BASS |
|
TREBLE |
|
|
|
||
|
|
original display |
||
|
|
|
|
|
|
Setting |
Effect |
|
|
|
BASS |
For lower pitch sound |
||
|
|
|
||
|
TREBLE |
For higher pitch sound |
||
2 |
|
|
|
|
Press [ |
/REW/4] or [ |
/FF/¢] to adjust the level. |
||
Note
The tone level can be varied within -4 to +4.
RQTV0177
12
12

External unit
Connecting and playing a USB mass storage class device
MP3
The USB connectivity enables you to connect and play MP3 tracks from USB mass storage class. Typically, USB memory devices. (Bulk only transfer)
Preparation
Before connecting any USB mass storage device to the unit, ensure that the data stored therein has been backed up.
It is not recommended to use a USB extension cable. The USB device is not recognised by this unit.
|
|
|
|
|
USB enabled device |
|
|
|
|
|
|
(not included) |
|
|
|
|
|
|
It is not recommended |
|
|
|
|
|
|
to use a USB extension |
|
|
|
|
|
|
cable. The device |
|
|
|
|
|
|
connected via the cable |
|
|
|
|
|
|
will not be recognised by |
|
|
|
|
|
|
this unit. |
|
1 |
Reduce the volume and connect the USB mass |
|||||
|
storage device. |
|
|
|
|
|
2 |
Press [USB 6] to start play. |
|
||||
|
|
|
|
|
|
|
To |
|
|
Action |
|
|
|
pause play |
Press [USB 6]. |
|
||||
|
|
|
Press again to resume play. |
|||
|
|
|
||||
stop play |
Press [CLEAR 7]. |
|
||||
|
|
|
“RESUME” is displayed. The position is |
|||
|
|
|
memorized. |
|
|
|
|
|
|
Press [USB 6] to resume. |
|||
|
|
|
Press [CLEAR 7] again to clear the position. |
|||
|
|
|
||||
skip track |
Press [ /REW/4] or [ |
/FF/¢]. |
||||
|
|
|
|
|||
skip album |
Press [ALBUM |
or |
] in the play mode. |
|||
|
|
|
Press [ALBUM |
or |
] once and then |
|
|
|
|
the numeric buttons in the stop mode. |
|||
|
|
|
|
|
|
|
Display function
Press [DISPLAY] repeatedly during play or pause mode.
 Elapsed time
  Remaining time
  Album name
  Track name
ID3 (Artist)  ID3 (Track)
  ID3 (Album)
Supported Format
Files must have the extension “.mp3” or “.MP3”.
Note
•CBI (Control/Bulk/Interrupt) is not supported.
•A device using NTFS fi le system is not supported [Only FAT 16/32 (File Allocation Table 16/32) fi le system is supported].
•Depending on the sector size, some fi les may not work.
•This unit can access up to 255 albums (including blank folders) and 2500 tracks.
•The maximum number of tracks in a folder are 999 tracks.
•Only one memory card will be selected when connecting a multiport USB card reader. Typically the fi rst memory card inserted.
•Disconnect the USB card reader from the unit when you remove the memory card. Failure to do so may cause malfunction to the device.
• When you connect your digital audio player to the USB jack, it charges all the time except in standby mode or during tape recording.
Connecting and playing a portable audio equipment
This feature enables you to enjoy music from portable audio equipment.
Audio cord (not included)
Portable audio equipment (not included)
Switch off the equalizer function (if there is any) of the portable audio equipment before you plug into the MUSIC PORT jack. Otherwise, sound from the speaker may be distorted.
1 |
Plug the audio cord into the MUSIC PORT jack and |
|
press [MUSIC PORT]. |
2 |
Play the portable audio equipment. (See the |
|
portable audio equipment’s instruction manual.) |
Note
All peripheral components and cables are sold separately.
Changing the remote control code
ENGLISH
For other operating functions, they are similar as those described in “Discs” ( page 7 and 8).
Compatible devices
Devices which are defined as USB mass storage class:
•USB devices that support bulk only transfer.
•USB devices that support USB 2.0 full speed.
Change the code if you fi nd the remote control unintentionally also controls other equipments.
Change the main unit’s code
Press and hold [MUSIC PORT] on the main unit and then press and hold [2] (or [1]) on the remote control.
“REMOTE 2” is displayed.
Change the remote control’s code
Press and hold [ENTER] and [2] (or [1]) on the remote control for at least 2 second.
If the remote control and main unit are using different codes, a message appears on the main unit’s display showing the main unit’s current code. Follow the above step to change the remote control’s code to match it.
RQTV0177
13
13

RQTV0177
14
Troubleshooting guide
Before requesting service, make the below checks. If you can’t fix the system as described below, or if something not listed here occurs, refer to the enclosed directory to locate an Authorized Service Center convenient to you or contact your dealer.
Common problems
No sound.
Sounds unfixed, reversed or come from one speaker only.
Humming heard during play.
“ERROR” is displayed.
“- -:- -” appears on the display.
“F76” is displayed.
Turn the volume up.
The speaker cords may not be connected properly. Turn the unit off, check and correct the connections and turn the unit on ( page 4).
Check the speaker connections ( page 4).
An AC mains lead or fl uorescent light is near the cables. Keep other appliances and leads away from this unit’s cables.
If possible in your area, turn the AC mains lead’s plug or connector over to reverse the lead’s polarity.
Incorrect operation performed. Read the instructions and try again.
You plugged the AC mains lead in for the fi rst time or there was a power failure recently. Set the time ( page 11).
Check and correct the speaker cord connections ( page 4).
If this does not fi x the problem, there is a power supply problem. Consult the dealer.
Listening to the radio
Noise is heard.
The stereo indicator flickers or doesn’t light.
Sound is distorted.
A beat sound is heard.
A low hum is heard during AM broadcast.
An AM broadcast station cannot be picked up clearly.
Use an outdoor antenna ( page 5).
Turn the TV off or separate it from the unit.
Separate the antenna from other cables and cords.
Frequency step is set to 10 kHz. Change the frequency step to 9 kHz ( page 10).
When there is a television set nearby
The picture on the TV |
The location and direction of the antenna are incorrect. If you are using an indoor antenna, |
disappears or stripes appear |
change to an outdoor antenna ( page 5). |
on the screen. |
The TV antenna wire is too close to the unit. Separate the antenna wire of the TV set from |
|
the unit. |
|
|
Using the cassette deck |
|
|
|
Recording is not possible. |
If the erasure prevention tabs have been removed, cover the holes with adhesive tape |
|
( page 9). |
|
|
Playing discs |
|
|
|
The display is wrong or play |
The disc may be upside down ( page 7). |
won’t start. |
Wipe the disc. |
|
Replace the disc if it is scratched, warped, or non-standard. |
|
Condensation may have formed inside the unit due to a sudden change in temperature. Wait |
|
about an hour for it to clear and try again. |
|
|
The remote control |
|
|
|
Remote control doesn’t work. |
Check that the batteries are inserted correctly ( page 5). |
|
Replace the batteries if they are worn. |
|
|
USB |
|
No response when [¶ REC/8] button is pressed.
The USB drive or its contents cannot be read.
Slow operation of the USB flash drive.
“USB OVER CURRENT ERROR”
“NO PLAY”
Disconnet the USB device and then reconnect it back. Alternatively, turn the unit off and then back on.
The USB drive format or its contents is/are not compatible with the system ( page 13). The USB host function of this product may not work with some USB devices.
USB devices with storage capacity of more than 8 gigabytes may not work in some instances.
Large fi le size or high memory USB fl ash drive takes longer time to read.
The USB mass storage device rating exceeds 500mA. Disconnect the USB device. Turn the unit off and then back on.
Check the content.
Only MP3 format fi les can be played.
14

Specifications
AMPLIFIER SECTION
RMS OUTPUT POWER both channel driven simultaneously
10 % Total harmonic distortion
|
20 W per channel (4 Ω) |
Input impedance |
|
MUSIC PORT |
250 mV 12 kΩ |
Output impedance |
|
HEADPHONE |
16 to 32 Ω |
Phone jack |
|
Terminal |
Stereo, 3.5 mm |
Music Port jack |
|
Terminal |
Stereo, 3.5 mm |
FM TUNER SECTION
Frequency range
87.50 to 108.00 MHz (50 kHz step)
Sensitivity |
0.10 µV (IHF) |
S/N 30 dB |
1.20 µV |
Antenna terminals |
75 Ω (unbalanced) |
Preset station |
FM 20 stations |
|
AM 15 stations |
AM TUNER SECTION
Frequency range
522 to 1629 kHz (9 kHz step)
520 to 1630 kHz (10 kHz step)
Sensitivity |
|
S/N 20 dB (at 999 kHz) |
1000 µV/m |
CASSETTE DECK SECTION
Track system |
4-track, 2-channel |
Heads |
|
Record/playback Solid permalloy head |
|
Erasure |
Double gap ferrite head |
Motor |
DC servo motor |
Recording system |
AC bias 100 kHz |
Erase system |
AC erase 100 kHz |
Tape speed |
4.8 cm/s |
Overall frequency response (+3, -6 dB) at
DECK OUT |
|
Normal |
35 Hz to 14 kHz |
S/N RATIO |
50 dB (A weighted) |
Wow and flutter |
0.08 % (WRMS) |
Fast-forward and rewind time
Approx. 120 seconds with C-60 cassette tape
CD SECTION
Disc played [8 cm or 12 cm]
(1)CD-Audio (CD-DA)
(2)CD-R/RW (CD-DA, MP3 formatted disc)
(3)MP3
Sampling frequency
CD |
44.1 kHz |
MP3 |
32 kHz, 44.1 kHz, 48 kHz |
Bit rate |
|
MP3 |
32 kbps to 384 kbps |
Decoding |
16/20/24 bit linear |
Pickup |
|
Wavelength |
785 nm |
Beam source |
Semiconductor laser |
(For Norge) |
|
Bølgelengde |
785 nm |
Laserstyrke |
|
Ingen farlig stråling sendes ut
Laser power |
CLASS 1 |
Audio output (Disc) |
|
Number of channels |
2 channel |
Frequency response |
|
20 Hz to 20 kHz (+1, -2 dB) |
|
Wow and flutter |
|
|
Below measurable limit |
Digital filter |
8 fs |
D/A converter |
MASH (1 bit DAC) |
USB SECTION
Playable USB Storage Media
(1)HDD
(2)USB MP3 player/Digital audio player
(3)USB Thumbdrives
Supported audio file format
MP3 |
|
|
USB memory port |
|
|
Maximum current |
|
500 mA |
Bit rate |
|
|
MP3 |
32 kbps to 320 kbps |
|
Audio output (MP3) |
|
|
Number of channels |
2 channel |
|
Frequency response (MP3)
20 Hz to 20 kHz
SPEAKER SECTION
Type |
2 way, 2 speaker system |
|
Speaker(s) |
|
|
WOOFER |
10 cm CONE type 4 Ω |
|
TWEETER |
6 cm CONE type 4 Ω |
|
Impedance |
|
4 Ω |
Input power (IEC) |
|
20 W (MAX) |
Output sound pressure |
|
|
|
76.56 dB/W (1.0 m) |
|
Cross over frequency |
4.3 kHz |
|
Frequency range |
|
|
|
43 Hz to 42 kHz (-16 dB) |
|
|
52 Hz to 22 kHz (-10 dB) |
|
Dimensions (W x H x D) |
|
|
138 mm x 227 mm x 141 mm |
||
Mass |
|
1.4 kg |
GENERAL
Power supply |
AC 230 V, 50 Hz |
Power consumption |
63 W |
Dimensions (W x H x D) |
|
164 mm x 227 mm x 314 mm |
|
Mass |
3.4 kg |
Operating temperature range
+5 to +35˚C
Operating humidity range
5 to 90 % RH (no condensation)
Power consumption in standby mode 0.6 W (approx.)
Note
1.Specifi cations are subject to change without notice.
Mass and dimensions are approximate.
2.Total harmonic distortion is measured by the digital spectrum analyzer.
ENGLISH
Maintenance
If the surfaces are dirty
To clean this unit, wipe with a soft, dry cloth.
•Never use alcohol, paint thinner or benzine to clean this unit.
•Before using chemically treated cloth, read the instructions that came with the cloth carefully.
For a cleaner, crisper sound
Clean the heads regularly to assure good quality playback and recording.
Use a cleaning tape (not included).
RQTV0177
15
15

RQTV0177
2
Estimado cliente
Muchísimas gracias por haber adquirido este aparato.
Lea con atención estas instrucciones para obtener las máximas prestaciones y seguridad.
Estas instrucciones de funcionamiento son para el sistema siquiente.
Sistema |
SC-PM45 |
|
|
Aparato principal |
SA-PM45 |
|
|
Altavoces |
SB-PM45 |
|
|
Parte interior del aparato
Este producto puede tener interferencias causadas por teléfonos móviles durante su utilización. Si tales interferencias resultan evidentes, aumente la separación entre el producto y el teléfono móvil.
La toma de corriente deberá estar instalada cerca del equipo y donde se pueda acceder a ella fácilmente.
El enchufe del cable de la alimentación deberá estar siempre listo para ser utilizado.
Para desconectar completamente este aparato de la red de CA, desconecte el enchufe del cable de alimentación del receptáculo de CA.
ESTA UNIDAD HA SIDO DISEÑADA PARA SER UTILIZADA EN CLIMAS MODERADOS.
ADVERTENCIA:
PARA REDUCIR EL RIESGO DE INCENDIOS, DESCARGAS ELÉCTRICAS O DAÑOS EN EL PRODUCTO,
•NO EXPONGA ESTE APARATO A LA LLUVIA, HUMEDAD, GOTEO O SALPICADURAS, Y NO COLOQUE ENCIMA DEL MISMO OBJETOS CON LÍQUIDOS COMO, POR EJEMPLO, FLOREROS.
•UTILICE SOLAMENTE LOS ACCESORIOS RECOMENDADOS.
•NO QUITE LA CUBIERTA (O EL PANEL TRASERO); EN EL INTERIOR NO HAY PIEZAS QUE PUEDA REPARAR EL USUARIO. SOLICITE LAS REPARACIONES AL PERSONAL DE SERVICIO CUALIFICADO.
Índice |
|
Accesorios suministrados.......................... |
3 |
Precauciones de seguridad........................ |
3 |
Colocación de los altavoces ...................... |
3 |
Preparativos iniciales.................................. |
4 |
Controles...................................................... |
6 |
Discos........................................................... |
7 |
Cintas de casete .......................................... |
9 |
Radio FM/AM................................................ |
10 |
Temporizador ............................................... |
11 |
Ajuste del sonido......................................... |
12 |
Equipo externo ............................................ |
13 |
Guía para la solución de problemas.......... |
14 |
Especificaciones ......................................... |
15 |
Mantenimiento ............................................. |
15 |
¡ADVERTENCIA!
ESTE APARATO UTILIZA UN LÁSER.
EL USAR LOS CONTROLES, HACER LOS REGLAJES O LOS PASOS REQUERIDOS EN FORMA DIVERSA DE LA AQUÍ EXPUESTA PUEDE REDUNDAR EN EXPOSICIÓN PELIGROSA A LA RADIACIÓN.
NO ABRA LAS TAPAS NI HAGA REPARACIONES USTED MISMO. EN CASO DE PRODUCIRSE ANOMALÍAS SOLICITE AYUDA DE PERSONAL CUALIFICADO.
¡ADVERTENCIA!
•PARA MANTENER BIEN VENTILADA ESTA UNIDAD, NO LA INSTALE NI PONGA EN UN ESTANTE DE LIBROS, MUEBLE EMPOTRADO U OTRO ESPACIO DE DIMENSIONES REDUCIDAS. ASEGÚRESE QUE CORTINAS Y OTROS MATERIALES NO OBSTRUYAN LAS CONDICIONES DE VENTILACIÓN PARA PREVENIR EL RIESGO DE SACUDIDAS ELÉCTRICAS O INCENDIOS DEBIDOS AL RECALENTAMIENTO.
•NO OBSTRUYA LAS ABERTURAS DE VENTILACIÓN DE LA UNIDAD CON PERIÓDICOS, MANTELES, CORTINAS U OBJETOS SIMILARES.
•NO COLOQUE OBJETOS CON LLAMA DESCUBIERTA, UNA VELA POR EJEMPLO, ENCIMA DE LA UNIDAD.
•TIRE LAS PILAS DE FORMA QUE NO CONTAMINE EL MEDIO AMBIENTE.
16

Accesorios suministrados
Por favor, verifique e identifique los accesorios suministrados.
1 x Mando a distancia |
1 x Cable de alimentación |
|
de CA |
(N2QAYB000078) |
|
1 x Antena de cuadro de AM |
1 x Antena interior de FM |
2 x Pilas del mando a distancia
Precauciones de seguridad
Ubicación
Coloque el aparato en una superficie plana lejos de la luz directa del sol, temperatura y humedad altas, y vibración excesiva. Estas condiciones pueden dañar a la caja y otros componentes, y por lo tanto acortar la vida útil del aparato.
Colóquelo por lo menos a 15 cm de superfi cies de paredes para evitar distorsión y efectos acústicos indeseados.
No ponga objetos pesados sobre el aparato.
Voltaje
No use fuentes de alimentación de alto voltaje. Esto puede sobrecargar el aparato y causar un incendio.
No use una fuente de alimentación de CC. Verifi que cuidadosamente la fuente cuando coloque el aparato en una embarcación u otro lugar donde se utilice CC.
Protección del cordón de alimentación de CA
Asegúrese que el cordón de alimentación de CA esté conectado correctamente y no dañado. Una mala conexión y daño en el cordón pueden causar un incendio o un cortocircuito. No tire, doble el cordón ni coloque objetos pesados sobre él.
Sujete el enchufe fi rmemente cuando desenchufe el cordón. Tirar del cordón puede causar un cortocircuito.
No manipule el enchufe con manos mojadas. Esto puede causar un cortocircuito.
Objetos extraños
No permita que objetos de metal caigan dentro del aparato. Esto puede causar un cortocircuito o fallas.
No permita que líquidos penetren en el aparato. Esto puede causar choque eléctrico o fallos. Si esto ocurre, desconecte inmediatemente el aparato de la alimentación y póngase en contacto con su distribuidor.
No rocíe insecticidas sobre o dentro del aparato. Contienen gases infl amables que pueden encenderse si son rociados dentro del aparato.
Servicio
No intente reparar este aparato por usted mismo. Si el sonido se interrumpe, los indicadores no se iluminan, sale humo o sucede cualquier problema que no esté tratado en estas instrucciones, desconecte el cordón de alimentación de CA y póngase en contacto con su distribuidor o con un centro de servicio autorizado. Puede ocurrir un choque eléctrico o daño al aparato si este aparato es reparado, desarmado o reconstruido por personas no califi cadas.
Alargue la vida útil del aparato desconectándolo de la fuente de alimentación si no va a ser usado por largo tiempo.
– Si ve este símbolo –
Información sobre la eliminación para los usuarios de equipos eléctricos y electrónicos usados (particulares)
La aparición de este símbolo en un producto y/o en la documentación adjunta indica que los productos eléctricos y electrónicos usados no deben mezclarse con la basura doméstica general.
Para que estos productos se sometan a un proceso adecuado de tratamiento, recuperación y reciclaje, llévelos a los puntos de recogida designados, donde los admitirán sin coste alguno. En algunos países existe también la posibilidad de devolver los productos a su minorista local al comprar un producto nuevo equivalente.
Si desecha el producto correctamente, estará contribuyendo a preservar valiosos recursos y a evitar cualquier posible efecto negativo en la salud de las personas y en el medio ambiente que pudiera producirse debido al tratamiento inadecuado de desechos. Póngase en contacto con su autoridad local para que le informen detalladamente sobre el punto de recogida designado más cercano.
De acuerdo con la legislación nacional, podrían aplicarse multas por la eliminación incorrecta de estos desechos.
Para empresas de la Unión Europea
Si desea desechar equipos eléctricos y electrónicos, póngase en contacto con su distribuidor o proveedor para que le informe detalladamente.
Información sobre la eliminación en otros países no pertenecientes a la Unión Europea
Este símbolo sólo es válido en la Unión Europea.
Si desea desechar este producto, póngase en contacto con las autoridades locales o con su distribuidor para que le informen sobre el método correcto de eliminación.
Colocación de los altavoces
Altavoz para agudos
Coloque los altavoces de forma que el altavzo de agudos quede en el exterior.
Utilice solamente los altavoces suministrados.
La combinación del aparato principal y los altavoces proporcionan el mejor sonido. Utilizando otros altavoces se puede estropear el aparato y el sonido quedará afectado negativamente.
Nota
•Mantenga sus altavoces alejados un mínimo de 10 mm del sistema para tener una ventilación apropiada.
•Estos altavoces no disponen de blindaje magnético. No los ponga cerca de televisores, ordenadores personales u otros dispositivos a los que afecte fácilmente el magnetismo.
•Para evitar estropear los altavoces, no toque sus conos si ha quitado las redes.
Precaución
• Use los altavoces sólo con el sistema recomendado. De lo contrario, se podrían dañar el amplificador y los altavoces, y se podría ocasionar un incendio. Consulte a un técnico de servicio especializado si se ha producido algún daño o si se ha producido un cambio repentino en su funcionamiento.
• No instale estos altavoces en paredes ni techos.
ESPAÑOL
RQTV0177
3
17

Preparativos iniciales
Paso 1 - Conexiones
Conecte el cable de alimentación de CA sólo después de haber hecho todas las demás conexiones.
RQTV0177
4
1 Conecte la antena de cuadro de AM.
Antena de cuadro de AM
Coloque la antena de cuadro sobre su base. Mantenga el cable de la antena alejado de otros cables.
3 Conecte los cables de los altavoces.
Rojas (ª)
Negras (·)
Rojas (ª)
Negras (·)
Una conexión incorrecta puede dañar el aparato.
2 Conecte la antena interior de FM.
 Cinta
Cinta
adhesiva
Antena interior de FM
Fije la antena en una pared o columna en una posición en que la señal de radio se reciba con las menores interferencias.
4 Conecte el cable de alimentación de CA.
El cable de alimentación de CA incluido es para ser usado con este aparato solamente. No lo utilice con otro equipo.
Inserción del conector
Toma del aparato |
Conector |
Incluso cuando el conector está bien insertado, dependiendo del tipo de toma usada, la parte delantera del conector puede sobresalir como se muestra en la fi gura. Sin embargo, no habrá problemas para usar el aparato.
18
 Loading...