


Contents - Inhoud - Sommaire - Inhaltverzeichnis - Contenido
UK
NL
Warranty & Safety information .......................................................................................... |
3 |
During Use ....................................................................................................................... |
3 |
Specifications & features .................................................................................................. |
4 |
Survey of the front panel................................................................................................... |
5 |
Charging the scope........................................................................................................... |
5 |
Use of the oscilloscope..................................................................................................... |
5 |
Short menu & Extended menu .......................................................................................... |
6 |
Hold function .................................................................................................................... |
7 |
Use the markers and recall the memory............................................................................ |
7 |
Look on our website www.velleman.eu for more info and updated manual |
|
Waarborg & Veiligheidwaarschuwingen............................................................................ |
8 |
Tijdens gebruik................................................................................................................. |
8 |
Specificaties en eigenschappen ....................................................................................... |
9 |
Overzicht van de voorzijde ............................................................................................. |
10 |
Laden van de batterijen .................................................................................................. |
10 |
Basisgebruik van de oscilloscoop ................................................................................... |
10 |
Verkorte menu & Uitgebreide menu................................................................................ |
11 |
‘Hold’-functie .................................................................................................................. |
12 |
Gebruik van markers en oproepen van het geheugen..................................................... |
12 |
Raadpleeg onze website www.velleman.eu voor meer info en de laatste versie van deze handleiding.
FR
Garantie & Information concernant la sécurité................................................................. |
13 |
Pendant l'usage.............................................................................................................. |
13 |
Caractéristiques & données techniques .......................................................................... |
14 |
Panneau frontal.............................................................................................................. |
15 |
Chargement de la batterie interne................................................................................... |
15 |
Utilisation de base de l’oscilloscope................................................................................ |
15 |
Menu abrégé & Menu détaille......................................................................................... |
16 |
Fonction de gel de l’affichage ......................................................................................... |
17 |
Utilisation des marqueurs et affichage des données mémorisées.................................... |
17 |
Consultez notre site web www.velleman.eu pour plus d’infos et une version ajournée de cette notice.
DE
ES
Garantie & Sicherheitsinformation .................................................................................. |
18 |
Während der anwendung ............................................................................................... |
18 |
Eigenschaften und specifications.................................................................................... |
19 |
Beschreibung der Frontplatte ......................................................................................... |
20 |
Das Oszilloskop laden.................................................................................................... |
20 |
Basisanwendung des Oszilloskopes............................................................................... |
20 |
Basismenü & Ausführliches menü .................................................................................. |
21 |
Hold-Funktion................................................................................................................. |
22 |
Anwendung der Markierungen und Abrufen der gespeicherten Daten.................................. |
22 |
Für mehr Informationen und die letzte Version dieser Bedienungsanleitung, siehe unsere Website www.velleman.eu
Garantía & Información sobre la seguridad..................................................................... |
23 |
Durante el uso................................................................................................................ |
23 |
Características & especificaciones ................................................................................. |
24 |
Resumen de parte frontal ............................................................................................... |
25 |
Cargar la batería interna................................................................................................. |
25 |
Uso básico del osciloscopio............................................................................................ |
25 |
Menú abreviado & menú detallado ................................................................................. |
26 |
Función HOLD (fijar en la pantalla)................................................................................. |
27 |
Uso de los marcadores y visualización de los datos guardados ...................................... |
27 |
Para más información y la última versión de este manual del usuario, consulte nuestra página web www.velleman.eu
- 2 -
To all citizens of the European Union
Important environmental information about this product
This symbol on this unit or the package indicates that disposal of this unit after its lifecycle could harm the environment. Do not dispose the unit (or batteries if used) as unsorted municipal waste; it should be disposed by a specialized company for recycling. This unit should be returned to your distributor or to a local recycling service. Respect the local environmental rules.
If any doubt contact your local authorities about waste disposal rules.
Safety : General rules concerning safe.
To ensure your safety, please observe these safety measures. In no way these are complete. As safety requirements vary, please check with your local authorities, in order to comply with local requirements.
WARRANTY
This product is guaranteed against defects in components and construction from the moment it is purchased and for a period of TWO YEAR starting from the date of sale. This guarantee is only valid if the unit is submitted together with the original purchase invoice. VELLEMAN Ltd. limits its responsibility to the reparation of defects or, as VELLEMAN Ltd. deems necessary, to the replacement or reparation of defective components. Costs and risks connected to the transport, removal or placement of the product, or any other costs directly or indirectly connected to the repair, will not be reimbursed by VELLEMAN Ltd. VELLEMAN Ltd. will not be held responsible for any damages caused by the malfunctioning of a unit.
Safety information
OVERVOLTAGE / INSTALLATION CATEGORIES
CAT II : A CAT II-rated meter is suitable for measurements on mono-phase appliances that are connected to the mains by means of a plug and circuits in a normal domestic environment. E.g. household appliances, portable tools…
Provided that the circuit is at least 10m apart from a CAT IIIor 20m apart from a CAT IV-environment.
POLLUTION DEGREE
Pollution degree 2 : Only nonconductive pollution occurs. Occasionally, temporary conductivity caused by condensation is to be expected.(home and office environments fall under this category).
During use
•Never exceed the limit values for protection. These values are listed in the specifications.
•Do not touch unused terminals when the unit is linked to a circuit which is being tested.
•When carrying out measurements on a TV set or switching power circuits, always remember that the meter may be damaged by high amplitude voltage pulses at test points.
•Always be careful when working with voltages above 60Vdc or 30Vac rms. Keep your fingers behind the probe barriers at all times during measurement.
•Use a measuring probe with an insulated connector when measuring voltages exceeding 30V.
•For X10 probe: Match the frequency response to the oscilloscope input by adjusting the compensation trimmer on the probe, see probe manual
- 3 -
Specifications & Features
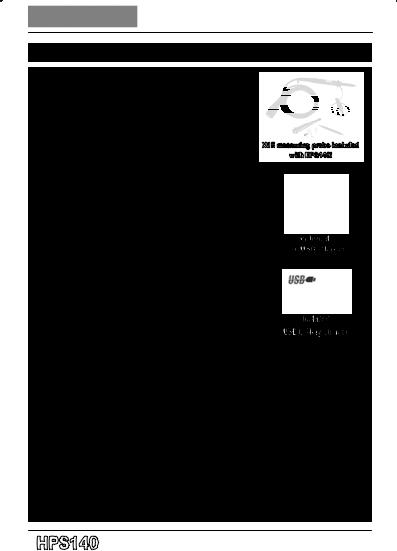
40 Megasamples/s in real time Bandwidth up to 10MHz
Full auto-range option Sensitivity down to 0.1mV
Signal markers for amplitude and time Memory ‘Hold’-function
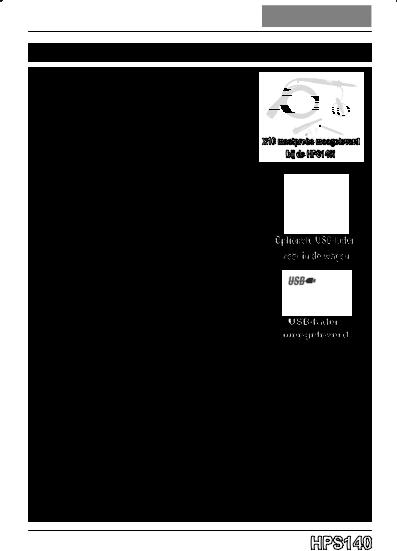
Direct Audio Power Measurement (Watts) USB battery charger included
X10 measuring probe included with HSP140i
Specifications:
•Bandwidth: up to 10 MHz (-3dB or -4dB at selected ranges)
•Input range: 1mV to 20V/division in 14 steps
• Input coupling: DC, AC and GND
• Real-time sample rate up to 40MS/s
•AD resolution: 8 bits
•Time base: 250ns to 1h per division
•Auto set-up function (or manual)
•Probe x10 readout option
•x10 probe test signal on backside
• Readouts: DC, AC+DC,True RMS, dBm, Vpp, Min-Max. (±2.5%)
•Audio power measurement into 2 to 32 ohms
•‘Hold’- & store function
•Time and Voltage markers readout
•Input : 100Vp AC+DC max.
•White LED backlight
•NiMH rechargeable battery pack (BPHPS140 included)
•Operates up to 6 hours on a single charge1
•Charging power supply: 9Vdc/200mA
•For use on CLASS II pollution degree II installations
•Dimensions: 74x114x29mm ( 2.9x4.5x1.14)”
•Weight: 200g, (7oz)
1 Do not operate the device while charging from the USB charger. Use a standard 9Vdc mains adaptor if operation during charging is required.
- 4 -
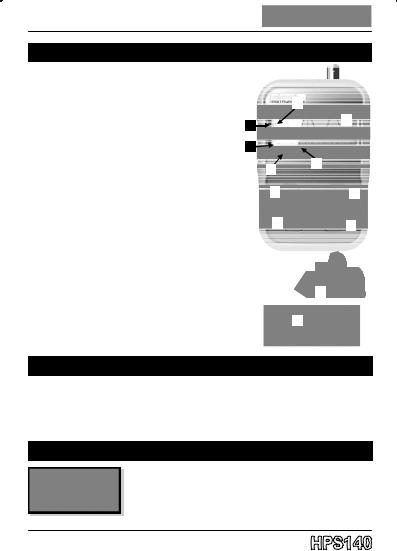
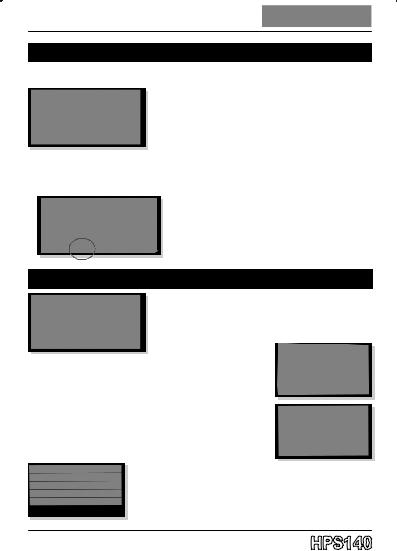
Frontpanel
1)Signal and menu display
2)Menu button
-Press briefly for the short menu
-Keep pressed to access the extended menu
3)Up and Down buttons
The up or down buttons are used to change or adjust a selected parameter
4)Hold button
Press the Hold button to freeze the waveform on-screen
5)Parameter indicators
Time/div, Trigger mode, AC/DC/GND, Volt/div and readout
6)Signal position indicators (X and Y scroll bar)
7)Trigger level and slope indicators
8)Last selected function indicator
9)On/Off switch
10)DC input (9V/200mA)
11)BNC input connector : Maximum input 100Vp !
12)Charge LED : Will light when the batteries are being charged.
13)X10 probe test signal
7
1
6
8
|
|
|
|
|
|
6 |
|
|
|
|
|
5 |
|
|
|
|
|
|
|
||||
|
|
|
|
|
|
|
|
|
|
||
|
|
|
|
|
|
|
|
|
|
|
|
3 |
|
|
|
|
|
|
|
||||
|
|
|
|
2 |
|||||||
|
|
|
|
|
|
|
|
|
|
|
|
3 |
|
|
|
|
|
|
|
|
|||
|
|
|
|
4 |
|
||||||
|
|
|
|
|
|
|
|
|
|
|
|
|
|
|
|
|
|
|
|
|
11 |
||
|
|
|
|
|
10 |
||||||
|
|
|
|
|
|
|
|
|
|
|
|
|
|
9 |
|
|
|
|
|
|
|
|
|
|
|
|
|
|
|
|
|
|
|
|
|
|
|
|
|
|
|
12 |
|
|
|
|
|
13
Backside
Charging the oscilloscope
The are several charging options: Use the included USB charger, plugged into a computer USB port, a mains to USB adaptor, a car 12V to USB adaptor or any USB type socket that can supply 5V/500mA. For measurements during charging, it is strongly advised to use a 9Vdc/min 200mA mains adaptor.
Charging of completely drained batteries can take up to 7 hours. The charge LED indicator will light while the scope is charging.
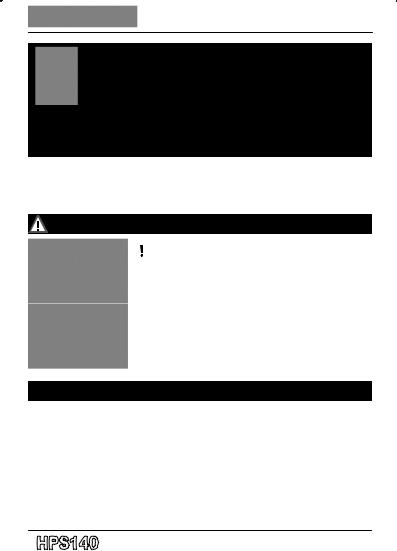
Quick use of the oscilloscope
After turning ON, a start-up screen appears. During this time, some calibrations are performed, so it can take a few seconds before the oscilloscope is ready for use.
The scope always starts in full auto set-up mode. This mode can be used for most (repetitive) signals. Set the input coupling to "DC" if very low frequencies or DC voltages are measured (see further).
- 5 -
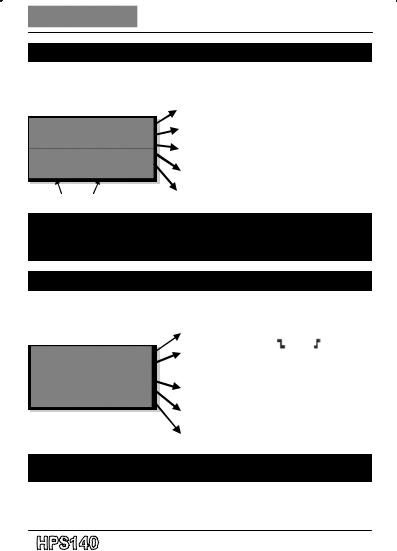
SHORT MENU > access by briefly pressing the menu button
The short menu is used to change the most common parameters like volts per division or timebase. For more advanced functions, the extended menu can be used.
Briefly press the menu button to select and highlight the desired parameter
Parameters in reverse= automatic mode.
Enlarge or reduce the signal vertically by adjusting the voltage per division, or select ‘AUTO’ for automatic signal display
Adapt the scope readout to the probe setting "x1" or "x10"
Time base: More or less signal cycles will be visible by modifying the time per division, or select ‘AUTO’ for automatic signal display
Select the input coupling AC / DC or choose a zero reference level (GND)
Select the desired voltage readout (Volt, dB, audio power measuring... )
Note: The menu will exit automatically if no button is pressed for a few seconds, or exit by a long press on the menu button.
Hint: In most settings, hold the UP or DOWN button pressed to activate the auto-range function.
EXTENDED MENU > access by keeping the menu button pressed
Briefly press the menu button to select and highlight the desired parameter
Select the desired trigger mode (run, normal)
Select the triggering at a falling |
or rising |
edge of the |
input signal |
|
|
 Adjust the trigger level
Move the signal vertically over the display (Y scroll bar)
Move the signal horizontally over the display (X scroll bar)
Increase or decrease the contrast until the desired contrast is reached
Note: The last selected extended menu option will appear in the short menu, until an other parameter is selected.
- 6 -
‘Hold’-function
The scope has two memories and one hold screen. The two memories are stored even after power off. Press the ‘hold’-button briefly to freeze the screen
To store:
1- Press and keep the ‘hold’-button to store the frozen screen until MEM1 appears
2- Your signal is stored in MEM1, if a signal was previous stored, this signal is moved to MEM2 3- Press the ‘hold’-button briefly to release the screen for measurements
Use the markers and recall the memory
Press the ‘hold’-button briefly
Now two menu screens can be recalled
1- Press the menu button briefly to call the short menu OR
2- Keep the menu button pressed to call the extended menu 3- Press the menu button briefly to select an item
4- Use the up or down buttons, to change the selected item
Using the short menu you can move the signal markers for voltage and time. To recall a memory (if used) select "memory", then press up or down to switch between:
Memory 1 > Memory 2 > Current Frozen screen…
Using the extended menu you can additionally:
-Set the “x10” probe readout
-Change the ‘time’ marker readout setting (time or frequency)
-Move the signal in X position
-Change the display contrast
-Select ‘time’ or ‘voltage’ marker
- 7 -
Aan alle ingezetenen van de Europese Unie Belangrijke milieu-informatie betreffende dit product
Dit symbool op het toestel of de verpakking geeft aan dat, als het na zijn levens-cyclus wordt weggeworpen, dit toestel schade kan toebrengen aan het milieu. Gooi dit toestel (en eventuele batterijen) niet bij het gewone huishoudelijke afval; het moet bij een gespecialiseerd bedrijf terechtkomen voor recyclage. U dient dit toestel naar uw verdeler of naar een lokaal recyclagepunt te brengen. Respecteer de plaatselijke milieuwetgeving.
Heeft u vragen, contacteer dan de plaatselijke autoriteiten inzake afvalverwijdering.
Veiligheid: algemene regels om dit toestel veilig te gebruiken. Hou rekening met deze aanbevelingen, ze zijn belangrijk voor Uw veiligheid. In geen geval zijn deze richtlijnen kompleet. Vermits de veiligheids vereisten verschillen van plaats tot plaats, dient U ervoor te zorgen dat Uw montage voldoet aan de plaatselijk geldende vereisten.
WAARBORG
Dit produkt is gewaarborgd wat betreft gebreken in materialen en vakmanschap op het ogenblik van de aankoop en dit gedurende een periode van TWEE JAAR vanaf de aankoop. De waarborg geldt enkel indien het produkt voorgelegd wordt samen met het origineel aankoop bewijs. De verplichtingen van VELLEMAN N.V. beperken zich tot het herstellen van defecten of, naar vrije keuze van VELLEMAN N.V. tot het vervangen of herstellen van defecte onderdelen. Kosten en risico’s van transport; het wegnemen en terugplaatsen van het produkt, evenals om het even welke andere kosten die rechtstreeks of onrechtstreeks verband houden met de herstelling, worden niet door VELLEMAN N.V. vergoed. VELLEMAN N.V. is niet verantwoordelijk voor schade van gelijk welke aard, veroorzaakt door het falen van een product.
Veiligheidsinformatie
 OVERSPANNING-/INSTALLATIECATEGORIE
CAT II : Een CAT II meter is geschikt voor metingen op enkelfasige apparaten die aan het lichtnet gekoppeld zijn door middel van een stekker en circuits in een normale huiselijke omgeving, bv. huishoudapparaten, draagbare gereedschappen, etc...,
op voorwaarde dat het circuit minstens 10m verwijderd is van een CAT III omgeving en minstens 20m van een CAT IV omgeving.
VERVUILINGSGRAAD
Vervuilings-graad 2 : Omgeving met enkel niet geleidende vervuiling. Uitzonderlijk kan condensatie voorkomen (bv. huishoudelijkeen kantooromgeving).
Tijdens gebruik
•U mag de limietwaarden bepaald in de specificaties nooit overschrijden.
•Raak geen vrije terminals aan wanneer het toestel op het testcircuit is aangesloten.
•Tijdens metingen aan tv-toestellen of schakelende voedingscircuits kan de meter beschadigingen oplopen door spanningpieken op de testpunten.
•Wees voorzichtig bij het testen van spanningen hoger dan 60VDC of 30VAC RMS. Houd vingers tijdens het meten altijd achter de beschermingen.
•Indien men metingen uitvoert aan spanningen hoger dan 30V dan moet men een meetprobe met geïsoleerde connector gebruiken.
•Voor de X10-probe: Pas de frequentierespons aan met behulp van de compensatietrimmer op de meetprobe (zie handleiding van de meetprobe).
-8 -
Specificaties en eigenschappen
40M samples/s in real-time Bandbreedte tot 10MHz Volautomatische instelling Gevoeligheid tot 0.1mV Signaalmarkers voor amplitude en tijd Geheugenfunctie
Directe meting van het audiovermogen (Watt) Geleverd met USB-batterijlader
Geleverd met X10 meetprobe bij de HPS140i
Specifications:
•Bandbreedte tot 10MHz (-3dB of -4dB afhankelijk van geselecteerde instelling)
•Ingangsbereik: 1mV tot 20V/div in 14 stappen
•Ingangskoppeling: DC, AC en GND
• Real-time bemonsteringsfrequentie tot 40MS/s
• AD-resolutie: 8 bits
•Tijdbasis: 250ns tot 1h per div
•Automatische of handmatige instelling
•Weergave van de probe x10-uitlezing
•Signaal voor probe calibratie achteraan het toestel
•Weergave: DC, AC+DC, True RMS, dBm, Vpp, Min-Max. (±2.5%)
• Meting van audiovermogen in 2 tot 32 ohm
•Holden geheugenfunctie
•Weergave van de signaalmarkers voor tijd en spanning
•Max. 100Vp AC+DC
•Achtergrondverlichting met witte leds
•NiMH batterijpack meegeleverd (BPHPS140)
•Autonomie tot 6 uur met een enkele laadbeurt1
•Voeding: 9VDC/200mA
•Voor gebruik op installaties klasse II, vervuilingsgraad II
•Afmetingen: 74x114x29mm
•Gewicht: 200g
1 Gebruik het toestel niet indien het aan de USB-lader gekoppeld is. Gebruik in dit geval een standaard 9VDCadapter.
- 9 -
 Loading...