


Daikin EHSX-08P50AA, EHSXB-08P50AA, EHSH-08P50AA, EHSHB-08P50AA, EHSX-16P50AA Installation manuals
...Startup Checklist
 check off executed action!
Daikin
Altherma EHSX
Altherma EHSXB
Altherma EHSH
Altherma EHSHB
-08P50AA -16P50AA
Daikin
Altherma EHSX
Altherma EHSXB
Altherma EHSH
Altherma EHSHB -04P30AA -08P30AA
Altherma EHS(X/H)
Startup Checklist |
Check off executed action! |
|
|
|
|
1.Initialization: Supply internal device and outdoor unit (if present) with power; pay attention to instructions on the display and follow them.
Confirm message with Yes
|
|
|
|
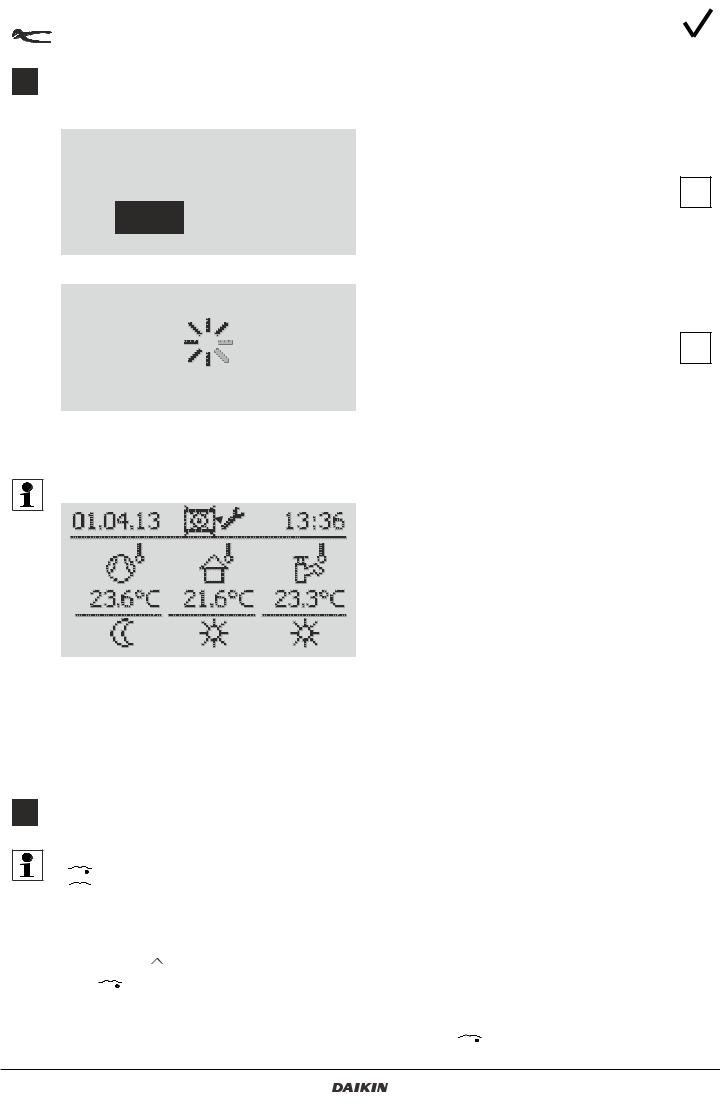
Figure 1-1
Initialization runs, parameters are applied. Wait until standard prompt appears.
Figure 1-2
Attention: Installations without outdoor unit
-Crossed-out outdoor unit
Figure 1-3
 If at the time of startup no outdoor unit is yet present, a crossed-out outdoor unit is shown at the top of the display. This icon has no influence on the startup of the system.
 If the symbol is shown when an outdoor unit is used, there is an error. (Error memory entry 9041).
2.Parameter settings for initial startup
ATTENTION! Before entering/adjusting the parameter, enter "Expert code" ( 


 RoCon HP / Chapter 3.6.1)
The expert code is intended exclusively for the specialized company and may
not be passed on to the end customer!
2.1Activate  Air Purge:
( 

 RoCon HP / Chapter 3.6.10)
2.2StartupParameters: all of the following parameters must necessarily be set – follow the sequence of Table 2-1 (for chapter information, see 


 RoCon HP)
SETUP - EHS(X/H)
2 |
ZB EHS(X/H) - setup -008.14 219 44_05 - 09/2014 |

Rotary switch main menu
Select main level
Push/turn control
Select (turn) and confirm (push) menu level 1 / Parameters
Exit button
Return to main level (push)
Figure 2-1 Controls – Control unit
|
|
|
|
Parameters |
|
|
|
|
Main level |
|
Prompts on the Display |
|
|
||
|
Rotary switch |
Menu level 1 |
Parameter |
Setting |
Comments |
||
|
main menu |
|
|
|
value |
|
|
1. |
Configuration |
Setup |
Outdoor type |
XX kW |
Set size of outdoor unit (even |
||
|
|
|
|
|
|
Power of |
if it is not yet installed) |
|
|
|
( |
RoCon HP) |
|
outdoor unit |
XX kW see rating plate |
|
|
|
|
|
|
||
|
|
|
Chapter 5.2.1 / |
|
|
|
|
2. |
|
|
Tab.5-1 |
Indoor Unit |
XXX Type of |
Set type of indoor unit |
|
|
|
|
|
|
|
indoor unit |
XXX see rating plate |
3. |
|
|
System |
Power DHW |
6 kW |
set to 6 kW or maximum value |
|
|
|
|
Configuration |
|
|
of the built-in Heating Rod |
|
4. |
|
|
( |
RoCon HP) |
BUH s1 power |
3 kW |
1st step of the |
|
|
|
Chapter 5.2.2 / |
|
|
heating support |
|
|
|
|
|
|
|
||
5. |
|
|
Tab.5-2 |
BUH s1 power |
9 kW |
2nd step of the |
|
|
|
|
|
|
|
|
heating support |
6. |
|
|
HC Configuration |
heating / |
19°C |
Set to desired temperature |
|
|
|
|
|
|
T-Outside lim day |
|
|
|
|
|
( |
RoCon HP) |
|
|
|
|
|
|
Chapter 5.2.3 / |
|
|
|
|
7. |
|
|
Tab.5-3 |
Insulation |
underdose |
Depending on the setting, the |
|
|
|
|
|
||||
|
|
|
|
|
|
|
external temperature is |
|
|
|
|
|
|
|
averaged over a specific time |
8. |
|
|
|
|
T-DHW |
48 °C |
Set to desired DHW-target |
|
DHW Set Temp |
|
|
Setpoint 1 |
|
temperature. Not below 40°C! |
|
|
( |
RoCon HP) |
|
|
|
|
|
|
Chapter 5.7 |
|
|
|
|
|
|
9. |
Operating Mode |
|
|
heating |
activate |
Device begins to heat. |
|
|
|
|
|
|
|
|
Attention: If the device was |
|
|
|
|
|
|
|
on standby, pay attention to |
|
( |
RoCon HP) |
|
|
|
|
the standby time; see on |
|
Chapter 5.4 |
|
|
|
|
Page 4. |
|
10. |
Information |
|
|
|
|
Switch to Info level |
|
|
|
|
|
|
|
||
Tab. 2-1 |
|
|
|
|
|
|
|
SETUP - EHS(X/H) |
|
|
|
|
|
|
3 |
ZB EHS(X/H) - setup -008.14 219 44_05 - 09/2014 |
|
|
|
|
|||
 Loading...