


Xerox Document Centre 505, Document Centre 506, Document Centre 605, Document Centre 606, Document Centre 705 User Guide
...Document Centre 706/705/606/605/506/505
Series
User Guide (Scanner)

Adobe and Photoshop are trademarks of Adobe Systems Incorporated. Microsoft, Windows, Windows NT are either registered trademarks or trademarks of Microsoft Corporation in the United States and/or other countries.
NetWare is a registered trademark of Novell, Inc., in the United States and other countries. Salutation is a trademark of Salutation Consortium, Inc.
All product/brand names are trademarks or registered trademarks of the respective holders. Permission has been obtained from Microsoft Corporation for use of software screen shots.
Important
 This manual is copyrighted with all rights reserved. Under the copyright laws, this manual may not be copied or modified in whole or part, without the written consent of the publisher.
 Parts of this manual are subject to change without prior notice.
 We welcome any comments on ambiguities, errors, omissions, or missing pages.
 Never attempt any procedure on the machine that is not specifically described in this manual. Unauthorized operation can cause faults or accidents. Fuji Xerox is not liable for any problems resulting from unauthorized operation of the equipment.
Xerox is a registered trademark. The Document Company and Ethernet are trademarks which may be registered in certain jurisdictions.
CentreWare and Docuworks are trademarks.

Preface
Thank you for purchasing the Fuji Xerox Document Centre 706/705/606/605/506/505 Series. This guide provides all the necessary operating instructions and precautions for the use of the scanning features.
To get the most out of the machine, please read this guide carefully in its entirety.
This guide is written with the assumption that you are familiar with the basic knowledge and way of operating the different operating systems. Refer to the manuals of these products for information on them.
Refer to the safety notes of the User Guide (Copier), or User Guide (Printer) before using the scan function.
i

Contents
Preface ........................................................................................................................................................... |
i |
Contents ....................................................................................................................................................... |
ii |
Types of Manuals ....................................................................................................................................... |
iv |
Using This Guide .......................................................................................................................................... |
v |
Chapter 1 Before Using the Scanner
1.1 |
Overview |
............................................................................................................................................. |
2 |
|
1.1.1 ............................................................................................... |
Scanning With the Mailbox |
2 |
1.2 |
Required ........................................................................................................................Environment |
3 |
|
1.3 |
Setting Up ..............................................................the Document Centre for Using Mailbox Feature |
4 |
|
|
1.3.1 ................................................................................................. |
Starting up the Salutation |
4 |
|
1.3.2 ................................................................ |
Setting up the Subnet Mask/Gateway Address |
7 |
|
1.3.3 .......................................................................................................... |
Creating a Mailbox |
10 |
1.4 |
Installing ..............................................................................................the Network Scanner Utility |
13 |
|
|
1.4.1 .................................................................................................... |
Required Environment |
13 |
|
1.4.2 ...................................................................................................................... |
Installation |
14 |
|
1.4.3 .................................................................................................................. |
Uninstallation |
16 |
Chapter 2 Operating the Scanner
2.1 |
Scanning Documents (Scan-to-Mailbox) .......................................................................................... |
18 |
|
2.2 |
Specifying Various Features ............................................................................................................. |
20 |
|
|
2.2.1 |
Selecting the Resolution Level ....................................................................................... |
20 |
|
2.2.2 |
Selecting the Original Type ............................................................................................. |
21 |
|
2.2.3 |
Selecting the Density Level ............................................................................................ |
21 |
|
2.2.4 |
Selecting the Scan Size ................................................................................................... |
22 |
|
2.2.5 |
Scanning Documents at the Specified Ratio ................................................................... |
23 |
|
2.2.6 |
Scanning Two Sided Originals ........................................................................................ |
24 |
2.3 |
Scanning With the Job Memory ....................................................................................................... |
25 |
|
2.4 |
Checking Job Status ......................................................................................................................... |
26 |
|
2.5 |
Deleting Stored Documents .............................................................................................................. |
28 |
|
2.6 |
Custom Presets for Scanning Features ............................................................................................. |
30 |
|
ii

Chapter 3 Operating the Client (Personal Computer)
3.1 |
Using the Network Scanner Driver .................................................................................................... |
34 |
|
|
3.1.1 |
Importing the Documents Stored in the Mailbox ............................................................ |
34 |
|
3.1.2 |
Changing Display of the Scanner Name ......................................................................... |
41 |
|
3.1.3 |
Changing Import Settings ............................................................................................... |
43 |
3.2 |
Using the Mailbox Viewer ................................................................................................................. |
44 |
|
|
3.2.1 |
Confirm/Delete/Import the Stored Document in a Mailbox ............................................. |
44 |
|
3.2.2 |
Setting up the Properties of Mailbox Viewer ................................................................... |
49 |
Chapter 4 Precautions and Limitations
4.1 Precautions and Limitations .............................................................................................................. 52
Appendix
A Compatible Software ......................................................................................................................... 54
Index ........................................................................................................................................................................... |
55 |
iii

Types of Manuals
The types of manuals available for the Document Centre 706/705/606/605/506/505 Series are as follows:
Manuals Bundled with the Main Unit (the Copier)
•User Guide (Copier)
Explains the handling of the main unit and the copier function.
Manuals Bundled with the Printer/Scanner Kit or Printer Model
•User Guide (Printer)
Explains the printer functions, installation/configuration of the printer drivers as well as the setting up and operations when using the machine as a network printer.
•User Guide (Scanner)
Explains the scanner functions and installation/configuration of the scanner driver.
Manuals Bundled with the Optional Accessories
Explains the handling and use of the accessories.
iv

Using This Guide
Background Knowledge
Read this guide in detail before using the scan function of the main unit. If you are not familiar with the operating environment for the scan function, read the relevant manuals first.
Operating environment refers to personal computers, networks, and the respective operating systems and applications on which these machines run.
Preparation
This guide is targeted at users who are using the Document Centre 706/705/606/605/506/ 505 Series Network Scanner. Read the contents of this guide in its entirety. You may skip sections on the options you did not purchase.
Organisation
The following is a summary of each chapter:
Chapter 1 Before Using the Scanner
This chapter provides a summary of the scan function and preparation on using the network scanner.
Chapter 2 Operating the Scanner
This chapter describes how to scan the document.
Chapter 3 Operating the Client (Personal Computer)
This chapter describes how to import the stored document from the mailbox of the machine to a personal computer using a client personal computer.
Chapter 4 Precautions and Limitations
This chapter describes the precautions and limitations when using the scan function.
Appendix
This section provides information on the softwares that are compatible with the machine.
v
Conventions
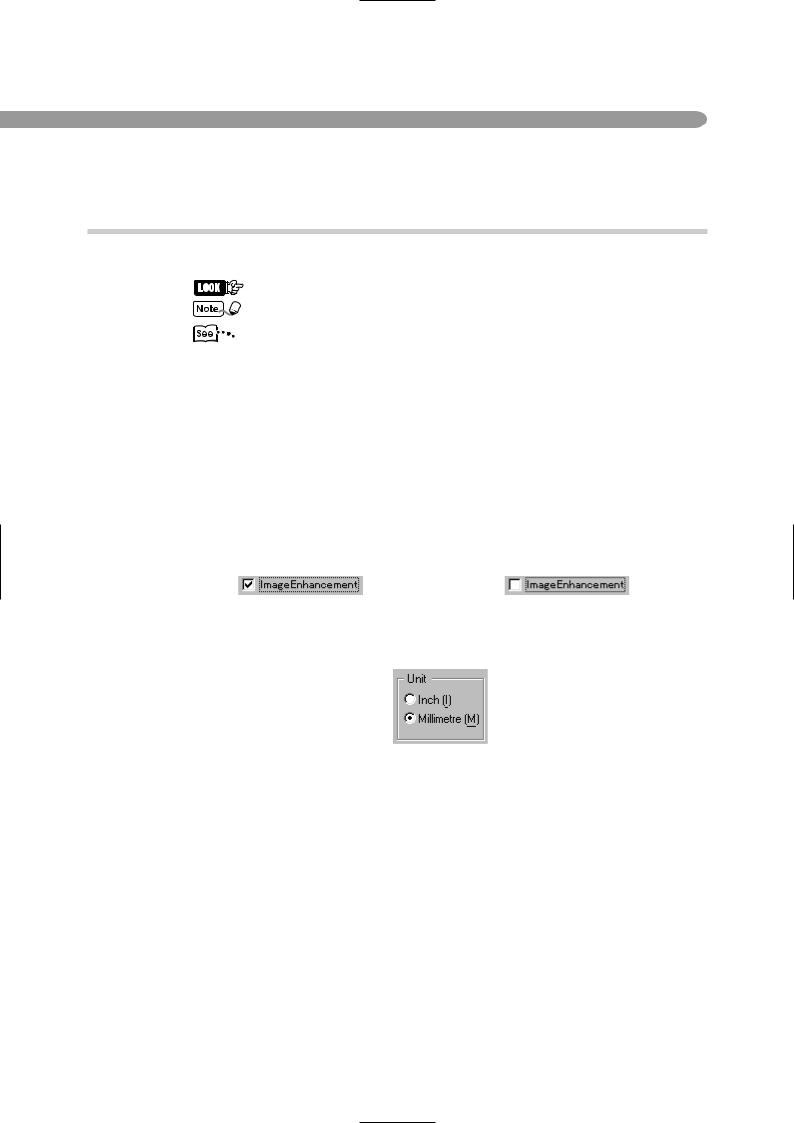
1. The following icons are used in this guide:
Indicates important information and must be read in detail.
Indicates supplementary information.
Indicates references used in this guide.
2. The following conventions are used in this guide:
"" : Double quotes are used to indicate names of files, windows, dialog
boxes and input contents.
E.g. "Mailbox Viewer" dialog box appears.
Bold face : Bold face characters refer to window menu items, dialog box items and all kinds of buttons.
E.g. Click OK.
3.When a check box is checked, it indicates ON. Otherwise it indicates OFF. E.g. "Image Enhancement" is on."Image Enhancement" is off.
4.The item with the option button checked is the selected item. E.g. "Millimetre" is selected.
vi

Before Using
the Scanner
1.1 |
Overview ............................................................................................. |
2 |
1.2 |
Required Environment ......................................................................... |
3 |
1.3 |
Setting Up the Document Centre for Using Mailbox Feature ................ |
4 |
1.4 |
Installing the Network Scanner Utility ............................................... |
13 |
1.1 Overview
The Document Centre Network Scanner provides the following feature:
• The scan feature by using the mailbox in the main unit The following explains the summary of scan function:
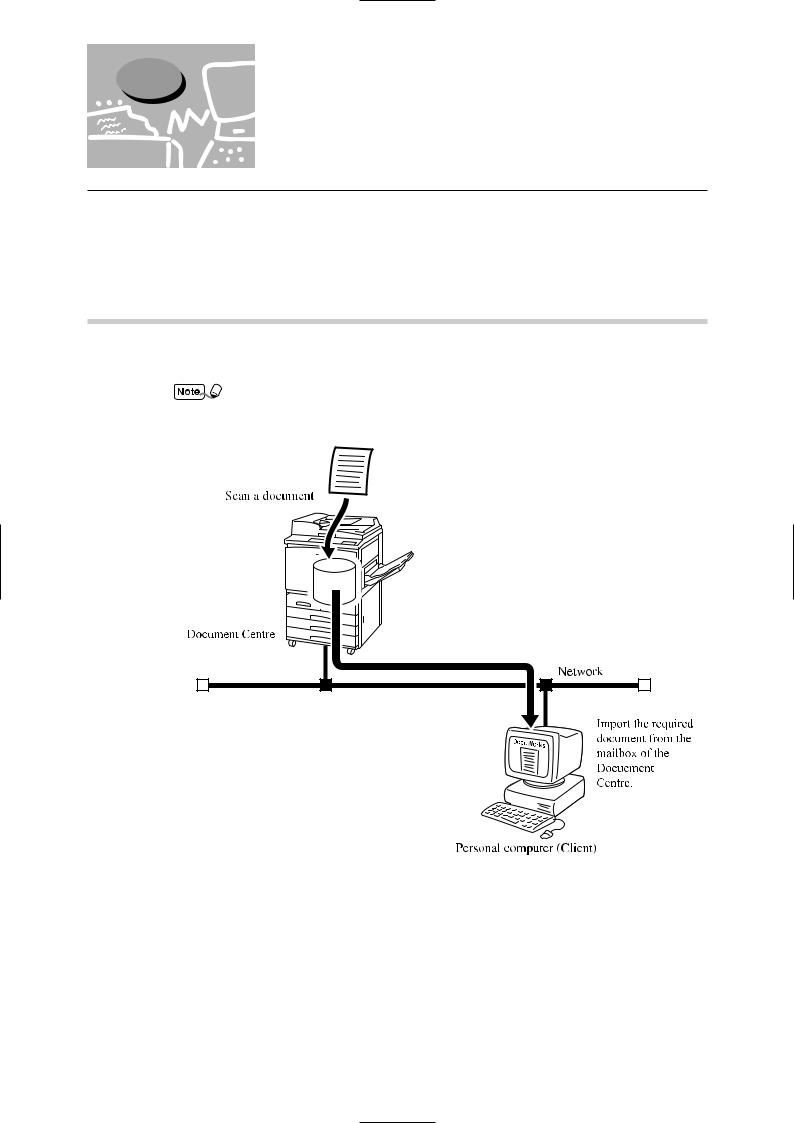
1.1.1Scanning With the Mailbox
You can store a document in the mailbox by scanning it with the Document Centre. The stored data can be imported to the personal computer (client) connected to a network.
The mailbox in this guide refer to the feature existing inside the main unit. It is different from the optional Mail Box which is an output device with multiple bins.
Mailbox
2
1.2 Required Environment
This section describes the environment required in order to use the scan feature (mailbox feature).

 Personal Computer (Client)
The personal computer as a client must be installed with either one of the following operatingsystems:
•Microsoft® Windows® 95/Windows® 98/Windows® Me
•Microsoft® Windows NT® Version 4.0/Windows® 2000
Windows NT 4.0 Server TSE (Terminal Server Edition) and Windows 2000 Server/
Advanced Server Terminal Service are not compatible with this feature.

 Network
The Document Centre and the personal computer should be connected with a network and be able to communicate with the TCP/IP protocol.
1 BeforeUsing theScanner
3
1.3Setting Up the Document Centre
for Using Mailbox Feature
The following preparation is necessary to scan a document using the mailbox:
•Activate Salutation (define IP address).
•Define subnet mask/gateway address.
•Register the mailbox.
The procedure for setting up is as follows:
1.3.1Starting up the Salutation
On the control panel of the Document Centre, start up the Salutation and define the IP address following the procedure shown below.
You do not need to define the IP address if it already exists. (The screen for defining the
IP address will not be displayed then.)
Procedure 
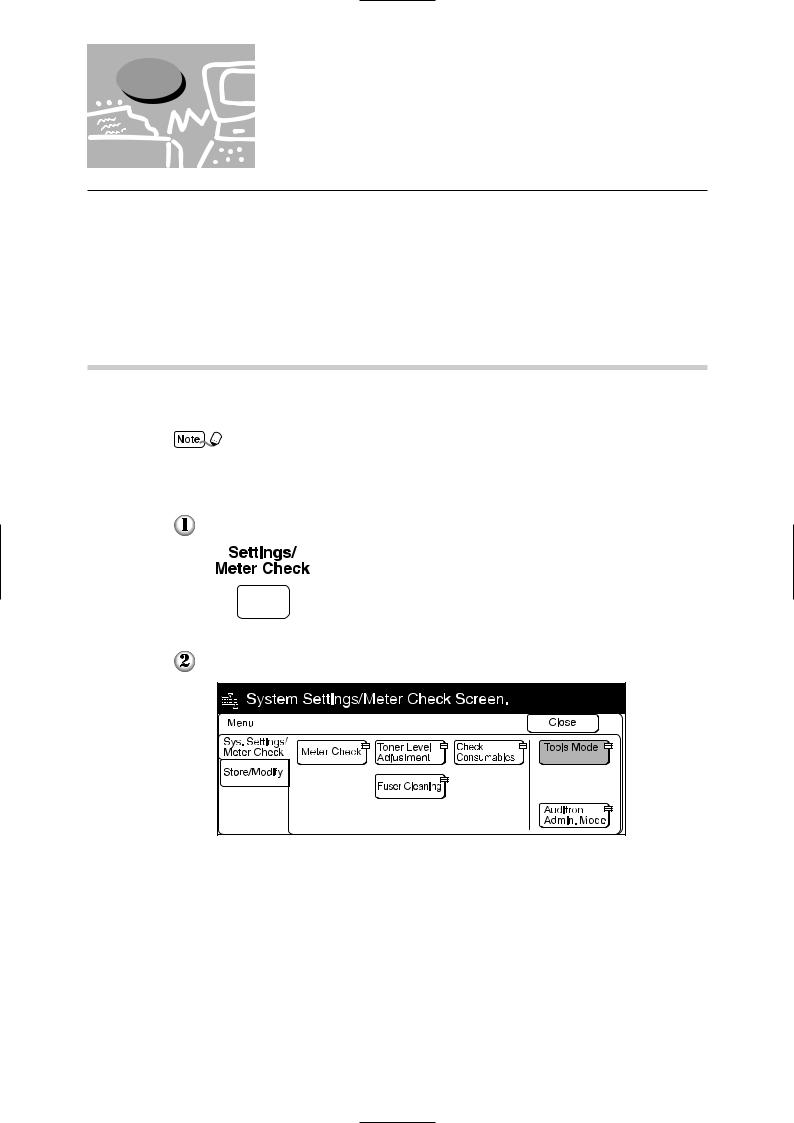
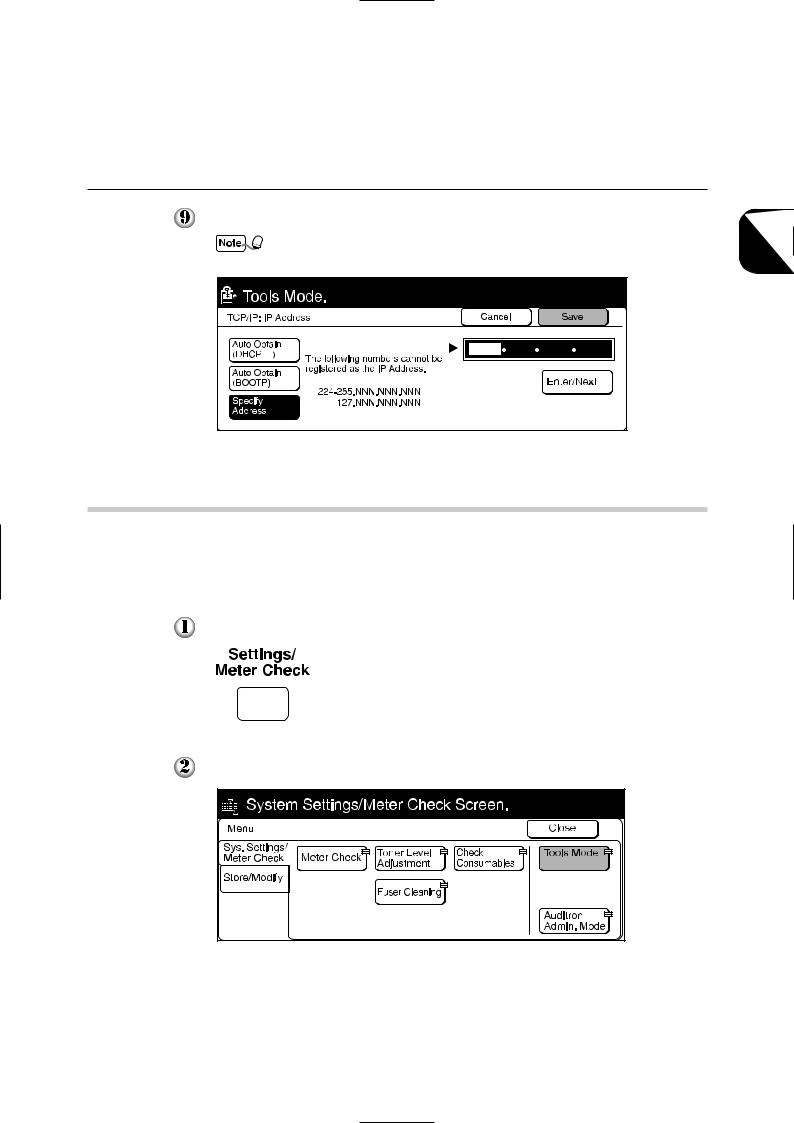
Press Settings/Meter Check.
Select Tools Mode.
4

1.3 Setting Up the Document Centre for Using Mailbox Feature
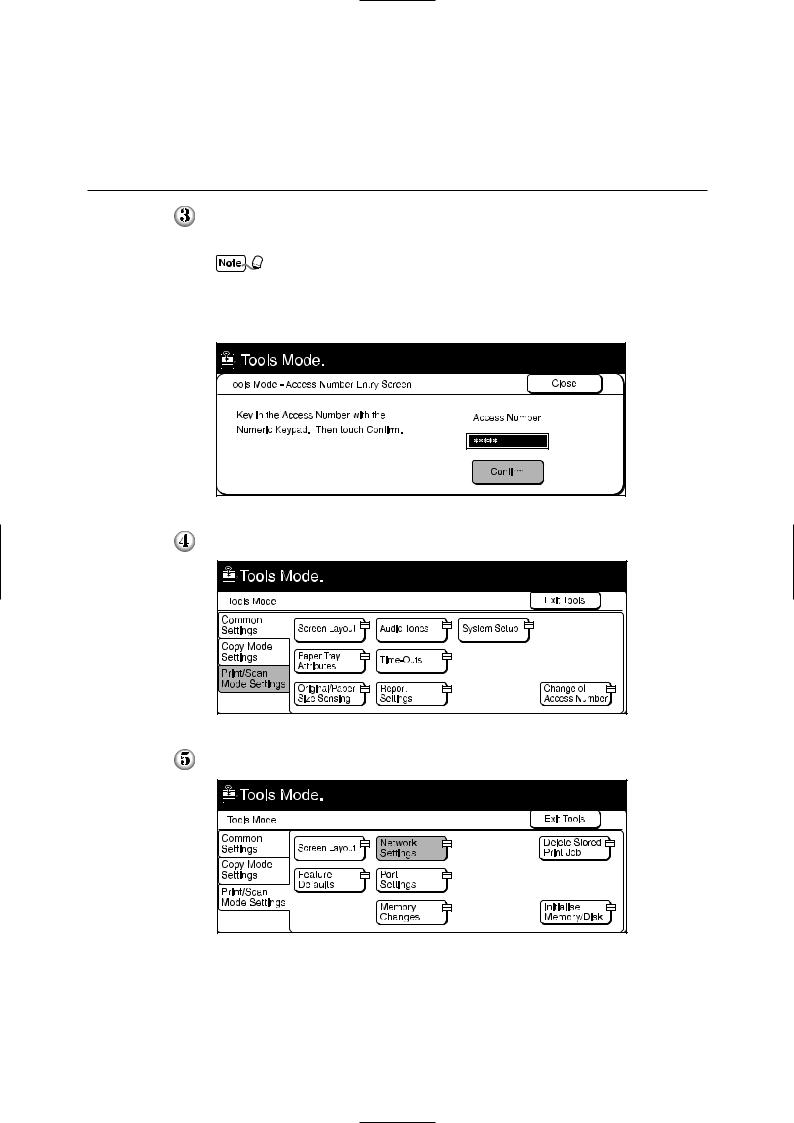
Enter the access number of the system administrator using the keypad, then select Confirm. The access number is displayed as *.
• If you made an error while entering the access number, press Clear C to clear and re-enter.
•Select Close to restart the machine.
•The factory default of the access number is "11111".
Select Print/Scan Mode Settings.
Select Port Settings.
1 BeforeUsing theScanner
5
1.3 Setting Up the Document Centre for Using Mailbox Feature
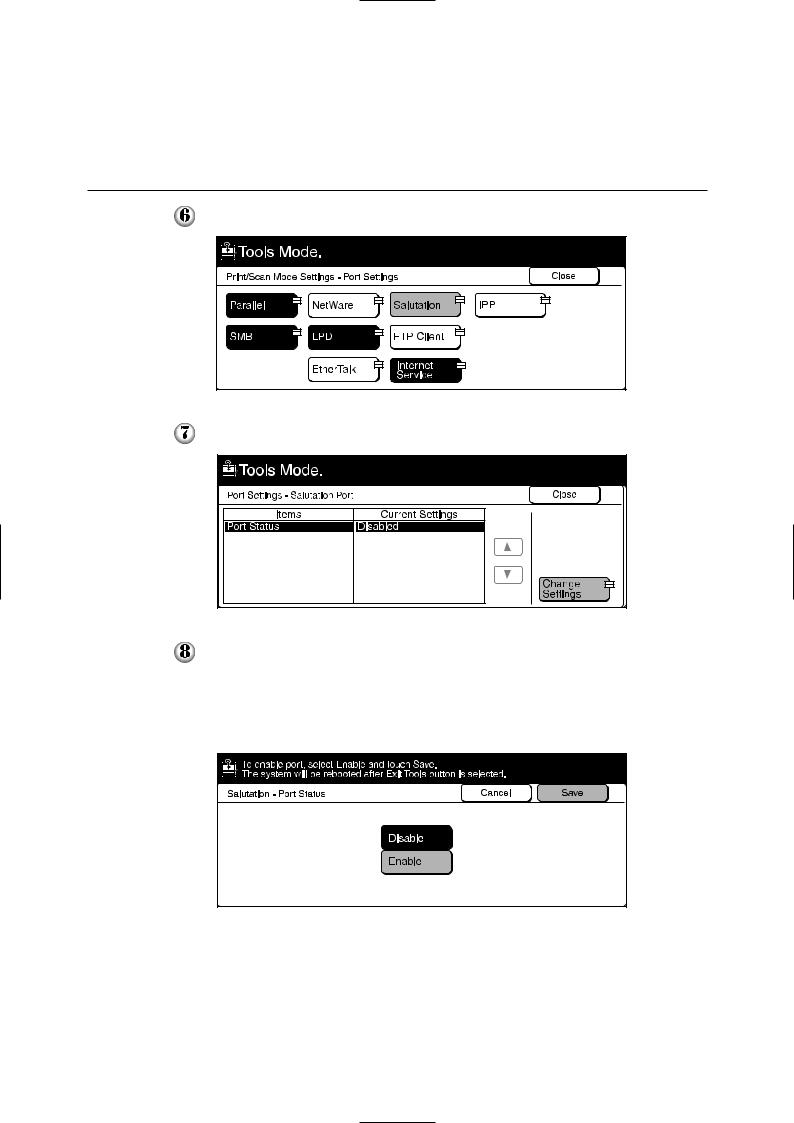
Select Salutation.
Select Port Status, followed by Change Settings.
Select Enable, then Save.
The Port Settings - Salutation Port screen is displayed with the new setting. The IP address is automatically obtained via DHCP or BOOTP depending on your setting. To specify a specific IP address, select Network Settings on the Tools Mode screen, followed by TCP/IP: IP Address and Change Settings.
6
1.3 Setting Up the Document Centre for Using Mailbox Feature
Enter the IP address using the keypad, then select Save.
When three numbers are entered, the cursor moves to the next bit automatically. If you want to move it manually, select the Enter/Next button.
1.3.2Setting up the Subnet Mask/Gateway Address
On the control panel of the Document Centre, set up the subnet mask and gateway address according to the procedure as shown below.
Procedure 
Press Settings/Meter Check.
Select Tools Mode.
1 BeforeUsing theScanner
7
1.3 Setting Up the Document Centre for Using Mailbox Feature
Enter the access number of the system administrator using the keypad, then select Confirm. The access number will be displayed as *.
• If you made an error while entering the access number, press the Clear C button to clear and re-enter.
•Select the Close button to restart the machine.
•The factory default of the access number is "11111".
Select Print/Scan Mode Settings.
Select Network Settings.
8
1.3 Setting Up the Document Centre for Using Mailbox Feature
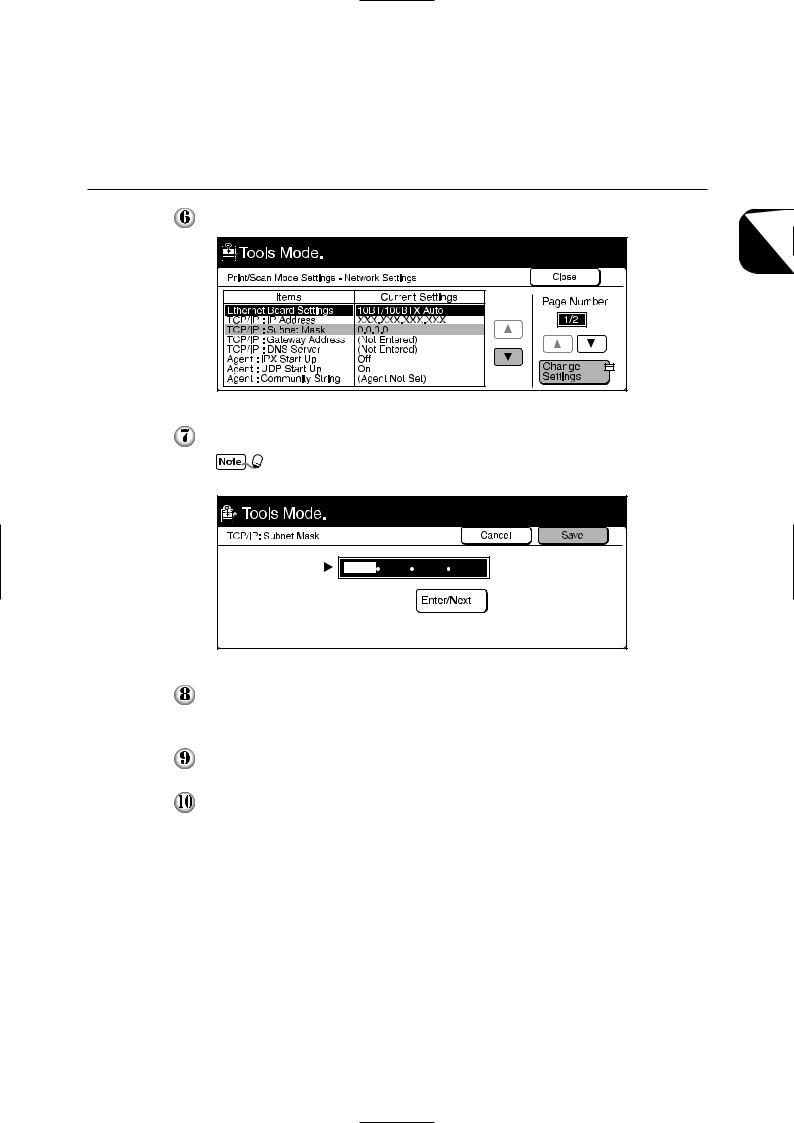
Select TCP/IP: Subnet Mask, then Change Settings.
Enter the subnet mask using the keypad, then select Save.
When three numbers are entered, the cursor moves to the next bit automatically. If you want to move it manually, select Enter/Next.
Select TCP/IP: Gateway Address in Step  to specify the gateway address, followed by Change Settings, then proceed to Step
  .
.
Select Close.
Select Exit Tools.
The machine will restart and the specified setting will take place.
1 BeforeUsing theScanner
9
1.3 Setting Up the Document Centre for Using Mailbox Feature
1.3.3Creating a Mailbox
Create a mailbox to store the scanned document. You can create the mailbox using the control panel of the main unit.

 You can create up to 200 mailboxes.
Procedure 
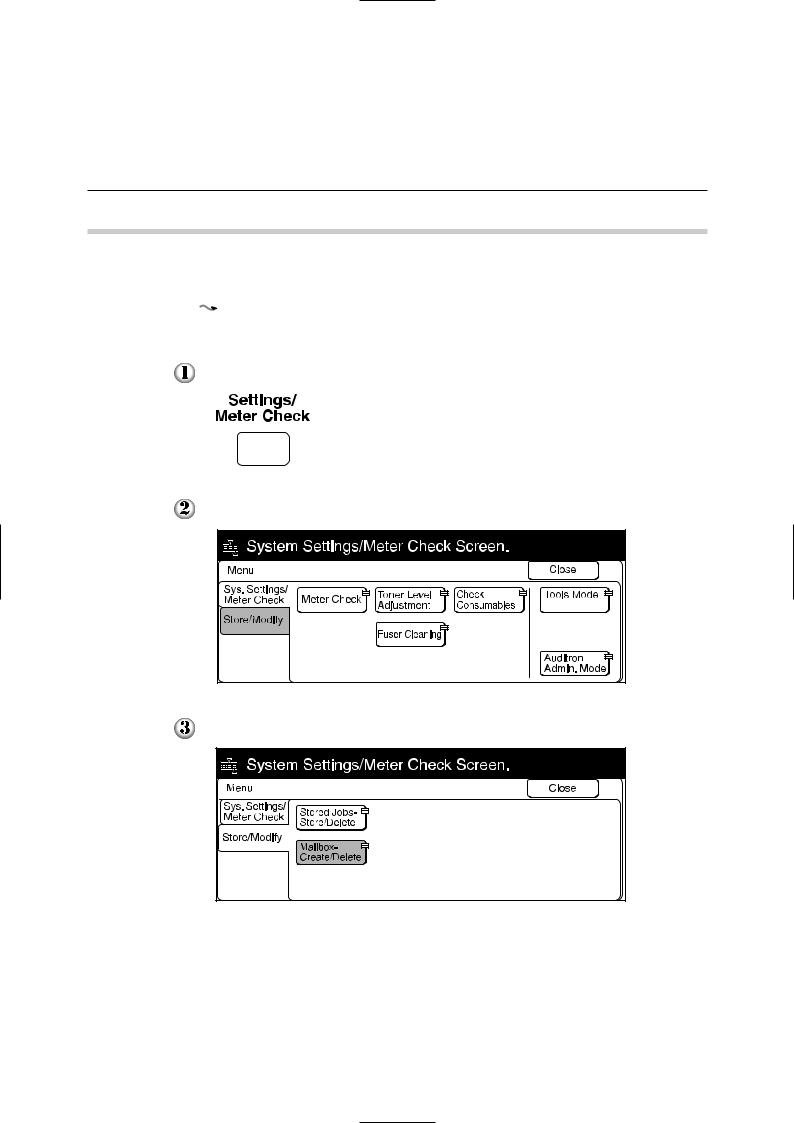
Press Settings/Meter Check.
Select Store/Modify. |
Select Mailbox-Create/Delete. |
10

1.3 Setting Up the Document Centre for Using Mailbox Feature
Select an unused mailbox number, then Create/Delete.
Enter a four-digit password using the keypad, then select Confirm. The password will be displayed as *.
The password must be unique.
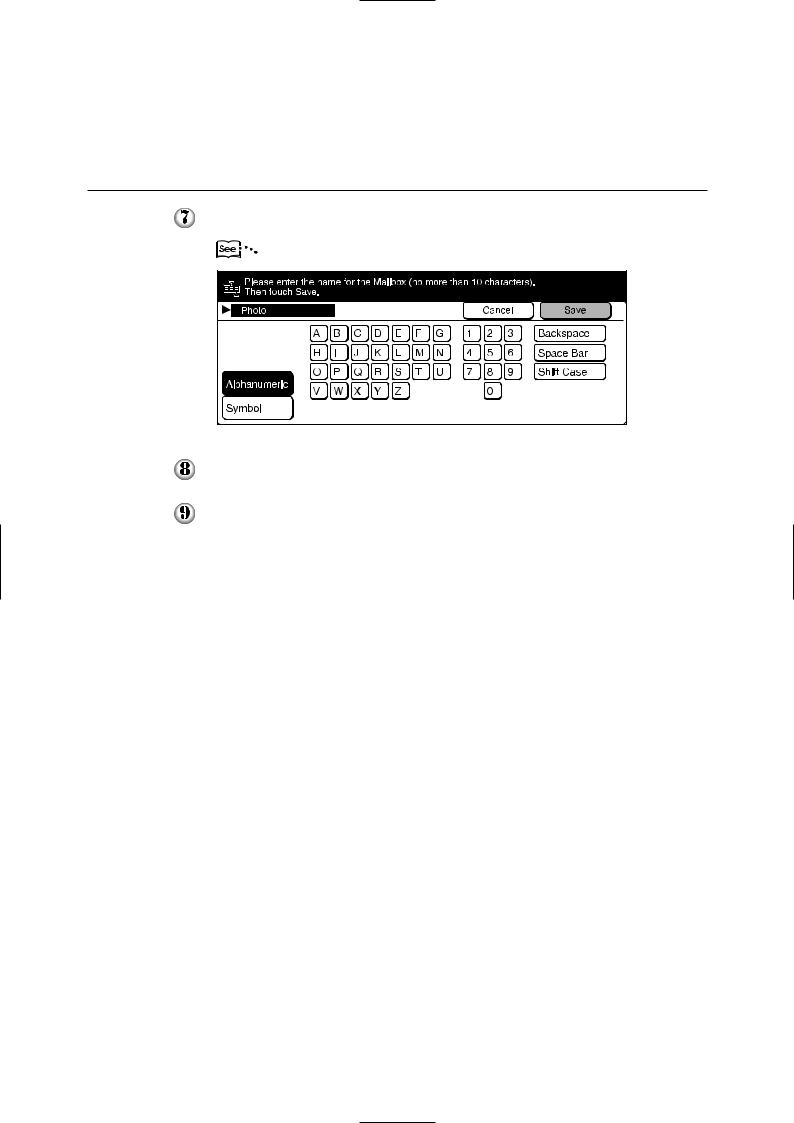
Select Enter/Change Name to enter the name for mailbox.
If you do not wish to enter any name, proceed to Step .
.
1 BeforeUsing theScanner
11
1.3 Setting Up the Document Centre for Using Mailbox Feature
Enter the name of the mailbox using the keypad on the screen, then select Save.
"User Guide (Copier)" for entering text.
Confirm the name of the mailbox, then select Save.
Select Close a few times to go to the screen on Step  . The mailbox is created.
12
1.4Installing the Network Scanner
Utility
Network Scanner Utility is the software which allows you to access data stored in the mailbox from a personal computer. This section describes the installation and uninstallation of the network scanner utility.
1.4.1Required Environment
To install the Network Scanner Utility, a personal computer must meet all the following requirements:
 Target Operating System
The following operating systems are compatible with the utility:
•Microsoft Windows 95/Windows 98/Windows Me
•Microsoft Windows NT Version 4.0/Windows 2000
Windows NT 4.0 Server TSE (Terminal Server Edition) and Windows 2000 Server/
Advanced Server Terminal Service are not compatible with this utility.
 Personal Computer
The target computer must meet all the following requirements:
•Running i486DX4/100 MHz processor or above (Pentium 100 MHz or above is recommended)
•32 MB memory or more
•25 MB or more of free hard disk space (not including the space for storing scanned data)
 Network
A personal computer has to be connected to a network and be able to communicate with the TCP/IP protocol.
Double-click on My Computer, Control Panel, then Network to confirm that the TCP/
IP is added on the menu.
 Target Application Software
To import the data stored in the mailbox to an application software, the software must be compatible with the TWAIN interface.
"Appendix A Compatible Software" for the applications that have been verified to be compatible with the Document Centre.
1 BeforeUsing theScanner
13
 Loading...