


 Loading...
DocuCentre-IV 3065
DocuCentre-IV 3060
DocuCentre-IV 2060
User Guide

Microsoft, Windows, Windows NT, Windows Server, Windows Vista, Internet Explorer, and Microsoft Network are trademarks or registered trademarks of Microsoft Corporation in the U.S. and other countries.
NetWare is a registered trademark of Novell, Inc. in the United States and other countries.
Adobe, Acrobat, PostScript, and Adobe PostScript 3 are trademarks of Adobe Systems Incorporated. EtherTalk, Macintosh, and Mac OS are registered trademarks of Apple Inc.
PCL, HP-GL, and HP-GL/2 are registered trademarks of Hewlett-Packard Corporation.
RSA and BSAFE are either registered trademarks or trademarks of RSA Security Inc. in the United States and/or other countries.
RSA Security Inc. All right reserved.
All product/brand names are trademarks or registered trademarks of the respective holders. Microsoft product screen shot(s) reprinted with permission from Microsoft Corporation.
For information on license, refer to About License.
In this manual, safety instructions are preceded by the symbol  .
.
Always read and follow the instructions before performing the required procedures.
The data saved in the hard disk of the machine may be lost if there is any problem in the hard disk. Fuji Xerox is not responsible for any direct and indirect damages arising from or caused by such data loss.
Fuji Xerox is not responsible for any breakdown of machines due to infection of computer virus or computer hacking.
Important
1.This manual is copyrighted with all rights reserved. Under the copyright laws, this manual may not be copied or modified in whole or part, without the written consent of the publisher.
2.Parts of this manual are subject to change without prior notice.
3.We welcome any comments on ambiguities, errors, omissions, or missing pages.
4.Never attempt any procedure on the machine that is not specifically described in this manual. Unauthorized operation can cause faults or accidents. Fuji Xerox is not liable for any problems resulting from unauthorized operation of the equipment.
An export of this product is strictly controlled in accordance with Laws concerning Foreign Exchange and Foreign Trade of Japan and/or the export control regulations of the United States.
XEROX, the sphere of connectivity design, PDF Bridge, ContentsBridge, and CentreWare are trademarks or registered trademarks of Xerox Corporation in the U.S. or Fuji Xerox Co., Ltd. DocuWorks is a trademark of Fuji Xerox Co., Ltd.

|
Table of Contents |
Table of Contents |
|
Table of Contents ........................................................................................................ |
1 |
1 Before Using the Machine ...................................................................................... |
11 |
Preface ...................................................................................................................... |
12 |
Types of Manuals ...................................................................................................... |
13 |
Using This Guide ....................................................................................................... |
14 |
Organization of This Guide ................................................................................... |
14 |
Conventions .......................................................................................................... |
15 |
Safety Notes .............................................................................................................. |
16 |
Electrical Safety .................................................................................................... |
17 |
Machine Installation .............................................................................................. |
18 |
Operational Safety ................................................................................................ |
21 |
Consumable.......................................................................................................... |
24 |
Location of Warning and Caution Labels .............................................................. |
26 |
Regulation ................................................................................................................. |
27 |
Radio Frequency Emissions (Class B) ................................................................. |
27 |
Product Safety Certification (UL, CB) ................................................................... |
27 |
Environment .............................................................................................................. |
28 |
About License............................................................................................................ |
29 |
RSA BSAFE.......................................................................................................... |
29 |
Heimdal................................................................................................................. |
29 |
JPEG Code ........................................................................................................... |
29 |
Libcurl ................................................................................................................... |
30 |
FreeBSD ............................................................................................................... |
30 |
OpenLDAP............................................................................................................ |
31 |
DES....................................................................................................................... |
33 |
AES....................................................................................................................... |
33 |
TIFF (libtiff)............................................................................................................ |
33 |
ICC Profile (Little cms) .......................................................................................... |
33 |
XPS (XML Paper Specification) ............................................................................ |
33 |
EDICT and COMPDIC .......................................................................................... |
33 |
Cyrus SASL .......................................................................................................... |
34 |
Legal Notice............................................................................................................... |
35 |
2 Product Overview .................................................................................................... |
37 |
Machine Components................................................................................................ |
38 |
Power Source ............................................................................................................ |
47 |
Switching the Main Power On............................................................................... |
47 |
Switching the Power On........................................................................................ |
48 |
Switching the Power Off........................................................................................ |
49 |
Switching the Main Power Off............................................................................... |
50 |
Ground Fault Interrupter ............................................................................................ |
51 |
1

Energy Saver Mode.................................................................................................... |
53 |
Exiting the Energy Saver Mode ............................................................................. |
54 |
Control Panel.............................................................................................................. |
55 |
Screens and Buttons Displayed............................................................................. |
58 |
About the [Services Home] Screen ............................................................................ |
59 |
Entering Text .............................................................................................................. |
63 |
Installing the Tray Attachment on the Finisher-B1 ..................................................... |
64 |
3 Copy .......................................................................................................................... |
65 |
Copying Procedure..................................................................................................... |
66 |
Step 1 Loading Documents ................................................................................... |
66 |
Step 2 Selecting Features ..................................................................................... |
68 |
Step 3 Entering a Quantity..................................................................................... |
69 |
Step 4 Starting the Copy Job................................................................................. |
70 |
Step 5 Confirming the Copy Job in Job Status ...................................................... |
71 |
Operations during Copying......................................................................................... |
72 |
Stopping the Copy Job .......................................................................................... |
72 |
Changing the Number of Copies ........................................................................... |
73 |
Interrupting the Copy Job ...................................................................................... |
74 |
Simple Copy ............................................................................................................... |
75 |
Paper Tray (Selecting the Paper Tray for Copying)............................................... |
75 |
Reduce/Enlarge (Making Enlarged/Reduced Copies) ........................................... |
76 |
2 Sided Copying (Making 2 Sided Copies) ............................................................ |
77 |
Lighten/Darken (Adjusting the Copy Density)........................................................ |
77 |
2 Pages per Side (Copying Two Pages onto One Sheet) ..................................... |
77 |
1 Staple.................................................................................................................. |
78 |
Copy ........................................................................................................................... |
79 |
Reduce/Enlarge (Making Enlarged/Reduced Copies) ........................................... |
79 |
Paper Supply (Selecting the Paper for Copying) ................................................... |
82 |
2 Sided Copying (Making 2 Sided Copies) ............................................................ |
85 |
Copy Output (Specifying Finishing Options).......................................................... |
85 |
Pages per Side (Copying Multiple Pages onto One Sheet)................................... |
85 |
Lighten/Darken (Adjusting the Copy Density)........................................................ |
86 |
Image Quality ............................................................................................................. |
87 |
Original Type (Selecting the Document Type)....................................................... |
87 |
Image Options (Adjusting Copy Density/Sharpness of Images)............................ |
88 |
Background Suppression (Erasing the Background Color of Documents) ............ |
89 |
Layout Adjustment...................................................................................................... |
90 |
2 Sided Copying (Making 2 Sided Copies) ............................................................ |
90 |
Book Copying (Copying Facing Pages onto Separate Sheets) ............................. |
92 |
2 Sided Book Copying (Making 2 Sided Copies of Facing Pages)........................ |
93 |
Original Size (Specifying the Scan Size for the Document)................................... |
95 |
Mixed Size Originals (Scanning Different Size Documents Simultaneously) ........ |
96 |
Edge Erase (Erasing Edges and Margin Shadows of the Document) ................... |
97 |
2

Table of Contents |
|
Image Shift (Adjusting the Image Position)........................................................... |
98 |
Invert Image (Making Reversed Copies of Images)............................................ |
101 |
Original Orientation (Specifying the Orientation of Loaded Documents) ............ |
101 |
Image Rotation (Changing the Orientation of Images) ....................................... |
102 |
Output Format ......................................................................................................... |
104 |
2 Sided Copying (Making 2 Sided Copies) ......................................................... |
104 |
Booklet Creation (Creating a Booklet) ................................................................ |
105 |
Covers (Attaching Covers to Copies).................................................................. |
108 |
Pages per Side (Copying Multiple Pages onto One Sheet) ................................ |
110 |
Poster (Making Enlarged Copies Spread over Multiple Sheets)......................... |
111 |
Repeat Image (Making Multiple Copies on One Sheet)...................................... |
112 |
Annotations (Adding a Comment/a Date/Page Numbers to Copies) .................. |
113 |
Watermark (Printing Control Numbers on the Background of Copies) ............... |
119 |
Folding (Outputting Bi-Folded)............................................................................ |
122 |
Preset Repeat Image (Making Multiple Copies on a Single Sheet) .................... |
123 |
Transparency Options (Inserting Blank Sheets between Transparencies)......... |
124 |
Copy Output (Specifying Finishing Options) ....................................................... |
125 |
ID Card Copy (Copying Both Sides of an ID Card)............................................. |
129 |
Job Assembly .......................................................................................................... |
131 |
Build Job |
|
(Processing Documents Scanned with Different Settings as One Job) .............. |
131 |
Sample Job (Checking the Finished Output of the Copy)................................... |
135 |
Combine Original Sets (Adding Originals) .......................................................... |
136 |
Form Overlay (Making Copies to Overlay Documents) ...................................... |
138 |
Delete Outside/Delete Inside (Deleting Outside or Inside of the Selected Area) 139 |
|
Stored Programming (Calling a Stored Program for Build Job) .......................... |
140 |
4 Fax .......................................................................................................................... |
141 |
Fax Procedure ......................................................................................................... |
142 |
Step 1 Loading Documents................................................................................. |
142 |
Step 2 Selecting Features................................................................................... |
144 |
Step 3 Specifying Destinations ........................................................................... |
145 |
Step 4 Starting the Fax Job ................................................................................ |
147 |
Step 5 Confirming the Fax Job in Job Status...................................................... |
148 |
Operations during Faxing ........................................................................................ |
149 |
Stopping the Fax Job .......................................................................................... |
149 |
Changing the Scan Settings ............................................................................... |
150 |
About Internet Fax ................................................................................................... |
152 |
Internet Fax Features.......................................................................................... |
152 |
Sending Internet Fax........................................................................................... |
154 |
Receiving Internet Fax ........................................................................................ |
155 |
Useful Features................................................................................................... |
156 |
About IP Fax (SIP)................................................................................................... |
160 |
IP Fax (SIP) Features ......................................................................................... |
161 |
Feature Comparison with Regular Fax ............................................................... |
163 |
3

Sending IP Fax (SIP) ........................................................................................... |
163 |
Receiving IP Fax (SIP) ........................................................................................ |
164 |
About Server Fax ..................................................................................................... |
165 |
Sending Server Fax ............................................................................................. |
165 |
Simple Fax ............................................................................................................... |
167 |
Specifying a Destination Using the Numeric Keypad .......................................... |
167 |
Speed Dialing (Specifying a Destination Using an Address Number) ................. |
168 |
Specifying a Destination Using a One Touch Button........................................... |
169 |
Resolution (Specifying the Scanning Resolution)................................................ |
170 |
Original Type (Selecting the Document Type)..................................................... |
170 |
2 Sided Scanning (Transmitting 2-sided Originals) ............................................. |
171 |
Fax/Internet Fax ....................................................................................................... |
172 |
Internet Fax/Fax/IP Fax (SIP) (Selecting Internet Fax/Fax)................................. |
172 |
+ Add (Sending Faxes to Multiple Recipients)..................................................... |
173 |
Specifying a Destination Using the Address Book............................................... |
174 |
Speed Dialing (Specifying a Destination Using an Address Number) ................. |
175 |
Specifying a Destination Using a One Touch Button........................................... |
176 |
Specifying a Destination Using the Keyboard Screen ......................................... |
177 |
Specifying a Destination Using the Redial Feature ............................................. |
178 |
Specifying a Line (Port) ....................................................................................... |
178 |
Entering Specific Symbols ................................................................................... |
179 |
Removing/Confirming a Recipient ....................................................................... |
180 |
Lighten/Darken (Adjusting Fax Density) .............................................................. |
180 |
2 Sided Scanning (Transmitting 2-sided Originals) ............................................. |
181 |
Original Type (Selecting the Document Type)..................................................... |
182 |
Resolution (Specifying the Scanning Resolution)................................................ |
183 |
Layout Adjustment.................................................................................................... |
184 |
2 Sided Scanning (Transmitting 2-sided Originals) ............................................. |
184 |
Original Size (Specifying the Scan Size for the Original)..................................... |
184 |
Mixed Sized Originals (Scanning Different Size Documents Simultaneously) .... |
185 |
Book Faxing (Scanning Facing Pages onto Separate Sheets)............................ |
186 |
Reduce/Enlarge (Specifying a Scan Ratio) ......................................................... |
187 |
Stamp (Adding a Stamp when Scanning a Document) ....................................... |
188 |
Fax/Internet Fax Options.......................................................................................... |
189 |
Acknowledgement Report (Confirming Transmission Results) ........................... |
189 |
Starting Rate (Selecting a Communication Mode)............................................... |
191 |
Priority Send/Delay Start (Specifying Send Priority/Send Time) ......................... |
192 |
Transmission Header Text |
|
(Adding Sender Name and Phone Number to Faxes) ......................................... |
194 |
Cover Page (Transmitting Documents With a Cover Page) ................................ |
194 |
Internet Fax Subject (Specifying the Internet Fax Subject) ................................. |
196 |
Internet Fax Message (Editing the Internet Fax Mail Contents) .......................... |
197 |
Recipient Print Sets (Printing Multiple Sets at the Remote Machine).................. |
198 |
Pages per Side (Combining Multiple Pages into One Sheet) .............................. |
198 |
Remote Folder (Using Remote Folder)................................................................ |
199 |
4

Table of Contents |
|
F Code (Using F Code Transmission) ................................................................ |
202 |
Internet Fax Profile (Specifying Internet Fax Profiles) ........................................ |
205 |
Encryption (Sending Internet Fax Encrypted by S/MIME) .................................. |
207 |
Digital Signature (Sending Internet Fax with a Digital Signature by S/MIME) .... |
207 |
More Options ........................................................................................................... |
208 |
Remote Polling (Retrieving Files from Remote Machines) ................................. |
208 |
Store for Polling |
|
(Storing Files on the Machine that a Remote Machine can Retrieve)................. |
210 |
On-hook (Confirming Remote Machine Response Prior to Transmission) ......... |
212 |
Broadcast ................................................................................................................ |
213 |
Broadcast Send (Transmitting to Multiple Recipients) ........................................ |
213 |
Relay Broadcast (Transmitting Documents Through a Relay Station) ............... |
213 |
Remote Relay Broadcast (Performing Relay Broadcast to Remote Locations).. |
217 |
Receiving Faxes ...................................................................................................... |
221 |
Switching between Auto Receive and Manual Receive...................................... |
221 |
Using Auto Receive ............................................................................................ |
222 |
Using Manual Receive ........................................................................................ |
222 |
Using Folder Receive.......................................................................................... |
223 |
Facsimile Information Services................................................................................ |
224 |
Using the Receiver.............................................................................................. |
224 |
When Not Using a Receiver................................................................................ |
224 |
5 Scan ....................................................................................................................... |
227 |
Scanning Procedure ................................................................................................ |
228 |
Step 1 Loading Documents................................................................................. |
228 |
Step 2 Selecting the Features............................................................................. |
230 |
Step 3 Starting the Scan Job .............................................................................. |
233 |
Step 4 Confirming the Scan Job in Job Status ................................................... |
234 |
Step 5 Saving the Scanned Data........................................................................ |
235 |
Operations during Scanning .................................................................................... |
236 |
Stopping the Scan Job........................................................................................ |
236 |
Previewing the Scanned Images during a Scan Job .......................................... |
237 |
Changing Scan Settings ..................................................................................... |
238 |
E-mail ...................................................................................................................... |
239 |
Address Book (Specifying an E-mail Address) ................................................... |
239 |
New Recipient (Entering an Address)................................................................. |
242 |
Add Me (Adding the Sender’s Address).............................................................. |
243 |
Recipient(s) (Editing a Recipient) ....................................................................... |
243 |
From (Setting the Sender’s Address).................................................................. |
244 |
Subject (Setting the Subject) .............................................................................. |
245 |
Message (Entering the E-mail Body) .................................................................. |
245 |
Preview (Previewing the Scanned Images during a Scan Job) .......................... |
246 |
Color Scanning (Selecting an Output Color)....................................................... |
246 |
2 Sided Scanning (Scanning Both Sides of a Document)................................... |
247 |
Original Type (Selecting the Document Type) .................................................... |
248 |
5

File Format (Selecting a File Format for Output Data)......................................... |
248 |
Network Scanning .................................................................................................... |
257 |
Preview (Previewing the Scanned Images during a Scan Job) ........................... |
258 |
Color Scanning (Selecting an Output Color)........................................................ |
258 |
2 Sided Scanning (Scanning Both Sides of a Document) ................................... |
258 |
Original Type (Selecting the Document Type)..................................................... |
258 |
File Format (Selecting a File Format for Output Data)......................................... |
258 |
Scan to PC ............................................................................................................... |
259 |
Transfer Protocol (Selecting a Transfer Protocol) ............................................... |
259 |
Address Book (Specifying a Destination PC Using the Address Book)............... |
260 |
Browse (Specifying a Destination PC by Browsing Your Network) ..................... |
261 |
Specifying a Destination |
|
(Specifying a Destination PC Using the Screen Keyboard)................................. |
262 |
Preview (Previewing the Scanned Images during a Scan Job) ........................... |
264 |
Color Scanning (Selecting an Output Color)........................................................ |
264 |
2 Sided Scanning (Scanning Both Sides of a Document) ................................... |
264 |
Original Type (Selecting the Document Type)..................................................... |
264 |
File Format (Selecting a File Format for Output Data)......................................... |
264 |
Store to Folder.......................................................................................................... |
265 |
Color Scanning (Selecting an Output Color)........................................................ |
266 |
2 Sided Scanning (Scanning Both Sides of a Document) ................................... |
266 |
Original Type (Selecting the Document Type)..................................................... |
266 |
Preview (Previewing the Scanned Images during a Scan Job) ........................... |
266 |
Store to USB ............................................................................................................ |
267 |
Save in |
|
(Specifying a Storage Location in the USB Memory Device) .............................. |
271 |
Details |
|
(Displaying the Details of a Storage Location in the USB Memory Device) ........ |
272 |
Preview (Previewing the Scanned Images during a Scan Job) ........................... |
272 |
Color Scanning (Selecting an Output Color)........................................................ |
272 |
2 Sided Scanning (Scanning Both Sides of a Document) ................................... |
272 |
Original Type (Selecting the Document Type)..................................................... |
273 |
File Format (Selecting a File Format for Output Data)......................................... |
273 |
Store & Send Link .................................................................................................... |
274 |
Scan To (Displaying the E-mail Address of the Authenticated User) .................. |
275 |
From (Displaying the E-mail Address of the Authenticated User) ....................... |
275 |
Subject (Setting the Subject) ............................................................................... |
275 |
Message (Entering the E-mail Body) ................................................................... |
275 |
Color Scanning (Selecting an Output Color)........................................................ |
275 |
2 Sided Scanning (Scanning Both Sides of a Document) ................................... |
275 |
Original Type (Selecting the Document Type)..................................................... |
275 |
Preview (Previewing the Scanned Images during a Scan Job) ........................... |
276 |
File Format (Selecting a File Format for Output Data)......................................... |
276 |
Store to WSD ........................................................................................................... |
277 |
Computer (Starting a Scan Job via Computer Operation) ................................... |
277 |
6

Table of Contents
This Device (Storing Data Scanned by the Machine on a Network Computer) .. 279
Advanced Settings................................................................................................... |
280 |
Photographs (Scanning a Color Photograph) ..................................................... |
280 |
Image Options (Adjusting Scan Density and Image Sharpness) ........................ |
281 |
Image Enhancement |
|
(Erasing the Background Color of Documents/Adjusting Contrast) .................... |
282 |
Shadow Suppression (Suppressing the Document Background) ....................... |
282 |
Color Space (Specifying the Color Space) ......................................................... |
283 |
Layout Adjustment................................................................................................... |
284 |
Resolution (Specifying a Scanning Resolution) .................................................. |
285 |
2 Sided Scanning (Scanning Both Sides of a Document)................................... |
285 |
Book Scanning (Scanning Facing Pages on Separate Sheets).......................... |
285 |
Original Size (Specifying a Scan Size) ............................................................... |
287 |
Mixed Sized Originals (Scanning Different Size Documents Simultaneously).... |
288 |
Edge Erase (Erasing Edges and Margin Shadows in the Document) ................ |
289 |
Reduce/Enlarge (Specifying a Scanning Ratio).................................................. |
290 |
Original Orientation (Specifying the Orientation of the Loaded Documents) ...... |
291 |
E-mail Options/Filing Options .................................................................................. |
292 |
Quality/File Size (Specifying an Image Compression Ratio When Scanning) .... |
293 |
Read Receipts (Specifying Read Receipts)........................................................ |
293 |
Split Send (Sending in Sections) ........................................................................ |
294 |
File Name (Specifying a Name for the File to be Sent)....................................... |
295 |
Reply To (Specifying a Reply Address) .............................................................. |
295 |
File Name Conflict (Setting the Action to be Taken for File Name Conflict) ....... |
296 |
File Name (Specifying a Name for the File to be Saved).................................... |
296 |
Encryption (Sending E-mail Encrypted by S/MIME) ........................................... |
297 |
Digital Signature (Sending E-mail with a Digital Signature by S/MIME) ............. |
297 |
Login Name......................................................................................................... |
297 |
Password ............................................................................................................ |
297 |
Meta Data ........................................................................................................... |
297 |
6 Send from Folder................................................................................................... |
299 |
Folder Operating Procedure .................................................................................... |
300 |
Step 1 Opening the [Send from Folder] Screen.................................................. |
300 |
Step 2 Selecting a Folder.................................................................................... |
300 |
Step 3 Checking/Selecting Files in a Folder ....................................................... |
301 |
Step 4 Operating Files in a Folder ...................................................................... |
301 |
Selecting a Folder.................................................................................................... |
302 |
Checking/Operating Files in a Folder ...................................................................... |
303 |
Checking File Details............................................................................................... |
305 |
Printing Files in a Folder.......................................................................................... |
306 |
Configuring/Starting Job Flow ................................................................................. |
309 |
[Link Job Flow Sheet to Folder] Screen .............................................................. |
311 |
Job Flow Restrictions.......................................................................................... |
313 |
7

7 |
Job Flow Sheets ..................................................................................................... |
315 |
|
Job Flow Procedure ................................................................................................. |
316 |
|
Step 1 Opening the [Job Flow Sheets] Screen.................................................... |
316 |
|
Step 2 Selecting a Job Flow Sheet...................................................................... |
317 |
|
Step 3 Confirming/Changing the Job Flow Sheet................................................ |
317 |
|
Step 4 Starting the Job Flow Sheet ..................................................................... |
317 |
|
Selecting/Changing a Job Flow Sheet ..................................................................... |
318 |
8 |
Stored Programming.............................................................................................. |
321 |
|
Stored Programming Overview ................................................................................ |
322 |
|
Registering/Deleting/Renaming Stored Programs ................................................... |
323 |
|
Registering Stored Programs .............................................................................. |
324 |
|
Notes and Restrictions on Registering Stored Programs .................................... |
325 |
|
Registering Stored Programs for Build Job ......................................................... |
326 |
|
Deleting Stored Programs ................................................................................... |
326 |
|
Entering/Changing a Stored Program Name ....................................................... |
327 |
|
Assigning/Changing Icons for Stored Programs.................................................. |
327 |
|
Calling a Stored Program ......................................................................................... |
329 |
|
Calling a Stored Program for Build Job ............................................................... |
330 |
9 |
Media Print-Text ..................................................................................................... |
331 |
|
Media Print Overview .............................................................................................. |
332 |
|
Supported File Formats ....................................................................................... |
332 |
|
Notes and Restrictions on Media Print ................................................................ |
333 |
|
Inserting USB Memory Device ................................................................................. |
334 |
|
Selecting Files .......................................................................................................... |
337 |
|
[Select From List] Screen .................................................................................... |
338 |
|
Selecting the Printing Options .................................................................................. |
339 |
|
Media Print - Text ................................................................................................ |
339 |
|
Index Print............................................................................................................ |
340 |
10 |
Job Status ............................................................................................................... |
341 |
|
Job Status Overview ................................................................................................ |
342 |
|
Checking Current/Pending Jobs............................................................................... |
343 |
|
Checking Completed Jobs ....................................................................................... |
344 |
|
Printing and Deleting Stored Jobs............................................................................ |
345 |
|
Secure Print ......................................................................................................... |
345 |
|
Sample Set .......................................................................................................... |
347 |
|
Delayed Print ....................................................................................................... |
349 |
|
Charge Print......................................................................................................... |
350 |
|
Private Charge Print ............................................................................................ |
353 |
|
Public Folder........................................................................................................ |
356 |
|
Undelivered Faxes............................................................................................... |
357 |
|
Printing Pending Jobs .............................................................................................. |
359 |
8
|
|
Table of Contents |
|
Handling Error Terminations.................................................................................... |
360 |
11 |
Computer Operations............................................................................................ |
361 |
|
Features Overview .................................................................................................. |
362 |
|
Print ......................................................................................................................... |
363 |
|
Print Features ..................................................................................................... |
363 |
|
Setup................................................................................................................... |
364 |
|
Printing................................................................................................................ |
365 |
|
E-mail Printing ......................................................................................................... |
366 |
|
Setup................................................................................................................... |
366 |
|
Sending E-Mail.................................................................................................... |
366 |
|
Sending Fax ............................................................................................................ |
368 |
|
Registering Destinations ..................................................................................... |
368 |
|
Importing Scanned Data.......................................................................................... |
370 |
|
Importing to a TWAIN Compatible Application.................................................... |
370 |
|
Importing Using Stored File Manager 3 .............................................................. |
372 |
|
Importing Using CentreWare Internet Services .................................................. |
374 |
|
Importing Using EasyOperator............................................................................ |
376 |
|
CentreWare Internet Services ................................................................................. |
378 |
12 |
Appendix ................................................................................................................ |
383 |
|
Glossary .................................................................................................................. |
384 |
Index.............................................................................................................................. |
391 |
|
9

10
1 Before Using the Machine
This chapter describes how to use this guide, as well as safety notes and legal notice you should read before using the machine.
z |
Preface ....................................................................................................... |
12 |
z |
Types of Manuals ....................................................................................... |
13 |
z |
Using This Guide ........................................................................................ |
14 |
z |
Safety Notes ............................................................................................... |
16 |
z |
Regulation................................................................................................... |
27 |
z |
Environment................................................................................................ |
28 |
z |
About License ............................................................................................. |
29 |
z |
Legal Notice................................................................................................ |
35 |

Machine the Using Before
1
1 Before Using the Machine
Preface
Thank you for selecting the DocuCentre-IV 3065/3060/2060 (hereafter referred to as "the machine").
This guide describes how to operate the machine and the precautions you should follow during operation. To get the most out of the machine and to use it effectively, be sure to read this guide before use.
The guide assumes that you are familiar with a personal computer and that you are knowledgeable of computer networks. When you need additional information, refer to the manuals provided with the personal computer, operating system, and network products.
For information on how to configure your network environment, refer to the Administrator Guide. For information on optional components for the print feature, also refer to the guide provided with each optional component.
After reading this guide, be sure to keep it handy for quick reference. It will be useful in case you forget how to perform operations or if a problem occurs with the machine.
Warning:
This equipment will be inoperable when main power fails.
12

Types of Manuals
Types of Manuals
The following guides are provided with the machine.
Accompanying Manuals
User Guide (this guide) (Document CD-ROM)
The guide describes all the necessary steps for copy, print, scan, and fax.
Administrator Guide (Document CD-ROM)
The guide is intended for system administrators, and describes how to configure network and how to solve problems that may occur with the machine. This guide also describes daily maintenance and the System Settings procedures.
Quick Reference Guide (Booklet)
The guide describes the basic operations of the machine, as well as daily management and maintenance.
Manual (HTML)
The manual describes installation and configuration procedures for print drivers and the printer environment. This manual is included in the Driver CD Kit.
Print Driver Help
The help describes print features and operations.
CentreWare Internet Services Help
The help describes how to change various settings of the machine using a web browser, and how to import scanned data to a computer from the machine.
Important • To display the online help for CentreWare Internet Services, users need to have the environment to connect to the internet. The communication fee shall be borne by you.
Guides for Optional Components
Optional components are available for this machine. Some of them come with user guides. The guides for optional components describe all the necessary steps for using the optional components and installing the software.
Machine the Using Before
1
13

Machine the Using Before
1
1 Before Using the Machine
Using This Guide
This guide is intended for first time users of the machine. It describes the basic operations for the Copy, Print, Scan, and Fax services.
Organization of This Guide
This guide consists of the following chapters:
1 Before Using the Machine
Describes how to use this guide, as well as safety notes, legal notices, and other important information you should read before using the machine.
2 Product Overview
Describes the basic information of the machine, such as the names of components, how to use the touch screen, how to switch the machine on and off, and how to exit the Energy Saver mode.
3 Copy
Describes the basic operations and features for the Copy service.
4 Fax
Describes the basic operations and features for the Fax services.
5 Scan
Describes the basic operations and features for the Scan services.
6 Send from Folder
Describes the basic operations and features to use folders.
7 Job Flow Sheets
Describes the operations to use a job flow created on a remote system.
8 Stored Programming
Describes the Stored Programming service that enables you to store customized job settings.
9 Media Print-Text
Describes the basic operations and features of Media Print that allows you to print image data and document files.
10 Job Status
Describes how to check job status and how to delete jobs.
11 Computer Operations
Describes operations performed from a computer, such as printing documents, importing scanned files, using Direct Fax, and operating CentreWare Internet Services.
12 Appendix
Contains a glossary of terms used in this guide.
14

Using This Guide
Conventions
zThe screen shots and illustrations used in this guide vary depending on the machine configuration and optional components installed. Some of the items in the screen shots may not be displayed or available depending on your machine configuration.
zThe procedures in this guide may vary depending on the driver and utility software being used due to the upgrades.
zIn this document, "Computer" refers to a personal computer or workstation.
zThe following terms are used in this guide:
Important |
: Important information that you should read. |
Note |
: Additional information on operations or features. |
zThe following symbols are used in this guide:
"" : • A cross-reference included in this guide.
•Names of CD-ROM, features, and touch screen messages and input text.
[ |
] |
: • Folders, files, applications, button or menu names displayed |
|
|
on the touch screen. |
•Names of menus, commands, windows, or dialog boxes displayed on the computer screen and their buttons and menu names.
<> button : Hardware buttons on the control panel.
< |
> key : |
Keys on the keyboard of the computer. |
> |
: |
• Path to a certain item within a procedure on the control panel. |
|
|
For example: When you see the procedure "select [Tools] > |
|
|
[Setup] > [Create Folder]", this means that you need to select |
|
|
[Tools], select [Setup], and then select [Create Folder]. |
•Path to a certain item within a procedure on a computer. For example: When you see the procedure "to search for files and folders, click [Start] > [Search] > [For Files or Folders]", this means that you need to click [Start], click [Search], and then click [For Files or Folders] to search for files and folders.
•Cross-reference
For example: "Refer to "5 Tools" > "Common Service Settings" > "Audio Tones" in the Administrator Guide." The sentence above means that you need to refer to the
section "Audio Tones", which can be found under "Common Service Settings" in chapter 5 Tools of the Administrator Guide.
z Orientation of documents or paper is described in this guide as follows:
 ,
,  ,Long Edge Feed (LEF): Loading documents or paper in portrait orientation when you view the machine from the front.
 ,
, ,Short Edge Feed (SEF): Loading documents or paper in landscape orientation when you view the machine from the front.
LEF Orientation |
SEF Orientation |
Paper feed direction |
Paper feed direction |
Machine the Using Before
1
15
Machine the Using Before
1
1 Before Using the Machine
Safety Notes
Before using this product, read "Safety Notes" carefully for safety use.
This product and recommended supplies have been tested and found to comply with strict safety requirements including safety agency approvals and compliance with environmental standards. Follow the following instructions for safety use.
 WARNING
Any unauthorized alteration including an addition of new functions or connection to external devices may not be covered by the product warranty. Contact your local Fuji Xerox representative for more information.
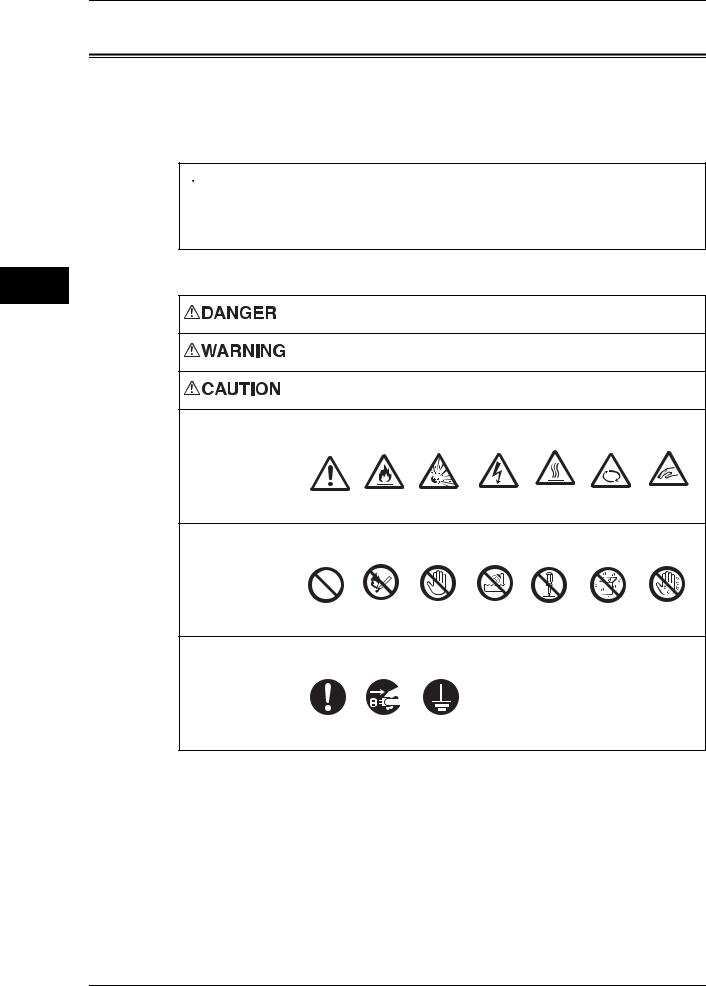
Follow all warning instructions marked on this product. The warning marks stand for the followings:
Used for item that if not followed strictly, can lead death or severe or fatal injuries and the possibility to do it is comparatively high.
Used for items that if not followed strictly, can lead to severe or fatal injuries.
Used for items that if not followed strictly, can cause injuries to user or damages to machine.
 : A symbol for items to pay attention to when handling machine.
Follow instructions carefully to use machine safely.
Caution Flammable Explodable Electric |
Heated |
Moving |
Pinched |
shock |
surface |
object |
fingers |
 : A symbol for prohibited items. Follow instructions carefully to avoid any dangerous acts.
Prohibited |
No fire |
Do not |
Do not use |
Do not |
Keep away |
Never touch |
|
|
touch |
in bathroom |
tear down |
from wet |
with wet hand |
 : A symbol for items that must be performed. Follow instructions carefully to carry out these essential tasks.
Instructions Unplug |
Ground/ |
|
Earth |
16

Safety Notes
Electrical Safety
This product shall be operated by the power source as indicated on the product's data plate. Consult your local power company to check if your power source meets the requirements.
WARNING: Connect this product to a protective earth circuit.
This product is supplied with a plug that has a protective earth pin. The plug fits only into an earthed electrical outlet. This is a safety feature. If the plug doesn't fit to the outlet, contact an electrician to replace the outlet to avoid risk of electric shock. Never use an earthed adapter plug to connect the product to the electrical outlet that has no earth connection terminal.
Improper connection of a grounding conductor may cause electric shock.
Plug the power cord directly into a grounded electrical outlet. To prevent overheat and a fire accident, do not use an extension cord, a multi-plug adaptor or a multiple connector. Consult your local Fuji Xerox representative to check if an outlet is grounded.
Connect this product to a branch circuit or an outlet that has larger capacity than the rated ampere and voltage of this product. See the data plate on the rear panel of this product for its rated ampere and voltage.
Never touch the power cord with wet hands. It may cause electric shock.
Do not place an object on the power cord.
Always keep the plug connection free of dust. The dusty and damp environment may bring about minute electric current in a connector. It may generate heat and eventually cause a fire accident.
To avoid the risk of electric shock and a fire accident, only use the power cord supplied with this product or the ones designated by Fuji Xerox.
The power cord is exclusive use for this product. Do not use it for any other product.
Do not damage or alter the power cord. Damage and alteration may generate heat and eventually cause electric shock or a fire accident.
If the power cord is damaged or insulated wires are exposed, contact your local Fuji Xerox representative for its replacement. Do not use a damaged or uninsulated cord to avoid the risk of electric shock and a fire accident.
When cleaning this product, always switch off and unplug it. Access to a live machine interior may cause electric shock.
Do not unplug or re-plug this product with the switch on. Plugging and unplugging a live connector may deform the plug and generate heat, and eventually cause a fire accident.
Hold the plug not the cord when unplugging this product, or it may damage the cord and cause electric shock or a fire accident.
Machine the Using Before
1
17

Machine the Using Before
1
1 Before Using the Machine
Switch off and unplug the product when it (i.e., fax function) is not used over weekends or long holidays.
Please note that it cannot receive fax message during switch-off.
Once a month, switch off this product and check if
zthe power cord is plugged firmly into an electrical outlet;
zthe plug is not excessively heated, rusted or bent;
zthe plug and electrical outlet are free of dust; and
zthe power cord is not cracked or worn down.
Once you notice any unusual condition, switch off and unplug this product first and contact your local Fuji Xerox representative.
Machine Installation
Do not locate this product where people might step on or trip over the power cord. Friction or excessive pressure may generate heat and eventually cause electric shock or a fire accident.
Never locate this product in the following places:
zNear radiators or any other heat sources
zNear volatile flammable materials such as curtains
zIn the hot, humid, dusty or poorly ventilated environment
zIn the place receiving direct sunlight
zNear cookers or humidifiers
When moving this product, always carry it by a team of two or more persons to avoid mishandling or injury.
The product weighs 62.7 Kg when Tray 1 being detached. Be sure to detach Tray 1 before lifting up the product. Otherwise, it may cause injury.
When lifting this product, face the front panel and firmly grip the handholds provided on both sides of the product. Never lift it by gripping any other areas. It will prevent you from dropping the product and getting back ache or injuries.
18
Safety Notes
Locate this product on a level and sturdy surface that can withstand a weight of 158.55 Kg (maximum weight when DADF, Finisher-B1, Booklet Maker Unit for Finisher-B1, 2/4 Hole Punch Kit for Finisher-B1, Fax Kit 2, and High Capacity Feeder (HCF) are installed). Otherwise, if tilted, the product may fall over and cause injuries.
Locate this product in a well-ventilated area. Do not obstruct ventilation openings of the product.
Keep the minimum clearance as follows for ventilation and an access to the power plug. Unplug the product if an abnormal condition is noted.
With the document cover
|
|
|
100 |
|
|
|
640 |
1547.6 |
|
|
|
|
|
|
407.6 |
70 |
929.8 |
100 |
400 |
|
965.8 |
|
(Unit: mm) |
|
|
|
|
|
1099.8 |
|
|
With the duplex automatic document feeder
|
|
|
100 |
|
|
|
640 |
1547.6 |
|
|
|
|
|
|
407.6 |
70 |
929.8 |
100 |
400 |
|
974.3 |
|
(Unit: mm) |
|
|
|
|
|
1099.8 |
|
|
With Finisher-A1 (optional)
|
|
|
100 |
|
|
|
640 |
1547.6 |
|
|
|
|
|
|
407.6 |
70 |
1035.8 |
50 |
400 |
|
|
|
(Unit: mm) |
|
1155.8 |
|
|
Machine the Using Before
1
19
1 Before Using the Machine
With Finisher-B1 (optional)
Machine the Using Before
1
|
|
100 |
|
|
640 |
1547.6 |
|
|
|
|
407.6 |
70 |
1572.8 |
50 |
|
|
400 |
|
|
(Unit: mm) |
|
1692.8 |
|
With Booklet Maker Unit for Finisher-B1 (optional)
|
|
100 |
|
|
651 |
1548 |
|
|
|
408 |
397 |
|
|
|
70 |
1572.8 |
50 |
|
|
400 |
|
|
(Unit: mm) |
|
1693 |
|
Do not incline the product at more than 10 degree angle. Otherwise, it may fall over and cause injuries.
Front
10 °

Front |
Back |
Right |
Right |
Left |
Left |
||
Back |
|
|
|
10 ° 10 ° |
|
10 ° |
|
|
|
20
Safety Notes
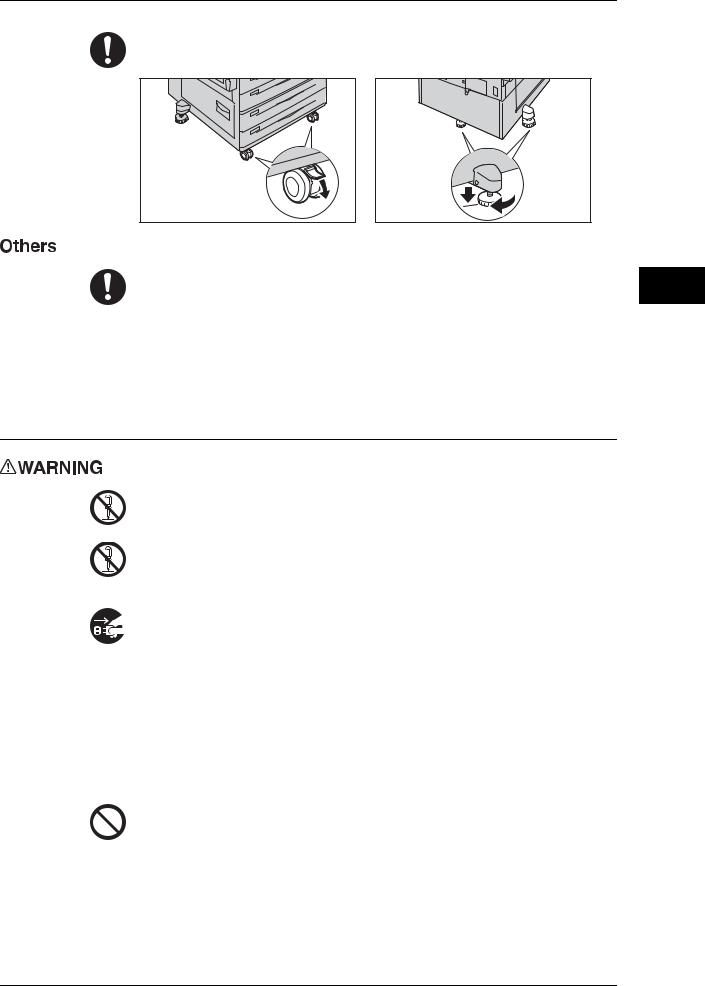
Always lock the wheels of this product and turn down the adjustable feet to the floor after installation. Otherwise, it may fall over or slide and cause injuries.
To keep this product in a good performance and condition, always use it in the following environment:
zTemperature: 10 - 32°C
zHumidity: 15 - 85%
When the product is left in a chilly room and the room is rapidly warmed up by heater, dew condensation may form inside the product and cause a partial deletion on printing.
Operational Safety
The operator's product maintenance procedures are described in the customer documentation supplied with this product. Do not carry out any other maintenance procedures not described in the documentation.
This product features safety design not to allow operators access to hazard areas. The hazard areas are isolated from operators by covers or protectors which require a tool to remove. To prevent electric shock and injuries, never remove those covers and protectors.
To avoid the risk of electric shock and a fire accident, switch off and unplug the product promptly in the following conditions, then contact your local Fuji Xerox representative.
zThe product emits smoke or its surface is unusually hot.
zThe product emits unusual noise or odor.
zThe power cord is cracked or worn down.
zA circuit breaker, fuse or any other safety device is activated.
zAny liquid is spilled into the product.
zThe product is soaked in water.
zAny part of the product is damaged.
Do not insert any object into slots or openings of this product.
Do not place any of the followings on the product:
zLiquid container such as flower vases or coffee cups
zMetal parts such as staples or clips
zHeavy objects
If liquid is spilled over or metal parts are slipped into the product, it may cause electric shock or a fire accident.
Machine the Using Before
1
21

Machine the Using Before
1
1 Before Using the Machine
Do not use conductive paper such as origami paper, carbonic paper or conductively-coated paper. When paper jam occurs, it may cause short-circuit and eventually a fire accident.
When cleaning this product, use the designated cleaning materials exclusive to it. Other cleaning materials may result in poor performance of the product. Never use aerosol cleaners, or it may catch fire and cause explosion.
Never play the CD-ROM supplied with the product on an audio player. Always use a CD-ROM player. Otherwise, large sound may damage audio players or your ears.
Laser Safety
CAUTION: Any operations or adjustments not stated in the operation manual may cause hazardous light exposure and eventually burn injuries or loss of eyesight.
This product has been tested and found to comply with the Class 1 Laser Equipment requirements defined by the international standard IEC60825 and has no light exposure hazard. The product has no hazardous light emission as it features light protection components and covers to shut in all light beam during operation and maintenance.
Always follow all warning instructions marked on or supplied with this product.
To avoid the risk of burn injuries and electric shock, never touch the area with the "High Temperature" or "High Voltage" marks on.
Keep electrical and mechanical safety interlocks active. Keep the safety interlocks away from magnetic materials. Magnetic materials may accidentally activate the product and cause injuries or electric shock.
A ground fault interrupter is embedded in this product. If current leakage occurs, the ground fault interrupter automatically cuts off power circuit to prevent electric shock and a fire accident. The ground fault interrupter is normally ON ("|"). Check once a month if the ground fault interrupter works properly in accordance with the following procedures:
Follow the steps below to ensure that the Ground Fault Interrupter functions properly.
1)Press the power switch to the [ ] position to switch the power off.
When Finisher B1 (Optional) is attached
22

Safety Notes
2)Make sure that the touch screen is blank and the <Energy Saver> button does not light up.
3) Open the front cover.
4) Press the main power switch to the [ ] position to switch the main power off.
Machine the Using Before
1
5)Press the <TEST> button lightly with a sharp edge such as a pen tip.
When the <RESET> button pops up, the Ground Fault Interrupter is properly operating.
When the <RESET> button remains in pressed state, the Ground Fault Interrupter is in trouble.
<RESET> button |
<TEST> button |
6)Press the <RESET> button back to the depressed position.
<RESET>button |
23

Machine the Using Before
1
1 Before Using the Machine
If the circuit does not work properly, contact your local Fuji Xerox representative.
Do not attempt to remove a paper jammed deeply inside the product, particularly a paper wrapped around a Fusing Unit or a heat roller. Otherwise, it may cause injuries or burns. Switch off the product promptly and contact your local Fuji Xerox representative.
Never touch the paper output area of the finisher during operation. It may cause injuries.
Be careful in removing jammed staples.
Be careful not to get injured by waste staples when removing jammed staples.
Waste staples may come out with output paper. Be careful not to get injured by the staples.
Do not staple punched holes of paper. Sharp points of a staple may cause injuries.
Do not apply excessive force to hold thick document on the document glass. It may break the glass and cause injuries.
Ventilate well during extended operation or mass copying. It may affect the office air environment due to odor such as ozone in a poorly ventilated room.
Provide proper ventilation to ensure the comfortable and safe environment.
Consumable
Store all consumables in accordance with the instructions given on its package or container.
Use a broom or a wet cloth to wipe off spilled toner. Never use a vacuum cleaner for the spills. It may catch fire by electric sparks inside the vacuum cleaner and cause explosion. If you spill a large volume of toner, contact your local Fuji Xerox representative.
Never throw a toner cartridge into an open flame. Remaining toner in the cartridge may catch fire and cause burn injuries or explosion.
If you have a used toner cartridge no longer needed, contact your local Fuji Xerox representative for its disposal.
RISK OF EXPLOSION IF BATTERY IS REPLACED BY AN INCORRECT TYPE. DISPOSE OF USED BATTERIES ACCORDING TO THE INSTRUCTIONS.
Keep drum cartridges and toner cartridges out of the reach of children. If a child accidentally swallows toner, spit it out, rinse mouth with water, drink water and consult a physician immediately.
24

Safety Notes
When replacing drum cartridges and toner cartridges, be careful not to spill the toner. In case of any toner spills, avoid contact with clothes, skin, eyes and mouth as well as inhalation.
If toner spills onto your skin or clothing, wash it off with soap and water.
If you get toner particles in your eyes, wash it out with plenty of water for at least 15 minutes until irritation is gone. Consult a physician if necessary.
If you inhale toner particles, move to a fresh air location and rinse your mouth with water.
If you swallow toner, spit it out, rinse your mouth with water, drink plenty of water and consult a physician immediately.
Fusing Unit Safety
When removing the Fusing Unit, always switch off first and wait for 40 minutes until it cools off.
Machine the Using Before
1
25

Machine the Using Before
1
1 Before Using the Machine
Location of Warning and Caution Labels
Always follow all warning instructions marked on or supplied with this product.
To avoid the risk of burn injuries and electric shock, never touch the area with the "High Temperature" or "High Voltage" marks on.
26

Regulation
Regulation
Radio Frequency Emissions (Class B)
This product has been tested and found to comply with the limits for a Class B digital device, pursuant to the International Standard for Electromagnetic Interference (CISPR Publ. 22) and Radiocommunications Act 1992 in Australia/New Zealand. These limits are designed to provide reasonable protection against harmful interference in a residential installation. This product generates, uses and can radiate radio frequency energy and, if not installed and used in accordance with the instructions, may cause harmful interference to radio communications. However, there is no guarantee that interference will not occur in a particular installation. If this product does cause harmful interference to radio or television reception, which can be determined by turning this product off and on, the user is encouraged to try to correct the interference by one or more of the following measures:
zReorient or relocate the receiving antenna.
zIncrease the separation between this product and the receiver.
zConnect this product into an outlet on a circuit different from that to which the receiver is connected.
zConsult the dealer or an experienced radio/TV technician for help.
Changes and modifications to this product not specifically approved by Fuji
Xerox may void the user’s authority to operate this product.
Product Safety Certification (UL, CB)
This product is certified by the following agency using the safety standards listed.
Agency |
Standard |
NEMKO |
IEC60950-1:ed. 1 |
Machine the Using Before
1
27

Machine the Using Before
1
1 Before Using the Machine
Environment
zFor environmental protection and efficient use of resources, Fuji Xerox reuses returned toner cartridges and drum cartridges to make recycle parts, recycle materials or energy recovery.
zProper disposal is required for toner cartridges and drum cartridges no longer needed. Do not open toner cartridges and drum cartridges. Return them to your local Fuji Xerox representative.
28
Loading...