Xerox DocuMate 510 Installation Guide
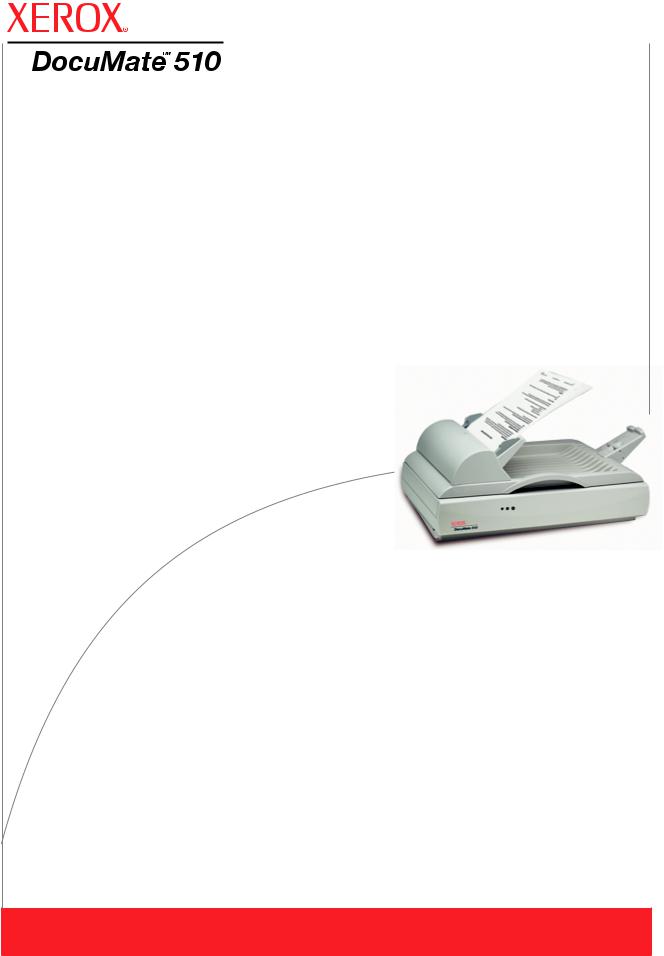
DocuMate 510
scanner
installation guide

DocuMate 510
scanner
installation guide
Copyright © 2006 Visioneer, Inc.
Reproduction, adaptation, or translation without prior written permission is prohibited, except as allowed under the copyright laws.
XEROX ® is a trademark of Xerox Corporation in the United States and/or other countries and is used under license. DocuMate is a trademark of Xerox Corporation used under license. All other Xerox product names and product numbers mentioned in this publication are trademarks of Xerox Corporation.
The Visioneer brand name and logo are registered trademarks of Visioneer, Inc. The PaperPort brand name and logo are registered trademarks of Nuance Communications, Inc.
Microsoft is a U.S. registered trademark of Microsoft Corporation. Windows is a trademark of Microsoft Corporation. ZyINDEX is a registered trademark of ZyLAB International, Inc. ZyINDEX toolkit portions, Copyright © 1990-1998, ZyLAB International, Inc. All Rights Reserved. All other products mentioned herein may be trademarks of their respective companies.
Information is subject to change without notice and does not represent a commitment on the part of Visioneer. The software described is furnished under a licensing agreement. The software may be used or copied only in accordance with the terms of such an agreement. It is against the law to copy the software on any medium except as specifically allowed in the licensing agreement. No part of this document may be reproduced or transmitted in any form or by any means, electronic or mechanical, including photocopying, recording, or information storage and retrieval systems, or translated to another language, for any purpose other than the licensee's personal use and as specifically allowed in the licensing agreement, without the express written permission of Visioneer.
Part Number: 05-0591-400
Restricted Rights Legend
Use, duplication, or disclosure is subject to restrictions as set forth in contract subdivision (c)(1)(ii) of the Rights in Technical Data and Computer Software Clause 52.227-FAR14. Material scanned by this product may be protected by governmental laws and other regulations, such as copyright laws. The customer is solely responsible for complying with all such laws and regulations.

Table of Contents
Welcome
What’s in the Box . . . . . . . . . . . . . . . . . . . . . . . . . . . . . . . . . . . . . . . . . . . . . . . . . . . . . . . . . . . . . . . . . 1
The Xerox DocuMate 510 Scanner . . . . . . . . . . . . . . . . . . . . . . . . . . . . . . . . . . . . . . . . . . . . . . . . . . . 2
What You Need . . . . . . . . . . . . . . . . . . . . . . . . . . . . . . . . . . . . . . . . . . . . . . . . . . . . . . . . . . . . . . . . . . 4
Documentation . . . . . . . . . . . . . . . . . . . . . . . . . . . . . . . . . . . . . . . . . . . . . . . . . . . . . . . . . . . . . . . . . . . 4
Installation
Before You Begin . . . . . . . . . . . . . . . . . . . . . . . . . . . . . . . . . . . . . . . . . . . . . . . . . . . . . . . . . . . . . . . . . 5
Step 1: Assemble the Scanner . . . . . . . . . . . . . . . . . . . . . . . . . . . . . . . . . . . . . . . . . . . . . . . . . . . . . . . 6
Step 2: Install the Software . . . . . . . . . . . . . . . . . . . . . . . . . . . . . . . . . . . . . . . . . . . . . . . . . . . . . . . . . . 8
Step 3: Connect and Power On the Scanner . . . . . . . . . . . . . . . . . . . . . . . . . . . . . . . . . . . . . . . . . . . 11
Step 4: Connect the USB Cable . . . . . . . . . . . . . . . . . . . . . . . . . . . . . . . . . . . . . . . . . . . . . . . . . . . . . 12
Scanning
Loading Documents to Scan . . . . . . . . . . . . . . . . . . . . . . . . . . . . . . . . . . . . . . . . . . . . . . . . . . . . . . . . 14
Scanning Items
Your Scanner and the TWAIN Standard . . . . . . . . . . . . . . . . . . . . . . . . . . . . . . . . . . . . . . . . . . . . . . . 16 If Your Computer is Running Windows Me or XP . . . . . . . . . . . . . . . . . . . . . . . . . . . . . . . . . . . . . . . . 16 Scanning from Windows 98SE, Me, 2000, or XP . . . . . . . . . . . . . . . . . . . . . . . . . . . . . . . . . . . . . . . . 16 Adjusting the Image with the Scan Manager . . . . . . . . . . . . . . . . . . . . . . . . . . . . . . . . . . . . . . . 21 Adjusting the Image Type, Resolution, Brightness and Contrast . . . . . . . . . . . . . . . . . . . . . . . . 21 Adjusting the Output Size . . . . . . . . . . . . . . . . . . . . . . . . . . . . . . . . . . . . . . . . . . . . . . . . . . . . . . 23 Setting the Scan Area . . . . . . . . . . . . . . . . . . . . . . . . . . . . . . . . . . . . . . . . . . . . . . . . . . . . . . . . 24 Reversing the Image . . . . . . . . . . . . . . . . . . . . . . . . . . . . . . . . . . . . . . . . . . . . . . . . . . . . . . . . . 26 Adjusting Color and Gray Images . . . . . . . . . . . . . . . . . . . . . . . . . . . . . . . . . . . . . . . . . . . . . . . 27 Adjusting Color Settings . . . . . . . . . . . . . . . . . . . . . . . . . . . . . . . . . . . . . . . . . . . . . . . . . . . . . . . 30 Scanning from Windows Me or XP . . . . . . . . . . . . . . . . . . . . . . . . . . . . . . . . . . . . . . . . . . . . . . . . . . . 35
Maintenance |
|
Clearing Paper Jams . . . . . . . . . . . . . . . . . . . . . . . . . . . . . . . . . . . . . . . . . . . . . . . . . . . . . . . . . . . . . |
40 |
Care and Maintenance . . . . . . . . . . . . . . . . . . . . . . . . . . . . . . . . . . . . . . . . . . . . . . . . . . . . . . . . . . . . |
41 |
Cleaning the Scanner Glass . . . . . . . . . . . . . . . . . . . . . . . . . . . . . . . . . . . . . . . . . . . . . . . . . . . |
41 |
Cleaning the Automatic Document Feeder . . . . . . . . . . . . . . . . . . . . . . . . . . . . . . . . . . . . . . . . |
41 |
Replacing the ADF Pad Assembly . . . . . . . . . . . . . . . . . . . . . . . . . . . . . . . . . . . . . . . . . . . . . . . |
42 |
Replacing the Roller Assembly . . . . . . . . . . . . . . . . . . . . . . . . . . . . . . . . . . . . . . . . . . . . . . . . . |
43 |
Troubleshooting . . . . . . . . . . . . . . . . . . . . . . . . . . . . . . . . . . . . . . . . . . . . . . . . . . . . . . . . . . . . . . . . . |
45 |
Uninstalling Your Scanner . . . . . . . . . . . . . . . . . . . . . . . . . . . . . . . . . . . . . . . . . . . . . . . . . . . . . . . . . |
47 |
Step 1: Uninstalling the DocuMate Software . . . . . . . . . . . . . . . . . . . . . . . . . . . . . . . . . . . . . . . |
47 |
Step 2: Uninstalling the PaperPort Software . . . . . . . . . . . . . . . . . . . . . . . . . . . . . . . . . . . . . . . |
48 |
Xerox DocuMate 510 Scanner Specifications . . . . . . . . . . . . . . . . . . . . . . . . . . . . . . . . . . . . . . . . . . |
49 |
Xerox DocuMate 510 Parts List . . . . . . . . . . . . . . . . . . . . . . . . . . . . . . . . . . . . . . . . . . . . . . . . . . . . . |
50 |
DocuMate 510 Scanner Installation Guide |
iii |

Notices . . . . . . . . . . . . . . . . . . . . . . . . . . . . . . . . . . . . . . . . . . . . . . . . . . . . . . . . . . . . . . . . . . . . . . . . . . 51
It’s Illegal in the USA . . . . . . . . . . . . . . . . . . . . . . . . . . . . . . . . . . . . . . . . . . . . . . . . . . . . . . . . . . . . . . 51 It’s Illegal in Canada . . . . . . . . . . . . . . . . . . . . . . . . . . . . . . . . . . . . . . . . . . . . . . . . . . . . . . . . . . . . . . 52 Federal Communications Commission (FCC) for USA . . . . . . . . . . . . . . . . . . . . . . . . . . . . . . . . . . . . 53 Energy Star for the USA . . . . . . . . . . . . . . . . . . . . . . . . . . . . . . . . . . . . . . . . . . . . . . . . . . . . . . . . . . . 54 RoHS and WEEE Compliance . . . . . . . . . . . . . . . . . . . . . . . . . . . . . . . . . . . . . . . . . . . . . . . . . . . . . . 54 Product recycling and disposal for USA . . . . . . . . . . . . . . . . . . . . . . . . . . . . . . . . . . . . . . . . . . . . . . . 54
Index . . . . . . . . . . . . . . . . . . . . . . . . . . . . . . . . . . . . . . . . . . . . . . . . . . . . . . . . . . . . . . . . . . . . . . . . . . . . . 57
DocuMate 510 Scanner Installation Guide |
iv |
Welcome
Your new Xerox DocuMate 510 scanner can scan stacks of items or single items, and place their images on your computer.
WARNING: Do not plug in the USB cable until after you have installed the software. Carefully follow the steps and sequence described in the installation procedure beginning on page 5.
What’s in the Box
Before proceeding, check the contents of the box. If items are missing or damaged, contact the dealer where you purchased the scanner.
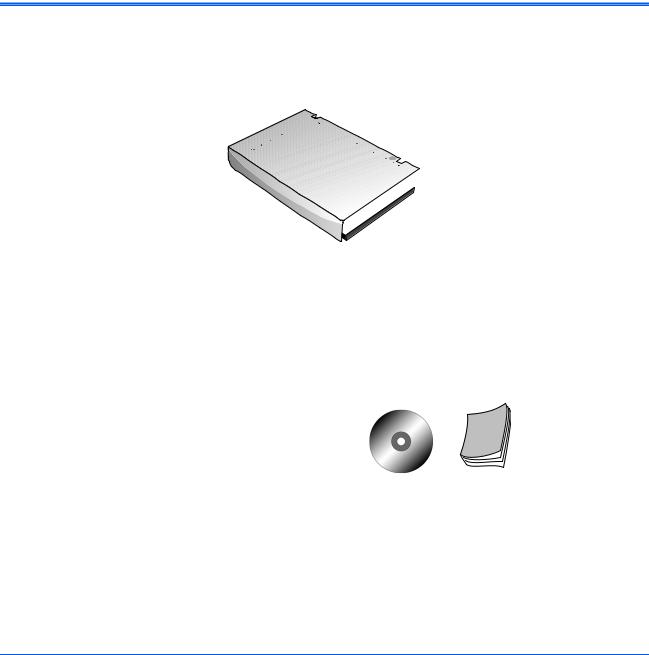
DocuMate 510 Scanner |
USB Cable |
AC Power Cable |
Paper Guide |
Paper Guide Extension |
Paper Stop |
Power Supply |
||
|
|
|
|
|
|
|
|
|
|
|
|
Replacement ADF Pad |
Installation CD |
User’s Guide, Quick Install Card, and |
|
Technical Support Card |
|||
|
|
DocuMate 510 Scanner Installation Guide |
1 |
Welcome
The Xerox DocuMate 510 Scanner
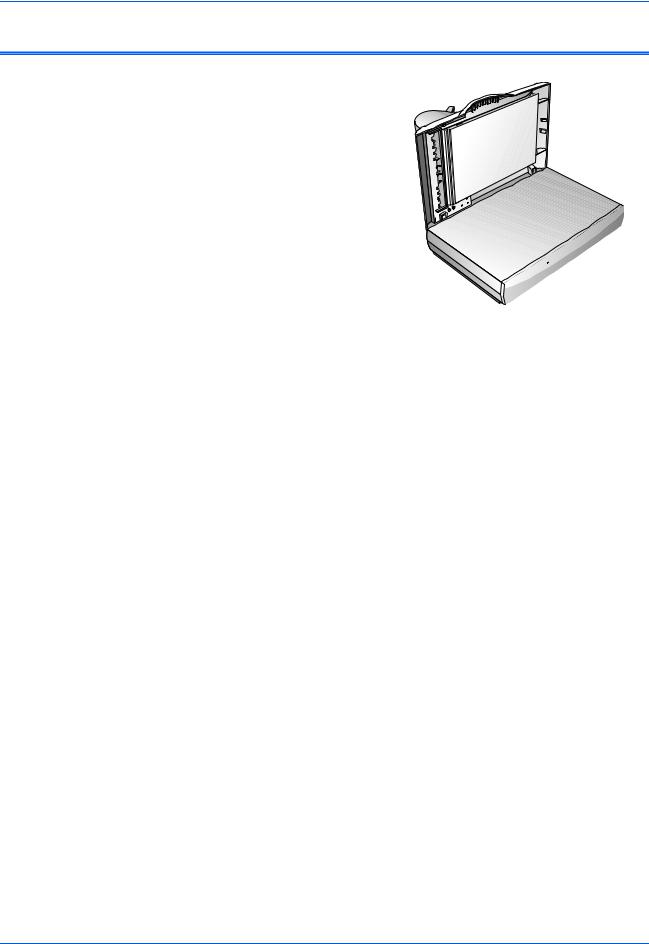
Document Cover
Document Pad
Glass
Reference Frame
Paper Stop
Paper Guide Extension
Paper Guide
Automatic Document Feeder
Status Lights
USB Port
ADF port
Power jack
Power On/Off Switch
ADF Cable
2 |
DocuMate 510 Scanner Installation Guide |

Welcome
Document Cover—Protects the document from light and contamination during scanning.
Document Pad—Helps secure the document in place on the scanner glass.
Reference Frame—Provides markings that show where to align various paper sizes.
Glass—Items are placed face down at the upper left corner of the glass.
Paper Stop—Holds items in place as they are ejected from the Automatic Document Feeder. Adjust for letter-sized or legal-sized pages.
Paper Guide Extension—Unfolds to support multiple pages to scan.
Paper Guide—Holds pages in place. Adjust to fit the size of the paper to scan.
Automatic Document Feeder (ADF)—Feeds a stack of pages onto the glass for scanning. The ADF can hold up to 50 pages at a time.
Lock—Locks or unlocks the scanning head, located on the underside of the scanner.
Status Lights—Shows the scanner’s status. Blinking green light: the scanner is preparing itself or the lamp is warming up. Steady green light: the scanner is on and ready to scan. See “Troubleshooting” on page 45 for additional details.
USB Port—Connects the scanner to the computer.
ADF Port—Connects the ADF cable from the Automatic Document Feeder to the scanner.
Power Jack—Connects the power cord to the scanner. Power On/Off Switch—Turns the scanner’s power on and off.
ADF Cable—Supplies power from the scanner body to the Automatic Document Feeder.
DocuMate 510 Scanner Installation Guide |
3 |

Welcome
What You Need
An IBM-compatible Pentium PC with:
•A CD-ROM drive
•An available Universal Serial Bus (USB) port; 1.1 or 2.0
•Microsoft Windows operating system: 98SE, 2000, Me, or XP
•Available internal memory (RAM) as follows:
•64 MB or more
•128 MB recommended for Windows XP
•200 MB of free hard disk space
A VGA or SVGA Monitor
Recommended settings for your monitor are as many colors as possible—High Color (16-bit), True Color (24-bit or 32-bit). Set the resolution to at least 800 by 600 pixels.
To set your monitor’s colors and resolution, open the Windows Control Panel, double-click Display, and then click the Settings tab.
Documentation
Your scanner is delivered with the following documentation:
•Quick Install Card—abbreviated installation instructions.
•DocuMate 510 Scanner Installation Guide—on the Installation CD; contains detailed installation, scanning, configuration, and maintenance information.
•Online Help—for the scanner, Scan Manager, and PaperPort software applications.
4 |
DocuMate 510 Scanner Installation Guide |

Installation
Installation
NOTE: Do not plug in the USB cable until after you have installed the software. Complete the installation steps in the order described in the installation procedure below.
Installation is a quick, four-step process:
1.Assemble the scanner
2.Install the software
3.Connect and power on the scanner
4.Connect the USB cable to your computer
Before You Begin
Please make sure of the following before you begin installation:
•The information in this guide may cover software not provided with the scanner you purchased. Disregard any information about the software not applicable to your chosen product. Please visit our web site at www.xeroxscanners.com for the latest software updates for your Xerox DocuMate 510 scanner.
•If your computer has AntiVirus or AntiSpyware software running, you may encounter alerts or messages during installation asking you to allow the installation to proceed. Although the messages will differ based on the software your computer is running, in each case you should allow the installation to proceed if that option is available. Alternatively, you can turn off the AntiVirus or AntiSpyware software before installing your scanner, but if you do, make sure to turn it back on again when installation is finished.
•If you already have a scanner connected to your computer, you need to remove its driver programs first before beginning the installation of your Xerox DocuMate 510 scanner. Please see “Uninstalling Your Scanner” on
page 47 for basic instructions, or see the User’s Guide that you received with your other scanner for specific instructions.
DocuMate 510 Scanner Installation Guide |
5 |
Installation
Step 1: Assemble the Scanner
All the components to assemble the scanner are included in the box.
To assemble the scanner:
1.Remove all shipping tape from the top and bottom of the scanner.
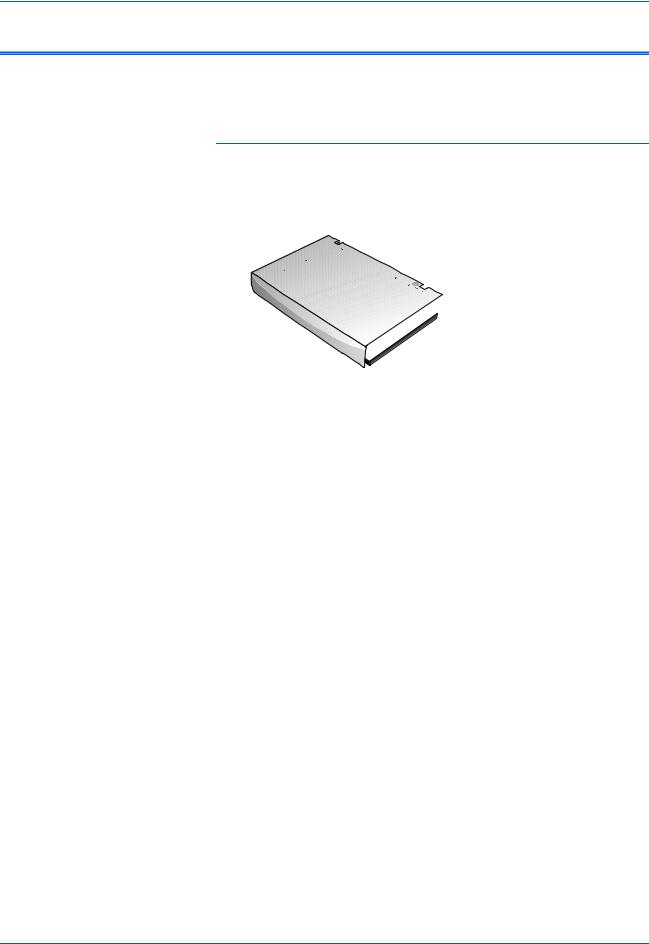
2.Slide the locking tab on the bottom of the scanner to its unlocked position.
Unlocked position
NOTE: The locking tab protects the scanner’s scan head by holding it securely in position. Lock the scanner when transporting it from one location to another, but always remember to unlock it before scanning. The scanner will not scan when locked.
6 |
DocuMate 510 Scanner Installation Guide |

Installation
3.Insert the slots (A) on the Paper Guide onto their tabs (B) on the scanner and slide the Guide down into place. The catch tabs (C) snap into place. Refer to the picture on page 2 to see the location of the assembled parts.
A
B
C
4.Insert the Paper Guide Extension into the Paper Guide and snap its tabs into place.
5.Insert the Paper Stop onto the back of the scanner and slide it downward to snap its tabs into place.
6. Proceed to “Step 2: Install the Software”.
DocuMate 510 Scanner Installation Guide |
7 |
Installation
Step 2: Install the Software
The Installation CD includes all the necessary installation files, as well as the PaperPort software files and other software files.
To install the software:
1.Start Microsoft Windows and make sure that no other applications are running.
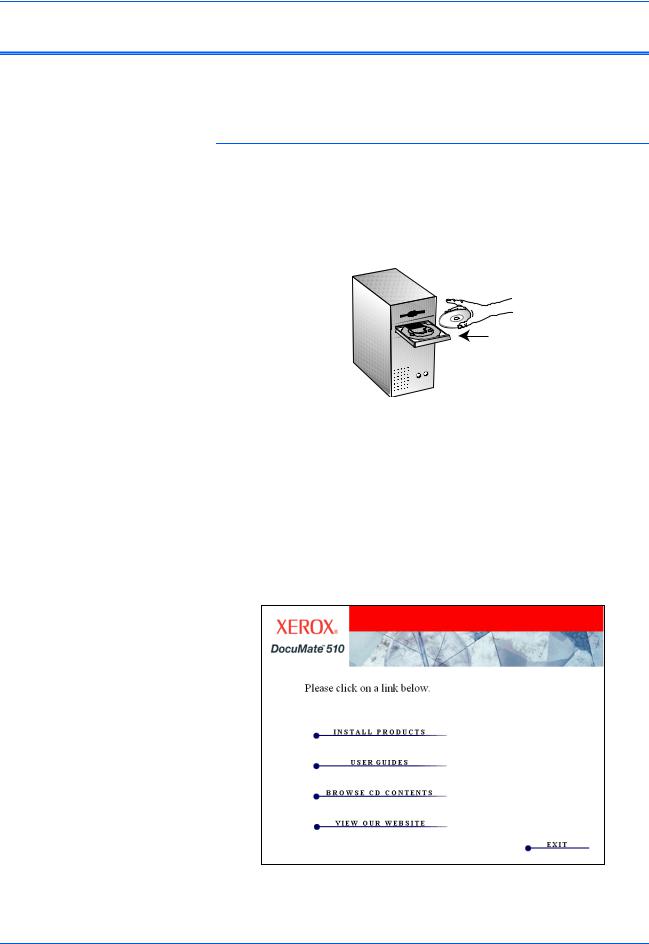
2.Insert the installation CD into your computer’s CD-ROM drive. The CD automatically starts.
NOTE: If the CD does not automatically start, check the following:
•Make sure the CD drive’s door is completely shut.
•Click the My Computer icon on your desktop. Double-click the icon for your CD-ROM drive. In the list of files on the CD, double-click the file named START32.EXE.
3. On the installation menu, select Install Products.
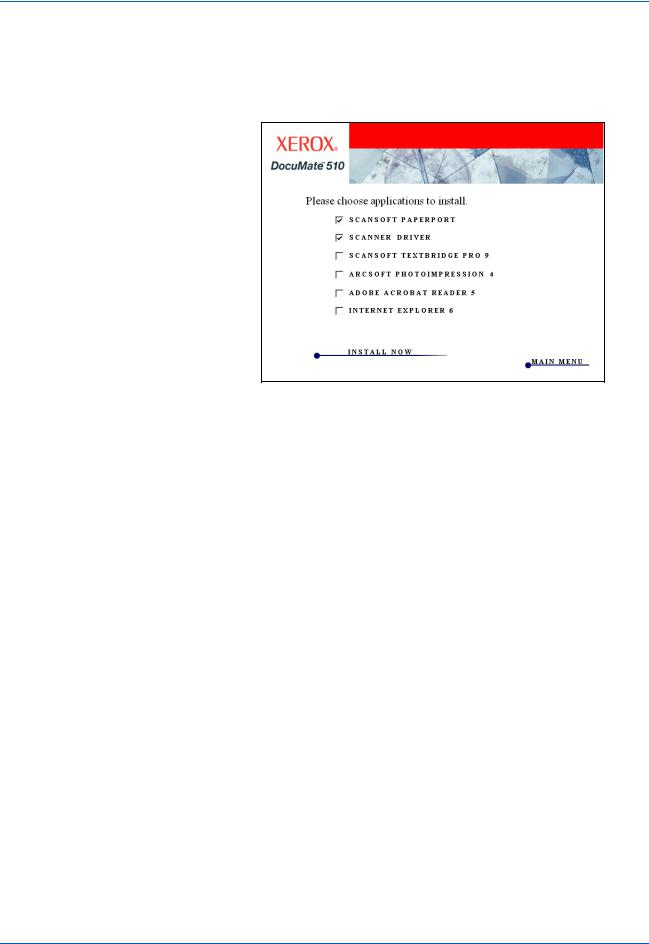
The next installation screen appears.
8 |
DocuMate 510 Scanner Installation Guide |
Installation
4.Click in the boxes for Scansoft PaperPort and Scanner Driver.
If you want to also install the other software, click their boxes as well.
5.Click Install Now.
6.On the PaperPort 9.0 Welcome window, click Next.
Installing PaperPort 9.0 will uninstall any previous, existing version of PaperPort and install PaperPort 9.0 while retaining all of your PaperPort files.
7.On the License Agreement window, read the ScanSoft license agreement. If you accept the terms, select I accept the terms in the license agreement, and then click Next.
8.On the Customer Information window, accept the current values or enter new information, and then click Next.
9.On the Setup Type window, click Next.
10.Click Install to begin the installation.
11.On the Product Registration window, do one of the following:
•Select Register online, click OK, and then follow the registration instructions.
•Select Print registration form, click OK, and then follow the instructions to complete and print the registration form.
•Select Remind me in 7 days and click OK.
12.At the Installshield Wizard Completed window, click Finish.
13.On the Xerox License Agreement window, read the license agreement. If you accept the terms, select I Agree, and click
Next.
DocuMate 510 Scanner Installation Guide |
9 |

Installation
14.On the Xerox Scanner Registration window, complete the required information, and then click Register.
Note that the serial number for your scanner is located on the side of the scanner body.
Serial Number
15.On the Welcome window, click Next to start the installation.
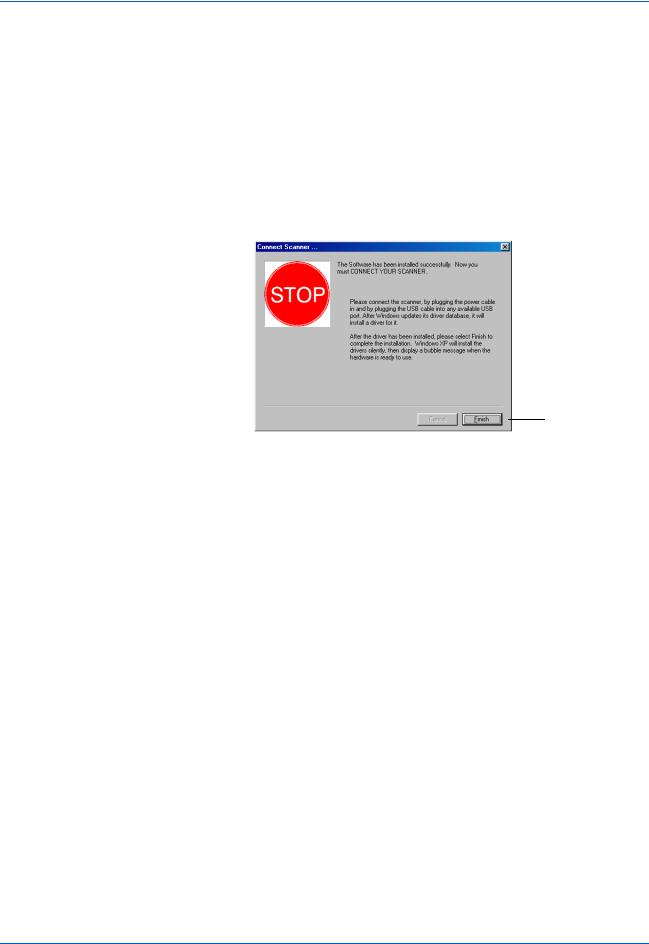
16.When you see the Connect Scanner window, STOP. Do NOT click Finish. Leave the window open and proceed to the next section,“Step 3: Connect and Power On the Scanner”.
10 |
DocuMate 510 Scanner Installation Guide |
Installation
Step 3: Connect and Power On the Scanner
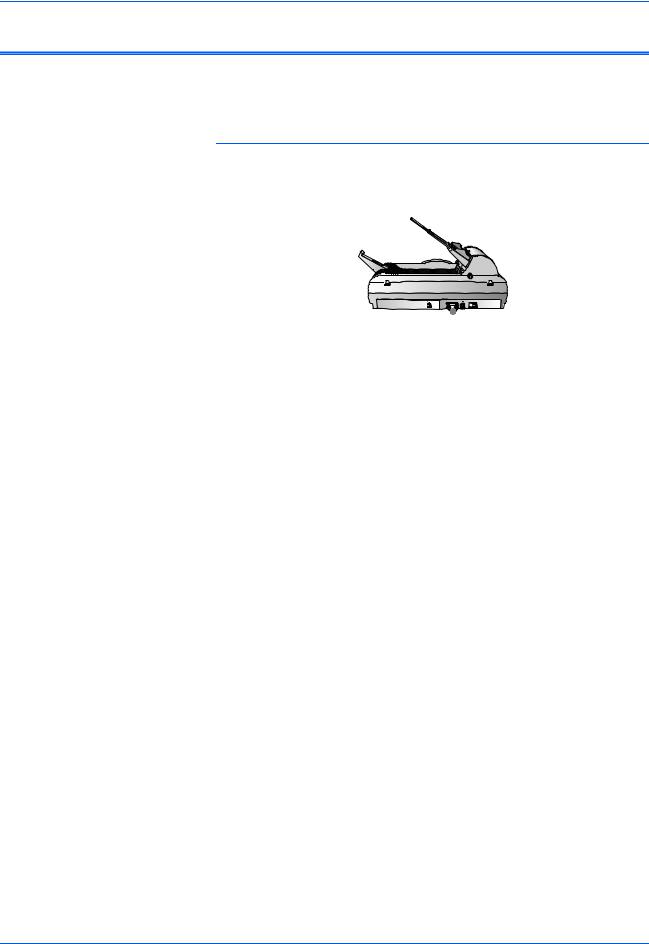
Connect the ADF cable, connect the scanner to a power source, and turn the power on.
To connect the scanner and turn the power on:
1.Plug the ADF cable into the ADF port on the body of the scanner.
2. Plug the power supply into its power port on the scanner.
NOTE: Only use the power supply (HEG42-240100-7L made by HiTRON) included with your scanner. Connecting any other type of power supply may damage your scanner and will void its warranty.
3.Plug the power cord into the power supply and then into a wall outlet.
DocuMate 510 Scanner Installation Guide |
11 |
Installation
4.Turn on the power switch, located on the back of the scanner to the right of the power port.
The status lights come on and flash indicating that the scanner is receiving power.
Proceed to the next section, “Step 4: Connect the USB Cable”.
Step 4: Connect the USB Cable
Your DocuMate 510 scanner connects to any available USB port.
Check your computer’s manual for the USB port locations.
NOTE: You do not have to shut off the power to your computer when connecting the scanner to a USB port.
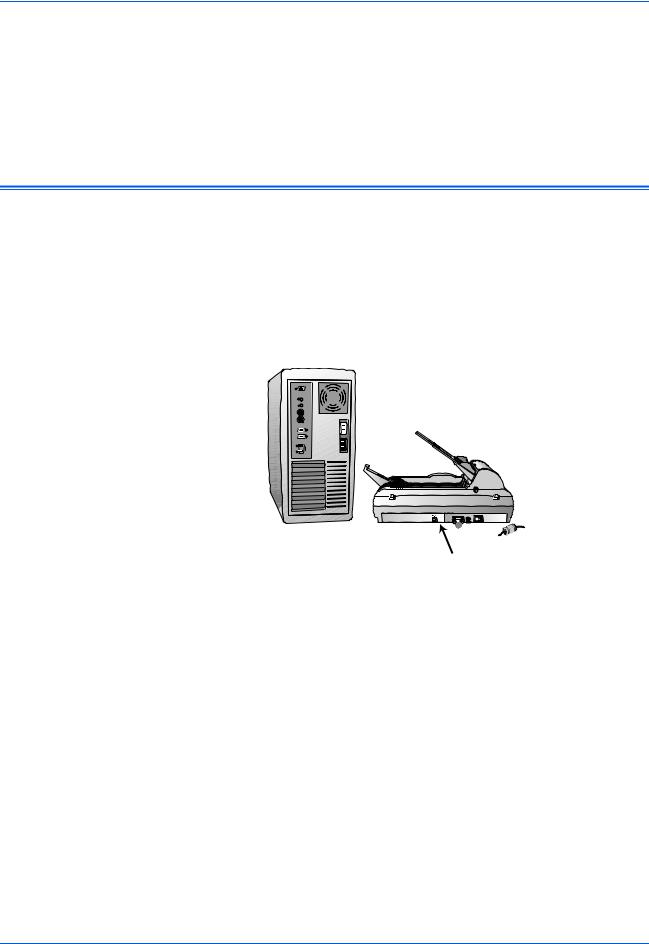
1.Plug the USB cable into the USB port on the scanner. The USB port is identified by its USB symbol.
USB
2.Plug the USB cable into a USB port on the computer, keyboard, or into a USB hub.
12 |
DocuMate 510 Scanner Installation Guide |
Installation
NOTE: If you have not installed the software, unplug the USB cable from the computer and install the software now. When the software installation is complete, a message tells you to connect the scanner.
Your computer recognizes that a scanner is plugged into the USB port and loads the appropriate software to run the scanner.
3.When the software is finished loading, return to the Connect Scanner window and click Finish.
Click Finish
4.When installation is finished, click Exit on the Xerox DocuMate 510 window and restart your computer.
If you selected other software to install from the CD, leave the CD in the CD drive when you restart your computer.
If you removed the CD from the CD drive and want to install other software, reinsert the CD into the drive.
In addition to installing the other software from the CD, you can also view and print the User Guides and Installation Guide.
DocuMate 510 Scanner Installation Guide |
13 |
Scanning
Scanning
This section explains how to scan documents with your Xerox
DocuMate 510 scanner.
Loading Documents to Scan
Your scanner can scan a stack of documents or a single item.
To load a stack of documents in the Automatic
Document Feeder:
1.Unfold the Paper Guide Extension and adjust the Paper Guide for the size of paper.
You can also adjust the Paper Stop at the back of the scanner for the size of the paper. Pull out the slide on the Stop for lettersized pages. Push it in for legal-sized pages.
NOTE: Remove any staples or paper clips from the documents before loading them into the Automatic Document Feeder. Staples and paper clips can jam the feed mechanism and scratch the glass.
14 |
DocuMate 510 Scanner Installation Guide |

Scanning
2.Load the stack of documents face up, with their tops into the Automatic Document Feeder.
IMPORTANT: Items scanned using the Automatic Document Feeder must be a minimum of 5 x 7 inches (12.7 x 17.8 cm).
To load a single item:
1.Place the item on the scanner glass, face down.
2.Align the item with the arrow on the reference frame.
3. Close the cover.
DocuMate 510 Scanner Installation Guide |
15 |
 Loading...