


B5/37
Table of contents
 Loading...
User manual
Manual del usuario
Manuel d’utilisation
B5
Register your product and get support at
www.philips.com/support
Always there to help you
Soundbar speaker
wireless detachable
speakers and subwoofer
wireless music streaming
with Bluetooth
Question?
Contact
Philips


1
English
EN
Contents
1 Important 2
Important safety instructions 2
Care for your product 3
Care of the environment 3
Help and support 3
2 Your SoundBar 4
Main unit 4
Remote control 5
Wireless portable speakers 6
Wireless subwoofer 7
Connectors 7
3 Connect and set up 8
Charge portable speakers 8
Pair up with subwoofer/speakers 8
Place speakers 9
Connect audio from TV 9
Connect audio from other devices 11
Connect digital devices through HDMI 12
4 Spatial calibration 12
Step 1: calibrate the listening zone 13
Step 2: calibrate the surround speaker
position 13
5 Use your SoundBar 14
Adjust the volume 14
Choose your sound 14
MP3 player 15
Play music via Bluetooth 15
Connect Bluetooth via NFC 16
Auto standby 17
Set display brightness 17
Apply factory settings 17
6 Update software 18
Check software version 18
Update software via USB 18
7 Wall mount your SoundBar 19
Wall mount 19
8 Productspecications 19
9 Troubleshooting 20
10 Notice 22

2
EN
1 Important
Read and understand all instructions before you
use your product. If damage is caused by failure
to follow instructions, the warranty does not
apply.
Important safety instructions
• Read these instructions.
• Keep these instructions.
• Heed all warnings.
• Follow all instructions.
• Do not use this apparatus near water.
• Clean only with dry cloth.
• Do not block any ventilation openings.
Install in accordance with the
manufacturer's instructions.
• Do not install near any heat sources such
as radiators, heat registers, stoves, or other
apparatus (including ampliers) that
produce heat.
• Do not defeat the safety
purpose of the polarized
or grounding-type plug.
A polarized plug has two blades with one
wider than the other. A grounding type
plug has two blades and a third grounding
prong. The wide blade or the third prong
are provided for your safety. If the provided
plug does not t into your outlet, consult
an electrician for replacement of the
obsolete outlet.
• Protect the power cord from being
walked on or pinched, particularly at plugs,
convenience receptacles, and the point
where they exit from the apparatus.
• Only use attachments/accessories
specied by the manufacturer.
• Use only with the cart,
stand, tripod, bracket or table
specied by the manufacturer
or sold with the apparatus.
When a cart is used, use
caution when moving the cart/apparatus
combination to avoid injury from tip-over.
• Unplug this apparatus during lightning
storm or when unused for long periods of
time.
• Refer all servicing to qualied service
personnel. Servicing is required when
the apparatus has been damaged in any
way, such as power-supply cord or plug
is damaged, liquid has been spilled or
objects have fallen into the apparatus, the
apparatus has been exposed to rain or
moisture, does not operate normally, or
has been dropped.
• Battery usage CAUTION - To prevent
battery leakage which may result in bodily
injury, property damage, or damage to the
unit:
• Install all batteries correctly, + and - as
marked on the unit.
• Do not mix batteries (old and new or
carbon and alkaline, etc.).
• Remove batteries when the unit is not
used for a long time.
• The batteries shall not be exposed to
excessive heat such as sunshine, re or
the like.
• Perchlorate Material - special handling
may apply. See www.dtsc.ca.gov/
hazardouswaste/perchlorate.
• The product/remote control may contain
a coin/button type battery, which can be
swallowed. Keep the battery out of reach
of children at all times! If swallowed, the
battery can cause serious injury or death.
Severe internal burns can occur within two
hours of ingestion.
• If you suspect that a battery has been
swallowed or placed inside any part of the
body, seek immediate medical attention.
• When you change the batteries, always
keep all new and used batteries out of
reach of children. Ensure that the battery
compartment is completely secure after
you replace the battery.
• If the battery compar tment cannot be
completely secured, discontinue use of the
3
English
EN
product. Keep out of reach of children and
contact the manufacturer.
• Apparatus shall not be exposed to
dripping or splashing.
• Do not place any sources of danger on
the apparatus (for example. liquid lled
objects, lighted candles).
• This apparatus may contain lead and
mercury. Dispose according to local, State
or Federal laws. For disposal or recycling
information, please contact your local
authorities. For additional assistance on
recycling options, please contact www.
mygreenelectronics.com or www.eiae.org
or www.recycle.philips.com.
• Where the MAINS plug or an appliance
coupler is used as the disconnect device,
the disconnect device shall remain readily
operable.
• Do not place this apparatus on the
furniture that is capable of being tilted by a
child and an adult leaning, pulling, standing
or climbing on it. A falling apparatus can
cause serious injury or even death.
• This apparatus should not be placed in a
built-in installation such as a bookcase or
rack unless proper ventilation is provided.
Make sure to leave a space of 7.8 inches
(20cm) or more around this apparatus.
Class II equipment symbol
This symbol indicates that the unit has a double
insulation system.
This 'bolt of lightning' indicates
uninsulated material within your unit
may cause an electrical shock. For
the safety of everyone in your household,
please do not remove product covering.
The 'exclamation point' calls
attention to features for which you
should read the enclosed literature
closely to prevent operating and
maintenance problems.
WARNING: To reduce the risk of re or
electric shock, this apparatus should not be
exposed to rain or moisture and objects lled
with liquids, such as vases, should not be placed
on this apparatus.
CAUTION: To prevent electric shock, match
wide blade of plug to wide slot, fully insert.
Care for your product
Use only microber cloth to clean the product.
Care of the environment
Disposal of your old product and battery
Your product is designed and
manufactured with high quality materials
and components, which can be recycled
and reused.
This product may contain lead and mercury.
Disposal of these materials may be regulated
due to environmental considerations. For
disposal or recycling information, please
contact your local authorities or visit
www.recycle.philips.com.
This product contains non-removable batteries:
• Do not incinerate. Batteries may explode if
overheated.
• For disposal or recycling information,
please contact your local authorities or visit
www.recycle.philips.com.
Help and support
For extensive online support, visit
www.philips.com/support to:
• download the user manual and the quick
start guide
• watch video tutorials (available only for
selected models)
• nd answers to frequently answered
questions (FAQs)
• email us a question
4
EN
• chat with our support representative.
Follow the instructions on the website to select
your language, and then enter your product
model number.
Alternatively, you can contact Consumer Care
in your country. Before you contact, note down
the model number and serial number of your
product. You can nd this information on the
back or bottom of your product.
2 Your SoundBar
Congratulations on your purchase, and
welcome to Philips! To fully benet from
the support that Philips offers, register your
SoundBar at www.philips.com/welcome.
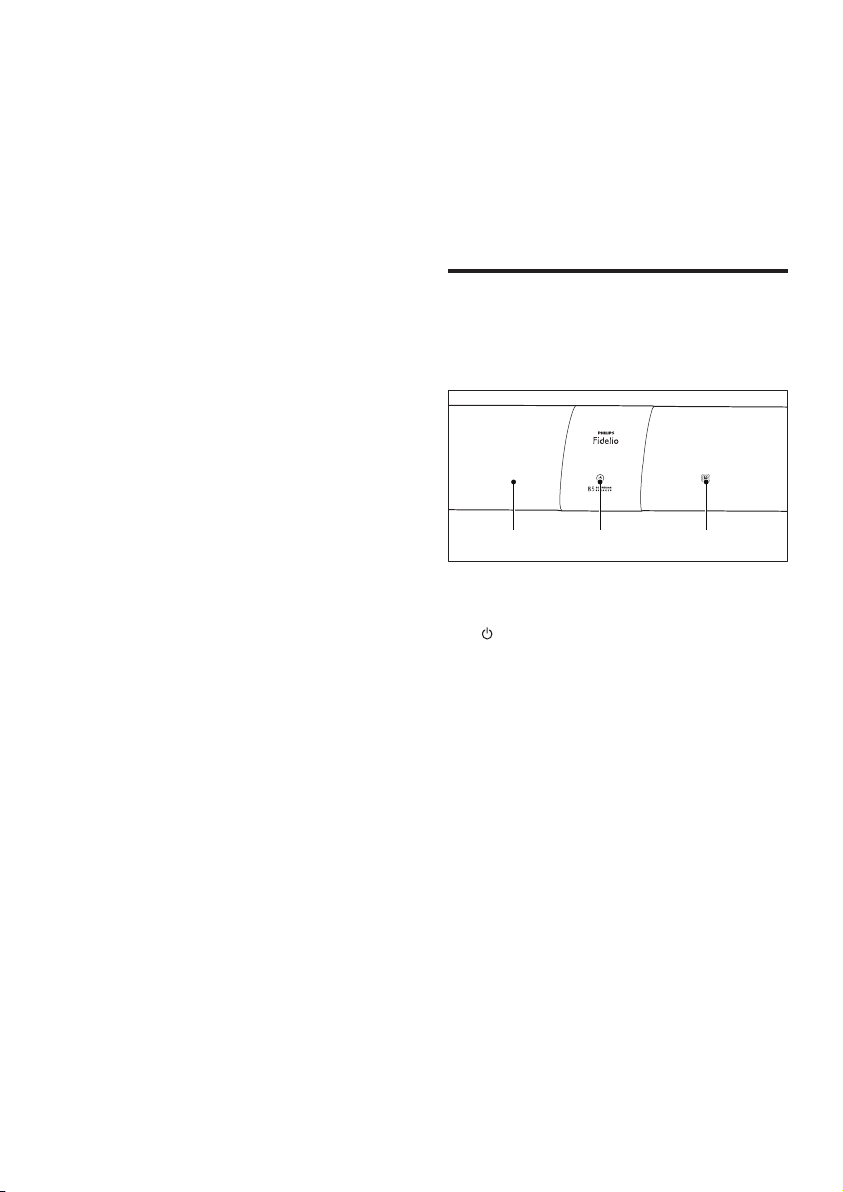
Main unit
This section includes an overview of the main
unit.
a Display panel
b (Standby-On/Standby indicator)
When the SoundBar is in standby, the
standby indicator turns red.
c NFC tag
Tap the NFC-enabled device on the tag for
Bluetooth connection.
ab c

5
English
EN
Remote control
This section includes an overview of the
remote control.
a
Switch the SoundBar on or to standby.
b Source buttons
• HDMI ARC: Switch your source to
HDMI ARC connection.
• HDMI 1: Switch your source to the
HDMI IN 1 connection.
• HDMI 2: Switch your source to the
HDMI IN 2 connection.
• COAX: Switch your audio source to
the coaxial connection.
• OPTICAL: Switch your audio source
to the optical connection.
b
a
c
d
f
g
h
i
j
k
l
e p
n
o
m
• AUDIO IN: Switch your audio source
to the MP3 connection (3.5mm jack).
• : For Bluetooth on the main unit only:
Switch to Bluetooth mode.
• AUX: Switch your audio source to the
AUX connection.
c /
For Bluetooth on the main unit only: skip
to the previous or next track.
d
For Bluetooth on the main unit only: play,
pause or resume.
e BASS +/-
Increase or decrease bass on the main unit.
f Volume control
• +/-: Increase or decrease volume.
• : Mute or restore volume.
g VOICE
• Press to select voice clarity sound mode.
• Press and hold to toggle on or off
CLOSE TO ME (close to me) sound
mode.
h MUSIC
Select stereo sound mode.
i REAR VOL.+/-
Press to increase or decrease volume of
the portable left and right speakers (only
applicable when the portable left and
right speakers are wirelessly connected
to the main unit (or SURROUND ON
DEMAND mode switches on)).
j AUDIO SYNC +/-
Increase or decrease audio delay.
k NIGHT
Turn night mode on or off.
l AUTO VOL.
Turn auto volume on or off.
m CALIBRATION
• Press and hold to trigger calibration for
listening zone.
6
EN
• Press three times to trigger calibration
for the portable left and right speakers
position.
n DIM
Set the brightness of SoundBar display
panel.
o MOVIE
Select surround sound mode.
p TREBLE +/-
Increase or decrease treble on the main
unit.
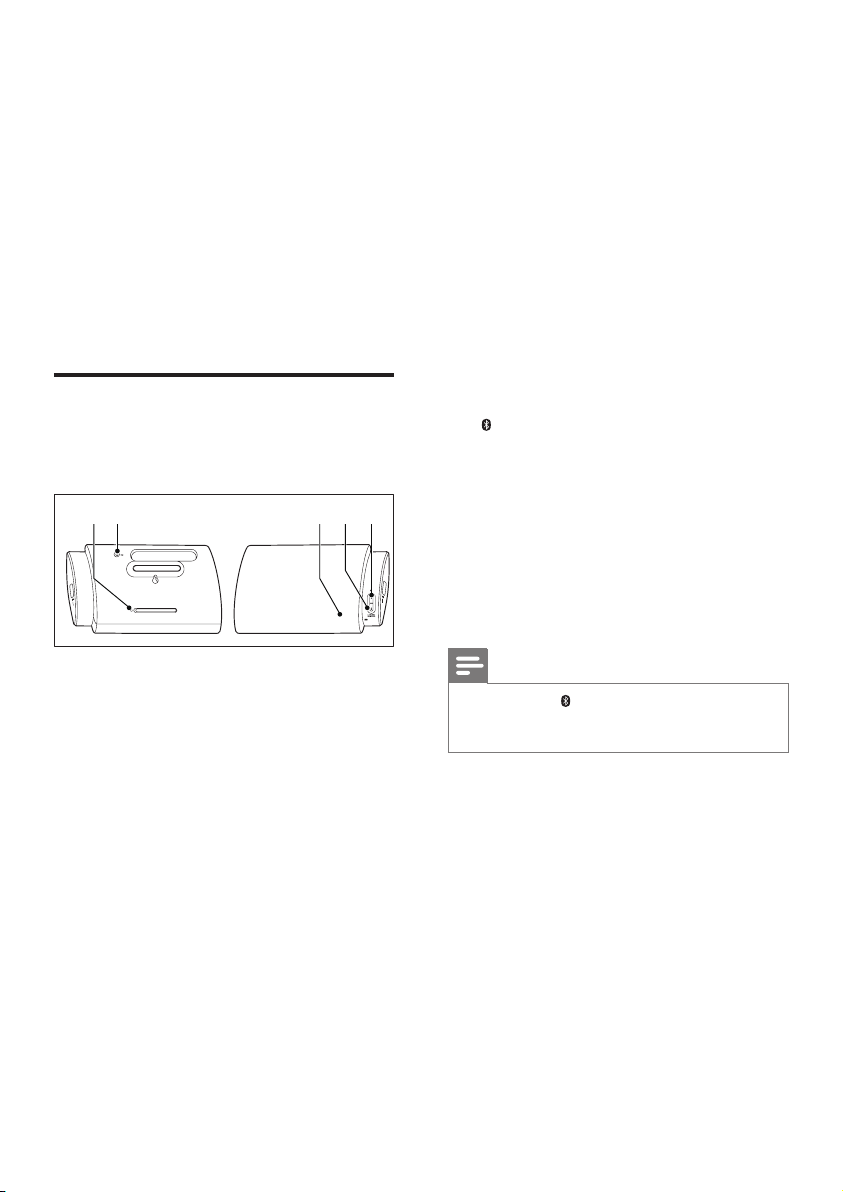
Wireless portable speakers
The SoundBar comes with two wireless
portable speakers (left and right).
* The illustration above is for overview of the
portable left speaker.
a Reset key
Press with a pin to reset the portable
speaker to the default settings.
b ON
• Press to turn on the portable speaker
if it automatically goes to standby.
• Press and hold to switch the portable
speaker to standby.
c Speaker LED
• Blinks in red and orange alternatively
if the portable speaker is not wirelessly
connected to the main unit.
• Lights up white when the portable
speaker is wirelessly connected to the
main unit, or when the battery capacity
is full or more than 30% remaining.
b ea dc
• Lights up red when the battery
capacity is less than 30% remaining .
• Blinks red when the battery capacity is
less than 10% remaining.
• Lights up orange when the portable
speaker is being charged (only for the
portable speakers docked into the
main unit).
d SURROUND ON DEMAND button/LED
• Press to switch the portable speaker
to SURROUND ON DEMAND
mode.
• The LED lights up white when the
portable speaker is switched to
SURROUND ON DEMAND mode.
e button/LED
• Press to switch the portable speaker
to Bluetooth mode.
• The LED blinks when you switch the
portable speaker to Bluetooth and no
Bluetooth devices are connected.
• The LED lights up when you switch
the portable speaker to Bluetooth and
Bluetooth devices are connected.
Note
• If you press the button on the portable speaker,
the portable speaker disconnects the main unit (or
SURROUND ON DEMAND mode switches off).

7
English
EN
Wireless subwoofer
The SoundBar comes with a wireless subwoofer.
a CONNECT (connect)
Press to to enter the pairing mode for the
subwoofer.
b Subwoofer indicator
• When the power is turned on, the
indicator lights up.
• During wireless pairing between the
subwoofer and the main unit, the
indicator blinks white quickly.
• When the pairing succeeds, the
indicator lights up white.
• When the pairing fails, the indicator
blinks white slowly.
c AC MAINS~
Connect to the power supply.
Connectors
This section includes an overview of the
connectors available on your SoundBar.
a AUDIO-IN
Audio input from, for example, an MP3
player (3.5mm jack).
b AUX-AUDIO IN L/R
Connect to an analog audio output on the
TV or an analog device.
c DIGITAL IN-COAXIAL
Connect to a coaxial audio output on the
TV or a digital device.
d (SERVICE)
Connect a USB ash drive to upgrade
software of this product (not for media
play).
e DIGITAL IN-OPTICAL
Connect to an optical audio output on the
TV or a digital device.
f HDMI IN1 / HDMI IN2
Connect to the HDMI output on a digital
device.
g TO TV-HDMI OUT (ARC)
Connect to the HDMI (ARC) input on the
TV.
h AC MAINS~
Connect to the power supply.
a c de g hb f
Loading...