


MC9090-G RFID Mobile
RFID Integrator Guide Supplement
MC9090-G RFID Integrator Guide Supplement
72E-89963-04
Rev A
September 2008

ii MC9090-G RFID Integrator Guide Supplement
© 2008 by Motorola, Inc. All rights reserved.
No part of this publication may be reproduced or used in any form, or by any electrical or mechanical means, without permission in writing from Motorola. This includes electronic or mechanical means, such as photocopying, recording, or information storage and retrieval systems. The material in this manual is subject to change without notice.
The software is provided strictly on an “as is” basis. All software, including firmware, furnished to the user is on a licensed basis. Motorola grants to the user a non-transferable and non-exclusive license to use each software or firmware program delivered hereunder (licensed program). Except as noted below, such license may not be assigned, sublicensed, or otherwise transferred by the user without prior written consent of Motorola. No right to copy a licensed program in whole or in part is granted, except as permitted under copyright law. The user shall not modify, merge, or incorporate any form or portion of a licensed program with other program material, create a derivative work from a licensed program, or use a licensed program in a network without written permission from Motorola. The user agrees to maintain Motorola’s copyright notice on the licensed programs delivered hereunder, and to include the same on any authorized copies it makes, in whole or in part. The user agrees not to decompile, disassemble, decode, or reverse engineer any licensed program delivered to the user or any portion thereof.
Motorola reserves the right to make changes to any software or product to improve reliability, function, or design.
Motorola does not assume any product liability arising out of, or in connection with, the application or use of any product, circuit, or application described herein.
No license is granted, either expressly or by implication, estoppel, or otherwise under any Motorola, Inc., intellectual property rights. An implied license only exists for equipment, circuits, and subsystems contained in Motorola products.
MOTOROLA and the Stylized M Logo and Symbol and the Symbol logo are registered in the US Patent & Trademark Office. Bluetooth is a registered trademark of Bluetooth SIG. Microsoft, Windows and ActiveSync are either registered trademarks or trademarks of Microsoft Corporation. All other product or service names are the property of their respective owners.
Motorola, Inc.
One Motorola Plaza
Holtsville, New York 11742-1300
http://www.motorola.com
Patents
This product is covered by one or more of the patents listed on the web site: http://www.symbol.com/patents

iii
Revision History
Changes to the original manual are listed below:
Change |
Date |
Description |
|
|
|
-01 Rev A |
12/2006 |
Initial Release |
|
|
|
-02 Rev A |
3/2008 |
Added Laser Scanner |
|
|
Updated Wireless Section |
|
|
Updated Applications Section |
|
|
|
-03 Rev A |
5/2008 |
Updated Program Tag settings |
|
|
Added Duty Cycle Paramameters |
|
|
|
-04 Rev A |
9/2008 |
Added ETSI EN302-208 Tx-Channels Window |
|
|
|
|
|
|

iv MC9090-G RFID Integrator Guide Supplement

Table of Contents
Patents.................................................................................................................................................. |
ii |
Revision History.................................................................................................................................... |
iii |
About This Guide |
|
Introduction ........................................................................................................................................... |
ix |
Documentation Set ......................................................................................................................... |
ix |
Configurations....................................................................................................................................... |
x |
Chapter Descriptions ............................................................................................................................ |
x |
Notational Conventions......................................................................................................................... |
xi |
Related Documents and Software ........................................................................................................ |
xi |
Service Information............................................................................................................................... |
xii |
Support Information ........................................................................................................................ |
xii |
Chapter 1: Getting Started |
|
Introduction .......................................................................................................................................... |
1-1 |
MC909X Integrator Guide .............................................................................................................. |
1-1 |
Unpacking the Mobile Computer ......................................................................................................... |
1-2 |
Accessories ......................................................................................................................................... |
1-3 |
Getting Started ..................................................................................................................................... |
1-4 |
Installing and Removing the Main Battery ........................................................................................... |
1-4 |
Installing the Main Battery .............................................................................................................. |
1-4 |
Charging the Battery ............................................................................................................................ |
1-5 |
Charging the Main Battery and Memory Backup Battery ............................................................... |
1-5 |
Charging the Main Battery ............................................................................................................. |
1-6 |
Charging Spare Batteries .................................................................................................................... |
1-7 |
Removing the Main Battery ............................................................................................................ |
1-7 |
Starting the Mobile Computer .............................................................................................................. |
1-8 |
Calibrating the Screen ......................................................................................................................... |
1-8 |
Checking Battery Status ...................................................................................................................... |
1-8 |
Configuring the Mobile Computer ........................................................................................................ |
1-9 |

vi MC9090-G RFID Integrator Guide Supplement
Resetting the Mobile Computer ........................................................................................................... |
1-9 |
Performing a Warm Boot ............................................................................................................... |
1-9 |
Performing a Cold Boot .................................................................................................................. |
1-9 |
Performing a Clean Boot ................................................................................................................ |
1-10 |
Battery Management ........................................................................................................................... |
1-11 |
Battery Saving Tips ........................................................................................................................ |
1-11 |
Changing the Power Settings .............................................................................................................. |
1-11 |
Changing the Display Backlight Settings ............................................................................................. |
1-11 |
Changing the Keypad Backlight Settings ............................................................................................. |
1-12 |
Turning the Radios Off ......................................................................................................................... |
1-12 |
WLAN Radio on Windows Mobile 5.0 ............................................................................................ |
1-12 |
Bluetooth and WAN Radios on Windows Mobile 5.0 ..................................................................... |
1-12 |
Wireless Applications ........................................................................................................................... |
1-13 |
ActiveSync ........................................................................................................................................... |
1-14 |
Chapter 2: Accessories |
|
Introduction .......................................................................................................................................... |
2-1 |
Keypads ......................................................................................................................................... |
2-1 |
Cradles ........................................................................................................................................... |
2-1 |
Miscellaneous ................................................................................................................................ |
2-2 |
Snap-on Modules ........................................................................................................................... |
2-2 |
Keypad ................................................................................................................................................. |
2-3 |
Keypad Removal ............................................................................................................................ |
2-3 |
Multi Media Card (MMC) / Secure Device (SD) Card .......................................................................... |
2-4 |
Chapter 3: Application Deployment for Mobile 5.0 |
|
Introduction .......................................................................................................................................... |
3-1 |
Security ................................................................................................................................................ |
3-1 |
Packaging ............................................................................................................................................ |
3-1 |
Deployment .......................................................................................................................................... |
3-2 |
XML Provisioning ................................................................................................................................. |
3-2 |
Storage ................................................................................................................................................ |
3-3 |
System Configuration Manager ........................................................................................................... |
3-3 |
Rapid Deployment Client ..................................................................................................................... |
3-3 |
AirBEAM Smart .................................................................................................................................... |
3-4 |
Symbol Mobility Developer Kits ........................................................................................................... |
3-4 |
Table of Contents |
vii |
|
|
Chapter 4: RFID Demo Application |
|
Introduction .......................................................................................................................................... |
4-1 |
RFIDDemo Application ........................................................................................................................ |
4-2 |
Using RFIDDemo to Read Tags From a Remote Reader ............................................................. |
4-2 |
Launching the RFIDDemo Application ................................................................................................. |
4-3 |
File Menu Options .......................................................................................................................... |
4-4 |
About .............................................................................................................................................. |
4-4 |
Device Settings .............................................................................................................................. |
4-5 |
Reader Device Settings: .......................................................................................................... |
4-5 |
Tag Logging ............................................................................................................................. |
4-6 |
Registry Settings Description ................................................................................................... |
4-6 |
Tag Access Parameters ................................................................................................................. |
4-10 |
Reader Tag Access Parameters Settings: ............................................................................... |
4-10 |
Program Tag .................................................................................................................................. |
4-12 |
Reader Program Tag Settings: ................................................................................................ |
4-12 |
Lock Options .................................................................................................................................. |
4-14 |
Reader Lock Option Settings: .................................................................................................. |
4-14 |
Tag Locking ............................................................................................................................. |
4-15 |
Read Tags ..................................................................................................................................... |
4-16 |
Duty Cycle Paramameters ................................................................................................................... |
4-18 |
ETSI EN 302-208 Tx-Channel Selection ............................................................................................. |
4-19 |
RFIDFlash Utility (Radio Firmware Update Utility) ............................................................................... |
4-20 |
Chapter 5: GeminiRFID Demo Application |
|
Introduction .......................................................................................................................................... |
5-1 |
Host Computer Display Setup ............................................................................................................. |
5-1 |
Using GeminiRFID Demo to Read Tags From a Remote Reader ....................................................... |
5-2 |
Using GeminiRFID Demo to Forward/Log Tags to Remote Device .................................................... |
5-2 |
Launching the GeminiRFID Demo Application .................................................................................... |
5-3 |
Reading Tags ................................................................................................................................. |
5-4 |
Selecting Tags ............................................................................................................................... |
5-5 |
Clearing the Display ....................................................................................................................... |
5-5 |
Saving Tag Data ............................................................................................................................ |
5-6 |
File Menu ....................................................................................................................................... |
5-6 |
About ........................................................................................................................................ |
5-7 |
Log ........................................................................................................................................... |
5-7 |
Reboot ..................................................................................................................................... |
5-7 |
Settings .................................................................................................................................... |
5-8 |
Gen2 Operational Settings ....................................................................................................... |
5-9 |
Exit ........................................................................................................................................... |
5-9 |
Mode Menu .................................................................................................................................... |
5-10 |
Inventory .................................................................................................................................. |
5-10 |
Locate Tag ............................................................................................................................... |
5-10 |
Program Tag ............................................................................................................................ |
5-11 |

viii MC9090-G RFID Integrator Guide Supplement
Chapter 6: SymbolRoam |
|
Introduction .......................................................................................................................................... |
6-1 |
SymbolRoam, Region Change ............................................................................................................ |
6-2 |
Country Drop Down List ................................................................................................................. |
6-2 |
SymbolRoam Version .................................................................................................................... |
6-3 |
Chapter 7: Maintenance & Troubleshooting |
|
Introduction .......................................................................................................................................... |
7-1 |
Maintaining the RFID reader ................................................................................................................ |
7-1 |
Accessories ......................................................................................................................................... |
7-2 |
Battery Safety Guidelines .................................................................................................................... |
7-2 |
Troubleshooting ................................................................................................................................... |
7-3 |
RFID Reader .................................................................................................................................. |
7-3 |
Appendix A: Technical Specifications |
|
Technical Specifications ...................................................................................................................... |
A-1 |
RFID Reader .................................................................................................................................. |
A-1 |
Accessory CAM and MSR Pin-Outs .................................................................................................... |
A-7 |
Index
About This Guide
Introduction
This MC9090-G RFID Integrator Guide Supplement provides the unique set up and configuration procedures for the MC9090-G RFID mobile computers and accessories. This guide is intended as a supplement to the MC909X Integrator Guide, P/N: 72E-72216-xx. Procedures common to the MC909X series of products are referenced to the
MC909X Integrator Guide.
NOTE Screens and windows pictured in this guide are samples and may differ from actual screens.
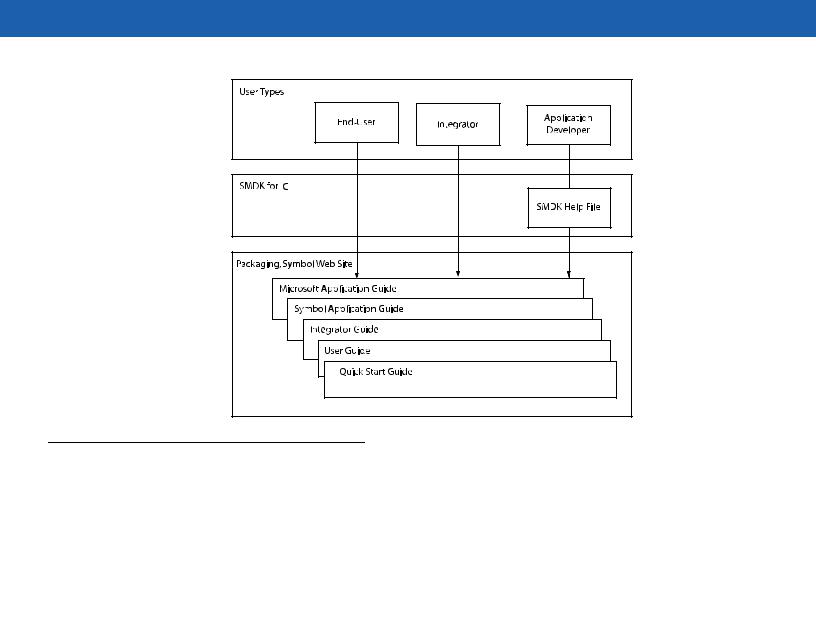
Documentation Set
The documentation set for the MC9090-G RFID reader is divided into guides that provide information for specific user needs.
•Microsoft Application Guide - describes how to use Microsoft developed applications.
•Symbol Application Guide - describes how to use Motorola developed applications.
•MC909X User Guide - describes how to use the MC909X mobile computers.
•MC9090-G RFID User Guide Supplement - describes how to use the MC9090-G RFID mobile computer.
•MC909X Integrator Guide - describes how to set up the MC909X mobile computers and the accessories.
•MC9090-G RFID Integrator Guide Supplement - describes how to set up the MC9090-G RFID mobile computer and the accessories.
•SMDK Help File - provides API information for writing applications.
x MC9090-G RFID Integrator Guide Supplement
Configurations
This guide covers the following configurations:
|
Configuration |
Radios |
Display |
Memory |
Data |
Operating |
Keypad |
|
|
Capture |
System |
||||||
|
|
|
|
|
|
|
||
|
MC9090-G |
WLAN: 802.11a/b/g |
Color |
64 MB RAM |
Laser Scan |
Windows |
53-key RFID |
|
|
RFID |
WPAN: Bluetooth |
|
|
128 MB |
Imager |
Mobile 5.0 |
|
|
|
|
|
|
Flash |
RFID |
|
|
|
|
|
|
|
|
|
|
|
|
|
|
|
|
|
|
|
|
Chapter Descriptions
Topics covered in this guide are as follows:
•Chapter 1, Getting Started, provides information on charging the RFID reader battery and resetting.
•Chapter 2, Accessories, describes the accessories available for the RFID reader and how to set up power connections and battery charging capabilities, where applicable.
•Chapter 3, Application Deployment for Mobile 5.0, describes features available in Windows Mobile 5.0.
•Chapter 4, RFID Demo Application, descries how application developers can use the RFID Demo a application.
•Chapter 5, GeminiRFID Demo Application, descries how application developers can use the Gemini RFID Sample application.
•Chapter 6, SymbolRoam, descries how to use the SymbolRoam application to change operating regions.
•Chapter 7, Maintenance & Troubleshooting, includes instructions on cleaning and storing the RFID reader, and provides troubleshooting solutions for potential problems during RFID reader operation.
•Chapter A, Technical Specifications, includes the technical specifications for the RFID reader

About This Guide |
xi |
|
|
Notational Conventions
The following conventions are used in this document:
•“RFID Reader”, “reader” or “mobile computer” refers to the Motorola MC9090-G RFID reader.
•Italics are used to highlight the following:
•Chapters and sections in this guide
•Related documents
•Bold text is used to highlight the following:
•Dialog box, window and screen names
•Drop-down list and list box names
•Check box and radio button names
•Icons on a screen
•Key names on a keypad
•Button names on a screen.
•Bullets (•) indicate:
•Action items
•Lists of alternatives
•Lists of required steps that are not necessarily sequential.
•Sequential lists (e.g., those that describe step-by-step procedures) appear as numbered lists.
Related Documents and Software
The following documents provide more information about the MC9090-G RFID reader.
•MC9090-G RFID Quick Start Guide, p/n 72-89960-xx
•MC9090-G RFID Windows® Mobile® 5.0 Regulatory Guide, p/n 72-89961-xx
•MC9090-G RFID User Guide Supplement, p/n 72E-79962-xx
•MC909X User Guide, p/n 72E-72215-xx
•MC909X Integrator Guide, p/n 72E-72216-xx
•Symbol Application Guide for Symbol Devices, p/n 72E-68901-xx
•Microsoft Applications for Mobile and WinCE 5.0 User Guide, p/n 72E-78456-xx
•Symbol Mobility Developer Kit (SMDK) Help File, p/n 72E-38880-03
•Symbol Mobility Developer Kit for .NET, available at: http://support.symbol.com
•Symbol Mobility Developer Kit for C, available at: http://support.symbol.com
•ActiveSync software, available at: http://www.microsoft.com.
For the latest version of this guide and all guides, go to: http://support.symbol.com.

xii MC9090-G RFID Integrator Guide Supplement
Service Information
If an equipment problem occurs, contact the appropriate regional Support Center for contact information. Before calling, locate the model number and serial number.
Call the Support Center from a phone near the scanning equipment so that the service person can try to talk through the problem. If the equipment is found to be working properly and the problem is symbol readability, the Support Center will request samples of bar codes for analysis at our plant.
If the problem cannot be solved over the phone, the equipment may need to be returned for servicing. If that is necessary, specific directions will be provided.
NOTE Motorola is not responsible for any damages incurred during shipment if the approved shipping container is not used. Shipping the units improperly can possibly void the warranty.
Support Information
For service information, warranty information or technical assistance contact or call the Support Center. Contact information is provided on the Motorola contact web site go to: http://www.support.symbol.com.
If the Motorola product was purchased from a Motorola Business Partner, contact that Business Partner for service.

Chapter 1 Getting Started
Introduction
This chapter lists the accessories for the MC9090-G RFID mobile computer and explains how to install and charge the batteries, replace the strap and start the mobile computer for the first time.
NOTE This MC9090-G RFID Integrator Guide Supplement is intended as a supplement to the MC909X Integrator Guide, P/N: 72E-72216-xx. Procedures common to the MC909X series of products are referenced to the MC909X Integrator Guide.
MC909X Integrator Guide
The MC909X Integrator Guide, P/N: 72E-72216-xx provides the following support information applicable to the MC9090-G RFID mobile computer:
•Accessories; describes the accessories available for the mobile computers and how to set up power connections and battery charging capabilities, where applicable.
•ActiveSync; provides instructions on installing ActiveSync and setting up a partnership between the mobile computer and a host computer.
•Wireless Applications; provides instructions using and configuring the mobile computer on a wireless network.
•Wireless Applications; describes how to configure the WLAN wireless connection.
•Rapid Deployment Client; explains how to use the Rapid Deployment Client to facilitate software downloads to the mobile computer from a Mobility Services Platform (MSP) Console FTP server.
•AirBEAM Client; explains how to set up the mobile computer to synchronize with a server using the AirBEAM® Client and AirBEAM Staging applications.
•Application Deployment for Windows Mobile; provides instructions for installing the SMDK for C and SMDK for .NET on the host computer.and downloading software and files to the mobile computer.
•Maintenance & Troubleshooting; includes instructions on cleaning and storing the mobile computer, and provides troubleshooting solutions for potential problems during mobile computer operation.
1 - 2 MC9090-G RFID Integrator Guide Supplement
Unpacking the Mobile Computer
Carefully remove all protective material from around the mobile computer and save the shipping container for later storage and shipping.
Verify that all equipment listed below was received:
•Mobile computer
•Lithium-ion battery
•Strap, attached to the mobile computer
•Stylus, in the stylus silo
•Regulatory Guide
•Quick Start Guide (poster)
Inspect the equipment for damage. If any equipment is missing or damaged, contact the Symbol Technologies Support Center immediately. See page xii for contact information.
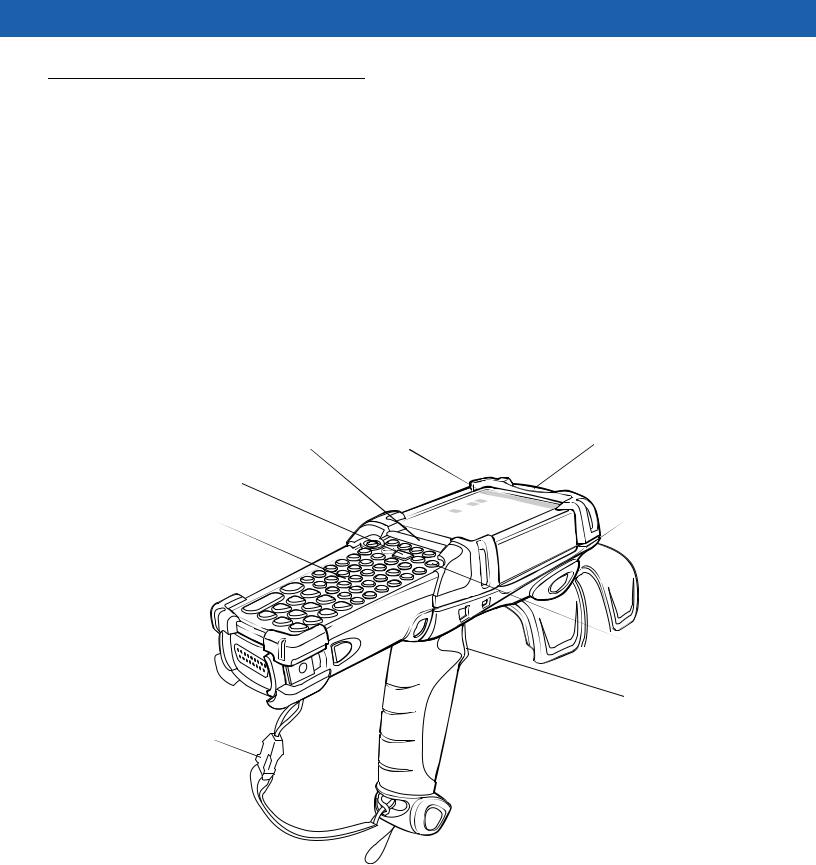
Indicator LED Bar Touch Screen |
Microphone (Windows |
|
Mobile 5.0 only) |
Scan Button |
|
Keypad |
Headphone Jack |
(Windows Mobile |
|
|
5.0 only) |

 Power Button
 Trigger
Handstrap
Figure 1-1 MC9090-G RFID Mobile Computer

Getting Started |
1 - 3 |
|
|
Accessories
Table 1-1 lists the accessories available for the MC9090-G RFID.
Table 1-1 MC9090-G RFID Accessories
Accessory |
Description |
|
|
Cable Adapter Module |
Snap-on required to connect the following cables to the mobile computer. |
(CAM) |
• AC line cord (country-specific) and power supply, charges the mobile |
|
computer. |
|
• Auto charge cable, charges the mobile computer using a vehicle’s |
|
cigarette lighter. |
|
• DEX cable, connects the mobile computer to a vending machine. |
|
• Serial cable, adds serial communication capabilities. |
|
• USB cable, adds USB communication capabilities. |
|
• Printer cable, adds printer communication capabilities. |
|
|
Four Slot Charge Only |
Charges the mobile computer main battery. |
Cradle |
|
|
|
Four Slot Ethernet Cradle |
Charges the mobile computer main battery and synchronizes the mobile |
|
computer with a host computer through an Ethernet connection. |
|
|
Four Slot Spare Battery |
Charges up to four mobile computer spare batteries. |
Charger |
|
|
|
Magnetic Stripe Reader |
Snaps on to the mobile computer and adds magstripe read capabilities. |
(MSR) |
|
|
|
Modem Module |
Enables data communication between the mobile computer and a host |
|
computer, remotely through the phone lines, and synchronizes information |
|
between the mobile computer and a host computer. |
|
|
Multimedia Card (MMC) |
Provides secondary non-volatile storage. |
|
|
Single Slot Serial/USB |
Charges the mobile computer main battery and a spare battery. It also |
Cradle |
synchronizes the mobile computer with a host computer through either a serial |
|
or a USB connection. |
|
|
Software |
Symbol Mobility Developer Kits available at: http://support.symbol.com. |
|
|
Spare lithium-ion battery |
Replacement battery. |
|
|
Stylus |
Performs pen functions. |
|
|
Universal Battery Charger |
Adapts the UBC for use with the Series 9000 batteries. |
Adapter |
|
|
|
Wall Mounting Bracket and |
Use for wall mounting applications. |
Shelf Slide |
|
|
|
1 - 4 MC9090-G RFID Integrator Guide Supplement
Getting Started
In order to start using the mobile computer for the first time:
•Install the main battery
•Charge the main battery and backup battery
•Start the mobile computer
•Configure the mobile computer
The main battery can be charged before or after it is installed. Use one of the spare battery chargers to charge the main battery (out of the mobile computer), or one of the cradles to charge the main battery installed in the mobile computer.
Installing and Removing the Main Battery
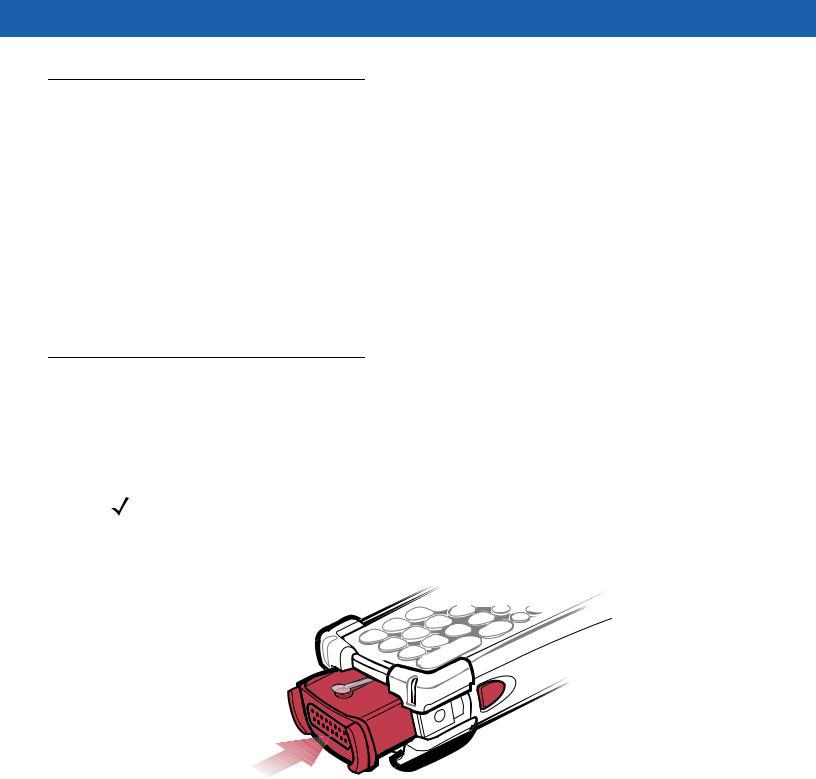
Installing the Main Battery
Before using the mobile computer, install a lithium-ion battery by sliding the battery into the mobile computer as shown in Figure 1-2.
NOTE Ensure the battery is fully inserted. Two audible clicks can be heard as the battery is fully inserted. A partially inserted battery may result in unintentional data loss.
When a battery is fully inserted in a mobile computer for the first time, upon the mobile computer’s first power up, the device boots and powers on automatically.
Figure 1-2 Installing the Main Battery

Getting Started |
1 - 5 |
|
|
Charging the Battery
Charging the Main Battery and Memory Backup Battery
Before using the mobile computer for the first time, charge the main battery until the amber charge indicator light remains lit (see Table 1-2 on page 1-6 for charge status indications). Charge time is less than four hours. The mobile computer can be charged using a cradle, the CAM with a charging cable, or the MSR with the appropriate power supply.
The mobile computer is equipped with a memory backup battery which automatically charges from the fully-charged main battery. When the mobile computer is used for the first time, the backup battery requires approximately 15 hours to fully charge. This is also true any time the backup battery is discharged, which occurs when the main battery is removed for several hours. The backup battery retains data in memory for at least 30 minutes when the mobile computer's main battery is removed. When the mobile computer reaches a very low battery state, the combination of main battery and backup battery retains data in memory for at least 72 hours.
NOTE Do not remove the main battery within the first 15 hours of use. If the main battery is removed before the backup battery is fully charged, data may be lost.
Use the following to charge batteries:
•Cradles: The mobile computer slips into the cradles for charging the battery in the mobile computer (and spare batteries, where applicable).
-Single Slot Serial/USB Cradle.
-Four Slot Ethernet Cradle and Four Slot Charge Only Cradles.
•Accessories: The mobile computer’s snap-on accessories provide charging capability, when used with one of the accessory charging cables.
-CAM
-MSR.
•Chargers: The mobile computer’s spare battery charging accessories are used to charge batteries that are removed from the mobile computer.
-Single Slot Serial/USB Cradle
-Four Slot Spare Battery Charger
-Universal Battery Charger (UBC).
NOTE To achieve the best battery life in mobile computers with multiple radios, turn off the radios that are not being used. This can be accomplished via the SetDevicePower() API (refer to the SMDK Help File for Symbol Mobile Computers) or via the Control Panel application (tap Start > 9000 Demo > Ctl Panel icon).

1 - 6 MC9090-G RFID Integrator Guide Supplement
Charging the Main Battery
Charge the main battery in the mobile computer using a cradle, the CAM with a charging cable, or the MSR with the appropriate power supply.
1.Ensure the accessory used to charge the main battery is connected to the appropriate power source (see Chapter 2, Accessories for setup information).
2.Insert the mobile computer into a cradle or attach the appropriate snap-on module.
3.The mobile computer starts to charge automatically. The amber charge LED, in the Indicator LED Bar, lights to show the charge status. See Table 1-2 for charging indications.
The main battery usually fully charges in less than four hours.
Table 1-2 Mobile Computer LED Charge Indicators
LED |
Indication |
|
|
Off |
Mobile computer not in cradle or the mobile computer is not attached to the CAM or |
|
MSR. Mobile computer not placed correctly. Charger is not powered. |
|
|
Fast Blinking Amber |
Error in charging; check placement of the mobile computer. |
|
|
Slow Blinking Amber |
Mobile computer is charging. |
|
|
Solid Amber |
Charging complete. |
|
|
Getting Started |
1 - 7 |
|
|
Charging Spare Batteries
Use the following three accessories to charge spare batteries:
•Single Slot Serial/USB Cradle
•Four Slot Spare Battery Charger
•UBC Adapter.
To charge a spare battery:
1.Ensure the accessory used to charge the spare battery is connected to the appropriate power source (see Chapter 2, Accessories for setup information).
2.Insert the spare battery into the accessory’s spare battery charging slot with the charging contacts facing down (over the charging pins) and gently press down on the battery to ensure proper contact.
3.The battery starts to charge automatically. The amber charge LED on the accessory lights to show the charge status. See Chapter 2, Accessories for charging indications for the accessory.
The battery usually fully charges in less than four hours.
Removing the Main Battery
To remove the main battery:
1.Prior to removing the battery, press the red Power button to place the mobile computer in the suspend mode.
2.Simultaneously press both primary battery releases. The battery partially ejects from the mobile computer.
3.Pause 3-4 seconds while the mobile computer performs battery removal shutdown.
4.Press the secondary battery release, on top of the battery, and slide the battery out of the mobile computer.
Primary Battery Releases
Secondary Battery
Release
Figure 1-3 Removing the Main Battery
1 - 8 MC9090-G RFID Integrator Guide Supplement
Starting the Mobile Computer
Press the red Power button to turn on the mobile computer. If the mobile computer does not power on, perform a cold boot. See Performing a Cold Boot on page 1-9.
NOTE When a battery is fully inserted in a mobile computer for the first time, upon the first power up, the device boots and powers on automatically.
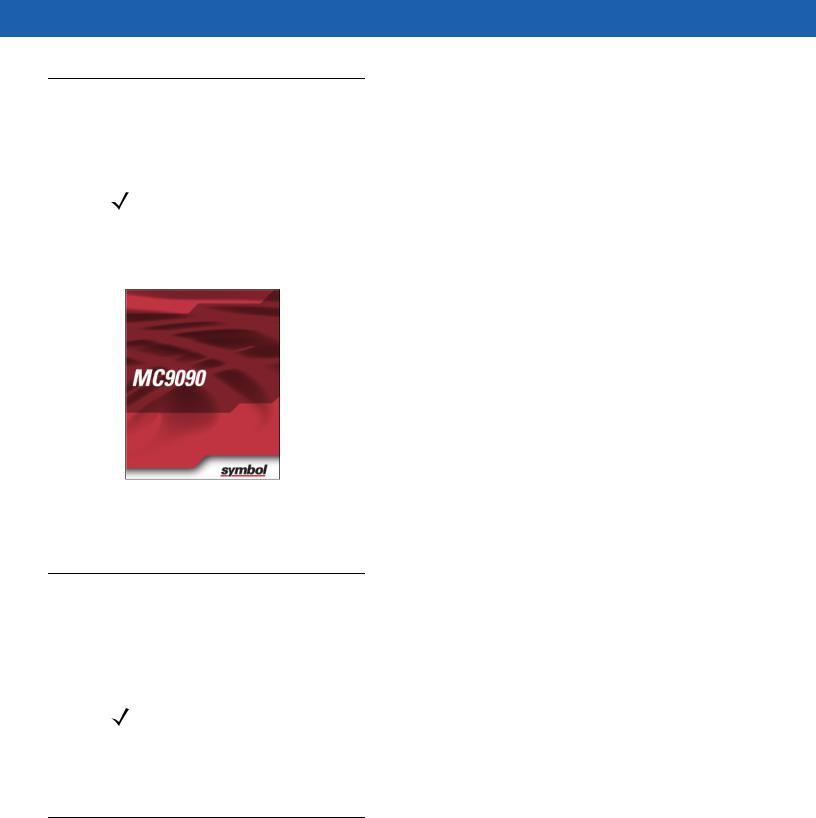
When the mobile computer is powered on for the first time, it initializes its system. The Symbol splash screen (Figure 1-4) appears for a short period of time.
Figure 1-4 Symbol Splash Window
Calibrating the Screen
To calibrate the screen so the cursor on the touch screen aligns with the tip of the stylus:
1.Using the stylus carefully press and briefly hold the tip of stylus on the center of each target that appears on the screen.
NOTE To re-calibrate the screen at anytime, press the blue FUNC and ESC keys on the mobile computer to launch the calibration screen application.
2.Repeat as the target moves around the screen or press ESC to cancel.
Checking Battery Status
To check whether the main battery or backup battery in the mobile computer is charged, tap Start - Settings -
System Tab - Power icon to display the Battery Status window.
To save battery power, set the mobile computer to turn off after a specified number of minutes.

Getting Started |
1 - 9 |
|
|
Configuring the Mobile Computer
•To customize the mobile computer settings, refer to the Microsoft Applications for Symbol Devices User Guide.
•To set up ActiveSync to synchronize the mobile computer with the host computer, see the MC909X Integrator Guide, P/N: 72E-72216-xx.
•To configure the mobile computer for WLAN network, see the MC909X Integrator Guide, P/N: 72E-72216-xx.
•To configure the mobile computer using the Rapid Deployment Client, see the MC909X Integrator Guide, P/N: 72E-72216-xx.
•To set up AirBEAM to synchronize the mobile computer with the host server, see the MC909X Integrator Guide, P/N: 72E-72216-xx.
•To install development software on the development PC, see Chapter 3, Application Deployment for Mobile 5.0 and see the MC909X Integrator Guide, P/N: 72E-72216-xx.
Resetting the Mobile Computer
If the mobile computer stops responding to input, reset it. There are two reset functions, warm boot and cold boot. A warm boot restarts the mobile computer by closing all running programs.
A cold boot also restarts the mobile computer, but erases all stored records and entries in RAM. Data saved in flash memory or a memory card is not lost. In addition it returns formats, preferences and other settings to the factory default settings.
Perform a warm boot first. This restarts the mobile computer and saves all stored records and entries. If the mobile computer still does not respond, perform a cold boot.
Performing a Warm Boot
Hold down the Power button for approximately five seconds. As soon as the mobile computer starts to perform a warm boot release the Power button.
Performing a Cold Boot
A cold boot restarts the mobile computer and erases all user stored records and entries that are not saved in flash memory (Application and Platform folders) or a memory card. Never perform a cold boot unless a warm boot does not solve the problem.
CAUTION Do not hold down any key, button or the trigger, other than the Power button during a reset. Performing a cold boot restores formats, preferences and other settings to the default settings.
NOTE Any data previously synchronized with a computer can be restored during the next ActiveSync operation.

1 - 10 MC9090-G RFID Integrator Guide Supplement
Perform a Cold Boot:
1.Press the primary battery release on the mobile computer to partially eject the battery from the mobile computer.
2.On an MC9090-G, while the battery is partially released, simultaneously press and release the trigger and the Power button.
3.Push the battery to fully re-insert it in the mobile computer. One audible click can be heard as the battery is fully inserted.
4.The mobile computer initializes.
Performing a Clean Boot
CAUTION A clean boot should only be performed by an authorized system administrator.
The mobile computer must be connected to AC power during a clean boot. Removing AC power from the mobile computer during a clean boot may render the mobile computer inoperable.
A clean boot resets the mobile computer to the factory default settings. All data is the Application folder is retained. The Clean Boot Package file must be downloaded from the Symbol Support Central and installed on the mobile computer before performing a clean boot.
To perform a clean boot:
1.Download the Clean Boot Package from the Symbol Support Central. Follow the instructions included in the package for installing the package onto the mobile computer.
2.Press the primary battery release on the mobile computer to partially eject the battery from the mobile computer.
3.While the battery is partially released, simultaneously press and release the trigger and the Power button.
NOTE After the battery is inserted, the trigger or left scan button must be pressed within two seconds.
4.Push the battery to fully insert it in the mobile computer. One audible click can be heard as the battery is fully inserted.
5.Press and hold the trigger.
6.Connect the mobile computer to AC power using the CAM or insert the mobile computer into a powered cradle.
7.The mobile computer updates and then re-boots.
8.The calibration screen appears.

Getting Started 1 - 11
Battery Management
Battery Saving Tips
•Leave the mobile computer connected to AC power at all times when not in use.
•Set the mobile computer to turn off after a short period of non-use.
•Set the display and keyboard backlight to turn off after a short period of non-use.
•Turn off all wireless radio activity when not in use.
•Power off the mobile computer when charging to charge at a faster rate.
Changing the Power Settings
To set the mobile computer to turn off after a short period of non-use:
1.On devices with Windows Mobile 5.0, tap Start > Settings > System tab > Power icon > Advanced tab.
2.Select the On battery power: Turn off device if not used for: check box and select a value from the drop-down list box.
3.Tap OK.
Changing the Display Backlight Settings
To change the display backlight settings in order to conserve more battery power:
1.On devices with Windows Mobile 5.0, tap Start > Settings > System tab > Backlight icon > Battery Power tab.
2.Select the On battery power: Disable backlight if not used for: check box and select a value from the drop-down list box.
3.Tap the Brightness tab.
4.Tap the Disable backlight check box to completely turn off the display backlight.
5.Use the slider to set the brightness of the backlight. Set it to a low value to save battery power.
6.Tap OK.
1 - 12 MC9090-G RFID Integrator Guide Supplement
Changing the Keypad Backlight Settings
To change the keypad backlight settings in order to conserve more battery power:
1.On devices with Windows Mobile 5.0, tap Start > Settings > System tab > Keylight icon > Battery Power tab.
2.Select the On battery power: Disable keylight if not used for: check box and select a value from the drop-down list box.
3.Tap the Advanced tab.
4.Tap the Disable keylight check box to completely turn off the display backlight.
5.Tap OK.
Turning the Radios Off
WLAN Radio on Windows Mobile 5.0
To turn off the WLAN radio tap the Signal Strength icon and select Disable Radio. A red X appears across the icon indicating that the radio is disabled (off).
To turn the radio back on, tap the Signal Strength icon and select Enable Radio. The red X disappears from the icon indicating that the radio is enabled (on).
The MC909X Integrator Guide, P/N: 72E-72216-xx provides the wireless applications support information applicable to the MC9090-G RFID mobile computer.
Bluetooth and WAN Radios on Windows Mobile 5.0
NOTE The Flight Mode feature only turns off the WAN and Bluetooth radios. The WLAN radio must be turned off separately.
To turn off the Bluetooth and WAN radios: |
|
|
|
Tap the Connectivity icon |
(on non-WAN devices) or the Antenna/Signal icon |
(on WAN devices) and select |
|
Turn On Flight Mode. |
|
|
|
To turn off the Bluetooth and WAN radios, tap the Connectivity icon |
(on non-WAN devices) or the |
||
Antenna/Signal icon |
(on WAN devices) and select Turn On Flight Mode. |
|
|
The MC909X User Guide, P/N: 72E-72215-xx provides the Bluetooth support information applicable to the MC9090-G RFID mobile computer.
Getting Started 1 - 13
Wireless Applications
Wireless Local Area Networks (WLANs) allow mobile computers to communicate wirelessly and send captured data to a host device in real time. Before using the mobile computer on a WLAN, the facility must be set up with the required hardware to run the wireless LAN and the mobile computer must be configured. Refer to the documentation provided with the access points (APs) for instructions on setting up the hardware.
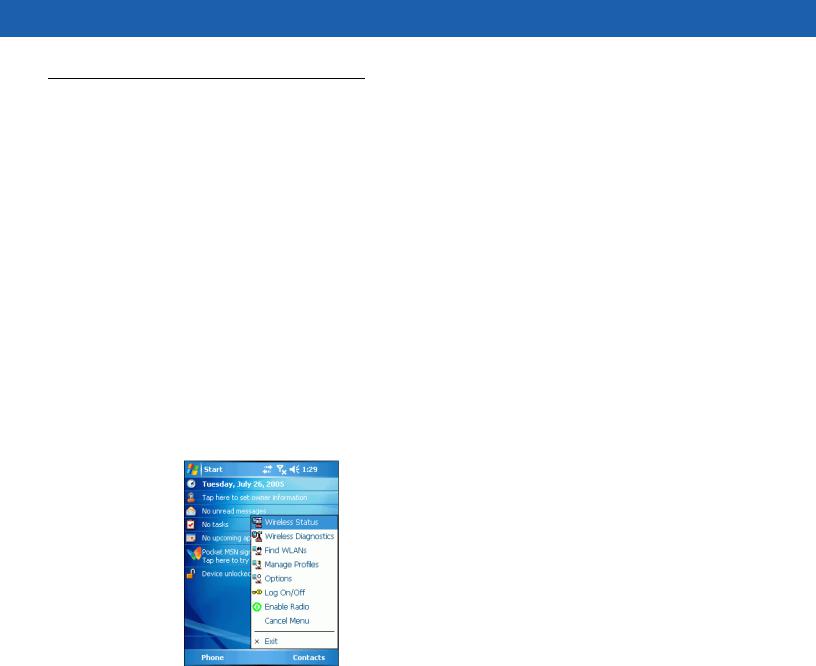
To configure the mobile computer, a set of wireless applications provide the tools to configure and test the wireless radio in the mobile computer. The Wireless Application menu on the task tray provides the following wireless applications:
•Wireless Status
•Wireless Diagnostics
•Find WLANs
•Manage Profiles
•Options
•Enable/Disable Radio
•Log On/Off
Tap the Signal Strength icon to display the Wireless Applications menu.
Figure 1-5 Wireless Applications Menu
The MC909X Integrator Guide, P/N: 72E-72216-xx provides the wireless applications support information applicable to the MC9090-G RFID mobile computer.

1 - 14 MC9090-G RFID Integrator Guide Supplement
ActiveSync
To communicate with various host devices, install Microsoft ActiveSync (version 4.1 or higher) on the host computer. Use ActiveSync to synchronize information on the mobile computer with information on the host computer. Changes made on the mobile computer or host computer appear in both places after synchronization.
ActiveSync software:
•Allows working with mobile computer-compatible host applications on the host computer. ActiveSync replicates data from the mobile computer so the host application can view, enter, and modify data on the mobile computer.
•Synchronizes files between the mobile computer and host computer, converting the files to the correct format.
•Backs up the data stored on the mobile computer. Synchronization is a one-step procedure that ensures the data is always safe and up-to-date.
•Copies (rather than synchronizes) files between the mobile computer and host computer.
•Controls when synchronization occurs by selecting a synchronization mode, e.g., set to synchronize continually while the mobile computer is connected to the host computer, or set to only synchronize on command.
•Selects the types of information to synchronize and control how much data is synchronized.
The MC909X Integrator Guide, P/N: 72E-72216-xx provides the ActiveSync support information applicable to the MC9090-G RFID mobile computer.

Chapter 2 Accessories
Introduction
The series 9000 accessories provide a wide variety of product support capabilities. Accessories include cradles, keypads, Magnetic Stripe Reader (MSR) and Cable Adapter Module (CAM) snap-on, four slot spare battery charger, headphone, Multimedia Card (MMC), Secure Device (SD) card, Universal Battery Charger (UBC) adapter, wall mounting bracket and shelf slide.
Keypads
The mobile computer has interchangeable modular keypads. However, only the 53-Key RFID keypad can be used with the MC9090-G RFID mobile computer. The modular keypad can be changed in the field as necessary. The MC909X Integrator Guide, P/N: 72E-72216-xx provides the keypad support information applicable to the MC9090-G RFID mobile computer:
• 53-key RFID keypad
Cradles
The MC909X Integrator Guide, P/N: 72E-72216-xx provides the cradle support information applicable to the MC9090-G RFID mobile computer:
•Single Slot Serial/USB cradle charges the mobile computer main battery and a spare battery. It also synchronizes the mobile computer with a host computer through either a serial or a USB connection.
•Four Slot Charge Only cradle charges the mobile computer main battery.
•Four Slot Ethernet cradle charges the mobile computer main battery and synchronizes the mobile computer with a host computer through an Ethernet connection.
 Loading...