


Livarno Z31710A, Z31710B User Manual [de, en, fr]
LED SPOTLIGHT
LED SPOTLIGHT
Assembly, operating and safety instructions
LED-STRÅLKASTARE FÖR UTOMHUSBRUK
Monterings-, bruks- och säkerhetsanvisningar
PROJECTEUR A LED
Instructions de montage, d‘utilisation et consignes de sécurité
LED-AUSSENSTRAHLER
Montage-, Bedienungs- und Sicherheitshinweise
IAN 93258
LED-ULKOV ALAISIN
Asennus-, käyttö- ja turvallisuusohjeet
LED-LAMPE TIL UDENDØRSBRUG
Monterings-, betjenings- og sikkerhedshenvisninger
LED-BUITENSCHIJNWERPER
Montage-, bedienings- en veiligheidsinstructies

GB / IE Assembly, operating and safety instructions Page 3
FI Asennus-, käyttö- ja turvallisuusohjeet Sivu 11
SE Monterings-, bruks- och säkerhetsanvisningar Sidan 18
DK Monterings-, betjenings- og sikkerhedshenvisninger Side 26
FR / BE Instructions de montage, d‘utilisation et consignes de sécurité Page 34
NL / BE Montage-, bedienings- en veiligheidsinstructies Pagina 42
DE / AT / CH Montage-, Bedienungs- und Sicherheitshinweise Seite 50

Intended use ...........................................................................Page 4
Parts description .................................................................Page 4
Technical Data .......................................................................Page 4
Scope of delivery................................................................Page 5
General safety instructions ........................................Page 5
Before installation .............................................................Page 6
Installation ...............................................................................Page 6
Start-up
Adjusting the motion detector.......................................................Page 7
Setting the lighting duration ..........................................................Page 8
Adjusting the sensitivity of the sensor ...........................................Page 8
Setting the daylight level ..............................................................Page 8
Aligning the motion detector ........................................................Page 8
Cleaning and Care .............................................................Page 9
Disposal ......................................................................................Page 9
Warranty ...................................................................................Page 9
3 GB/IE
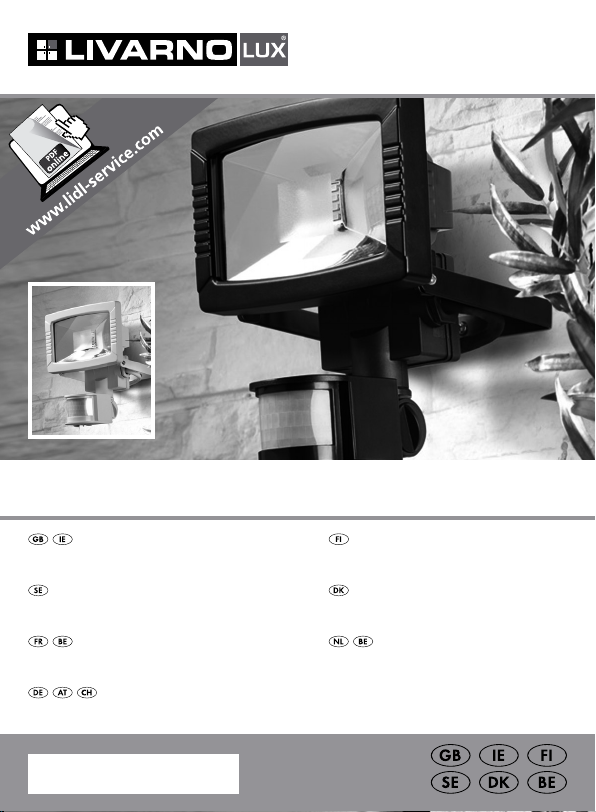
LED Spotlight
Technical Data
Intended use
The LED spotlight with motion
detector is intended for automatic
lighting in outdoor areas. This device
is solely intended for private use.
Parts description
1
Spot
2
Connection box
3
Cable gland
4
Mounting stirrup
5
Hinge joint
6
Locking screw (motion detector)
7
Motion detector
8
Rotary control SENS (sensitivity)
9
Rotary control TIME
(switched on duration)
10
Rotary control LUX
(light sensitivity)
11
Terminal block
Operating voltage: 230 V∼ 50 Hz,
max. 8.5 W
LEDs: 12 x LED x
3.27 V
,
0.5 W (LEDs
non-replaceable)
Dimming switch: Adjustable
from 10 lx–
20,000 lx
Light on time: adjustable
between
approx.10 s –
4 min
Protection class:
/ II
Protection class: IP44 (splash
water proof)
Dimensions
(HxWxD): approx. 197 x
149 x 120 mm
Weight: approx. 675 g
Model no.: Z31710A
(black),
Z31710B
(white)
4 GB/IE
Scope of delivery
1 LED spot with motion detector
2 Wall plugs (Ø 6 mm)
2 Screws
1 Set of mounting and operating
instructions
General safety
instructions
Before using the product, please
familiarise yourself with all of the
safety information and instructions
for use! When passing this product
on to others, please also include
all the documents!
DANGER TO LIFE
AND ACCIDENT
HAZARD
TODDLERS AND SMALL
CHILDREN! Never leave chil-
dren unattended with the packaging material. The packaging
material represents a danger of
suffocation. Children frequently
underestimate the dangers.
Please keep children away
from the device at all times.
FOR
This appliance may be used by
children age 8 years and up, as
well as by persons with reduced
physical, sensory or mental
capacities, or lacking experience
and / or knowledge, so long as
they are supervised or instructed
in the safe use of the appliance
and understand the associated
risks. Children should not be
allowed to play with the
appliance. Cleaning and user
maintenance should not be
performed by children without
supervision.
Danger to life by
electric shock
Always check lamp for damage
before connecting it to power.
Never use the light if it shows
any signs of damage.
Prior to installation, verify that
the mains voltage on site corresponds with the operating
voltage required for the light
(230 V∼ 50 Hz). Otherwise do
not install the light.
5 GB/IE

CAUTION! DANGER OF
BURN INJURIES! To prevent
burns, verify the light is switched
off and has cooled down for
at least 15 min before touching
it. Lamps can become very hot.
Only intended for installations
out of normal reach.
This product does not contain
any parts that can be serviced
by the user. The LEDs cannot
be replaced.
Before installation
Important: The electrical con-
nection must be established by a
qualified electrician or a person
trained to perform electrical installations. This person must be familiar
with the properties of the light and
the connection regulations.
Before installation ensure that
the circuit, to which the light will
be connected, is not energised.
To do so, remove the fuse or
switch off the circuit breaker in
the fuse box (0 position).
Use the voltage tester to verify
the de-energised status.
The included mounting material
is suitable for ordinary solid
concrete or masonry construction. Check which mounting
material is suitable for your
chosen mounting surface. If
necessary, seek expert advice.
Installation
When selecting the mounting location, pay attention to the following:
Make sure that the spot 1
illuminates the desired area. You
can move the spot vertically.
Make sure the motion detector
7
covers the desired area. The
motion detector has a maximum
coverage range of 12 m, with a
coverage angle of about 180°
(depending on the mounting
height – a height of 2.50 m is
ideal) (Fig. D).
Make sure the motion detector
is not illuminated at night by
street lighting. This can influence
its functioning.
6 GB/IE

During mounting, proceed as
described below:
Hold the mounting bracket 4
so that it is horizontal (possibly
with a spirit level) against the
wall and mark the fastening
holes.
Now drill the fastening holes
(Ø 6 mm) and push the wall
plugs into the drill holes (Fig. A).
Secure the mounting bracket
onto the wall using the screws
provided.
Open the connection box 2
after you have released the lid
of the connection box with a
cross head screwdriver.
Run the flexible supply line
through the cable gland
3
and into the connection box.
Fix the connection cable by
turning the nut of the cable
gland.
Connect it with the connection
terminals in the connection box.
Pay attention to the markings
on the terminals
11
(L for live
and N for neutral) (Fig. C).
Close the connection box.
Align the spot into the desired
direction. For this, you may need
to slacken the screw of the hinge
5
joint
. After alignment, tighten
the screw of the hinge joint
again, to ensure a secure hold.
Reinsert the fuse or switch the circuit
breaker back on. Your light is now
ready to use.
Start-up
Adjusting the
motion detector
Depending on the preadjustments
of the motion detector
1
will switch itself on for a certain
period of time as soon as the motion
detector detects movement. These
preadjustments are made using the
three controllers on the underside
of the motion detector (Fig. B).
7
, the spot
7 GB/IE

Setting the lighting
duration
Setting the daylight
level
Turn the rotary control TIME 9
clockwise to increase the duration of the illumination. The
lighting duration can be adjusted
within a time window of approx.
10 seconds to 4 minutes.
Adjusting the sensi-
tivity of the sensor
Turn the rotary control SENS
8
clockwise to increase the
sensitivity of the sensor.
Note: The motion detector
responds to heat radiation. When
outdoor temperatures are low,
it is more sensitive to body heat
than when outdoor temperatures
are warm. Be sure to regulate
the sensitivity of the sensor
over the course of the year.
Turn the rotary control LUX 10
to increase the daylight level:
In the
position, the motion
detector only reacts at night
(at approx. 10 lx). In the
position, the motion detector
also responds at daylight levels,
as long as about 20,000 lx are
not exceeded.
Aligning the motion
detector
Note: Perform this adjustment at
twilight.
Slacken the locking screw 6.
Turn the rotary control LUX 10
to position
Align the motion detector 7
into the central region of the
desired coverage area.
Move about through the cover-
age area until you are satisfied
with the response characteristics
of the motion detector. To find
the proper orientation, change
.
8 GB/IE
the position of the rotary control
SENS or the orientation of the
motion detector.
Note: Please note that the
motion detector primarily detects
movements transverse to the
motion detector. If you move
directly towards the motion
detector, it cannot detect this
movement.
When you have aligned the
motion detector satisfactorily,
re-tighten the fastening screws
to fix the adjustment.
Turn the rotary control LUX to
the desired position. These can
be determined during the dawn
or twilight hours during which
the spotlight
Slowly turn the rotary control
LUX clockwise until it reacts to
movement within the coverage
area.
1
should respond.
Cleaning and Care
Before cleaning, remove the
fuse or switch off the circuit
breaker at the fuse box.
Never immerse the product in
water or other liquids. Otherwise
the product can be damaged.
Clean the spotlight with a
lint-free, slightly moist cloth and
mild cleaning agent.
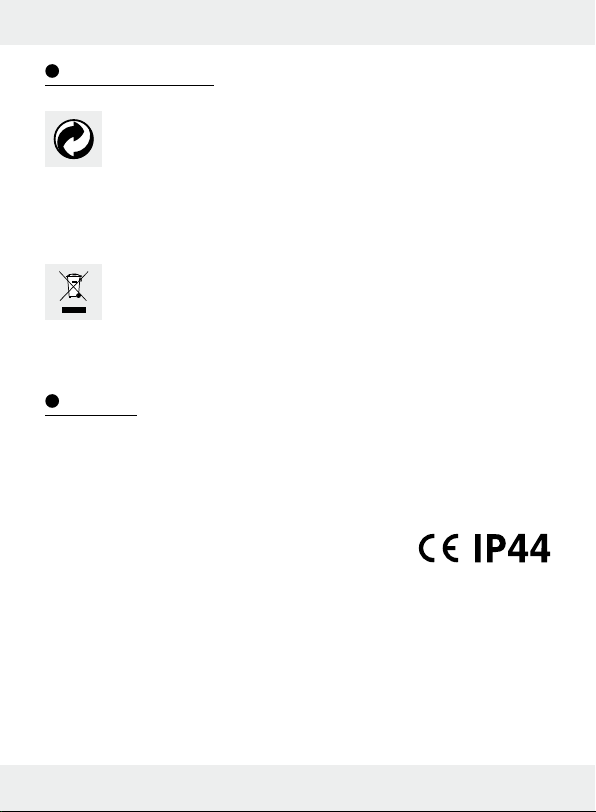
Disposal
The packaging is made of
environmentally-friendly
materials, which may be
disposed of through your
local recycling facilities.
Contact your municipal
authorities for details on
how to dispose of your
worn-out product.
Warranty
The product has been manufactured
according to strict quality guidelines
and meticulously examined before
delivery. In the event of product
defects, you have legal rights against
the retailer of this product. Your
statutory rights are not limited in
9 GB/IE

any way by our warranty detailed
below.
This appliance has a warranty of 3
years from the date of purchase. The
warranty period begins on the date
of purchase. Please retain the original
receipt safely. This document is required as your proof of purchase.
Should this device show any fault
in materials or manufacture within
3 years from date of purchase, it
will be repaired or replaced - at
our choice - by us free of charge.
This warranty becomes void if the
device has been damaged or
improperly used or maintained.
The warranty applies to faults in
material or manufacture. This guarantee does not apply to product
parts which are subject to normal
wear and tear and can be regarded
as wearing parts, (e. g. batteries)
or for damage to breakable parts,
e.g., switch, rechargeable batteries,
or parts which are made of glass.
EMC
10 GB/IE

Määräystenmukainen käyttö .................................. Sivu 12
Osien kuvaus .......................................................................... Sivu 12
Tekniset tiedot ........................................................................Sivu 12
Toimituksen sisältö .............................................................Sivu 12
Yleiset turvallisuusohjeet ............................................. Sivu 13
Ennen asennusta .................................................................. Sivu 14
Asennus ....................................................................................... Sivu 14
Käyttöönotto
Liiketunnistimen säätäminen...........................................................Sivu 15
Valaisuajan säätäminen ................................................................ Sivu 15
Anturin herkkyyden säätäminen .................................................... Sivu 15
Päivänvalon määrän säätäminen..................................................Sivu 16
Liiketunnistimen kohdistaminen ......................................................Sivu 16
Puhdistus ja hoito ................................................................ Sivu 16
Hävittäminen .......................................................................... Sivu 17
Takuu ............................................................................................. Sivu 17
11 FI
LED-ulkovalaisin
Määräystenmukai-
nen käyttö
Liiketunnistimella varustettu LEDvalaisin on tarkoitettu ulkotilojen
automaattiseen valaisuun. Tuote on
tarkoitettu ainoastaan yksityiskäyttöön.
Osien kuvaus
1
Spottilamppu
2
Liitäntärasia
3
Kaapelin ruuvikiinnitys
4
Asennuskannake
5
Kiertonivel
6
Kiinnitysruuvi (liiketunnistin)
7
Liiketunnistin
8
Kääntösäädin SENS
(herkkyys)
9
Kääntösäädin TIME
(kytkentäaika)
10
Kääntösäädin LUX
(valoherkkyys)
11
Sokeripalaliitin
Tekniset tiedot
Käyttöjännite: 230 V∼ 50 Hz,
kork. 8,5 W
LEDit: 12 x LED à
3, 27 V
,
0,5 W (LEDejä
ei voi vaihtaa)
Himmennyskytkin: säätöalue
10 lx – 20 000 lx
Valaisuaika: säädettävissä
n. 10 s–4 min
Suojaluokka:
/ II
Suojaustapa: IP44 (roiskevesi-
suojattu)
Mitat (K x L x S): n. 197 x 149 x
120 mm
Paino: n. 675 g
Mallinro:
Z31710A (musta),
Z31710B
(valkoinen)
Toimituksen sisältö
1 LED-valaisin liiketunnistimella
2 tulppaa (Ø 6 mm)
2 ruuvia
1 asennus- ja käyttöohje
12 FI

Yleiset turvallisuusohjeet
Tutustu ennen tuotteen käyttöä
huolellisesti kaikkiin käyttö- ja
turvallisuusohjeisiin. Anna kaikki
ohjeet tuotteen mukana mahdolliselle uudelle omistajalle.
HENGEN- JA
TAPATURMANVAARA LAPSILLE!
Älä koskaan jätä lapsia yksin
pakkausmateriaalin kanssa.
Pakkausmateriaali voi aiheuttaa
tukehtumisen. Lapset aliarvioivat useimmiten vaaratilanteet.
Pidä tuote aina lasten ulottumattomissa.
Laitetta voivat käyttää 8 vuotta
täyttäneet lapset sekä henkilöt,
jotka ovat fyysisiltä tai psyykkisiltä kyvyiltään tai aisteiltaan
rajoittuneita tai joilla ei ole kokemusta tai tietoa laitteen käytöstä, jos he käyttävät laitetta
valvonnan alaisina tai heitä on
opastettu laitteen turvallisessa
käytössä ja he ovat tietoisia
laitteeseen liittyvistä vaaroista.
Lapset eivät saa leikkiä
laitteella. Lapset eivät saa puhdistaa tai huoltaa laitetta ilman
valvontaa.
Hengenvaara
sähköiskun vuoksi
Tarkista aina ennen sähköverk-
koon liittämistä, ettei tuotteessa
ole vaurioita. Älä koskaan käytä
valaisinta, jos olet havainnut
siinä jotain vikaa.
Varmista ennen asennusta, että
käytettävissä oleva verkkojännite
on yhdenmukainen valaisimen
käyttöjännitteen kanssa
(230 V∼ 50 Hz). Ellei näin ole,
älä asenna valaisinta.
VARO! PALOVAMMAN
VAARA! Varmistaudu, että
valaisin on sammutettu ja jäähtynyt vähintään 15 minuuttia
ennen kuin kosketat sitä. Lamput voivat tulla erittäin kuumiksi
käytön aikana.
Tarkoitettu asennettavaksi kos-
ketusetäisyyden ulkopuolelle.
Tuote ei sisällä osia, jotka käyt-
täjä voisi itse huoltaa. LEDejä
ei voi vaihtaa uusiin.
13 FI
Ennen asennusta
Tärkeää: Sähköliitännät saa
tehdä vain koulutuksen saanut
sähköasentaja tai sähköasennuksiin
perehtynyt henkilö. Heidän tulee
tietää valaisimen ominaisuuksista
ja liitäntämääräyksistä.
Varmista ennen asennusta,
ettei valaisimeen liitettävässä
johdossa ole jännitettä. Poista
tätä varten sulake tai kytke
sulakekotelon suojakytkin pois
päältä (0-asento).
Tarkista jännitteettömyys jänni-
temittarilla.
Toimitukseen kuuluva asennus-
materiaali soveltuu tavalliseen
kiinteään seinään. Ota selvää
myös millainen asennusmateriaali soveltuu valitsemaasi asennuspintaan. Kysy tarvittaessa
neuvoa alan ammattilaiselta.
Asennus
Huomioi seuraavat asiat asennuspaikan valinnassa:
Varmista, että spottilamppu 1
valaisee halutun alueen. Voit
liikuttaa lamppua pystysuunnassa.
Varmista, että liiketunnistin 7
ulottuu halutulle alueelle. Liiketunnistimen tunnistusalue on
kork. 12 metriä n. 180° tunnistuskulmassa (asennuskorkeudesta riippuen – paras korkeus
on 2,50 m) (kuva D).
Varmista, etteivät katuvalot
valaise liiketunnistinta yöllä.
Tämä voi vaikuttaa liiketunnistimen toimintaan.
Suorita asennus seuraavasti:
Pidä asennuskannaketta 4
vaakasuorassa asennossa
(tarvittaessa vesivaa´an avulla)
seinää vasten ja merkitse
kiinnitysreiät.
Poraa kiinnitysreiät (Ø 6 mm)
ja aseta tulpat poranreikiin
(kuva A).
Kiinnitä asennuskannake toimi-
tukseen kuuluvilla ruuveilla.
Avaa liitäntärasia 2 sen jäl-
keen kun olet saanut irrotettua
liitäntärasian kannen ristipäisellä ruuvimeisselillä.
14 FI
Pujota taipuisa syöttöjohto kaa-
pelin ruuvikiinnityksen läpi
liitäntärasiaan. Kiinnitä liitäntäkaapeli ruuvikiinnityksen mutteria kääntämällä.
Yhdistä se liitäntärasiassa
oleviin liitospinteisiin. Huomioi
liittimien
teiseen johtimeen, N nollajohtimeen) (kuva C).
Sulje liitäntärasia.
Kohdista spottilamppu haluttuun
suuntaan. Tarvittaessa löysää
hieman kiertonivelen
via. Kiristä kiertonivelen ruuvia
kohdistamisen jälkeen, jotta
tukeva kiinnitys on taattu.
Aseta sulake jälleen sisään tai
kytke suojakytkin jälleen päälle.
Valaisin on nyt käyttövalmis.
11
merkinnät (L jännit-
3
5
ruu-
Käyttöönotto
Liiketunnistimen
säätäminen
Liiketunnistimeen 7 tehdyistä esiasetuksista riippuen spottilamppu
kytkeytyy tietyksi ajaksi päälle heti
kun se tunnistaa liikkeen. Nämä
esiasetukset tehdään liiketunnistimen pohjassa sijaitsevilla kolmella
kääntösäätimellä (kuva B).
Valaisuajan
säätäminen
Käännä kääntösäädintä TIME
9
myötäpäivään, kun haluat
pidentää valaisuaikaa. Valaisuajan voit säätää n. 10 sekunnin ja 4 minuutin välille.
Anturin herkkyyden
säätäminen
Käännä kääntösäädintä
8
SENS
haluat nostaa anturin herkkyyttä.
Huomautus: Liiketunnistin
reagoi lämpösäteilyyn. Se reagoi viileällä säällä herkemmin
kehon lämpötilaan kuin lämpimällä säällä. Säädä anturin
herkkyyttä tarvittaessa aina
vuodenajan mukaan.
1
myötäpäivään, kun
15 FI

Päivänvalon mää-
rän säätäminen
Käännä kääntösäädintä LUX 10
myötäpäivään, kun haluat
nostaa päivänvalon määrää:
liiketunnistin reagoi
nossa vain yöllä (n. 10 lx).
Asennossa
reagoi myös päivänvalossa
niin kauan, kun n. 20 000 luksin raja ei ylity.
asen-
liiketunnistin
Liiketunnistimen
kohdistaminen
Huomautus: tämä säätö tulisi
suorittaa hämärässä.
Huomautus: huomioi, että
liiketunnistin tunnistaa etupäässä
poikittaissuunnassa tulevan
liikkeen. Jos liikut kohtisuoraan
liiketunnistinta kohden, se ei
tunnista liikettä.
Sen jälkeen kun olet kohdista-
nut liiketunnistimen, kiristä
jälleen kiinnitysruuvi, jotta
tekemäsi asetukset pysyvät.
Käännä kääntösäädintä LUX
haluttuun asentoon. Tee säätö
hämärän aikana, jolloin spottilampun
Käännä kääntösäädintä LUX
hitaasti myötäpäivään, kunnes
se reagoi liikkeeseen tunnistusalueella.
1
tulee reagoida.
Irrota kiinnitysruuvi 6.
Käännä kääntösäädintä LUX 10
asentoon
Kohdista liiketunnistin 7 halutun
tunnistusalueen keskikohtaan.
Liiku tunnistusalueella, kunnes
olet tyytyväinen liiketunnistimen
reagoimiseen. Muuta tätä
varten kääntösäätimen SENS
asentoa tai liiketunnistimen
kohdistusta.
16 FI
.
Puhdistus ja hoito
Poista ennen puhdistusta
sulake tai kytke johdon turvakytkin pois päältä.
Älä koskaan upota tuotetta
veteen tai muihin nesteisiin.
Muutoin tuote voi vahingoittua.
Puhdista valaisin kevyesti kostu-
tetulla, nukattomalla liinalla ja
miedolla puhdistusaineella.
Hävittäminen
Pakkaus on valmistettu
ympäristöystävällisistä
materiaaleista, jotka
voidaan hävittää paikallisen kierrätyspisteen
kautta.
Kysy lisätietoja käytöstä
poistetun tuotteen hävittämisestä kunnan- /
kaupunginvirastosta.
Takuu
Laite on valmistettu huolellisesti
tiukkojen laatudirektiivien mukaan
ja tarkistettu huolella ennen toimitusta. Jos tuote on virheellinen,
sinulla on ostajana lakisääteiset oikeudet esittää vaatimuksia tuotteen
myyjää kohtaan. Seuraavassa esitetty takuu ei rajoita lakisääteisiä
oikeuksiasi.
alkuperäinen kassakuitti. Se toimii
todisteena tehdystä ostoksesta.
Jos kolmen vuoden sisällä tuotteen
ostopäivästä alkaen tuotteesta
löytyy materiaali- tai valmistusvirhe,
korjaamme tuotteen ilmaiseksi tai
toimitamme tilalle uuden tuotteen
harkintamme mukaan. Takuu raukeaa, jos tuote on vioittunut asiattoman käytön tai huollon vuoksi.
Takuu koskee materiaali- ja valmistusvirheitä. Takuu ei kata tuotteen
osia, jotka kuluvat normaalisti
(esim. paristot) ja joita voidaan sen
vuoksi pitää kuluvina osina eikä
myöskään rikkoutuvia osia esim.
kytkimiä, akkuja tai lasista valmistettuja osia.
EMC
Laitteen takuu on 3 vuotta ostopäivästä. Takuun voimassaolo alkaa
tuotteen ostopäivästä. Säilytä aina
17 FI

Ändamålsenlig användning .................................... Sidan 19
Beskrivning av delarna .............................................. Sidan 19
Tekniska specifikationer ............................................ Sidan 19
Leveransomfattning ....................................................... Sidan 19
Allmän säkerhetsinformation ................................ Sidan 20
Före montering ................................................................... Sidan 21
Montering ............................................................................... Sidan 21
Idrifttagning
Inställning av rörelsevakten ........................................................ Sidan 22
Inställning av lystid ...................................................................... Sidan 22
Inställning av sensorns känslighet .............................................. Sidan 22
Inställning av dagsljus ................................................................. Sidan 23
Rikta rörelsevakten ...................................................................... Sidan 23
Rengöring och skötsel .................................................. Sidan 24
Avfallshantering ............................................................... Sidan 24
Garanti ...................................................................................... Sidan 24
18 SE
LED-strålkastare
för utomhusbruk
Ändamålsenlig
användning
LED-lampan med rörelsevakt är
avsedd som automatisk belysning
utomhus. Apparaten är endast
avsedd för privat användning.
Beskrivning
av delarna
1
Spotlight
2
Kopplingsdosa
3
Kabelförskruvning
4
Monteringsbygel
5
Vridled
6
Låsskruv (rörelsevakt)
7
Rörelsevakt
8
Vridreglage SENS (känslighet)
9
Vridreglage TIME (belysningstid)
10
Vridreglage LUX (ljuskänslighet)
11
Klämma (sockerbit)
Tekniska
specifikationer
Driftspänning: 230 V∼ 50 Hz,
max. 8,5 W
Lysdioder: 12 x LED à
3, 27 V
(lysdioder ej
utbytbara)
Dimmer: kan ställas in från
10 lx – 20.000 lx
Lystid: kan ställas in från
ca 10 s–4 min
Skyddsklass:
Skyddsart: IP44 (stänkvatten-
skyddad)
Mått (HxBxD): ca 197 x 149 x
120 mm
Vikt: ca 675 g
Modell-nr.: Z31710A (svart),
Z31710B (vit)
Leveransomfattning
1 LED-spotlight med rörelsevakt
2 pluggar (Ø 6 mm)
2 skruvar
1 monterings- och bruks anvisning
, 0,5 W
/ II
19 SE
 Loading...