


 Loading...
User’s Guide: Introduction

Table of contents
1Introduction
1.1 |
Welcome ..................................................................................................................... |
..................... 1-2 |
1.2 |
User's Guides .................................................................................................................................. |
1-3 |
|
Booklet manuals ................................................................................................................................. |
1-3 |
|
User's guides included in User's Guide CD-ROM.............................................................................. |
1-3 |
1.3 |
Notations and symbols used in this manual................................................................................. |
1-4 |
|
Procedural instruction......................................................................................................................... |
1-4 |
|
Symbols used in this manual .............................................................................................................. |
1-4 |
|
Product and key names ...................................................................................................................... |
1-4 |
|
Notations of application names .......................................................................................................... |
1-4 |
1.4 |
Safety information........................................................................................................................... |
1-5 |
|
Warning and precaution symbols ....................................................................................................... |
1-5 |
|
Meaning of symbols............................................................................................................................ |
1-5 |
1.5 |
Legal restrictions on reproduction.............................................................................................. |
1-10 |
1.6 |
Regulation notices ........................................................................................................................ |
1-11 |
|
For EU member states only .............................................................................................................. |
1-11 |
2Before Using This Function
2.1 |
CD-ROM supplied with this machine ............................................................................................ |
2-2 |
|
Driver & Utilities CD-ROM................................................................................................................... |
2-2 |
|
User's Guide CD-ROM ....................................................................................................................... |
2-2 |
2.2 |
Installation location and environment........................................................................................... |
2-3 |
2.2.1 |
Installation location ............................................................................................................................. |
2-3 |
|
Front view ........................................................................................................................................... |
2-3 |
|
Right view ........................................................................................................................................... |
2-3 |
|
Right view (with optional devices installed) ........................................................................................ |
2-3 |
2.2.2 |
Installation environment ...................................................................................................................... |
2-4 |
3About This Machine
3.1 |
Checking the name of each part ................................................................................................... |
3-2 |
|
Front side ............................................................................................................................................ |
3-2 |
|
Rear side ............................................................................................................................................. |
3-5 |
3.2 |
Checking the option configuration................................................................................................ |
3-6 |
|
List of optional components ............................................................................................................... |
3-6 |
|
Front view (with optional devices installed) ........................................................................................ |
3-7 |
3.3 |
How to use the Finisher.................................................................................................................. |
3-8 |
4Turning the Power On or Off
4.1 |
About power supply........................................................................................................................ |
4-2 |
4.2 |
Turning the Power Switch ON or OFF........................................................................................... |
4-3 |
4.3 |
Using the Power key....................................................................................................................... |
4-4 |
|
When using the Power key as a Power Save key............................................................................... |
4-4 |
|
When using the Power key as a Sub Power OFF key ........................................................................ |
4-5 |
5Loading the Original
5.1 |
Loading the original into the ADF.................................................................................................. |
5-2 |
|
Original available for ADF.................................................................................................................... |
5-2 |
|
Loading the original into the ADF ....................................................................................................... |
5-3 |
5.2 |
Loading the original onto the Original Glass................................................................................ |
5-4 |
|
Original available on the Original Glass .............................................................................................. |
5-4 |
|
Loading the original onto the Original Glass....................................................................................... |
5-4 |
[Introduction] |
Contents-1 |

6Loading Paper
6.1 |
Paper ................................................................................................................................................ |
6-2 |
6.1.1 |
Checking the available paper types.................................................................................................... |
6-2 |
6.1.2 |
Checking the available paper sizes .................................................................................................... |
6-3 |
6.1.3 |
Precautions for correct operations ..................................................................................................... |
6-4 |
|
Unavailable paper ............................................................................................................................... |
6-4 |
|
Storing paper ...................................................................................................................................... |
6-4 |
6.2 |
Loading paper into the Manual Feed Tray.................................................................................... |
6-5 |
|
How to load paper into the Manual Feed Tray ................................................................................... |
6-5 |
|
Loading postcards .............................................................................................................................. |
6-6 |
|
Loading envelopes.............................................................................................................................. |
6-7 |
6.3 |
Loading paper into Tray 1 .............................................................................................................. |
6-8 |
6.4 |
Loading paper into Tray 2/3 ......................................................................................................... |
6-10 |
7Control Panel
7.1 |
Names and functions of Control Panel keys ................................................................................ |
7-2 |
7.2 |
Changing the angle of the Control Panel...................................................................................... |
7-4 |
7.3 |
Touch Panel..................................................................................................................................... |
7-5 |
7.3.1 |
Operating the Touch Panel ................................................................................................................. |
7-5 |
|
Tap ...................................................................................................................................................... |
7-5 |
|
Flick..................................................................................................................................................... |
7-5 |
7.3.2 |
Displaying the Keypad ........................................................................................................................ |
7-5 |
7.3.3 |
Switching the entry or selection screen.............................................................................................. |
7-6 |
7.3.4 |
Precautions on using the Touch Panel ............................................................................................... |
7-6 |
7.4 |
Entering characters ........................................................................................................................ |
7-7 |
7.5 |
Screen layout................................................................................................................................... |
7-8 |
7.5.1 |
Main Menu .......................................................................................................................................... |
7-8 |
7.5.2 |
Main screen......................................................................................................................................... |
7-9 |
7.5.3 |
Icon types ........................................................................................................................................... |
7-9 |
|
Icons indicating the status of this machine ........................................................................................ |
7-9 |
|
Icons to change to selection screen ................................................................................................. |
7-10 |
7.6 |
Changing the function assigned to a Register key (for administrators).................................. |
7-11 |
8Viewing Active Job and Job Logs
Displaying the Job List screen............................................................................................................ |
8-2 |
Viewing the active job ......................................................................................................................... |
8-2 |
Viewing job logs .................................................................................................................................. |
8-3 |
9Login Screen
|
Logging in to this machine.................................................................................................................. |
9-2 |
|
Performing user authentication (MFP authentication)......................................................................... |
9-2 |
|
Performing user authentication (external server authentication) ........................................................ |
9-3 |
|
Performing account track ................................................................................................................... |
9-5 |
10 Specifications |
|
|
10.1 |
Checking the specifications of this machine ............................................................................. |
10-2 |
10.2 |
Checking the specifications of optional devices ....................................................................... |
10-4 |
|
Paper Feed Unit PF-P13 ................................................................................................................... |
10-4 |
|
Fax Kit FK-512 .................................................................................................................................. |
10-4 |
|
Finisher FS-P03 ................................................................................................................................ |
10-5 |
|
Authentication Unit AU-201 .............................................................................................................. |
10-5 |
10.3 |
Standard operating life of consumables and periodic replacement parts.............................. |
10-6 |
[Introduction] |
Contents-2 |

|
|
|
|
|
|
|
|
11 |
Trademarks and copyrights |
|
|
|
Trademark acknowledgements......................................................................................................... |
11-2 |
|
|
OpenSSL Statement ......................................................................................................................... |
11-2 |
|
|
OpenSLP License ............................................................................................................................. |
11-4 |
|
|
Bonjour.............................................................................................................................................. |
11-4 |
|
|
NetSNMP License............................................................................................................................. |
11-6 |
|
|
Kerberos............................................................................................................................................ |
11-8 |
|
|
WPA Supplicant .............................................................................................................................. |
11-11 |
|
|
Copyright ........................................................................................................................................ |
11-11 |
|
|
Note ................................................................................................................................................ |
11-11 |
|
|
SOFTWARE LICENSE AGREEMENT.............................................................................................. |
11-12 |
|
|
About Adobe Color Profile .............................................................................................................. |
11-13 |
|
|
ICC Profile for TOYO INK Standard Color on Coated paper (TOYO Offset Coated 3.0)................ |
11-14 |
|
|
DIC STANDARD COLOR PROFILE LICENSE AGREEMENT.......................................................... |
11-15 |
|
|
Our Concern for Environmental Protection..................................................................................... |
11-16 |
|
12 |
Index |
|
|
[Introduction] |
Contents-3 |

1
Introduction

1.1 |
|
|
|
|
Welcome |
1 |
||||||||||||||||||||||||||||||||||||||||||||||||||||||||||||||||||||||||||||||||||||||||||||||||
|
|
|
|
|
|
|
|
|
|
|
|
|
|
|
|
|
|
|
|
|
|
|
|
|
|
|
|
|
|
|
|
|
|
|
|
|
|
|
|
|
|
|
|
|
|
|
|
|
|
|
|
|
|
|
|
|
|
|
|
|
|
|
|
|
|
|
|
|
|
|
|
|
|
|
|
|
|
|
|
|
|
|
|
|
|
|
|
|
|
|
|
|
|
|
|
|
|
|
|
|
|
|
|
|
|
|
|
|
|
|
|
|
|
|
|
|
|
|
|
|
|
|
|
|
|
|
|
|
|
|
|
|
|
|
|
|
|
|
|
|
|
|
|
|
|
|
|
|
|
|
|
|
|
|
|
|
|
|
|
|
|
|
|
|
|
|
|
|
|
|
|
|
|
|
|
|
|
|
|
|
|
|
|
|
|
|
|
|
|
|
|
|
|
|
|
|
|
|
|
|
|
|
|
|
|
|
|
|
|
|
|
|
|
|
|
|
|
|
|
|
|
|
|
|
|
|
|
|
|
|
|
|
|
|
|
|
|
|
|
|
|
|
|
|
|
|
|
|
|
|
|
|
|
|
|
|
|
|
|
|
|
|
|
|
|
|
|
|
|
|
|
|
|
|
|
|
|
|
|
|
|
|
|
|
|
|
|
|
|
|
|
|
|
|
|
|
|
|
|
|
|
|
|
|
|
|
|
|
1Introduction
1.1Welcome
Thank you for purchasing this machine.
To obtain maximum performance from this product and to learn how to use it effectively, please read this User's Guide as necessary.
[Introduction] |
1-2 |

1.2 |
User's Guides |
|
|
1 |
|
|
|
|
|
|
|
|
|
1.2 |
|
User's Guides |
|
|
|
|
|
|
Booklet manuals |
|
|
|
|
|
|
Manual title |
|
Overview |
||
|
|
|
||||
|
|
|
|
|
||
|
|
[Quick Start Guide] |
|
This guide describes how to perform basic operations of this |
||
|
|
|
|
machine and configure initial settings. |
||
|
|
|
|
|
||
|
|
[Safety Information Guide] |
|
This guide describes notes and precautions that should be fol- |
||
|
|
|
|
lowed to use this machine. |
||
|
|
|
|
Please be sure to read this manual before using this machine. |
||
|
|
|
|
|
|
|
User's guides included in User's Guide CD-ROM
Manual title |
Overview |
|
|
[User's Guide: Introduction] |
This guide contains information that is useful to know before be- |
|
ginning to operate this machine, such as the name of each part |
|
and how to turn the power on and off, use the Control Panel, |
|
and load an original or paper. |
|
|
[User's Guide: Print Functions] |
This guide describes how to install the printer driver as well as |
|
basic usage and applications. |
|
|
[User's Guide: Copy Functions] |
This guide describes various methods to make copies. |
|
|
[User's Guide: Scan Functions] |
This guide describes scan transmission operations and neces- |
|
sary preparations. |
|
You can scan a paper document, convert it to digital data, and |
|
send the result to the computer or server. |
|
|
[User's Guide: Fax Functions] |
This guide describes fax operations and necessary prepara- |
|
tions. |
|
|
[User's Guide: Network Fax Func- |
This guide describes fax (Internet fax) operations using the net- |
tions] |
work and necessary preparations. |
|
|
[User's Guide: PC-FAX Functions] |
This guide describes PCFax operations and necessary prepa- |
|
rations. |
|
You can send the original data created on the computer by fax |
|
directly without printing it out to paper. |
|
|
[User's Guide: Advanced Functions] |
This guide describes how to install optional license kits and |
|
functions that can be used by installing the license kits. |
|
|
[User's Guide: Maintenance/Trouble- |
This guide describes how to replace consumables, clean this |
shooting] |
machine, and perform troubleshooting. |
|
|
[User's Guide: Description of Utility |
This guide describes Utility settings such as [User Settings] and |
Keys] |
[Administrator Settings] for this machine. |
|
|
[User's Guide: Applied Functions] |
This guide describes the special usages of this machine such as |
|
how to use Web Connection, manually install the printer driver, |
|
configure print settings using Linux, and use the authentication |
|
unit. |
|
|
[Introduction] |
1-3 |

1.3 |
Notations and symbols used in this manual |
1 |
|
|
|
1.3Notations and symbols used in this manual
Procedural instruction
0 This check mark symbol shows a precondition of a procedure.
1This format number "1" represents the first step.
2This format number represents the order of consecutive steps.
% This symbol indicates a supplementary explanation of a procedural instruction.
Symbols used in this manual
7WARNING
-This symbol indicates that a failure to heed the instructions may lead to death or serious injury.
7CAUTION
-This symbol indicates that a failure to heed the instructions may lead to mishandling that may cause injury or property damage.
NOTICE
This symbol indicates a risk that may result in damage to this machine or documents.
Follow the instructions to avoid property damage.
 Tips
Tips
This symbol indicates supplemental information of a topic as well as options required to use a function.
dReference
This symbol indicates reference functions related to a topic.
 Related setting
This shows the settings related to a particular topic for any user.
 Related setting (for the administrator)
This shows the settings related to a topic only for administrators.
Product and key names
Notations used |
Description |
in this manual |
|
|
|
[ ] |
An item enclosed in brackets [ ] indicates a key name on the Touch Panel or com- |
|
puter screen, or the name of a user's guide. |
|
|
Bold text |
This presents a key name, part name, product name, or option name on the Control |
|
Panel. |
|
|
Notations of application names
This manual describes application names as shown below.
Application name |
Notations used in this manual |
|
|
PageScope Direct Print |
Direct Print |
|
|
PageScope Web Connection |
Web Connection |
|
|
PageScope Data Administrator |
Data Administrator |
|
|
[Introduction] |
1-4 |

1.4 |
Safety information |
1 |
|
|
|
1.4Safety information
This section contains detailed instructions on the operation and maintenance of this machine. To achieve optimum utility of this device, all operators should carefully read and follow the instructions in this manual.
Please read the following section before connecting the machine to the supply. It contains important information related to user safety and preventing equipment problems.
Please keep this manual in a handy place near the machine.
Make sure you observe all of the precautions appear in each section of this manual.
Reference
-Some parts of the contents of this section may not correspond with the purchased product.
Warning and precaution symbols
The following indicators are used on the warning labels or in the manuals to categorize the level of safety warnings.
WARNING |
Ignoring this warning could cause serious injury or even death. |
|
|
|
|
CAUTION |
Ignoring this caution could cause injury or damage to property. |
|
|
|
|
Meaning of symbols
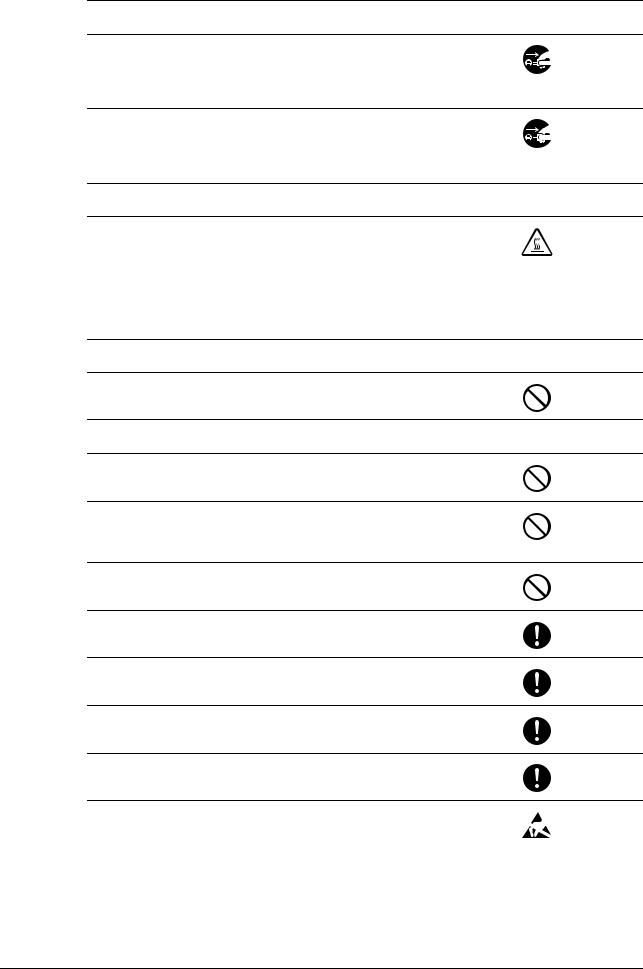
A triangle indicates a danger against which you should take precaution.
 This symbol warns against cause burns.
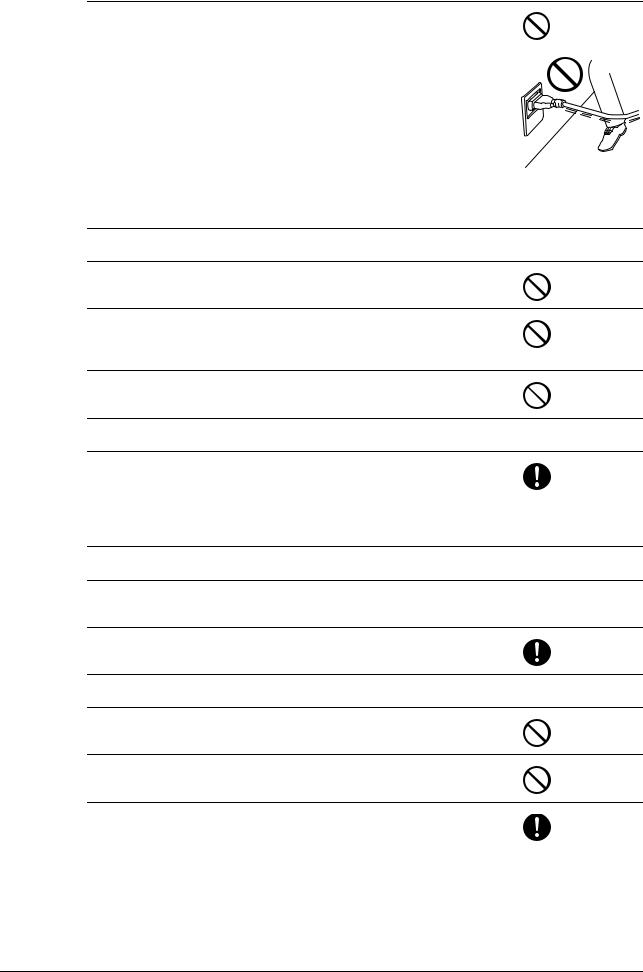
A diagonal line indicates a prohibited course of action.
 This symbol warns against dismantling the device.
A solid circle indicates an imperative course of action.
 This symbol indicates you must unplug the device.
Disassemble and modification
 WARNING
•Do not modify this product, as a fire, electrical shock, or breakdown could result. If the product employs a laser, the laser beam source could cause blindness.
•Do not attempt to remove the covers and panels which have been fixed to the product. Some products have a high-voltage part or a laser beam source inside that could cause an electrical shock or blindness.
Power cord
 WARNING
•Use only the power cord supplied in the package. If a power cord is not supplied, only use the power cord and plug that is specified in POWER CORD INSTRUCTION. Failure to use this cord could result in a fire or electrical shock.
•Do not use the power cord other than being supplied in the package. If a power cord is not supplied, only use the power cord and plug that is specified in POWER CORD INSTRUCTION. Failure to use this cord could result in a fire or electrical shock.
[Introduction] |
1-5 |
1.4 |
Safety information |
1 |
|
|
|
Power cord
•Do not scratch, abrade, place a heavy object on, heat, twist, bend, pull on, or damage the power cord. Use of a damaged power cord (exposed core wire, broken wire, etc.) could result in a fire or breakdown.
Should any of these conditions be found, immediately turn OFF the power switch, unplug the power cord from the power outlet, and then call your authorized service representative.
Power source
 WARNING
•Do not use the power source voltage other than being specified on the machine. Failure to do that could result in a fire or electrical shock.
•Do not use a multiple outlet adapter to connect any other appliances or machines.
Use of a power outlet for more than the marked current value could result in a fire or electrical shock.
•Do not use an extension cord in principle. Use of an extension cord could cause a fire or electrical shock. Contact your authorized service representative if an extension cord is required.
 CAUTION
•The outlet must be near the equipment and easily accessible. Otherwise you can not pull out the power plug when an emergency occurs.
Power plug
 WARNING
•Do not unplug and plug in the power cord with a wet hand, as an electrical shock could result.
•Plug the power cord all the way into the power outlet. Failure to do this could result in a fire or electrical shock.
 CAUTION
•Do not place any objects around the power plug, as the power plug may be difficult to pull out when an emergency occurs.
•Do not tug the power cord when unplugging. Pulling on the power cord could damage the cord, resulting in a fire or electrical shock.
•Remove the power plug from the outlet more than one time a year and clean the area between the plug terminals. Dust that accumulates between the plug terminals may cause a fire.
[Introduction] |
1-6 |
1.4 |
Safety information |
1 |
|
|
|
Grounding
 WARNING
•Make sure to ground this product. (Connect the power cord to an electrical outlet that is equipped with a grounding terminal.) Failure to do so and an unlikely event of leakage could result in a fire or electrical shock.
Installation
 WARNING
•Do not place a flower vase or other container that contains water, or metal clips or other small metallic objects on this product. Spilled water or metallic objects dropped inside the product could result in a fire, electrical shock, or breakdown.
Should a piece of metal, water, or any other similar foreign matter get inside the product, immediately turn OFF the power switch, unplug the power cord from the power outlet, and then call your authorized service representative.
•Do not use flammable sprays, liquids, or gases inside or near this machine. Do not clean the inside of this machine using a flammable gas duster. A fire or explosion could result.
 CAUTION
•After installing this product, mount it on a secure base. If the unit moves or falls, it may cause personal injury.
•Do not place the product in a dusty place, or a site exposed to soot or steam, near a kitchen table, bath, or a humidifier. A fire, electrical shock, or breakdown could result.
•Do not place this product on an unstable or tilted bench, or in a location subject to a lot of vibration and shock. It could drop or fall, causing personal injury or mechanical breakdown.
•Do not let any object plug the ventilation holes of this product. Heat could accumulate inside the product, resulting in a fire or malfunction.
Ventilation
 CAUTION
•Using this product in a poorly ventilated room for a long time or producing a large volume of copies or prints may cause the odor of exhaust air from the machine. Ventilate the room well.
[Introduction] |
1-7 |
1.4 |
Safety information |
1 |
|
|
|
Actions in response to troubles
 WARNING
•Do not keep using this product, if this product becomes inordinately hot or emits smoke, or unusual odor or noise. Immediately turn OFF the power switch, unplug the power cord from the power outlet, and then call your authorized service representative. If you keep on using it as is, a fire or electrical shock could result.
•Do not keep using this product, if this product has been dropped or its cover damaged. Immediately turn OFF the power switch, unplug the power cord from the power outlet, and then call your authorized service representative. If you keep on using it as is, a fire or electrical shock could result.
 CAUTION
•The inside of this product has areas subject to high temperature, which may cause burns.
When checking the inside of the unit for malfunctions such as a paper misfeed, do not touch the locations (around the fusing unit, etc.) which are indicated by a "Caution HOT" caution label.
Consumables
 WARNING
•Do not throw the toner cartridge or toner into an open flame. The hot toner may scatter and cause burns or other damage.
 CAUTION
•Do not leave toner-related parts (toner units, PC drum units, imaging units or developing units) within easy reach of children. Licking any of these parts or ingesting toner could damage your health.
•Do not store toner-related parts (toner units, PC drum units, imaging units or developing units) near devices susceptible to magnetism, such as precision equipment and data storage devices, otherwise they may malfunction. They could cause these products to malfunction.
•Do not force open the toner-related parts (toner units, PC drum units, imaging units or developing units). If toner tumbles from the toner bottle, take utmost care to avoid inhaling it or even getting skin contact.
•If toner lands on your skin or clothing, wash thoroughly with soap and water.
•If you inhale toner, move to a place with fresh air and gargle with a lot of water repeatedly. Should you get symptoms such as coughing, seek medical advice.
•If you get toner into your eyes, immediately rinse them with running water for over 15 minutes. Seek medical advice if irritation persists.
•If you swallow toner, rinse out your mouth and drink a few glasses of water. Seek medical advice if necessary.
•Never touch the electrical contacts of the toner cartridge or the imaging unit, as an electrostatic discharge may damage the product.
[Introduction] |
1-8 |

1.4 |
Safety information |
1 |
|
|
|
When moving the machine
 CAUTION
•Whenever moving this product, be sure to disconnect the power cord and other cables. Failure to do this could damage the cord or cable, resulting in a fire, electrical shock, or breakdown.
•When moving this product, always hold it at the locations specified in the User’s Guide or other documents. If the unit is moved while held at locations other than those specified, it may fall, causing severe personal injury.
When using the machine
 WARNING
•If you use an implantable medical equipment (cardiac pacemaker, etc.), do not bring the IC card reader close from the implant within 12 cm at all times. The radio waves may affect implantable medical equipment (cardiac pacemaker, etc.) operations.
 CAUTION
•When using the machine, do not look at the light of the lamp for a prolonged time. Eyestrain could result.
Papers
 CAUTION
•Do not use stapled paper, conductive paper (such as silver paper or carbon paper) or treated heat-sensitive/inkjet paper, otherwise a fire may result.
When the Fax is not installed:
Before successive holidays
 CAUTION
•Unplug the product when you will not use the product for long periods of time.
[Introduction] |
1-9 |

1.5 |
Legal restrictions on reproduction |
1 |
|
|
|
1.5Legal restrictions on reproduction
Certain types of originals must never be reproduced with the purpose or intent to pass reproductions of such originals off as the originals.
The following is not a complete list, but is meant to be used as a guide to responsible reproduction.
<Financial Instruments>
-Personal checks
-Traveler’s checks
-Money orders
-Certificates of deposit
-Bonds or other certificates of indebtedness
-Stock certificates
<Legal Originals>
-Food stamps
-Postage stamps (canceled or uncanceled)
-Checks or drafts drawn by government agencies
-Internal revenue stamps (canceled or uncanceled)
-Passports
-Immigration papers
-Motor vehicle licenses and titles
-House and property titles and deeds
<General>
-Identification cards, badges, or insignias
-Copyrighted works without permission of the copyright owner
In addition, it is prohibited under any circumstances to reproduce domestic or foreign currencies, or works of art without permission of the copyright owner.
When in doubt about the nature of an original, consult with legal counsel.
NOTICE
This machine provides the forgery prevention function in order to prevent financial instruments from being reproduced illegally.
We appreciate your understanding that printed images may infrequently have some noise or image data may not be stored under certain circumstances due to this forgery prevention function.
[Introduction] |
1-10 |

1.6 |
Regulation notices |
1 |
|
|
|
1.6Regulation notices
For EU member states only
This symbol means: Do not dispose of this product together with your household waste!
Please contact the Local Authority for appropriate disposal instructions. In the case of a new device being purchased, the used one can also be given to our dealer for appropriate disposal. Recycling of this product will help to conserve natural resources and prevent potential negative consequences for the environment and human health caused by inappropriate waste handling.
This product complies with RoHS (2011/65/EU) directive.
[Introduction] |
1-11 |

2 Before Using This Function

2.1 CD-ROM supplied with this machine |
2 |
|||||||||||||||||||||||||||||||||||||||||||||||||||||||||||||||||||||||||||||||||||||||||||||||||||||
|
|
|
|
|
|
|
|
|
|
|
|
|
|
|
|
|
|
|
|
|
|
|
|
|
|
|
|
|
|
|
|
|
|
|
|
|
|
|
|
|
|
|
|
|
|
|
|
|
|
|
|
|
|
|
|
|
|
|
|
|
|
|
|
|
|
|
|
|
|
|
|
|
|
|
|
|
|
|
|
|
|
|
|
|
|
|
|
|
|
|
|
|
|
|
|
|
|
|
|
|
|
|
|
|
|
|
|
|
|
|
|
|
|
|
|
|
|
|
|
|
|
|
|
|
|
|
|
|
|
|
|
|
|
|
|
|
|
|
|
|
|
|
|
|
|
|
|
|
|
|
|
|
|
|
|
|
|
|
|
|
|
|
|
|
|
|
|
|
|
|
|
|
|
|
|
|
|
|
|
|
|
|
|
|
|
|
|
|
|
|
|
|
|
|
|
|
|
|
|
|
|
|
|
|
|
|
|
|
|
|
|
|
|
|
|
|
|
|
|
|
|
|
|
|
|
|
|
|
|
|
|
|
|
|
|
|
|
|
|
|
|
|
|
|
|
|
|
|
|
|
|
|
|
|
|
|
|
|
|
|
|
|
|
|
|
|
|
|
|
|
|
|
|
|
|
|
|
|
|
|
|
|
|
|
|
|
|
|
|
|
|
|
|
|
|
|
|
|
|
|
|
|
|
|
|
|
|
|
2Before Using This Function
2.1CD-ROM supplied with this machine
Driver & Utilities CD-ROM
Item |
Overview |
|
|
[Printer/FAX] |
Allows you to install the printer driver and fax driver. |
|
For details, refer to [User's Guide: Print Functions] and [User's |
|
Guide: PC-FAX Functions]. |
|
|
[Scanner] |
Allows you to install the scanner driver. |
|
For details, refer to [User's Guide: Scan Functions]. |
|
|
[PageScope Utilities] |
Various utilities are provided to optimize functions of this ma- |
|
chine. |
|
Clicking this displays the download page. |
|
|
User's Guide CD-ROM
Contains various user's guides.
For details on the user's guide types, refer to page 1-3.
[Introduction] |
2-2 |

2.2 |
Installation location and environment |
2 |
|
|
|
2.2Installation location and environment
2.2.1Installation location
To simplify tasks such as operations, consumable replacement, or inspection, create an installation environment as shown below.
Unit: Inch (mm)
Front view
|
|
|
|
|
41-11/16 (1059) |
|
|
|
|
|
|
|||
5-7/8 |
|
|
|
|
|
|
|
|
|
|
3-15/16 |
|||
|
|
21-7/8 (555) |
|
10 (254) |
|
|
||||||||
(150) |
|
|
|
|
|
|
|
(100) |
|
|||||
|
|
|
|
|
|
|
|
|
|
|
|
|
|
|
|
|
|
|
|
|
|
|
|
|
|
|
|
|
|
|
|
|
|
|
|
|
|
|
|
|
|
|
|
|
|
|
|
|
|
|
|
|
|
|
|
|
|
|
|
|
|
|
|
|
|
|
|
|
|
|
|
|
|
|
|
|
|
|
|
|
|
|
|
|
|
|
|
|
|
Right view
|
|
|
|
|
|
|
|
|
|
|
|
|
|
32-11/16 (830) |
|
|
|
|
|
|
|
|
|
|
|
|
23-3/4 (603) |
|
|
|
|
|
|
|
|
|
|
|
|
|
|
|
||
|
|
|
|
|
|
|
|
|
|
|
|
|
||
|
|
|
|
|
|
|
|
|
|
|
|
|
||
|
|
|
|
|
|
|
|
|
|
|
|
|
||
|
|
|
|
|
|
|
|
|
|
|
|
|
|
|
|
|
|
|
|
|
|
|
|
|
|
|
|
|
|
|
|
|
|
|
|
|
|
|
|
|
|
|
|
|
|
|
|
|
|
|
|
|
|
|
|
|
|
|
|
|
|
|
|
|
|
|
|
|
|
|
|
|
|
|
23 (584)
36-11/16 (932)
Right view (with optional devices installed)
The hatched parts indicate optional devices in this figure.
15/16 (836) |
41-13/16 (1062) |
32- |
|
|
|
23 (584)
36-11/16 (932)
[Introduction] |
2-3 |

2.2 |
Installation location and environment |
2 |
|
|
|
2.2.2Installation environment
Install this machine in a location that can support its weight, including consumables and paper.
Configuration |
Weight |
|
|
Main unit (including Imaging Unit and Waste Ton- |
bizhub C3850: Approx. 102-1/16 lb (46.3 kg) |
er Bottle) |
bizhub C3350: Approx. 101-7/8 lb (46.2 kg) |
|
|
Main unit (including Imaging Unit, Toner Car- |
bizhub C3850: Approx. 104-15/16 lb (47.6 kg) |
tridge, and Waste Toner Bottle) |
bizhub C3350: Approx. 104-11/16 lb (47.5 kg) |
|
|
Install this machine in the place shown below.
-Stable and horizontal (inclination around this machine: 1 degree or less) location with a hard, even surface
-To check whether the installation location is level, use a normal round pencil. If the pencil rolls, the location is not horizontal. Ensure this machine is horizontal, and make sure that there are no objects such as cables caught under this machine.
-Location close to a dedicated power outlet that is grounded
-Location close to your computer
-Sufficiently spacious location that ensures ease of use and appropriate air ventilation
-Location in which ambient temperature is 50°F to 86°F (10°C to 30°C) and humidity is 15% to 85%
Do not install this machine in the locations described below.
-Location exposed to direct sunlight
-Location in which excessive differences in temperature and humidity are detected due to close proximity to a heater or cooling equipment
-Location exposed to direct flame or combustible materials
-Location close to equipment such as a copy machine or air-conditioner that generates noise, or equipment such as a refrigerator that generates a strong magnetic or electromagnetic force
-Location close to water, water pipes, or fluid (drink) containers, corrosive chemicals, or corrosive gases such as ammonia
-Location in which fine metallic pieces such as clips or staples are scattered
-Location subject to thumping vibrations
 Tips
Tips
-Do not connect to the same power outlet as that used for a high-current equipment.
-If this machine is installed in or moved to an environment subject to excessive changes in temperature, condensation will form in this machine, which may reduce printing quality. If condensation is detected, leave this machine for approximately 1 hour before using it to adjust to the environment.
-When using a humidifier or vaporizer in the room where this machine is installed, use purified or distilled water. If impurities in water are emitted into the air, they will collect in this machine and reduce printing quality.
[Introduction] |
2-4 |

3 About This Machine
3.1 |
|
|
|
|
Checking the name of each part |
3 |
||||||||||||||||||||||||||||||||||||||||||||||||||||||||||||||||||||||||||||||||||||||||||||||||
|
|
|
|
|
|
|
|
|
|
|
|
|
|
|
|
|
|
|
|
|
|
|
|
|
|
|
|
|
|
|
|
|
|
|
|
|
|
|
|
|
|
|
|
|
|
|
|
|
|
|
|
|
|
|
|
|
|
|
|
|
|
|
|
|
|
|
|
|
|
|
|
|
|
|
|
|
|
|
|
|
|
|
|
|
|
|
|
|
|
|
|
|
|
|
|
|
|
|
|
|
|
|
|
|
|
|
|
|
|
|
|
|
|
|
|
|
|
|
|
|
|
|
|
|
|
|
|
|
|
|
|
|
|
|
|
|
|
|
|
|
|
|
|
|
|
|
|
|
|
|
|
|
|
|
|
|
|
|
|
|
|
|
|
|
|
|
|
|
|
|
|
|
|
|
|
|
|
|
|
|
|
|
|
|
|
|
|
|
|
|
|
|
|
|
|
|
|
|
|
|
|
|
|
|
|
|
|
|
|
|
|
|
|
|
|
|
|
|
|
|
|
|
|
|
|
|
|
|
|
|
|
|
|
|
|
|
|
|
|
|
|
|
|
|
|
|
|
|
|
|
|
|
|
|
|
|
|
|
|
|
|
|
|
|
|
|
|
|
|
|
|
|
|
|
|
|
|
|
|
|
|
|
|
|
|
|
|
|
|
|
|
|
|
|
|
|
|
|
|
|
|
|
|
|
|
|
|
|
3About This Machine
3.1Checking the name of each part
Front side
2-b 2
2-c
2-a
2-d
 2-e
2-e
1


 3 6
3 6 


5 |
4 |
|
No. Name
1Control Panel
2Automatic Document Feeder (ADF)
2-a ADF Feed Cover
2-b Document Guide
2-c Document Feed Tray
2-d Document Output Tray
2-e Document Stopper
3USB Host Port
4Manual Feed Tray
5Tray 1
6Data Indicator
[Introduction] |
3-2 |

3.1 |
Checking the name of each part |
3 |
|
||
|
View with Automatic Document Feeder (ADF) opened |
|
|
9 |
10 |
8
7 
11
No. Name
7Output Tray
8Scanner Lock Lever
9Original Glass
10Original Cover Pad
11Scanner Unit
[Introduction] |
3-3 |

3.1 |
Checking the name of each part |
3 |
|
View with Front Cover and Right Door opened
20 


19 


12
18 


17
13
16 |
15 |
14 |
No. Name
12Fusing Unit
13Right Door
14Transfer Roller
15Transfer Belt Unit
16Laser Lens Cleaning Tool
17Front Cover
18Waste Toner Bottle
19Imaging Unit
20Toner Cartridge
[Introduction] |
3-4 |
3.1 |
Checking the name of each part |
3 |
|
|
|
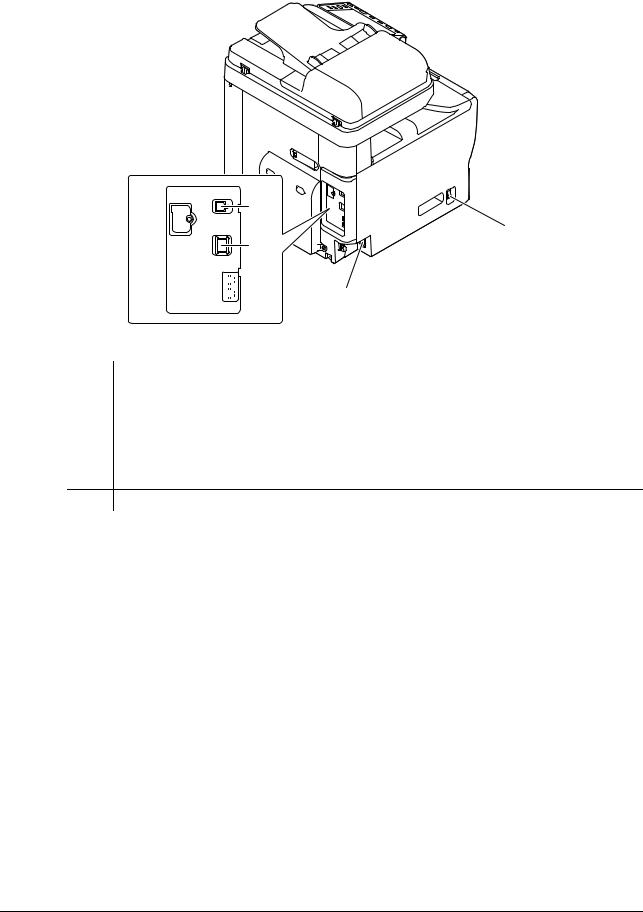
Rear side
This view shows the machine with the optional Fax Kit FK-512 and Mount Kit MK-738 installed. These are provided as standard on bizhub C3850 models sold in North America.
3
1
4
 5
5  6 2
6 2
No. |
Name |
1 |
Power Switch |
|
|
2 |
Power Connection |
|
|
3 |
USB Port (Type B) |
|
|
4 |
Ethernet (LAN) Port (1000Base-T/100Base-TX/10Base-T) |
|
|
5 |
TEL (telephone) Jack |
6LINE (telephone line) Jack
[Introduction] |
3-5 |

3.2 |
Checking the option configuration |
3 |
|
|
|
3.2Checking the option configuration
List of optional components
1
2
3
4
|
6 |
5 |
||
No. |
|
Name |
|
Description |
|
|
|||
|
|
|
|
|
1 |
|
Authentication Unit |
|
Performs user authentication by scanning information recorded on |
|
|
AU-201 |
|
the IC card. |
|
|
|
|
|
2 |
|
Working Table WT- |
|
Provides an area to temporarily place an original or other materials. |
|
|
P02 |
|
This is also used when the Authentication Unit or Finisher is in- |
|
|
|
|
stalled. |
|
|
|
|
|
3 |
|
Finisher FS-P03 |
|
Staples the printed sheets. |
|
|
|
|
For staples, use Staple Kit SK-501. |
|
|
|
|
|
4 |
|
Keypad KP-101 |
|
Located on the side of the Control Panel. |
|
|
|
|
Allows you to enter numbers by using the Hardware Keypad. |
|
|
|
|
|
5 |
|
Paper Feed Unit PF- |
|
Allows you to load up to 500 sheets. |
|
|
P13 |
|
There are two slots in which the Paper Feed Unit can be installed. |
|
|
|
|
|
6 |
|
DESK DK-P03 |
|
Used to install this machine on the floor. |
|
|
|
|
This component may not be able to be used depending on the region |
|
|
|
|
the machine is used in. |
|
|
|
|
|
The following optional components are built into this machine and are not shown in the figure above.
7 |
Fax Kit FK-512 |
Used to operate this machine as a fax machine. |
|
|
This is provided as standard on bizhub C3850 models sold in North |
|
|
America. |
|
|
|
8 |
Mount Kit MK-738 |
This unit is required to install the Fax Kit. |
|
|
This is provided as standard on bizhub C3850 models sold in North |
|
|
America. |
9Mount Kit MK-P02 Required to have Authentication Unit built in to the main unit.
[Introduction] |
3-6 |

3.2 |
Checking the option configuration |
|
|
3 |
|||
|
|
|
|
|
|
|
|
|
|
No. |
|
Name |
|
Description |
|
|
|
|
|
||||
|
|
|
|
|
|
|
|
|
10 |
|
Local Interface Kit |
|
Used to add an RS-232C port. |
||
|
|
|
|
EK-P01 |
|
|
|
|
|
|
|
|
|
|
|
|
11 |
|
i-Option LK-106 |
|
Used to add a bar code font, which is one of special fonts. |
||
|
|
|
|
|
|
|
|
|
12 |
|
i-Option LK-107 |
|
Used to add a unicode font, which is one of special fonts. |
||
|
|
|
|
|
|
|
|
|
13 |
|
i-Option LK-108 |
|
Used to add an OCR font, which is one of special fonts. |
||
|
|
|
|
|
|
|
|
|
14 |
|
i-Option LK-111 |
|
Supports the ThinPrint function, which is one of a number of ad- |
||
|
|
|
|
|
|
vanced functions. |
|
|
|
|
|
|
|
|
|
dReference
For details on how to register i-Option license kits, refer to Chapter 2 "Registering License Kits" in [User's Guide: Advanced Functions].
Front view (with optional devices installed)
3


 4 1
4 1


2
No. |
Name |
1 |
Paper Feed Unit PF-P13 (Tray 2) |
|
|
2 |
Paper Feed Unit PF-P13 (Tray 3) |
3Working Table WT-P02
4Keypad KP-101
[Introduction] |
3-7 |

3.3 |
How to use the Finisher |
3 |
|
|
|
3.3How to use the Finisher
Using an optional Finisher, you can easily staple printed sheets at a corner. This function is useful when preparing a project proposal or other booklet materials.
To staple sheets, align their corners to the Finisher.
NOTICE
When repeating stapling, wait for three seconds or more after the first stapling has been completed to load the next sheets in order to prevent the internal temperature of the Finisher from increasing.
 Tips
Tips
-Up to 20 sheets (plain paper 90 g/m2) can be stapled at one time.
-If the Finisher does not function, turn this machine off and on, then reset the Finisher.
-Paper on which an image without margins has been printed will not be stapled because the sensor cannot detect it. Do not load paper on which an image without margins is printed.
dReference
For details on how to replace staples, refer to Chapter 2 "Checking and Replacing Consumables" in [User's Guide: Maintenance/Troubleshooting].
For details on how to clear a staple jam, refer to Chapter 3 "Clearing Paper Jam and Staple Jam" in [User's Guide: Maintenance/Troubleshooting].
[Introduction] |
3-8 |

4 Turning the Power On or Off
Loading...