


 Loading...
Authentication Unit AU-211P
User’s Guide
Ver. 1.2

Contents
Contents
|
Contents ............................................................................ |
1 |
|
1 |
Introduction....................................................................... |
4 |
|
|
1.1 |
Safety Information ................................................................................ |
5 |
2 |
Getting Started.................................................................. |
8 |
|
|
2.1 |
Product Overview ................................................................................. |
8 |
|
2.2 |
Part names and their functions ........................................................... |
9 |
|
2.3 |
Pre-Setting .......................................................................................... |
10 |
|
2.3.1 |
Configuring Network Settings ......................................................... |
10 |
|
2.3.2 |
Registering Active Directory for Authentication ............................... |
12 |
|
2.3.3 |
Correcting the MFP Time ................................................................ |
13 |
|
2.3.4 |
Registering the DNS Server Associated with Active Directory ........ |
14 |
|
2.3.5 |
Specifying the PIV Transitional Mode .............................................. |
16 |
2.3.6Configuring Settings for Verifying the Active Directory
|
Certificate ........................................................................................ |
17 |
2.3.7 |
Enabling TPM (Trusted Platform Module) ........................................ |
21 |
2.4 |
Operation Settings ............................................................................. |
23 |
3 How to Use the Authentication Unit ............................. |
24 |
||
3.1 |
|
Login and Logout ............................................................................... |
24 |
3.1.1 |
Login ................................................................................................ |
24 |
|
3.1.2 |
Logout ............................................................................................. |
26 |
|
3.2 |
Functions Using the PKI Card Authentication System ................... |
27 |
|
3.3 |
Address Search (LDAP) Using PKI Card .......................................... |
29 |
|
3.3.1 |
Overview .......................................................................................... |
29 |
|
3.3.2 |
Related Settings .............................................................................. |
30 |
|
3.3.3 |
Handling Address Search (LDAP) .................................................... |
33 |
|
AU-211P |
1 |

Contents
3.4 SMB TX Using PKI Card .................................................................... |
35 |
|
3.4.1 |
Overview .......................................................................................... |
35 |
3.4.2 |
Related Settings .............................................................................. |
36 |
3.4.3 |
Using SMB TX ................................................................................. |
38 |
3.5 |
Scan to E-mail (S/MIME) Using PKI Card ........................................ |
40 |
3.5.1 |
Overview .......................................................................................... |
40 |
3.5.2 |
Related Settings .............................................................................. |
41 |
3.5.3 |
Encrypting an E-Mail and Adding a Digital Signature ..................... |
43 |
3.6 |
PDF Encryption and Signature Addition Using PKI Card ............... |
44 |
3.6.1 |
Overview .......................................................................................... |
44 |
3.6.2 |
Encrypting a PDF Document ........................................................... |
45 |
3.6.3 |
Adding a Signature to a PDF Document ......................................... |
46 |
3.7 |
PKI Card Print ..................................................................................... |
47 |
3.7.1 |
Overview .......................................................................................... |
47 |
3.7.2 |
Installing the Printer Driver .............................................................. |
48 |
3.7.3 |
Specifying the Print Data Deletion Time .......................................... |
51 |
3.7.4 |
Handling PKI Card Print .................................................................. |
52 |
3.8 |
Scan To Me ......................................................................................... |
57 |
3.8.1 |
Overview .......................................................................................... |
57 |
3.8.2 |
Related Settings .............................................................................. |
59 |
3.8.3 |
Handling Scan To Me ...................................................................... |
60 |
3.9 |
Scan To Home .................................................................................... |
61 |
3.9.1 |
Overview .......................................................................................... |
61 |
3.9.2 |
Related Settings .............................................................................. |
62 |
3.9.3 |
Using Scan To Home ...................................................................... |
63 |
4 Added or Changed Setting Information........................ |
64 |
|
4.1 |
User Settings ...................................................................................... |
64 |
4.1.1 |
System Settings .............................................................................. |
64 |
4.2 |
Administrator Settings ....................................................................... |
65 |
4.2.1 |
System Settings .............................................................................. |
65 |
4.2.2 |
User Authentication/Account Track ................................................ |
65 |
4.2.3 |
Network Settings ............................................................................. |
66 |
4.2.4 |
Security Settings ............................................................................. |
68 |
|
|
|
AU-211P |
|
2 |

Contents |
|
|
5 Appendix.......................................................................... |
69 |
|
5.1 |
Product Specifications ...................................................................... |
69 |
5.2 |
Cleaning the Authentication Unit ...................................................... |
69 |
5.3 |
Troubleshooting ................................................................................. |
70 |
AU-211P |
3 |

Introduction |
1 |
|
1 Introduction
Thank you for choosing this device.
This User’s Guide provides descriptions of the operating procedures and precautions for using Authentication Unit (IC Card Type) AU-211P. Carefully read this User’s Guide before using this device.
The actual screens that appear may be slightly different from the screen images used in this User’s Guide.
Trademark/copyright acknowledgements
-Microsoft® and Windows® are either registered trademarks or trademarks of Microsoft Corporation in the United States and/or other countries.
-All other company names and product names mentioned in this User’s Guide are either registered trademarks or trademarks of their respective companies.
Restrictions
-Unauthorized use or reproduction of this User’s Guide, whether in its entirety or in part, is strictly prohibited.
-The information contained in this User’s Guide is subject to change without notice.
AU-211P |
4 |

Introduction |
1 |
|
1.1Safety Information
Carefully read this information, and then store it in a safe place.
-Before using this device, carefully read this information and follow it to operate the device correctly.
-After reading this information, store it in the designated holder with the warranty.
Important information
-The reprinting or reproduction of the content of this publication, either in part or in full, is prohibited without prior permission.
-The content of this publication is subject to change without notice.
-This publication was created with careful attention to content; however, if inaccuracies or errors are noticed, please contact your sales representative.
-The marketing and authorization to use our company’s product mentioned in this information are provided entirely on an “as is” basis.
-Our company assumes no responsibility for any damage (including lost profits or other related damages) caused by this product or its use as a result of operations not described in this information. For disclaimers and warranty and liability details, refer to the User’s Guide Authentication Unit (IC Card Type AU-211P).
-This product is designed, manufactured and intended for general business use. Do not use it for applications requiring high reliability and which may have an extreme impact on lives and property. (Applications requiring high reliability: Chemical plant management, medical equipment management and emergency communications management)
-Use with other authentication devices is not guaranteed.
-In order to incorporate improvements in the product, the specifications concerning this product are subject to change without notice.
For safe use
•Do not this product near water, otherwise it may be damaged.
•Do not cut, damage, modify or forcefully bend the USB cable. A malfunction may occur as a result of a damaged or cut USB cable.
•Do not disassembly this device, otherwise it may be damaged.
AU-211P |
5 |

Introduction |
1 |
|
Regulation notices
USER INSTRUCTIONS FCC PART 15 - RADIO FREQUENCY DEVICES
(For U.S.A. Users)
FCC: Declaration of Conformity
Product Type |
Authentication Unit (IC Card Type) |
|
|
Product Name |
AU-211P |
|
|
(This device complies with Part 15 of the FCC Rules.) Operation is subject to the following two conditions: (1) this device may not cause interference, and (2) this device must accept any interference, including interference that may cause undesired operation of this device.
NOTE:
This equipment has been tested and found to comply with the limits for a Class B digital device, pursuant to Part 15 of the FCC Rules.
These limits are designed to provide reasonable protection against harmful interference in a residential installation. This equipment generates, uses and can radiate radio frequency energy and, if not installed and used in accordance with the instructions, may cause harmful interference to radio communications. However, there is no guarantee that interference will not occur in a particular installation. If this equipment does cause harmful interference to radio or television reception, which can be determined by turning the equipment off and on, the user is encouraged to try to correct the interface by one or more of the following measures:
-Reorient or relocate the receiving antenna.
-Increase the separation between the equipment and receiver.
-Connect the equipment into an outlet on a circuit different from that to which the receiver is connected.
-Consult the dealer or an experienced radio/TV technician for help.
WARNING:
The design and production of this unit conform to FCC regulations, and any changes or modifications must be registered with the FCC and are subject to FCC control. Any changes made by the purchaser or user without first contacting the manufacturer will be subject to penalty under FCC regulations.
AU-211P |
6 |

Introduction |
1 |
|
INTERFERENCE-CAUSING EQUIPMENT STANDARD (ICES-003 ISSUE
4) (For Canada Users)
(This device complies with RSS-Gen of IC Rules.) Operation is subject to the following two conditions: (1) this device may not cause interference, and (2) this device must accept any interference, including interference that may cause undesired operation of this device.
This Class B digital apparatus complies with Canadian ICES-003.
Cet appareil numérique de la classe B est conforme à la norme NMB-003 du Canada.
AU-211P |
7 |

Getting Started |
2 |
|
2Getting Started
2.1Product Overview
This product is a PKI card authentication unit that scans a PKI card (CAC or PIV card) to perform personal authentication.
Connecting this unit enables you to run a PKI card authentication system (hereinafter referred to as "this system") that uses the PKI card authentication unit on the MFP.
Using this system will enable you to carry out operations without making a password public on the network, and to configure the system environment with a higher level of security. You can also implement the unique functions using this system on the MFP.
Use conditions
The following conditions are required to use this system.
-PKI card authentication unit (This unit)
-MFP compatible with a PKI card authentication system
-PKI card available for PIV and CAC
-User management using Active Directory (Kerberos authentication + PKINIT)
2
Reminder
Do not disconnect the USB cable while using this unit. Doing so may cause this system to become unstable.
AU-211P |
8 |

Getting Started |
2 |
|
2.2Part names and their functions
3
2
1
No. |
Part name |
Description |
1 |
Card inlet |
Used to insert the PKI card. |
|
|
|
2 |
LED lamp |
Turns green when you insert a PKI card into this unit. |
|
|
Blinks green while authentication. |
|
|
|
3 |
USB cable |
Used for connecting this device to the |
|
|
multifunctional product. |
|
|
|
AU-211P |
9 |
Getting Started |
2 |
|
2.3Pre-Setting
To use this system, pre-configure the following settings on the MFP.
-Configuring network settings (page 10)
-Registering Active Directory for Authentication (page 12)
-Correcting the MFP time (page 13)
-Registering the DNS server associated with Active Directory (page 14)
-Specifying the PIV transitional mode (page 16)
-Configuring settings for verifying the Active Directory certificate (page 17)
2.3.1Configuring Network Settings
Configure the basic settings required to use the MFP in a network environment.
TCP/IP Settings
On the MFP control panel, tap [Utility] - [Administrator Settings] - [Network Settings] - [TCP/IP Settings].
Item |
Description |
ON/OFF |
Select [ON]. |
|
|
IPv4 Settings |
|
|
|
Item |
Description |
IP Application Method |
Select whether to automatically retrieve the IP address |
|
or directly specify it. |
|
|
Auto Input |
When automatically retrieving the IP address, select the |
|
automatic retrieval method. |
|
|
IP Address |
When directly specifying the IP address, enter the IP |
|
address of the MFP. |
|
|
AU-211P |
10 |

Getting Started |
2 |
|
Item |
Description |
Subnet Mask |
When directly entering the IP address, specify the |
|
subnet mask for the connected network. |
|
|
Default Gateway |
When directly entering the IP address, specify the |
|
default gateway for the connected network. |
|
|
IPv6 Settings
2
Note
These settings are required when using the MFP in an IPv6 environment.
Item |
Description |
ON/OFF |
Select [ON] when using the MFP in an IPv6 |
|
environment. |
|
|
Auto IPv6 Settings |
Select [ON] when automatically retrieving the IPv6 |
|
address. |
|
|
DHCPv6 Setting |
Select [ON] when retrieving the IPv6 address using |
|
DHCPv6. |
|
|
Global Address |
Specify the IPv6 global address when not automatically |
|
retrieving the IPv6 address. |
|
|
Prefix Length |
Specify the IPv6 global address prefix length when not |
|
automatically retrieving the IPv6 address. |
|
|
Gateway Address |
Specify the IPv6 gateway address when not |
|
automatically retrieving the IPv6 address. |
|
|
Link-Local Address |
Displays the link-local address generated from the MAC |
|
address. |
|
|
DNS Host |
|
Item |
Description |
DNS Host Name |
Specify the host name of the MFP (up to 63 characters). |
|
|
Dynamic DNS Settings |
Select [Enable] when automatically registering the |
|
specified DNS host name in the DNS server that |
|
supports the Dynamic DNS function. |
|
|
DNS Domain |
|
Item |
Description |
Domain Name Auto |
Select whether to automatically retrieve the domain |
Retrieval |
name. This item is available when using DHCP. |
|
|
AU-211P |
11 |
Getting Started |
2 |
|
Item |
Description |
Search Domain Name |
Select whether to automatically retrieve the search |
Auto Retrieval |
domain name. This item is available when using |
|
DHCPv6. |
|
|
Default DNS Domain |
Specify the domain name that the MFP is connected to |
Name |
(up to 253 bytes with the host name). |
|
|
DNS Search Domain |
Specify the DNS search domain name (up to 251 bytes). |
Name 1 to 3 |
|
|
|
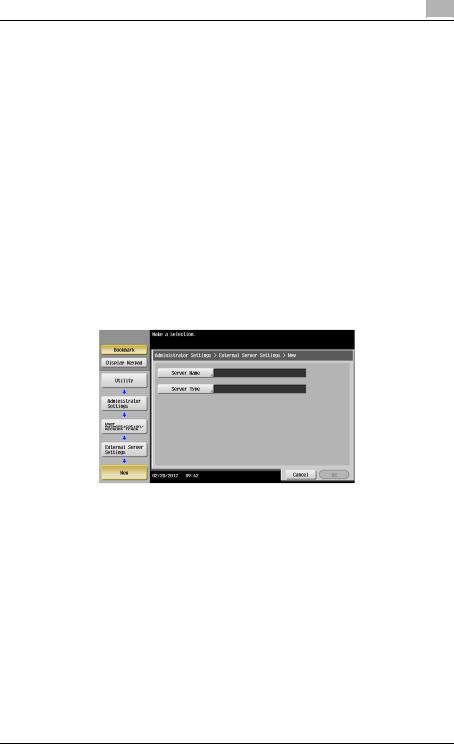
2.3.2Registering Active Directory for Authentication
Register Active Directory for authentication in the MFP. You can register up to 20 Active Directory services.
External Server Settings
On the MFP control panel, tap [Utility] - [Administrator Settings] - [User Authentication/Account Track] - [External Server Settings] - [New].
Item |
Description |
Server Name |
Specify the name of the external server (up to 32 |
|
characters). |
|
|
Server Type |
Select Active Directory, and specify its default domain |
|
name (up to 64 characters). |
|
|
!
Detail
When registering multiple Active Directory services, specify the default Active Directory previously. Select the desired Active Directory on the External Server Settings screen, and tap [Set as Default].
AU-211P |
12 |

Getting Started |
2 |
|
2.3.3Correcting the MFP Time
You cannot log into Active Directory if the MFP system time is extremely different between the MFP and Active Directory. Correct the MFP time so it matches the Active Directory time with the system time.
Time Adjustment Setting
On the MFP control panel, tap [Utility] - [Administrator Settings] - [Network Settings] - [Forward] - [Detail Settings] - [Time Adjustment Setting].
2
Note
Before correcting the MFP time, tap [Utility] - [Administrator Settings] - [System Settings] - [Date/Time Setting], and check that the time zone is specified correctly.
Page 1/2
Item |
Description |
ON/OFF |
Select [ON]. |
|
|
Auto IPv6 Retrieval |
To automatically obtain the IPv6 address of the NTP |
|
server, select [On]. |
|
This item is necessary when IPv6 is used while DHCPv6 |
|
is enabled. |
|
|
Host Address |
Specify the host address of the NTP server associated |
|
with Active Directory. |
|
|
Port Number |
Specify the port number. |
|
|
Set Date |
Correct the time. |
|
|
AU-211P |
13 |

Getting Started |
2 |
|
Page 2/2
Item |
Description |
Auto Time Adjustment |
When an automatic time correction is made, select [On]. |
|
|
Polling Interval |
When [On] is selected for Auto Time Adjustment, set the |
|
polling interval. |
|
|
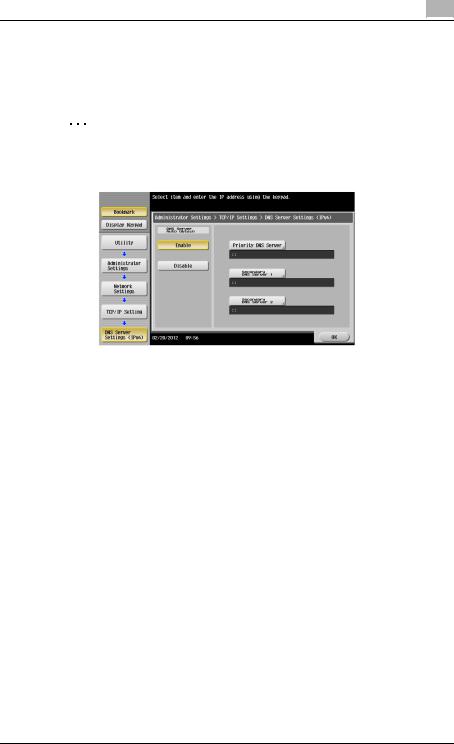
2.3.4Registering the DNS Server Associated with Active Directory
Register the DNS server associated with Active Directory in the MFP.
DNS Server Settings (IPv4)
On the MFP control panel, tap [Utility] - [Administrator Settings] - [Network Settings] - [TCP/IP Settings] - [DNS Server Settings (IPv4)].
Item |
Description |
DNS Server Auto Obtain |
Select whether to automatically obtain the DNS server |
|
address. This item is available when using DHCP. |
|
|
Priority DNS Server |
Specify the IPv4 address of the priority DNS server |
|
associated with Active Directory. |
|
|
Secondary DNS Server 1 |
Specify the IPv4 address of the secondary DNS server |
and 2 |
associated with Active Directory. |
|
|
AU-211P |
14 |
Getting Started |
2 |
|
DNS Server Settings (IPv6)
On the MFP control panel, tap [Utility] - [Administrator Settings] - [Network Settings] - [TCP/IP Settings] - [DNS Server Settings (IPv6)].
2
Note
These settings are required when using the MFP in the IPv6 environment.
Item |
Description |
DNS Server Auto Obtain |
Select whether to automatically obtain the DNS server |
|
address. This item is available when using DHCPv6. |
|
|
Priority DNS Server |
Specify the IPv6 address of the priority DNS server |
|
associated with Active Directory. |
|
|
Secondary DNS Server 1 |
Specify the IPv6 address of the secondary DNS server |
and 2 |
associated with Active Directory. |
|
|
AU-211P |
15 |

Getting Started |
2 |
|
2.3.5Specifying the PIV Transitional Mode
Specify the PIV transitional mode in the PIV transitional specifications.
Authentication Device Settings
On the MFP control panel, tap [Utility] - [Administrator Settings] - [User Authentication/Account Track] - [Authentication Device Settings] - [General Settings] - [PKI Card Authentication].
Item |
Description |
PIV Transitional Mode |
Select PIV or CAC as the PIV transitional mode. |
|
|
AU-211P |
16 |
Getting Started |
2 |
|
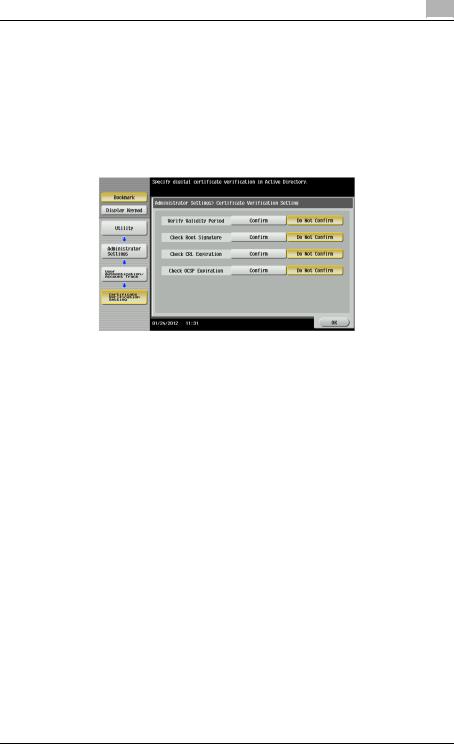
2.3.6Configuring Settings for Verifying the Active Directory Certificate
Configure the certificate verification settings to verify the Active Directory certificate when communicating with Active Directory.
Certificate Verification Setting
On the MFP control panel, tap [Utility] - [Administrator Settings] - [User Authentication/Account Track] - [Certificate Verification Setting].
Item |
Description |
Verify Validity Period |
Select whether to verify that the certificate is within the |
|
validity period. |
|
|
Check Root Signature |
Select whether to check the root signature. |
|
To check the root signature, view the external |
|
certificates managed on the MFP. For details on how to |
|
register an external certificate on the MFP, refer to |
|
"External Certificate Setting" (page 20). |
|
|
Check CRL Expiration |
Select whether to check that the certificate is not |
|
expired in the CRL (Certificate Revocation List). |
|
|
Check OCSP Expiration |
Select whether to check that the certificate is not |
|
expired in the OCSP service. |
|
For details on how to configure the OCSP service |
|
setting, refer to "Certificate Verification Settings" |
|
(page 18). |
|
|
AU-211P |
17 |

Getting Started |
2 |
|
Certificate Verification Settings
In the PageScope Web Connection administrator mode, select [Security], and then [Certificate Verification Settings].
2
Note
For details on how to use PageScope Web Connection, refer to the User's Guide [Web Management Tool] supplied together with the MFP.
Item |
Description |
Certificate Verification |
Select [ON] to enable certificate verification. |
Settings |
|
|
|
Timeout |
Enter the timeout period to check the expiration date. |
|
|
OCSP Service |
Select this check box to use an OCSP service. |
|
|
URL |
Enter the URL of the OCSP service (up to 511 |
|
characters). |
|
If this item is left blank, the system accesses the URL of |
|
the OCSP service embedded in the certificate. If the |
|
URL of the OCSP service is not embedded in the |
|
certificate, it will result in an error. |
|
|
Proxy Server Address |
To check the expiration date via a proxy server, enter |
|
the proxy server address. |
|
If the DNS server is specified, you can enter the host |
|
name instead. |
|
If [IPv6] is set to [ON], you can also specify the IPv6 |
|
address. |
|
|
AU-211P |
18 |

Getting Started |
2 |
|
Item |
Description |
Proxy Server Port |
Enter the port number for the proxy server. |
Number |
|
|
|
User Name |
Enter the user name to log in to the proxy server (up to |
|
63 characters). |
|
|
Password |
Enter the password to log in to the proxy server (up to |
|
63 characters). |
|
When changing the registered password, select |
|
[Password is changed.], and enter a new password. |
|
|
Address not using Proxy |
Specify an address with no proxy server used |
Server |
depending on your environment when checking the |
|
expiration date. |
|
If the DNS server is specified, you can enter the host |
|
name instead. |
|
If [IPv6] is set to [ON], you can also specify the IPv6 |
|
addresses. |
|
|
AU-211P |
19 |

Getting Started |
2 |
|
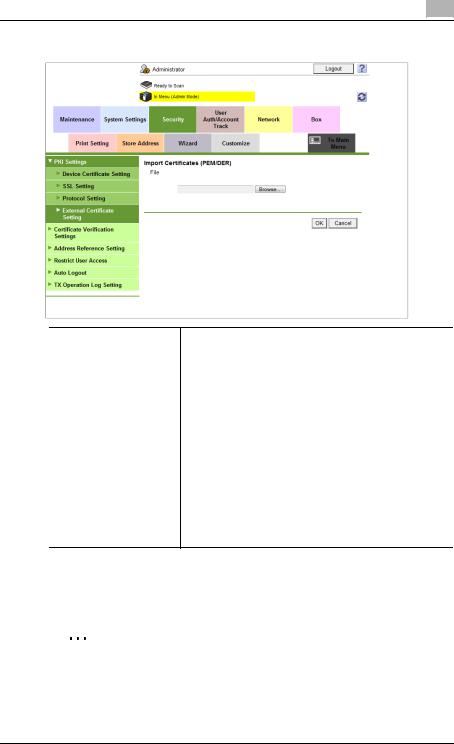
External Certificate Setting
In the PageScope Web Connection administrator mode, select [Security] , and then [PKI Settings] - [External Certificate Setting].
!
Detail
•To check the root signature in Certificate Verification, register the external certificate you want to view when checking the root signature as necessary.
•For details on how to use PageScope Web Connection, refer to the User's Guide [Web Management Tool] supplied together with the MFP.
Item |
Description |
Certificate type |
Select the type of the external certificate you want to |
|
display, and click [Changes the display]. You will see a |
|
list of the selected types of external certificates. |
|
|
[New Registration] |
Click this button to register a new external certificate. |
|
Click [Browse] in the New Registration screen, and |
|
specify a new external certificate. |
|
|
Issuer |
Displays the issuer of the external certificate. |
|
|
Subject |
Displays the destination to issue the external certificate. |
|
|
Validity Period |
Displays the validity period of the external certificate. |
|
|
Detail |
View the detailed information about the external |
|
certificate. |
|
|
Delete |
Displays the deletion confirmation dialog box. If |
|
necessary, you can delete the external certificate. |
|
|
AU-211P |
20 |
Getting Started |
2 |
|
<New Registration>
Item |
Description |
File |
Click [Browse] in the Import Certificates (PEM/DER) |
|
screen, and specify a new external certificate to be |
|
registered. |
•If [Trusted CA Root Certificate] is selected, register the root certificate from the CA (Certificate Authority).
•If [Trusted CA Intermediate Certificate] is selected, register the intermediate certificate from the CA (Certificate Authority).
•If [Trusted EE (End Entity) Certificate] is selected, register the certificates individually.
•If [Non-Trusted Certificate] is selected, register the non-trusted certificates individually.
2.3.7Enabling TPM (Trusted Platform Module)
If TPM (Trusted Platform Module) is installed, enable TPM on this machine.
2
Note
An optional i-Option LK-115 is required to use TPM on this machine.
AU-211P |
21 |
Loading...