


 Loading...
User’s Guide [Copy Operations]

Introduction
Introduction
Thank you for choosing this machine.
This manual contains details on the operation of the various functions of the machine, precautions on its use, and basic troubleshooting procedures. In order to ensure that this machine is used correctly and efficiently, carefully read this manual as needed.
In order to operate the machine safely and properly, be sure to read the Quick Guide [Copy/Print/Fax/Scan/Box Operations].
For descriptions on trademarks and copyrights, refer to [Trademarks/Copyrights].
The illustrations used in this manual may appear slightly different from views of the actual equipment.
C353/C253/C203 |
x-1 |

Introduction
Contents
Introduction
Contents .................................................................................................................................................................. |
x-2 |
Available features ................................................................................................................................................. |
x-10 |
Selecting the print color ......................................................................................................................... |
x-10 |
Automatically selecting the paper ......................................................................................................... |
x-10 |
Adjusting copies to the size of the paper .............................................................................................. |
x-10 |
Specifying separate horizontal and vertical zoom ratios ....................................................................... |
x-10 |
Scanning the original in separate batches ............................................................................................ |
x-10 |
Center binding and folding in half .......................................................................................................... |
x-10 |
Sorting copies ........................................................................................................................................ |
x-10 |
Stapling copies ...................................................................................................................................... |
x-11 |
Punching holes in copies ....................................................................................................................... |
x-11 |
Copying multiple original pages onto a single page .............................................................................. |
x-11 |
Copying an original containing various page sizes ............................................................................... |
x-11 |
Adjusting copies according to the image quality of the original ............................................................ |
x-11 |
Inserting paper between copies of OHP ............................................................................................... |
x-11 |
Adding a cover page ............................................................................................................................. |
x-12 |
Inserting different paper into copies ...................................................................................................... |
x-12 |
Inserting pages from a different original at specified locations in a copy ............................................. |
x-12 |
Printing double-sided copies with the specified page on the front side ............................................... |
x-12 |
Copying with reversed colors ................................................................................................................ |
x-12 |
Printing a mirror image .......................................................................................................................... |
x-13 |
Copying with a background color ......................................................................................................... |
x-13 |
Improving the copy color quality ........................................................................................................... |
x-13 |
Separately copying a page spread ........................................................................................................ |
x-13 |
Repeating copy images ......................................................................................................................... |
x-13 |
Printing the enlarged image on multiple pages ..................................................................................... |
x-13 |
Creating booklets from copies of pamphlets ........................................................................................ |
x-14 |
Making copies for filing .......................................................................................................................... |
x-14 |
Adjusting the image to fit the paper size ............................................................................................... |
x-14 |
Copying with the page layout of a magazine ........................................................................................ |
x-14 |
Erasing sections of copies ..................................................................................................................... |
x-14 |
Printing a sample copy .......................................................................................................................... |
x-15 |
Printing date/time or page number on copies ....................................................................................... |
x-15 |
Managing jobs ....................................................................................................................................... |
x-15 |
Programming copy settings .................................................................................................................. |
x-15 |
Checking the copy settings ................................................................................................................... |
x-15 |
Enlarging the size of text in touch panel screens .................................................................................. |
x-15 |
Displaying explanations of functions and settings ................................................................................ |
x-15 |
Interrupting a copy job .......................................................................................................................... |
x-15 |
Explanation of manual conventions.................................................................................................................... |
x-16 |
Descriptions of originals and paper.................................................................................................................... |
x-18 |
User’s Guides........................................................................................................................................................ |
x-19 |
Printed manual ....................................................................................................................................... |
x-19 |
User’s Guide CD manuals ..................................................................................................................... |
x-19 |
1 Before making copies
1.1 |
Part names and their functions ........................................................................................................... |
1-2 |
1.1.1 |
Options ..................................................................................................................................................... |
1-2 |
1.1.2 |
Outside of machine................................................................................................................................... |
1-4 |
1.1.3 |
Inside of machine ..................................................................................................................................... |
1-7 |
1.1.4 |
Finisher FS-519/Output tray OT-602/Punch kit PK-515 .......................................................................... |
1-9 |
1.1.5 |
Saddle stitcher SD-505/Mailbin kit MT-502 ........................................................................................... |
1-11 |
1.1.6 |
Finisher FS-609/Punch kit PK-501 ......................................................................................................... |
1-13 |
1.1.7 |
Job separator JS-505............................................................................................................................. |
1-14 |
1.1.8 |
Control panel .......................................................................................................................................... |
1-16 |
1.1.9 |
Basic settings screens............................................................................................................................ |
1-18 |
1.1.10 |
Icons that appear in the screen .............................................................................................................. |
1-19 |
|
|
|
C353/C253/C203 |
x-2 |
|

Introduction
|
1.2 |
Adjusting the angle of the control panel .......................................................................................... |
1-21 |
|
1.2.1 |
To adjust the angle of the control panel ................................................................................................. |
1-21 |
|
1.3 |
Turning on the main power and the sub power............................................................................... |
1-24 |
|
1.3.1 |
Turning on the machine .......................................................................................................................... |
1-24 |
|
1.3.2 |
Scanning during warm-up ...................................................................................................................... |
1-25 |
|
1.3.3 |
Turning off the machine.......................................................................................................................... |
1-26 |
|
1.3.4 |
Automatically clearing settings (automatic panel reset) ......................................................................... |
1-27 |
|
1.3.5 |
Automatically canceling the mode screen (System Auto Reset) ............................................................ |
1-27 |
|
1.3.6 |
Automatically conserving energy (Low Power mode)............................................................................. |
1-27 |
|
1.3.7 |
Automatically conserving energy (Sleep mode) ..................................................................................... |
1-28 |
|
1.3.8 |
Manually conserving energy ................................................................................................................... |
1-29 |
|
1.3.9 |
Automatically turning the machine on/off (Weekly Timer) ...................................................................... |
1-29 |
|
1.3.10 Controlling each user’s use of this machine (User Authentication) ........................................................ |
1-31 |
|
|
1.3.11 |
Controlling each account’s use of this machine (Account Track) .......................................................... |
1-34 |
|
1.3.12 Controlling use of this machine with authentication unit (biometric type).............................................. |
1-36 |
|
|
|
When "1-to-many authentication" has been specified........................................................................... |
1-37 |
|
|
When "1-to-1 authentication" has been specified ................................................................................. |
1-38 |
|
1.3.13 Controlling use of this machine with the authentication unit (IC card type) ........................................... |
1-39 |
|
|
|
When "Card Authentication" has been specified ................................................................................... |
1-39 |
|
|
When "Card Authentication + Password" has been specified ............................................................... |
1-40 |
|
1.4 |
Loading paper into tray 1/2/3/4......................................................................................................... |
1-42 |
|
1.5 |
Loading paper into the LCT ............................................................................................................... |
1-44 |
|
1.6 |
Loading paper into the bypass tray .................................................................................................. |
1-46 |
2 |
Basic copy operations |
|
|
|
2.1 |
General copy operation........................................................................................................................ |
2-2 |
|
2.2 |
Operations that cannot be combined ................................................................................................. |
2-4 |
|
2.2.1 |
Operations where the setting specified last is given priority .................................................................... |
2-4 |
|
2.2.2 |
Operations where the setting specified first is given priority.................................................................... |
2-5 |
|
2.3 |
Feeding the original.............................................................................................................................. |
2-6 |
|
2.3.1 |
Loading the original into the ADF ............................................................................................................. |
2-6 |
|
2.3.2 |
Placing the original on the original glass .................................................................................................. |
2-7 |
|
2.3.3 |
Scanning the original in separate batches ("Separate Scan" setting) ...................................................... |
2-9 |
|
2.3.4 |
Scanning a multi-page original from the original glass .......................................................................... |
2-12 |
|
2.4 |
Specifying original settings ............................................................................................................... |
2-16 |
|
2.4.1 |
Specifying the original size (Original Size settings) ................................................................................ |
2-16 |
|
2.4.2 |
Copying originals of mixed sizes ("Mixed Original" setting) ................................................................... |
2-18 |
|
2.4.3 |
Loading folded (Z-folded) originals......................................................................................................... |
2-20 |
|
2.4.4 |
Selecting the original orientation (Original Direction settings)................................................................ |
2-21 |
|
2.4.5 |
To select an Original Direction setting.................................................................................................... |
2-22 |
|
2.4.6 |
Selecting the position of the binding margin (Binding Position settings) ............................................... |
2-23 |
|
2.4.7 |
To select a Binding Position setting ....................................................................................................... |
2-24 |
|
2.4.8 |
Reducing the effects of dust on the left partition glass.......................................................................... |
2-25 |
|
2.4.9 |
Changing scan settings for each original ............................................................................................... |
2-26 |
|
2.5 |
Selecting a Color setting.................................................................................................................... |
2-29 |
|
2.5.1 |
To select a Color setting......................................................................................................................... |
2-29 |
|
2.6 |
Selecting a Paper Setting .................................................................................................................. |
2-31 |
|
2.6.1 |
Automatically selecting the paper size ("Auto" Paper setting) ............................................................... |
2-31 |
|
2.6.2 |
Manually selecting the desired paper size ............................................................................................. |
2-32 |
|
2.7 |
Specifying a Zoom setting ................................................................................................................. |
2-34 |
|
2.7.1 |
Automatically selecting the zoom ratio ("Auto" Zoom setting)............................................................... |
2-34 |
|
2.7.2 |
Specifying the zoom ratio of the original ("Full Size" setting)................................................................. |
2-35 |
|
2.7.3 |
Typing in the zoom ratio (XY Zoom setting) ........................................................................................... |
2-35 |
|
2.7.4 |
Slightly reducing the copy ("Minimal" setting)........................................................................................ |
2-37 |
|
2.7.5 |
Selecting a preset zoom ratio (Enlarge and Reduce settings)................................................................ |
2-38 |
|
|
||
C353/C253/C203 |
x-3 |
||

Introduction
2.7.6 |
Typing in separate X and Y zoom ratios (Individual Zoom settings)....................................................... |
2-39 |
2.7.7 |
Selecting a stored zoom ratio................................................................................................................. |
2-41 |
2.7.8 |
Storing the desired zoom ratio ............................................................................................................... |
2-42 |
2.8 |
Selecting an Original > Copy setting ................................................................................................ |
2-44 |
2.8.1 |
Selecting single-sided copies................................................................................................................. |
2-45 |
2.8.2 |
Selecting double-sided copies ............................................................................................................... |
2-46 |
2.9 |
Selecting a combined copy setting................................................................................................... |
2-49 |
2.9.1 |
Copying multiple original pages onto a single page (combined copy settings) ..................................... |
2-50 |
2.10 |
Selecting the quality of the original .................................................................................................. |
2-52 |
2.10.1 |
Loading originals with small print or photos (Original Type settings)..................................................... |
2-52 |
2.10.2 |
To select an Original Type setting .......................................................................................................... |
2-53 |
2.11 |
Selecting the Density settings........................................................................................................... |
2-55 |
2.11.1 |
Adjusting the print density (Density settings) ......................................................................................... |
2-55 |
2.11.2 |
Adjusting the background density (Background Removal settings)....................................................... |
2-57 |
2.11.3 |
Adjusting the reproduction quality of text .............................................................................................. |
2-58 |
2.11.4 |
Printing with a glossy finish ("Glossy" setting) ....................................................................................... |
2-59 |
2.12 |
Selecting Finishing settings............................................................................................................... |
2-60 |
2.12.1 |
Separating copies by sets ("Sort" setting).............................................................................................. |
2-63 |
2.12.2 |
Separating copies by pages ("Group" Setting) ...................................................................................... |
2-64 |
2.12.3 |
Selecting the output tray ........................................................................................................................ |
2-65 |
2.12.4 |
Stapling copies (Staple settings) ............................................................................................................ |
2-66 |
2.12.5 |
Punching holes in copies (Punch settings)............................................................................................. |
2-69 |
2.13 |
Selecting a folding setting ................................................................................................................. |
2-72 |
2.13.1 |
Folding copies in half ("Half-Fold" setting) ............................................................................................. |
2-72 |
2.13.2Binding copies at the center
|
("Center Staple" and "Half-Fold" setting/"Center Staple & Fold" setting) |
..............................................2-74 |
2.14 |
Selecting not to rotate the image...................................................................................................... |
2-78 |
2.15Scanning the next original to be copied while a copy job is being printed
|
|
(next job reservation) |
2-79 |
|
2.16 |
Temporarily stopping scanning/printing .......................................................................................... |
2-80 |
|
2.17 |
Deleting a paused job......................................................................................................................... |
2-81 |
3 |
Additional copy operations |
|
|
|
3.1 |
Checking the Copy Settings (Check Job)........................................................................................... |
3-2 |
|
3.1.1 |
To check the settings ............................................................................................................................... |
3-2 |
|
3.1.2 |
To change the settings ............................................................................................................................. |
3-5 |
|
3.2 |
Printing a proof to check the settings (Proof Copy).......................................................................... |
3-6 |
|
3.3 |
Checking the print image as a preview image (Advanced Preview)................................................ |
3-9 |
|
3.3.1 |
Preview screen ......................................................................................................................................... |
3-9 |
|
|
Zoom ...................................................................................................................................................... |
3-10 |
|
|
Page Rotation ......................................................................................................................................... |
3-10 |
|
|
View Finishing......................................................................................................................................... |
3-11 |
|
|
Change Setting....................................................................................................................................... |
3-11 |
|
3.3.2 |
Checking the advanced preview ............................................................................................................ |
3-12 |
|
3.4 |
Interrupting a copy job (Interrupt mode) .......................................................................................... |
3-14 |
|
3.5 |
Registering copy programs (Mode Memory) ................................................................................... |
3-15 |
|
3.5.1 |
Deleting a copy program ........................................................................................................................ |
3-17 |
|
3.6 |
Copying with programmed copy settings (Mode Memory) ............................................................ |
3-18 |
|
3.7 |
Displaying function descriptions (Help)............................................................................................ |
3-20 |
|
3.7.1 |
Overview of Help screens....................................................................................................................... |
3-20 |
|
3.7.2 |
Displaying main Help screens ................................................................................................................ |
3-23 |
|
3.8 |
Specifying control panel settings (Accessibility mode) .................................................................. |
3-25 |
|
3.8.1 |
Displaying the Accessibility Setting screen ............................................................................................ |
3-25 |
|
3.8.2 |
Setting the "Touch Panel Adjustment" function ..................................................................................... |
3-25 |
|
3.8.3 |
Setting the Key Repeat Start/Interval Time functions ............................................................................ |
3-26 |
|
3.8.4 |
Setting the "System Auto Reset Confirmation" function........................................................................ |
3-28 |
|
|
||
C353/C253/C203 |
x-4 |
||

Introduction
|
3.8.5 |
Setting the "Auto Reset Confirmation" function..................................................................................... |
3-30 |
|
3.8.6 |
Setting the "Enlarge Display Mode Confirmation" function ................................................................... |
3-32 |
|
3.8.7 |
Setting the "Message Display Time" function ........................................................................................ |
3-33 |
|
3.8.8 |
Setting the "Sound Setting" functions.................................................................................................... |
3-34 |
4 |
Troubleshooting |
|
|
|
4.1 |
When an error code appears ............................................................................................................... |
4-2 |
|
4.2 |
When the message "Misfeed detected." appears ............................................................................. |
4-4 |
|
4.2.1 |
Location of paper misfeed........................................................................................................................ |
4-4 |
|
4.2.2 |
Paper misfeed indications ........................................................................................................................ |
4-5 |
|
4.2.3 |
Clearing a paper misfeed in the ADF (feed section) ................................................................................. |
4-7 |
|
4.2.4 |
Clearing a paper misfeed in the ADF (transport section)........................................................................ |
4-10 |
|
4.2.5 |
Clearing a paper misfeed in the ADF (scanning section)........................................................................ |
4-13 |
|
4.2.6 |
Clearing a paper misfeed in the ADF (output section)............................................................................ |
4-16 |
|
4.2.7 |
Clearing a paper misfeed in the ADF (turnover section)......................................................................... |
4-18 |
|
4.2.8 |
Clearing a paper misfeed in the fusing unit ............................................................................................ |
4-20 |
|
4.2.9 |
Clearing a paper misfeed in the main unit .............................................................................................. |
4-23 |
|
4.2.10 |
Clearing a paper misfeed in the automatic duplex unit.......................................................................... |
4-26 |
|
4.2.11 |
Clearing a paper misfeed in the bypass tray .......................................................................................... |
4-27 |
|
4.2.12 |
Clearing a paper misfeed in the paper transport section ....................................................................... |
4-30 |
|
4.2.13 Clearing a paper misfeed in tray 1.......................................................................................................... |
4-31 |
|
|
4.2.14 Clearing a paper misfeed in tray 2.......................................................................................................... |
4-34 |
|
|
4.2.15 |
Clearing a paper misfeed in paper feed cabinet (Tray 3/4) .................................................................... |
4-36 |
|
4.2.16 |
Clearing a paper misfeed in the LCT ...................................................................................................... |
4-37 |
|
4.2.17 Clearing a banner paper misfeed ........................................................................................................... |
4-39 |
|
|
4.2.18 |
Clearing a paper misfeed in finisher FS-519 .......................................................................................... |
4-43 |
|
4.2.19 |
Clearing a paper misfeed in the mailbin ................................................................................................. |
4-46 |
|
4.2.20 |
Clearing a paper misfeed in the saddle stitcher ..................................................................................... |
4-48 |
|
4.2.21 |
Clearing a paper misfeed in finisher FS-609 .......................................................................................... |
4-49 |
|
4.2.22 |
Clearing a paper misfeed in the separator ............................................................................................. |
4-52 |
|
4.3 |
When the message "Unable to staple." appears............................................................................. |
4-54 |
|
4.3.1 |
Clearing jammed staples in finisher FS-519........................................................................................... |
4-55 |
|
4.3.2 |
Clearing jammed staples in the saddle stitcher...................................................................................... |
4-57 |
|
4.3.3 |
Clearing jammed staples in finisher FS-609........................................................................................... |
4-58 |
|
4.4 |
When the message "Replenish paper." appears ............................................................................. |
4-61 |
|
4.5 |
When the message "... due to insufficient memory." appears ....................................................... |
4-62 |
|
4.6 |
When the message "Please replace following unit(s)." appears ................................................... |
4-63 |
|
4.7 |
When the message "XXXX needs to be replaced." appears .......................................................... |
4-64 |
|
4.8 |
When the message "Now remote operating. Please do not turn off the power." appears ......... |
4-65 |
|
4.9 |
Simple troubleshooting ...................................................................................................................... |
4-66 |
|
4.10 |
Main messages and their remedies.................................................................................................. |
4-69 |
5 |
Specifications |
|
|
|
5.1 |
Specifications........................................................................................................................................ |
5-2 |
|
5.1.1 |
Main unit ................................................................................................................................................... |
5-2 |
|
5.1.2 |
Automatic duplex unit............................................................................................................................... |
5-3 |
|
5.1.3 |
Reverse automatic document feeder DF-611 .......................................................................................... |
5-4 |
|
5.1.4 |
Paper feed cabinet PC-104 ...................................................................................................................... |
5-4 |
|
5.1.5 |
Paper feed cabinet PC-204 ...................................................................................................................... |
5-4 |
|
5.1.6 |
Paper feed cabinet PC-405 ...................................................................................................................... |
5-5 |
|
5.1.7 |
Finisher FS-519 ........................................................................................................................................ |
5-5 |
|
5.1.8 |
Punch kit PK-515...................................................................................................................................... |
5-6 |
|
5.1.9 |
Saddle stitcher SD-505 ............................................................................................................................ |
5-6 |
|
5.1.10 |
Output tray OT-602 .................................................................................................................................. |
5-6 |
|
|
||
C353/C253/C203 |
x-5 |
||

Introduction
|
5.1.11 |
Mailbin kit MT-502.................................................................................................................................... |
5-6 |
|
5.1.12 |
Finisher FS-609 ........................................................................................................................................ |
5-7 |
|
5.1.13 |
Punch kit PK-501...................................................................................................................................... |
5-7 |
|
5.1.14 |
Job Separator JS-505 .............................................................................................................................. |
5-8 |
6 |
Copy paper/originals |
|
|
|
6.1 |
Copy paper ............................................................................................................................................ |
6-2 |
|
6.1.1 |
Possible paper sizes................................................................................................................................. |
6-2 |
|
6.1.2 |
Paper types and paper capacities............................................................................................................ |
6-3 |
|
6.1.3 |
Special paper............................................................................................................................................ |
6-3 |
|
6.1.4 |
Precautions for paper ............................................................................................................................... |
6-4 |
|
6.1.5 |
Paper storage ........................................................................................................................................... |
6-5 |
|
6.1.6 |
Auto tray switch feature............................................................................................................................ |
6-5 |
|
6.1.7 |
Order for selecting paper trays................................................................................................................. |
6-5 |
|
6.2 |
Selecting the Paper settings................................................................................................................ |
6-6 |
|
6.2.1 |
Automatically detecting the paper size ("Auto Detect" setting)................................................................ |
6-6 |
|
6.2.2 |
Selecting a paper size setting (Size Setting) ............................................................................................ |
6-7 |
|
6.2.3 |
Specifying a non-standard paper size (Custom Size settings)................................................................. |
6-9 |
|
6.2.4 |
Storing a non-standard paper size (Custom Size settings) .................................................................... |
6-11 |
|
6.2.5 |
Selecting a setting for oversized paper (Wide Paper settings)............................................................... |
6-13 |
|
6.2.6 |
Specifying a setting for special paper .................................................................................................... |
6-15 |
|
6.2.7 |
Printing double-sided copies manually .................................................................................................. |
6-17 |
|
6.3 |
Originals............................................................................................................................................... |
6-19 |
|
6.3.1 |
Originals that can be loaded into the ADF.............................................................................................. |
6-19 |
|
6.3.2 |
Precautions for loading originals into the ADF ....................................................................................... |
6-20 |
|
6.3.3 |
Originals that can be placed on the original glass.................................................................................. |
6-20 |
|
6.3.4 |
Precautions for positioning originals on the original glass ..................................................................... |
6-20 |
7 |
Application functions |
|
|
|
7.1 |
Color Adjust parameters and samples ............................................................................................... |
7-2 |
|
7.1.1 |
General information about color............................................................................................................... |
7-3 |
|
7.1.2 |
"Red" parameter....................................................................................................................................... |
7-5 |
|
7.1.3 |
"Green" parameter.................................................................................................................................... |
7-6 |
|
7.1.4 |
"Blue" parameter ...................................................................................................................................... |
7-7 |
|
7.1.5 |
"Color Balance" parameter (CMYK color adjustment) ............................................................................. |
7-8 |
|
7.1.6 |
"Brightness" parameter .......................................................................................................................... |
7-10 |
|
7.1.7 |
"Contrast" parameter ............................................................................................................................. |
7-11 |
|
7.1.8 |
"Saturation" parameter........................................................................................................................... |
7-12 |
|
7.1.9 |
"Sharpness" parameter .......................................................................................................................... |
7-13 |
|
7.1.10 |
"Hue" parameter..................................................................................................................................... |
7-14 |
|
7.1.11 |
"Copy Density" parameter...................................................................................................................... |
7-15 |
|
7.1.12 |
"Single Color" function ........................................................................................................................... |
7-16 |
|
7.1.13 |
"2 Color" function ................................................................................................................................... |
7-17 |
|
7.1.14 |
"Background Color" function ................................................................................................................. |
7-18 |
|
7.1.15 |
"Neg-/Pos. Reverse" function ................................................................................................................ |
7-19 |
|
7.1.16 |
"Mirror Image" function .......................................................................................................................... |
7-20 |
|
7.2 |
Inserting paper between OHP transparencies ("OHP Interleave" function) ................................. |
7-21 |
|
7.3 |
Adding cover pages ("Cover Sheet" function) ................................................................................. |
7-23 |
|
7.4 |
Inserting different paper into copies ("Insert Sheet" function) ...................................................... |
7-26 |
|
7.5 |
Inserting copies of a different original for a specified page ("Insert Image" function)................ |
7-29 |
|
7.6 |
Specifying pages to be printed on the front side ("Chapters" function) ....................................... |
7-32 |
7.7Scanning originals with different settings and printing copies all together
|
("Program Jobs" function) |
7-35 |
7.8 |
Copying with image colors inversed ("Neg./Pos. Reverse" function) ........................................... |
7-39 |
7.9 |
Copying in a mirror image ("Mirror Image" function)...................................................................... |
7-41 |
|
|
|
C353/C253/C203 |
x-6 |
|

Introduction
|
7.10 |
Adding a background color to copies ("Background Color" function) ......................................... |
7-44 |
|
7.11 |
Adjusting the copy color quality (Color Adjust parameters) .......................................................... |
7-46 |
|
7.11.1 |
To adjust the Color Adjust parameters................................................................................................... |
7-46 |
|
7.11.2 |
Checking the print result of the Color Adjust settings (Sample Copy) ................................................... |
7-48 |
|
7.12 |
Producing separate copies of each page in a page spread ("Book Copy" function)................... |
7-50 |
|
7.13 |
Tiling copy images ("Image Repeat" function) ................................................................................ |
7-54 |
|
7.14 |
Copying an enlarged image on multiple pages ("Poster Mode" function).................................... |
7-58 |
|
7.15 |
Copying booklets ("Booklet Original" function)............................................................................... |
7-62 |
|
7.16 |
Adding a binding margin to copies ("Page Margin" function)........................................................ |
7-65 |
|
7.17 |
Adjusting the image to fit the paper (Image Adjust settings)......................................................... |
7-68 |
|
7.18 |
Copying with the page layout of a booklet ("Booklet" function).................................................... |
7-71 |
|
7.19 |
Erasing specified areas of copies ("Frame Erase" function).......................................................... |
7-73 |
|
7.20 |
Printing the date/time or page number on copies (Stamp/Composition functions) .................... |
7-75 |
|
7.20.1 |
Printing the date/time ("Date/Time" function)......................................................................................... |
7-76 |
|
7.20.2 |
Printing the page number ("Page Number" function) ............................................................................. |
7-79 |
|
7.20.3 |
Printing previously registered stamps ("Stamp" function)...................................................................... |
7-82 |
|
7.20.4 |
Printing copy protection text ("Copy Protect" function)......................................................................... |
7-86 |
|
7.20.5 |
Printing repeating stamps ("Stamp Repeat" function) ........................................................................... |
7-93 |
|
7.20.6 |
Printing the image scanned first overlapped by the remaining original pages ("Overlay" function) ...... |
7-98 |
|
7.20.7 |
Saving a scanned image as a registered overlay ("Overlay" function) ................................................. |
7-101 |
|
7.20.8 |
Using a registered overlay ("Overlay" function).................................................................................... |
7-102 |
|
7.20.9 |
Printing a header/footer ("Header/Footer" function)............................................................................. |
7-103 |
|
7.21 |
Saving the scanned original in a user box ("Save in User Box" function)................................... |
7-105 |
8 |
Replacing toner cartridges and staple cartridges and emptying punch scrap box |
||
|
8.1 |
Replacing the toner cartridge.............................................................................................................. |
8-2 |
|
8.1.1 |
To replace the toner cartridge .................................................................................................................. |
8-4 |
|
8.2 |
Replacing the waste toner box............................................................................................................ |
8-7 |
|
8.2.1 |
To replace the waste toner box................................................................................................................ |
8-8 |
|
8.3 |
Replacing an imaging unit ................................................................................................................. |
8-11 |
|
8.3.1 |
To replace the imaging unit .................................................................................................................... |
8-13 |
|
8.4 |
Replacing the staple cartridge .......................................................................................................... |
8-18 |
|
8.4.1 |
To replace the staple cartridge in the finisher FS-519 ........................................................................... |
8-19 |
|
8.4.2 |
To replace the staple cartridge in saddle stitcher .................................................................................. |
8-20 |
|
8.4.3 |
To replace the staple cartridge in the finisher FS-609 ........................................................................... |
8-23 |
|
8.5 |
Emptying the punch scrap box.......................................................................................................... |
8-27 |
|
8.5.1 |
To empty the punch scrap box in the finisher FS-519 ........................................................................... |
8-30 |
|
8.5.2 |
To empty the punch scrap box in the finisher FS-609 ........................................................................... |
8-31 |
9 |
Care of the machine |
|
|
|
9.1 |
Cleaning................................................................................................................................................. |
9-2 |
|
9.1.1 |
Housing..................................................................................................................................................... |
9-2 |
|
9.1.2 |
Original glass ............................................................................................................................................ |
9-2 |
|
9.1.3 |
Left partition glass .................................................................................................................................... |
9-3 |
|
9.1.4 |
Control panel ............................................................................................................................................ |
9-3 |
|
9.1.5 |
Original pad .............................................................................................................................................. |
9-4 |
|
9.1.6 |
Electrostatic charger wire ......................................................................................................................... |
9-4 |
|
9.1.7 |
Print head ................................................................................................................................................. |
9-5 |
|
9.2 |
Viewing counters (Meter Count).......................................................................................................... |
9-6 |
|
9.2.1 |
Viewing counters ...................................................................................................................................... |
9-6 |
|
9.2.2 |
Viewing the coverage rate ........................................................................................................................ |
9-7 |
|
9.3 |
When the message "It is time for the scheduled inspection of the device." appears ................... |
9-8 |
C353/C253/C203 |
x-7 |

Introduction
10 Managing jobs
10.1 |
Overview of Job List screen .............................................................................................................. |
10-2 |
10.1.1 |
Jobs ........................................................................................................................................................ |
10-2 |
10.1.2 |
Multi-job feature ..................................................................................................................................... |
10-2 |
10.1.3 |
Job List screens ..................................................................................................................................... |
10-3 |
10.1.4 |
Left panel Job List .................................................................................................................................. |
10-5 |
10.2 |
Performing operations on jobs.......................................................................................................... |
10-6 |
10.2.1 |
Deleting a job.......................................................................................................................................... |
10-6 |
10.2.2 |
Checking job settings ............................................................................................................................. |
10-7 |
10.2.3 |
Checking job details ............................................................................................................................... |
10-8 |
10.2.4 |
Displaying the Current Jobs list (stored jobs and active jobs) ............................................................... |
10-9 |
10.2.5 |
Displaying the Job History list .............................................................................................................. |
10-10 |
10.2.6 |
Printing a proof copy of a stored job.................................................................................................... |
10-10 |
10.2.7 |
Printing a stored job ............................................................................................................................. |
10-11 |
10.2.8 |
Increasing printing priority .................................................................................................................... |
10-13 |
11 Utility mode
11.1 |
Overview of Utility mode parameters ............................................................................................... |
11-2 |
11.1.1 |
List of registration information and parameters ..................................................................................... |
11-2 |
11.2 |
Registering a destination ................................................................................................................... |
11-7 |
11.2.1 |
Create One-Touch Destination............................................................................................................... |
11-7 |
11.2.2 |
Create User Box ..................................................................................................................................... |
11-7 |
11.2.3 |
Limiting Access to Destinations ............................................................................................................. |
11-7 |
|
Access Level........................................................................................................................................... |
11-7 |
|
Level settings.......................................................................................................................................... |
11-8 |
|
Group...................................................................................................................................................... |
11-8 |
|
Specifying a group setting...................................................................................................................... |
11-9 |
|
Specifying a destination level ............................................................................................................... |
11-10 |
|
Specifying a user level.......................................................................................................................... |
11-12 |
11.2.4 |
Displaying the destination registration screen...................................................................................... |
11-13 |
11.3 |
Specifying user settings................................................................................................................... |
11-15 |
11.3.1 |
System Settings.................................................................................................................................... |
11-15 |
11.3.2 |
Custom Display Settings ...................................................................................................................... |
11-17 |
11.3.3 |
Copier Settings ..................................................................................................................................... |
11-18 |
11.3.4 |
Scan/Fax Settings ................................................................................................................................ |
11-20 |
11.3.5 |
Printer Settings ..................................................................................................................................... |
11-21 |
11.3.6 |
Change Password ................................................................................................................................ |
11-21 |
11.3.7 |
Change E-Mail Address........................................................................................................................ |
11-21 |
11.3.8 |
Change Icon ......................................................................................................................................... |
11-21 |
11.3.9 |
Displaying the User Settings screen..................................................................................................... |
11-21 |
11.4 |
Specifying administrator settings ................................................................................................... |
11-23 |
11.4.1 |
System Settings.................................................................................................................................... |
11-23 |
11.4.2 |
Administrator/Machine Settings ........................................................................................................... |
11-28 |
11.4.3 |
One-Touch/User Box Registration ....................................................................................................... |
11-28 |
11.4.4 |
User Authentication/Account Track...................................................................................................... |
11-29 |
11.4.5 |
Network Settings .................................................................................................................................. |
11-31 |
11.4.6 |
Copier Setting....................................................................................................................................... |
11-32 |
11.4.7 |
Printer Settings ..................................................................................................................................... |
11-32 |
11.4.8 |
Fax Settings.......................................................................................................................................... |
11-33 |
11.4.9 |
System Connection .............................................................................................................................. |
11-33 |
11.4.10 |
Security Settings................................................................................................................................... |
11-33 |
11.4.11 |
License Settings ................................................................................................................................... |
11-36 |
11.4.12 |
Displaying the Administrator Settings screen....................................................................................... |
11-36 |
11.5 |
Check Consumable Life................................................................................................................... |
11-38 |
11.5.1 |
Displaying the Check Consumable Life screen.................................................................................... |
11-38 |
|
|
|
C353/C253/C203 |
x-8 |
|

Introduction
11.6 |
Overview of weekly timer settings .................................................................................................. |
11-40 |
11.7 |
Printer Adjustment............................................................................................................................ |
11-41 |
11.7.1 |
Leading Edge Adjustment .................................................................................................................... |
11-41 |
11.7.2 |
Centering .............................................................................................................................................. |
11-42 |
11.7.3 |
Leading Edge Adjustment (Duplex Side 2) ........................................................................................... |
11-44 |
11.7.4 |
Centering (Duplex 2nd Side)................................................................................................................. |
11-45 |
11.7.5 |
Adjusting printing according to the media ........................................................................................... |
11-47 |
11.8 |
Finisher Adjustment ......................................................................................................................... |
11-49 |
11.8.1 |
Center Staple Position Adjustment ...................................................................................................... |
11-49 |
11.8.2 |
Half-Fold Position ................................................................................................................................. |
11-51 |
11.8.3 |
Punch Horizontal Position Adjustment ................................................................................................. |
11-53 |
11.8.4 |
Punch Regist Loop Size Adjustment .................................................................................................... |
11-54 |
|
11.9 |
Color Registration Adjust ................................................................................................................ |
11-56 |
|
11.9.1 |
Adjusting the color registration for yellow, magenta and cyan ............................................................ |
11-56 |
|
11.10 |
Gradation Adjustment ...................................................................................................................... |
11-59 |
|
11.11 |
Header/Footer Settings.................................................................................................................... |
11-62 |
|
11.11.1 |
Specifying headers/footers................................................................................................................... |
11-62 |
|
11.11.2 |
Editing headers/footers ........................................................................................................................ |
11-64 |
|
11.12 |
Authentication Method..................................................................................................................... |
11-65 |
|
11.12.1 |
User authentication and account track ................................................................................................ |
11-65 |
|
11.12.2 |
When user authentication and account track are synchronized .......................................................... |
11-65 |
|
11.12.3 |
When user authentication and account track are used separately ...................................................... |
11-66 |
|
11.12.4 |
Selecting an authentication method..................................................................................................... |
11-66 |
|
11.13 |
User Authentication Setting............................................................................................................. |
11-70 |
|
11.13.1 |
Administrative Settings—List ............................................................................................................... |
11-70 |
|
11.13.2 |
Default Function Permission................................................................................................................. |
11-70 |
|
11.13.3 |
Public User Access............................................................................................................................... |
11-71 |
|
11.13.4 |
User Registration .................................................................................................................................. |
11-72 |
|
11.13.5 |
User Counter ........................................................................................................................................ |
11-77 |
|
11.13.6 |
Viewing user counters .......................................................................................................................... |
11-78 |
|
11.14 |
Account Track Setting...................................................................................................................... |
11-79 |
|
11.14.1 |
Account Track Registration .................................................................................................................. |
11-79 |
|
11.14.2 |
Account Track Counter......................................................................................................................... |
11-82 |
|
11.14.3 |
Viewing account counters .................................................................................................................... |
11-82 |
|
11.15 |
Password Rules ................................................................................................................................ |
11-84 |
|
11.15.1 |
Conditions of the password rules......................................................................................................... |
11-84 |
|
11.16 |
Enhanced Security Mode................................................................................................................. |
11-86 |
12 |
Appendix |
|
|
|
12.1 |
Entering text........................................................................................................................................ |
12-2 |
|
12.1.1 |
Enlarging the keyboard........................................................................................................................... |
12-3 |
|
12.1.2 |
To type text............................................................................................................................................. |
12-4 |
|
12.1.3 |
List of Available Characters.................................................................................................................... |
12-4 |
|
12.2 |
Glossary............................................................................................................................................... |
12-5 |
13 |
Index |
|
|
|
13.1 |
Index .................................................................................................................................................... |
13-2 |
C353/C253/C203 |
x-9 |
Introduction
Available features
Selecting the print color
The color used to print copies can be specified, for example, the copy can be printed in full color or in black and white.
For details, refer to "Selecting a Color setting" on page 2-29.
Automatically selecting the paper
The most appropriate paper size can automatically be selected based on the size of the loaded original and the specified zoom ratio.
For details, refer to "Automatically selecting the paper size ("Auto" Paper setting)" on page 2-31.
Adjusting copies to the size of the paper
The most appropriate zoom ratio can automatically be selected based on the size of the loaded original and the specified paper size.
For details, refer to "Automatically selecting the zoom ratio ("Auto" Zoom setting)" on page 2-34.
Specifying separate horizontal and vertical zoom ratios
By specifying separate horizontal and vertical zoom ratios, copies of the original can be resized as desired.
For details, refer to "Typing in separate X and Y zoom ratios (Individual Zoom settings)" on page 2-39.
|
|
|
|
|
|
|
|
|
|
|
|
|
|
|
|
|
|
|
|
|
|
|
ABC |
|
|
ABC |
|
|
ABC |
|||
|
|
|
|
|
|
|
|
|
|
|
|
|
|
|
|
|
|
|
|
|
|
Scanning the original in separate batches
An original with a large number of pages can be divided and scanned in separate batches. Double-sided copies can be produced by using the original glass or the original pages can be alternately loaded onto the original glass or into the ADF, and then all pages can be copied together as a single job.
For details, refer to "Scanning the original in separate batches ("Separate Scan" setting)" on page 2-9 and "Scanning a multi-page original from the original glass" on page 2-12.
Center binding and folding in half
Copies can be folded at their center ("Half-Fold" setting) or bound with staples ("Center Staple & Fold" setting).
For details, refer to "Selecting a folding setting" on page 2-72.
|
|
|
|
|
|
|
|
|
|
Half-fold |
Center staple and fold |
|||
Sorting copies
The finishing method for copies can be selected.
For details, refer to "Separating copies by sets ("Sort" setting)" on page 2-63, "Separating copies by pages ("Group" Setting)" on page 2-64.
|
|
|
|
|
|
|
|
|
|
|
|
|
|
|
|
|
|
|
|
|
|
|
|
|
|
|
|
|
|
|
|
|
|
|
|
|
|
|
|
|
|
|
|
|
|
|
|
|
|
|
|
|
|
|
|
|
|
|
|
|
|
|
|
|
|
|
|
|
|
|
|
|
|
|
|
|
|
|
|
|
|
|
|
|
|
|
|
|
|
|
|
|
|
|
|
|
|
|
|
|
|
|
|
|
|
ABC |
|
|
|
|
|
|
|
|
|
|
|||
|
|
ABC |
|
|
|
|
|
|
|
|
|
|
|
|
|
||||||||
|
|
|
|
|
|
|
|
|
|
|
ABC |
|
|
||||||||||
|
|
|
|
|
|
|
|||||||||||||||||
|
|
|
|
|
|
|
|
|
|
|
|
|
|
|
|
|
|
|
|
|
|
|
|
|
|
|
|
|
|
|
|
|
|
|
|
|
|
|
|
|
|
|
|
|
|
|
|
|
|
|
|
|
|
|
|
|
|
|
|
|
|
|
|
|
|
|
|
|
|
|
|
|
|
|
|
|
|
|
|
|
|
|
|
|
|
|
|
|
|
|
|
|
|
|
|
C353/C253/C203 |
x-10 |

Introduction
Stapling copies
Multi-page originals can be copied and stapled together.
For details, refer to "Stapling copies (Staple settings)" on page 2-66.
ABC ABC
Punching holes in copies
Holes for filing can be punched in the copies.
For details, refer to "Punching holes in copies (Punch settings)" on page 2-69.
 ABC
ABC
Copying multiple original pages onto a single page
Multiple pages of the original can be printed together on a single page.
For details, refer to "Copying multiple original pages onto a single page (combined copy settings)" on page 2-50.
ABC DEF
ABC DEF
Copying an original containing various page sizes
An original with various page sizes can be scanned and copied together.
For details, refer to "Copying originals of mixed sizes ("Mixed Original" setting)" on page 2-18.
ABC |
ABC |
Adjusting copies according to the image quality of the original
The copies can be adjusted according to the image quality of the original.
For details, refer to "Loading originals with small print or photos (Original Type settings)" on page 2-52 or "Adjusting the print density (Density settings)" on page 2-55.
Inserting paper between copies of OHP
In order to prevent OHP from becoming stuck to each other, a page (interleaf) can be inserted between the transparency copies.
For details, refer to "Inserting paper between OHP transparencies ("OHP Interleave" function)" on page 7-21.
DEF |
DEF |
ABC |
ABC |
|
C353/C253/C203 |
x-11 |
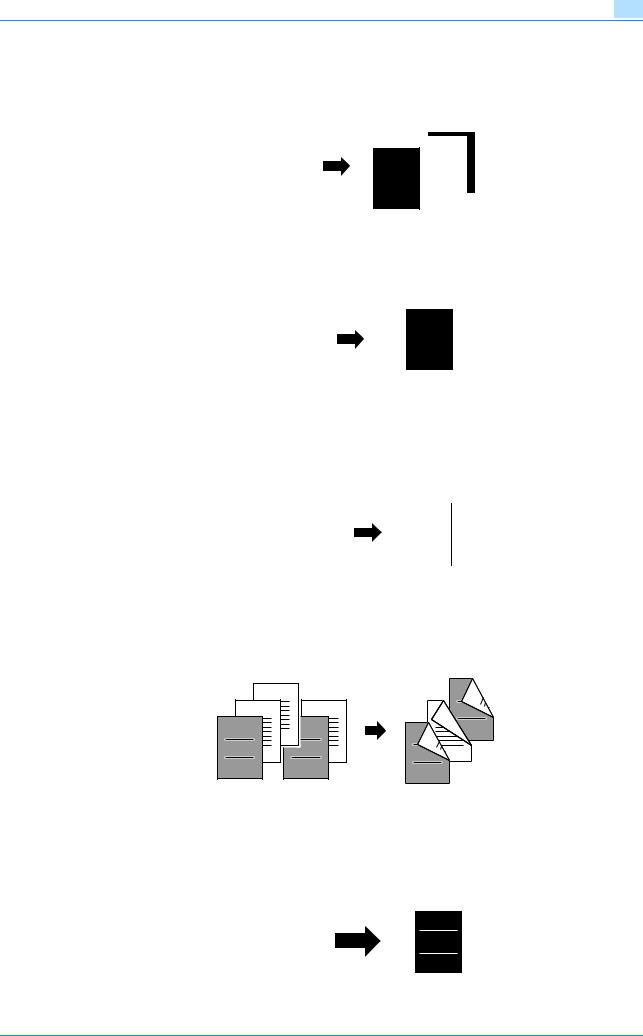
Introduction
Adding a cover page
Cover pages can be added to copies, or copies can be made using different paper (for example, colored paper) for only the cover pages.
For details, refer to "Adding cover pages ("Cover Sheet" function)" on page 7-23.
|
|
|
|
|
|
|
|
|
|
|
|
|
|
|
|
|
|
|
|
|
|
|
|
|
|
|
|
|
|
|
|
|
|
COVER |
|
|
|
|
|
|
|
|
|
|
|||
|
|
ABC |
|
|
ABC |
|
|
|
|||||||||||||||
|
|
|
|
|
|
|
|
|
|
|
|
||||||||||||
|
|
|
|
|
|
|
|
|
|
|
|
|
|
|
|
|
|
|
|
|
|
|
|
|
|
|
|
|
|
|
|
|
|
|
|
|
|
|
|
|
|
|
|
|
|
|
|
|
|
|
|
|
|
|
|
|
|
|
|
|
|
|
|
|
|
|
|
|
|
|
|
|
|
|
|
|
|
|
|
|
|
|
|
|
|
|
|
|
|
|
|
|
|
|
|
|
|
|
|
|
|
|
|
|
|
|
|
|
|
|
|
|
|
|
|
|
|
|
|
Inserting different paper into copies
Different paper (such as colored paper) can be inserted for specified pages in the copies.
For details, refer to "Inserting different paper into copies ("Insert Sheet" function)" on page 7-26.
|
|
|
|
|
|
|
|
|
|
|
|
|
|
|
|
|
|
|
|
|
|
|
|
|
|
|
|
|
|
|
|
|
|
|
|
|
|
|
|
|
|
|
|
ABC |
|
|
|
|
|
ABC |
|
|
|
|||||||||
|
|
|
|
|
|
|
|
|
|
|
|
|
|
|
|
|
|
|
|
|
|
|
|
|
|
|
|
|
|
|
|
|
|
|
|
|
|
|
|
|
|
|
|
|
|
|
|
|
|
|
|
|
|
|
|
|
|
|
|
|
|
|
|
|
|
|
|
|
|
|
|
|
|
|
|
|
|
|
|
|
|
|
|
Inserting pages from a different original at specified locations in a copy
An original scanned later can be inserted for specified pages in an original scanned earlier for copying.
For details, refer to "Inserting copies of a different original for a specified page ("Insert Image" function)" on page 7-29.
|
|
|
|
|
|
|
|
|
|
|
|
|
|
|
|
|
|
|
|
|
|
|
|
|
|
|
|
|
|
|
|
|
|
|
|
|
|
|
|
|
|
|
|
|
|
|
|
|
|
|
|
|
|
|
|
|
|
|
|
|
|
|
|
|
|
|
|
|
|
|
|
|
|
|
DEF |
|
||||
|
|
ABC |
|
|
|
|
DEF |
|
|
|
|
|
|
|
|
|
||||||||||
|
|
|
|
|
|
|
|
|
ABC |
|
|
|
|
|||||||||||||
|
|
|
|
|
|
|
|
|
|
|
|
|
|
|
|
|
|
|||||||||
|
|
|
|
|
|
|
|
|
|
|
|
|
|
|
|
|
|
|
|
|
|
|
|
|
||
|
|
|
|
|
|
|
|
|
|
|
|
|
|
|
|
|
|
|
|
|
|
|
|
|
|
|
|
|
|
|
|
|
|
|
|
|
|
|
|
|
|
|
|
|
|
|
|
|
|
|
|
|
|
|
|
|
|
|
|
|
|
|
|
|
|
|
|
|
|
|
|
|
|
|
|
|
|
|
|
|
|
|
|
|
|
|
|
|
|
|
|
|
|
|
|
|
|
|
|
|
|
|
|
|
|
|
|
|
|
|
|
|
|
|
|
|
|
|
|
|
|
|
|
|
|
|
|
|
|
|
|
|
|
|
Printing double-sided copies with the specified page on the front side
Double-sided copies can be printed with the specified pages on the front side.
For details, refer to "Specifying pages to be printed on the front side ("Chapters" function)" on page 7-32.
|
3 |
|
|
|
4 |
|
2 |
5 |
|
3 |
5 |
||
|
|
|||||
|
|
2 |
||||
1 |
|
4 |
1 |
|
4 |
|
|
|
3 |
2 |
|||
|
|
|
|
|||
1 |
2 |
2 |
5 |
3 |
||
1 |
||||||
|
1 |
|
4 |
1 |
|
|
|
|
|
|
|
Copying with reversed colors
An original can be copied with the lightand dark-colored areas of the original image inversed. With Color setting "Full Color", copies are printed with the hues and brightness inversed. With Color setting "Black" or "Single Color", copies are printed with the hues inversed.
For details, refer to "Copying with image colors inversed ("Neg./Pos. Reverse" function)" on page 7-39.
|
|
|
|
|
|
ABC |
|
ABC |
|
|
|
|
|
|
C353/C253/C203 |
x-12 |
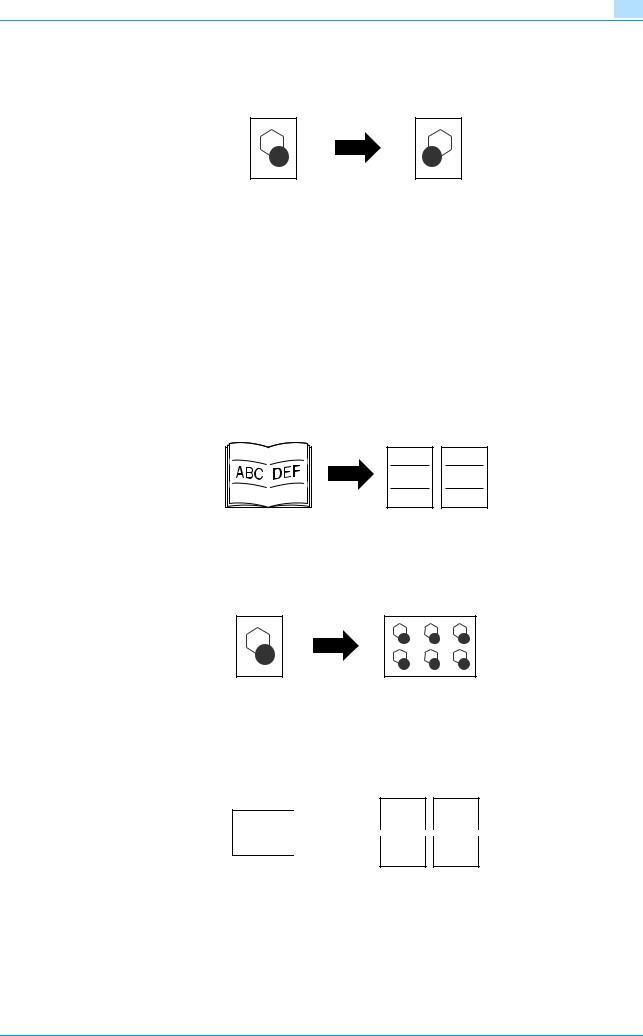
Introduction
Printing a mirror image
An original can be copied in its mirror image.
For details, refer to "Copying in a mirror image ("Mirror Image" function)" on page 7-41.
Copying with a background color
An original can be copied using one of the 18 colors available as the color of the background (blank areas).
For details, refer to "Adding a background color to copies ("Background Color" function)" on page 7-44.
Improving the copy color quality
You can adjust color copies to the quality for the desired image.
For details, refer to "Adjusting the copy color quality (Color Adjust parameters)" on page 7-46.
Separately copying a page spread
A page spread, such as in an open book or catalog, can be copied onto separate pages.
For details, refer to "Producing separate copies of each page in a page spread ("Book Copy" function)" on page 7-50.
ABC DEF
Repeating copy images
An original image can be repeatedly printed on a single sheet of paper.
For details, refer to "Tiling copy images ("Image Repeat" function)" on page 7-54.
Printing the enlarged image on multiple pages
A single original page can be automatically split into parts with each part printed enlarged.
For details, refer to "Copying an enlarged image on multiple pages ("Poster Mode" function)" on page 7-58.
A 


C353/C253/C203 |
x-13 |
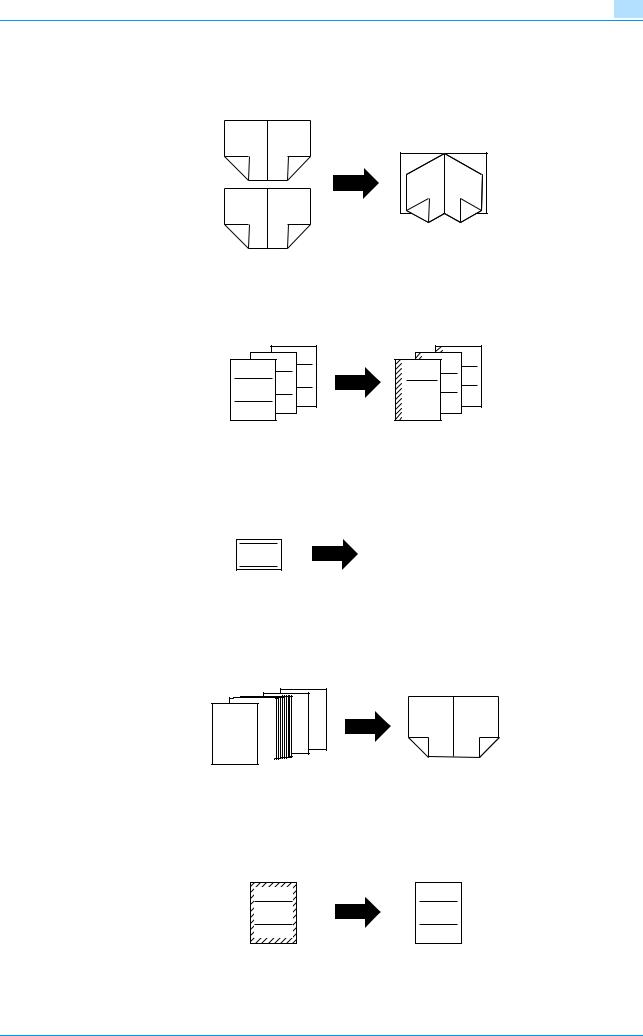
Introduction
Creating booklets from copies of pamphlets
Pamphlets with their staples removed can be copied and bound with staples.
For details, refer to "Copying booklets ("Booklet Original" function)" on page 7-62.
2
1
4
3
7
8
5
6
2 |
4 |
7 |
|
5 |
|
|
|
|
3 |
1 4 |
6 |
Making copies for filing
Copies can be printed with a filing margin so they can easily be stored in filing binders.
For details, refer to "Adding a binding margin to copies ("Page Margin" function)" on page 7-65.
GHI |
GHI |
DEF |
DEF |
ABC |
ABC |
Adjusting the image to fit the paper size
When the copy paper is larger than the original, copies can be printed so that the original image fills the paper.
For details, refer to "Adjusting the image to fit the paper (Image Adjust settings)" on page 7-68.
|
|
|
|
ABC |
|
ABC |
|
|
|
|
|
|
|
|
|
|
|
|
|
Copying with the page layout of a magazine
Copies can be made with the pages arranged in a layout for center binding, such as for a magazine.
For details, refer to "Copying with the page layout of a booklet ("Booklet" function)" on page 7-71.
|
2 |
11 |
12 |
1 |
|
|
|
|
|
|
11
12 1
2
Erasing sections of copies
Areas, such as the shadows of punched holes and transmission information in received faxes, can be erased in copies.
For details, refer to "Erasing specified areas of copies ("Frame Erase" function)" on page 7-73.
ABC |
ABC |
C353/C253/C203 |
x-14 |

Introduction
Printing a sample copy
Before printing a large number of copies, a single sample copy can be printed so that it can be checked.
For details, refer to "Printing a proof to check the settings (Proof Copy)" on page 3-6.
Printing date/time or page number on copies
The date/time, page number or copy protection text (hidden text that prevents improper copying) can be printed on copies, or each copy set can be printed with distribution numbers.
For details, refer to "Printing the date/time or page number on copies (Stamp/Composition functions)" on page 7-75.
GHI |
GHI |
GHI |
DEF |
DEF |
DEF |
ABC |
ABC |
ABC |
Managing jobs
The print status of copy jobs can be checked and the jobs can be managed.
For details, refer to "Managing jobs" on page 10-2.
Programming copy settings
Frequently used copy settings can be programmed and recalled to be used with other copy jobs.
For details, refer to "Registering copy programs (Mode Memory)" on page 3-15.
Checking the copy settings
Screens showing the current copy settings can be displayed. From these screens, the copy settings can also be changed.
For details, refer to "Checking the Copy Settings (Check Job)" on page 3-2.
Enlarging the size of text in touch panel screens
The text and buttons in the touch panel can be displayed in a larger size that is easier to read, allowing basic operations to be easily performed.
For details, refer to the User’s Guide [Enlarge Display Operations].
Displaying explanations of functions and settings
The name and function of parts and details of functions and settings appears in the Help screens.
For details, refer to "Displaying function descriptions (Help)" on page 3-20.
Interrupting a copy job
The copy job being printed can be interrupted in order for a different copy job to be printed.
For details, refer to "Interrupting a copy job (Interrupt mode)" on page 3-14.
C353/C253/C203 |
x-15 |

Introduction
Explanation of manual conventions
|
|
|
|
|
|
|
|
|
|
|
|
|
|
|
|
|
|
|
|
|
|
|
|
|
|
|
|
|
|
|
|
|
|
|
|
|
|
|
|
|
|
|
|
|
|
|
|
|
|
|
|
|
|
|
|
|
|
|
|
|
|
|
|
|
|
|
|
|
|
|
|
|
|
|
|
|
|
|
|
|
|
|
|
|
|
|
|
|
|
|
|
|
|
|
|
|
|
|
|
|
|
|
|
|
|
|
|
|
|
|
|
|
|
|
|
|
|
|
|
|
|
|
|
|
|
|
|
|
|
|
|
|
|
|
|
|
|
|
|
|
|
|
|
|
|
|
|
|
|
|
|
|
|
|
|
|
|
|
|
|
|
|
|
|
|
|
|
|
|
|
|
|
|
|
|
|
|
|
|
|
|
|
|
|
|
|
|
|
|
|
|
|
|
|
|
|
|
|
|
|
|
|
|
|
|
|
|
|
|
|
|
|
|
|
|
|
|
|
|
|
|
|
|
|
|
|
|
|
|
|
|
|
|
|
|
|
|
|
|
|
|
|
|
|
|
|
|
|
|
|
|
|
|
|
|
|
|
|
|
|
|
|
|
|
|
|
|
|
|
|
|
|
|
|
|
|
|
|
|
|
|
|
|
|
|
|
|
|
|
|
|
|
|
|
|
|
|
|
|
|
|
|
|
|
|
|
|
|
|
|
|
|
|
|
|
|
|
|
|
|
|
|
|
|
|
|
|
|
|
|
|
|
|
|
|
|
|
|
|
|
|
|
|
|
|
|
|
|
|
|
|
|
|
|
|
|
|
|
|
|
|
|
|
|
|
|
|
|
|
|
|
|
|
|
|
|
|
|
|
|
|
|
|
|
|
|
|
|
|
|
|
|
|
|
|
|
|
|
|
|
|
|
|
|
|
|
|
|
|
|
|
|
|
|
|
|
|
|
|
|
|
|
|
|
|
|
|
|
|
|
|
|
|
|
|
|
|
|
|
|
|
|
|
|
|
|
|
|
|
|
|
|
|
|
|
|
|
|
|
|
|
|
|
|
|
|
|
|
|
|
|
|
|
|
|
|
|
|
|
|
|
|
|
|
|
|
|
|
|
|
|
|
|
|
|
|
|
|
|
|
|
|
|
|
|
|
|
|
|
|
|
|
|
|
|
|
|
|
|
|
|
|
|
|
|
|
|
|
|
|
|
|
|
|
|
|
|
|
|
|
|
|
|
|
|
|
|
|
|
|
|
|
|
|
|
|
|
|
|
|
|
|
|
|
|
|
|
|
|
|
|
|
|
|
|
|
|
|
|
|
|
|
|
|
|
|
|
|
|
|
|
|
|
|
|
|
|
|
|
|
|
|
|
|
|
|
|
|
|
|
|
|
|
|
|
|
|
|
|
|
|
|
|
|
|
|
|
|
|
|
|
|
|
|
|
|
|
|
|
|
|
|
|
|
|
|
|
|
|
|
|
|
|
|
|
|
|
|
|
|
|
|
|
|
|
|
|
|
|
|
|
|
|
|
|
|
|
|
|
|
|
|
|
|
|
|
|
|
|
|
|
|
|
|
|
|
|
|
|
|
|
|
|
|
|
|
|
|
|
|
|
|
|
|
|
|
|
|
|
|
|
|
|
|
|
|
|
|
|
|
|
|
|
|
|
|
|
|
|
|
|
|
|
|
|
|
|
|
|
|
|
|
|
|
|
|
|
|
|
|
|
|
|
|
|
|
|
|
|
|
|
|
|
|
|
|
|
|
|
|
|
|
|
|
|
|
|
|
|
|
|
|
|
|
|
|
|
|
|
|
|
|
|
|
|
|
|
|
|
|
|
|
|
|
|
|
|
|
|
|
|
|
|
|
|
|
|
|
|
|
|
|
|
|
|
|
|
|
|
|
|
|
|
|
|
|
|
|
|
|
|
|
|
|
|
|
|
|
|
|
|
|
|
|
|
|
|
|
|
|
|
|
|
|
|
|
|
|
|
|
|
|
|
|
|
|
|
|
|
|
|
|
|
|
|
|
|
|
|
|
|
|
|
|
|
|
|
|
|
|
|
|
|
|
|
|
|
|
|
|
|
|
|
|
|
|
|
|
|
|
|
|
|
|
|
|
|
|
|
|
|
|
|
|
|
|
|
|
|
|
|
|
|
|
|
|
|
|
|
|
|
|
|
|
|
|
|
|
|
|
|
|
|
|
|
|
|
|
|
|
|
|
|
|
|
|
|
|
|
|
|
|
|
|
|
|
|
|
|
|
|
|
|
|
|
|
|
|
|
|
|
|
|
|
|
|
|
|
|
|
|
|
|
|
|
|
|
|
|
|
|
|
|
|
|
|
|
|
|
|
|
|
|
|
|
|
|
|
|
|
|
|
|
|
|
|
|
|
|
|
|
|
|
|
|
|
|
|
|
|
|
|
|
|
|
|
|
|
|
|
|
|
|
|
|
|
|
|
|
|
|
|
|
|
|
|
|
|
|
|
|
|
|
|
|
|
|
|
|
|
|
|
|
|
|
|
|
|
|
|
|
|
|
|
|
|
|
|
|
|
|
|
|
|
|
|
|
|
|
|
|
|
|
|
|
|
|
|
|
|
|
|
|
|
|
|
|
|
|
|
|
|
|
|
|
|
|
|
|
|
|
|
|
|
|
|
|
|
|
|
|
|
|
|
|
|
|
|
|
|
|
|
|
|
|
|
|
|
|
|
|
|
|
|
|
|
|
|
|
|
|
|
|
|
|
|
|
|
|
|
|
|
|
|
|
|
|
|
|
|
|
|
|
|
|
|
|
|
|
|
|
|
|
|
|
|
|
|
|
|
|
|
|
|
|
|
|
|
|
|
|
|
|
|
|
|
|
|
|
|
|
|
|
|
|
|
|
|
|
|
|
|
|
|
|
|
|
|
|
|
|
|
|
|
|
|
|
|
|
|
|
|
|
|
|
|
|
|
|
|
|
|
|
|
|
|
|
|
|
|
|
|
|
|
|
|
|
|
|
|
|
|
|
|
|
|
|
|
|
|
|
|
|
|
|
|
|
|
|
|
|
|
|
|
|
|
|
|
|
|
|
|
|
|
|
|
|
|
|
|
|
|
|
|
|
|
|
|
|
|
|
|
|
|
|
|
|
|
|
|
|
|
|
|
|
|
|
|
|
|
|
|
|
|
|
|
|
|
|
|
|
|
|
|
|
|
|
|
|
|
|
|
|
|
|
|
|
|
|
|
|
|
|
|
|
|
|
|
|
|
|
|
|
|
|
|
|
|
|
|
|
|
|
|
|
|
|
|
|
|
|
|
|
|
|
|
|
|
|
|
|
|
|
|
|
|
|
|
|
|
|
|
|
|
|
|
|
|
|
|
|
|
|
|
|
|
|
|
|
|
|
|
|
|
|
|
|
|
|
|
|
|
|
|
|
|
|
|
|
|
|
|
|
|
|
|
|
|
|
|
|
|
|
|
|
|
|
|
|
|
|
|
|
|
|
|
|
|
|
|
|
|
|
|
|
|
|
|
|
|
|
|
|
|
|
|
|
|
|
|
|
|
|
|
|
|
|
|
|
|
|
|
|
|
|
|
|
|
|
|
|
|
|
|
|
|
|
|
|
|
|
|
|
|
|
|
|
|
|
|
|
|
|
|
|
|
|
|
|
|
|
|
|
|
|
|
|
|
|
|
|
|
|
|
|
|
|
|
|
|
|
|
|
|
|
|
|
|
|
|
|
|
|
|
|
|
|
|
|
|
|
|
|
|
|
|
|
|
|
|
|
|
|
|
|
|
|
|
|
|
|
|
|
|
|
|
|
|
|
|
|
|
|
|
|
|
|
|
|
|
|
|
|
|
|
|
|
|
|
|
|
|
|
|
|
|
|
|
|
|
|
|
|
|
|
|
|
|
|
|
|
|
|
|
|
|
|
|
|
|
|
|
|
|
|
|
|
|
|
|
|
|
|
|
|
|
|
|
|
|
|
|
|
|
|
|
|
|
|
|
|
|
|
|
|
|
|
|
|
|
|
|
|
|
|
|
|
|
|
|
|
|
|
|
|
|
|
|
|
|
|
|
|
|
|
|
|
|
|
|
|
|
|
|
|
|
|
|
|
|
|
|
|
|
|
|
|
|
|
|
|
|
|
|
|
|
|
|
|
|
|
|
|
|
|
|
|
|
|
|
|
|
|
|
|
|
|
|
|
|
|
|
|
|
|
|
|
|
|
|
|
|
|
|
|
|
|
|
|
|
|
|
|
|
|
|
|
|
|
|
|
|
|
|
|
|
|
|
|
|
|
|
|
|
|
|
|
|
|
|
|
|
|
|
|
|
|
|
|
|
|
|
|
|
|
|
|
|
|
|
|
|
|
|
|
|
|
|
|
|
|
|
|
|
|
|
|
|
|
|
|
|
|
|
|
|
|
|
|
|
|
|
|
|
|
|
|
|
|
|
|
|
|
|
|
|
|
|
|
|
|
|
|
|
|
|
|
|
|
|
|
|
|
|
|
|
|
|
|
|
|
|
|
|
|
|
|
|
|
|
|
|
|
|
|
|
|
|
|
|
|
|
|
|
|
|
|
|
|
|
|
|
|
|
|
|
|
|
|
|
|
|
|
|
|
|
|
|
|
|
|
|
|
|
|
|
|
|
|
|
|
|
|
|
|
|
|
|
|
|
|
|
|
|
|
|
|
|
|
|
|
|
|
|
|
|
|
|
|
|
|
|
|
|
|
|
|
|
|
|
|
|
|
|
|
|
|
|
|
|
|
|
|
|
|
|
|
|
|
|
|
|
|
|
|
|
|
|
|
|
|
|
|
|
|
|
|
|
|
|
|
|
|
|
|
|
|
|
|
|
|
|
|
|
|
|
|
|
|
|
|
|
|
|
|
|
|
|
|
|
|
|
|
|
|
|
|
|
|
|
|
|
|
|
|
|
|
|
|
|
|
|
|
|
|
|
|
|
|
|
|
|
|
|
|
|
|
|
|
|
|
|
|
|
|
|
|
|
|
|
|
|
|
|
|
|
|
|
|
|
|
|
|
|
|
|
|
|
|
|
|
|
|
|
|
|
|
|
|
|
|
|
|
|
|
|
|
|
|
|
|
|
|
|
|
|
|
|
|
|
|
|
|
|
|
|
|
|
|
|
|
|
|
|
|
|
|
|
|
|
|
|
|
|
|
|
|
|
|
|
|
|
|
|
|
|
|
|
|
|
|
|
|
|
|
|
|
|
|
|
|
|
|
|
|
|
|
|
|
|
|
|
|
|
|
|
|
|
|
|
|
|
|
|
|
C353/C253/C203 |
|
|
|
|
|
x-16 |
|||||||||||||||||||||||||||||||||||||||
Introduction
|
|
|
|
|
|
|
|
|
|
|
|
|
|
|
|
|
|
|
|
|
|
|
|
|
|
|
|
|
|
|
|
|
|
|
|
|
|
|
|
|
|
|
|
|
|
|
|
|
|
|
|
|
|
|
|
|
|
|
|
|
|
|
|
|
|
|
|
|
|
|
|
|
|
|
|
|
|
|
|
|
|
|
|
|
|
|
|
|
|
|
|
|
|
|
|
|
|
|
|
|
|
|
|
|
|
|
|
|
|
|
|
|
|
|
|
|
|
|
|
|
|
|
|
|
|
|
|
|
|
|
|
|
|
|
|
|
|
|
|
|
|
|
|
|
|
|
|
|
|
|
|
|
|
|
|
|
|
|
|
|
|
|
|
|
|
|
|
|
|
|
|
|
|
|
|
|
|
|
|
|
|
|
|
|
|
|
|
|
|
|
|
|
|
|
|
|
|
|
|
|
|
|
|
|
|
|
|
|
|
|
|
|
|
|
|
|
|
|
|
|
|
|
|
|
|
|
|
|
|
|
|
|
|
|
|
|
|
|
|
|
|
|
|
|
|
|
|
|
|
|
|
|
|
|
|
|
|
|
|
|
|
|
|
|
|
|
|
|
|
|
|
|
|
|
|
|
|
|
|
|
|
|
|
|
|
|
|
|
|
|
|
|
|
|
|
|
|
|
|
|
|
|
|
|
|
|
|
|
|
|
|
|
|
|
|
|
|
|
|
|
|
|
|
|
|
|
|
|
|
|
|
|
|
|
|
|
|
|
|
|
|
|
|
|
|
|
|
|
|
|
|
|
|
|
|
|
|
|
|
|
|
|
|
|
|
|
|
|
|
|
|
|
|
|
|
|
|
|
|
|
|
|
|
|
|
|
|
|
|
|
|
|
|
|
|
|
|
|
|
|
|
|
|
|
|
|
|
|
|
|
|
|
|
|
|
|
|
|
|
|
|
|
|
|
|
|
|
|
|
|
|
|
|
|
|
|
|
|
|
|
|
|
|
|
|
|
|
|
|
|
|
|
|
|
|
|
|
|
|
|
|
|
|
|
|
|
|
|
|
|
|
|
|
|
|
|
|
|
|
|
|
|
|
|
|
|
|
|
|
|
|
|
|
|
|
|
|
|
|
|
|
|
|
|
|
|
|
|
|
|
|
|
|
|
|
|
|
|
|
|
|
|
|
|
|
|
|
|
|
|
|
|
|
|
|
|
|
|
|
|
|
|
|
|
|
|
|
|
|
|
|
|
|
|
|
|
|
|
|
|
|
|
|
|
|
|
|
|
|
|
|
|
|
|
|
|
|
|
|
|
|
|
|
|
|
|
|
|
|
|
|
|
|
|
|
|
|
|
|
|
|
|
|
|
|
|
|
|
|
|
|
|
|
|
|
|
|
|
|
|
|
|
|
|
|
|
|
|
|
|
|
|
|
|
|
|
|
|
|
|
|
|
|
|
|
|
|
|
|
|
|
|
|
|
|
|
|
|
|
|
|
|
|
|
|
|
|
|
|
|
|
|
|
|
|
|
|
|
|
|
|
|
|
|
|
|
|
|
|
|
|
|
|
|
|
|
|
|
|
|
|
|
|
|
|
|
|
|
|
|
|
|
|
|
|
|
|
|
|
|
|
|
|
|
|
|
|
|
|
|
|
|
|
|
|
|
|
|
|
|
|
|
|
|
|
|
|
|
|
|
|
|
|
|
|
|
|
|
|
|
|
|
|
|
|
|
|
|
|
|
|
|
|
|
|
|
|
|
|
|
|
|
|
|
|
|
|
|
|
|
|
|
|
|
|
|
|
|
|
|
|
|
|
|
|
|
|
|
|
|
|
|
|
|
|
|
|
|
|
|
|
|
|
|
|
|
|
|
|
|
|
|
|
|
|
|
|
|
|
|
|
|
|
|
|
|
|
|
|
|
|
|
|
|
|
|
|
|
|
|
|
|
|
|
|
|
|
|
|
|
|
|
|
|
|
|
|
|
|
|
|
|
|
|
|
|
|
|
|
|
|
|
|
|
|
|
|
|
|
|
|
|
|
|
|
|
|
|
|
|
|
|
|
|
|
|
|
|
|
|
|
|
|
|
|
|
|
|
|
|
|
|
|
|
|
|
|
|
|
|
|
|
|
|
|
|
|
|
|
|
|
|
|
|
|
|
|
|
|
|
|
|
|
|
|
|
|
|
|
|
|
|
|
|
|
|
|
|
|
|
|
|
|
|
|
|
|
|
|
|
|
|
|
|
|
|
|
|
|
|
|
|
|
|
|
|
|
|
|
|
|
|
|
|
|
|
|
|
|
|
|
|
|
|
|
|
|
|
|
|
|
|
|
|
|
|
|
|
|
|
|
|
|
|
|
|
|
|
|
|
|
|
|
|
|
|
|
|
|
|
|
|
|
|
|
|
|
|
|
|
|
|
|
|
|
|
|
|
|
|
|
|
|
|
|
|
|
|
|
|
|
|
|
|
|
|
|
|
|
|
|
|
|
|
|
|
|
|
|
|
|
|
|
|
|
|
|
|
|
|
|
|
|
|
|
|
|
|
|
|
|
|
|
|
|
|
|
|
|
|
|
|
|
|
|
|
|
|
|
|
|
|
|
|
|
|
|
|
|
|
|
|
|
|
|
|
|
|
|
|
|
|
|
|
|
|
|
|
|
|
|
|
|
|
|
|
|
|
|
|
|
|
|
|
|
|
|
|
|
|
|
|
|
|
|
|
|
|
|
|
|
|
|
|
|
|
|
|
|
|
|
|
|
|
|
|
|
|
|
|
|
|
|
|
|
|
|
|
|
|
|
|
|
|
|
|
|
|
|
|
|
|
|
|
|
|
|
|
|
|
|
|
|
|
|
|
|
|
|
|
|
|
|
|
|
|
|
|
|
|
|
|
|
|
|
|
|
|
|
|
|
|
|
|
|
|
|
|
|
|
|
|
|
|
|
|
|
|
|
|
|
|
|
|
|
|
|
|
|
|
|
|
|
|
|
|
|
|
|
|
|
|
|
|
|
|
|
|
|
|
|
|
|
|
|
|
|
|
|
|
|
|
|
|
|
|
|
|
|
|
|
|
|
|
|
|
|
|
|
|
|
|
|
|
|
|
|
|
|
|
|
|
|
|
|
|
|
|
|
|
|
|
|
|
|
|
|
|
|
|
|
|
|
|
|
|
|
|
|
|
|
|
|
|
|
|
|
|
|
|
|
|
|
|
|
|
|
|
|
|
|
|
|
|
|
|
|
|
|
|
|
|
|
|
|
|
|
|
|
|
|
|
|
|
|
|
|
|
|
|
|
|
|
|
|
|
|
|
|
|
|
|
|
|
|
|
|
|
|
|
|
|
|
|
|
|
|
|
|
|
|
|
|
|
|
|
|
|
|
|
|
|
|
|
|
|
|
|
|
|
|
|
|
|
|
|
|
|
|
|
|
|
|
|
|
|
|
|
|
|
|
|
|
|
|
|
|
|
|
|
|
|
|
|
|
|
|
|
|
|
|
|
|
|
|
|
|
|
|
|
|
|
|
|
|
|
|
|
|
|
|
|
|
|
|
|
|
|
|
|
|
|
|
|
|
|
|
|
|
|
|
|
|
|
|
|
|
|
|
|
|
|
|
|
|
|
|
|
|
|
|
|
|
|
|
|
|
|
|
|
|
|
|
|
|
|
|
|
|
|
|
|
|
|
|
|
|
|
|
|
|
|
|
|
|
|
|
|
|
|
|
|
|
|
|
|
|
|
|
|
|
|
|
|
|
|
|
|
|
|
|
|
|
|
|
|
|
|
|
|
|
|
|
|
|
|
|
|
|
|
|
C353/C253/C203 |
|
|
|
|
|
|
|
|
|
|
|
|
|
|
|
|
|
|
|
|
|
|
|
|
|
|
|
|
|
|
|
x-17 |
|||

Introduction
Descriptions of originals and paper
The descriptions used in this manual for originals and paper are explained below.
Whenever original and paper dimensions are mentioned in this manual, the value shown as Y in the illustration refers to the width, and the value shown as X refers to the length.
Lengthwise (w)
If the width (Y) of the paper is shorter than the length (X), the paper has a vertical or portrait orientation, indicated by w.
Crosswise (v)
If the width (Y) of the paper is longer than the length (X), the paper has a horizontal or landscape orientation, indicated by v.
C353/C253/C203 |
x-18 |

Introduction
User’s Guides
This machine is provided with printed manuals and PDF manuals on the User’s Guide CD.
Printed manual
Quick Guide [Copy/Print/Fax/Scan/Box Operations]
This manual contains operating procedures and descriptions of the most frequently used functions, allowing the machine to immediately be used.
In addition, this manual contains notes and precautions that should be followed for safe use of the machine.
Be sure to read this manual before using the machine.
User’s Guide CD manuals
User’s Guide [Copy Operations] (this manual)
This manual contains descriptions of the Copy mode operations and machine maintenance.
Refer to this manual for details on the paper and originals, copy procedures using convenient Application functions, replacing consumables, and troubleshooting operations such as clearing paper misfeeds.
User’s Guide [Enlarge Display Operations]
This manual contains details on operating procedures in Enlarge Display mode.
Refer to this manual for details on using copy, scanner, G3 fax, and network fax operations in Enlarge Display mode.
User’s Guide [Print Operations]
This manual contains details of the printing functions that can be specified with the standard built-in printer controller.
Refer to this manual for operating procedures on using the printing functions.
User’s Guide [Box Operations]
This manual contains operating procedures for using the user boxes on the hard disk.
Refer to this manual for details on saving data in user boxes, retrieving data from user boxes and transferring data.
User’s Guide [Network Scan/Fax/Network Fax Operations]
This manual contains details on the network scan, G3 fax, and network fax operations.
Refer to this manual for details on using network scan function by E-Mail or FTP, G3 fax, Internet fax and IP address fax operations.
In order to use the fax functions, the optional fax kit must be purchased separately.
User’s Guide [Fax Driver Operations]
This manual contains details of the fax driver functions that can be used to send a fax directly from a computer.
Refer to this manual for operating procedures on using the PC-FAX functions.
In order to use the fax functions, the optional fax kit must be purchased separately.
User’s Guide [Network Administrator]
This manual contains descriptions on setting methods for each function utilizing network connection, mainly using the PageScope Web Connection.
Refer to this manual for details on using network functions.
User’s Guide [Advanced Function Operations]
This User’s Guide describes overview and usage of functions that become available by registering the optional license kit and enabling its function, and functions that become available by connecting the MFP with applications.
In order to use the functions effectively, please read this User’s Guide.
The following models support the advanced function.
bizhub C650/C550/C451/C353/C253/C203
C353/C253/C203 |
x-19 |
Introduction
Trademarks/Copyrights
This manual contains descriptions on trademarks and copyrights.
Be sure to read this manual before using the machine.
C353/C253/C203 |
x-20 |

1
Before making copies
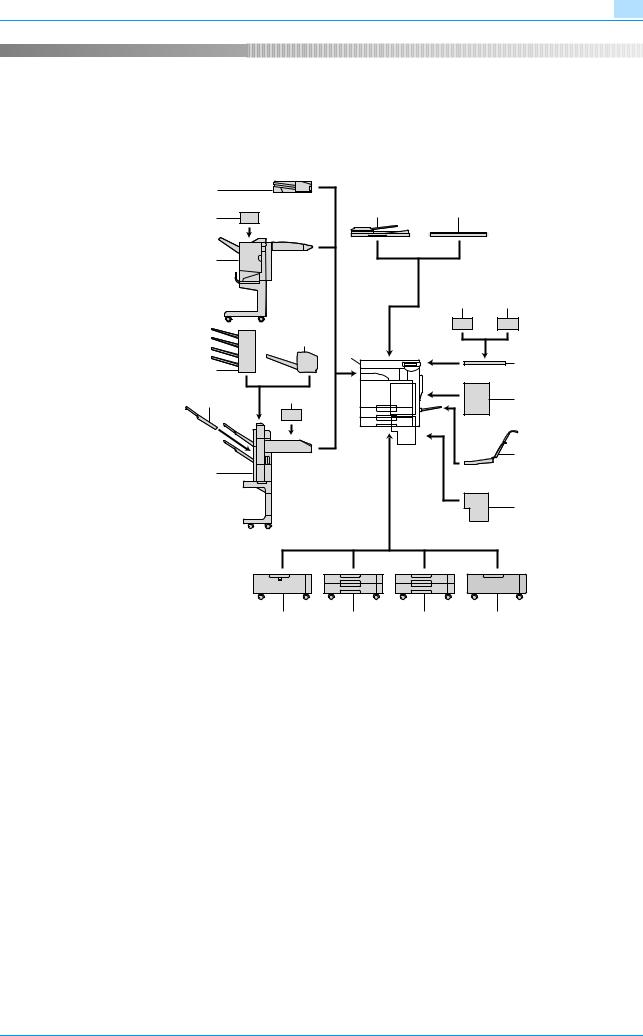
Before making copies |
1 |
|
1Before making copies
1.1Part names and their functions
1.1.1Options
21 |
|
|
|
20 |
2 |
3 |
|
|
|
|
|
19 |
|
|
|
|
|
4 |
5 |
|
17 |
|
|
|
1 |
|
6 |
16 |
|
|
|
|
|
|
|
15 |
18 |
|
7 |
|
|
|
|
|
|
|
8 |
14 |
|
|
|
|
|
|
9 |
13 12 11 10
No. |
Part name |
Description |
1 |
Main unit |
The original is scanned by the scanner section, and the scanned image is |
|
|
printed by the printer section. |
|
|
Referred to as the "machine", the "main unit", or the "C353/C253/C203" |
|
|
throughout the manual. |
|
|
|
2 |
Reverse automatic docu- |
Automatically feeds one original sheet at a time for scanning, and automatical- |
|
ment feeder DF-611 |
ly turns over double-sided originals for scanning. |
|
|
Referred to as the "ADF" throughout the manual. |
|
|
|
3 |
Original cover OC-507 |
Presses down on the loaded original to keep it in place. |
|
|
Referred to as the "original cover" throughout the manual. |
|
|
|
4 |
Authentication unit (biomet- |
Performs user authentication by scanning vein patterns in the finger. |
|
ric type) AU-101 |
For details, refer to the manual provided with the authentication unit (biometric |
|
|
type). |
|
|
|
5 |
Authentication unit (IC card |
Performs user authentication by reading the information registered on IC |
|
type) AU-201 |
cards. |
|
|
For details, refer to the manual provided with the authentication unit (IC card |
|
|
type). |
|
|
|
6 |
Working table WT-502 |
Provides an area to temporarily place an original or other materials. This is also |
|
|
used when the authentication unit is installed. |
|
|
|
7 |
Mount kit MK-711 |
Used for installing the fax kit, local interface kit, scan accelerator kit, and fax |
|
|
multi line. |
|
|
|
8 |
Mount kit MK-713 |
Used for banner printing. |
|
|
|
C353/C253/C203 |
1-2 |

Before making copies |
1 |
|
No. |
Part name |
Description |
9 |
Image controller IC-409 |
The external image controller connecting to bizhub C353/C253. |
|
|
Allows this machine to be used as a color printer configured into a computer |
|
|
network. For details, refer to the corresponding User’s Guide. |
|
|
! |
|
|
Detail |
|
|
To install the image controller, any of the desk, LCT, single paper feed cab- |
|
|
inet, or double paper feed cabinet must be installed to the machine. |
|
|
|
10 |
Desk DK-504 |
Allows this machine to be set up on the floor. |
|
|
Referred to as the "desk" throughout the manual. |
|
|
|
11 |
Paper feed cabinet PC-104 |
The top tray can be loaded with up to 500 sheets of paper, and the bottom tray |
|
|
can be used as storage. |
|
|
Referred to as the "single paper feed cabinet" throughout the manual. |
|
|
|
12 |
Paper feed cabinet PC-204 |
Both the top and bottom trays can each be loaded with up to 500 sheets of |
|
|
paper. |
|
|
Referred to as the "double paper feed cabinet" throughout the manual. |
|
|
|
13 |
Paper feed cabinet PC-405 |
Can be loaded with up to 2,500 sheets of paper. |
|
|
Referred to as the "LCT" throughout the manual. |
|
|
|
14 |
Finisher FS-519 |
Feeds out finished printed pages. The "Sort" setting (separating by copy set), |
|
|
"Group" setting (separating by pages), Staple settings ("Corner" and "2 posi- |
|
|
tion") Center Staple setting, and Half-Fold setting are available. |
|
|
|
15 |
Output tray OT-602 |
Installed onto finisher FS-519 to divide printed pages. |
|
|
Referred to as the "output tray" throughout the manual. |
|
|
|
16 |
Mailbin kit MT-502 |
Installed onto finisher FS-519 to divide printed pages (only with computer |
|
|
printing) and feed them into the appropriate tray assigned to a specific individ- |
|
|
ual or group. Collects printed pages. |
|
|
Referred to as the "mailbin kit" throughout the manual. |
|
|
|
17 |
Saddle stitcher SD-505 |
Installed onto finisher FS-519 so that copies can be bound or folded at the |
|
|
center. |
|
|
Referred to as the "saddle stitcher" throughout the manual. |
|
|
|
18 |
Punch kit PK-515 |
Installed onto finisher FS-519 to allow hole punching to be used. |
|
|
|
19 |
Finisher FS-609 |
Feeds out finished printed pages. The "Sort" setting (separating by copy set), |
|
|
"Group" setting (separating by pages), Staple settings ("Corner" and "2 posi- |
|
|
tion"), and Center Staple & Fold setting are available. |
|
|
! |
|
|
Detail |
|
|
To install the finisher, any of the desk, LCT, single paper feed cabinet, or |
|
|
double paper feed cabinet must be installed to the machine. |
|
|
|
20 |
Punch kit PK-501 |
Installed onto finisher FS-609 to allow hole punching to be used. |
|
|
|
21 |
Job separator JS-505 |
Installed onto the output tray to divide printed pages. |
|
|
Referred to as the "separator" throughout the manual. |
|
|
|
22 |
Local interface kit EK-603*1 |
Used for connecting the authentication unit (biometric type), the authentication |
|
|
unit (IC card type) and external memory (USB memory). |
|
|
|
23 |
Fax kit FK-502*1 |
Allows this machine to be used as a fax machine. |
24 |
Scan accelerator kit SA- |
Creates images at high speed when sending scans. |
|
501*1 |
|
25 |
Fax multi line ML-501 |
Installed to increase the telephone lines available for faxing. |
|
|
|
26 |
Video interface kit VI-504*2 |
Necessary for connecting the image controller to bizhub C353/C253. |
27 |
Stamp unit SP-501*2 |
Applies a stamp to originals that have been scanned. |
|
|
For details, refer to the User’s Guide [Network scan/Fax/Network Fax Opera- |
|
|
tions]. |
|
|
|
28 |
Security kit SC-503*1 |
Installed to encode the entire data saved on the hard disk. Even if an unexpect- |
|
|
ed accident such as hard disk theft occurs, encoded data in the hard disk is |
|
|
protected against disclosure. |
|
|
|
29 |
Assist handle AH-101*3 |
Used when closing the original cover or ADF. |
30 |
i-Option LK-101*3 |
Allows the Web Browser and Image Panel functions to be used from the con- |
|
|
trol panel. |
|
|
For details, refer to the User’s Guide [Advanced Function Operations]. |
|
|
|
31 |
i-Option LK-102*3 |
Allows PDF encryption, digital signatures and properties to be specified when |
|
|
transmitting PDF documents with Scan mode or User Box mode operations. |
|
|
For details, refer to the User’s Guide [Advanced Function Operations]. |
|
|
|
C353/C253/C203 |
1-3 |
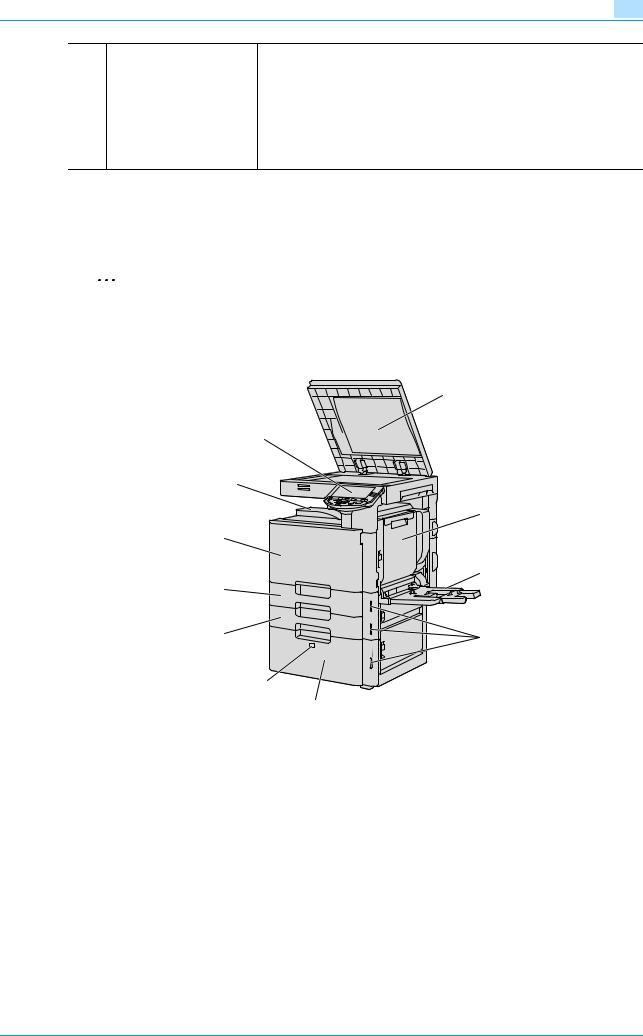
Before making copies |
1 |
|
No. |
Part name |
Description |
32 |
i-Option LK-103*3 |
Functions for both the i-Option LK-101 and i-Option LK-102 are available. |
|
|
! |
|
|
Detail |
|
|
This option may not be available depending on the service area. For de- |
|
|
tails, contact your technical representative. |
|
|
|
33 |
Upgrade kit UK-201*3 |
Required in order to use i-Option LK-101, i-Option LK-102 or i-Option LK-103. |
*1 Parts marked with an asterisk are to be installed to the mount kit, and therefore are not shown in the illustration.
*2 Parts marked with an asterisk are internal options and therefore are not shown in the illustration.
*3 Parts marked with an asterisk are not shown in the illustration.
2
Reminder
To keep the features and quality of the machine, use the desk or paper feed cabinet to place the machine on the floor.
1.1.2Outside of machine
|
1 |
|
11 |
10 |
|
|
2 |
9 |
|
|
3 |
8 |
|
7 |
4 |
6
5
*The illustration above shows the main unit with the optional original cover and LCT installed.
No. |
Part name |
Description |
1 |
Original pad |
Holds down the placed originals to keep it in place. |
|
|
|
2 |
Automatic duplex unit |
Turns over the paper for double-sided printing. |
|
|
|
3 |
Bypass tray |
Used when printing onto paper with a size not loaded into a paper tray or onto |
|
|
thick paper, OHP transparencies, postcards, envelopes, label sheets or ban- |
|
|
ner paper. |
|
|
Can be loaded with up to 150 sheets of plain paper, 20 sheets of thick paper |
|
|
1, thick paper 2, thick paper 3, thick paper 4, OHP transparencies, postcards, |
|
|
or label sheets, 10 envelopes, or 10 sheets of banner paper. |
|
|
|
4 |
Paper-empty indicator |
Flashes in orange when very few pages remain in the paper tray, and lights up |
|
|
when the tray is empty. |
|
|
|
5 |
LCT |
Can be loaded with up to 2,500 sheets of plain paper. |
|
|
Can be loaded with up to 1,000 sheets of thick paper 1, thick paper 2 or thick |
|
|
paper 3. |
|
|
|
6 |
Tray release button |
Press this button to pull out the LCT. |
|
|
|
C353/C253/C203 |
1-4 |
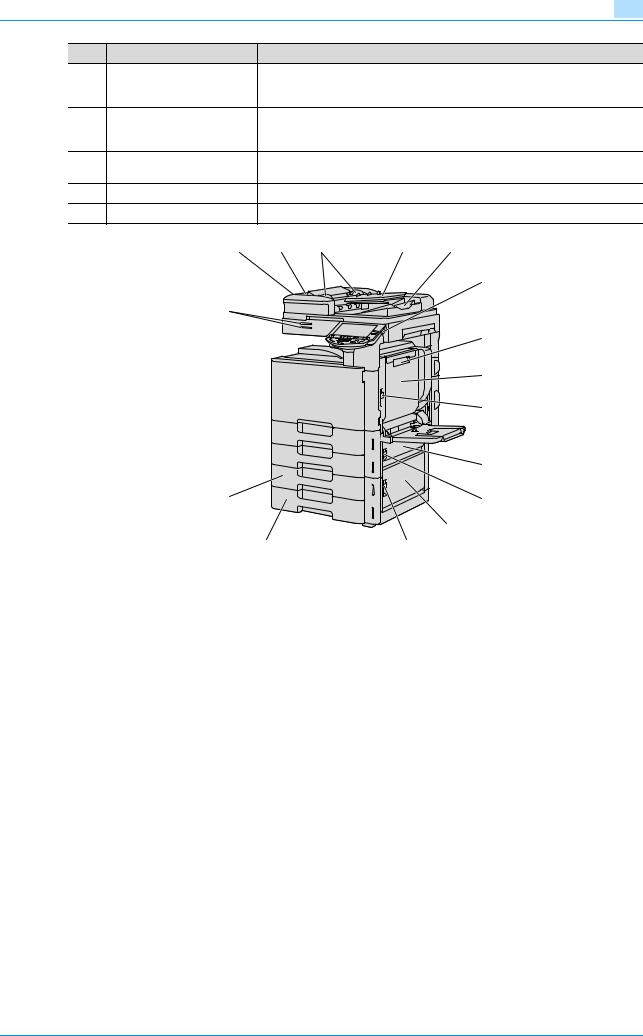
Before making copies |
1 |
|
No. |
Part name |
Description |
|
|
|
7 |
Tray 2 |
Can be loaded with up to 500 sheets of plain paper. |
|||
|
|
Can be loaded with up to 150 sheets of thick paper 1, thick paper 2 or thick |
|||
|
|
paper 3. |
|
|
|
8 |
Tray 1 |
Can be loaded with up to 500 sheets of plain paper. |
|||
|
|
Can be loaded with up to 150 sheets of thick paper 1, thick paper 2 or thick |
|||
|
|
paper 3. |
|
|
|
9 |
Front door |
Opened when replacing the toner cartridge, waste toner box, or imaging unit, |
|||
|
|
or when cleaning the print head. |
|
||
10 |
Output tray |
Collects printed pages. |
|
|
|
11 |
Control panel |
Used to specify the various machine settings. |
|||
|
12 |
13 |
14 |
15 |
16 |
|
|
|
|
|
17 |
|
27 |
|
|
|
|
|
|
|
|
|
18 |
|
|
|
|
|
19 |
|
|
|
|
|
20 |
|
21 |
26 |
22 |
|
23 |
25 |
24 |
*The illustration above shows the main unit with the optional ADF and double paper feed cabinet installed.
No. |
Part name |
Description |
12 |
Left-side cover release lever |
Used to open the left-side cover. |
|
|
|
13 |
Left-side cover |
Opened when clearing paper misfeeds. |
|
|
|
14 |
Lateral guide |
Adjusted to the width of the original. |
|
|
|
15 |
Original feed tray |
Loaded with originals facing up. |
|
|
|
16 |
Original output tray |
Collects originals that have been scanned. Open the output tray when clearing |
|
|
a misfeed in the ADF. |
|
|
|
17 |
Sub power switch |
Pressed to turn on/off machine operations. |
|
|
When turned off, the machine enters a state where it conserves energy. |
|
|
|
18 |
Automatic duplex unit re- |
Used to open the automatic duplex unit door when clearing paper misfeeds. |
|
lease lever |
|
|
|
|
19 |
Automatic duplex unit door |
Opened when clearing paper misfeeds in the automatic duplex unit. |
|
|
|
20 |
Upper right-side door re- |
Used to open the upper right-side door. |
|
lease lever |
|
|
|
|
21 |
Center right-side door |
Opened when clearing paper misfeeds from the paper transport section of tray |
|
|
2. |
|
|
|
22 |
Center right-side door re- |
Used to open the centerright-side door. |
|
lease lever |
|
|
|
|
23 |
Lower right-side door |
Opened when clearing paper misfeeds from the paper transport section of tray |
|
|
2, 3 or 4. |
|
|
|
24 |
Lower right-side door re- |
Used to open the Lower right-side door. |
|
lease lever |
|
|
|
|
C353/C253/C203 |
1-5 |

Before making copies |
1 |
|
No. |
Part name |
Description |
25 |
Tray 4/storage box |
Used as the storage box when the single paper feed cabinet is installed. |
|
|
Can be loaded with up to 500 sheets of plain paper when the double paper |
|
|
feed cabinet is installed. Can be loaded with up to 150 sheets of thick paper |
|
|
1, thick paper 2 or thick paper 3. |
26 |
Tray 3 |
Can be loaded with up to 500 sheets of plain paper. |
|
|
Can be loaded with up to 150 sheets of thick paper 1, thick paper 2 or thick |
|
|
paper 3. |
27 |
Status indicator |
The machine’s current status is indicated by the color and lighting/flashing of |
|
|
the indicator. |
|
|
Flashing in blue: Printing normally |
|
|
Flashing in orange: Warning |
|
|
Lit in orange: Stopping operating |
|
|
32 |
|
36 |
|
|
35 |
28 |
|
29 |
|
|
34 |
|
|
33 |
30 |
|
31 |
*The illustration above shows the main unit with the optional fax multi line, ADF, LCT, video interface kit and mount kit (fax kit, local intarface kit and fax multi line) installed.
37
38
39
40
*The illustration above shows the main unit with the optional ADF and double paper feed cabinet installed.
No. |
Part name |
Description |
28 |
Jack for connecting a tele- |
Used for connecting the cord from a telephone. |
|
phone |
|
|
(TEL PORT2) |
|
|
|
|
C353/C253/C203 |
1-6 |
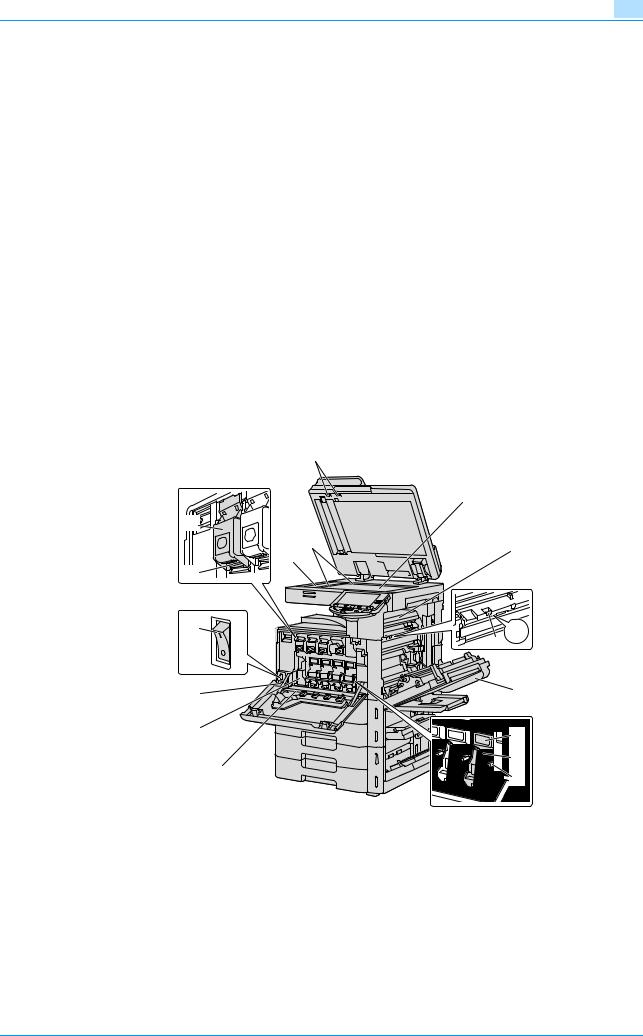
Before making copies |
1 |
|
No. |
Part name |
Description |
29 |
Telephone jack 2 |
Used for connecting a general subscriber line. |
|
(LINE PORT2) |
This jack is used when the optional fax multi line is installed. |
|
|
|
30 |
Jack for connecting a tele- |
Used for connecting the cord from a telephone. |
|
phone |
|
|
(TEL PORT1) |
|
|
|
|
31 |
Telephone jack 1 |
Used for connecting a general subscriber line. |
|
(LINE PORT1) |
|
|
|
|
32 |
USB port (type A) |
Used for connecting the USB cable for the authentication unit (biometric type), |
|
USB 2.0/1.1 |
the authentication unit (IC card type) or external memory (USB memory). |
|
|
|
33 |
External controller port |
Used for connecting the cable from the image controller. |
|
|
|
34 |
Internal controller port |
Used for connecting the internal controller. |
|
|
|
35 |
USB port (type B) |
Used for making connections when the machine is used as a USB printer. |
|
USB 2.0/1.1 |
|
|
|
|
36 |
Network connector |
Used for connecting the network cable when this machine is used for network |
|
(10Base-T/100Base- |
printing and network scanning. |
|
TX/1000Base-T) |
|
|
|
|
37 |
ADF connector |
Used for connecting the ADF hookup cord. |
|
|
|
38 |
Finisher connector |
Used for connecting the finisher hookup cord. |
|
|
|
39 |
Ozone filter |
Collects the ozone generated in the machine. |
|
|
|
40 |
Power cord |
Supplies power to the machine. |
|
|
|
1.1.3Inside of machine
16
|
|
1 |
13 |
|
|
|
15 |
2 |
|
14 |
|
|
|
|
12 |
|
|
10 |
|
M2 |
|
|
|
|
|
3 |
11 |
|
4 |
9 |
|
5 |
|
|
|
|
8 |
6 |
|
7 |
|
|
|
No. |
Part name |
Description |
1 |
Original glass |
The original placed on the glass is scanned. |
|
|
|
2 |
Fusing unit upper cover |
Opened when cleaning paper misfeeds in the fusing unit. |
|
|
|
3 |
Fusing cover lever M2 |
Opened when cleaning paper misfeeds in the fusing unit. |
|
|
|
4 |
Upper right-side door |
Opened when clearing paper misfeeds from inside the main unit. |
|
|
|
5 |
Unlock lever |
Used when removing an imaging unit. |
|
|
|
6 |
Imaging unit |
Creates the print image. |
|
|
|
C353/C253/C203 |
1-7 |

Before making copies |
1 |
|
No. |
Part name |
Description |
7 |
Charger-cleaning tool |
Used to clean the electrostatic charger wire, for example, when incorrect cop- |
|
|
ies are produced. |
|
|
|
8 |
Print head glass cleaning |
Used to clean the surface of the print head glass, for example, when replacing |
|
tool |
the imaging unit. |
|
|
|
9 |
Waste toner box |
Collects used waste toner. |
|
|
|
10 |
Main power switch |
Used to turn the machine on and off. |
|
|
|
11 |
Total counter |
Shows the total number of pages that have been printed. |
|
|
|
12 |
Lock tub |
Used when removing the toner cartridge. |
|
|
|
13 |
Toner cartridges |
There are four toner cartridges: cyan (C), magenta (M), yellow (Y) and black (K). |
|
|
The combination of the four toners generates full-color images. |
|
|
|
14 |
Left partition glass |
Used to scan the original image in this area when the ADF is used. |
|
|
|
15 |
Original scales |
Position the original so that it is aligned with the scales. Also, use the scales to |
|
|
measure the loaded original. |
|
|
|
16 |
Misfeed-clearing dial |
Turned when clearing paper misfeeds within the ADF. |
|
|
|
C353/C253/C203 |
1-8 |

Before making copies |
1 |
|
1.1.4Finisher FS-519/Output tray OT-602/Punch kit PK-515
1
14 
2
3 |
4 |
5 |
6 |
7 |
13 |
12 |
11 |
10 |
9 |
8 |
C353/C253/C203 |
1-9 |
Loading...