


 Loading...
Agilent 82357A
USB/GPIB Interface Converter
User’s Guide

Contents
82357A USB/GPIB Interface Converter User’s Guide
Chapter 1 - Installing the 82357A ........................................................... |
5 |
Steps to Install the 82357A............................................................ |
7 |
Step 1: Before You Install the 82357A........................................... |
8 |
Check Your Shipment ............................................................ |
8 |
Check System Requirements ................................................. |
9 |
Step 2: Installing Agilent IO Libraries Suite ................................. |
10 |
Checking for Installed Agilent IO Libraries ........................... |
10 |
Installing Agilent IO Libraries Suite ...................................... |
11 |
Step 3: Connecting the 82357A................................................... |
13 |
82357A Hardware Description ............................................. |
13 |
Connecting the 82357A to Your PC ..................................... |
14 |
Connecting the 82357A to a USB Hub ................................. |
15 |
Observing Windows Plug and Play Manager Sequence |
|
(Windows XP Only) .............................................................. |
17 |
Step 4: Configuring the 82357A................................................... |
21 |
Setting 82357A Default Configuration .................................. |
21 |
Setting 82357A Custom Configuration ................................. |
24 |
Step 5: Connecting GPIB Instruments......................................... |
27 |
Connecting a Single GPIB Instrument .................................. |
27 |
Connecting Multiple GPIB Instruments ................................ |
28 |
Step 6: Programming via the 82357A.......................................... |
29 |
Establishing Instrument Communication .............................. |
29 |
Programming GPIB Instruments .......................................... |
30 |
Chapter 2 - Using the 82357A ............................................................... |
33 |
Modes of Operation ..................................................................... |
35 |
Initial 82357A Operating States ............................................ |
35 |
Introduction to 82357A Operating Modes ............................. |
36 |
Single 82357A Operation ..................................................... |
37 |
Multiple 82357A Operation ................................................... |
38 |
SRQ Operation ..................................................................... |
38 |
Setting Configuration Parameters................................................ |
39 |
Changing Configuration Parameters .................................... |
39 |
Changing Modes of Operation ............................................. |
40 |
Setting Timeout Floor Values ............................................... |
40 |
Setting 82357A High-Performance Operation ...................... |
41 |
Chapter 3 - Troubleshooting the 82357A ............................................. |
43 |
Troubleshooting Flowchart .......................................................... |
45 |
Hardware Checks ........................................................................ |
47 |
Contents 3

Check USB Cables, USB Interface, Host PC ....................... |
47 |
Reboot the PC ...................................................................... |
47 |
Check Device Manager ......................................................... |
48 |
Software Installation Checks ........................................................ |
49 |
Check Suspend/Resume Operation ..................................... |
49 |
Verify Agilent IO Libraries Suite Installation .......................... |
49 |
Verify 82357A USB Driver Installation .................................. |
51 |
Software Configuration Checks .................................................... |
52 |
Checking IO Control Operation ............................................. |
52 |
Check USB Scanner ............................................................. |
53 |
Check for usbscan.sys (Windows 98 SE Only) ..................... |
54 |
Service/Support Information......................................................... |
56 |
82357A Service Information .................................................. |
56 |
Contacting Agilent ................................................................. |
56 |
Chapter 4 - 82357A User’s Guide Information ..................................... |
57 |
Guide Contents............................................................................. |
59 |
Guide General Information ........................................................... |
60 |
Appendix A - 82357A Specifications .................................................... |
63 |
Technical Specifications ............................................................... |
65 |
Supplementary Information .......................................................... |
66 |
Index ........................................................................................................ |
67 |
Contents 4

1
Installing the 82357A

Installing the 82357A
This Agilent 82357A USB/GPIB Interface Converter User’s Guide shows how to install and configure the Agilent 82357A USB/GPIB Interface Converter for PCs with Windows 98 (SE), Windows Me, Windows 2000, or Windows XP Professional operating systems.
NOTE
The 82357A USB/GPIB Interface Converter is supported ONLY for PCs with Windows 98 (Second Edition), Windows Me, Windows 2000, or Windows XP Professional operating systems.
These operating systems are specifically not supported: Windows 98 First (“Gold”) Edition
Windows 95
Windows NT 4.0 (OS does not support USB)
In case of difficulty in installing the 82357A, see Chapter 3 - Troubleshooting the 82357A. See Chapter 4 - 82357A User Guide Information for guide contents and general guide information.
This chapter shows suggested steps to install the 82357A, including:
Steps to Install the 82357A
Step 1: Before You Install the 82357A
Step 2: Installing the Agilent IO Libraries Suite
Step 3: Connecting the 82357A
Step 4: Configuring the 82357A
Step 5: Connecting GPIB Instruments
Step 6: Programming via the 82357A
6 |
Chapter 1 |

Installing the 82357A
Steps to Install the 82357A
Steps to Install the 82357A
This figure shows a suggested sequence of steps to install and configure the 82357A and to communicate between your PC and GPIB instruments.
Step 1 - Before You Install the 82357A
Check Your Shipment
Check System Requirements
Step 2 - Installing Agilent IO Libraries Suite
Check for Installed Libraries
Install the Libraries
Step 3 - Connecting the 82357A
Connect to a USB Port
Observe Plug and Play Manager
Step 4 - Configuring the 82357A
Set default configuration OR
Set custom configuration
Step 5 - Connecting GPIB Instruments
Connect single GPIB instrument OR
Connect multiple GPIB instruments
Step 6 - Programming via the 82357A
Establish communication
Program GPIB instruments
Chapter 1 |
7 |

Installing the 82357A
Step 1: Before You Install the 82357A
Step 1: Before You Install the 82357A
Before you install the 82357A, you should:
Check Your Shipment
Check System Requirements
Check Your Shipment
Your 82357A USB/GPIB Interface Converter shipment should include the items in the following figure. If any items are missing or damaged, keep the shipping materials and contact Agilent Technologies. See “Contacting Agilent” on page 56 for addresses and telephone numbers.
As you check the shipment items, verify that the 82357A Serial Number on the bottom of the 82357A matches the Serial Number shown on the Serial Number Label on the 82357A Kit Box and on the 82357A Certificate of Calibration. If the Serial Numbers do not match, contact Agilent. If all
Serial Numbers match, you may want to record the Serial Number for future reference.
Agilent Technologies 82357A USB/GPIB Interface Converter
Agilent Automation-Ready CD with Agilent IO Libraries Suite
82357A USB/GPIB Interface Converter Getting Started Poster
82357A USB/GPIB Interface Converter User's Guide
82357A Registration Card
Software License Agreement
|
|
|
|
Software License |
|
|
|
||||
|
|
|
|
|
|
|
|
|
|
|
|
|
82357A KIt Box |
|
|
Registration Card |
|
|
|||||
|
|
|
|
|
|
|
|
|
|
||
|
|
|
|
|
|
82357A Getting |
|
||||
|
|
|
|
|
|
Started |
Poster |
|
|||
|
US12345678 |
|
|
|
|
|
|||||
|
|
|
|
|
|
|
|
|
|
|
|
|
|
|
|
|
82357A User's |
||||||
82357A USB/GPIB Interface |
|
|
|
|
|||||||
|
|
|
|
|
|
|
|||||
Serial Number Label |
|
|
|
|
|||||||
|
|
|
|
|
Guide |
||||||
Converter |
|
|
|
|
|
||||||
|
|
|
|
|
|
|
|
|
|
|
|
|
|
|
|
|
|
|
|
|
|
|
|
|
|
|
|
|
|
|
|
|
|
|
|
Agilent Automation-
Ready CD
8 |
Chapter 1 |

Installing the 82357A
Step 1: Before You Install the 82357A
Check System Requirements
Before you install the Agilent IO Libraries Suite, you should verify that your system meets the minimum hardware and software requirements listed to install and use the software. Adding additional RAM may improve overall system performance.
NOTE
The 82357A USB/GPIB Interface Converter is supported ONLY on Windows 98 Second Edition, Windows Me, Windows 2000, and Windows XP Professional.
Item |
|
Minimum Requirements |
|
|
|
Hardware Requirements |
|
|
|
|
|
PC Operation/ |
|
200 MHz Pentium II (800 MHz recommended) |
Memory |
|
and 64 MBytes RAM (96 MB recommended). |
|
|
|
Hard Drive Space |
|
215 MB for installation: 160 MB for Microsoft |
|
|
.NET Framework, 55 MB for Agilent IO Libraries |
|
|
Suite |
|
|
125 MB for operation: 70 MB for Microsoft .NET |
|
|
Framework, 55 MB for Agilent IO Libraries Suite |
|
|
|
USB Port |
|
At least one USB port (to connect 82357A) |
|
|
|
Software Requirements |
|
|
|
|
|
Operating System |
|
Windows 98 SE, Windows Me, Windows 2000 |
|
|
(Service Pack 4 or later), or Windows XP |
|
|
Professional (Service Pack 1 or later). |
|
|
|
Agilent IO Libraries |
|
Agilent IO Libraries Version L.01.00 or greater, or |
|
|
Agilent IO Libraries Suite Version 14.0 or greater. |
|
|
|
NOTE
For Windows 98 Second Edition, you may need to install usbscan.sys, located on the Windows 98 CD-ROM. See “Check for usbscan.sys (Windows 98 SE Only)” in Chapter 3 - Troubleshooting the 82357A for details.
Chapter 1 |
9 |

Installing the 82357A
Step 2: Installing Agilent IO Libraries Suite
Step 2: Installing Agilent IO Libraries Suite
This step shows how to install the Agilent IO Libraries Suite, using default settings, including:
Checking for Installed Agilent IO Libraries or Agilent IO Libraries Suite
Installing Agilent IO Libraries Suite
NOTE
See the Agilent IO Libraries Getting Started Guide on your AutomationReady CD for a full description of installation options and installation troubleshooting information.
NOTE
You must have Administrator privileges to install the IO Libraries Suite and to run the Connection Expert utility.
Checking for Installed Agilent IO Libraries
Before you begin installation, check for previously installed Agilent IO Libraries software. If a version of the Agilent IO Libraries or Agilent IO Libraries Suite is installed on your PC, a blue IO icon may be displayed on the Windows taskbar (on the lower right-hand side of the screen).
 IO Libraries icon
 IO Libraries Suite
icon
If either IO icon is displayed, click the icon and click About Agilent IO Libraries Control to display the version. The version must be L.01.00 or greater. Note that Agilent IO Libraries Suite 14.0 was the revision
10 |
Chapter 1 |
Installing the 82357A
Step 2: Installing Agilent IO Libraries Suite
immediately following Agilent IO Libraries M.01.01, so you should consider revision “14.0” to be a greater version number than ”L” or “M”.
If the IO icon is not displayed, a version may still be installed. To check this, click Start | Programs and look for the Agilent IO Libraries or Agilent IO Libraries Suite program group.
If this group is displayed, click Agilent IO Libraries | IO Control to display the IO icon. Then, click the icon and click About Agilent IO Libraries Control to display the installed version (must be L.01.00 or greater, inclusive of 14.0 or greater).
If neither the IO icon nor the Agilent IO Libraries program group is displayed, no Agilent IO Libraries are installed and you can use
the steps in this chapter and in the Agilent IO Libraries Suite Getting Started Guide to install the libraries.
If the version of the Agilent IO Libraries is less than L.01.00, you must install the newer version included on your Automation-Ready CD to support the 82357A.
If your version of the Agilent IO Libraries is at least L.01.00, but less than the version on your Automation-Ready CD, you may want to install the newer version to take advantage of new features and greater ease of use of the more recent Agilent IO Libraries Suite. Note that Agilent IO Libraries Suite 14.0 was the revision immediately following Agilent IO Libraries M.01.01, so you should consider revision “14.0” to be a greater version number than “L” or “M”. Configuration instructions in this manual make use of Agilent IO Libraries Suite 14.0.
Installing Agilent IO Libraries Suite
To install the Agilent IO Libraries Suite software,
1First, disconnect any USB instruments, USB/GPIB converters, and FireWire-VXI interfaces that are connected to your PC.
2Insert the Automation-Ready CD in your CD-ROM drive. Wait a few seconds for the auto-run window to appear.
Chapter 1 |
11 |

Installing the 82357A
Step 2: Installing Agilent IO Libraries Suite
3If the auto-run window does not appear automatically,
Click Start | Run...
Type <drive>:autorun\auto.exe, where <drive> is your CD drive letter.
4When the auto-run window appears, follow the directions in this window to install the Agilent IO Libraries Suite. (See the Agilent IO Libraries Getting Started Guide on your Automation-Ready CD for a full description of installation options and installation troubleshooting information.)
12 |
Chapter 1 |

Installing the 82357A
Step 3: Connecting the 82357A
Step 3: Connecting the 82357A
After the Agilent IO Libraries (Version L.01.00 or later) have been installed, you can connect the 82357A to any USB port on your PC or you can connect the 82357A via standard USB hubs. This step includes:
82357A Hardware Description
Connecting the 82357A to Your PC
Connecting the 82357A to a USB Hub
Observing Windows Plug and Play Manager (Windows XP)
NOTE
If the Agilent IO Libraries or Agilent IO Libraries Suite has not been installed on your PC, STOP. Install the libraries (see Step 2: Installing the Agilent IO Libraries Suite) and then return to this step.
NOTE
For Windows 98 Second Edition, you may need to install usbscan.sys, located on the Windows 98 CD-ROM. See “Check for usbscan.sys (Windows 98 SE Only)” in Chapter 3 - Troubleshooting the 82357A for details.
82357A Hardware Description
The Agilent 82357A USB/GPIB Interface Converter (82357A) provides a direct interface connection from the USB port on your PC to GPIB instruments. The 82357A includes an attached USB cable that is USB 1.1 compliant. This cable is shielded and the connector is specified for up to 1,500 insertions.
An 82357A can be directly connected to a single GPIB instrument or can be connected to up to 14 GPIB instruments via GPIB cables. In addition, several 82357As can be connected to your PC via standard USB hubs.
The following figure shows main 82357A hardware features.
Chapter 1 |
13 |

Installing the 82357A
Step 3: Connecting the 82357A
GPIB Connector.
Connect to up to 14
GPIB Instruments.
Green ACCESS LED
Green READY LED
Red FAIL LED
USB Cable. Connect to USB Port.
Connecting the 82357A to Your PC
This section shows steps to connect the 82357A to a USB port on your PC or to connect to your PC via a USB Hub.
1Connect to a USB Port. Make sure the PC is ON and plug the 82357A USB cable into any available USB port on your PC. Do not connect the 82357A to GPIB instruments at this time.
READY LED
FAIL LED 


Connect to USB Port |
82357A |
USB Cable
ACCESS LED
14 |
Chapter 1 |

Installing the 82357A
Step 3: Connecting the 82357A
2Observe the LEDs. Observe the LEDs on the 82357A for at least 10 seconds. See Chapter 2 - Using the 82357A for a description of the normal LED sequence with an initial installation of an 82357A.
aInitially, only the red FAIL LED should be ON. After a few seconds, all three LEDs should be ON. All three LEDs ON shows the 82357A has been successfully installed, but is not yet configured for use with the Agilent IO Libraries Suite.
bIf all three LEDs are not ON after 10 seconds and all Windows Plug and Play Manager activity has ceased, STOP. See Chapter 3 - Troubleshooting the 82357A for diagnostics information.
cIf all three LEDs are still ON after 10 seconds, go to “Observing Windows Plug and Play Manager Sequence (Windows XP Only)”.
Connecting the 82357A to a USB Hub
This section shows steps to connect the 82357A to a USB port on your PC via a standard USB hub.
NOTE
Any USB hub used with the 82357A MUST be self-powered (must not be bus-powered or powered from the USB bus). Also, be sure to check the applicable USB hub documentation for hub operating parameters, such as power requirements and maximum length of USB cables.
1Plug the power adapter into the hub and into an electrical outlet. Make sure the hub is operating in self-powered mode. For example, the following figure shows a 4-port self-powered USB hub with two 82357A USB/GPIB Interface Converters connected.
2Make sure your PC is ON. Connect the USB cable of the USB hub to any available USB port on your PC.
3Plug at least one 82357A USB/GPIB Interface Converter into the port(s) on the USB hub. It is not necessary to connect GPIB instruments to any 82357A at this time.
Chapter 1 |
15 |

Installing the 82357A
Step 3: Connecting the 82357A
USB Cable
82357A
USB Cable |
4-Port |
|
Self- |
|
|
|
Powered |
|
|
USB Hub |
USB Cable |
|
|
82357A
4Observe the LEDs. Observe the LEDs on the 82357A for at least 10 seconds. See Chapter 2 - Using the 82357A for a description of the normal LED sequence with an initial installation of an 82357A.
aInitially, only the red FAIL LED should be ON. After a few seconds, all three LEDs should be ON. All three LEDs ON shows the 82357A has been successfully installed, but is not yet configured for use with the Agilent IO Libraries.
bIf all three LEDs are not ON after 10 seconds and all Windows Plug and Play Manager activity has ceased, STOP. See Chapter 3 - Troubleshooting the 82357A for diagnostics information.
cIf all three LEDs are still ON after 10 seconds, go to “Observing Windows Plug and Play Manager Sequence (Windows XP Only)”.
16 |
Chapter 1 |

Installing the 82357A
Step 3: Connecting the 82357A
|
Observing Windows Plug and Play Manager |
|
Sequence (Windows XP Only) |
|
When an 82357A is first plugged into a USB port, for Windows XP ONLY, |
|
a Windows Plug and Play Manager installation sequence may be displayed. |
|
|
|
NOTE |
|
This section shows typical displays for a Windows XP Professional |
|
operating system ONLY. Similar displays may appear for Windows |
|
98 SE, Windows 2000, or Windows Me operating systems. |
Introduction |
|
The following sequence only appears when an 82357A is initially plugged |
|
|
into a USB port. The sequence appears each time an 82357A with a new |
|
serial number is installed or when an 82357A is installed in a new USB port. |
|
For example, if an 82357A with Serial Number US12345678 is initially |
|
plugged into USB port #1, the sequence may appear. If this 82357A is |
|
configured using the sequence, the next time this 82357A is plugged into |
|
USB port #1, the sequence will not appear. |
|
However, if another 82357A is plugged into USB port #1 or if the 82357A |
|
with Serial Number US12345678 is initially plugged into USB port #2, the |
|
sequence may also appear. |
|
|
|
NOTE |
|
The displays in the following sequence assume you have installed the |
|
Agilent IO Libraries Suite as shown in Step 2 - Installing Agilent IO |
|
Libraries Suite. If you have not installed the libraries, STOP and do |
|
Step 2 before continuing. |
|
|
Chapter 1 |
17 |

Installing the 82357A
Step 3: Connecting the 82357A
Typical Windows
Plug and Play
Manager Sequence
When an 82357A is initially plugged into a USB port, a Welcome to the Found New Hardware Wizard dialog box may appear, as shown in the following figure. If this dialog box appears, select Install the software
automatically (Recommended) and click Next>.
NOTE
Ignore the statement “If your hardware came with an installation CD or floppy disk, insert it now”, as the software has already been installed.
5The Please wait while the wizard searches... dialog box appears. Wait until the initializing process completes and then click Next>.
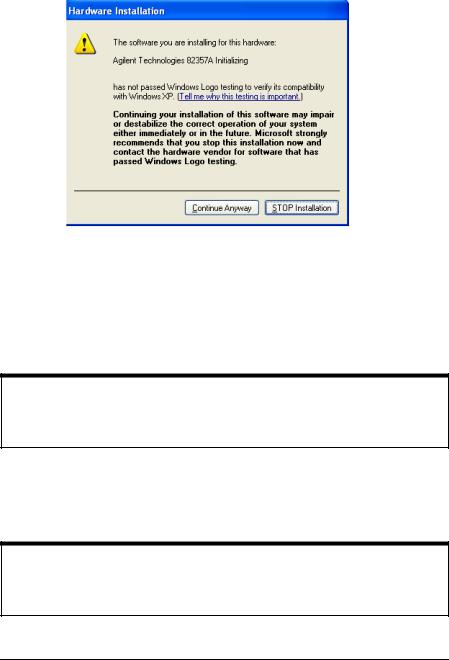
6The Hardware Installation dialog box appears.
NOTE
Although the statement “Continuing your installation ... passed Windows Logo testing.” appears, you can safely click the Continue Anyway button.
18 |
Chapter 1 |
Installing the 82357A
Step 3: Connecting the 82357A
7The Completing the Found New Hardware Wizard dialog box appears. Click Finish to close the wizard.
8A slightly different version of the Welcome to the Found New Hardware Wizard dialog box appears, this time for installing 82357A software Select Install the software automatically (Recommended) and then click Next>.
NOTE
Ignore the statement “If your hardware came with an installation CD or floppy disk, insert it now”, as the software has already been installed.
9The Please wait while the wizard searches... dialog box appears. Wait until the initializing process completes and click Next>.
10A different version of the Hardware Installation dialog box appears.
NOTE
Although the statement “Continuing your installation ... passed Windows Logo testing.” appears, you can safely click the Continue Anyway button.
Chapter 1 |
19 |

Installing the 82357A
Step 3: Connecting the 82357A
11The Please wait while the wizard installs the software... dialog box appears. After the installation is complete, click the Next> button to display the Agilent 82357A USB/GPIB Interface Detected dialog box. Go to “Step 4: Configuring the 82357A” to continue the installation.
20 |
Chapter 1 |
Installing the 82357A
Step 4: Configuring the 82357A
Step 4: Configuring the 82357A
After the 82357A has been installed and the applicable Windows Plug and Play Manager installation sequence has completed, the 82357A must be configured before it can be used with SICL or with Agilent VISA or
VISA COM. This step includes:
Setting 82357A Default Configuration
Setting 82357A Custom Configuration
NOTE
You must have Administrator privileges to install the IO Libraries Suite and to run the Connection Expert utility. If you do not have Administrator privileges, the default configuration for the 82357A will not take effect, and you will not be able to use the 82357A until it has been configured using Connection Expert.
Setting 82357A Default Configuration
This section shows steps to configure an 82357A for default settings by using the Agilent 82357A USB/GPIB Interface Detected dialog box. The default configuration should be sufficient for most applications.
NOTE
The Agilent 82357A USB/GPIB Interface Detected dialog box is displayed only if the Connection Expert utility is not running when you connect the 82357A. If Connection Expert is running, default configuration is automatic; you need take no further action. (If Connection Expert is running and you do not see your 82357A in the Connection Expert window after connecting it, click Refresh All to force the default configuration.)
1Check LED Status. Before setting 82357A configuration, verify that all three LEDs on the 82357A are still ON to indicate the 82357A has been successfully installed, but has not yet been configured.
282357A Interface Detected Box Appears. After an 82357A has been connected to a USB port and the Windows Plug and Play Manager
Chapter 1 |
21 |
Loading...