


Copyright Information
Copyright © 2007 by Oki Data Americas, Inc. All Rights Reserved
Document Information
OkiLAN 7120e Network User’s Guide P/N 59386201, Revision 1.3 February, 2007
Disclaimer
Every effort has been made to ensure that the information in this document is complete, accurate, and up-to-date. The manufacturer assumes no responsibility for the results of errors beyond its control. The manufacturer also cannot guarantee that changes in software and equipment made by other manufacturers and referred to in this guide will not affect the applicability of the information in it. Mention of software products manufactured by other companies does not necessarily constitute endorsement by the manufacturer .
While all reasonable efforts have been made to make this document as accurate and helpful as possible, we make no warranty of any kind, expressed or implied, as to the accuracy or completeness of the information contained herein.
The most up-to-date drivers and manuals are available from the web site: http://www.okiprintingsolutions.com
Trademark Information
Oki and Microline are registered trademarks of Oki Electric Industry Company Ltd. Apple, Macintosh and Mac OS are registered trademarks of Apple Computers Inc.
Microsoft, MS-DOS and Windows are either registered trademarks or trademarks of Microsoft Corporation in the United States and/or other countries.
Other product names and brand names are registered trademarks or trademarks of their proprietors.
Regulatory Information
This product complies with the requirements of the Council Directives 89/336/EEC (EMC), 73/23/EEC (LVD) and 1999/5/EC (R&TTE), as amended where applicable, on the approximation of the laws of the member states relating to Electromagnetic Compatibility, Low Voltage and Radio & Telecommunications Terminal Equipment.
OkiLAN 7120e Network User’s Guide
Copyright Information - 2
Table of Contents
Configuration . . . . . . . . . . . . . . . . . . . . . . . . . . . . . .5
Introduction . . . . . . . . . . . . . . . . . . . . . . . . . . . . . . . . . . 5 Specification. . . . . . . . . . . . . . . . . . . . . . . . . . . . . . . . . 6 Self-diagnostic test . . . . . . . . . . . . . . . . . . . . . . . . . . . . 6 Configuration utility. . . . . . . . . . . . . . . . . . . . . . . . . . . . . 7 Available utilities. . . . . . . . . . . . . . . . . . . . . . . . . . . . . . 7 Using Quick Setup. . . . . . . . . . . . . . . . . . . . . . . . . . . . . . 8 Using AdminManager. . . . . . . . . . . . . . . . . . . . . . . . . . . . 9 Installation. . . . . . . . . . . . . . . . . . . . . . . . . . . . . . . . . . .10 Interface . . . . . . . . . . . . . . . . . . . . . . . . . . . . . . . . . . . .10 File menu. . . . . . . . . . . . . . . . . . . . . . . . . . . . . . . . . . .10 Status Menu. . . . . . . . . . . . . . . . . . . . . . . . . . . . . . . . .11 Setup Menu . . . . . . . . . . . . . . . . . . . . . . . . . . . . . . . . .11 Oki Device Setup . . . . . . . . . . . . . . . . . . . . . . . . . . . . .11 Setup by HTTP . . . . . . . . . . . . . . . . . . . . . . . . . . . . . . .23 IP Address Setup . . . . . . . . . . . . . . . . . . . . . . . . . . . . .23 Option Menu. . . . . . . . . . . . . . . . . . . . . . . . . . . . . . . . .24 Help Menu . . . . . . . . . . . . . . . . . . . . . . . . . . . . . . . . . .24 Using a Web browser. . . . . . . . . . . . . . . . . . . . . . . . . . . .24 Web User Name and Password . . . . . . . . . . . . . . . . . . . .25 Microsoft Internet Explorer. . . . . . . . . . . . . . . . . . . . . . .25 Netscape Navigator . . . . . . . . . . . . . . . . . . . . . . . . . . . .26 Using SNMP . . . . . . . . . . . . . . . . . . . . . . . . . . . . . . . . . .26 Management utility . . . . . . . . . . . . . . . . . . . . . . . . . . . . .26 System requirement . . . . . . . . . . . . . . . . . . . . . . . . . . .27 Installation. . . . . . . . . . . . . . . . . . . . . . . . . . . . . . . . . . .29 Uninstallation . . . . . . . . . . . . . . . . . . . . . . . . . . . . . . . . .29 Printing utility. . . . . . . . . . . . . . . . . . . . . . . . . . . . . . . . .30 To install the Oki LPR utility . . . . . . . . . . . . . . . . . . . . . . .31 Uninstallation . . . . . . . . . . . . . . . . . . . . . . . . . . . . . . . . .32
Microsoft Windows. . . . . . . . . . . . . . . . . . . . . . . . .33
Overview . . . . . . . . . . . . . . . . . . . . . . . . . . . . . . . . . . . .33 Installation of TCP/IP Protocol . . . . . . . . . . . . . . . . . . . . .34 Windows 95/98/Me . . . . . . . . . . . . . . . . . . . . . . . . . . . .34 Windows NT 4.0 . . . . . . . . . . . . . . . . . . . . . . . . . . . . . .35 Windows 2000 . . . . . . . . . . . . . . . . . . . . . . . . . . . . . . .35 Windows XP . . . . . . . . . . . . . . . . . . . . . . . . . . . . . . . . .36 Network printer IP address configuration . . . . . . . . . . . . .36 Configuring Windows for Network Printing . . . . . . . . . . . . .38
OkiLAN 7120e Network User’s Guide
Table of Contents - 3
Windows 95/98/Me . . . . . . . . . . . . . . . . . . . . . . . . . . . .38 Windows NT 4.0 . . . . . . . . . . . . . . . . . . . . . . . . . . . . . .38 Windows 2000 . . . . . . . . . . . . . . . . . . . . . . . . . . . . . . .40 Windows XP . . . . . . . . . . . . . . . . . . . . . . . . . . . . . . . . .42 Novell Netware IPX . . . . . . . . . . . . . . . . . . . . . . . . . . . . .45 NetBEUI Protocol . . . . . . . . . . . . . . . . . . . . . . . . . . . . . .45 Windows 95/98/Me . . . . . . . . . . . . . . . . . . . . . . . . . . . .46 Windows NT 4.0 . . . . . . . . . . . . . . . . . . . . . . . . . . . . . .46 Windows 2000 . . . . . . . . . . . . . . . . . . . . . . . . . . . . . . .47 Windows XP . . . . . . . . . . . . . . . . . . . . . . . . . . . . . . . . .47 Printer driver configuration. . . . . . . . . . . . . . . . . . . . . . . .48
Novell NetWare . . . . . . . . . . . . . . . . . . . . . . . . . . .50
Overview . . . . . . . . . . . . . . . . . . . . . . . . . . . . . . . . . . . .50 Supported Versions and Modes . . . . . . . . . . . . . . . . . . . .50 Remote Printer Mode. . . . . . . . . . . . . . . . . . . . . . . . . . .50 Print Server Mode (Recommended) . . . . . . . . . . . . . . . . .50 Setup Utilities. . . . . . . . . . . . . . . . . . . . . . . . . . . . . . . . .51 OKI NDPS Gateway . . . . . . . . . . . . . . . . . . . . . . . . . . . .51 iPrint . . . . . . . . . . . . . . . . . . . . . . . . . . . . . . . . . . . . . .53
UNIX. . . . . . . . . . . . . . . . . . . . . . . . . . . . . . . . . . . .54
Overview . . . . . . . . . . . . . . . . . . . . . . . . . . . . . . . . . . . .54 Configuration . . . . . . . . . . . . . . . . . . . . . . . . . . . . . . . .54 Operating system configuration . . . . . . . . . . . . . . . . . . .57
Troubleshooting . . . . . . . . . . . . . . . . . . . . . . . . . . .68
Self-diagnostic test . . . . . . . . . . . . . . . . . . . . . . . . . . . . .68 TCP/IP . . . . . . . . . . . . . . . . . . . . . . . . . . . . . . . . . . . . . .69 NetWare . . . . . . . . . . . . . . . . . . . . . . . . . . . . . . . . . . . .69 NetBEUI. . . . . . . . . . . . . . . . . . . . . . . . . . . . . . . . . . . . .71 Glossary . . . . . . . . . . . . . . . . . . . . . . . . . . . . . . . . . . .72
OkiLAN 7120e Network User’s Guide
Table of Contents - 4
CONFIGURATION
Introduction
The OkiLAN 7120e is a fast 100BASE-TX/10BASE-T network interface card for a range of Oki printers. This user’s guide explains the functionality of the OkiLAN 7120e.
Access for interconnection and producing self-diagnostic test and configuration printouts is provided via an interface panel at the rear of the printer.
This network interface card supports IEEE802.2, IEEE802.3, Ethernet-II and SNAP and can detect those frame types automatically.
Also, the interface card supports major protocols such as TCP/IP, IPX/SPX (NetWare) and NetBEUI.
This section details the OkiLAN 7120e specification and several software utilities.
OkiLAN 7120e Network User’s Guide
5
Specification
Frame types |
IEEE 802.2 |
|
IEEE 802.3 |
|
Ethernet-II, SNAP, AUTO |
|
|
Network interface |
100BASE-TX |
|
10BASE-T |
|
|
Network protocols |
TCP/IP |
|
Network layerARP, RARP, IP, ICMP |
|
Session layerTCP, UDP |
|
Application layerLPR, FTP, HTTP, IPP, BOOTP, DHCP, |
|
SNMP, DNS, SMTP, SLP |
|
IPX/SPX (NetWare) |
|
Remote printer mode (up to eight file servers and 32 |
|
queues) |
|
Print server mode over IPX/SPX (up to eight print |
|
servers) |
|
Encrypted password supported in print server mode |
|
SNMP |
|
NetBEUI |
|
SMB, NetBIOS, WINS |
|
|
Functions |
Self-diagnostic test printing |
|
Banner supported |
|
Monitoring/configure by Web browser |
|
Printer status notification by E-Mail |
|
|
Self-diagnostic test
With the printer power switched on, press the push-button on the network interface panel (at the rear of the printer) for more than three seconds and release. The self-diagnostic test results and configuration settings are printed.
Printed self-diagnostic test sample
EthernetBoard OkiLAN 7120e Ver 1.0.0
*** Diagnostic report ***
ROM Check : OK stat: EE69 FFFF 0000 0000 RAM Check : OK stat: 0000 0000 0000 0000
NIC Check : OK addr: 00:80:92:12:34:56100 Base-TX [100Full] EEPROM Check : OK stat: 80A9 80A9 0000 0000
DIPSW1 : OFF(ON:Test use only)
DIPSW2 : OFF(ON:Initialize configuration)
DIPSW3 : OFF(ON:Diagnostic/Configuration print)
DIPSW4 : OFF(ON:Reserved)
OkiLAN 7120e Network User’s Guide
6
From this the Ethernet address is: 00:80:92:12:34:56
Restrictions
1.The printer can not receive data from either the Centronics or the USB interfaces with OkiLAN 7120e installed. To use these remove OkiLAN 7120e.
2.Set "Buffer Print" in the printer menu "I-Prime". Missing data or other unexpected problem occurs when anything else ("Invalid" or "Buffer Clear") is selected.
3.When the printer is off-line, the status displayed on WEB/ AdminManager/TELNET may not be correct.
4.The link address is the same.
5.When large amounts of data are sent via FTP or IPP, time out may occur on the application side.
Configuration utility
Available utilities
You can configure the OkiLAN 7120e by using one of the following methods:
Utility |
Features |
System requirements |
|
|
|
Quick Setup |
Configure the OkiLAN 7120e |
Windows95/98/Me/NT4.0/ |
|
easily and simply without |
2000/XP (TCP/IP protocol or |
|
installing any software |
IPX/SPX protocol should be |
|
packages into your system. |
installed). |
|
You can set the following: |
To create a NetWare queue, |
|
Enable/disable TCP/IP, |
|
|
NetWare Client 32 or |
|
|
NetWare, EtherTalk, NetBEUI |
|
|
IntranetWare Client should |
|
|
protocols. |
|
|
be installed in your system. |
|
|
|
|
|
> Set IP address, Subnet Mask |
|
|
and Gateway for TCP/IP |
|
|
manually or by using DHCP. |
|
|
> Set NetWare Mode and create |
|
|
Queue/Print Server/Printer |
|
|
objects. |
|
|
|
|
OkiLAN 7120e Network User’s Guide
7
Utility |
Features |
System requirements |
|
|
|
AdminManag |
Configure the OkiLAN 7120e |
Windows95/98/Me/NT4.0/ |
er |
in detail. |
2000/XP (TCP/IP protocol or |
|
|
IPX/SPX protocol should be |
|
|
installed). |
|
|
To create a NetWare queue, |
|
|
NetWare Client 32 or |
|
|
IntranetWare Client should |
|
|
be installed in your system. |
|
|
|
Web browser |
Configure the print server and |
Microsoft Internet Explorer |
|
printer by using a Web |
Version 3.0 and higher or |
|
browser such as Microsoft |
Netscape Navigator Version |
|
Internet browser or Netscape |
3.0 and higher. |
|
Navigator. |
Operating system that |
|
|
|
|
|
supports Web browser. |
|
|
|
SNMP |
The printer and print server |
Third-party vendor developed |
|
can be controlled using |
SNMP application. |
|
third-party vendor developed |
|
|
SNMP application. |
|
|
|
|
OkiLAN |
Configure print server using |
Solaris 2.6 (Sparc)/SunOS |
Setup Utility |
character-base user interface. |
4.1.3/HP-UX 10.20/SuSE |
for UNIX |
|
Linux 8.1/RedHat Linux 7.2 |
|
|
and 8.0. |
|
|
To configure network |
|
|
interface cards, "root' |
|
|
privilege is required. |
|
|
|
Using Quick Setup
Quick Setup utility allows you to configure the OkiLAN 7120e easily and simply without installing any software packages.
You can configure the following:
>Enable/disable TCP/IP, NetWare, NetBEUI protocols.
>Set IP address, Subnet Mask and Gateway for TCP/IP manually or by using DHCP.
>Set NetWare mode and create Queue/Print Server/Printer objects.
Configuration requires a PC with Windows 95/98/Me, Windows 2000 Advanced Server/Professional or Windows NT Server 4.0/Work-station 4.0, Windows XP running TCP/IP or IPX/SPX (NetWare).
This utility can only be used on a PC that can be connected to the network with TCP/IP or IPX/ SPX.
OkiLAN 7120e Network User’s Guide
8
This utility must be used on a PC that is located in the same segment as the printer. To create a NetWare queue, NetWare Client 32 or IntranetWare Client should be installed in your system.
The following explanation uses Windows 98 as an example.
1.Insert the CD-ROM into the CD-ROM drive. The Setup Utility starts automatically. If it does not start, double-click autorun.exe on the CD-ROM.
2.Select [Optional Utilities].
3.Select [Install Network Setup Utility].
4.Select the appropriate language.
5.Select [OKI Device Quick Setup].
6.Follow the on-screen instructions.
>The NetWare Client 32 or IntranetWare Client should be installed on the PC used for the creation of network queues. Installation enables the user to create network queues and perform other functions.
7.If the settings are correct, click [Execute]. The new settings are transmitted to the network card but the network card is still operating with pre-transmission settings.
8.Click [Finish] to validate the new settings. Depending on the model, the printer may have to be switched off and on again.
Using AdminManager
AdminManager is a powerful Microsoft Windows-based utility to configure all of OkiLAN 7120e’s functions easily and intuitively by using a graphical user interface. (AdminManager can also be used with OkiLAN 7100e, 7100e+, 7200e, 7300e and 8100e network cards.)
Configuration requires a PC with Windows 95/98/Me, Windows 2000 Advanced Server/Professional or Windows NT Server 4.0/Work-station 4.0, Windows XP running TCP/IP or IPX/SPX (NetWare).
This utility can only be used on a PC that can be connected to the network with TCP/IP or IPX/ SPX and must be used on a PC that is located in the same segment as the printer.
OkiLAN 7120e Network User’s Guide
9
To create a NetWare queue, NetWare Client 32 or IntranetWare Client should be installed on to your system.
The following explanation uses Windows 98 as an example.
Installation
1.Insert the CD-ROM into the CD-ROM drive. The installation starts automatically. If it does not start, double-click autorun.exe on the CD-ROM.
2.Select [Optional Utilities].
3.Select [Install Network Setup Utility].
4.Select the appropriate language.
5.Select [OKI Device Standard Setup].
6.Follow the on-screen instructions. If you want to install AdminManager on to your local drive, select [Install and Execute]. Otherwise, select [Execute from CD-ROM].
7.To run AdminManager, check [Yes] for [Do you wish to execute AdminManager?] and click [Finish]. Otherwise, uncheck [No] and click [Finish].
The following explanation of AdminManager is based on when OkiLAN 7120e is selected. When the other OkiLAN network cards such as OkiLAN 8100e is selected, the displayed information and available tabs are different. Refer to each network card manual for these items.
Interface
Select [Start]-[Programs]-[Oki Setup Utility]-[Admin Manager].
File menu
In the [File] menu, the following item can be selected:
Item |
Function |
|
|
Search |
Search printers in your network and list all printers |
|
that have the OkiLAN 7100e, 7100e+, 7120e, |
|
7200e, 7300e and 8100e installed. |
|
|
OkiLAN 7120e Network User’s Guide
10
Status Menu
In the [Status] menu, the following items can be selected:
Item |
Function |
|
|
Printer Status |
Current printer status is displayed. |
|
|
System Status |
Displays current OkiLAN 7120e configuration. |
|
Configuration data can be saved as log file. |
|
|
List of Configuration |
Displays current OkiLAN 7120e configuration. |
Items |
Configuration data can be saved as log file.,. |
|
|
Setup Menu
In this menu, the following items can be selected:
Item |
Function |
|
|
Oki Device Setup |
Configure the Configure the currently selected |
|
network card. |
|
|
Setup by HTTP |
Launch the default browser in your environment to |
|
access the selected printer’s web page. |
|
|
Setup by TELNET |
Launch TELNET application in your environment to |
|
access the selected printer’s TELNET port. |
|
Note: The TELNET application is not included as part of |
|
the OkiLAN 7120e package. Install the TELNET |
|
package on to your system. For further information, |
|
see your Windows manual. |
|
|
Create NetWare |
Create a NetWare queue. |
Queue |
|
|
|
Delete NetWare |
Delete NetWare object. |
Object |
|
|
|
Reset |
Reset the selected network interface card. |
|
|
Test Print |
Print self-diagnostic test pages. |
|
|
IP Address Setup |
Set static IP address of network interface card |
|
manually. |
|
|
Oki Device Setup
Oki Device Setup allows you to configure the print server. Type the root password (default value is the last 6 characters of the MAC address) to configure. Remember that the root password for AdminManager and FTP is case sensitive, and if the MAC address contains any alpha characters, type them as upper case. Oki Device Setup contains details for the following selectable tabs:
>General
>TCP/IP
>NetWare
OkiLAN 7120e Network User’s Guide
11
>NetBEUI
>SNMP
>SMTP
>Maintenance
>Printer Port
The following section explains each tab’s functionality. Depending on your printer, some items in the following explanation may not be displayed.
General Tab
This allows you to set or change the root password used for Admin Manager and FTP.
Location |
Comments |
|
|
Change root |
You can set/change the root password for |
password |
AdminManager and FTP. |
|
|
TCP/IP Tab
This allows you to configure TCP/IP related items.
Location |
Comments |
|
|
Use TCP/IP |
Set TCP/IP protocol as enabled/disabled. |
Protocol |
|
|
|
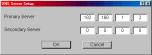
Use DHCP/ |
Check this item if IP address, subnet mask, default gateway |
BOOTP |
and IP addresses for DNS primary server and secondary |
|
servers are retrieved from the DHCP or BOOTP server. |
|
Otherwise, uncheck. |
|
|
Use RARP |
Check this item if IP address is retrieved from the RARP |
|
server. Otherwise, uncheck. |
|
|
IP Address |
Set the IP address of the selected network interface card. |
|
|
Subnet Mask |
Set the subnet mask of the selected network interface card. |
|
|
Default |
Set the default gateway of the selected network interface |
Gateway |
card. |
|
|
Use FTP/LPD |
Check this item if you want to add the FTP/LPD banner. |
Banner |
Otherwise, uncheck. |
|
|
DNS Server... |
Set IP addresses for DNS primary and secondary servers. |
|
|
OkiLAN 7120e Network User’s Guide
12
Location |
Comments |
|
|
|
|
WINS |
Set IP addresses for WINS primary |
|
Server... |
and secondary servers; set scope |
|
|
ID |
|
|
|
|
Netware Tab
This is where you can configure NetWare related items.
Location |
Comments |
|
|
|
|
Use NetWare Protocol |
Set NetWare protocol as enabled/disabled. |
|
|
|
|
Print Server Name |
Set Print Server name. |
|
|
|
|
Frame Type |
Set primary NetWare frame type. |
|
|
|
|
Operation Mode |
Set NetWare mode. |
|
|
|
|
Check box besides |
Check if you want to use the Bindery mode and |
|
Bindery Setup |
Bindery Setup button becomes available. If it is |
|
|
unchecked, the button is greyed out. |
|
|
|
|
Bindery Setup |
Configure items related to Bindery mode. |
|
|
In this dialogue box, the following items can be |
|
|
configured. |
|
|
|
|
|
Password. |
Set password for Print |
|
|
Server. |
|
|
|
|
Job Polling Time. |
Set print job polling |
|
|
interval in seconds. |
|
|
|
NDS Setup |
Set NDS tree and context |
where Print Server was |
|
created. |
|
|
|
|
RPRINTER Setup |
Available if you select RPRINTER mode in |
|
|
Operation Mode. |
|
|
By selecting the [RPRINTER] button, this is |
|
|
displayed: |
|
|
|
|
|
Available print server |
Select file servers to |
|
and Selected print |
connect. Up to eight |
|
server |
print servers can be |
|
|
selected. |
|
|
|
|
Time Out |
Set duration from the |
|
|
last data’s arrival to |
|
|
freeing of the port in |
|
|
seconds. |
|
|
|
Printer Name |
Set the NetWare printer |
object name. |
|
|
|
OkiLAN 7120e Network User’s Guide
13
NetBEUI Tab
This allows you to configure NetBEUI related items.
Location |
Comments |
|
|
Use NetBEUI |
Set NetBEUI protocol to enabled/disabled. |
Protocol |
|
|
|
Short Printer Name |
Set a computer name for the print server. |
|
|
Workgroup |
Set a work group name to which the print server |
|
belongs. |
|
|
Comment |
Set the comments for the print server. |
|
|
SNMP Tab
This allows you to configure SNMP related items.
Location |
Comments |
|
|
|
|
Authentic |
This community name is used to check whether incoming |
|
Community |
SNMP requests have the correct community name or not. The |
|
|
community name is displayed as ****** for security reasons. |
|
|
|
|
TRAP |
This community name is assigned to outgoing system traps |
|
Community |
such as cold start, authentication failure, etc. |
|
|
|
|
TRAP Address |
Set a destination IP address of a Trap packet. If 0.0.0.0 is set, |
|
|
the Trap is disabled. |
|
|
|
|
MIB-II |
The following items can be configured |
|
Parameters |
|
|
|
|
|
|
SysContact |
Set SysContact (printer manager) name. |
|
|
|
|
SysName |
Set SysName (printer model name). |
|
|
|
|
SysLocation |
Set SysLocation (the location where the |
|
Default TTL |
printer is installed). |
|
|
|
|
Enable Authentic |
Set TTL (Time To Live) value. |
|
Trap |
Set Authentic Trap to enabled/disabled. |
|
|
|
|
|
|
OkiLAN 7120e Network User’s Guide
14

Location |
Comments |
|
|
Printer Trap |
By selecting the button, the following dialogue box is |
Setup . . . |
displayed: |
In the dialogue box, the following items can be configured:
|
Printer Trap |
This community name is assigned to |
|
|
Community Name |
outgoing printer status traps such as |
|
|
|
off-line, paper out, etc. |
|
|
|
|
|
|
TCP#1—5 |
Set the IP address to which a Trap packet |
|
|
|
will be sent. You can set up to five IP |
|
|
|
addresses. |
|
|
|
|
|
|
Detail . . . |
In the dialogue box, the following items can |
|
|
|
be configured: |
|
|
|
|
|
|
|
Trap Enable |
Set sending a Trap |
|
|
|
packet, enabled or |
|
|
|
disabled, for each |
|
|
|
destination. |
|
|
|
|
|
|
On-line |
Set sending a Trap, |
|
|
|
enabled or disabled, |
|
|
|
when the printer turns |
|
|
|
to ON-LINE. |
|
|
|
|
|
|
Off-line |
Set sending a Trap, |
|
|
|
enabled or disabled, |
|
|
|
when the printer turns |
|
|
|
to OFF-LINE. |
|
|
|
|
|
|
Paper Out |
Set sending a Trap, |
|
|
|
enabled or disabled, |
|
|
|
when paper is out. |
|
|
|
|
|
|
Printer Error |
Set sending a Trap, |
|
|
|
enabled or disabled, |
|
|
|
when the printer error |
|
|
|
occurs. |
|
|
|
|
|
|
Exit JAM |
Set sending a Trap, |
|
|
|
enabled or disabled, |
|
|
|
when an Exit JAM |
|
|
|
occurs. |
|
|
|
|
OkiLAN 7120e Network User’s Guide
15
Location |
Comments |
|
|
|
|
|
|
Printer Trap |
Detail . . . |
Insert JAM |
Set sending a Trap, |
Setup . . . |
|
|
enabled or disabled, |
|
|
|
when an Insert JAM |
|
|
|
occurs. |
|
|
|
|
|
|
Park JAM |
Set sending a Trap, |
|
|
|
enabled or disabled, |
|
|
|
when a Park JAM |
|
|
|
occurs. |
|
|
|
|
|
|
Paper Lever ALARM |
Set sending a Trap, |
|
|
|
enabled or disabled, |
|
|
|
when a Paper Lever |
|
|
|
Alarm occurs. |
|
|
|
|
|
|
Cover Open |
Set sending a Trap, |
|
|
|
enabled or disabled, |
|
|
|
when the printer cover |
|
|
|
opens. |
|
|
|
|
|
|
Feed JAM |
Set sending a Trap, |
|
|
|
enabled or disabled, |
|
|
|
when an Feed JAM |
|
|
|
occurs. |
|
|
|
|
|
|
Ribbon JAM |
Set sending a Trap, |
|
|
|
enabled or disabled, |
|
|
|
when an Ribbon JAM |
|
|
|
occurs. |
|
|
|
|
|
|
Paper JAM |
Set sending a Trap, |
|
|
|
enabled or disabled, |
|
|
|
when an Paper JAM |
|
|
|
occurs. |
|
|
|
|
|
IPX |
Set node address and network address to |
|
|
|
which a Trap packet will be sent. |
|
|
|
|
|
|
Detail . . . |
By selecting the button, the following items |
|
|
|
can be configured: |
|
|
|
|
|
|
|
Trap Enable |
Set sending a Trap |
|
|
|
packet, enabled or |
|
|
|
disabled, for each |
|
|
|
destination. |
|
|
|
|
|
|
On-line |
Set sending a Trap, |
|
|
|
enabled or disabled, |
|
|
|
when the printer turns |
|
|
|
to ON-LINE. |
|
|
|
|
|
|
Off-line |
Set sending a Trap, |
|
|
|
enabled or disabled, |
|
|
|
when the printer turns |
|
|
|
to OFF-LINE. |
|
|
|
|
OkiLAN 7120e Network User’s Guide
16
Location |
Comments |
|
|
|
|
|
|
Printer Trap |
Detail . . . |
Paper Out |
Set sending a Trap, |
Setup . . . |
|
|
enabled or disabled, |
|
|
|
when paper is out. |
|
|
|
|
|
|
Printer Error |
Set sending a Trap, |
|
|
|
enabled or disabled, |
|
|
|
when the printer error |
|
|
|
occurs. |
|
|
|
|
|
|
Exit JAM |
Set sending a Trap, |
|
|
|
enabled or disabled, |
|
|
|
when an Exit JAM |
|
|
|
occurs. |
|
|
|
|
|
|
Insert JAM |
Set sending a Trap, |
|
|
|
enabled or disabled, |
|
|
|
when an Insert JAM |
|
|
|
occurs. |
|
|
|
|
|
|
Park JAM |
Set sending a Trap, |
|
|
|
enabled or disabled, |
|
|
|
when a Park JAM |
|
|
|
occurs. |
|
|
|
|
|
|
Paper Lever ALARM |
Set sending a Trap, |
|
|
|
enabled or disabled, |
|
|
|
when a Paper Lever |
|
|
|
Alarm occurs. |
|
|
|
|
|
|
Cover Open |
Set sending a Trap, |
|
|
|
enabled or disabled, |
|
|
|
when the printer cover |
|
|
|
opens. |
|
|
|
|
|
|
Feed JAM |
Set sending a Trap, |
|
|
|
enabled or disabled, |
|
|
|
when an Feed JAM |
|
|
|
occurs. |
|
|
|
|
|
|
Ribbon JAM |
Set sending a Trap, |
|
|
|
enabled or disabled, |
|
|
|
when an Ribbon JAM |
|
|
|
occurs. |
|
|
|
|
|
|
Paper JAM |
Set sending a Trap, |
|
|
|
enabled or disabled, |
|
|
|
when an Paper JAM |
|
|
|
occurs. |
|
|
|
|
OkiLAN 7120e Network User’s Guide
17
E-mail (Send) Tab
In E-mail (Send) tab, you can configure SNMP related items.
Location |
Comments |
|
|
|
|
Use SMTP |
Set sending E-Mail via SMTP, enabled or disabled. |
|
Transmit Protocol |
|
|
|
|
|
SMTP Server |
Set IP address or host name of SMTP server. |
|
Address/Name |
|
|
|
|
|
Reply-To Address |
Set the E-Mail address that is used in the [Reply-To] |
|
|
field in the mail header. |
|
|
|
|
E-Mail Address |
Set the E-Mail address that is used in the [From] field in |
|
|
the mail header. |
|
|
|
|
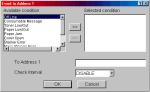
1—5 |
By selecting each button, the following dialogue box is |
|
|
displayed: |
|
|
In the dialogue box, the following items can be |
|
|
configured: |
|
|
|
|
|
Available |
Select each E-Mail alert condition. |
|
condition and |
Select a condition from Available |
|
Selected |
Condition list and click >> button. |
|
condition |
The selected condition is copied to |
|
|
Selected condition list. Available |
|
|
conditions are: |
|
|
On-line, Off-line, Paper Out, Printer |
|
|
Error, Exit JAM, Insert JAM, Park |
|
|
JAM, Paper Lever Alarm, Cover |
|
|
Open, Feed JAM, Ribbon JAM and |
|
|
Paper JAM. |
|
|
|
1-5 |
To Address 1—5 |
Set E-Mail addresses to that E-Mail |
|
|
should be send. Up to five E-Mail |
|
|
addresses can be set. |
|
|
|
|
Check Interval |
Set interval that the OkiLAN 7120e |
|
|
checks specified event(s). An E-Mail |
|
|
is sent when specified event(s) |
|
|
occurs when DISABLE is selected. |
|
|
|
OkiLAN 7120e Network User’s Guide
18

Location |
Comments |
|
|
|
|
Advanced . . . |
By selecting the button, the following dialogue box is |
|
|
displayed: |
|
|
In the dialogue box, the following items can be |
|
|
configured: |
|
|
|
|
|
SMTP Port |
Set port number of SMTP. |
|
Number |
|
|
|
|
|
Signature |
Set up to four signature lines. |
|
|
Signatures added to the bottom of |
|
|
an E-Mail. |
|
|
|
OkiLAN 7120e Network User’s Guide
19
Maintenance Tab
Location |
|
Comments |
|
|
|
|
|
Service |
Use TCPIP |
Set TCPIP Protocol, enabled or disabled. |
|
|
Protocol |
|
|
|
|
|
|
|
Use NetBEUI |
Set NetBEUI Protocol, enabled or disabled. |
|
|
Protocol |
|
|
|
|
|
|
|
Use FTP |
Set FTP service, enabled or disabled. |
|
|
Service |
|
|
|
|
|
|
|
Use TELNET |
Set TELNET service, enabled or disabled. (Not |
|
|
Service |
supported.) |
|
|
|
|
|
|
Use Web |
Set Web service, enabled or disabled. |
|
|
Service |
|
|
|
|
|
|
|
Use SNMP |
Set Web service, enabled or disabled. |
|
|
Service |
|
|
|
|
|
|
|
Use STMP |
Set Web service, enabled or disabled. |
|
|
Service |
|
|
|
|
|
|
IP Filter |
Use IP Filter |
Set IP filtering, enabled or disabled. |
|
Setup… |
|
|
|
Admin IP |
Set one IP address excluding this filtering functionality. |
||
|
Address |
|
|
|
|
|
|
|
IP Filter |
Select the 10 IP address ranges (Range 1 has the |
|
|
Range 1 – 10 |
lowest priority and Range 10 has the highest priority). |
|
|
|
For each range, |
|
|
|
|
|
|
|
Start Address |
Set the starting and end addresses. |
|
|
|
|
|
|
End Address |
|
|
|
|
|
|
|
Printing |
Select when printing access is |
|
|
Configuration |
permitted from the range. |
|
|
|
Select when configuration access is |
|
|
|
permitted from the range. |
|
|
|
|
OkiLAN 7120e Network User’s Guide
20
Printer Port Tab
Location |
Comments |
|
|
|
|
lP Port |
BOJ String |
Set an appropriate command |
|
|
sequence to be sent to the |
|
|
connected printer before printing job |
|
|
when data is sent to lp logical printer |
|
|
port. |
|
|
Any alphanumeric and following |
|
|
control characters up to 31 |
|
|
characters can be used: |
|
|
\bBackspace(0x08) |
|
|
\tTab (0x09)\nLinefeed(0x0a) |
|
|
\vVertical tab (0x0b) |
|
|
\fForm feed (0x0c) |
|
|
\rCarriage return (0x0d) |
|
|
\xnnHex code [nn] (0xnn) |
|
|
\]Double quote (0x22) |
|
|
\\Backslash (0x5c) |
|
|
|
|
EOJ String |
Set an appropriate command |
|
|
sequence to be sent to the |
|
|
connected printer before printing job |
|
|
when data is sent to lp logical printer |
|
|
port.The available string is the same |
|
|
as BOJ String. |
|
|
|
euc/sjis Port |
BOJ String |
Set an appropriate command |
|
|
sequence to be sent to the |
|
|
connected printer before printing job |
|
|
when data is sent to euc/sjis logical |
|
|
printer port. |
|
|
The available string is the same as lp |
|
|
Port-BOJ String. |
|
|
|
|
EOJ String |
Set an appropriate command |
|
|
sequence to be sent to the |
|
|
connected printer after printing job |
|
|
when data is sent to euc/sjis logical |
|
|
printer port. |
|
|
The available string is the same as lp |
|
|
Port-BOJ String. |
|
|
|
|
Tab Size |
Set tab size when data is sent to |
|
|
sjis/euc logical printer port. The |
|
|
options available are from 0 to 16 |
|
|
(default 8). The value 0 does not |
|
|
convert any tabs. |
|
|
|
OkiLAN 7120e Network User’s Guide
21
Location |
Comments |
|
|
|
|
|
Page Width |
Set page width when data is sent to |
|
|
sjis/euc logical printer port. If the |
|
|
width of one line exceeds this value, |
|
|
Carriage Return and Line Feed are |
|
|
inserted automatically. The options |
|
|
available are from 0 to 255 (default |
|
|
78). The value 0 means no limitation |
|
|
of the line width. |
|
|
|
|
Page Length |
Set page length when data is sent to |
|
|
sjis/euc logical printer port. If the |
|
|
width of one line exceeds this value, |
|
|
Carriage Return and Line Feed are |
|
|
inserted automatically. The options |
|
|
available are from 0 to 255 (default |
|
|
66). The value 0 means no limitation |
|
|
of the page length. |
|
|
|
Parallel Port |
Bi-directional |
Set the interface mode between |
Detail… |
Mode |
OkiLAN 7120e and the printer. |
|
|
Normally no need to change this |
|
|
setting. Leave at 1284-Std. |
|
|
As bi-directional printing is not |
|
|
performed when Compatible is set, |
|
|
the printer status and menu setting |
|
|
cannot be retrieved, but print jobs |
|
|
can be sent to the printer. The |
|
|
1284-ECP mode is the same as |
|
|
1284-Std for currently supported |
|
|
printers. |
|
|
|
|
Centronics I/F |
Adjust Centronics interface timing |
|
Timing |
between the OkiLAN 7120e and the |
|
|
printer when 1284-Std or |
|
|
Compatible mode is set in |
|
|
bi-directional mode. There is |
|
|
normally no need to change this |
|
|
setting. Keep at NORMAL for |
|
|
currently supported printers. |
|
|
|
OkiLAN 7120e Network User’s Guide
22
 Loading...