


®
ELECTRIC CHAINSAW |
FKS 2200 D2 |
|
|
ELECTRIC CHAINSAW |
ELEKTRYCZNA PIŁA ŁAŃCUCHOWA |
Translation of original operation manual |
Tłumaczenie oryginalnej instrukcji obsługi |
ELEKTROMOS LÁNCFŰRÉSZ |
ELEKTRIČNA VERIŽNA ŽAGA |
Az originál használati utasítás fordítása |
Prevod originalnega navodila za uporabo |
ELEKTRICKÁ ŘETĚZOVÁ PILA |
ELEKTRICKÁ REŤAZOVÁ PÍLA |
Překlad originálního provozního návodu |
Preklad originá lneho návodu na obsluhu |
ELEKTRO-KETTENSÄGE |
|
Originalbetriebsanleitung |
|
IAN 96817

Before reading, unfold the page containing the illustrations and familiarise yourself with all functions of the device.
Przed przeczytaniem proszę rozłożyć stronę z ilustracjami, a następnie proszę zapoznać się z wszystkimi funkcjami urządzenia.
Olvasás előtt kattintson az ábrát tartalmazó oldalra és végezetül ismerje meg a készülék mindegyik funkcióját.
Pred branjem odprite stran s slikami in se nato seznanite z vsemi funkcijami naprave.
Před čtením si otevřete stranu s obrázky a potom se seznamte se všemi funkcemi přístroje.
Pred čítaním si odklopte stranu s obrázkami a potom sa oboznámte so všetkými funkciami prístroja.
Klappen Sie vor dem Lesen die Seite mit den Abbildungen aus und machen Sie sich anschließend mit allen Funktionen des Gerätes vertraut.
GB |
Translation of original operation manual |
Page |
4 |
PL |
Tłumaczenie oryginalnej instrukcji obsługi |
Strona |
26 |
HU |
Az originál használati utasítás fordítása |
Oldal |
49 |
SI |
Prevod originalnega navodila za uporabo |
Stran |
71 |
CZ |
Překlad originálního provozního návodu |
Strana |
93 |
SK |
Preklad originálneho návodu na obsluhu |
Strana |
114 |
DE/ AT/ CH |
Originalbetriebsanleitung |
Seite |
136 |

A
B
1 |
2 |
3 4 |
5 |
6 |
7 |
8 |
9 |
10 |
11 |
18 |
17 |
16 |
15 |
14 13 |
|
19 |
20 |
12 |
|
|
|
|
|
|
|
|
|
|
|
|
8 |
3 |
C |
|
|
2 21 |
|
|
14 13 |
D |
8 |
3 |
10 11
17
G
26 |
25 |
24 |
5 |
|
|
|
|
|
|
|
14 |
E 8 |
22 |
|
|
3 |
8 |
3 |
F
15 14
23
24
4
H
I
J
 27
27
15

GB |
|
Content |
|
Introduction ................................. |
4 |
Intended purpose......................... |
4 |
General description...................... |
5 |
Extent of the delivery ........................ |
5 |
Overview........................................ |
5 |
Function description.......................... |
5 |
Technical data .............................. |
6 |
Safety functions .............................. |
6 |
Notes on safety .............................. |
7 |
Symbols used on the instructions....... |
7 |
Symbols used on the saw ................ |
7 |
General notes on safety................... |
8 |
General safety instructions for |
|
power tools.................................... |
8 |
Causes and operator prevention |
of |
kickback...................................... |
11 |
Further safety directions................. |
12 |
Operation startup ...................... |
12 |
Tensioning the saw chain............... |
13 |
Chain lubrication.......................... |
13 |
Operating the chainsaw............. |
14 |
Switching on................................ |
14 |
Checking the chain brake ............. |
15 |
Checking the chain lubrication ........ |
15 |
Fitting the saw chain ..................... |
15 |
Changing the saw bar .................. |
16 |
Sawing techniques..................... |
16 |
General....................................... |
16 |
Bucking....................................... |
16 |
Limbing ...................................... |
17 |
Felling trees ................................. |
17 |
Maintenance and cleaning ......... |
19 |
Cleaning ..................................... |
19 |
Maintenance Interval Table ............ |
19 |
Maintenance intervals ................... |
20 |
Trouble shooting ........................... |
20 |
Oiling the saw chain..................... |
21 |
Sharpening the saw chain .............. |
21 |
Adjusting the chain tension ............ |
22 |
Starting up a new saw chain ......... |
22 |
Maintaining the chain bar ............. |
22 |
Waste disposal and |
|
environmental protection ........... |
23 |
Spare parts................................ |
23 |
Guarantee ................................. |
24 |
Repair Service............................ |
25 |
Service-Center............................ |
25 |
Importer .................................... |
25 |
Translation of the original |
|
EC declaration of conformity .... |
160 |
Exploded Drawing ................... |
169 |
Introduction
Congratulations on the purchase of your new device. With it, you have chosen a high quality product.
The operating instructions constitute part of this product. They contain important information on safety, use and disposal. Before using the product, familiarise yourself with all of the operating and safety instructions. Use the product only as described and for the applications specified.
Keep this manual safely and in the event that the product is passed on, hand over all documents to the third party.
4
Intended purpose
The electric chainsaw is constructed for sawing wood only. The saw is not designed for any other types of application (e.g. cutting of brickwork, plastic or food). The chainsaw is designed for employment in the do-it-yourselfer sector. It was not designed for continuous employment in the commercial sector.
The device is designed for use by adults. Young people over 16 years old may use the chainsaw under supervision only.

The manufacturer is not liable for damages, which were caused through use in applications for which it was not designed, or incorrect operation.
This electric chainsaw is to be used only by one person and only for sawing wood. The chainsaw must be held with the right hand on the rear handle and the left hand on the front handle. Before use, the user must have read and understood all of the information and directions in the operating instructions. The user must wear appropriate personal protective equipment (PPE). The chainsaw is to be used only for sawing wood. Materials such as plastic, stone, metal or wood containing foreign objects (e.g. nails or screws) must not be cut with the chain saw!
General description
Extent of the delivery
-Chainsaw
-Chain bar (mounted)
-Saw chain (mounted)
-Saw bar protection sheath
-180 ml Grizzly bio chain oil
-Instruction Manual
The diagrams can be found on the front old-out pages.
Overview
|
1 |
Rear handle |
A |
||
|
2 |
Oil filler cap |
|
||
|
3 |
Chain brake handle, front hand |
|
|
guard |
|
4 |
Chain bar |
|
5 |
Saw chain |
|
6 |
Nose sprocket |
GB
7Bumper
8Front handle
9Electric motor
10On/off switch
11Safety lock
12Chain catcher
13Chain adjustment ring
14Fastening bolt for sprocket chain wheel covering
15Sprocket chain wheel covering
16Rear hand guard
17Cable holder
18Mains cable
19Saw bar protection sheath
20Oil bottle
C 21 upper Oil level control 22 lower Oil level control
F 23 Bar bolt
24 Tensioning plate
G 25 Sprocket
26 Tab
J 27 Oil passages
Function description
The chainsaw is driven by an electric motor. The circulating chain is led around a saw bar (guide rail)
The tool is fitted with a rapid-action chaintensioning system and a fast-acting chain brake. An automatic oil dosing regulator ensures continuous chain lubrication.
The chainsaw is equipped with various protection fittings for the protection of the user.
Refer to the following descriptions for the function of control elements.
5

GB
Technical Data
Electrical chainsaw |
..... FKS 2200 D2 |
|
Rated input voltage .......... |
230 V~, 50 Hz |
|
Input power............................... |
2200 W |
|
Safety class ................................... |
|
/ II |
Chain speed............................. |
13.6 m/s |
|
Weight |
|
|
(without guide rail and chain) ......... |
4.7 kg |
|
Weight (with guide rail and chain) .. |
5.9 kg |
|
Oiltank ....................................... |
|
270 ml |
Chain .......................... |
Oregon 91P057X |
|
Chrome cutting teeth, low-kickback Chain bar Oregon 160SDEA041 (112364)
Chain link separation ................... |
10 mm |
|
Chain width ............................... |
|
1.3 mm |
Teeth of the sprocket chain wheel ........... |
7 |
|
Length of the chain bar ............... |
460 mm |
|
Sawing length |
........................... |
395 mm |
Acoustic pressure level |
|
|
(LpA)........... |
96.0 dB (A); KpA=3.0 dB (A) |
|
Sound power level (LWA) |
|
|
measured ..... |
108 dB (A); KWA=3.0 dB (A) |
|
guaranteed............................. |
112 dB (A) |
|
Vibration (an)....... |
6.97 m/s2 ; K=1.5 m/s2 |
|
Noise and vibration values were determined according to the standards and stipulations mentioned in the declaration of conformity.
Technical and optical changes can be carried out in the course of further development without notice. All dimensions, references and information of this instruction manual are therefore without guarantee. Legal claims, which are made on the basis of the instruction manual, cannot thus be considered as valid.
The stated vibration emission value was measured in accordance with a standard testing procedure and may be used to compare one power tool to another.
6
The stated vibration emission value may also be used for a preliminary exposure assessment.
Warning: |
The vibration |
emission value may differ during |
|
actual use of the power tool from |
|
the stated value depending on the |
|
manner in which the power tool is |
|
used. |
|
Safety precautions aimed at protect- |
|
ing the user should be based on esti- |
|
mated exposure under actual usage |
|
conditions (all parts of the operating |
|
cycle are to be considered, includ- |
|
ing, for example, times during which |
|
the power tool is turned off and |
|
times when the tool is turned on but |
|
is running idle). |
|
Safety functions |
|
|
1 Rear grip with hand guard |
A |
|
|
(16) |
|
|
|
Protects the hand against branch- |
|
es and boughs in the case of |
|
springing away by the chain. |
|
3 Chain braking lever/hand |
|
guard |
|
Control system, which stops the |
|
saw chain immediately in case |
|
of a spring-back; lever can also |
|
be activated manually; protects |
|
the left hand of the operator if it |
|
slides from the front grip. |
|
The motor cannot be turned on if |
|
the chain brake has engaged. |
|
5 Saw chain with small |
|
spring-back |
|
Helps you to catch spring-backs |
|
with specially developed control |
|
systems. |
7 Metal stop claw
Reinforces the stability when vertical cuts are carried out and facilitates sawing.
9Electric motor
Double insulated for safety reasons.
10On-off switch with safety chain brake
On releasing the On/Off switch, the device immediately switches off.
11Switch-on block
The switch-on block must be released for switching on the device.
12Chain catcher
Decreases the danger of injuries if the chain breaks or if it comes off.
Notes on safety
This section deals with the basic safety regulations while working with the electric chainsaw.
An electric chainsaw is a dangerous device, which can cause serious or even fatal injuries with incorrect or careless use. Thus, for your own safety and the safety of others, you should always take note of the instructions on safety and, in case of difficulties, consult a specialist for advice.
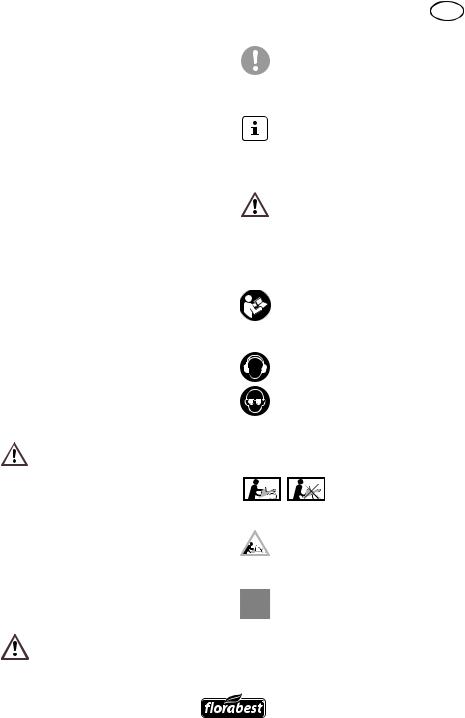
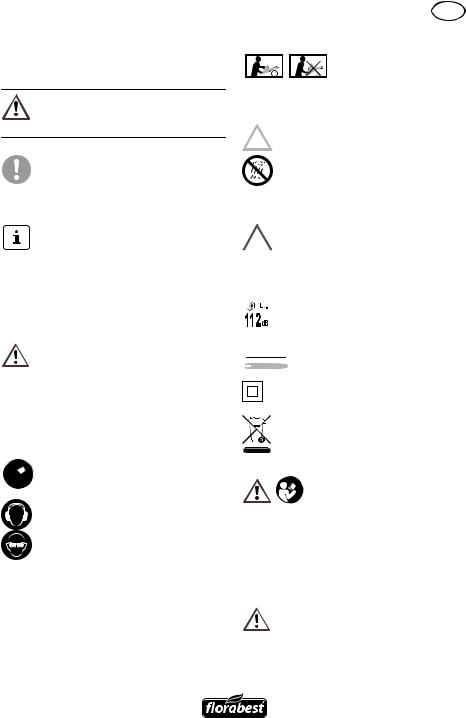
Symbols used in the instructions
Hazard symbols with information on prevention of personal injury and property damage.
GB
Precaution symbol (explanation of precaution instead of exclamation mark) with information on prevention of harm / damage.
Notice symbol with information on how to handle the device properly.
Symbols used on the saw
Make yourself familiar with all control elements before any work. Practice handling the saw and have explained the functions, operating methods and sawing techniques by a practiced user or specialist.
Read and take note of the operating manual belonging to the machine!
Wear personal protective equipment. Basically, wear protective goggles or, even better, face protection, ear protection, safety helmet, cut-protection working clothes, cutprotection gloves, and cut-protec- tion safety boots with anti-slip soles.
Only use the saw with both hands on the device
Caution! Spring-back - Be careful of spring-back of the machine during work.
Do not expose the unit to rain. The device must not be wet, nor should it be operated in a moist environment.
7
GB
Caution! Remove the plug immediately from the plug socket in case of damage or cutting through of the mains cable
Information of the acoustic power level LWA in dB.
460 mm Length of the chain bar
Safety class II
Machines do not belong with domestic waste.
The motor cannot be turned on if the chain brake has engaged. Release the chain brake by shifting the brake arm over against the front grip.
General notes on safety
Before you do any work with the electric chainsaw, make yourself familiar with all operating parts. Practise using the saw (sawing logs on a sawhorse) and get an experienced user or a specialist to explain to you the function of the saw, the way of working, the techniques of sawing and the personal protection equipment.
Observe noise control and local regulations.
Caution! When using power tools, observe the following basic safety measures for the prevention of electric shocks and the risk of injury and fire. There is a risk of injury!
8
General safety instructions for power tools
WARNING! Read all safety directions and instructions.
Omissions in the compliance with safety directions and instructions can cause electrical shock, fire and/or severe injuries.
Retain all safety directions and instructions for future use.
The term “Power Tools” used in the safety instructions refers to mains-operated power tools (with power cord) and to battery-oper- ated power tools (without power cord).
Work area safety
•Keep work area clean and well lit. Cluttered or dark areas invite accidents.
•Do not operate power tools in explosive atmospheres, such as in the presence of flammable
Iiquids, gases or dust. Power tools create sparks which may ignite the dust or fumes.
•Keep children and bystanders away while operating a power tool. Distractions can cause you to lose control.
Electrical safety
•Power tool plugs must match the outlet. Never modify the plug in any way. Do not use any adapter plugs with earthed (grounded) power tools. Unmodified plugs and matching outlets will reduce risk of electric shock

•Avoid body contact with earthed or grounded surfaces, such as pipes, radiators, ranges and refrigerators. There is an increased risk of electric shock if your body is earthed or grounded.
•Do not expose power tools to rain or wet conditions. Water entering a power tool will increase the risk of electric shock.
•If the supply cord of this power tool is damaged, it must be replaced by a specially prepared cord available through the service organization.
•If it is necessary to replace the connection cable, we recommend that this be performed by the manufacturer or an authorised representative (e.g. authorised workshop, customer service, etc.).
•Do not abuse the cord. Never use the cord for carrying, pulling or unplugging the power tool. Keep cord away from heat, oil, sharp edges or moving parts. Damaged or entangled cords increase the risk of electric shock.
•When operating a power tool outdoors, use an extension cord suitable for outdoor use. Use of a cord suitable for outdoor use reduces the risk of electric shock.
•If operating a power tool in a damp location is unavoidable, use a residual current device (RCD) protected supply. Use of an RCD reduces the risk of electric shock.
Personal safety
•Stay alert, watch what you are doing and use common sense when operating a power tool.
GB
Do not use a power tool while you are tired or under the influence of drugs, alcohol or medication. A moment of inattention white
operating power tools may result in serious personal injury.
•Wear personal protective equipment and always wear safety glasses. Wearing personal protective equipment such as nonslip safety boots, cut protection trousers, a hard hat or ear protection reduces the risk of injuries.
•Prevent unintentional starting. Ensure the switch is in the offposition before connecting to power source and/or battery pack, picking up or carrying the tool. Carrying power tools with your finger on the switch or energising power tools that have the switch on invites accidents.
•Remove any adjusting key or wrench before turning the power tool on. A wrench or a key left attached to a rotating part of the power tool may result in personal injury.
•Do not overreach. Keep proper footing and balance at all times.
This enables better control of the power tool in unexpected situations.
•Keep your hair, clothing and gloves away from moving parts.
Jewellery or long hair can be caught in moving parts.
•Warning! During operation, this electric tool generates an electromagnetic field which, under certain circumstances, may impair the functionality of active
or passive medical implants. To reduce the risk of serious or lethal injuries, we recommend that persons with medical implants consult their doctor and the manufacturer of their medical implant before operating the machine.
9

GB
Power tool use and care
•Do not force the power tool. Use the correct power tool for your application. The correct power tool will do the job better and safer at the rate for which it was designed.
•Do not use the power tool if the switch does not turn it on and off. Any power tool that cannot be controlled with the switch is dangerous and must be repaired.
•Disconnect the plug from the power source and/or the battery pack from the power tool before making any adjustments, changing accessories, or storing power tools. Such preventive safety measures reduce the risk of starting the power tool accidentaIly.
•Store idle power tools out of the reach of children and do not allow persons unfamiliar with the power tool or these instructions to operate the power tool. Power tools are dangerous in the hands of untrained users.
•Maintain power tools. Check for misalignment or binding of moving parts, breakage of parts and any other condition
that may affect the power tool’s operation. If damaged, have the power tool repaired before use. Many accidents are caused by poorly maintained power tools.
•Keep cutting tools sharp and clean. Properly maintained cutting tools with sharp cutting edges are less Iikely to bind and are easier to control.
•Use the power tool, accessories and tool bits etc. in accordance with these instructions, taking
10
into account the working conditions and the work to be performed. Use of the power tool for op-
erations different from those intended could result in a hazardous situation.
•For sawing work on a slope, always stand above the tree trunk. To keep control at the moment of “sawing through”, reduce the contact pressure at the end of the cut without loosening the firm grip on the chainsaw handles. Ensure that the saw chain does not come into contact with the ground. After completing the cut, wait for the chainsaw to come to a standstill before removing the chainsaw. Always switch off the chainsaw motor before moving from one tree to another.
•Dirt, stones, loose bark, nails, staples and wire must be removed from the tree.
Service
•Have your power tool serviced by a qualified repair person using only identical replacement parts. This will ensure that the safety of the power tool is maintained.
Chain saw safety warnings:
•Keep all parts of the body away from the saw chain when the chain saw is operating. Before you start the chain saw, make sure the saw chain is not contacting anything. A moment of inattention white operating chain saws may cause entanglement of your clothing or body with the saw chain.
•Always hold the chain saw with your right hand on the rear handle and your left hand on the front handle. Holding the chain saw with a reversed hand configura-
tion increases the risk of personal injury and should never be done.
•Wear safety glasses and ear protection. Other protective equipment for the head, hands, legs and feet is compulsory. Adequate protective clothing will reduce personal injury by flying debris or accidentaI contact with the saw chain.
•Do not operate a chain saw in a tree. Operation of a chain saw white up in a tree may result in personal in jury.
•Always keep proper footing and operate the chain saw only when standing on fixed, secure and level surface. Slippery or unstable surfaces such as ladders may cause a loss of balance or control of the chain saw.
•When cutting a branch that is under tension be alert for spring back. When the tension in
the wood fibres is released the spring loaded Iimb may strike the operator and/or throw the chain saw out of control.
•Use extreme caution when cutting brush and saplings. The slender material may catch the saw chain and be whipped toward you or pull you off balance.
•Carry the chain saw by the front handle with the chain saw switched off and away from your body. When transporting or storing the chain saw always fit the guide bar cover. Proper handling of the chain saw will reduce the Iikelihood of accidentaI contact with the moving saw chain.
GB
•Follow instructions for lubricating, chain tensioning and changing accessories.
Improperly tensioned or lubricated chain may either break or increase the chance for kickback.
•Keep handles dry, clean, and free from oil and grease. Greasy, oily handles are slippery causing loss of control.
•Cut wood only. Do not use chain saw for purposes not intended. For example: do not use chain saw for cutting plastic, masonry or non-wood building materials.
Use of the chain saw for operations different than intended could result in a hazardous situation
•Hold the power tool only on the insulated handle surfaces, as the saw chain may come into contact with concealed power cables.
Contact between the saw chain and a live cable may render metallic components live and result in an electric shock
Causes and operator prevention of kickback
Beware of kickback! Be careful of kickback of the machine during work. There is danger of injury here. You can avoid kickbacks by exercising caution and using a correct sawing technique.
Fig. 1
11

GB
•Kickback may occur when the nose or tip of the guide bar touches an object, or when the wood closes in and pinches the saw chain in the cut
(cf. image 1/fig. B).
•Tip contact in some cases may cause a sudden reverse reaction, kicking the guide bar up and back towards the operator (cf. image 1/fig. A).
•Pinching the saw chain along the top of the guide bar may push the guide bar rapidly back towards the operator.
•Either of these reactions may cause you to lose control of the saw which could result in serious personal injury. Do not rely exclusively upon the safety devices built into your saw. As a chain saw user, you should take several steps to keep your cutting jobs free from accident or injury.
Kickback is the result of tool misuse and/ or incorrect operating procedures or conditions and can be avoided by taking proper precautions as given below:
•Maintain a firm grip, with thumbs and fingers encircling the chain saw handles, with both hands on the saw and position your body and arm to allow you to resist kickback forces. Kickback forces can be controlled by the operator, if proper precautions are taken. Do not let go of the chain saw.
•Do not overreach and do not cut above shoulder height. This helps prevent unintended tip contact and enables better control of the chain saw in unexpected situations.
•Only use replacement bars and chains specified by the manufacturer. Incorrect replacement bars and
12
chains may cause chain breakage and/ or kickback.
•Follow the manufacturer´s sharpening and maintenance instructions for the saw chain. Decreasing the depth gauge height can lead to increased kickback.
Further safety directions
•If the supply cord of this power tool is damaged, it must be replaced by a specially prepared cord available through the service organization.
•If it is necessary to replace the connection cable, we recommend that this be performed by the manufacturer or an authorised representative (e.g. authorised workshop, customer service, etc.).
•Lay the extension cable in such a way that it will not be caught by branches or similar during sawing.
•Use a surge protector with a release current of 30 mA or less.
•Comply carefully with maintenance, control and service instructions in this manual. Damaged protective de-
vices and parts have to be repared or changed except as noted otherwise in this manual.
Operation startup
Always wear protective gloves when working with the chainsaw and employ only original parts. Pull out the power plug before doing any work on the chainsaw itself -– injury hazard!
The tool is completely assembled on delivery.Before you start up the electric chainsaw, adjust the chain, fill up with chain oil

and check the automatic lubrication and chain brake function.
Note that the saw can re-oil.
Please note that the saw re-oils after use and oil may leak out if it is stored on its side or on the head. This is a normal process due to the necessary ventilation opening on the upper edge of the tank and does not constitute a reason for complaint. As each saw is checked during production and tested with oil, a small residue may be in the tank despite draining, which may slightly dirty the housing with oil in transit. Please clean the housing with a cloth.
Tensioning the saw chain
Regularly tightening the saw chain provides safety for the user and reduces and/ or prevents wear and chain damages. Before the start of work and in approx. 10 minute intervals, we recommend the user to examine the chain tension and correct it, if necessary.
The chain warms up when working with the saw and thus expands slightly. These “expansions” can be expected especially from newer chains.
Do not re-tighten or change the chain when it is hot because it shrinks slightly once it has cooled down. In case of nonobservance, this can lead to damages on the guide rail or the engine because now the chain is too taut on the blade.
Chain tension and chain lubrication have a significant impact on the service life of the chain.
The chain is correctly tensioned if it does not sag at the rail underside and can be
GB
rotated completely around with the gloved hand.
When the saw chain is tensioned with 9 N (approx. 1 kg), the gap between the saw chain and the guide rail may not be more than 2 mm.
|
1. |
Ensure that the chain brake has |
B |
||
|
|
been released, that is, that the |
|
|
|
|
|
chain brake lever (3) is pulled up |
|
|
against the front grip (8). |
2. |
Unscrew the fastening bolt (14). |
|
3. |
To tighten the saw, turn the chain |
|
|
|
adjustment ring (13) clockwise. |
|
|
To loosen the tension, turn the |
|
|
chain adjustment ring anti-clock- |
|
|
wise. |
4. |
Tighten up the fastening bolt (14) |
|
|
|
again. |
With a new saw chain, you must readjust the chain tension after at least 5 cutting operations.
Chain lubrication
The rail and chain must never be without oil. If you operate the electric chainsaw with too little oil, the cutting performance and the lifetime of the saw chain is reduced, since the chain becomes blunt faster. You can identify a case of too little oil where smoke development or discoloration of the rail occurs.
As soon as the motor is speeded up, the oil also flows faster to the chain bar (4).
13

GB
Filling up with chain oil:
•Check the oil fill level ( C 21/22) and regularly top up with oil. The oil tank holds 270 ml oil.
•Use Parkside bio-oil; this product contains additives that reduce wear and tear and does not damage the pump system. bio-oil is available from our Service-Center.
•If you have no Grizzly bio-oil available, use chain lubrication oil with low adhesive additive content.
•Empty the oil tank before longer periods (several month) of non-use
|
1. |
Unscrew the oil fill cap (2) and fill |
C |
||
|
|
up with chain oil. |
|
|
|
2. |
Wipe off any spilled oil and |
|
|
|
close the cap again. |
Always switch off the device and allow the motor to cool before filling with chain oil. There is a risk of fire if oil overflows.
Operating the chainsaw
Switch on the chainsaw only when chain bar, saw chain and sprocket chain wheel covering are correctly assembled. Ensure the voltage of the mains connection agrees with the label on the device. Make sure you have a secure stance
Note: The saw is a high-powered device, where a 13 A fuse generally suffices, provided that further current consumers with high service are not connected. However, if
the premises installations are not implemented optimally and “quick-
14
acting” protection fuses are built-in (e.g. B 16), the protection fuse will be activated due to the current peaks during switch-on. You should
install time-delay fuses with the designation “L”, which can be bought in every hardware store. Fuses with the designation “G” are provided with even longer time delay, however they are not usually employed in households.
Caution! Saw can oil up, see notes on Operation startup.
Switching on
|
1. |
Check before the start, whether |
|
D |
|||
|
sufficient chain oil is in the tank |
||
|
|
and, if necessary, refill with chain |
|
|
|
oil (see Chapter Operation Start). |
|
|
2. |
Form a loop from the end of the |
|
|
|
extension cable and hang this |
|
|
|
into the tension relief (17) on the |
|
|
|
rear grip (1). |
|
|
3. |
Connect the device to the mains |
|
|
|
voltage. |
|
|
4. |
Release the chain brake, where |
|
|
|
you shift the brake arm (3) back |
|
|
|
against the front grip (8). |
|
|
5. |
Hold the electric chainsaw firmly |
|
|
|
with both hands, with the right |
|
|
|
hand on the rear grip (1) and |
|
|
|
the left hand on the front handle |
|
|
|
(8). Thumb and finger must close |
|
|
|
securely over the handles. |
|
|
6. |
For switching on, activate the |
|
|
|
switch-on block (11) with the right |
|
|
|
thumb and then press the On/Off |
switch (10), the electric power saw runs with highest speed. Release the switch-on block again.

7.The power saw switches off when you release the On/Off switch (10) again. Switching for continuous running is not possible.
Checking the chain brake
The motor cannot be turned on if the chain brake has engaged. Do not employ the chain brake in order to start the chainsaw or to switch it off.
|
1. |
Place the electric chainsaw onto |
|||
E |
|||||
|
a solid, flat surface. It must not |
||||
|
|
||||
|
|
contact any objects. |
|||
|
2. |
Connect the device to the mains |
|||
|
|
voltage. |
|||
|
3. |
Release the chain brake by |
|||
|
|
shifting the brake arm (3) over |
|||
|
|
against the front grip (8). |
|||
|
4. |
Hold the electric chainsaw firmly |
|||
|
|
with both hands, with the right |
|||
|
|
hand on the rear handle ( |
|
1) |
|
|
|
A |
|||
|
|
and the left hand on the front |
|
||
|
|
handle (8). Thumb and finger |
|||
|
|
must close securely over the han- |
|||
|
|
dles. |
|||
|
5. |
Turn on the electric chainsaw. |
|||
|
6. |
Activate the chain braking lever |
|||
|
|
(3), with running motor, with |
|||
|
|
the left hand. To do so, push the |
|||
|
|
chain braking lever/front hand |
|||
|
|
protection (3) away from the front |
|||
|
|
handle (8). Chain should stop |
|||
|
|
abruptly. |
|||
|
7. |
Once the chain brake is work- |
|||
|
|
ing properly, release the on/off |
|||
|
|
switch (10) and the chain brake. |
|||
If the chain brake does not function correctly, you must not use the electric chainsaw. A slack saw chain leads to
GB
danger of injury.
Return the electric chainsaw to our Service-Center for repair.
Checking the chain lubrication
Check the oil level and the chain lubrication system before commencement of work.
•Switch on the chainsaw and hold it above a bright background. The saw must not touch the ground.
If an oil trace can be seen, the chainsaw is working trouble-free.
|
If no oil trace can be seen clean the |
||
|
oil passages or turn the chainsaw |
||
|
to our Service-Center for repair. |
||
|
4. Clean the oil passages of the |
||
J |
|||
|
chain bar (27), in order to guar- |
||
|
|
||
|
|
antee a trouble-free, automatic |
|
|
|
oiling of the saw chain during |
|
|
|
operation. |
|
Fitting the saw chain |
|||
G 1. |
Switch the saw off and unplug it |
||
from the mains.
2. Spread the chain (5) out into a loop with the cutting edges running clockwise .
3. Slide the saw chain (5) into the bar guide groove. To mount the guide bar (4), raise it to an angle of approx. 45 degrees. This will make it easier to replace the saw chain (5) onto the sprocket (25). It is normal that the saw chain (5) is slack. Sagging in the chain is normal.
15

GB
4. |
Pre-tighten the chain (5) by turn- |
Sawing techniques |
|||||||||
|
|
ing the tensioning plate (24) |
General |
||||||||
|
|
clockwise. |
|||||||||
|
5. Position the sprocket chain wheel |
• You have better control when you saw |
|||||||||
|
|
covering (15). First place the tab |
|||||||||
|
|
(26) on the cover into the corre- |
|
with the bottom side of the chain bar |
|||||||
|
|
sponding notch on the plate (15). |
|
(with pulling saw chain) and not to with |
|||||||
|
|
Only lightly tighten the fastening |
|
the top side of the chain bar (with push- |
|||||||
|
|
bolt (14), as you will still have to |
|
ing saw chain). |
|||||||
|
|
tension the saw. |
• The saw chain must not contact either |
||||||||
|
|
|
|
|
|
|
|
|
|
the ground or another object during |
|
|
Refer to the start-up section on how |
|
sawing through or after sawing comple- |
||||||||
|
to tension the saw chain. |
|
tion. |
|
|||||||
Prior to changing the chain, the nut of the |
• Make sure that the saw chain does not |
||||||||||
|
become jammed in the wood. Do not |
||||||||||
guide rail must be cleaned of dirt because |
|
let the tree trunk break or split off. |
|||||||||
dirt deposits available can cause the chain |
• Consider also the precautions against |
||||||||||
to break out of the rail. The deposits can |
|
spring-back (see notes on safety). |
|||||||||
also absorb the chain oil. So the conse- |
|
If the saw chain jams, you |
|||||||||
quence would be that the chain oil would |
|
||||||||||
not or only a small part of it would reach |
|
do not attempt to pull out the |
|||||||||
the underside of the rail and the lubrication |
|
electric chainsaw using pow- |
|||||||||
would be reduced. |
|
er. There is a danger of injury |
|||||||||
Changing the saw bar |
|
here. Switch off the motor |
|||||||||
|
and use a lever or wedge to |
||||||||||
|
1. |
Switch the saw off and unplug it |
|
free the electric chainsaw. |
|||||||
F |
Bucking |
||||||||||
|
|
from the mains. |
|||||||||
|
|
||||||||||
|
2. Lay the saw on a flat surface. |
|
|
|
|||||||
3. |
Turn the fastening bolt (14) anti- |
This refers to sawing up a felled tree trunk |
|||||||||
|
|
clockwise and loose the chain |
into smaller sections. |
||||||||
|
|
adjustment ring ( |
|
|
13) to remove |
|
|
|
|||
|
|
A |
|
|
|
||||||
|
|
the sprocket chain |
|
|
wheel cover- |
• Ensure that the saw chain does not |
|||||
|
|
ing (15). |
|
come in contact with the ground during |
|||||||
4. |
Remove the saw bar (4) and saw |
|
sawing. |
||||||||
|
|
chain ( |
|
5). To remove the guide |
• Make sure you have a secure stance |
||||||
|
|
A |
|||||||||
|
|
bar (4), |
|
raise it to an angle of ap- |
|
and, in the case of sloping ground, |
|||||
|
|
prox. 45 degrees. This will make |
|
stand above the log. |
|||||||
|
|
it easier to take the saw chain (5) |
|
1. |
Log is lying on the ground: |
||||||
|
|
off the sprocket ( |
G |
25). |
|
||||||
|
|
K |
|||||||||
|
|
|
|||||||||
5. |
To fit the new bar, place the bar |
|
Saw through the log completely |
||||||||
|
|
||||||||||
|
|
(4) onto the bar bolt (22) with |
|
|
from above and ensure at the |
||||||
|
|
the tensioning plate pointing out- |
|
|
end of the cut not to contact the |
||||||
|
|
wards (24). |
|
|
ground. |
||||||
16

|
|
|
If you can turn the tree trunk, saw |
|
|
|
two-thirds of the way through it. |
|
|
|
Then turn the trunk around and |
|
|
|
saw the rest of the way through |
|
|
|
from above. |
|
|
|
2. Log is supported at one |
L |
|||
|
|
|
end: |
|
|
||
|
|
|
Start sawing from the bottom and |
|
|
|
work your way up (with the up- |
|
|
|
per edge of the bar) a third of the |
|
|
|
way into the diameter of the trunk |
|
|
|
to prevent splitting. Then saw from |
|
|
|
the top downwards with the lower |
|
|
|
edge of the bar towards the first |
|
|
|
cut to prevent the bar from becom- |
|
|
|
ing jammed in the wood. |
|
|
|
3. Log is supported at both |
M |
|
||
|
ends: |
||
|
|
|
|
|
|
|
Start from the top and work down |
|
|
|
(with the lower edge of the bar) |
|
|
|
to a third of the diameter of the |
|
|
|
trunk. Then saw from underneath |
|
|
|
with the upper edge of the bar |
|
|
|
until the two cuts meet. |
|
|
|
4. Sawing on a sawhorse: |
N |
|
||
|
Hold the electric chainsaw steady |
||
|
|
|
with both hands, keeping the |
|
|
|
saw in front of you while saw- |
|
|
|
ing. Once the saw is through the |
|
|
|
wood, guide the machine passed |
|
|
|
you on the right (1). Hold your left |
|
|
|
arm as straight as you can (2). |
|
|
|
Watch out for the falling trunk. |
|
|
|
Position yourself to prevent any |
|
|
|
danger from the separated trunk. |
|
|
|
Watch your feet. The trunk may |
|
|
|
cause injuries when falling. Keep |
|
|
|
your balance (3). |
|
|
|
Limbing |
O |
|
||
Limbing is the designation for the sawing off of branches and boughs from a felled tree.
GB
Many accidents occur during the removal of branches. Never cut tree limbs when you are standing on the log. Keep the spring-back area in mind if branches are under tension.
•Do not remove support branches until after the sawing off.
•Branches under tension must be sawed from below to above, in order to prevent jamming of the chainsaw.
When working on thicker branches, use the same technique as when you are sawing up a felled trunk.
•Work to the left of the log and as near as possible to the electric chainsaw. As far as possible, the weight of the saw should rest on the log.
•Change position to saw off branches on the other side of the trunk.
•Branches sticking out are cut off separately.
Felling trees
A lot of experience is necessary in felling trees. Cut down trees only when you can safely handle the electric chainsaw. In no case should you use the electric chainsaw if you feel unsure about anything.
•Ensure that no people or animals are in the field of action. The safety distance between the tree to be felled and the nearest-located workplace must be 2 ½ tree lengths.
•Note the felling direction:
The user must be able to move safely near the felled tree, to saw off the tree
17
GB
easily and remove branches.It is to be avoided that the felled tree snags itself on another tree. Note the natural felling direction, which is dependent on the slope and curvature characteristic of the tree, wind direction and the number of branches.
•In the case of sloping ground, stand above the tree to be felled.
•Small trees, with a diameter of 15-18 cm, can usually be sawn off with one cut.
•In case of trees with a larger diameter, a notched cut and a back cut must be implemented (see diagram Q ).
Do not fell any trees when a strong or changing wind is blowing, if the danger of property damage exists or if the tree could fall on electric wires.
Immediately after termination of the sawing procedure, remove the ear protection so that you can hear hooter and alarm signals.
1.Removal of branches: Remove hanging branches by positioning the cut from above the branch. With removal of branches, never work higher than shoulder level.
P 2. Escape area:
Remove the undergrowth around the tree to ensure an easy escape. The escape area (1) should be around 45° either side behind the planned felling direction (2).
18
|
|
|
|
3. |
Cutting notch (A): |
Q |
|||||
|
|
|
|
|
Make a felling notch in the direc- |
|
|
|
|
|
|
|
|
|
|
|
tion in which you wish the tree to |
|
|
|
|
|
fall. Start with the bottom, hori- |
|
|
|
|
|
zontal cut. The cut depth should |
|
|
|
|
|
be around 1/3 of the trunk diam- |
|
|
|
|
|
eter. Now make a slanted saw |
|
|
|
|
|
cut from above at an angle of |
|
|
|
|
|
roughly 45° to meet exactly with |
|
|
|
|
|
the bottom saw cut. |
|
|
|
|
Never step in front of a tree |
|
|
|
|
|
which is notched. |
|
|
|
|
|
4. |
Felling back cut (B): |
Q |
|
||||
|
|
Make the back cut from the other |
|||
|
|
|
|
||
|
|
|
|
|
side of the log, where you stand |
|
|
|
|
|
to the left of the log and saw with |
|
|
|
|
|
the chainsaw pulling. The back |
|
|
|
|
|
cut must run horizontally 5 cm |
|
|
|
|
|
above the horizontal notched cut. |
|
|
|
|
|
The back cut should be so deep |
|
|
|
|
|
that the separation distance be- |
|
|
|
|
|
tween the back cut and the notch |
|
|
|
|
|
cutting line is at least 1/10 of the |
|
|
|
|
|
trunk diameter. The part of the |
|
|
|
|
|
log not sawed through is desig- |
|
|
|
|
|
nated as a break dimension. |
|
|
|
|
|
Insert a felling wedge or a crow- |
R |
|
|
|
|
|
|
|
|
bar into the back cut, as soon as |
||
|
|
||||
|
|
|
|
|
the depth of cut permits this, in |
|
|
|
|
|
order to prevent a jamming of the |
|
|
|
|
5. |
chain bar. |
|
|
|
|
If the trunk diameter is larger than |
|
S |
|
|
|||
|
|
the length of the chain bar, make |
|||
|
|
||||
two cuts.
For safety reasons, we advise inexperienced users not to fell any logs with a rail length which is smaller than the trunk diameter.
GB
6.After carrying out of the back cut, the tree falls by itself or with the aid of the felling wedge or crowbar.
As soon as the tree begins to fall, pull out the saw from the section, stop the motor, place the electric chainsaw down and leave the workplace using the withdrawal path.
Maintenance and cleaning
Basically, carry out maintenance and cleaning works with switched-off motor and power plug removed. Danger of injury!
Leave any maintenance and servicing work not covered by this manual to our Serv- ice-Center. Use only original spare parts.
Maintenance Interval Table
Allow the machine to cool down before all maintenance and cleaning works. Danger of burn injuries!
Cleaning
•Clean the machine thoroughly after every use. In this way, you extend the life of the machine and avoid accidents.
•Keep the gripping handles free of petrol, oil or grease. Clean the gripping handles, where appropriate, with a moist cloth soaked in soap. Use no solvents or petrol for cleaning!
•Clean the saw chain after every use. Use a paint brush or wipe for that. Do not use any liquids to clean the chain. After cleaning, oil the chain lightly with chain oil.
•When cleaning, also remove the chain wheel cover (15) so that this area can be cleaned as well.
•Clean the ventilation slots and the surfaces of the machine with a paint brush, whisk or dry cloth. Do not use any liquids for cleaning.
 Machine part
Components of the chain brake
 Sprocket chain wheel
  Saw chain (5)
Guide bar (4)
 Action
Check, replace if required
 Check, replace if required
Check oil, regrind or replace if required
Check, turn round, clean and oil
Before |
After 10 hours |
|
every |
||
of operation |
||
use |
||
|
19

GB
Maintenance intervals
Regularly carry out the maintenance operations listed in the following table. The life of the saw is extended by regular maintenance of your chainsaw. Furthermore, you get optimum cutting performance and avoid accidents.
Trouble shooting
 Problem
Device does not start
Chain does not rotate
Inferior cutting performance
Saw runs with difficulty, chain comes off
Chain becomes hot, smoke development during sawing, discoloration of the rail
Possible cause |
Fault correction |
|
Mains voltage defective |
Check plug socket, cable, line |
|
|
and plug, where appropriate, |
|
|
repair by electrical specialist. |
|
House protection fuse |
Check house protection fuse, |
|
activated |
see note |
|
Defective On/Off switch (10) |
Repair by customer service |
|
Worn carbon brushes |
Repair by customer service |
|
Defective motor |
Repair by customer service |
|
Chain brake blocks saw |
Check chain brake. |
|
chain (5) |
Possibly release chain brake |
|
Incorrectly mounted saw |
Mount saw chain correctly |
|
chain (5) |
||
|
||
Saw chain (5) blunt |
Sharpen cutting teeth or place |
|
on new chain |
||
|
||
Chain tension insufficient |
Check chain tension |
|
Chain tension insufficient |
Check chain tension |
|
|
Check oil level and, where |
|
|
appropriate, refill with chain oil, |
|
|
check oil automatic system and, |
|
Too little chain oil |
where appropriate, clean oil |
|
|
outflow duct or have repaired by |
|
|
customer service |
20
Oiling the saw chain
Clean and oil the chain regularly. In this way, you keep the chain sharp and get optimum machine performance. In case of damage due to inadequate maintenance of the saw chain, the guarantee claim is invalid.
Remove the power plug and use cut-protection gloves when you are handling the chain or the chain bar.
•Oil the chain after cleaning, after 10 hours of use or at least once weekly, depending on which comes first.
•Before oiling, the chain bar must be cleaned thoroughly, in particular the teeth of the rail. Use a whisk and a dry cloth for that.
•Oil the individual chain links with the aid of an oil suction gun with pinpoint tip (available in the specialist trade).
Place individual oil drops onto the articulated links and onto the tooth tips of the individual chain links.
Sharpening the saw chain
An incorrectly sharpened saw chain increases the danger of spring-back!
Use cut-protection gloves when you are handling the chain or the chain bar.
A sharp chain guarantees an optimal cutting performance. It eats effortlessly through the wood and leaves large, long wooden chips.
A saw chain is blunt if you have to press the cutting equipment through the wood and the wooden chips
GB
are very small. In the case of a very blunt saw chain, no chip cuttings result at all, only sawdust.
•The sawing parts of the chain are the cutting elements, which consist of a cutting tooth and a depth limiting projection. The vertical separation distance between these two determines the sharpness depth.
•The following values must be noted in sharpening the cutting teeth:
H - Sharp edge angle (30°)
-Breast angle (85°)
-Sharpness depth (0.65 mm)
-Round file diameter (4.0 mm)
Deviations from the measurement data of the cutting
geometry can lead to an increase of the spring-back slope of the machine. Increased danger of accident!
Special tools are necessary for sharpening the chain, which guarantee that the cutting edges are sharpened at the correct angle and to the correct depth. For the inexperienced user of chainsaws, we recommend to have the saw chain sharpened by a specialist or a specialist workshop. If you think yourself capable of sharpening the chain, you can acquire the special tools in the specialist trade.
|
1. |
Switch the saw off and unplug it |
|
I |
|||
|
from the mains. |
||
|
|
||
|
2. |
Remove the saw chain (refer |
|
|
|
to the section on operating the |
|
|
|
saw). The chain should be well- |
|
|
|
tensioned to ensure proper sharp- |
|
|
|
ening. |
|
|
3. |
For the sharpening, a round file |
|
|
|
with 4.0 mm diameter is neces- |
|
|
|
sary. |
21

GB
Other diameters damage the Starting up a new saw chain chain and can lead to danger
during work! In the case of a new chain, the tensioning force decreases after some time. Therefore
4.Sharpen only from the inside to you must re-tension the chain after the first the outside. Guide the file from 5 cuts and at longer intervals after this. the inner side of the cutting teeth
|
to the outer side. Lift the file when |
Never attach a new chain |
||||
|
you are withdrawing it. |
to a worn drive pinion or |
||||
5. |
Sharpen first the teeth on one |
place onto a damaged or |
||||
|
side. Turn the saw around and |
worn chain bar. The chain |
||||
|
sharpen the teeth of the other |
could spring back or break, |
||||
|
side. |
potentially leading to serious |
||||
6. |
The chain is worn and must be |
injury. |
||||
|
replaced by a new saw chain if |
|
|
|
|
|
|
only approx. 4 mm of the cutting Maintaining the chain bar |
|||||
|
teeth is remaining. |
Use cut-protection gloves |
||||
7. |
After the sharpening, all cutting |
|||||
|
elements must now be equal in |
when handling the chain or |
||||
|
length and width. |
the chain bar. |
||||
8. After every third sharpening, the |
The chain bar must be turned round every |
|||||
|
sharpness depth (depth limitation) |
|||||
|
must be checked and the height |
10 working minutes, in order to guarantee |
||||
|
filed with the aid of a flat file. The |
uniform wear. |
||||
|
depth limitation should be set back |
1. Switch off the saw and pull out the |
||||
|
about 0.65 mm from the cutting |
power plug (18). |
||||
|
tooth. After the setting back of |
2. Remove the sprocket chain wheel cov- |
||||
|
depth limitation, round it off a lit- |
ering (15), the saw chain (5) and the |
||||
|
tle at the front. |
chain bar (4). |
||||
Adjusting the chain tension |
3. Check the chain bar (4) for wear. Re- |
|||||
move burrs and straighten the guide |
||||||
|
|
surfaces with a flat file. |
||||
The adjustment of the chain tension is de- |
4. Clean the oil passages ( |
|
|
27) of |
||
J |
||||||
scribed in the chapter: Starting operation, |
the chain bar, in order to |
guarantee |
||||
tensioning chainsaw. |
a trouble-free, automatic oiling of the |
|||||
|
|
saw chain during operation. |
||||
• Switch off the saw and pull out the |
5. Mount chain bar (4), chainsaw (5) and |
|||||
power plug. |
sprocket chain wheel covering (15) |
|||||
• Check the chain tension regularly and |
and tighten the chainsaw. |
|||||
re-adjust this as often as possible.When |
|
|
|
|
|
|
the saw chain is tensioned with 9 N |
Turning over the bar (4) requires you to |
|||||
(approx. 1 kg), the gap between the |
move the tensioning screw ( |
|
24) to the |
|||
F |
||||||
saw chain and the guide rail may not |
other side of the bar. Unscrew |
|
the retain- |
|||
be more than 2 mm. |
ing bolt attaching the bar to the tensioning |
|||||
22
screw. Move the tensioning screw over to the other side of the bar and screw the retaining bolt back in.
With the oil nozzles in good condition and the oil regulator set cor-
rectly, the saw chain will spray a little oil off after starting.
Waste disposal and environmental protection
Do not dispose of used oil in the sewage system or drains. Dispose of used oil in an environmentally correct manner - bring it to a waste disposal center.
Be environmentally friendly. Return the tool, accessories and packaging to a recycling centre when you have finished with them.
Machines do not belong with domestic waste.
Empty the oil tank carefully and hand in your electric chainsaw at a disposal center. The plastic and metal parts employed can be separated out and thus recycled use can be implemented. Ask our ServiceCenter for details.
GB
Spare parts
The following spares are available from Service-Center. Please indicate the machine type and the number of the spare part with your order.
Oil filler cap......................... |
9109 7802 |
Saw chain............................ |
3009 1570 |
Chain bar ............................ |
3010 0420 |
Bio chain oil 1 liter................ |
3023 0001 |
Bio chain oil 5 liter................ |
3023 0002 |
If further spare parts should be necessary, please find the part number on the exploded drawings.
The Oregon replacement saw chain is to be used only in conjunction with the associated Oregon blade and the electric chainsaw approved for this. There is a risk of injury.
Spare parts and accessories can be obtained at www.grizzly-service.eu If you do not have internet access, please contact the Service Centre via telephone (see “Sercice-Center” Page 25). Please have the order number mentioned below ready.
23

GB
Guarantee
Dear Customer,
This equipment is provided with a 3-year guarantee from the date of purchase.
In case of defects, you have statutory rights against the seller of the product. These statutory rights are not restricted by our guarantee presented below.
Terms of Guarantee
The term of the guarantee begins on the date of purchase. Please retain the original receipt. This document is required as proof of purchase.
If a material or manufacturing defect occurs within three years of the date of purchase of this product, we will repair or replace – at our choice – the product for you free of charge. This guarantee requires the defective equipment and proof of purchase to be presented within the three-year period with a brief written description of what constitutes the defect and when it occurred.
If the defect is covered by our guarantee, you will receive either the repaired product or a new product. No new guarantee period begins on repair or replacement of the product.
Guarantee Period and Statutory Claims for Defects
The guarantee period is not extended by the guarantee service. This also applies for replaced or repaired parts. Any damages and defects already present at the time of purchase must be reported immediately after unpacking. Repairs arising after expiry of the guarantee period are chargeable.
Guarantee Cover
The equipment has been carefully produced in accordance with strict quality guidelines and conscientiously checked prior to delivery.
The guarantee applies for all material and manufacturing defects. This guarantee does not extend to cover product parts that are subject to normal wear and may therefore be considered as wearing parts (e.g. filters or attachments) or to cover damage to breakable parts (e.g. switches, batteries, or parts made of glass).
This guarantee shall be invalid if the product has been damaged, used incorrectly or not maintained. Precise adherence to all of the instructions specified in the operating manual is required for proper use of the product. Intended uses and actions against which the operating manual advises or warns must be categorically avoided.
The product is designed only for private and not commercial use. The guarantee will be invalidated in case of misuse or improper handling, use of force, or interventions not undertaken by our authorised service branch.
Processing in Case of Guarantee
To ensure quick handling of you issue, please follow the following directions:
•Please have the receipt and item number (IAN 96817) ready as proof of purchase for all enquiries.
•Please find the item number on the rating plate.
•Should functional errors or other defects occur, please initially contact the
service department specified below by telephone or by e-mail. You will then receive further information on the processing of your complaint.
24

•After consultation with our customer service, a product recorded as defective can be sent postage paid to the service address communicated to you, with the proof of purchase (receipt) and specification of what constitutes the defect and when it occurred. In order to avoid acceptance problems and additional costs, please be sure to use only the address communicated to you. Ensure that the consignment is not sent carriage forward or by bulky goods, express or other special freight. Please send the equipment inc. all accessories supplied at the time of purchase and ensure adequate, safe transport packaging.
Repair Service
For a charge, repairs not covered by the guarantee can be carried out by our ser-
vice branch, which will be happy to issue a cost estimate for you.
We can handle only equipment that has been sent with adequate packaging and
postage.
Attention: Please send your equipment to our service branch in clean condition and with an indication of the defect.
Equipment sent carriage forward or by bulky goods, express or other special freight will not be accepted.
We will dispose of your defective devices free of charge when you send them to us.
GB
Service-Center
Service Great Britain
Tel.: 0871 5000 720 (£ 0.10/Min.)
E-Mail: grizzly@lidl.co.uk
IAN 96817
Importer
Please note that the following address is not a service address. Please initially contact the service centre specified above.
Grizzly Gartengeräte GmbH & CO KG
Am Gewerbepark 2 64823 Groß-Umstadt Germany www.grizzly-service.eu
25


Przeznaczenie
Elektryczna piła łańcuchowa jest przeznaczona tylko do cięcia drewna. Piła nie jest przewidziana do żadnych innych zastosowań (np. przecinania murów, tworzyw sztucznych czy środków spożywczych). Piła jest przeznaczona do wykonywania prac domowych. Nie jest ona przystosowana do ciągłego używania zarobkowego. Urządzenie jest przeznaczone do używania przez osoby dorosłe. Nieletni powyżej 16 roku życia mogą używać
piły tylko pod nadzorem osoby dorosłej. Producent nie odpowiada za szkody wywołane niezgodnym z przeznaczeniem stosowaniem i nieprawidłową obsługą urządzenia.
Opis ogólny
Zawartość opakowania
-Piła łańcuchowa
-Szyna prowadząca (miecz)
-Łańcuch tnący
-Kołczan ochronny na miecz
-Śrubokręt
-180 ml bio-olej Grizzly
-Instrukcja obsługi
Ilustracje sposobu obsługi i konserwacji znajdziesz na przedniej odchylanej stronie.
Przegląd
|
1 Tylny uchwyt |
|
A |
||
|
2 |
Pokrywa zbiornika oleju |
|
||
|
3 |
Dźwignia hamulca łańcucha i |
|
|
przednia osłona dłoni |
|
4 |
Szyna prowadząca (miecz) |
|
5 |
Łańcuch tnący |
PL
6 Gwiazda zwrotna
7 Ogranicznik pazurowy
8 Przedni uchwyt
9 Silnik elektryczny
10Włącznik-wyłącznik
11Blokada włącznika
12Trzpień przechwytujący łańcuch
13Pierścień napinacza łańcucha
14Śruba mocująca osłony koła łańcucha
15Osłona koła łańcucha
16Tylna osłona dłoni
17Uchwyt kabla
18Kabel sieciowy
19Kołczan ochronny na miecz
20Butelka oleju
C |
|
21 górny poziom wskaźnika |
||
|
|
|
22 niższy wskaźnik poziomu oleju |
|
|
|
|
23 |
Śruby kolei |
F |
|
|||
|
|
|
24 |
Śruba zaciskająca |
|
|
|
||
|
|
|
|
|
G |
25 |
Koło zębate |
||
|
|
26 |
Nos |
|
|
|
|
||
J |
27 |
Przejście oleju |
||
Opis działania
Pilarka łańcuchowa jest napędzana przez silnik elektryczny. Obiegowy łańcuch tnący jest prowadzony przez miecz (prowadnicę szynową).
Urządzenie jest wyposażone system szybkiego napinania łańcucha i szybkodziałający hamulec łańcucha. Automatyczny układ zasilania olejem zapewnia ciągłe smarowanie łańcucha.
Do ochrony użytkownika służą różne zabezpieczenia pilarki.
Funkcje elementów urządzenia są podane w poniższym opisie.
27
PL
Dane techniczne
Elektryczna piła łańcuchowa..........
.................................. |
FKS 2200 D2 |
Napięcie znamionowe wejścia |
|
Pobór.......................................mocy |
230 V~, 50 Hz |
2200 W |
|
Klasa zabezpieczenia .................... |
/ II |
Prędkość ruchu łańcucha............ |
13,6 m/s |
Ciężar |
|
(bez szyny prowadzącej i łańcucha)4,7 kg Ciężar
(z szyną prowadzącą i łańcuchem).5,9 kg
Poj. zbiornika |
..............................270 ml |
Łańcuch ....................... |
Oregon 91P057X |
... chromowany ząb tnący, niskoodrzutowy
Miecz.... |
Oregon 160SDEA041 (112364) |
|
Odstęp łańcucha |
........................ 10 mm |
|
Grubość łańcucha....................... |
1,3 mm |
|
Zęby łańcucha..................................... |
7 |
|
Długość miecza ......................... |
460 mm |
|
Długość cięcia .......................... |
395 mm |
|
Poziom ciśnienia |
|
|
akustycznego |
|
|
(LpA) .............. |
96 dB (A); KpA= 3,0 dB (A) |
|
poziom mocy |
|
|
akustycznej |
|
|
(LWA) ............. |
108 dB (A); KwA= 3,0 dB (A) |
|
gwarantowany poziom mocy |
||
akustycznej ........................... |
112 dB (A) |
|
Wibracja (an) |
6,97 m/s 2 ; K=1,5 m/s2 |
|
.......................... |
|
|
Podana wartość emisji drgań została zmierzona metodą znormalizowaną i może być wykorzystywana do porównań urządzenia elektrycznego z innymi urządzeniami.
Podana wartość emisji drgań może też służyć do szacunkowej oceny stopnia ekspozycji użytkownika na drgania.
28
Ostrzeżenie:
Wartość emisji drgań może się różnić w czasie korzystania z urządzenia od podanej wartości, jest to zależne od sposobu używania urządzenia.
Istnieje konieczność określenia i zastosowania środków ochrony użytkownika, opartych na ocenie ekspozycji w rzeczywistych warunkach używania urządzenia (należy przy tym uwzględnić wszystkie części cyklu roboczego, na przykład okresy czasu, w których urządzenie elektryczne jest wyłączone bądź jest włączone, ale pracuje bez obciążenia).
Zmiany techniczne i optyczne mogą być dokonywane bez zapowiedzi w trakcie udoskonalania produktu. W związku z tym wszelkie podane w niniejszej instrukcji obsługi wymiary, wskazówki i dane nie posiadają gwarancji bezwzględnej prawidłowości. W związku z powyższym wyklucza się wszelkie roszczenia prawne zgłaszana na podstawie danych instrukcji obsługi.
Zasady bezpieczeństwa
Ten rozdział zawiera podstawowe zasady bezpieczeństwa dotyczące pracy z elektryczną piłą łańcuchową.
Elektryczna piła łańcuchowa zalicza się do niebezpiecznych urządzeniem, które w przypadku nieprawidłowego lub lekkomyślnego użytkowania może powodować poważne, a nawet śmiertelne obrażenia. W związku z tym w celu zapewnienia bezpieczeństwa sobie i innym zawsze przestrzegaj poniższych zasad, a w razie niepewności zasięgnij porady specjalisty.
Symbole zawarte w instrukcji
Znaki niebezpieczeństwa z informacjami dot. zapobiegania wypadkom.
Znaki nakazowe (wyjaśnienie nakazu zamiast wykrzyknika) z informacjami dot. zapobiegania wypadkom.
Wskazówki zawierające informacje dot. lepszego użytkowania urządzenia.
Zasady bezpieczeństwa, symbole znajdujące się na pile
Przed rozpoczęciem pracy zapoznaj się dokładnie z wszystkimi elementami piły. Przećwicz sposób postępowania z piłą i poproś doświadczonego użytkownika o wyjaśnienie funkcji, sposobu działania piły oraz technik piłowania drewna.
 Przeczytaj instrukcję obsługi urzą-
  dzenia i zastosuj się do niej.
Noś osobiste wyposażenie ochronne. Zasadniczo noś okulary ochronne lub, lepiej, maskę ochronną na twarz, nauszniki, kask ochronny, zabezpieczoną przed przecięciem odzież roboczą, zabezpieczone przed przecięciem rękawice oraz zabezpieczone przed przecięciem obuwie ochronne z przeciwpoślizgową podeszwą.
PL
Mocno trzymaj maszyną obiema dłońmi. Nigdy nie pracuj jedną ręką.
Uwaga! Odbój - podczas pracy 

 uważaj na odboje urządzenia.
Nie wystawiaj maszyny na deszcz. Urządzenie nie może być wilgotne ani używane w wilgotnym otocze-
niu.
Uwaga! W razie uszkodzenia lub  przecięcia kabla sieciowego natychmiast wyjmij wtyczkę z gniazd-
ka sieci elektrycznej.
gwarantowany poziommocy akustycznej
460 mm  Długość miecza
Klasa zabezpieczenia II
Urządzeń elektrycznych nie należy wyrzucać razem z odpadami domowymi
Łańcuch piły nie obraca  się, gdy jest zablokowany
hamulec łańcucha. Przyłącz piłę do źródła napięcia elektrycznego.
Ogólne zasady bezpieczeństwa
Przed rozpoczęciem pracy elektryczną piłą łańcuchową zapoznaj się dokładnie z wszystkimi jej elementami. Proszę przećwiczyć obchodzenie się z piłą (przycinanie na długość drewna okrągłego na koźle do piłowania)
29

PL
i zlecić wyjaśnienie sobie przez doświadczonego użytkownika lub specjalistę działania, sposobu oddziaływania, technik piłowania i osobistego wyposażenia ochronnego.
Proszę przeczytać następujące wskazówki w celu uniknięcia szkód osobowych i rzeczowych:
OSTRZEŻENIE! Przeczytaj wszystkie zasady i instrukcje bezpieczeństwa.
Niedokładne przestrzeganie zasad i instrukcji bezpieczeństwa może spowodować porażenie prądem, pożar i/lub inne ciężkie zranienia.
Zachowaj wszystkie zasady bezpieczeństwa i instrukcje na przyszłość.
Użyte w zasadach bezpieczeństwa pojęcie „narzędzie elektryczne“ dotyczy narzędzi elektrycznych zasilanych prądem sieciowym (za kablem sieciowym) oraz narzędzi elektrycznych zasilanych z baterii (bez kabla sieciowego).
Bezpieczeństwo miejsca pracy
•Zapewnij porządek i wystarczające oświetlenie w miejscu pracy.
Nieporządek lub nieoświetlone miejsce pracy może spowodować wypadek.
•Nie pracuj pilarką elektryczną w atmosferze potencjalnie wybuchowej, w której znajdują się palne ciecze, gazy lub pyły. Narzędzia elektryczne wytwarzają iskry, które mogą zapalić pył lub pary.
•Trzymaj od dzieci i innych ludzi w bezpiecznej odległości podczas używania pilarki elektrycznej.
30
Odwrócenie uwagi może spowodować utratę kontroli nad urządzeniem.
Bezpieczeństwo elektryczne:
Ostrożnie: W ten sposób unikniesz wypadków i zranień wskutek porażenia prądem:
•Wtyczka pilarki elektrycznej musi pasować do gniazdka. Wtyczki nie można w żaden sposób modyfikować. Nie używaj adapterów wtyczek razem z narzędziami elektrycznymi posiadającymi zestyk ochronny (uziemiający).
Nienaruszone wtyczki i dopasowane gniazdka zmniejszają ryzyko porażenia prądem.
•Unikaj dotykania uziemionych powierzchni, takich jak rury, kaloryfery, piecyki, kuchenki, lodówki.
Gdy Twoje ciało jest uziemione, ryzyko porażenia prądem jest większe.
•Trzymaj pilarkę elektryczną z daleka od deszczu i wilgoci/wody.
Dostanie się wody do wnętrza urządzenia elektrycznego zwiększa ryzyko porażenia prądem.
•Jeżeli kabel zasilający tego urządzenia jest uszkodzony, musi on zostać wymieniony przez producenta lub jego serwis albo osobę posiadającą podobne kwalifikacje - tylko w ten sposób można zapewnić bezpieczeństwo urządzenia.
•W przypadku konieczności wymiany przewodu przyłączeniowego, zalecamy zlecenie wymiany przewodu producentowi lub jego przedstawicielowi (np. autoryzowany warsztat serwisowy, dział obsługi klienta itd.)
•Prowadź przewód sieciowy tak, by podczas piłowania nie został pochwycony przez gałęzie i podobne przedmioty.
 Loading...