


Handy
Recorder
H1
Quick Start Guide
H1Safety and Operation  Precautions must be read before using the unit.
ZOOM CORPORATION
4-4-3 Surugadai, Kanda, Chiyoda-ku, Tokyo
101-0062 Japan www.zoom.co.jp
Copying or reproduction of this document in part or in whole without permission is prohibited.
H1-5001-2

Prepare Turning the power on/off
Turning the unit ON and OFF is easy.
1. To turn the unit ON, slide the power switch down for about 1 second.
2. To turn the unit OFF, slide the power switch down for about 1 second again.
↓ |
Prepare Disabling the buttons
The buttons can be disabled to prevent recording from being stopped accidentally, for example.
1. To disable the buttons, slide the power switch upward to HOLD.
2. To enable use of the buttons again, slide the power switch back to the middle position.
↑ |
1
Prepare Setting the date and time
Set the date and time on the unit.
|
|
1. |
While pressing |
|
, turn the |
|
|
|
|
power on. |
|
|
|
|
|
2. |
Use |
and |
to set the |
|
|
|
|
value, and press |
to move |
||
|
|
|
to the next item. |
|
|
|
|
|
|
• Press |
to return to the |
||
2 |
|
|
previous item. |
|
|
|
2,3 |
|
3. |
After setting the last item |
|||
2 |
1,2 |
|
(seconds), press |
|
||
|
MEMO |
|
|
|
||
↓1 |
|
|
|
|
||
|
If the date/time setting is initialized, |
|||||
|
|
this screen opens automatically. |
||||
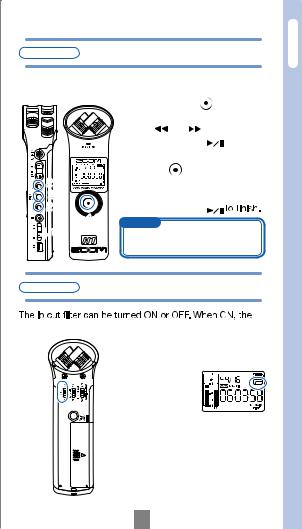
Prepare |
Reducing noise |
|
|
|||
sound of wind and other noise can be reduced.
• Slide the LO CUT switch to
ON. The LO CUT icon appears
on the screen.
noise Reducing / time and date the Setting / buttons Disabling / Power e epa P r
2
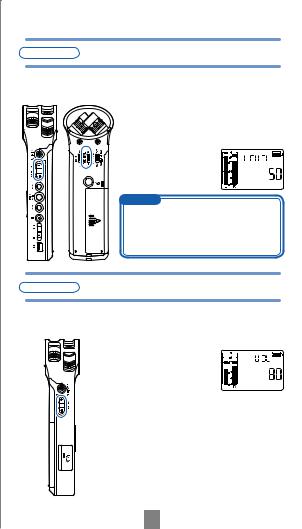
Prepare Adjusting the input level
Adjust the level of the input signal. The unit can also be set to automatic adjustment.
• Use the +/– INPUT LEVEL buttons to adjust the level. For automatic adjustment, set the AUTO level switch to ON.
• During adjustment, the value is shown on the screen.
MEMO
When the AUTO level switch is ON, the input level adjustment buttons have no effect.
If the PEAK/REC LED blinks rapidly, the sound might be distorted. In this case, lower the input level.
Prepare Adjusting the output level
Adjust the output level (volume) from the line/headphones output jack and built-in speaker.
• Use the +/– VOLUME buttons to adjust the level.
• Press and hold the + or – button to change the value rapidly.
3

Prepare Setting the recording format
Set the recording format and bit rate.
2 |
1 |
|
Back |
||
|
||
2 |
|
2
Front
1.Select MP3 or WAV format.
2.Use  and
and  to select the bit rate and press
  .
.
•The screen shows the remaining recording time for the current bit rate.
MEMO
Since the MP3 format uses data compression, its sound quality is not as good as WAV format, but it uses less microSD card capacity. For both formats, higher rates provide higher quality.
Operate Recording
After turning on the unit, you can start recording from the home screen with the press of one button.
1. |
Press |
to start |
|
recording. |
|
|
• The recording time appears |
|
|
on the screen. |
|
2. |
Press |
again to stop recording and |
return to the home screen.
MEMO
If no microSD card is in the unit, you can still
unit's built-in memory. Be aware that recording again without a card will overwrite the recording already in the built-in memory.
ding Reco Operate format ding eco Settingr / levels output and input Adjusting e epa P r
4
 Loading...