


Operating Instructions
Software Guide
1Preparing for Printing
2Setting Up the Printer Driver
3Other Print Operations
4Direct Printing from a Digital Camera (PictBridge)
5Monitoring and Configuring the Printer
6Using a Print Server
7Special Operations under Windows
8Mac OS Configuration
9Appendix
Read this manual carefully before you use this machine and keep it handy for future reference. For safe and correct use, be sure to read “Safety Information” before using the machine.
Introduction
This manual contains detailed instructions and notes on the operation and use of this machine. For your safety and benefit, read this manual carefully before using the machine. Keep this manual in a handy place for quick reference.
Important
Contents of this manual are subject to change without prior notice. In no event will the company be liable for direct, indirect, special, incidental, or consequential damages as a result of handling or operating the machine.
Do not copy or print any item for which reproduction is prohibited by law.
Copying or printing the following items is generally prohibited by local law:
bank notes, revenue stamps, bonds, stock certificates, bank drafts, checks, passports, driver's licenses.
The preceding list is meant as a guide only and is not inclusive. We assume no responsibility for its completeness or accuracy. If you have any questions concerning the legality of copying or printing certain items, consult with your legal advisor.
Caution:
Use of controls or adjustments or performance of procedures other than those specified in this manual might result in hazardous radiation exposure.
Trademarks
Microsoft, Windows, Windows Server, and Windows Vista are registered trademarks of Microsoft Corporation in the United States and/or other countries.
Adobe®, PageMaker® and PostScript® are registered trademarks of Adobe Systems Incorporated. PCL® is a registered trademark of Hewlett-Packard Company.
Citrix® and MetaFrame® are registered trademarks of Citrix Systems, Inc NetWare are registered trademarks of Novell, Inc.
Apple, AppleTalk, EtherTalk, Macintosh, Mac OS and TrueType are trademarks of Apple Computer, Inc., registered in the U.S. and other countries.
Netscape and Netscape Navigator are registered trademarks of Netscape Communications Corporation. PictBridge is a trademark.
Other product names used herein are for identification purposes only and might be trademarks of their respective companies. We disclaim any and all rights in those marks.
The proper names of the Windows operating systems are as follows:
•The product names of Windows 2000 are as follows: Microsoft® Windows® 2000 Professional
Microsoft® Windows® 2000 Server Microsoft® Windows® 2000 Advanced Server
•The product names of Windows XP are as follows: Microsoft® Windows® XP Professional
Microsoft® Windows® XP Home Edition
•The product names of Windows Vista are as follows: Microsoft® Windows Vista® Ultimate
Microsoft® Windows Vista® Enterprise Microsoft® Windows Vista® Business Microsoft® Windows Vista® Home Premium Microsoft® Windows Vista® Home Basic
•The product names of Windows Server 2003 are as follows: Microsoft® Windows Server® 2003 Standard Edition Microsoft® Windows Server® 2003 Enterprise Edition Microsoft® Windows Server® 2003 Web Edition
•The product names of Windows Server 2003 R2 are as follows: Microsoft® Windows Server® 2003 R2 Standard Edition Microsoft® Windows Server® 2003 R2 Enterprise Edition

 Note
Note
PostScript 3 in this manual stands for "Adobe PostScript 3 Emulation".
Notes:
Some illustrations in this manual might be slightly different from the machine.
Certain options might not be available in some countries. For details, please contact your local dealer. Depending on which country you are in, certain units may be optional. For details, please contact your local dealer.
Manuals for This Printer
For particular functions, see the relevant parts of the manual.
Safety Information
Provides information on safe usage of this machine. To avoid injury and prevent damage to the machine, be sure to read this.
Quick Installation Guide
Contains procedures for removing the printer from its box and connecting it to a computer.
Hardware Guide
Contains information about paper and procedures such as installing options, replacing consumables, responding to error messages, and resolving jams.
Software Guide (This manual)
Contains procedures for using this machine in a network environment and utilizing the software.
i
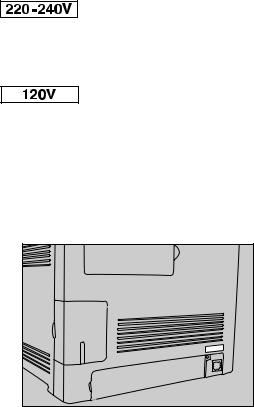
Description for the Specified Model
In this manual, the following items explain about the printer for the specified models:
This explains about the 220–240 V model printer. You can identify the model by checking the label on the rear of the printer.
Read if you purchase this model.
This explains about the 120 V model printer. You can identify the model by checking the label on the rear of the printer.
Read if you purchase this model.

 Note
Note
You can identify the printer's model by checking the label on the rear of the printer as shown.
ASH074S
ii

How to Read This Manual
Symbols
This manual uses the following symbols:
Indicates important safety notes.
Ignoring these notes could result in serious injury or death. Be sure to read these notes. They can be found in the “Safety Information” section of About This Printer.
Indicates important safety notes.
Ignoring these notes could result in moderate or minor injury, or damage to the machine or to property. Be sure to read these notes. They can be found in the “Safety Information” section of About This Printer.
Indicates points to pay attention to when using the machine, and explanations of likely causes of paper misfeeds, damage to originals, or loss of data. Be sure to read these explanations.
Indicates supplementary explanations of the printer’s functions, and instructions on resolving user errors.
This symbol is located at the end of sections. It indicates where you can find further relevant information.
[ ]
Indicates the names of keys that appear on the printer’s display panel.
{ }
Indicates the names of keys on the printer’s control panel.
iii

TABLE OF CONTENTS |
|
Manuals for This Printer......................................................................................... |
i |
Description for the Specified Model..................................................................... |
ii |
How to Read This Manual .................................................................................... |
iii |
Symbols .................................................................................................................... |
iii |
1. Preparing for Printing |
|
Confirming the Connection Method..................................................................... |
1 |
Network Connection................................................................................................... |
1 |
Local Connection ....................................................................................................... |
2 |
Installing the Printer Driver in a Network Environment ..................................... |
3 |
Installing the PCL Printer Driver................................................................................. |
3 |
Installing the PostScript 3 Printer Driver .................................................................... |
7 |
Installing the Printer Driver to Use As a Windows Network Printer............................ |
9 |
Installing the Printer Driver Using USB ............................................................. |
10 |
Installing the PCL Printer Driver............................................................................... |
10 |
Installing the PostScript 3 Printer Driver (Windows 2000) ....................................... |
12 |
Installing the PostScript 3 Printer Driver (Windows XP and Windows Server 2003/2003 R2)... |
13 |
Installing the PostScript 3 Printer Driver (Windows Vista) ....................................... |
14 |
Troubleshooting USB ............................................................................................... |
15 |
If a Message Appears during Installation .......................................................... |
16 |
Making Option Settings for the Printer .............................................................. |
17 |
Conditions for Bidirectional Communication ............................................................ |
17 |
If Bidirectional Communication Is Disabled.............................................................. |
18 |
2. Setting Up the Printer Driver |
|
PCL - Accessing the Printer Properties............................................................. |
19 |
Windows 2000 - Making Printer Settings ................................................................. |
19 |
Windows XP and Windows Server 2003/2003 R2 - Making Printer Settings........... |
21 |
Windows VistaMaking Printer Settings .................................................................. |
23 |
PostScript 3 - Setting Up for Printing ................................................................ |
25 |
Windows 2000 - Accessing the Printer Properties ................................................... |
25 |
Windows XP and Windows Server 2003/2003 R2 - Making Printer Settings........... |
27 |
Windows Vista - Making Printer Settings ................................................................. |
29 |
3. Other Print Operations |
|
Form Feed............................................................................................................. |
31 |
Performing Form Feed ............................................................................................. |
31 |
Canceling a Print Job ............................................................................................... |
31 |
Canceling a Print Job .......................................................................................... |
32 |
Canceling a Print Job Using the Control Panel ........................................................ |
32 |
Windows - Canceling a Print Job from the Computer .............................................. |
32 |
Collate ................................................................................................................... |
33 |
Cover..................................................................................................................... |
34 |
Watermark ............................................................................................................ |
35 |
Manual Duplex...................................................................................................... |
36 |
Memory Capacity and Paper Size....................................................................... |
37 |
iv

4. Direct Printing from a Digital Camera (PictBridge) |
|
What Is PictBridge? ............................................................................................. |
39 |
PictBridge Printing .............................................................................................. |
40 |
What Can Be Done on This Printer .................................................................... |
41 |
Paper Size................................................................................................................ |
41 |
Image Print Size....................................................................................................... |
41 |
Exiting PictBridge ................................................................................................ |
42 |
When PictBridge Printing Does Not Work......................................................... |
43 |
5. Monitoring and Configuring the Printer |
|
Using Web Image Monitor................................................................................... |
45 |
Displaying Top Page ................................................................................................ |
46 |
Displaying the Printer Status.................................................................................... |
47 |
About Menu and Mode............................................................................................. |
47 |
Access in the Administrator Mode............................................................................ |
49 |
Configuring the Printer Settings ............................................................................... |
49 |
Changing the Login Information ............................................................................... |
52 |
Displaying Web Image Monitor Help........................................................................ |
52 |
Using Smart Organizing Monitor........................................................................ |
53 |
Installing Smart Organizing Monitor ......................................................................... |
53 |
Displaying the Smart Organizing Monitor Dialog Box .............................................. |
54 |
Displaying the Printer Status.................................................................................... |
54 |
Displaying the Printer Information ............................................................................ |
56 |
Printer Configuration ................................................................................................ |
58 |
Printer Status Notification by E-Mail.................................................................. |
61 |
Mail Authentication................................................................................................... |
62 |
SNMP..................................................................................................................... |
63 |
Reading the Configuration Page ........................................................................ |
64 |
6. Using a Print Server |
|
Preparing Print Server......................................................................................... |
67 |
7. Special Operations under Windows |
|
Printing Files Directly from Windows ................................................................ |
69 |
Setup........................................................................................................................ |
69 |
Using a Host Name Instead of an IPv4 Address...................................................... |
70 |
Printing Commands.................................................................................................. |
71 |
v

8. Mac OS Configuration |
|
Installing the PostScript 3 Printer Driver........................................................... |
73 |
Specifying the Printer.......................................................................................... |
74 |
Using USB................................................................................................................ |
74 |
Using TCP/IP ........................................................................................................... |
74 |
Setting Up the PPD File ....................................................................................... |
76 |
Setting Up Options .............................................................................................. |
77 |
Set Up for Printing ............................................................................................... |
78 |
Making paper settings from an application............................................................... |
78 |
Setting up for printing from an application................................................................ |
78 |
Canceling a Print Job from the Computer......................................................... |
79 |
Changing to EtherTalk......................................................................................... |
80 |
Configuring the Printer........................................................................................ |
81 |
Using PostScript 3 ............................................................................................... |
82 |
Using Smart Organizing Monitor........................................................................ |
85 |
Installing Smart Organizing Monitor ......................................................................... |
85 |
Displaying the Smart Organizing Monitor Dialog Box .............................................. |
86 |
Displaying the Printer Status.................................................................................... |
86 |
Displaying the Printer Information ............................................................................ |
86 |
Printer Configuration ................................................................................................ |
88 |
9. Appendix |
|
Software and Utilities Included on the CD-ROM ............................................... |
91 |
Printer Drivers for this Printer................................................................................... |
91 |
Smart Organizing Monitor ........................................................................................ |
92 |
Cautions to Take When Using in a Network...................................................... |
93 |
Using DHCP............................................................................................................. |
93 |
Using Adobe PageMaker Version 6.0, 6.5, or 7.0 .............................................. |
94 |
When Using Windows Terminal Service/MetaFrame........................................ |
95 |
Operating Environment ............................................................................................ |
95 |
Supported Printer Drivers......................................................................................... |
95 |
Limitations ................................................................................................................ |
96 |
INDEX......................................................................................................... |
97 |
vi

1. Preparing for Printing
Confirming the Connection Method
This printer supports network and local connection.
Before installing the printer driver, check how the printer is connected. Follow the driver installation procedure that is appropriate to the connection method.
Network Connection
This printer can be used as a Windows printing port or network printer.
Using this printer as the Windows printing port
Network connections can be established via Ethernet.
ASH100S
Operating system
Windows 2000/XP/Vista, and Windows Server 2003/2003 R2
Connection method
Ethernet (10baseT/100baseTX)
Available ports
Standard TCP/IP

 Reference
For details about how to use this printer as the Windows printing port, see p.3 “Installing the Printer Driver in a Network Environment”.
1

Preparing for Printing
Using as a network printer
This printer can be used as the Windows network printer, the NetWare print
server, or the NetWare remote printer.
1
ASH110S

 Reference
For details about how to use this printer as a Windows network printer, see p.9 “Installing the Printer Driver to Use As a Windows Network Printer”.
Local Connection
Local connections can be established via USB connections.

 Reference
For details about how to install the printer driver, see p.10 “Installing the Printer Driver Using USB”.
2
Installing the Printer Driver in a Network Environment
Installing the Printer Driver in a Network
Environment
|
|
This section explains how to install the printer driver that allows you to use this |
1 |
printer in a network environment. |
|
Installing the PCL Printer Driver
The following four steps are required to use this printer in the network environment.
APrint the test page
BInstall Smart Organizing Monitor
CSpecify the printer's IP address
DInstall the printer driver
Printing a test page
To install the printer driver, you must first specify the printer's IP address.
Before specifying it, you must obtain the printer's MAC address, which is printed on the test page.
A Turn the printer's power switch to off, and then wait a few seconds.
B While pressing down the {Job Reset} key, turn the printer's power switch back to on, and then keep the key pressed down until the Alert indicator flashes once.
C Printing starts when the printer is fully warmed up.
Installing Smart Organizing Monitor
You can specify the printer's IP address using Smart Organizing Monitor.
Smart Organizing Monitor can be installed from the CD-ROM provided with this printer.
A B
Quit all applications currently running. Insert the CD-ROM into the CD-ROM drive.
The installer starts.
C Select an interface language, and then click [OK].
The default interface language is English.
D Click [Smart Organizing Monitor].
3

|
|
Preparing for Printing |
|
|
E Select a language for Smart Organizing Monitor, and then click [OK]. |
|
|
The [Smart Organizing Monitor Setup] dialog box appears. |
|
|
F Click [Next >]. |
1 |
|
The software license agreement appears. |
G After reading the agreement, click [Yes].
The [Select Destination Folder] dialog box appears.
H Click [Next >].
Click [Browse...], if you want to change the destination folder.
I In the [Select Program Folder] dialog box, click [Next >].
J When the [Setup Complete] dialog box appears, click [Finish].
To continue the installation, leave the [Printer Driver and Utilities] dialog box open.

 Note
Note
Smart Organizing Monitor will appear in the language selected in step 5, not the language selected in step 3.
Specifying the printer's IP address
Use the following procedure to specify the printer's IP address using Smart Organizing Monitor.
 Important
To perform the following procedure, you must first return the printer's set-
tings to its factory-set defaults. To do this: first turn the printer's power switch to off, wait a few seconds and then, while pressing down the {Job Reset} and {Stop/Start} keys, turn the printer's power switch back to on and keep both keys pressed down until the Alert and Ready indicators light up.
A Connect the printer and computer using an Ethernet cable.
B On the [Start] menu, point to [Programs], and then point to [Smart Organizing Monitor for PCL] > [Smart Organizing Monitor for PCL Status].
The [Smart Organizing Monitor] dialog box appears.
In a Windows XP/Vista or Windows Server 2003/2003 R2 environment, point to [All Programs] on the [Start] menu, and then point to [Smart Organizing Monitor for PCL] > [Smart Organizing Monitor for PCL Status].
C Click [IP Address].
The [IP Address Setting] dialog box appears.
4

Installing the Printer Driver in a Network Environment
D In the [MAC Address] box, enter the printer’s MAC address that was printed on the test page. Then, in the [IP Address] box, enter the IP address you want to set for the printer.
Enter the subnet mask and gateway address if necessary.
1
E Click [OK].
A confirmation message appears.
F Click [OK].
G Click [Close] to close the Smart Organizing Monitor dialog box.
Installing the printer driver
Use the following procedure to install the printer driver.
A On the [Printer Drivers and Utilities] dialog box, click [PCL 6 Printer Driver].
If you have already closed the [Printer Drivers and Utilities] dialog box, launch “Setup.exe” from the CD-ROM root directory.
The software license agreement appears.
B After reading the agreement, click [I accept the agreement.], and then click
[Next >].
C In the dialog box that appears, click [Add a new printer], select the [Search for network printers.] check box, and then click [Next >].
If the search fails, the printer driver is installed via port LPT1.
Check the port settings and printer's IP address again, before reconfiguring the settings.
D When the list of found printers appears, click this printer (whose IP address you specified before the installation), and then click [Next >].
E Double-click the printer name to display the printer's settings, change the settings as required, and then click [Continue].
F If a message appears informing you that the installation was successfully completed, click [Finish].
5

|
|
Preparing for Printing |
|
|
Note |
|
|
When you click [Finish], the [Digital Signature Not Found] dialog box might |
|
|
appear. To continue the installation, click [Yes]. |
|
|
Auto Run might not work under certain operating system settings. If this |
1 |
|
|
|
is the case, launch “Setup.exe” from the CD-ROM root directory. |
To stop the selected software installing, click [Cancel] before the installation is complete.
A message appears if there is a newer version of the printer driver already installed. If there is, you cannot install the printer driver using Auto Run. If you still want to install the printer driver, use [Add Printer]. See p.16 “If a Message Appears during Installation”.

 Reference
For details about reconfiguring the printer settings, when the search for network printer fails, see p.6 “If the network printer search fails”.
For details about the network connection, see Hardware Guide.
If the network printer search fails
This section explains how to reconfigure the settings if the network printer search fails during the installation.
Before reconfiguring the settings, print a test page to obtain the printer's IP address, and then configure the necessary settings.
Reconfigure the printer's IP address
For details about reconfiguring the printer's IP address, see p.4 “Specifying the printer's IP address”
Reconfigure the port settings
A On the [Start] menu, open the [Printers] window.
BClick the icon of this printer. On the [File] menu, click [Properties]. The printer properties appears.
CClick the [Ports] tab, and then click [Add Port].
DClick [Standard TCP/IP Port], and then click [New Port...]. The Add Standard TCP/IP Printer Port Wizard appears.
EClick [Next >]
FEnter the printer's IP address that is printed on the test page, and then click
[Next >].
GClick [Finish].
6

Installing the Printer Driver in a Network Environment
Installing the PostScript 3 Printer Driver
Important |
|
Before installing the PostScript 3 printer driver, print the test page to obtain |
|
1 |
|
the printer's IP address. For details, see p.3 “Printing a test page”. |
|
To install this printer driver, you must have an account that has Manage Printers permission. Log on as an Administrators or Power Users group member.
A B
Quit all applications currently running. Insert the CD-ROM into the CD-ROM drive.
The installer starts.
C Select an interface language, and then click [OK].
The default interface language is English.
D Click [PostScript 3 Printer Driver].
The Add Printer Wizard starts.
E Click [Next >].
F Click [Local printer], and then click [Next >].
In a Windows Vista environment, click [Add a local printer].
G Click [Create a new port].
H Click [Standard TCP/IP Port], and then click [Next >].
The [Add Standard TCP/IP Printer Port Wizard] dialog box appears.
I Enter the printer's IPv4 address in the [Port Name] box, and then click [OK].
The IPv4 address you enter here is the address you have checked on the configuration page.
In a Windows Vista environment, make the following settings in the dialog box that appears, and then click [Next >].
AIn [Device Type] list, select an item.
You can select [Autodetect], [TCP/IP Device], or [Web Services Device].
BEnter an IP address in the [Hostname or IP address:] box.
CIf necessary, enter an port name in the [Port name] box.
J Click [Finish].
K Check that the name of this printer whose driver you want to install is selected, and then click [Next >].
7

Preparing for Printing
L
M
1N O
Change the printer name if you want, and then click [Next >].
Select the [Yes] check box to configure the printer as default.
Specify whether or not to share this printer, and then click [Next >]. Specify whether or not to print a test page, and then click [Next >]. Click [Finish].
The printer driver installation starts.

 Note
Note
When you click [Finish], the [Digital Signature Not Found] dialog box may appear. To continue the installation, click [Yes].
Auto Run might not work under certain operating system settings. If this is the case, launch “Setup.exe” from the CD-ROM root directory.
The printer driver in the selected language will be installed.
To stop the selected software installation, click [Cancel] before the installation is complete.

 Reference
For details about checking the printer's IP address, see p.3 “Printing a test page”.
For details about reconfiguring the printer settings when the network printer search fails, see p.6 “If the network printer search fails”.
8

Installing the Printer Driver in a Network Environment
Installing the Printer Driver to Use As a Windows Network Printer
This section explains how to install the printer driver for using this printer as a |
|
|
Windows network printer. |
1 |
|
Important |
||
|
Before you can make the following settings, you must configure this printer as a Windows network printer. For details about configuring a Windows network printer, see p.67 “Using a Print Server”.
The following example procedure explains installing the printer driver under Windows XP.
For details, see Windows Help.
A On the [Start] menu, click [Control Panel].
B Click [Printers and Other Hardware], and then click your computer's [Printers and Faxes] folder.
C Click [Add a printer].
The Add Printer Wizard appears.
D Select [A network printer, or printer attached to another computer], and then click [Next >].
E Select [Connect to this printer], and then click [Next >].
F Select this printer from the list of the shared printers, and then click [Next >].
G Select whether or not to use this printer as the default printer, and then click [Next >].
H Click [Finish].
9

Preparing for Printing
Installing the Printer Driver Using USB
This section explains how to install the printer drivers using USB.
|
|
The printer drivers can be installed from the CD-ROM provided with this printer. |
1 |
||
|
|
|
Installing the PCL Printer Driver
 Important
To install this printer driver, you must have an account that has Manage Printers permission. For this, log on as an Administrators or Power Users group member.
A B
Close all applications currently running.
Check the following:
•The printer's USB cable is disconnected
•The printer’s main power switch is turned to off
C Insert the CD-ROM into the CD-ROM drive.
The installer starts.
D E
Select the interface language, and then click [OK]. Click [PCL 6 Printer Driver].
The software license agreement appears.
F After reading the agreement, click [I accept the agreement.], and then click
[Next >].
G In the [Method to install printer driver] dialog box, clear the [Search for network printers.] check box, select the [Connect a printer using a USB cable.] check box, and then click [Next >].
H Select this printer, and then click [Next >].
A message appears, asking you to check that the USB cable is not connected and the printer's main power switch is turned to off.
I Check the USB cable and the printer status, and then click [Next >].
J When the [<Auto-detect USB Port>] dialog box appears, connect this printer to the computer using a USB cable, and then turn the printer's main power switch to on.
USB auto detection begins.
K When the dialog box asking you to use this printer as the default printer appears, click either key.
10

Installing the Printer Driver Using USB
L When a message appears informing you that the installation was successfully completed, click [Finish].
Note |
|
In a Windows Vista environment, depending on security settings, the [User |
|
1 |
|
Account Control] dialog box might appear after you insert the CD-ROM. If |
|
this is the case, click [Allow].
If the printer driver is already installed, plug and play is enabled and the printer connected to the USB port appears automatically in the [Printers] window.
When USB is first used, plug and play starts. Then the [New Hardware Found], [Device Driver Wizard], or [Add New Hardware Wizard] dialog box appears, depending on the operating system.
To disable Auto Run, press the left the {Shift} key when inserting the CDROM into the drive and keep it pressed until the computer finishes reading from the CD-ROM.
The number after “USB” varies depending on the number of printers connected.
A message appears if the printer connection fails. Check the USB cable is connected and the printer's main power switch is turned to on, and then click [Retry].
To stop USB auto detection, click [Stop Auto-detecting].
The USB port is available only for the printer driver that is installed first. To install additional drivers for this printer, install them using other ports (such as LPT1). Then, after the installation, change the port settings to the specified USB port.
11

Preparing for Printing
Installing the PostScript 3 Printer Driver (Windows 2000)
1 |
Important |
To install this printer driver, you must have an account that has Manage Print- |
|
|
ers permission. Log on as an administrator or Power Users group member. |
If the printer driver has already been installed, plug and play is enabled, and the icon of the printer connected to the “USB” port is added to the [Printers] window.
If the printer driver is not installed, follow the plug-and-play instructions of the printer to install it from the CD-ROM provided.
A B
Check the printer's power switch is turned to off. Connect the printer and computer using the USB cable.
Connect the USB cable firmly.
C Turn the printer's power switch back to on.
The Plug and Play is enabled and the [Found New Hardware Wizard] dialog box appears, and USB Printing Support is installed automatically.
D In the [Found New Hardware Wizard] dialog box, click [Search for a suitable driver for my device (recommended)], and then click [Next >].
E Select the [Specify location] check box, and then click [Next >].
F Insert the CD-ROM into the CD-ROM drive.
When Auto Run starts, click [Exit].
G Specify the location where the source files of the printer driver is stored.
If the CD-ROM drive is D, the source files of the PostScript printer driver are stored in the following location:
D:\DRIVERS\PS\XP_VISTA\(Language)\DISK1
H I J
Check the printer driver location, and then click [OK].
Click [Next >].
Click [Finish].
If the printer driver has already been installed, plug and play is enabled, and the icon of the printer connected to the “USB001” port is added to the [Printers] window.

 Note
Note
To disable Auto Run, press the {Shift} key when inserting the CD-ROM into the drive and keep it pressed until the computer finishes reading from the CD-ROM.
The number after “USB” varies depending on the number of printers connected.
The USB port is available only for the printer driver that is installed first. To install additional drivers for this printer, install them using other ports (such as LPT1). Then, after the installation, change the port settings to the specified USB port.
12
Installing the Printer Driver Using USB
Installing the PostScript 3 Printer Driver (Windows XP and Windows Server 2003/2003 R2)
Important |
1 |
To install this printer driver, you must have an account that has Manage Printers permission. Log on as an administrator or Power Users group member.
If the printer driver has already been installed, plug and play is enabled, and the icon of the printer connected to the “USB” port is added to the [Printers] window.
If the printer driver is not installed, follow the plug-and-play instructions of the printer to install it from the CD-ROM provided.
A B
Check the printer's power switch is turned to off. Connect the printer and computer using the USB cable.
Connect the USB cable firmly.
C Turn the printer's power switch back to on.
The Plug and Play is enabled and the [Found New Hardware Wizard] dialog box appears, and USB Printing Support is installed automatically.
D In the [Found New Hardware Wizard] dialog box, click [Install from a list or specific location (Advanced)], and then click [Next >].
E F
G
Select the [Specify location] check box, and then click [Next >].
Insert the CD-ROM into the CD-ROM drive.
When Auto Run starts, click [Exit].
Specify the location where the source files of the printer driver is stored.
If the CD-ROM drive is D, the source files of the PostScript printer driver are stored in the following location:
D:\DRIVERS\PS\XP_VISTA\(Language)\DISK1
H I J
Check the printer driver location, and then click [OK].
Click [Next >].
Click [Finish].
If the printer driver has already been installed, plug and play is enabled, and the icon of the printer connected to the “USB001” port is added to the [Printers] window.

 Note
Note
To disable Auto Run, press the {Shift} key when inserting the CD-ROM into the drive and keep it pressed until the computer finishes reading from the CD-ROM.
The number after “USB” varies depending on the number of printers connected.
The USB port is available only for the printer driver that is installed first. To install additional drivers for this printer, install them using other ports (such as LPT1). Then, after the installation, change the port settings to the specified USB port.
13

Preparing for Printing
Installing the PostScript 3 Printer Driver (Windows Vista)
1 |
Important |
To install this printer driver, you must have an account that has Manage Print- |
|
|
ers permission. Log on as an administrator or Power Users group member. |
If the printer driver is already installed and plug and play is enabled, the icon of the printer connected to the “usb” port appears in the [Printers] window.
The printer drivers can be installed from the CD-ROM provided with this machine.
If the printer driver is not already installed, follow the printer's plug-and-play instructions to install it from the provided CD-ROM.
A Connect the printer and computer using the USB cable.
Connect the USB cable firmly.
The [Found New Hardware] dialog box appears.
B Click [Locate and install driver software (Recommended)].
If the [User Account Control] dialog box appears, click [Continue].
C Click [Don't search online].
A message prompting you to insert the provided CD-ROM appears.
D Insert the provided CD-ROM into the computer's CD-ROM drive.
The printer driver search begins, and a list of printer drivers appears.
E Select the printer driver you want to use, and then click [Next].
If the [Windows can't verify the publisher of this driver software] message appears, click [Install this driver software anyway].
F Click [Close].
If the installation is successful, the icon of the printer connected to the “USB001” port appears in the [Printers] window.

 Note
Note
To disable Auto Run, press the {Shift} key when inserting the CD-ROM into the drive and keep it pressed until the computer finishes reading from the CD-ROM.
The number after “USB” varies depending on the number of printers connected.
The USB port is available only for the printer driver that is installed first. To install additional drivers for this printer, install them using other ports (such as LPT1). Then, after the installation, change the port settings to the specified USB port.
14

Installing the Printer Driver Using USB
Troubleshooting USB
Problem |
Solutions |
|
|
|
|
|
|
The printer is not recognized auto- |
Turn off the power of the printer, reconnect the USB cable, |
|
1 |
matically. |
and then turn it on again. |
|
|
|
|||
|
|
|
|
Windows has already configured |
Open Windows' Device Manager, and then, under [Univer- |
|
|
the USB settings. |
sal Serial Bus controllers], remove any conflicting devices. |
|
|
|
Conflicting devices have a [!] or [?] icon by them. Take |
|
|
|
care not to accidentally remove required devices. For de- |
|
|
|
tails, see Windows Help. |
|
|
|
When using Windows 2000/XP/Vista or Windows Serv- |
|
|
|
er 2003/2003 R2, an erroneous device is displayed under |
|
|
|
[USB Controller] in the [Device Manager] dialog box. |
|
|
|
|
|
|
15

Preparing for Printing
If a Message Appears during Installation
When a message that shows the number 58 or 34 appears during the installation, 1 the printer driver can not be installed using Auto Run. Please use [Add Printer] or
[Install Printer] to install the printer driver.
For Windows 2000
A B C
On the [Start] menu, point to [Settings], and then click [Printers]. Double-click the Add Printer icon.
Follow the instructions in the Add Printer Wizard.
For Windows XP Professional and Windows Server 2003/2003 R2:
A B C
On the [Start] menu, click [Printers and Faxes]. Click [Install Printer].
Follow the instructions in the Add Printer Wizard.
For Windows XP Home Editions:
A B C D E
On the [Start] menu, click [Control Panel]. Click [Printers and Other Hardware].
Click [Printers and Faxes].
Click [Install Printer].
Follow the instructions in the Add Printer Wizard.
For Windows Vista:
A B C D
On the [Start] menu, click [Control Panel]. Click [Printer] in “Hardware and Sound”. Click [Add a printer].
Follow the instructions in the Add Printer Wizard.
16

Making Option Settings for the Printer
Making Option Settings for the Printer
Make option settings for the printer using the printer driver when bidirectional |
1 |
|
communication is disabled. |
||
Reference |
||
|
For details about making option settings for the printer, see p.18 “If Bidirectional Communication Is Disabled”.
Conditions for Bidirectional Communication
Bidirectional communication allows information about paper settings to be automatically sent from the printer. You can check printer status from your computer.
•Bidirectional communication is supported by Windows 2000/XP/Vista, and Windows Server 2003/2003 R2.
To support bidirectional communication, the following conditions must be met:
When connected with the network
The printer must be connected via standard TCP/IP port, and the default name has not been changed.
When connected with USB
The printer must be connected to the computer's USB port using the USB interface cable.
The computer must support bidirectional communication.

 Note
Note
The PostScript printer driver does not support bidirectional communications.
The PCL printer drivers support bidirectional communications. You can update printer status manually.
17

Preparing for Printing
If Bidirectional Communication Is Disabled
Set up option settings when bidirectional communications are disabled.
1 Important
Manage Printers permission is required to change the printer properties in the [Printers] folder. Log on as an Administrators or Power Users group member.
Make sure that [Enable bidirectional support] is selected on the [Ports] tab in the printer properties dialog box. Printing is possible only if this check box is selected.
A On the [Start] menu, point to [Settings], and then click [Printers].
The [Printers] window appears.
When using Windows XP, and Windows Server 2003/2003 R2, click [Printers and Faxes] on the [Start] menu. The [Printers and Faxes] window appears.
When using Windows Vista, click [Control Panel] on the [Start] menu, and then click [Printer]. The [Printer] window appears.
B Click the icon of the printer you want to use.
C On the [File] menu, click [Properties].
D Click the [Accessories] tab.
If you are using the PostScript 3 printer driver, click the [Device Settings] tab.
E Select options installed from the [Options] area, and then make the necessary settings.
F Select the total amount of the memory in [Total Memory:], when the optional SDRAM module is added.
G Under [Paper Size Settings], click and highlight the tray to be used, select the appropriate size , and then click [Update].
H Click [OK] to close the printer properties dialog box.
18

2. Setting Up the Printer Driver
PCL - Accessing the Printer Properties
This section explains about accessing the printer properties and make the printer settings.
Windows 2000 - Making Printer Settings
Making the printer default settingsthe [Printer] window
 Important
To change the printer default settings including option configuration settings, log on using an account that has Manage Printers permission. Members of the Administrators and Power Users groups have Manage Printers permission by default.
You cannot change the printer default settings for each user. Settings made in the printer properties dialog box are applied to all users.
A
B C
On the [Start] menu, point to [Settings], and then click [Printers].
The [Printers] window appears.
Click the icon of the printer you want to use.
On the [File] menu, click [Properties].
The printer properties dialog box appears.
D Make the necessary settings, and then click [OK].

 Note
Note
Settings you make here are used as the default settings for all applications.
Do not make a setting for [Form to Tray Assignment].

 Reference
For details about settings, see the printer driver Help.
19

Setting Up the Printer Driver
Making the printer default settings - Printing Preferences
 Important
You cannot change the printer default settings for each user. Settings made in the printer properties dialog box are applied to all users.
A
2
B
C
D
On the [Start] menu, point to [Settings], and then click [Printers].
The [Printers] window appears.
Click the icon of the printer you want to use.
On the [File] menu, click [Printing Preferences...].
The [Printing Preferences] dialog box appears.
Make the necessary settings, and then click [OK].

 Note
Note
Settings you make here are used as the default settings for all applications.

 Reference
For details about settings, see the printer driver Help.
Making printer settings from an application
You can make printer settings for a specific application.
To make printer settings for a specific application, open the [Printing Preferences] dialog box from that application. The following explains how to make settings for the WordPad application provided with Windows 2000.
A
B C
On the [File] menu, click [Print...].
The [Print] dialog box appears.
Select the printer you want to use in the [Select Printer] list.
Make the necessary settings, and then click [Apply] to start printing.

 Note
Note
The procedure to open the [Printing Preferences] dialog box may vary depending on the application. For details, see the manuals provided with the application you use.
Any settings you make in the procedure above are valid for the current application only.
General users can change the properties displayed in the [Print] dialog box of an application. Settings made here are used as defaults when printing from this application.

 Reference
For details about settings, see the printer driver Help.
20

PCL - Accessing the Printer Properties
Windows XP and Windows Server 2003/2003 R2 - Making Printer Settings
Making the printer default settings - the [Printers and Faxes] window
Important |
|
To change the printer default settings including option configuration settings, |
2 |
log on using an account that has Manage Printers permission. Members of the |
Administrators and Power Users groups have Manage Printers permission by default.
You cannot change the printer default settings for each user. Settings made in the printer properties dialog box are applied to all users.
A
B C
On the [Start] menu, click [Printers and Faxes].
The [Printers and Faxes] window appears.
Click the icon of the printer you want to use.
On the [File] menu, click [Properties].
The printer properties dialog box appears.
D Make the necessary settings, and then click [OK].

 Note
Note
Settings you make here are used as the default settings for all applications.
Do not make a setting for [Form to Tray Assignment].

 Reference
For details about settings, see the printer driver Help.
21

Setting Up the Printer Driver
Making the printer default settings - Printing Preferences
 Important
You cannot change the printer default settings for each user. Settings made in the printer properties dialog box are applied to all users.
A
2
B
C
D
On the [Start] menu, click [Printers and Faxes].
The [Printers and Faxes] window appears.
Click the icon of the printer you want to use.
On the [File] menu, click [Printing Preferences...].
The [Printing Preferences] dialog box appears.
Make the necessary settings, and then click [OK].

 Note
Note
Settings you make here are used as the default settings for all applications.

 Reference
For details about settings, see the printer driver Help.
Making printer settings from an application
You can make printer settings for a specific application.
To make printer settings for a specific application, open the [Printing Preferences] dialog box from that application. The following explains how to make settings for the WordPad application provided with Windows XP.
A On the [File] menu, click [Print...].
The [Print] dialog box appears.
B Select the printer you want to use in the [Select Printer] list, and then click
[Preferences].
C Make the necessary settings, and then click [OK] to start printing.

 Note
Note
The procedure to open the [Printing Preferences] dialog box may vary depending on the application. For details, see the manuals provided with the application you use.
Any settings you make in the procedure above are valid for the current application only.
General users can change the properties displayed in the [Print] dialog box of an application. Settings made here are used as defaults when printing from this application.

 Reference
For details about settings, see the printer driver Help.
22
 Loading...