


Operating Instructions
Troubleshooting
1When the Machine Does Not Operate As Wanted
2Troubleshooting When Using the Copy Function
3Troubleshooting When Using the Facsimile Function
4Troubleshooting When Using the Printer Function
5Troubleshooting When Using the Scanner Function
6Troubleshooting When Using the DDST Unit
7Adding Paper and Replacing Toner
8Clearing Misfeeds
9Remarks
Read this manual carefully before you use this machine and keep it handy for future reference. For safe and correct use, be sure to read the Safety Information in "About This Machine" before using the machine.
Introduction
This manual contains detailed instructions and notes on the operation and use of this machine. For your safety and benefit, read this manual carefully before using the machine. Keep this manual in a handy place for quick reference.
Important
Contents of this manual are subject to change without prior notice. In no event will the company be liable for direct, indirect, special, incidental, or consequential damages as a result of handling or operating the machine.
Notes:
Some illustrations in this manual might be slightly different from the machine.
Certain options might not be available in some countries. For details, please contact your local dealer.
Depending on which country you are in, certain units may be optional. For details, please contact your local dealer.
Caution:
Use of controls or adjustments or performance of procedures other than those specified in this manual might result in hazardous radiation exposure.
Two kinds of size notation are employed in this manual. With this machine refer to the inch version.
For good copy quality, the supplier recommends that you use genuine toner from the supplier.
The supplier shall not be responsible for any damage or expense that might result from the use of parts other than genuine parts from the supplier with your office products.
Power Source
120V, 60Hz, 8A or more
Please be sure to connect the power cord to a power source as shown above. For details about power source, see p.97 “Power Connection”.
Manuals for This Machine
Refer to the manuals that are relevant to what you want to do with the machine. Manuals for machines with copier function only or with the DDST Unit are different. See “Manuals for Machines with Copier Function Only or with the DDST Unit”.
 Important
Media differ according to manual.
The printed and electronic versions of a manual have the same contents.
Adobe Acrobat Reader/Adobe Reader must be installed in order to view the manuals as PDF files.
Depending on which country you are in, there may also be html manuals. To view these manuals, a Web browser must be installed.
About This Machine
Be sure to read the Safety Information in this manual before using the machine. This manual provides an introduction to the functions of the machine. It also explains the control panel, preparation procedures for using the machine, how to enter text, and how to install the CD-ROMs provided.
General Settings Guide
Explains User Tools settings, and Address Book procedures such as registering fax numbers, e-mail addresses, and user codes. Also refer to this manual for explanations on how to connect the machine.
Troubleshooting
Provides a guide to solving common problems, and explains how to replace paper, toner, and other consumables.
Security Reference
This manual is for administrators of the machine. It explains security functions that the administrators can use to protect data from being tampered with, or prevent the machine from unauthorized use.
Also refer to this manual for the procedures for registering administrators, as well as setting user and administrator authentication.
Copy Reference
Explains Copier functions and operations. Also refer to this manual for explanations on how to place originals.
Facsimile Reference
Explains Facsimile functions and operations.
Printer Reference
Explains Printer functions and operations.
Scanner Reference
Explains Scanner functions and operations.
i

Network Guide
Explains how to configure and operate the machine in a network environment, and use the software provided.
This manual covers all models, and includes descriptions of functions and settings that might not be available on this machine. Images, illustrations, and information about operating systems that are supported might also differ slightly from those of this machine.
Other manuals
•PostScript3 Supplement
•UNIX Supplement
•Manuals for DeskTopBinder Lite
•DeskTopBinder Lite Setup Guide
•DeskTopBinder Introduction Guide
•Auto Document Link Guide

 Note
Note
Manuals provided are specific to machine types.
For “UNIX Supplement”, please visit our Web site or consult an authorized dealer.
“PostScript3 Supplement” and “UNIX Supplement” include descriptions of functions and settings that might not be available on this machine.

 Reference
p.iii “Manuals for Machines with Copier Function Only or with the DDST
Unit”
ii

Manuals for Machines with Copier Function Only or with the DDST Unit
This section describes the manuals for machines with copier function only or with the DDST Unit.
About This Machine
Be sure to read the Safety Information in this manual before using the machine. This manual provides an introduction to the functions of the machine. It also explains the control panel, preparation procedures for using the machine, and how to install the CD-ROMs provided.
General Settings Guide
Explains User Tools settings. Also refer to this manual for explanations on how to register user codes.
Troubleshooting
Provides a guide to solving common problems, and explains how to replace paper, toner, and other consumables.
Copy Reference
Explains Copier functions and operations. Also refer to this manual for explanations on how to place originals.
Printer/Scanner Reference
Explains system settings, functions and operations for the machine's printer/scanner unit. Also refer to this manual for explanations on how to connect the machine.
Network Guide
Explains how to configure and operate the machine in a network environment, and use the software provided.

 Note
Note
Some manuals include descriptions of functions and settings that are not available on machines with copier function only or with the DDST Unit.
iii

TABLE OF CONTENTS |
|
Manuals for This Machine ...................................................................................... |
i |
Manuals for Machines with Copier Function Only or with the DDST Unit ................. |
iii |
How to Read This Manual ..................................................................................... |
1 |
Symbols ..................................................................................................................... |
1 |
Name of Major Item.................................................................................................... |
1 |
1. When the Machine Does Not Operate As Wanted |
|
Indicators................................................................................................................ |
3 |
Panel Tone.............................................................................................................. |
4 |
When the Function Status Indicator Lights Up in Red....................................... |
5 |
When You Have Problems Operating the Machine............................................. |
6 |
When a Job Is Not Performed............................................................................... |
9 |
2. Troubleshooting When Using the Copy Function |
|
When a Message Is Displayed ............................................................................ |
11 |
When You Cannot Make Clear Copies ............................................................... |
13 |
When You Cannot Make Copies As Wanted ..................................................... |
15 |
When Memory Is Full ............................................................................................... |
17 |
3. Troubleshooting When Using the Facsimile Function |
|
Adjusting the Volume .......................................................................................... |
19 |
When a Message Is Displayed ............................................................................ |
22 |
When You Cannot Send or Receive Fax Messages As Wanted ...................... |
28 |
When Memory Is Full ............................................................................................... |
32 |
When an Error Report Is Printed ........................................................................ |
33 |
Turning Off the Main Power / In the Event of Power Failure............................ |
34 |
When an Error Occurs Using Internet Fax ........................................................ |
35 |
Error Mail Notification............................................................................................... |
35 |
Error Report (E-Mail)................................................................................................ |
35 |
Server-Generated Error E-mail ................................................................................ |
35 |
4. Troubleshooting When Using the Printer Function |
|
When a Message Is Displayed during Installation of the Printer Driver ......... |
37 |
Windows 95/98/Me, Windows 2000 or Windows NT 4.0 ......................................... |
37 |
Windows XP Professional or Windows Server 2003................................................ |
37 |
Windows XP Home Edition ...................................................................................... |
38 |
When a Message Is Displayed ............................................................................ |
39 |
Status Messages...................................................................................................... |
39 |
Alert Messages ........................................................................................................ |
40 |
Printing the Error Log ............................................................................................... |
42 |
When You Cannot Print....................................................................................... |
43 |
Other Printing Problems ..................................................................................... |
46 |
iv

5. Troubleshooting When Using the Scanner Function |
|
When Scanning Is Not Done As Expected ........................................................ |
53 |
When You Cannot Send Scanned Files ............................................................. |
54 |
When You Cannot Browse the Network to Send a Scanned File ............................ |
54 |
When the TWAIN Driver Cannot Be Started ............................................................ |
54 |
The Network Delivery Function Cannot Be Used..................................................... |
54 |
Operations Are Not Possible When Messages Appear ........................................... |
55 |
When a Message Is Displayed ............................................................................ |
56 |
When a Message Is Displayed on the Display Panel............................................... |
56 |
When a Message Is Displayed on the Client Computer........................................... |
60 |
6. Troubleshooting When Using the DDST Unit |
|
The Printer Function............................................................................................ |
65 |
When a Message Is Displayed................................................................................. |
65 |
When You Cannot Print ........................................................................................... |
68 |
Other Printing Problems........................................................................................... |
70 |
The Scanner Function ......................................................................................... |
73 |
When Scanning Is Not Done As Expected............................................................... |
73 |
When a Message Is Displayed on the Client Computer........................................... |
74 |
7. Adding Paper and Replacing Toner |
|
Loading Paper ...................................................................................................... |
75 |
Loading Paper into the Paper Trays ........................................................................ |
76 |
Orientation-Fixed Paper or Two-Sided Paper .......................................................... |
77 |
Changing the Paper Size..................................................................................... |
80 |
Changing the Paper Size in the Paper Tray (Tray 1) ............................................... |
80 |
Changing a Paper Size in the Optional Paper Tray Unit (Tray 2) ............................ |
83 |
Adding Toner........................................................................................................ |
87 |
Replacing Toner....................................................................................................... |
88 |
Sending Fax Messages When Toner Has Run Out ................................................. |
89 |
Waste Toner............................................................................................................. |
89 |
8. Clearing Misfeeds |
|
Removing Jammed Paper ................................................................................... |
91 |
9. Remarks |
|
Where to Put Your Machine ................................................................................ |
95 |
Machine Environment .............................................................................................. |
95 |
Moving...................................................................................................................... |
96 |
Power Connection.................................................................................................... |
97 |
Access to the Machine ............................................................................................. |
98 |
When Not Used for a Long Time.............................................................................. |
98 |
Maintaining Your Machine .................................................................................. |
99 |
Cleaning the Exposure Glass................................................................................... |
99 |
Cleaning the Exposure Glass Cover ...................................................................... |
100 |
Cleaning the ARDF ................................................................................................ |
100 |
INDEX....................................................................................................... |
101 |
v
vi

How to Read This Manual
Symbols
This manual uses the following symbols:
Indicates important safety notes.
Ignoring these notes could result in serious injury or death. Be sure to read these notes. They can be found in the “Safety Information” section of About This Machine.
Indicates important safety notes.
Ignoring these notes could result in moderate or minor injury, or damage to the machine or to property. Be sure to read these notes. They can be found in the “Safety Information” section of About This Machine.
Indicates points to pay attention to when using the machine, and explanations of likely causes of paper misfeeds, damage to originals, or loss of data. Be sure to read these explanations.
Indicates supplementary explanations of the machine’s functions, and instructions on resolving user errors.
This symbol is located at the end of sections. It indicates where you can find further relevant information.
[ ]
Indicates the names of keys that appear on the machine’s display panel.
{}
Indicates the names of keys on the machine’s control panel.
Name of Major Item
Major item of this machine is referred to as follows in this manual:
• Auto Document Feeder capable of scanning both sides of a sheet → ARDF
1
2
1. When the Machine Does
Not Operate As Wanted
This section describes basic troubleshooting procedures that are applicable to all functions of this machine.
Indicators
This section explains the indicators that light up when the machine requires the user to remove misfed paper, add paper, or perform other procedures.
h: Error indicator |
Appears when there is a misfeed, a cover is left open, or |
|
another problem occurs. See p.91 “Clearing Misfeeds”. |
|
|
B: Load Paper indicator |
Appears when paper-out condition occurs. See p.75 |
|
“Loading Paper”. |
|
|
D: Add Toner indicator |
Appears when toner runs out. See p.87 “Adding Toner”. |
|
|
3

When the Machine Does Not Operate As Wanted
|
|
Panel Tone |
|
|
|
|
The following table explains the various beep patterns that the machine produc- |
||
|
|
es to alert users about machine conditions. |
|
|
1 |
|
|||
|
|
|
|
|
|
|
Beep pattern |
Meaning |
Cause |
|
|
|
|
|
|
|
Two long beeps. |
Machine has warmed |
After cooling or being switched on, the |
|
|
|
up. |
machine has fully warmed up and is |
|
|
|
|
ready for use. |
|
|
|
|
|
|
|
Single short beep. |
A valid operation is ac- |
A control panel key was pressed, the |
|
|
|
cepted. |
machine was switched on, or a docu- |
|
|
|
|
ment was placed on the ARDF. |
|
|
|
|
|
|
|
Five short beeps repeated |
Strong alert. |
Machine requires user attention. Paper |
|
|
five times. |
|
might have jammed or toner might need |
|
|
|
|
replenishing. |
|
|
|
|
|

 Note
Note
Users cannot mute the machine's beep alerts. When the machine beeps to alert users of a paper jam or toner request, if the machine's covers are opened and closed repeatedly within a short space of time, the beep alert might continue, even after normal status has resumed.

 Reference
For details about enabling or disabling beep alerts, see “General Features”, General Settings Guide.
4

When the Function Status Indicator Lights Up in Red
When the Function Status Indicator Lights
Up in Red
|
|
|
|
|
If a function key is lit in red, press the key to switch to the screen for the corre- |
1 |
|||
sponding function, and then follow the message that appears. |
|
|||
|
|
|
|
|
Problem |
Cause |
Solution |
|
|
|
|
|
|
|
Documents and reports |
There is no copy paper left. |
Add more paper. See p.75 “Load- |
|
|
are not printed out. |
|
ing Paper”. |
|
|
|
|
|
|
|
An error has occurred. |
The function whose indicator is lit |
Record the code number shown |
|
|
|
is defective. |
in the display and contact your |
|
|
|
|
service representative. See |
|
|
|
|
“When a Message Is Displayed” |
|
|
|
|
of each chapter. You can use other |
|
|
|
|
functions normally. |
|
|
|
|
|
|
|
The machine is unable to |
A network error has occurred. |
• Check the displayed message |
|
|
connect to the network. |
|
and take an appropriate ac- |
|
|
|
|
tion. See “When a Message Is |
|
|
|
|
Displayed” of each chapter. |
|
|
|
|
• Check that the machine is cor- |
|
|
|
|
rectly connected to the net- |
|
|
|
|
work, and that the machine is |
|
|
|
|
correctly set. See “Network |
|
|
|
|
Settings”, General Settings |
|
|
|
|
Guide. |
|
|
|
|
• Contact the administrator. |
|
|
|
|
• When the function key is still |
|
|
|
|
lit in red, even if you take the |
|
|
|
|
measures above, contact your |
|
|
|
|
service representative. |
|
|
|
|
|
|
|

 Note
Note
If an error occurs in the function you are using, check the message that appears on the display panel, and then refer to “When a Message Is Displayed” for the relevant function.

 Reference
p.11 “Troubleshooting When Using the Copy Function”
p.19 “Troubleshooting When Using the Facsimile Function”
p.37 “Troubleshooting When Using the Printer Function”
p.53 “Troubleshooting When Using the Scanner Function”
p.65 “Troubleshooting When Using the DDST Unit”
5

When the Machine Does Not Operate As Wanted
When You Have Problems Operating the
Machine
|
|
1 |
The following chart gives explanations of common problems and messages. |
If other messages appear, follow the instructions displayed.
Problem |
Cause |
Solution |
|
|
|
“Please wait...” |
This message appears when you |
Wait for the machine to get ready. |
appears. |
turn on the operation switch or |
|
|
change the toner bottle. |
|
|
|
|
“Please wait...” |
If the machine has not been in use |
Wait for the machine to get ready. |
appears. |
for a long time, it may take longer |
|
|
than normal to print or start up |
|
|
when switched on. |
|
|
|
|
Although the copier |
Functions other than the copier |
Wait a little longer. |
screen appears when |
function are not yet ready. |
|
the machine is turned |
|
|
on using the main |
|
|
power switch, it cannot |
|
|
be switched to another |
|
|
screen by pressing the |
|
|
{Facsimile} or {Scan- |
|
|
ner} key. |
|
|
|
|
|
The machine has just |
Functions other than the copier |
Wait a little longer. |
been turned on and the |
function are not yet ready. Time |
|
User Tools screen is |
required varies by function. |
|
displayed, but the User |
Functions appear in the User |
|
Tools menu has items |
Tools menu when they become |
|
missing. |
ready for use. |
|
|
|
|
The display is difficult |
Screen contrast is not adjusted. |
Adjust the screen's contrast so |
to see. |
|
that you can see the display panel |
|
|
properly. See “General Features”, |
|
|
General Settings Guide. |
|
|
|
The display is off. |
The machine is in Energy Saver |
Turn on the operation switch. |
|
mode. |
|
|
|
|
The display is off. |
The operation switch is turned |
Turn on the operation switch. |
|
off. |
|
|
|
|
Nothing happens |
The main power switch is turned |
Turn on the main power switch. |
when the operation |
off. |
|
switch is turned on. |
|
|
|
|
|
The operation switch |
The machine is communicating |
Check if the machine is communi- |
indicator continues |
with external equipment. |
cating with a computer. |
blinking and does not |
|
|
turn off when pressed. |
|
|
|
|
|
6

When You Have Problems Operating the Machine
Problem |
Cause |
Solution |
|
|
|
Original images are |
You may have loaded the paper |
Load paper correctly. Load paper |
printed on the reverse |
incorrectly. |
into Tray 1-2 with the print side |
side of the paper. |
|
up, and into the bypass tray with |
|
|
the print side down. See p.77 |
|
|
“Orientation-Fixed Paper or |
|
|
Two-Sided Paper”. |
|
|
|
Misfeeds occur frequently. |
Copy paper size setting is not correct. |
Set the proper paper size. See |
|
|
“Tray Paper Settings”, General |
|
|
Settings Guide and “Copy Pa- |
|
|
per”, About This Machine. |
|
|
|
Misfeeds occur frequently. |
The tray's end fence may not be |
Check the end fence is set proper- |
|
set properly. |
ly. See p.80 “Changing the Paper |
|
|
Size”. |
|
|
|
An error message re- |
When a misfeed message ap- |
Clear misfed paper, and then |
mains, even if misfed |
pears, it remains until you open |
open and close the cover. See p.91 |
paper is removed. |
and close the cover as required. |
“Removing Jammed Paper”. |
|
Paper is still jammed in the tray. |
|
|
|
|
Cannot print in duplex |
You cannot use paper in the by- |
For duplex printing, select Tray 1- |
mode. |
pass tray for duplex printing. |
2 in the copier mode or with the |
|
|
printer driver. |
|
|
|
Cannot print in duplex |
You have selected a tray that is set |
Select a paper tray in [Tray Paper |
mode. |
to [Off] for duplex printing in [Tray |
Settings] under [System Settings], |
|
Paper Settings] under [System Set- |
and then press [OK]. Then, select |
|
tings]. |
[No Display (Plain Paper)] or [Recy- |
|
|
cled Paper] for Paper Type, press |
|
|
[Duplex], and then select [On]. See |
|
|
“Tray Paper Settings”, General |
|
|
Settings Guide. |
|
|
|
The user code entry |
Users are restricted by user man- |
Enter the user code (up to eight |
screen is displayed. |
agement. |
digits), and then press the {OK}or |
|
|
{q} key. |
|
|
|
The Authentication |
Basic Authentication, Windows |
Enter your login user name and |
screen appears. |
Authentication, LDAP Authenti- |
user password. See “When the |
|
cation or Integration Server Au- |
Authentication Screen is Dis- |
|
thentication is set. |
played”, About This Machine. |
|
|
|
“Temperature |
The temperature inside the ma- |
Locate the machine in an environ- |
Alert. Turn |
chine is too high or too low. |
ment where the temperature re- |
main power off, |
|
mains between 10 and 32 °C. See |
adjust room |
|
p.95 “Where to Put Your Ma- |
|
chine”. |
|
temp. and wait a |
|
|
|
|
|
while before |
|
|
restarting.” ap- |
|
|
pears, and printing is |
|
|
disabled. |
|
|
|
|
|
“You do not have |
The use of the function is restrict- |
Contact the administrator. |
privileges to |
ed to authenticated users only. |
|
use this func- |
|
|
tion.” appears. |
|
|
|
|
|
1
7

When the Machine Does Not Operate As Wanted
|
|
Problem |
Cause |
Solution |
|
|
|
|
|
|
|
|
|
Authentication failed. |
The entered login user name or |
Ask the administrator for the cor- |
|
|
|
|
password is not correct. |
rect login user name and password. |
|
|
|
|
|
|
|
|
|
Authentication failed. |
Cannot access the authentication |
Contact the administrator. |
|
1 |
|||||
|
|
server when using Windows Au- |
|
||
|
|
|
thentication, LDAP Authentica- |
|
|
|
|
|
tion, or Integration Server |
|
|
|
|
|
Authentication. |
|
|
|
|
|
|
|

 Note
Note
If you cannot make copies as you want because of paper type, paper size, or paper capacity problems, use recommended paper. See “Copy Paper”, About This Machine.
8

When a Job Is Not Performed
When a Job Is Not Performed
If you cannot execute a function, it may be that the machine is being held up by |
1 |
another function. |
|
|
If you cannot execute a function, terminate any other functions currently active, and then try executing the function again. In some cases, you can carry out another job (copier, facsimile, printer, or scanner) without canceling the current job being performed. Performing multiple functions simultaneously like this is called “Multi-accessing”.
Combination Chart |
|
|
|
|
|
|
|
|
|
|
|
|
|
|
|
||
|
|
Mode after you select Copy |
|
Facsimile |
|
|
|
|
|
Printer |
Scanner |
TWAIN |
|||||
|
|
|
|
|
|
Transmission |
Reception |
|
|
|
|||||||
|
|
|
|
|
|
|
|
|
|
|
|
|
|
|
|
|
|
Mode before you |
Using the control panel |
Copying |
Transmission Operation |
Scanning an Original for |
Memory Transmission |
Memory Transmission |
Immediate Transmission |
Memory Reception |
|
Printing Received Data |
Receive Data |
Printing |
Using the control panel |
Scanning |
Scanning |
||
select |
|
|
|
||||||||||||||
Copy |
Using the control panel |
× |
× |
|
|
|
|
|
|
|
|
|
|
|
|
× |
|
Copying |
× |
× |
|
|
*1 |
|
|
*1 |
|
|
|
|
|
*1 |
× |
||
|
|
|
|
|
|
|
|
|
|
|
|
|
|
|
|
|
|
|
Transmission Operation |
|
|
× |
|
× |
|
|
× |
|
|
|
|
|
|
× |
|
|
Transmission |
Scanning an Original for |
× |
× |
× |
|
× |
|
|
× |
|
|
|
|
× |
× |
× |
|
Memory Transmission |
|
|
|
|
|
|
|
|
|
|
|
|
|
|
|
|
|
Memory Transmission |
|
|
|
|
|
|
× |
× |
× |
|
|
|
|
|
× |
|
|
Immediate |
× |
× |
× |
|
× |
|
× |
× |
× |
|
|
|
× |
× |
× |
|
|
Transmission |
|
|
|
|
|
|||||||||||
Facsimile |
Reception |
Memory Reception |
|
|
|
|
|
|
× |
× |
× |
|
|
|
|
|
× |
Printing Received |
|
|
|
|
|
|
*2 |
*2 |
*2 |
× |
|
|
|
|
× |
||
Data |
|
|
|
|
|
|
|
|
|
|
|||||||
|
|
|
|
|
|
|
|
|
|
|
|
|
|
|
|||
|
|
|
|
|
|
|
|
|
|
|
|
|
|
|
|
||
Printer |
Receive Data |
|
|
|
|
|
|
|
|
|
|
|
|
|
|
|
|
Printing |
|
|
|
|
|
|
|
|
|
|
|
|
|
|
|
||
|
|
|
|
|
|
|
|
|
|
|
|
|
|
|
|
||
Scanner |
|
Using the control |
|
|
|
|
|
|
|
|
|
|
|
|
× |
× |
× |
|
panel |
|
|
|
|
|
|
|
|
|
|
|
|
||||
|
|
|
|
|
|
|
|
|
|
|
|
|
|
|
|
||
|
Scanning |
|
|
*1 |
|
*1 |
|
|
*1 |
|
|
|
|
× |
× |
× |
|
|
|
|
|
|
|
|
|
|
|
|
|
|
|
|
|
|
|
TWAIN |
|
Scanning |
× |
× |
× |
|
× |
|
× |
× |
× |
× |
|
|
× |
× |
× |
|
|
|
|
|
|
||||||||||||
|
|
|
|
|
|
|
|
|
|
|
|
|
|
|
|
|
|
 …means that these functions can be used together.
 …means that you can interrupt the current job with the function keys to proceed to a subsequent job.
 …means that another job will automatically start after the current job is finished.
×…means that you must manually start another job after the current job is finished (i.e., these functions cannot be used together).
*1
*2
You can scan a document once the preceding job documents are all scanned. During parallel reception, any subsequent job is suspended until reception is completed.
9

When the Machine Does Not Operate As Wanted

 Note
Note
If the machine is capable of executing multiple functions simultaneously, specify which function should have priority in “Print Priority”. This setting is factory-preset to “Display mode”. For setting of Printing Priority Function,
1see “General Features”, General Settings Guide.
While printing is in progress, scanning a document using another function may take more time.
10

2. Troubleshooting When
Using the Copy Function
This chapter describes likely causes of and possible solutions for copier function problems.
When a Message Is Displayed
This section describes the machine's main messages. If other messages appear, follow the instructions they contain.
 Important
For messages that are not listed here, see “When You Have Problems Operating the Machine”.
Message |
Cause |
Solution |
|
|
|
|
|
Cannot dup. copy |
Duplex mode does not support |
Duplex mode supports the fol- |
|
this size. |
the selected paper size. |
lowing paper sizes: A4L, B5 |
|
|
|
JISL, 81/2"×14"L, 81/4"×14"L, |
|
|
|
81/2"×11"L, 81/2"×13"L, |
|
|
|
81/4"×13"L, 16KL. Select one of |
|
|
|
these sizes. |
|
|
|
|
|
Cannot sort this |
The specified paper size is not |
This message appears when the |
|
size. |
available with the Sort function. |
bypass tray is selected. |
|
|
|
Use copy paper that is not longer |
|
|
|
than 356 mm. |
|
|
|
|
|
Size error in |
The specified paper size is not avail- |
This message appears when the |
|
Combine mode. |
able with the Combine function. |
bypass tray is selected. |
|
|
|
Use copy paper that is not longer |
|
|
|
than 356 mm. |
|
|
|
|
|
Cannot select |
The specified function is not |
Select a paper tray other than the |
|
Bypass Tray in |
available with the bypass tray. |
bypass tray. |
|
current set- |
|
|
|
ting. |
|
|
|
|
|
|
|
Original with |
The specified custom length is not |
Do not place originals that are |
|
this length can- |
available for duplex printing |
longer than 356 mm. |
|
not be duplex |
from the ARDF (eg. 2 Sided → 2 |
|
|
scanned. |
Sided, 2 Sided → 1 Sided, 2 Sided |
|
|
→ Combine). |
|
|
|
|
|
|
|
|
|
|
|
Max. number of |
The number of copies exceeds the |
You can change the maximum |
|
sets is nn. |
maximum copy quantity. |
copy quantity. See “Copier Fea- |
|
|
|
tures”, General Settings Guide. |
|
|
|
|
|
Cannot copy. |
The scanner function is in use. |
Cancel the current scan job. To do |
|
Original is be- |
|
this, press the {Clear/ Stop}key on |
|
ing scanned by |
|
the scanner screen to display the |
|
another func- |
|
message “Clear/Stop key |
|
|
was pressed. Stop scan- |
|
|
tion. |
|
|
|
|
ning?”, and then press [Stop]. |
|
|
|
|
11 |
|
|
|
|
|
|
|
|

Troubleshooting When Using the Copy Function
|
|
Message |
Cause |
Solution |
|
|
|
|
|
|
|
|
|
You do not have |
The use of this function is restrict- |
Contact the administrator. |
|
|
|
privileges to |
ed to authentified users only. |
|
|
|
|
use this func- |
|
|
|
|
|
tion. |
|
|
|
|
|
|
|
|
|
|
|
Authentication |
The entered login user name or |
Ask the administrator for the cor- |
|
|
|
failed. |
password is not correct. |
rect login user name and password. |
|
2 |
|
|
|
|
|
|
Authentication |
Cannot access the authentication |
Contact the administrator. |
||
|
|||||
|
|
failed. |
server when using Windows Au- |
|
|
|
|
|
thentication , LDAP Authentica- |
|
|
|
|
|
tion, or Integration Server |
|
|
|
|
|
Authentication. |
|
|
|
|
|
|
|

 Reference
p.6 “When You Have Problems Operating the Machine”
12
When You Cannot Make Clear Copies
When You Cannot Make Clear Copies
This section describes likely causes of and possible solutions for unclear copies.
Problem |
Cause |
Solution |
|
|
|
|
|
|
|
Copies appear dirty. |
Image density is too dark. |
Adjust the image density. See |
|
|
|
|
“Adjusting Image Density”, |
|
|
|
|
Copy Reference. |
|
2 |
Copies contain blots or |
The machine is not on a level surface. |
Place the machine on a stable and |
|
|
are patchy. |
|
level surface. |
|
|
|
|
Make sure the machine's environ- |
|
|
|
|
ment meets requirements. See |
|
|
|
|
p.95 “Where to Put Your Ma- |
|
|
|
|
chine”. |
|
|
|
|
|
|
|
Copies contain blots or |
The paper is creased, curled, or |
Smooth out the wrinkles from the |
|
|
are patchy. |
has blemishes. |
paper, or replace it. See “Copy Pa- |
|
|
|
|
per”, About This Machine. |
|
|
|
|
If paper comes out curled, adjust |
|
|
|
|
the Output Tray. See “Originals”, |
|
|
|
|
Copy Reference. |
|
|
|
|
|
|
|
Copies contain blots or |
Image density is too light. |
Adjust the image density. See |
|
|
are patchy. |
|
“Adjusting Image Density”, |
|
|
|
|
Copy Reference. |
|
|
|
|
|
|
|
Copies contain blots or |
The paper is damp. |
Use paper that has been stored in |
|
|
are patchy. |
|
the recommended temperature and |
|
|
|
|
humidity condition. See “Copy Pa- |
|
|
|
|
per”, About This Machine. |
|
|
|
|
|
|
|
Copies are too dark or |
The correct paper type settings |
Check the paper loaded on the |
|
|
too light. |
are not made. |
paper tray or bypass tray matches |
|
|
|
|
the paper type set on the display |
|
|
|
|
panel. See “Copy Paper”, About |
|
|
|
|
This Machine. |
|
|
|
|
|
|
|
Copies are too dark or |
The image was not printed on a |
Before printing on special paper, |
|
|
too light. |
suitable surface. |
check its surface carefully. Print- |
|
|
|
|
ing on non-print surfaces reduces |
|
|
|
|
print quality and can damage the |
|
|
|
|
machine's internal components. |
|
|
|
|
See “Copy Paper”, About This |
|
|
|
|
Machine. |
|
|
|
|
|
|
|
Copies are dirty. |
Use of non-recommended toner |
Use manufacturer-genuine toner. |
|
|
|
can result in loss of print quality |
Contact your service representative. |
|
|
|
and other problems. |
|
|
|
|
|
|
|
|
The reverse side of an |
Image density is too dark. |
Adjust the image density. See |
|
|
original image is copied. |
|
“Adjusting Image Density”, |
|
|
|
|
Copy Reference. |
|
|
|
|
|
|
|
13
Troubleshooting When Using the Copy Function
|
|
|
Problem |
Cause |
Solution |
|||
|
|
|
|
|
|
|
|
|
|
|
A shadow appears on |
Image density is too dark. |
Adjust the image density. See |
||||
|
|
copies if you use past- |
|
“Adjusting Image Density”, |
||||
|
|
ed originals. |
|
Copy Reference. |
||||
|
|
|
|
|
|
|
|
Change the orientation of the original. |
|
|
|
|
|
|
|
|
Put mending tape on the pasted area. |
|
|
|
|
|
|
|
|
|
|
|
The same copy area is |
The exposure glass or ARDF is |
Clean them. See p.99 “Maintain- |
||||
2 |
|
dirty whenever mak- |
dirty. |
ing Your Machine”. |
||||
|
|
ing copies. |
|
|
||||
|
|
|
|
|
|
|
|
|
|
|
Copies are too light. |
Image density is too light. |
Adjust the image density. See |
||||
|
|
|
|
|
|
|
|
“Adjusting Image Density”, |
|
|
|
|
|
|
|
|
Copy Reference. |
|
|
|
|
|
|
|
|
|
|
|
Copies are too light. |
The paper is damp or rough. |
Use the recommended paper. A |
||||
|
|
|
|
|
|
|
|
light copy may result when you |
|
|
|
|
|
|
|
|
use damp or rough grain paper. |
|
|
|
|
|
|
|
|
|
|
|
Copies are too light. |
The toner bottle is almost empty. |
Add toner. See p.87 “Adding |
||||
|
|
|
|
|
|
|
|
Toner”. |
|
|
|
|
|
|
|
|
|
|
|
Parts of images are not |
The original is not placed correctly. |
Place originals correctly. See “Plac- |
||||
|
|
copied. |
|
ing Originals”, Copy Reference. |
||||
|
|
|
|
|
|
|
|
|
|
|
Parts of images are not |
The correct paper size is not selected. |
Select the proper paper size. |
||||
|
|
copied. |
|
|
||||
|
|
|
|
|
|
|
|
|
|
|
White lines appear. |
The exposure glass or scanning |
Clean them. See p.99 “Maintain- |
||||
|
|
|
|
|
|
|
glass is dirty. |
ing Your Machine”. |
|
|
|
|
|
|
|
|
|
|
|
Copies are blank. |
The original is not placed correctly. |
When using the exposure glass, |
||||
|
|
|
|
|
|
|
|
place originals face down. When |
|
|
|
|
|
|
|
|
using the ARDF, place them face |
|
|
|
|
|
|
|
|
up. See “Placing Originals”, Copy |
|
|
|
|
|
|
|
|
Reference. |
|
|
|
|
|
|
|
|
|
|
|
A moiré pattern is pro- |
Your original has a dot pattern |
Place the original on the exposure |
||||
|
|
duced on copies. |
image or many lines. |
glass at a slight angle. |
||||
|
|
|
|
|
|
|
|
|
|
|
|
|
|
|
|
|
|
Black spots appear on |
Because of high humidity, the |
Place the print on the exposure glass |
the copy of a photo- |
photographic print has stuck to |
in either of the following ways: |
graphic print. |
the exposure glass. |
• Place an OHP transparency on |
|
|
|
|
|
the exposure glass, and then |
|
|
place the print on top of the |
|
|
OHP transparency. |
|
|
• Place the print on the expo- |
|
|
sure glass, and then place two |
|
|
or three sheets of white paper |
|
|
on top of it. Leave the expo- |
|
|
sure glass cover or ARDF |
|
|
open when copying. |
14

When You Cannot Make Copies As Wanted
When You Cannot Make Copies As
Wanted
This section describes causes and remedies when copy results are not as expected.
Basic
|
|
|
|
|
|
|
|
|
2 |
Problem |
Cause |
Solution |
|
|
|
|
|
|
|
Misfeeds occur frequently. |
The number of sheets loaded ex- |
Load paper only as high as the |
|
|
|
ceeds the capacity of the machine. |
upper limit markings on the side |
|
|
|
|
fences of the paper tray or bypass |
|
|
|
|
tray. See “Copy Paper”, About |
|
|
|
|
This Machine. |
|
|
|
|
|
|
|
Misfeeds occur frequently. |
The paper is damp. |
Use paper that has been stored in |
|
|
|
|
the recommended temperature and |
|
|
|
|
humidity condition. See “Copy Pa- |
|
|
|
|
per”, About This Machine. |
|
|
|
|
|
|
|
Misfeeds occur frequently. |
The paper is too thick or too thin. |
Use recommended paper. See |
|
|
|
|
“Copy Paper”, About This Ma- |
|
|
|
|
chine. |
|
|
|
|
|
|
|
Misfeeds occur frequently. |
The copy paper is wrinkled or has |
Use recommended paper. Use pa- |
|
|
|
been folded/creased. |
per that has been stored in the |
|
|
|
|
recommended temperature and |
|
|
|
|
humidity condition. See “Copy |
|
|
|
|
Paper”, About This Machine. |
|
|
|
|
|
|
|
Misfeeds occur frequently. |
Printed paper is used. |
Use recommended paper. Do not re- |
|
|
|
|
use copy paper that has been already |
|
|
|
|
copied or printed onto. See “Copy |
|
|
|
|
Paper”, About This Machine. |
|
|
|
|
|
|
|
Copy paper becomes |
The paper is damp. |
Use paper that has been stored in |
|
|
creased. |
|
the recommended temperature and |
|
|
|
|
humidity condition. See “Copy Pa- |
|
|
|
|
per”, About This Machine. |
|
|
|
|
|
|
|
Copy paper becomes |
The paper is too thin. |
Use recommended paper. See “Copy |
|
|
creased. |
|
Paper”, About This Machine. |
|
|
|
|
|
|
|
You cannot combine |
Selected functions cannot be used |
Check the combination of func- |
|
|
several functions. |
together. |
tions and make the settings again. |
|
|
|
|
See “Combination Chart”, Copy |
|
|
|
|
Reference. |
|
|
|
|
|
|
|
Print is slanted. |
The paper is feeding in at a slant. |
Load the paper correctly. See p.75 |
|
|
|
|
“Loading Paper”. |
|
|
|
|
|
|
|
Print is slanted. |
The machine's cover is open. |
Make sure the right and lower |
|
|
|
|
right covers are properly closed. |
|
|
|
|
|
|
|
15

Troubleshooting When Using the Copy Function
Edit
|
|
Problem |
Cause |
Solution |
|
|
|
|
|
|
|
When using the Duplex |
You set a wide erased margin. |
Set a narrower margin with User |
|
|
Margin function, parts |
|
Tools. You can set the width be- |
|
|
of the original image |
|
tween 0 - 50 mm (0" - 2"). |
|
|
are not copied. |
|
See “Copier Features”, General |
|
|
|
|
|
|
|
|
|
Settings Guide. |
2 |
|
|
|
|
|
When using the Duplex |
There is a lack of margin space on |
Set a narrower margin with User |
|
|
|
Margin function, parts |
the opposite side of the binding |
Tools. You can set the width be- |
|
|
of the original image |
position. |
tween 0 - 50 mm (0" - 2"). |
|
|
are not copied. |
|
See “Copier Features”, General |
|
|
|
|
|
|
|
|
|
Settings Guide. |
|
|
|
|
|
|
|
Combine |
|
|
|
|
|
|
|
|
|
Problem |
Cause |
Solution |
|
|
|
|
|
|
|
When using Combine, |
You specified a reproduction ra- |
When you specify a reproduction |
|
|
parts of the image are |
tio that does not match the sizes |
ratio using the Manual Paper Se- |
|
|
not copied. |
of your originals and copy paper. |
lect function, make sure that the |
|
|
|
|
ratio matches your originals and |
|
|
|
|
the copy paper. |
|
|
|
|
(Select the correct reproduction |
|
|
|
|
ratio before using the Combine |
|
|
|
|
function.) |
|
|
|
|
|
|
|
When using Combine, |
Your originals are not identical in |
Use originals that are identical in |
|
|
parts of the image are |
size and direction. |
size and direction. |
|
|
not copied. |
|
|
|
|
|
|
|
|
|
Copies are not in cor- |
You placed the originals in the in- |
When placing a stack of originals |
|
|
rect order. |
correct order. |
in the ARDF, the last page should |
|
|
|
|
be on the bottom. |
|
|
|
|
If you place an original on the ex- |
|
|
|
|
posure glass, start with the first |
|
|
|
|
page to be copied. |
|
|
|
|
|
16

When You Cannot Make Copies As Wanted
Duplex
Problem |
Cause |
Solution |
|
|
|
|
|
|
|
Cannot print in duplex |
You may have loaded paper on |
Remove paper loaded on the by- |
|
|
mode. |
the bypass tray. |
pass tray. Load paper in Tray 1 - 2. |
|
|
|
|
|
|
|
Cannot print in duplex |
You have loaded paper exceeding |
Change the paper. |
|
|
mode. |
90 g/m2. |
|
|
|
|
|
|
|
|
|
|
|
|
|
Cannot print in duplex |
You have selected a tray that is set |
Select a paper tray in [Tray Paper |
|
2 |
|
|
|||
mode. |
to [Off] for duplex printing in |
Settings] under [System Settings], |
|
|
|
||||
|
[Tray Paper Settings] under [System |
and then press [OK]. Then, select |
|
|
|
Settings]. |
[No Display (Plain Paper)] or [Recy- |
|
|
|
|
cled Paper] for Paper Type, press |
|
|
|
|
[Duplex], and then select [On]. See |
|
|
|
|
“Tray Paper Settings”, General |
|
|
|
|
Settings Guide. |
|
|
|
|
|
|
|
Order of copies is not |
You placed the originals in the in- |
When placing a stack of originals |
|
|
correct. |
correct order. |
in the ARDF, the last page should |
|
|
|
|
be on the bottom. |
|
|
|
|
If you place an original on the ex- |
|
|
|
|
posure glass, start with the first |
|
|
|
|
page to be copied. |
|
|
|
|
|
|
|
When using Duplex, |
You placed the originals in the |
Place the original in the correct |
|
|
copy is made Top to |
wrong orientation. |
orientation. See “Original Orien- |
|
|
Bottom even though |
|
tation”, Copy Reference. |
|
|
[Top to Top] is selected. |
|
|
|
|
|
|
|
|
|
Parts of the original im- |
The margin is too wide. |
Set a narrower margin with User |
|
|
age are not copied. |
|
Tools. See “User Tools Menu (Copi- |
|
|
|
|
er Features)”, Copy Reference. |
|
|
|
|
|
|
|
Parts of the original im- |
There is a lack of margin space on |
Set a narrower margin with User |
|
|
age are not copied. |
the opposite side of the binding |
Tools. See “User Tools Menu (Copi- |
|
|
|
position. |
er Features)”, Copy Reference. |
|
|
|
|
|
|
|
|
|
|
|
|
When Memory Is Full
This section describes likely causes of and possible solutions for problems related to full memory.
Message |
Cause |
Solution |
|
|
|
Press [Resume] |
The machine checks if the remain- |
To continue copying, remove all |
to scan and copy |
ing originals should be copied, af- |
copies, and then press [Resume]. |
remaining orig- |
ter the scanned original has been |
To stop copying, press [Stop]. |
inals. |
printed. |
|
|
|
|
|
|
|
17

Troubleshooting When Using the Copy Function
2
18
3. Troubleshooting When
Using the Facsimile Function
This chapter describes likely causes of and possible solutions for facsimile function problems.
Adjusting the Volume
The following describes how to adjust the volume.
You can change the volume of the following sounds that the machine makes.
On Hook Mode
Heard when the {On Hook Dial} key is pressed.
At Transmission
Heard when immediate transmission is performed.
At Reception
Heard when the machine receives a document.
At Dialing
Heard after pressing the {Start}key, until the line connects to the destination.
At Printing
Heard when a received document is printed.
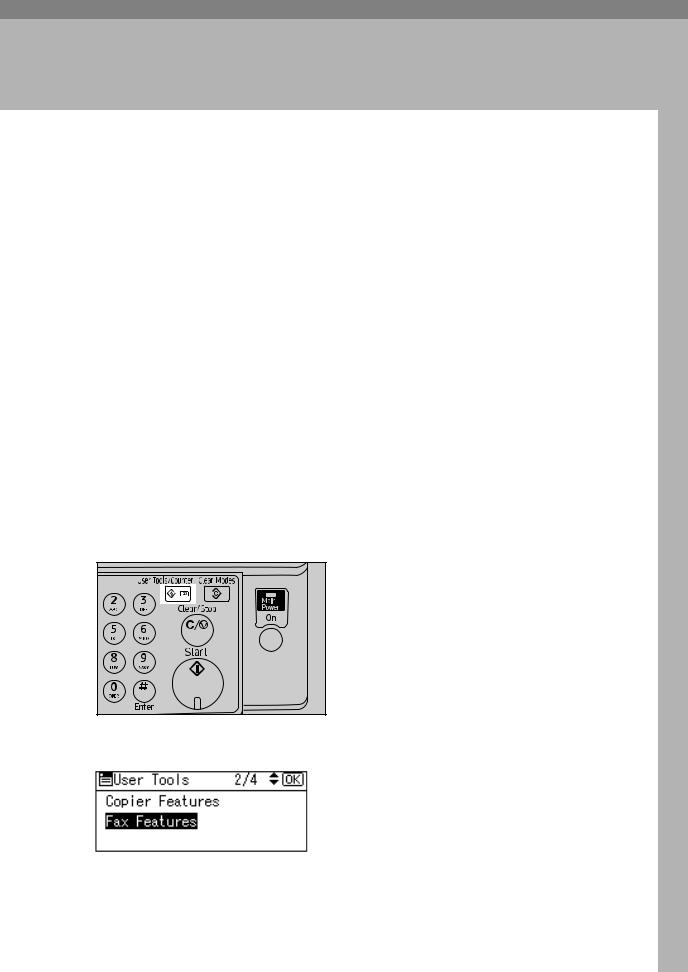
A Press the {User Tools/Counter} key.
ASO032S |
B Select [Fax Features] using {U} or {T}, and then press the {OK} key.
19

Troubleshooting When Using the Facsimile Function
C Select [General Settings/Adjust] using {U}or {T}, and then press the {OK}key.
D Select [Adjust Sound Volume] using {U} or {T}, and then press the {OK} key.
3
E Select the item you want to adjust using {U} or {T}, and then press the {OK} key.
F Select the volume using {W} or {V}, and then press the {OK} key.
Press the {Escape} key to cancel the setting and the display returns to that of step E.
G Press the {User Tools/Counter} key.
ASO032S |
The standby display appears.
20

Adjusting the Volume

 Note
Note
You can also adjust the On Hook volume when you press the {On Hook Dial} key. See “On Hook Dial”, Facsimile Reference.
If the extended security function prevents you from changing this setting, contact the administrator.
You can set the volume level to between 0 and 7.
3
21

Troubleshooting When Using the Facsimile Function
When a Message Is Displayed
This section describes the machine's main messages. If other messages appear, follow their instructions.
|
|
Message |
Cause |
Solution |
|
|
|
|
|
|
|
Error occurred, |
A document jam occurred during |
Press [Exit], and then resend the |
|
|
and trans. was |
Immediate Transmission. There |
pages that have not been sent. |
|
|
cancelled. |
may be a problem with the ma- |
If the error reoccurs frequently, |
|
|
chine or the telephone line (for ex- |
||
|
|
|
contact your service representa- |
|
|
|
|
ample, noise or cross talk). |
|
3 |
|
|
tive. |
|
|
|
|
||
|
|
|
|
|
|
|
|
|
|
|
|
Put original |
Original jammed during Memory |
Place originals that have not been |
|
|
back, check it |
Transmission. |
scanned on the exposure glass or |
|
|
and press Start |
|
ARDF again. |
|
|
key. |
|
|
|
|
|
|
|
|
|
LFunc. Problems |
There is a problem with the fax. |
Record the code number shown |
|
|
Data will be |
|
in the display and contact your |
|
|
|
service representative. |
|
|
|
initialized. |
|
|
|
|
|
Other functions can be used. |
|
|
|
|
|
|
|
|
|
|
|
|
|
Memory is full. |
The memory is full. |
If you press [Exit], the machine re- |
|
|
Scanning will be |
|
turns to standby mode and starts |
|
|
stopped and only |
|
transmitting the pages that have |
|
|
scanned page(s) |
|
been stored. |
|
|
|
|
|
|
|
will be stored. |
|
|
|
|
|
|
|
|
|
Cannot send fax |
The machine is scanning an origi- |
Before sending the fax, cancel the |
|
|
as scanner is in |
nal under another function. |
current scan job under the other |
|
|
use by another |
|
function. To do this, press the |
|
|
function. |
|
{Clear/Stop} key on the control |
|
|
|
panel to display the message |
|
|
|
|
|
|
|
|
|
|
“Clear/Stop key was |
|
|
|
|
pressed. Stop scan- |
|
|
|
|
ning?”, and then press [Stop]. |
|
|
|
|
|
|
|
Updating desti- |
The destination list is being up- |
Wait until the message disap- |
|
|
nation list. Re- |
dated from the network using |
pears. Do not switch off the pow- |
|
|
select |
SmartDeviceMonitor for Admin |
er while this message is |
|
|
destination(s) |
or Web Image Monitor. |
displayed. Depending on the |
|
|
|
number of destinations to be up- |
|
|
|
or sender's name |
|
|
|
|
|
dated, there may be some delay |
|
|
|
later. |
|
|
|
|
|
before you can resume operation. |
|
|
|
|
|
|
|
|
|
|
Operations are not possible while |
|
|
|
|
this message is displayed. |
|
|
|
|
|
|
|
You do not have |
Use of this function is restricted. |
Contact the administrator. |
|
|
privileges to |
|
|
|
|
use this func- |
|
|
|
|
tion. |
|
|
|
|
|
|
|
|
|
Authentication |
Wrong login user name or password. |
Confirm correct login user name |
|
|
failed. |
|
or password. |
|
|
|
|
|
22
 Loading...