


FAX Option Type 2018
Operating Instructions
Facsimile Reference
<Advanced Features>
Transmission Mode
Communication Information
Other Transmission Features
Reception Features
Using Fax with Computers
Facsimile Features
Key Operator Setting
Solving Operation Problems
Appendix
Read this manual carefully before you use this machine and keep it handy for future reference. For safe and correct use, be sure to read the Safety Information in the "Copy Reference"before using the machine.
Introduction
This manual contains detailed instructions and notes on the operation and use of this machine. For your safety and benefit, read this manual carefully before using the machine. Keep this manual in a handy place for quick reference.
Notes
Some illustrations in this manual might be slightly different from the machine.
Certain options might not be available in some countries. For details, please contact your local dealer.
Two kinds of size notation are employed in this manual. With this machine refer to the inch version.
Important
Contents of this manual are subject to change without prior notice. In no event will the company be liable for direct, indirect, special, incidental, or consequential damages as a result of handling or operating the machine.
Trademarks
Microsoft®, Windows® and Windows NT® are registered trademarks of Microsoft Corporation in the United States and/or other countries.
Adobe®, PostScript® and Acrobat® are registered trademarks of Adobe Systems Incorporated.
Other product names used herein are for identification purposes only and might be trademarks of their respective companies. We disclaim any and all rights in those marks.
Note
The proper names of the Windows operating systems are as follows:
•The product name of Windows® 95 is Microsoft® Windows 95.
•The product name of Windows® 98 is Microsoft® Windows 98.
•The product name of Windows® Me is Microsoft® Windows Millennium Edition (Windows Me).
•The product names of Windows® 2000 are as follows: Microsoft® Windows® 2000 Advanced Server Microsoft® Windows® 2000 Server
Microsoft® Windows® 2000 Professional
•The product names of Windows® XP are as follows: Microsoft® Windows® XP Professional
Microsoft® Windows® XP Home Edition
•The product names of Windows NT® 4.0 are as follows: Microsoft® Windows NT® Server 4.0
•Microsoft® Windows NT® Workstation 4.0
•The product name of Windows Server™ 2003 are as follows: Microsoft® Windows Server™ 2003 Standard Edition Microsoft® Windows Server™ 2003 Enterprise Edition Microsoft® Windows Server™ 2003 Web Edition
Manuals for This Machine
The following manuals describe the operational procedures of this machine. For particular functions, see the relevant parts of the manual.

 Note
Note
Manuals provided are specific to machine type.
Adobe Acrobat Reader is necessary to view the manuals as a PDF file.
Two CD-ROMs are provided:
•CD-ROM 1“Operating Instructions for Printer/Scanner”
•CD-ROM 2“Scanner Driver & Document Management Utilities”
General Settings Guide
Provides an overview of the machine and describes System Settings (paper trays, Key Operator Tools, etc.) and troubleshooting.
Refer to this manual for Address Book procedures such as registering fax numbers, e-mail addresses, and user codes.
Network Guide (PDF file - CD-ROM1)
Describes procedures for configuring the machine and computers in a network environment.
Copy Reference
Describes operations, functions, and troubleshooting for the machine's copier function.
Facsimile Reference <Basic Features>
Describes operations, functions, and troubleshooting for the machine's facsimile function.
Facsimile Reference <Advanced Features> (this manual)
Describes advanced functions and settings for key operators.
Printer Reference 1
Describes system settings and operations for the machine's printer function.
Printer Reference 2 (PDF file - CD-ROM1)
Describes operations, functions, and troubleshooting for the machine's printer function.
Scanner Reference (PDF file - CD-ROM1)
Describes operations, functions, and troubleshooting for the machine's scanner function.
i
Manuals for DeskTopBinder Lite
DeskTopBinder Lite is a utility included on the CD-ROM labeled “Scanner Driver & Document Management Utilities”.
•DeskTopBinder Lite Setup Guide (PDF file - CD-ROM2)
Describes installation of, and the operating environment for DeskTopBinder Lite in detail. This guide can be displayed from the [Setup] dialog box when DeskTopBinder Lite is installed.
•DeskTopBinder Lite Introduction Guide (PDF file - CD-ROM2) Describes operations of DeskTopBinder Lite and provides an overview of its functions. This guide is added to the [Start] menu when DeskTopBinder Lite is installed.
•Auto Document Link Guide (PDF file - CD-ROM2)
Describes operations and functions of Auto Document Link installed with DeskTopBinder Lite. This guide is added to the [Start] menu when DeskTopBinder Lite is installed.
Manuals for ScanRouter V2 Lite
ScanRouter V2 Lite is a utility included on the CD-ROM labeled “Scanner Driver & Document Management Utilities”.
•ScanRouter V2 Lite Setup Guide (PDF file - CD-ROM2)
Describes installation of, settings, and the operating environment for ScanRouter V2 Lite in detail. This guide can be displayed from the [Setup] dialog box when ScanRouter V2 Lite is installed.
•ScanRouter V2 Lite Management Guide (PDF file - CD-ROM2)
Describes delivery server management and operations, and provides an overview of ScanRouter V2 Lite functions. This guide is added to the [Start] menu when ScanRouter V2 Lite is installed.
Other manuals
•PostScript3 Supplement (PDF file - CD-ROM1)
•UNIX Supplement (Available from an authorized dealer, or as a PDF file on our Web site.)
ii

TABLE OF CONTENTS |
|
Manuals for This Machine ...................................................................................... |
i |
How to Read This Manual ..................................................................................... |
1 |
Symbols ..................................................................................................................... |
1 |
Names of Major Options ............................................................................................ |
2 |
1. Transmission Mode |
|
Sending at a Specific Time (Send Later) ............................................................. |
3 |
User Transmission................................................................................................. |
5 |
Two-Sided Transmission (Double-Sided Transmission) ................................... |
7 |
E-mail Options........................................................................................................ |
9 |
Fax Header Print .................................................................................................. |
10 |
Label Insertion ..................................................................................................... |
11 |
2. Communication Information |
|
Canceling a Transmission .................................................................................. |
13 |
Printing a List of Files in Memory (Print TX Standby File List) ....................... |
15 |
Checking the Transmission Result (TX File Status)......................................... |
16 |
Checking the Reception Result (RX File Status) .............................................. |
17 |
Printing a File (Print TX Standby File)................................................................ |
18 |
Printing a File Received with Memory Lock (Print Memory Lock File) ........... |
19 |
Printing the Journal ............................................................................................. |
21 |
Journal ..................................................................................................................... |
22 |
E-mail Reception.................................................................................................. |
24 |
3. Other Transmission Features |
|
Handy Dialing Functions..................................................................................... |
25 |
Chain Dial................................................................................................................. |
25 |
(Example) 01133-155533 ...................................................................................... |
25 |
Redial ....................................................................................................................... |
26 |
On Hook Dial ........................................................................................................ |
27 |
Manual Dial ........................................................................................................... |
28 |
Transmission Features........................................................................................ |
29 |
Stamp....................................................................................................................... |
29 |
Detecting Blank Sheet.............................................................................................. |
30 |
iii

More Transmission Functions............................................................................ |
31 |
If Memory Runs Out While Storing an Original ........................................................ |
31 |
Parallel Memory Transmission................................................................................. |
31 |
Checking the Transmission Result........................................................................... |
32 |
Automatic Redial ...................................................................................................... |
32 |
Batch Transmission.................................................................................................. |
32 |
ECM (Error Correction Mode) .................................................................................. |
32 |
Dual Access ............................................................................................................. |
33 |
Transmission with Image Rotation ........................................................................... |
33 |
JBIG Transmission................................................................................................... |
33 |
Transmitting Journal by E-mail................................................................................. |
33 |
Journal by E-mail................................................................................................... |
34 |
Printed Report ...................................................................................................... |
35 |
Memory Storage Report........................................................................................... |
35 |
Transmission Result Report (Memory Transmission) .............................................. |
35 |
Communication Failure Report ................................................................................ |
36 |
Transmission Result Report (Immediate Transmission) .......................................... |
36 |
4. Reception Features |
|
Reception.............................................................................................................. |
37 |
Immediate Reception ............................................................................................... |
37 |
Memory Reception ................................................................................................... |
37 |
Substitute Reception ................................................................................................ |
38 |
Receiving messages unconditionally..................................................................... |
39 |
Receiving messages according to parameter-specified settings........................... |
39 |
Reception Functions ........................................................................................... |
40 |
Forwarding Received Documents ............................................................................ |
40 |
SMTP Reception Using Internet Fax........................................................................ |
41 |
Routing E-mail Received via SMTP ...................................................................... |
42 |
JBIG Reception ........................................................................................................ |
43 |
Auto Fax Reception Power-up ................................................................................. |
43 |
Printing Options................................................................................................... |
44 |
Print Completion Beep ............................................................................................. |
44 |
Checkered Mark....................................................................................................... |
44 |
Center Mark ............................................................................................................. |
44 |
Reception Time ........................................................................................................ |
45 |
Image Rotation......................................................................................................... |
45 |
Combine Two Originals............................................................................................ |
45 |
Page Separation and Length Reduction ................................................................. |
46 |
TSI Print (Transmitting Subscriber Identification Print) ............................................ |
46 |
When There Is No Paper of the Correct Size........................................................... |
47 |
Setting priority trays............................................................................................... |
48 |
Just size printing.................................................................................................... |
48 |
Page Reduction........................................................................................................ |
48 |
iv

5. Using Fax with Computers |
|
Sending Fax Documents from Computers ........................................................ |
49 |
Before Use ............................................................................................................... |
50 |
Installing the Software.............................................................................................. |
50 |
Auto run program................................................................................................... |
50 |
Installing individual applications ............................................................................ |
51 |
Applications Stored on the CD-ROM ....................................................................... |
52 |
LAN-Fax Driver...................................................................................................... |
52 |
Address Book ........................................................................................................ |
52 |
LAN-Fax Cover Sheet Editor ................................................................................. |
52 |
Setting LAN-Fax Properties ..................................................................................... |
53 |
Basic Transmission .................................................................................................. |
54 |
Attaching a cover sheet ........................................................................................ |
56 |
Previewing fax images........................................................................................... |
56 |
Specifying options ................................................................................................. |
56 |
Printing and Saving .................................................................................................. |
58 |
Editing Address Book............................................................................................... |
59 |
Editing Fax Cover Sheets ........................................................................................ |
61 |
Creating a cover sheet .......................................................................................... |
61 |
Attaching a created cover sheet............................................................................ |
61 |
LAN-Fax Operation Messages................................................................................. |
63 |
LAN-Fax Error Report .............................................................................................. |
63 |
LAN-Fax Result by E-mail ..................................................................................... |
63 |
Editing Receiver's Fax Information Via Web Browser...................................... |
64 |
6. Facsimile Features |
|
Function List ........................................................................................................ |
67 |
Accessing User Tools (Facsimile Features)...................................................... |
70 |
Quitting Default Settings .......................................................................................... |
71 |
Print List/Report ....................................................................................................... |
71 |
General Settings/Adjust ........................................................................................... |
72 |
Reception Settings ................................................................................................... |
73 |
E-mail Settings ......................................................................................................... |
73 |
v

7. Key Operator Setting |
|
Key Operator Tools List ...................................................................................... |
75 |
Using Key Operator Settings .............................................................................. |
76 |
Counters................................................................................................................... |
76 |
Forwarding ............................................................................................................... |
76 |
Programming an End Receiver ............................................................................. |
77 |
Quitting the forwarding function............................................................................. |
78 |
Forwarding Mark.................................................................................................... |
78 |
Memory Lock............................................................................................................ |
79 |
User Parameters ...................................................................................................... |
80 |
Changing the User Parameters ............................................................................. |
83 |
Printing the User Parameter List ........................................................................... |
84 |
Home Position ....................................................................................................... |
85 |
Special Senders to Treat Differently ........................................................................ |
89 |
Programming/ Changing Special Senders ............................................................ |
91 |
Deleting a Special Sender ..................................................................................... |
94 |
Programming Initial Set Up of a Special Sender ................................................... |
95 |
Printing the Special Sender List ............................................................................ |
96 |
Programming a Memory Lock ID ............................................................................. |
97 |
Selecting Dial/Push Phone....................................................................................... |
98 |
G3 Analog Line ........................................................................................................ |
98 |
RDS (Remote Diagnostic System)......................................................................... |
100 |
8. Solving Operation Problems |
|
When An Error Report is Printed...................................................................... |
101 |
Turning Off the Main Power/In Case of a Power Failure ................................ |
102 |
When an Error Occurs Using Internet Fax ...................................................... |
103 |
Error Mail Notification............................................................................................. |
103 |
Error Report (Mail) ................................................................................................. |
103 |
Server-Generated Error E-mail .............................................................................. |
103 |
9. Appendix |
|
Replacing the Stamp Cartridge ........................................................................ |
105 |
Connecting the Machine to a Telephone Line and Telephone ...................... |
106 |
Connecting the Telephone Line ............................................................................. |
106 |
Selecting the Line Type.......................................................................................... |
107 |
Connecting the Optional Handset or an External Telephone................................. |
107 |
Optional Equipment........................................................................................... |
109 |
Handset.................................................................................................................. |
109 |
Specifications..................................................................................................... |
110 |
Compatible Machines............................................................................................. |
111 |
Acceptable Types of Originals ............................................................................... |
112 |
Acceptable original sizes ..................................................................................... |
112 |
Paper size and scanned area.............................................................................. |
112 |
Maximum Values................................................................................................ |
115 |
INDEX....................................................................................................... |
116 |
vi

How to Read This Manual
Symbols
In this manual, the following symbols are used:
R WARNING:
This symbol indicates a potentially hazardous situation that might result in death or serious injury when you misuse the machine without following the instructions under this symbol. Be sure to read the instructions, all of which are included in “Safety Information”, Copy Reference.
R CAUTION:
This symbol indicates a potentially hazardous situation that might result in minor or moderate injury or property damage that does not involve personal injury when you misuse the machine without following the instructions under this symbol. Be sure to read the instructions, all of which are included in “Safety Information”, Copy Reference.
* The statements above are notes for your safety.
 Important
If this instruction is not followed, paper might be misfed, originals might be damaged, or data might be lost. Be sure to read this.
 Preparation
This symbol indicates information or preparations required prior to operating.

 Note
Note
This symbol indicates precautions for operation, or actions to take after abnormal operation.
 Limitation
This symbol indicates numerical limits, functions that cannot be used together, or conditions under which a particular function cannot be used.

 Reference
This symbol indicates a reference.
[ ]
Keys that appear on the machine's display panel.
[ ]
Keys and buttons that appear on the computer's display.
{}
Keys built into the machine's control panel.
1

Names of Major Options
The following software products are referred to using a general name:
•DeskTopBinder Lite and DeskTopBinder Professional* → DeskTopBinder *Optional
Major options of this machine are referred to as follows in this manual:
•Auto Document Feeder → ADF
•Auto Document Feeder capable of scanning both side of a sheet → ARDF
2
1. Transmission Mode
Sending at a Specific Time (Send Later)
Using this function, you can instruct the machine to delay transmission of your fax message until a specified later time. This allows you to take advantage of off-peak telephone charges without having to be by the machine at the time.

 Note
Note
You can specify a time within the next 24 hour period.
If the current time shown is not correct, change it. See “Timer Settings”, General Settings Guide.
A Place the original, and then select the scan settings you require.

 Reference
p.15 “Placing Originals”, Facsimile Reference <Basic Features>
p.29 “Scan Settings”, Facsimile
Reference <Basic Features>
B Press [TX Mode].
If you have a non-urgent fax, select Send Later when you scan it. Faxes will be queued in memory and sent during Economy Transmission Time.
 Important
After the machine has been switched off for about one hour, all fax messages stored in memory are lost. If messages are lost for this reason, a Power Failure Report is automatically printed when the main power switch is turned on. Use this report to identify lost messages.
 Limitation
This function is unavailable with Immediate Transmission. Use Memory Transmission.
C Select [Send Later] using {U} or {T}, and then press the {OK} key.
3

Transmission Mode
D Select [Send at specified time] using
{U} or {T}, and then press the {OK} key.
H Specify a destination, and then press the {Start} key.
1

 Note
Note
To cancel the setting, select [Off], and then press the {OK} key. The display returns to that of step C.
E Enter the time using the number keys, and then press [AM/PM].

 Note
Note
If you enter a wrong number, press the {Clear/Stop} key, and then reenter.
To cancel Send Later, press the {Cancel} key. The display returns to that of step C.
F Press the {OK} key.
G Press the {Cancel} key.
The standby display appears.

 Note
Note
To check the settings, press [TX Mode].
4

User Transmission
User Transmission
This function allows you to check each user or department's transmission history. To use the function, you need to program a user code (eight digits max.) for each user or department, to be entered before transmission. See General Settings Guide.
If a user code set with an e-mail address is specified, a transmission result e-mail can be sent.

 Note
Note
You can program codes of up to 8 digits for a maximum of 50 users and/or departments.
You can enter user codes or names into various lists or reports.
You can program transmission operations in User Function key. User Function key let you skip steps B and C.
When you send an Internet Fax document using the user code with e-mail address programmed and "Regist. as Sender" set to [On], the following sender name appears on the e-mail received at the other end. For details about settings, see "User Code (MFP)", General Settings Guide.
•When User Name is programmed in the user code:
User Name <E-mail address programmed in the user code>
•When User Name is not programmed in the user code: E-mail address programmed in the user code
A Place the original, and then select |
1 |
desired scan settings. |

 Reference
p.15 “Placing Originals”, Facsimile Reference <Basic Features>
p.29 “Scan Settings”, Facsimile
Reference <Basic Features>
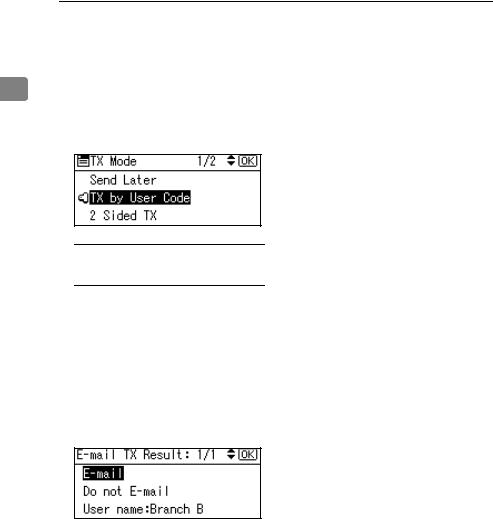
B Press [TX Mode].
C Select [TX by User Code] using {U} or {T}, and then press the {OK} key.
D Using the number keys enter a user code (up to eight characters).

 Note
Note
Entered character is shown by *.
If you enter a wrong code, press the {Clear/Stop} key, and then try again.
To cancel the operation, press the {Cancel}key. The display returns to that of step C.
5
Transmission Mode
When canceling transmission by user code, to delete the programmed user code, press the {Clear/Stop} key, and then the
|
{OK} key. |
|
1 |
||
E Press the {OK} key. |
||
|
The display returns to that of step
C.
When your e-mail address is programmed with the user code
If your e-mail address is programmed with the user code, you can select whether the machine sends transmission result by e- mail.
ASelect [E-mail] or [Do not E-mail] using {U} or {T}, and then press the {OK} key.
The display returns to that of step C.
F Press the {Cancel} key.
The standby display appears.

 Note
Note
To check the settings, press [TX Mode].
G Specify a destination, and then press the {Start} key.
6
Two-Sided Transmission (Double-Sided Transmission)
Two-Sided Transmission (Double-Sided
Transmission)
The optional ARDF is required.
Use this function to send two-sided originals.

 Note
Note
Originals placed on the exposure glass cannot be sent.
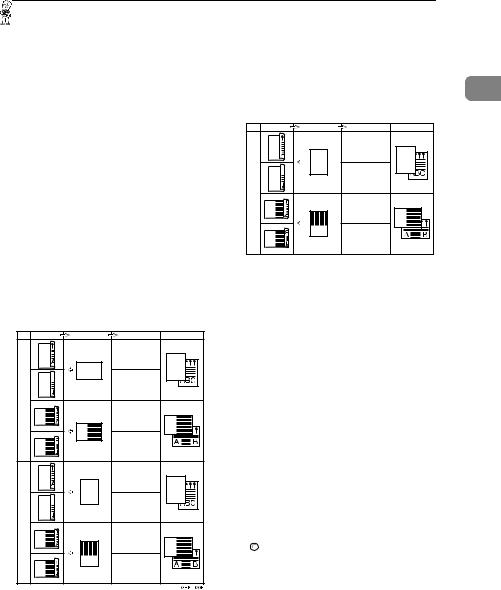
The front and back of the scanned original will be printed in order on separate sheets at the other end. The orientation of alternate sheets may be reversed at the other end. If you want to print the original with the same orientation at the other end, specify the Original Position and Page Opening Orientation.
Original |
Original position |
Page opening orinentation Output at the other end |
x 11" |
|
Top to Top |
/2" |
|
|
|
|
|
1 |
|
|
/2" x 14", 8 |
|
Top to Bottom |
1 |
|
|
11" x 17", 8 |
|
Top to Top |
B4 JIS, A4, |
|
Top to Bottom |
A3, |
|
|
|
|
Top to Top |
/2" |
|
|
1 |
|
|
5 |
|
Top to Bottom |
x |
|
|
/2" |
|
|
|
|
|
1 |
|
|
A5, 8 |
|
|
B5 JIS, |
|
Top to Top |
|
|
|
|
|
Top to Bottom |
1
Original |
Original position |
Page opening orinentation Output at the other end |
|
|
Top to Top |
/2" x 11" |
|
Top to Bottom |
|
|
|
1 |
|
|
A4, 8 |
|
Top to Top |
|
|
Top to Bottom |
|
|
GHPY030E |
p.33 “Transmission with Image Rotation”
This function is only available with Memory Transmission.
This function is only available with the ARDF.
You can confirm whether both sides were properly scanned using the Stamp function. See p.29 “Stamp”.
You can program one of the User Function keys with operations for this function. User Function key let you skip steps B and C.
A Place the original in the ARDF, and then select the scan settings you require.

 Reference
p.15 “Placing Originals”, Facsimile Reference <Basic Features>
p.29 “Scan Settings”, Facsimile
Reference <Basic Features>
7

Transmission Mode
B Press [TX Mode].
1
C Select [2 Sided TX] using {U} or {T}, and then press the {OK} key.
D Specify the transmission mode from [2 Sided from 1st Page] or [1 Sided for 1st Page], and then press the {OK} key.

 Note
Note
To cancel this mode, press the {Cancel} key. The display returns to that of step C.
Select [2 Sided from 1st Page] to send a two-sided original from the first page.
Select [1 Sided for 1st Page] if you want to send a cover letter as the first page.
To cancel the setting, select [Off] using {U} or {T}. The display returns to that of step C.
E Specify the original orientation, and then press the {OK} key.
F Specify the page opening orientation from [Top to Top] or [Top to Bottom].
G Press the {OK} key.
H Press the {Cancel} key.
The standby display appears.

 Note
Note
To check the settings, press [TX Mode].
8

E-mail Options
When using the Internet Fax function, you can make the following settings:
•Attach Subject
You can enter a subject for the e- mail you want to send.

 Note
Note
For convenience, program frequently used subjects. [Urgent] and [High] are programmed by default. See "File Transfer", Network Guide.
If you send e-mail without setting a subject in [E-mail Options] under [TX Mode], the subject is automatically inserted. For details about how a subject is automatically inserted, see p.53 “About the E-mail Subject”, Facsimile Reference <Basic Features>.
You cannot send a subject-only e-mail, with no message.
•Return Receipt
You can confirm sent documents were properly received using notification e-mail or the Journal function.

 Reference
p.49 “Transmitting Internet Fax”,
Facsimile Reference <Basic Features>
E-mail Options
1
9
Transmission Mode
Fax Header Print
In some cases, you may want the oth- 1 er party to receive an unmarked copy of your original. To do this, switch
Fax Header off.
When the Fax Header is set to “On”, the stored name is printed on the receiver's paper.
 Important
In the USA, the Fax Header must contain the telephone number of the line your machine is connected to. It will be printed on the header of every page you send. Required in the USA.

 Note
Note
You can program a fax header name using the Program Fax Information function.
You can select whether or not dates, fax header names, file numbers, or page numbers are printed by changing their respective User Parameters. (switch 18, bit 3, 2, 1, 0) See p.80 “User Parameters”.
You can program one of the User Function keys with operations for this function.
In the USA, law requires that your fax number be included in the Fax Header. Program the fax number and switch on Fax Header Print with User Parameters. See, p.80 “User Parameters”.
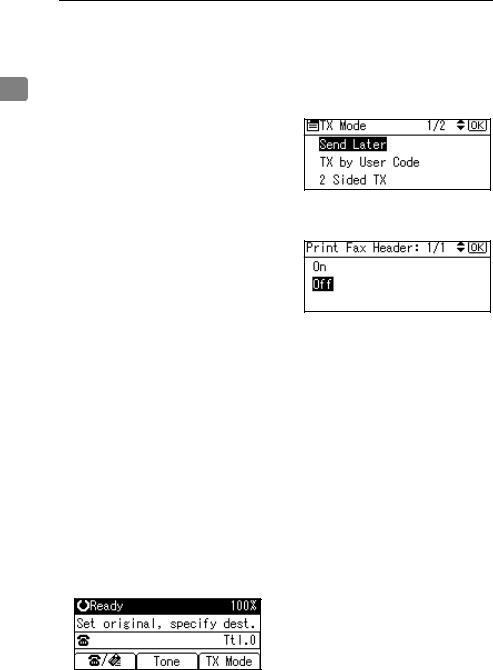
A Press [TX Mode].
B Select [Print Fax Header] using {U} or {T}, and then press the {OK} key.
C Select [On] using {U} or {T}, and then press the {OK} key.
D Press the {Cancel} key.
The standby display appears.

 Note
Note
To check the settings, press [TX Mode].
10
Label Insertion
With this function you can have the receiver name printed on the message when it is received at the other end. The name will be printed at the top of the page and will be preceded by “To:”.

 Note
Note
When there is an image around the area where the Label is to be printed, that image is deleted.
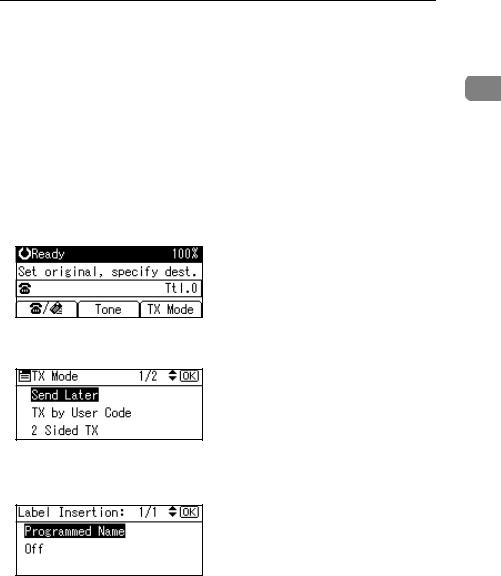
A Press [TX Mode].
B Select [Label Insertion] using {U} or
{T}, and then press the {OK} key.
C Select [Programmed Name] using
{U} or {T}, and then press the {OK} key.
D Press the {Cancel} key.
The standby display appears.

 Note
Note
To check the settings, press [TX Mode].
Label Insertion
1
11

Transmission Mode
1
12
2. Communication
Information
After you have pressed the {Start} key (after scanning originals), you can check and edit the destination or settings of Memory Transmission. You can also cancel a transmission, print a stored file and print a list of stored files.
•Memory Transmission
p.20 “Memory Transmission”, Facsimile Reference <Basic Features>
•Internet Fax Transmission
p.49 “Transmitting Internet Fax”, Facsimile Reference <Basic Features>

 Note
Note
You cannot check or edit a file being sent or received. Also a stored file to be printed as a report cannot be checked or edited.
Canceling a Transmission
You can cancel transmission of a file when the file is being sent, stored in memory, or fails to transmit. All the scanned data is deleted from memory.
You can cancel a file for Memory Transmission. This function is useful to cancel a transmission when you notice a mistake in destination or with the originals after storing. To cancel Memory Transmission, search for the file to be canceled among the files stored in memory, and then delete it.

 Note
Note
If you cancel a transmission while the file is being sent, some pages of your file may have already been sent and will be received at the other end.
If the transmission finishes while you are carrying out this procedure, transmission cannot be canceled.
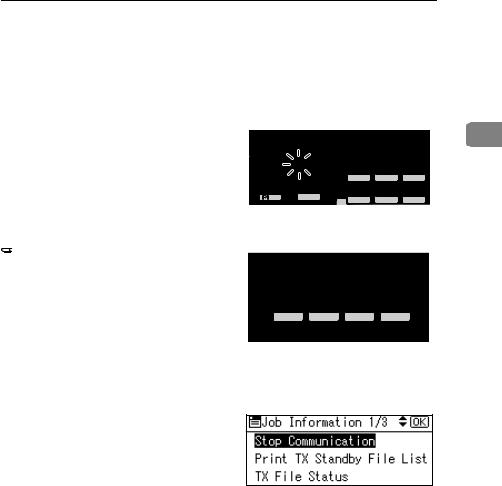
A Press the {Job Information} key.
Search |
Check |
Job |
Scanner |
Destination |
Destination |
Information |
|
01 |
02 |
03 |
04 |
ABC |
DEF |
GHI |
JKL |
05 |
06 |
07 |
08 |
|
|
|
AAN118F |
B Select [Stop Communication] using
{U} or {T}, and then press the {OK} key.
C Select a file whose transmission you want to cancel using {U} or {T}, and then press [Stop TX].
13

Communication Information

 Note
Note
If multiple destinations were specified, only one destination number appears.
D Press [Delete].
2
The selected file is deleted. The display returns to that of step B.

 Note
Note
To quit transmission cancel, press [No].
To cancel another transmission, repeat from step B.
E Press the {Cancel} key.
The standby display appears.
14
Printing a List of Files in Memory (Print TX Standby File List)
Printing a List of Files in Memory (Print TX Standby File List)
Print this list if you want to find out which files are stored in memory and what their file numbers are. Knowing the file number can be useful (for example when erasing files).

 Note
Note
The contents of a file stored in memory can also be printed. See p.18 “Printing a File (Print TX Standby File)”.
A Press the {Job Information} key.
Search |
Check |
Job |
Scanner |
Destination |
Destination |
Information |
|
01 |
02 |
03 |
04 |
ABC |
DEF |
GHI |
JKL |
05 |
06 |
07 |
08 |
|
|
|
AAN118F |
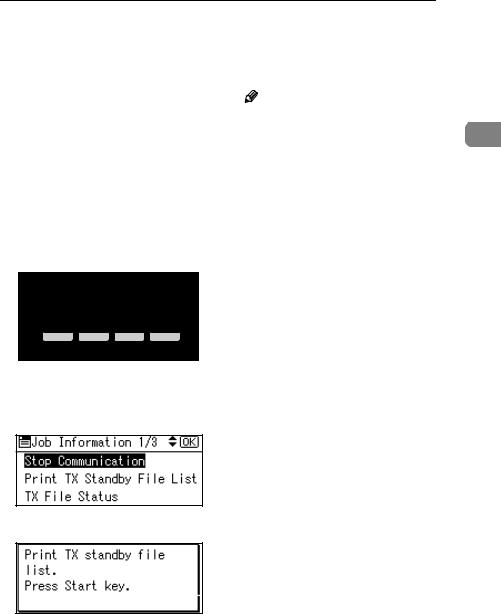
B Select [Print TX Standby File List] using {U} or {T}, and then press the {OK} key.
Note |
|
To cancel printing after pressing |
|
the {Start } key, press the |
2 |
{Clear/Stop} key. The display re- |
turns to that of step B.
D Press the {Cancel} key.
The standby display appears.

 Note
Note
You can print a transmission standby file list using facsimile features, see p . 71 “ Print List/Report” for details.
C Press the {Start} key.
The display returns to that of step
B.
15
Communication Information
Checking the Transmission Result (TX File
Status)
You can browse a part of the Transmission Result Report on the display.
2
 Note
Note
Only the transmission result of the last 100 communications (receptions & transmissions) are shown.
You can also check the transmission result using Web browser. For details, see Web browser Help.
If a transmission is completed while you are using this function, the result will not appear. To view the latest result, exit TX File Status, and then try again.
You can program one of the User Function keys with operations for this function. User Function key let you skip steps A and B. In this case, however, you cannot print a journal.
A Press the {Job Information} key.
Search |
Check |
Job |
Scanner |
Destination Destination Information |
|||
01 |
02 |
03 |
04 |
ABC |
DEF |
GHI |
JKL |
05 |
06 |
07 |
08 |
|
|
|
AAN118F |
B Select [TX File Status] using {U} or |
|||
{T}, and then press the {OK} key. |
|||
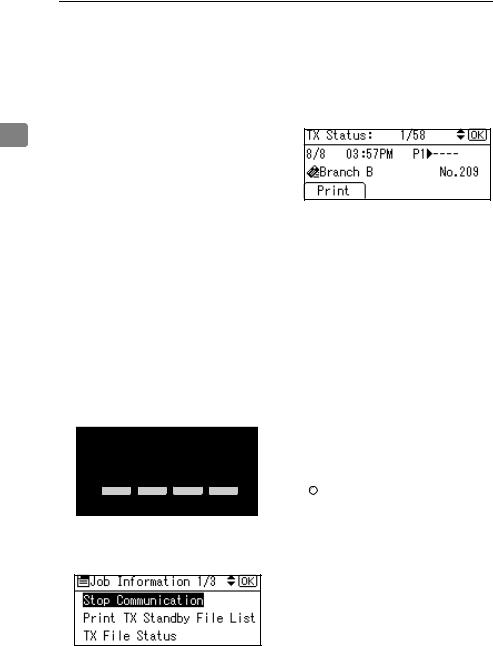
C Check the transmission results using {U} or {T}.
Firstly, the latest transmission result appears.

 Note
Note
When a fax is sent, “Destination” shows the Own Fax Number or Fax Header information of a receiver. The e-mail address and name programmed in the destination list appears in the "To" field of the sent Internet Fax. For a transmission from a computer, “-- LAN-Fax -->” is shown.
To print the journal, press
[Print].
D Press the {Cancel} key twice.
The standby display appears.

 Reference
p.21 “Printing the Journal”
16
Checking the Reception Result (RX File Status)
Checking the Reception Result (RX File
Status)
You can browse a part of the Reception Result Report on the display.

 Note
Note
Only the reception result of the last 100 communications (receptions & transmissions) are shown.
You can also check the reception result using Web browser. For details, see Web browser Help.
If a message is received while you are using this function, the result will not appear. To view the latest result, exit RX File Status, and then try again.
You can program a User Function key with operations for this function. User Function keys let you skip steps A and B. In this case, however, you cannot print a journal.
A Press the {Job Information} key.
Search |
Check |
Job |
Scanner |
Destination Destination Information |
|||
01 |
02 |
03 |
04 |
ABC |
DEF |
GHI |
JKL |
05 |
06 |
07 |
08 |
|
|
|
AAN118F |
B Select [RX File Status] using {U} or |
|||
{T}, and then press the {OK} key. |
|||
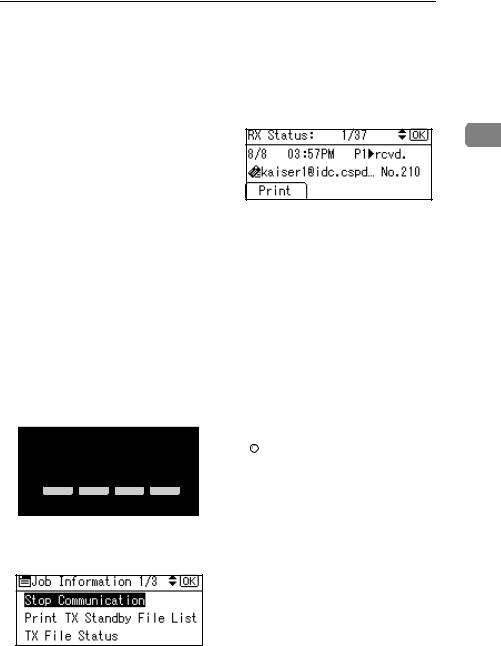
C Check the reception results using
{U} or {T}.
2
Firstly, the latest reception result appears.

 Note
Note
When a fax is received, Transmission Status shows the fax number of a sender or Fax Header information. The sender's e-mail address appears in the "From" field of the received Internet Fax.
To print the journal, press
[Print].
D Press the {Cancel} key twice.
The standby display appears.

 Reference
p.21 “Printing the Journal”
17
Communication Information
Printing a File (Print TX Standby File)
If you want to check the contents of a file that is stored in memory and not yet sent, use this procedure to print it out.
2
 Note
Note
You can also print files that have not been successfully transmitted.
A Press the {Job Information} key.
Search |
Check |
Job |
Scanner |
Destination |
Destination |
Information |
|
01 |
02 |
03 |
04 |
ABC |
DEF |
GHI |
JKL |
05 |
06 |
07 |
08 |
|
|
|
AAN118F |
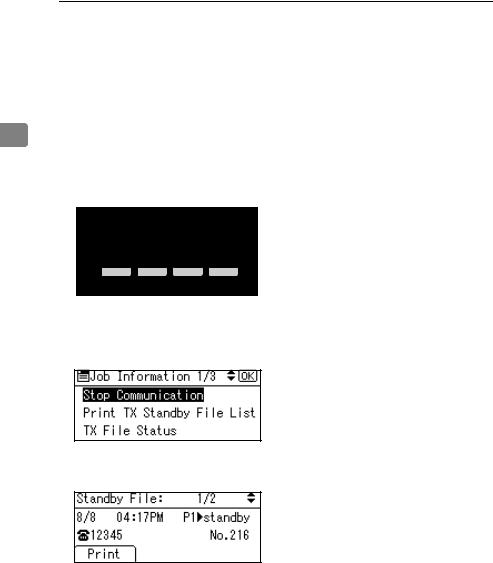
B Select [Print TX Standby File] using
{U} or {T}, and then press the {OK} key.
D Press [Print].
The display returns to that of step
B.
E Press the {Cancel} key.
The standby display appears.

 Note
Note
Repeat from step B, if you want to print another file.
C Select the file you want to print using {U} or {T}.
Firstly, the latest transmission standby file appears.

 Note
Note
If there is no transmission file, the message "No standby files." is shown.
If multiple destinations were specified, only one destination
number appears.
18
Printing a File Received with Memory Lock (Print Memory Lock File)
Printing a File Received with Memory Lock (Print Memory Lock File)
This is a security function designed to prevent unauthorized users from reading your messages. If Memory Lock is switched on, all received messages are stored in memory and are not automatically printed. To print the messages, you have to enter the Memory Lock ID Code. When your machine has received a message with Memory Lock, the Receive File indicator blinks.
 Preparation
Before using this function, program a Memory Lock ID and set Memory Lock to on. See p.97 “Programming a Memory Lock ID” and p.79 “Memory Lock”.
 Important
If the power is cut and remain off for more than an hour, all messages protected by Memory Lock are deleted. When this happens, the Power Failure Report is printed, informing you which messages have been deleted. See p.102 “Turning Off the Main Power/In Case of a Power Failure”.

 Note
Note
Even when Memory Lock is available, reception is not possible if free memory is insufficient.
You can also apply a Memory Lock to messages that come only from certain senders. See p.91 “Programming/ Changing Special Senders”.
A Confirm that the Receive File in-
dicator is blinking.
|
|
Search |
Check |
Job |
2 |
|
Facsimile |
Destination |
Destination |
Information |
|
Commu- |
Receive File |
01 |
02 |
03 |
|
nicating |
|
|
|
|
|
|
Immediate |
ABC |
DEF |
GHI |
|
Start Manual |
Trance. |
|
|
|
|
Memory |
05 |
06 |
07 |
|
|
Reception |
Trance. |
|
|
|
|
|
|
MNO |
PQR |
STU |
|
|
|
|
|
AAN122F |
|
B Press the {Job Information} key.
Search |
Check |
Job |
Scanner |
Destination |
Destination |
Information |
|
01 |
02 |
03 |
04 |
ABC |
DEF |
GHI |
JKL |
05 |
06 |
07 |
08 |
|
|
|
AAN118F |
C Select [Print Memory Lock File] using
{U} or {T}, and then press the {OK} key.

 Note
Note
If no confidential messages have been received, the message "There are no memory lock files." is shown, and then the display returns to that of step C.
19

Communication Information
D Enter a 4-digit Memory Lock ID using the number keys, and then press the {Start} key.
2
The display returns to that of step
C.

 Note
Note
If the Memory Lock ID does not match, the message "Specified code does not match the programmed Memory Lock ID." appears, and then the display returns to that of step D.
To cancel printing after pressing the {S tart} key, press the {Clear/Stop} key. The display returns to that of step C.
E Press the {Cancel} key.
The standby display appears.
20
Printing the Journal
Printing the Journal
The Journal contains information about the last 50 communications (maximum) made by your machine. It is printed automatically after every 50 communications (receptions & transmissions).
You can also print a copy of the Journal at any time by following the procedure below.
 Important
The contents of a Journal printed automatically are deleted after printing. Keep the journal if you require a record of transmissions and receptions. You can check a total of 100 communications (receptions & transmissions) on the display.

 Note
Note
The setting on the machine can be changed so that user codes will be printed instead of user names. For more information, contact your service representative.
The sender name column of the Journal is useful when you need to program a special sender. See p.89 “Special Senders to Treat Differently”.
You can set whether the Journal is automatically printed after every 50 communications in User Parameters. See p.80 “User Parameters” (switch 03, bit 7).
You can set whether you print the Journal by line type. See p.80 “User Parameters” (switch 19, bit 1).
You can program a User Function key with operations for this function. User Function keys let you skip steps A and B.
A Press the {Job Information} key.
Search |
Check |
Job |
Scanner |
Destination |
Destination |
Information |
01 |
02 |
03 |
04 |
2 |
ABC |
DEF |
GHI |
JKL |
|
05 |
06 |
07 |
08 |
|
|
|
|
AAN118F |
|
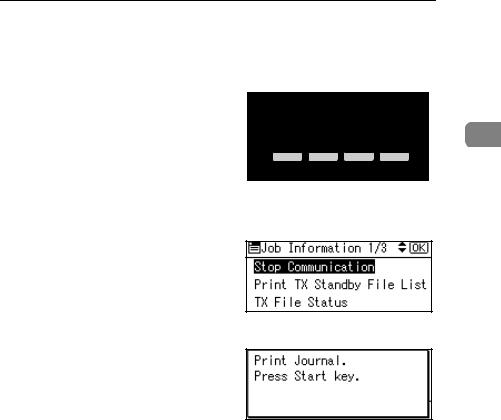
B Select [Print Journal] using {U} or |
|
|||
{T}, and then press the {OK} key. |
|
|||
C Press the {Start} key.

 Note
Note
To cancel printing after pressing the {Start } key, press the {Clear/Stop} key. The display returns to that of step B.
D Press the {Cancel} key.
The standby display appears.
21

Communication Information
Journal |
2 |
AAN080F |
1. Printing date
Shows the date and time when the report is printed.
2. Programmed sender name
Shows the sender name programmed for printing.
3. Date
Shows the transmission or reception date.
4. Time
Shows the transmission or reception start time.
5. Other end
To prioritize a fax number or name programmed in the destination list, contact your service representative.
•For fax destinations
Shows the name (for display) programmed by the other end. Shows the programmed fax number if the name (for display) has not been pro - grammed.
If neither name nor fax number has been programmed by the other end, an entered fax number or a name programmed in a destination list is shown for transmissions. The space will be blank for receptions.
•For Internet Fax destinations
Shows the e-mail address or name programmed in the destination list for transmissions. Shows the number of the destinations after an e-mail address or a name for broadcasting transmissions.
When receiving a fax, the e-mail address of the sender for receptions.
22
 Loading...