


Operating Instructions
Wireless Speaker System
Model No. SC-GA10
Thank you for purchasing this product.
Please read these instructions carefully before using this product, and save this manual for future use.
Model number suffix “EB” denotes UK model.
EB GN
TQBJ2055-1

Safety precautions
WARNING
Unit
≥To reduce the risk of fire, electric shock or product damage,
–Do not expose this unit to rain, moisture, dripping or splashing.
–Do not place objects filled with liquids, such as vases, on this unit.
–Use the recommended accessories.
–Do not remove covers.
–Do not repair this unit by yourself. Refer servicing to qualified service personnel.
–Do not place any item on top of this unit.
AC mains lead
≥To reduce the risk of fire, electric shock or product damage,
–Ensure that the power supply voltage corresponds to the voltage printed on this unit.
–Insert the mains plug fully into the socket outlet.
–Do not pull, bend, or place heavy items on the lead.
–Do not handle the plug with wet hands.
–Hold onto the mains plug body when disconnecting the plug.
–Do not use a damaged mains plug or socket outlet.
≥The mains plug is the disconnecting device.
Install this unit so that the mains plug can be unplugged from the socket outlet immediately.
CAUTION
Unit
≥This unit may receive radio interference caused by mobile telephones during use. If such interference occurs, please increase separation between this unit and the mobile telephone.
≥This unit is intended for use in moderate climates.
≥Do not carry this unit with one hand to prevent injury by dropping.
Placement
≥Place this unit on an even surface.
≥Do not expose this unit to direct sunlight, high temperatures, high humidity, and excessive vibration.
Caution for AC Mains Lead
(For the AC mains plug of three pins)
For your safety, please read the following text carefully.
This appliance is supplied with a moulded three pin mains plug for your safety and convenience.
A 5-ampere fuse is fitted in this plug.
Should the fuse need to be replaced please ensure that the replacement fuse has a rating of 5-ampere and that it is approved by ASTA or BSI to BS1362.
Check for the ASTA mark Ï or the BSI mark Ì on the body of the fuse.
If the plug contains a removable fuse cover you must ensure that it is refitted when the fuse is replaced.
If you lose the fuse cover the plug must not be used until a replacement cover is obtained.
A replacement fuse cover can be purchased from your local dealer.
Before use
Remove the connector cover.
How to replace the fuse
The location of the fuse differ according to the type of AC mains plug (figures A and B). Confirm the AC mains plug fitted and follow the instructions below.
Illustrations may differ from actual AC mains plug.
1. Open the fuse cover with a screwdriver.
Figure A |
Figure B |
Fuse cover
2. Replace the fuse and close or attach the fuse cover.
Figure A |
|
Figure B |
|
Fuse |
Fuse |
|
(5 ampere) |
|
|
(5 ampere) |
|
|
|
2TQBJ2055
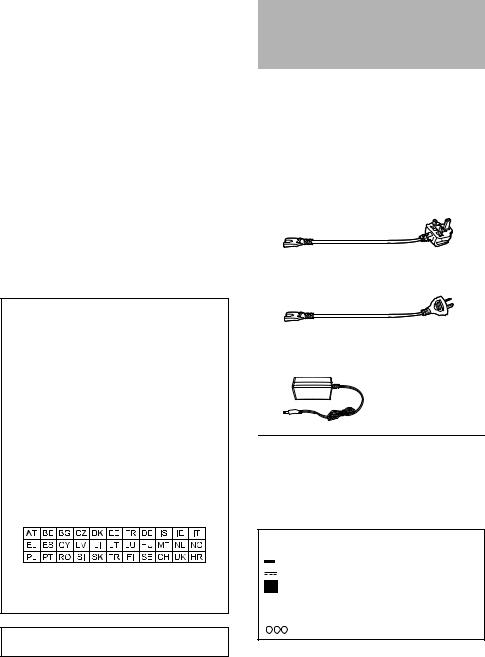
Table of contents |
|
Safety precautions............................................ |
2 |
Accessories ...................................................... |
3 |
Control reference guide .................................... |
4 |
Indicator illumination......................................... |
5 |
Connections...................................................... |
7 |
Network setup................................................... |
8 |
Operations by voice (the Google Assistant).......... |
9 |
Streaming music over the network.................. |
10 |
Bluetooth® operations ..................................... |
12 |
AUX input........................................................ |
13 |
Others............................................................. |
14 |
Troubleshooting.............................................. |
15 |
Specifications.................................................. |
17 |
About Bluetooth®............................................. |
18 |
Unit care ......................................................... |
18 |
Licenses.......................................................... |
18 |
Limited Warranty (ONLY FOR AUSTRALIA)... |
19 |
For the United Kingdom and Ireland
Declaration of Conformity (DoC)
Hereby, “Panasonic Corporation” declares that this product is in compliance with the essential requirements and other relevant provisions of Directive 2014/53/EU.
Customers can download a copy of the original DoC to our RE products from our DoC server: http://www.ptc.panasonic.eu
Contact to Authorised Representative:
Panasonic Marketing Europe GmbH, Panasonic Testing Centre, Winsbergring 15, 22525 Hamburg, Germany
Type of wireless |
Operating |
Maximum Power |
|
Frequency |
(EIRP) |
||
|
|||
|
|
|
|
|
2412 - 2472 MHz |
19 dBm |
|
WLAN |
5180 - 5320 MHz |
19 dBm |
|
|
5500 - 5700 MHz |
19 dBm |
|
|
|
|
|
Bluetooth® |
2402 - 2480 MHz |
4 dBm |
5.15 - 5.35 GHz band is restricted to indoor operations only in the following countries.
The WLAN feature of this product shall exclusively be used inside buildings.
This product on purpose to connect to access point of 2.4 GHz or 5 GHz WLAN.
Product Identification Marking is located on the bottom of the unit.
About descriptions in these operating instructions
≥Pages to be referred to are indicated as “l ±±”.
≥Labels on this unit are indicated as [±±] in these operating instructions.
Accessories
Check the supplied accessories before using this unit.
∏1 AC mains lead
For the United Kingdom and Ireland (K2CT3YY00034)
For Australia and N.Z. (K2CJ2YY00052)
∏1 AC adaptor
(TXH0002FA)
≥Do not use the AC mains lead with other equipment.
≥Product numbers provided in these operating instructions are correct as of October 2017. These may be subject to change.
The symbols on this product (including the accessories) represent the following:
AC
DC
Class II equipment (The construction of the product is double-insulated.)
IOn
ÍStandby


 Positive polarity
TQBJ2055 3

Control reference guide
Top
4
Indicator 10
11 |
12 |
13 |
14 |
Rear |
|
15 |
16 17 |
Front
§These switches work just by touching the marks. To ensure correct operation, touch the centre of the mark.
≥ To avoid operating these switches unintentionally, do not put any object on them.
4TQBJ2055
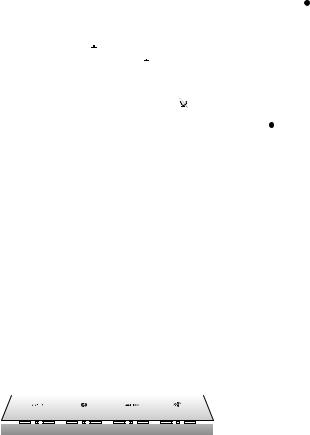
1Standby/on switch [Í/I]
≥Touch to switch the unit from on to standby mode or vice versa. In standby mode, the unit is still consuming a small amount of power.
2 Volume control switch [j VOLUME i]
3Mic mute switch [  ]
]
≥To mute the microphones, touch [ ]. The status indicators will light up in orange. (l 6)
–The unit will not hear any command and your Google Assistant features will not work. To use
your Google Assistant features, touch [  ] again to unmute the microphones.
4Built-in microphone
5Play/pause switch [1/;]
≥Your Google Assistant can be activated when you touch and hold [1/;] for at least two seconds. (l 9)
6 Network selector switch [NET]
7 Bluetooth® selector switch [  ]
]
8AUX selector switch [AUX]
9“Panasonic Music Control” mode selector switch [
 ]
]
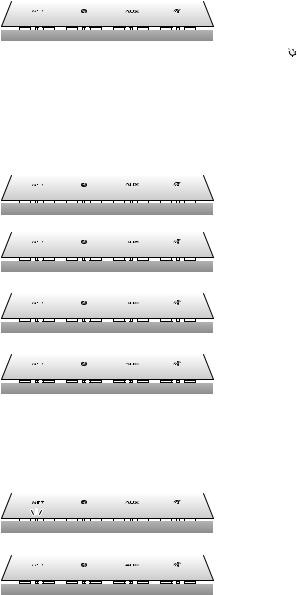
10Status indicators
≥Show the status of your Google Assistant (l below)
≥Show the status of updating firmware (l 6)
11NET (Network) selector indicator (l 6)
12 (Bluetooth®) selector indicator (l 12)
13AUX selector indicator (l 13)
14
 (“Panasonic Music Control” mode) selector indicator (l 11)
15DC IN terminal (l 7)
16LAN port (for service use only)
17AUX IN terminal (l 7)
Indicator illumination
The below illustrates the indicator illumination patterns.
∫ The Google Assistant (l 9)
Indicator |
Description |
||||||||||||||||||
Illumination: white |
All the status indicators light up one by one |
||||||||||||||||||
|
|
|
|
|
|
|
|
|
|
|
|
|
|
|
|
|
|
|
from left to right, then simultaneously blink |
|
|
|
|
|
|
|
|
|
|
|
|
|
|
|
|
|
|
|
slowly |
|
|
|
|
|
|
|
|
|
|
|
|
|
|
|
|
|
|
|
≥ Your Google Assistant is waiting for your |
|
|
|
|
|
|
|
|
|
|
|
|
|
|
|
|
|
|
|
command. |
|
|
|
|
|
|
|
|
|
|
|
|
|
|
|
|
|
|
|
|
|
|
|
|
|
|
|
|
|
|
|
|
|
|
|
|
|
|
|
The status indicator scrolls from the 1st |
|
|
|
|
|
|
|
|
|
|
|
|
|
|
|
|
|
|
|
position (left) to the last position (right) |
|
|
|
|
|
|
|
|
|
|
|
|
|
|
|
|
|
|
|
≥ Your Google Assistant is processing your |
|
|
|
|
|
|
|
|
|
|
|
|
|
|
|
|
|
|
|
request. |
|
|
|
|
|
|
|
|
|
|
|
|
|
|
|
|
|
|
|
All the status indicators blink |
|
|
|
|
|
|
|
|
|
|
|
|
|
|
|
|
|
|
|
simultaneously |
|
|
|
|
|
|
|
|
|
|
|
|
|
|
|
|
|
|
|
≥ Your Google Assistant is responding. |
|
|
|
|
|
|
|
|
|
|
|
|
|
|
|
|
|
|
|
|
TQBJ2055 5
∫ Mic mute
Indicator |
Description |
||||||||||
Illumination: orange |
The 3rd to 6th status indicators light up |
||||||||||
|
|
|
|
|
|
|
|
|
|
|
≥ The microphones are muted. |
|
|
|
|
|
|
|
|
|
|
|
The unit will not hear any command and your |
|
|
|
|
|
|
|
|
|
|
|
Google Assistant features will not work. |
|
|
|
|
|
|
|
|
|
|
|
– To use your Google Assistant features: |
|
|
|
|
|
|
|
|
|
|
|
|
|
|
|
|
|
|
|
|
|
|
|
Touch [ ] again. |
|
|
|
|
|
|
|
|
|
|
|
|
∫ Firmware update (l 14)
Do not disconnect the AC adaptor and the AC mains lead during the update.
≥ During the update process, no operations can be performed, and you cannot use your Google Assistant.
Indicator |
Description |
||||||||||||||||||||
Illumination: white |
The selector indicator scrolls from left to |
||||||||||||||||||||
|
|
|
|
|
|
|
|
|
|
|
|
|
|
|
|
|
|
|
|
|
right |
|
|
|
|
|
|
|
|
|
|
|
|
|
|
|
|
|
|
|
|
|
≥ The unit is starting the firmware update |
|
|
|
|
|
|
|
|
|
|
|
|
|
|
|
|
|
|
|
|
|
process. |
|
|
|
|
|
|
|
|
|
|
|
|
|
|
|
|
|
|
|
|
|
The status indicator scrolls from the 1st |
|
|
|
|
|
|
|
|
|
|
|
|
|
|
|
|
|
|
|
|
|
|
|
|
|
|
|
|
|
|
|
|
|
|
|
|
|
|
|
|
|
|
|
position (left) to the 4th position repeatedly |
|
|
|
|
|
|
|
|
|
|
|
|
|
|
|
|
|
|
|
|
|
≥ The unit is updating the firmware. |
|
|
|
|
|
|
|
|
|
|
|
|
|
|
|
|
|
|
|
|
|
The status indicator scrolls from the 5th |
|
|
|
|
|
|
|
|
|
|
|
|
|
|
|
|
|
|
|
|
|
|
|
|
|
|
|
|
|
|
|
|
|
|
|
|
|
|
|
|
|
|
|
position to the last position (right) |
|
|
|
|
|
|
|
|
|
|
|
|
|
|
|
|
|
|
|
|
|
repeatedly |
|
|
|
|
|
|
|
|
|
|
|
|
|
|
|
|
|
|
|
|
|
≥ The unit is updating the firmware. |
|
|
|
|
|
|
|
|
|
|
|
|
|
|
|
|
|
|
|
|
|
|
|
|
|
|
|
|
|
|
|
|
|
|
|
|
|
|
|
|
|
|
|
The selector indicator scrolls from left to |
|
|
|
|
|
|
|
|
|
|
|
|
|
|
|
|
|
|
|
|
|
right |
|
|
|
|
|
|
|
|
|
|
|
|
|
|
|
|
|
|
|
|
|
≥ The unit is finishing the firmware update |
|
|
|
|
|
|
|
|
|
|
|
|
|
|
|
|
|
|
|
|
|
process. When the scrolling stops, firmware |
|
|
|
|
|
|
|
|
|
|
|
|
|
|
|
|
|
|
|
|
|
|
|
|
|
|
|
|
|
|
|
|
|
|
|
|
|
|
|
|
|
|
|
update is completed. |
|
|
|
|
|
|
|
|
|
|
|
|
|
|
|
|
|
|
|
|
|
|
∫ NET (Network) selector indicator |
|
||||||||||||||||||||
|
|
|
|
|
|
|
|
|
|
|
|
|
|
|
|
|
|
|
|
|
|
Indicator |
Description |
||||||||||||||||||||
Illumination: white |
The Network selector indicator blinks slowly |
||||||||||||||||||||
|
|
|
|
|
|
|
|
|
|
|
|
|
|
|
|
|
|
|
|
|
≥ The unit is ready for the network setup. |
|
|
|
|
|
|
|
|
|
|
|
|
|
|
|
|
|
|
|
|
|
≥ The unit is disconnected from network. |
|
|
|
|
|
|
|
|
|
|
|
|
|
|
|
|
|
|
|
|
|
≥ The network setup has failed. |
|
|
|
|
|
|
|
|
|
|
|
|
|
|
|
|
|
|
|
|
|
The Network selector indicator lights up |
|
|
|
|
|
|
|
|
|
|
|
|
|
|
|
|
|
|
|
|
|
|
|
|
|
|
|
|
|
|
|
|
|
|
|
|
|
|
|
|
|
|
|
≥ The unit is in Network selector mode with |
|
|
|
|
|
|
|
|
|
|
|
|
|
|
|
|
|
|
|
|
|
network connected. |
|
|
|
|
|
|
|
|
|
|
|
|
|
|
|
|
|
|
|
|
|
|
|
|
|
|
|
|
|
|
|
|
|
|
|
|
|
|
|
|
|
|
|
|
6TQBJ2055
 Loading...