


High Speed Laser Fax and Copier
Operating Instructions
Model No. KX-FL511
FOR FAX ADVANTAGE ASSISTANCE:
— PHONE CALL
1-800-HELP-FAX (1-800-435-7329)
—E-MAIL TO consumerproducts@panasonic.com for customers in the U.S.A. or Puerto Rico
—REFER TO
www.panasonic.com
for customers in the U.S.A. or Puerto Rico
Please read these Operating Instructions before using the unit and save for future reference.
This model is designed to be used only in the U.S.A.
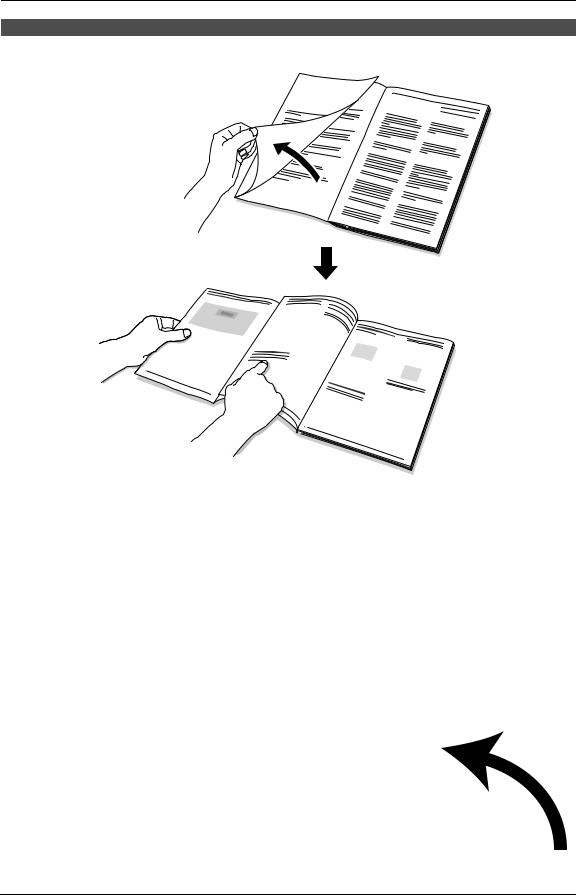
How to use the operating instructions
When following operating instructions, always keep the front cover page (next page) open so that you will find easy reference to the buttons.
OPEN
I

Location of controls
Please keep this page open when following operating instructions.
A |
B |
C |
D |
E F G H I |
|
|
|
|
|
|
|
|
|
|
|
|
|
|
|
|
|
|
|
|
|
|
|
|
|
|
|
|
|
|
|
|
J K L M N O P Q |
R S T U V W |
||||||
Keys |
|
|
|
|
|||
AUTO ANSWER H |
FLASH L |
QUICK SCAN START I |
|||||
BROADCAST C |
HANDSET MUTE K |
REDIAL/PAUSE J |
|||||
CALLER ID PRINT R |
HELP N |
RESOLUTION G |
|||||
CALLER ID SEARCH S |
LOWER T |
SET V |
|||||
CALLER IQ E |
MANUAL BROAD D |
Station keys B |
|||||
COLLATE F |
MENU P |
STOP U |
|||||
COPY START W |
MONITOR M |
TONE A |
|||||
DIRECTORY PROGRAM O |
NAME/TEL NO. T |
VOLUME Q |
|||||
FAX START V |
NAVIGATOR Q |
|
|
|
|||
II

Thank you for purchasing a Panasonic fax machine.
Things you should keep a record of
Attach your sales receipt here.
|
|
|
|
|
|
|
|
|
|
|
|
|
|
|
|
|
|
|
|
|
|
|
|
|
|
|
|
|
|
|
|
|
|
|
|
|
|
|
|
|
|
|
|
|
|
|
|
|
|
|
|
|
|
|
|
|
|
|
|
|
|
|
|
|
|
|
|
|
|
|
|
|
|
|
|
|
|
|
|
|
|
|
|
|
|
|
|
|
|
|
|
|
|
For your future |
reference |
|
|
|
|
|
|
|
|
|
|
|
|
|
|
|
|
|
|
|
|
|
||||||||||||||||||||||||
|
Date of purchase |
|
Serial number |
|
||||||||||||||||||||||||||||||||||||||||||
|
|
|
|
|
|
|
|
|
|
|
|
|
|
|
|
|
|
|
|
|
|
|
|
|
|
|
|
|
||||||||||||||||||
|
|
|
|
|
|
|
|
|
|
|
|
|
|
|
|
|
|
|
|
|
|
|
|
|
|
|
(found on the rear of the unit) |
|
||||||||||||||||||
|
Dealer’s name and address |
|
|
|
|
|
|
|
|
|
|
|
|
|
|
|
|
|
|
|
|
|
||||||||||||||||||||||||
|
|
|
|
|
|
|
|
|
|
|
|
|
|
|
|
|
|
|
|
|
|
|
||||||||||||||||||||||||
|
Dealer’s telephone number |
|
|
|
|
|
|
|
|
|
|
|
|
|
|
|
|
|
|
|
|
|
||||||||||||||||||||||||
|
|
|
|
|
|
|
|
|
|
|
|
|
|
|
|
|
|
|
|
|
|
|
|
|
|
|
|
|
|
|
|
|
|
|
|
|
|
|
|
|
|
|
|
|
|
|
Caution:
LThe Telephone Consumer Protection Act of 1991 makes it unlawful for any person to use a computer or other electronic device, including fax machines, to send any message unless such message clearly contains in a margin at the top or bottom of each transmitted page or on the first page of the transmission, the date and time it is sent and an identification of the business or other entity, or other individual sending the message and the telephone number of the sending machine or such business, other entity, or individual. (The telephone number provided may not be a 900 number or any other number for which charges exceed local or long-distance transmission charges.)
In order to program this information into your fax machine, you should complete the instructions on page 28 to page 30.
L Do not rub or use an eraser on the printed side of recording paper, as the print may smear.
Energy Star:
LAs an ENERGY STAR® Partner, Panasonic has determined that this product meets the ENERGY STAR guidelines for energy efficiency.
ENERGY STAR is a U.S. registered mark.
Trademarks:
L openLCR and openLCR.com are the trademarks of openLCR.com, Inc.
L All other trademarks identified herein are the property of their respective owners.
Copyright:
LThis manual is copyrighted by Panasonic Communications Co., Ltd. (PCC) and its licensee. Under the copyright laws, this manual may not be reproduced in any form, in whole or part, without the prior written consent of PCC and its licensee.
©Panasonic Communications Co., Ltd. 2003
2

Safety Instructions
Important safety instructions
When using this unit, basic safety precautions should always be followed to reduce the risk of fire, electric shock, or personal injury.
1.Read and understand all instructions.
2.Follow all warnings and instructions marked on this unit.
3.Unplug this unit from power outlets before cleaning. Do not use liquid or aerosol cleaners. Use a damp cloth for cleaning.
4.Do not use this unit near water, for example near a bathtub, wash bowl, kitchen sink, etc.
5.Place the unit securely on a stable surface. Serious damage and/or injury may result if the unit falls.
6.Do not cover slots and openings on the unit. They are provided for ventilation and protection against overheating. Never place the unit near radiators, or in a place where proper ventilation is not provided.
7.Use only the power source marked on the unit. If you are not sure of the type of power supplied to your home, consult your dealer or local power company.
8.For safety purposes this unit is equipped with a grounded plug. If you do not have this type of outlet, please have one installed. Do not defeat this safety feature by tampering with the plug.
9.Do not place objects on the power cord. Install the unit where no one can step or trip on the cord.
10.Do not overload power outlets and extension cords. This can result in the risk of fire or electric shock.
11.Never push any objects through slots in this unit. This may result in the risk of fire or electric shock. Never spill any liquid on the unit.
12.To reduce the risk of electric shock, do not disassemble this unit. Take the unit to an authorized service center when service is required. Opening or removing covers may expose you to dangerous voltages or other risks. Incorrect reassembly can cause electric shock when the unit is subsequently used.
13.Unplug this unit from power outlets and refer servicing to an authorized service center when the following conditions occur:
A.When the power cord is damaged or frayed.
B.If liquid has been spilled into the unit.
C.If the unit has been exposed to rain or water.
D.If the unit does not work normally by following the operating instructions. Adjust only controls covered by the operating instructions. Improper adjustment may require extensive work by an authorized service center.
E.If the unit has been dropped or physically damaged.
F.If the unit exhibits a distinct change in performance.
14.During thunderstorms, avoid using telephones except cordless types. There may be a remote risk of an electric shock from lightning.
15.Do not use this unit to report a gas leak, when in the vicinity of the leak.
SAVE THESE INSTRUCTIONS
INSTALLATION:
L After moving the unit from cold areas to warmer areas, let the unit adjust to the warmer temperature and do not connect the unit for about 30 minutes. If the unit is connected too soon after a sudden climate change, condensation may form inside the unit causing malfunction.
L Never install telephone wiring during a lightning storm.
LNever install telephone jacks in wet locations unless the jack is specifically designed for
wet locations.
L Never touch uninsulated telephone wires or terminals unless the telephone line has been disconnected at the network interface.
LUse caution when installing or modifying telephone lines.
WARNING:
LTo prevent the risk of fire or electrical shock, do not expose this product to rain or any type of moisture.
For Fax Advantage assistance, call 1-800-435-7329. |
3 |
Safety Instructions
OTHER INFORMATION:
L Keep the unit away from electrical noise generating devices, such as fluorescent lamps and motors.
LThe unit should be kept free from dust, high temperature and vibration.
LThe unit should not be exposed to direct sunlight.
L Do not place heavy objects on top of this unit. L Do not touch the plug with wet hands.
CAUTION:
Laser radiation
LThe printer of this unit utilizes a laser. Use of controls or adjustments or performance of procedures other than those specified herein may result in hazardous radiation exposure.
–If any toner comes into contact with your eyes, flush them thoroughly with water, and seek medical treatment.
–If any toner comes into contact with your skin, wash the area thoroughly with soap and water.
Drum unit
LRead the instructions on page 10 before you begin installation of the drum unit. After you have read them, open the drum unit protection bag. The drum unit contains a photosensitive drum. Exposing it to light may damage the drum. Once you have opened the protection bag:
–Do not expose the drum unit to light for more than 5 minutes.
–Do not touch or scratch the green drum surface.
–Do not place the drum unit near dust or dirt, or in a high humidity area.
–Do not expose the drum unit to direct sunlight.
1
Fuser unit
Fuser unit
L The fuser unit gets hot. Do not touch it.
LDuring or immediately after printing, the area near the recording paper exit (1) also gets warm. This is normal.
Toner cartridge
LBe careful of the following when you handle the toner cartridge:
–Do not leave the toner cartridge out of the protection bag for a long time. It will decrease the toner life.
–If you ingest any toner, drink several glasses of water to dilute your stomach contents, and seek immediate medical treatment.
4 |
For Fax Advantage assistance, call 1-800-435-7329. |

Table of Contents
1. Introduction and |
|
|
Installation |
|
|
Accessories |
|
|
1.1 |
Included accessories.......................... |
7 |
1.2 |
Accessory information ........................ |
8 |
Finding the Controls |
|
|
1.3 |
Description of buttons......................... |
8 |
1.4 |
Overview ............................................ |
9 |
Installation |
|
|
1.5 |
Toner cartridge and drum unit ......... |
10 |
1.6 |
Paper tray ......................................... |
12 |
1.7 |
Paper stacker.................................... |
12 |
1.8 |
Document stacker............................. |
13 |
1.9 |
Handset cord .................................... |
13 |
1.10 |
Recording paper............................... |
13 |
2. Preparation
Connections and Setup
2.1Selecting the way to use your fax
machine............................................ |
15 |
2.2 Case 1: FAX ONLY ........................... |
16 |
2.3Case 2a: Distinctive Ring (1 phone line
with 2 or more phone numbers) ....... |
17 |
2.4Case 2b: Distinctive Ring (using with
|
voice mail service)............................ |
19 |
2.5 |
Case 3: EXT. TAM ............................ |
21 |
2.6 |
Case 4: TEL ONLY ........................... |
23 |
2.7Case 5: FAX with PC MODEM (one
|
phone number) ................................. |
25 |
Help Button |
|
|
2.8 |
Help function .................................... |
27 |
Volume |
|
|
2.9 |
Adjusting volume .............................. |
27 |
Initial Programming |
|
|
2.10 |
Date and time ................................... |
28 |
2.11 |
Your logo........................................... |
29 |
2.12 |
Your fax number ............................... |
30 |
3. Telephone
Automatic Dialing
3.1Storing names and telephone numbers
into one-touch dial ............................ |
31 |
3.2Storing names and telephone numbers
|
into the navigator directory ............... |
31 |
3.3 |
Editing a stored entry ....................... |
32 |
3.4 |
Erasing a stored entry ...................... |
32 |
3.5Making a phone call using one-touch
dial and navigator directory .............. |
32 |
Caller ID |
|
3.6 Caller ID service ............................... |
33 |
3.7Viewing and calling back using caller
|
information........................................ |
33 |
3.8 |
Printing the Caller ID list................... |
34 |
3.9 |
Erasing caller information ................. |
34 |
3.10 |
Storing caller information.................. |
34 |
4. Fax |
|
|
Sending Faxes |
|
|
4.1 |
Sending a fax manually .................... |
36 |
4.2 |
Documents you can send ................. |
37 |
4.3Sending a fax using one touch dial and
|
navigator directory............................ |
37 |
4.4 |
Broadcast transmission .................... |
38 |
Receiving Faxes |
|
|
4.5 |
Receiving a fax manually.................. |
39 |
4.6 |
Receiving a fax automatically ........... |
40 |
4.7Junk fax prohibitor (preventing fax
reception from undesired callers) ..... |
40 |
4.8 Programming undesired callers........ |
41 |
5. Distinctive Ring
Distinctive Ring
5.1Distinctive Ring service from your
phone company ................................ |
42 |
5.2Using two or more phone numbers in a
single telephone line......................... |
42 |
5.3Using three or more phone numbers in
a single telephone line...................... |
42 |
5.4Programming the ring pattern assigned
|
for fax................................................ |
43 |
6. Copy |
|
|
Copying |
|
|
6.1 |
Making a copy .................................. |
44 |
7. Programmable Features |
|
|
Features Summary |
|
|
7.1 |
Programming .................................... |
46 |
7.2 |
Basic features................................... |
46 |
7.3 |
Advanced features............................ |
47 |
7.4Direct commands for programming
|
features............................................. |
49 |
8. Help |
|
|
Error Messages |
|
|
8.1 |
Error messages – Reports ............... |
51 |
8.2 |
Error messages – Display ................ |
51 |
Frequently Asked Questions
8.3When a function does not work, check
here .................................................. |
53 |
Replacement
8.4Replacing the toner cartridge and the
drum unit ......................................... |
56 |
5

Table of Contents |
|
|
Jams |
|
|
8.5 |
Recording paper jam ........................ |
58 |
8.6 |
Document jams - sending................. |
60 |
Cleaning |
|
|
8.7 |
Cleaning the inside of the unit .......... |
61 |
9. Caller IQ Feature
Caller IQ Feature
9.1openLCR service for the Caller IQ
feature .............................................. |
64 |
9.2 To turn the Caller IQ ON / OFF......... |
64 |
9.3Updating the rate table (downloading
|
the rate table) ................................... |
64 |
9.4 |
Downloading information .................. |
65 |
9.5 |
Viewing information .......................... |
65 |
9.6 |
Printing information .......................... |
65 |
10.General Information |
|
|
Printed Reports |
|
|
10.1 |
Reference lists and reports .............. |
66 |
Specifications |
|
|
10.2 |
Technical data about this product..... |
67 |
FCC and Other Information |
|
|
10.3 |
FCC and Other Information .............. |
70 |
Limited Warranty |
|
|
10.4 |
Limited Warranty .............................. |
72 |
Customer Services |
|
|
10.5 |
Customer Services directory ............ |
74 |
11.Index |
|
|
11.1 |
Index................................................ |
75 |
6

1. Introduction and Installation
1.1 Included accessories
No. |
Item |
Part number*1 |
Quantity |
Specifications |
1 |
Power cord |
PFJA1030Z |
1 |
---------- |
|
|
|
|
|
2 |
Telephone line cord |
PQJA10075Z |
1 |
---------- |
|
|
|
|
|
3 |
Handset |
PFJXE0805Z |
1 |
---------- |
|
|
|
|
|
4 |
Handset cord |
PFJA1029Z |
1 |
---------- |
|
|
|
|
|
5 |
Paper stacker |
PFKS1096Z1 |
1 |
|
|
|
|
|
|
6 |
Paper tray |
PFKS1085Z1 |
1 |
---------- |
|
|
|
|
|
7 |
Drum unit |
KX-FA84 |
1 |
See page 69. |
|
|
|
|
|
8 |
Toner cartridge |
---------- |
1 |
prints about 800 letter- |
|
(complementary starter toner |
|
|
sized pages with a 5% |
|
cartridge) |
|
|
image area (page 69). |
|
|
|
|
|
9 |
A4 paper guides |
PFZXFL511M |
2 |
---------- |
|
|
|
|
|
j |
Operating instructions |
PFQX1823Z |
1 |
---------- |
|
|
|
|
|
k |
Quick start sheet |
PFQW1969Z |
1 |
---------- |
|
|
|
|
|
*1 Part numbers are subject to change without notice.
Note:
L If any items are missing or damaged, check with the place of purchase.
L Save the original carton and packing materials for future shipping and transportation of the unit.
1 |
2 |
3 |
4 |
5 |
6 |
7 |
8 |
9 |
j |
k
For Fax Advantage assistance, call 1-800-435-7329. |
7 |

1. Introduction and Installation
1.2 Accessory information
To ensure that the unit operates properly, we recommend the use of a Panasonic toner cartridge and drum unit.
1.2.1 Available accessories
–Replacement toner cartridge (KX-FA83)
–Replacement drum unit (KX-FA84)
LTo place an order:
Telephone:
1-800-332-5368.
Fax:
1-800-237-9080. Include:
–your name, shipping address and telephone number
–credit card type, number, expiration date and your signature
–part number and quantity
Internet:
Visit our web site: http://www.panasonic.com/store (for customers in the U.S.A. ONLY)
LIf you have any questions about internet orders, please contact us at:
E-mail: panasonicdirect@panasonic.com
Telephone:
1-866-888-2929
1.3 Description of buttons
LKeep the front cover page open for button locations.
A{TONE}
LTo change from pulse to tone temporarily during dialing when your line has rotary pulse services.
BStation keys
L To use one-touch dial (page 31, 32, 37).
C{BROADCAST}
LTo transmit a document to multiple parties (page 38, 39).
D{MANUAL BROAD}
LTo transmit a document to multiple parties manually (page 38, 39).
E{CALLER IQ}
L To use the Caller IQ feature (page 64).
F{COLLATE}
L To make a collated copy (page 44).
G{RESOLUTION}
L To select a resolution (page 36, 44).
H{AUTO ANSWER}
LTo turn ON/OFF the auto answer setting (page 39, 40).
I{QUICK SCAN START}
LTo store a scanned document into memory, and then send it (page 36).
J{REDIAL/PAUSE}
L To redial the last number dialed. L To insert a pause during dialing.
K{HANDSET MUTE}
LTo mute your voice to the other party during a conversation. Press this button again to resume the conversation.
L{FLASH}
L To access special telephone services such as call waiting or for transferring extension calls.
M{MONITOR}
L To initiate dialing.
N{HELP}
L To print a quick reference (page 27).
O{DIRECTORY PROGRAM}
LTo store or edit names and telephone numbers (page 31).
P{MENU}
L To initiate or exit programming.
Q{NAVIGATOR}{VOLUME}
L To adjust volume (page 27).
L To search for a stored entry (page 32, 37).
LTo select features or feature settings during programming (page 46).
L To navigate to the next operation.
R{CALLER ID PRINT}
L To print the Caller ID list (page 34).
S{CALLER ID SEARCH}
L To view caller information (page 33).
T{LOWER}{NAME/TEL NO.}
L To select stations 12–22 for one-touch dial (page 31, 32, 37).
LTo change the display of the caller information (page 33).
U{STOP}
L To stop an operation or programming.
V{FAX START}{SET}
L To initiate fax transmission or reception. L To store a setting during programming.
W{COPY START}
L To initiate copying (page 44).
8 |
For Fax Advantage assistance, call 1-800-435-7329. |
1. Introduction and Installation
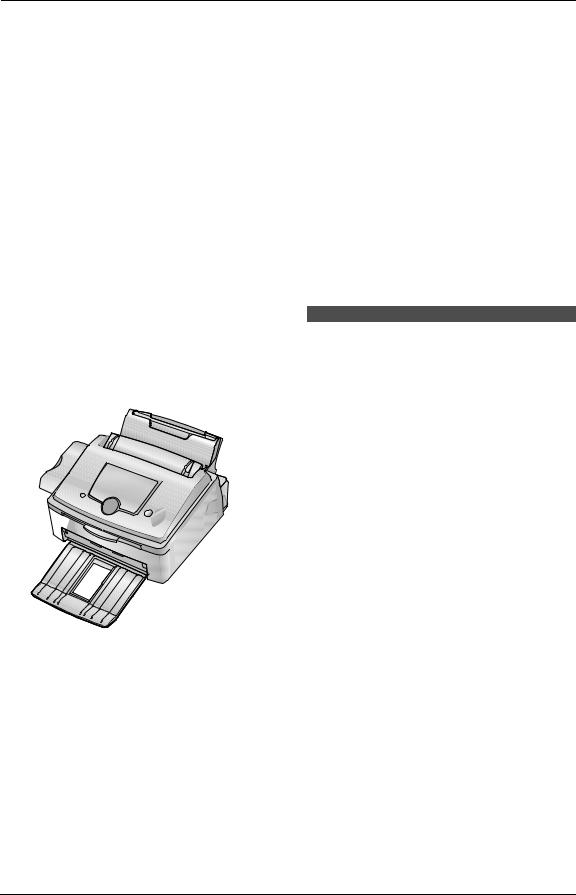
1.4 Overview
1 2 3 4 5 6
7 8 9 j k l
1Handset
2Speaker
3Document guides
4Paper tray
5Recording paper entrance
6Tension plate
7Paper stacker*1
8Document stacker*1
9Recording paper exit
j Document exit k Front cover
l Document entrance
*1 The paper stacker and document stacker may not be shown in all illustrations.
For Fax Advantage assistance, call 1-800-435-7329. |
9 |
1. Introduction and Installation
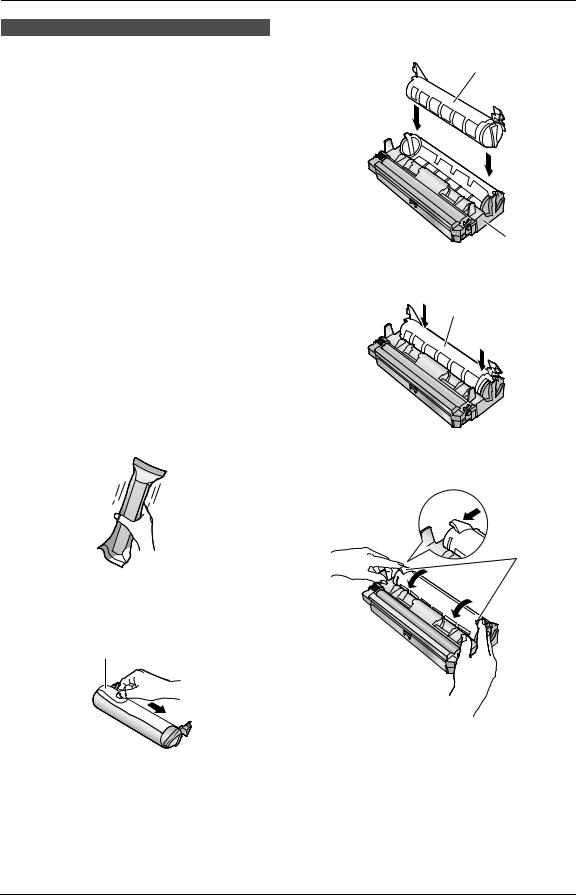
1.5 Toner cartridge and drum unit
Caution:
LRead the following instructions before you begin installation. After you have read them, open the drum unit protection bag. The drum unit contains a photosensitive drum. Exposing it to light may damage the drum. Once you have opened the protection bag:
–Do not expose the drum unit to light for more than 5 minutes.
–Do not touch or scratch the green drum surface.
–Do not place the drum unit near dust or dirt, or in a high humidity area.
–Do not expose the drum unit to direct sunlight.
LDo not leave the toner cartridge out of the protection bag for a long time. It will decrease the toner life.
1Before opening the protection bag of the new toner cartridge, shake it vertically more than 5 times.
3Place the toner cartridge (1) into the drum unit (2) vertically.
1
2
4Firmly press down the toner cartridge to snap into position (1).
1
5Turn the two levers (1) on the toner cartridge firmly.
1
2 Remove the toner cartridge and drum unit from the protection bags. Peel off the seal (1) from the toner cartridge.
1
10 |
For Fax Advantage assistance, call 1-800-435-7329. |

1. Introduction and Installation
6Make sure that the triangles (1) match, to install the toner cartridge correctly.
1
LIf the lower glass (3) is dirty, clean it with a soft and dry cloth.
3
7Lift open the front cover (1), holding OPEN (2).
1
 2
2
8Install the drum and toner unit (1) by holding the tabs.
2
1
L Do not touch the transfer roller (2).
9Close the front cover (1) by pushing down on both sides, until locked.
1
LWhile the unit displays “PLEASE WAIT”, do not open the front cover, or disconnect the power cord.
Toner save feature
If you want to reduce toner consumption, set the toner save setting to ON (feature #79 on page 49). The toner cartridge will last approximately 40% longer. This feature may lower the print quality.
For Fax Advantage assistance, call 1-800-435-7329. |
11 |

1. Introduction and Installation
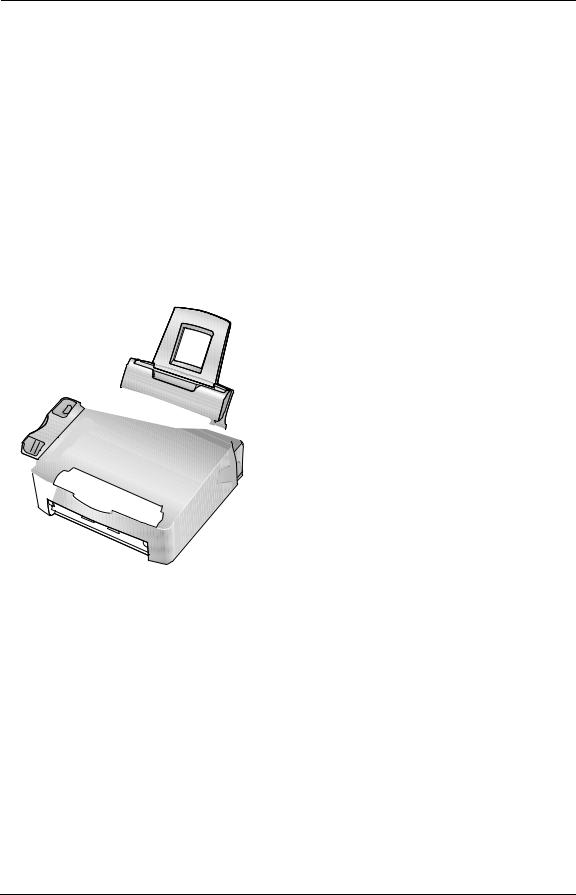
1.6 Paper tray
Insert the paper tray (1) into the slot (2) on the back of the unit.
1
2
3
Note:
LDo not place the unit in an area where the paper tray may be obstructed (i.e., by a wall,
etc.).
LKeep this surface (3) away from walls etc. more than 50 mm (131/32") to let the unit cool down.
1.7 Paper stacker
Line up the slots (1) in the paper stacker with the pegs (2) on the bottom of the unit, then insert the two tabs of the paper stacker into the slots on the unit (3).
2
 3
3
1
Note:
LDo not place the unit in an area where the paper stacker obstructs a walkway or is
easily bumped in to.
LDocument and recording paper will be ejected from the front of the unit. Do not place
anything in front of the unit.
LThe paper stacker can hold up to approximately 100 sheets of printed paper. Remove the printed paper before the paper stacker becomes full.
12 |
For Fax Advantage assistance, call 1-800-435-7329. |
1. Introduction and Installation
|
|
|
1.8 Document stacker |
|
1.9 Handset cord |
Pull the document stacker (1) forward gently until it clicks into place, then press the center part of the document stacker (2) to open the extender (3).
Connect the handset cord (1).
|
|
1 |
1 |
|
1.10 Recording paper |
|
|
A4, letter or legal size recording paper can be |
|
|
used for fax messages. The unit can hold up to |
|
|
220 sheets of 60 g/m2 to 75 g/m2 (16 lb. to 20 lb.) |
|
|
paper, 200 sheets of 80 g/m2 (21 lb.) or 180 |
|
2 |
sheets of 90 g/m2 (24 lb.) paper. |
|
See the note for paper specifications (page 68). |
|
|
|
|
|
|
L The unit is set for letter size paper by default. |
|
|
If you want to use legal or A4 size paper, |
|
|
change the setting (feature #16 on page 47). |
|
|
1 Before inserting a stack of paper, fan the |
|
|
paper to prevent paper jams. |
3

For Fax Advantage assistance, call 1-800-435-7329. |
13 |

1. Introduction and Installation
2Pull the tension plate forward (1) and insert the paper, print-side down (2), then push the tension plate (3) back.
2
4
 1
1
4
 3
3 
L The paper should not be over the tabs (4).
LIf the paper is not inserted correctly, readjust the paper, or the paper may jam.
Correct |
|
|
Incorrect |
|
|
|
|
|
|
|
|
|
|
|
To use A4 size paper
Insert the tabs on the A4 paper guides (1) into the slots.
1
L“L” is shown on the A4 paper guide for the left side.
“R” is shown on the A4 paper guide for the right side.
14 |
For Fax Advantage assistance, call 1-800-435-7329. |

2. Preparation
2.1 Selecting the way to use your fax machine
Depending on your situation, you can select the way you prefer to use your fax machine in Quick Setup feature #00.
You can print out the Quick Setup Guide for your assistance.
–Case 1: FAX ONLY (page 16)
–Case 2a: Distinctive Ring (1 phone line with 2 or more phone numbers) (page 17)
–Case 2b: Distinctive Ring (using with voice mail service) (page 19)
–Case 3: EXT. TAM (page 21)
–Case 4: TEL ONLY (page 23)
–Case 5: FAX with PC MODEM (one phone number) (page 25)
L You cannot select case 5 in feature #00.
{MENU} {A}{B} |
{SET} |
1Press {MENU}.
2Press {#} then {0}{0}.
QUICK SETUP
PRESS SET
3 Press {SET}.
L The Quick Setup Guide will be printed.
4Press {A} or {B} repeatedly to display the desired setting.
5Press {SET}.
6Press {MENU}.
2.1.1 Connections
Connect to LINE.
(Lineprotectorsurge)
|
To a single |
|
|
telephone |
|
Telephone line cord |
line jack |
|
(RJ11C) |
||
|
To a power outlet (120 V, 60 Hz)
Power cord (Powerprotectorsurge)
Using surge protectors
LThe warranty does not cover damage due to power line surges or lightning. For additional equipment protection, we recommend the use of a surge protector.
Caution:
LWhen you operate this product, the power outlet should be near the product and easily accessible.
Note:
LTo avoid malfunction, do not position fax machine near appliances such as TVs or
speakers which generate an intense magnetic field.
LIf any other device is connected on the same line, this unit may disturb the network condition of the device.
For Fax Advantage assistance, call 1-800-435-7329. |
15 |
2. Preparation
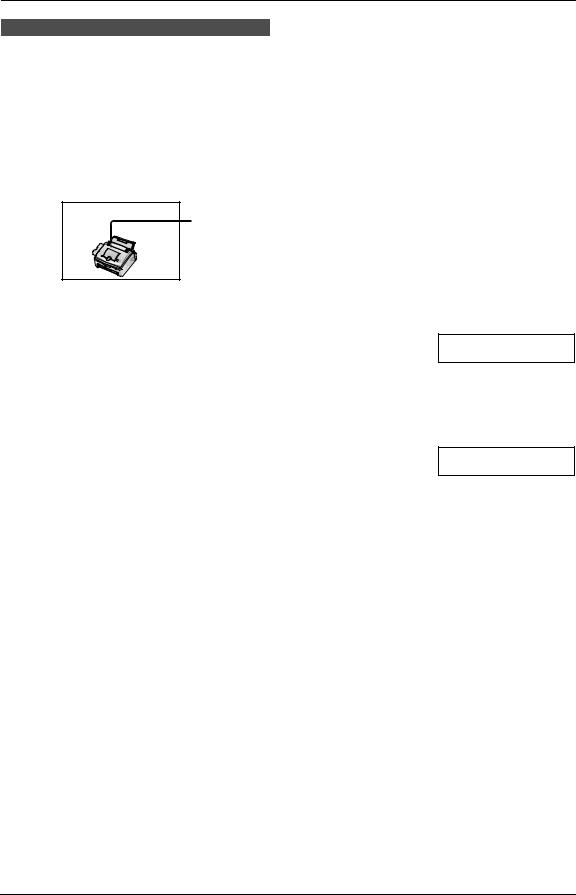
2.2 Case 1: FAX ONLY
2.2.1 Your situation
You wish to use the fax machine only for fax reception/transmission.
2.2.2 Telephone wiring image in house or office
Single telephone
line
(1 phone
number)
Fax machine
2.2.3 Connections for Case 1
Connect to LINE.
To a single telephone line jack
Telephone line cord
To a power outlet
Power cord
2.2.4 How to setup
ON
{MENU} {A}{B} |
{SET} |
1Press {MENU}.
2Press {#} then {0}{0}.
QUICK SETUP
PRESS SET
3 Press {SET}
L The Quick Setup Guide will be printed.
4Press {A} or {B} repeatedly to display the following.
SELECT A SETUP =FAX ONLY [±]
5Press {SET}.
6Press {MENU}.
L The AUTO ANSWER light is ON.
Note:
LThe ring count is set to 2. You can change the ring setting in feature #06 (page 47).
2.2.5 How to receive calls
Just leave it. When the other party sends a fax, the fax machine will receive it automatically.
16 |
For Fax Advantage assistance, call 1-800-435-7329. |
2. Preparation
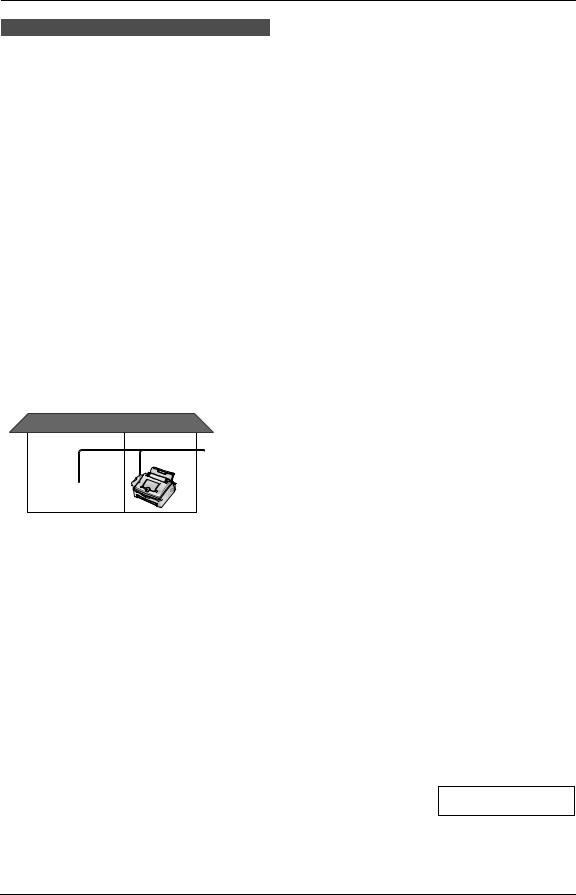
2.3 Case 2a: Distinctive Ring (1 phone line with 2 or more phone numbers)
2.3.1 Your situation
You wish to use the fax machine and your answering machine in a different room and receive faxes and phone calls automatically. You must get another phone number to use for fax besides the current phone number. To get a new phone number, you need to subscribe to Distinctive Ring service at your local telephone company.
LDistinctive Ring service may be called Identa Ring service. The name of the service depends on the telephone company.
2.3.2 Telephone wiring image in house or office
2 numbers example
Room |
Room |
Single |
|
|
|
|
|
telephone |
|
|
line |
|
|
(2 phone |
|
|
numbers) |
Answering |
Fax machine |
machine |
Facsimile No. |
Telephone No. |
(555-1333) |
(555-1111) |
|
2.3.3 Connections for Case 2a
Connect to LINE.
To a single telephone line jack
Telephone line cord
To a power outlet
Power cord
2.3.4 How to setup
ON
{MENU} {A}{B} |
{SET} |
1Subscribe to Distinctive Ring service at your local telephone company to get a new phone number.
2Press {MENU}.
3Press {#} then {0}{0}.
QUICK SETUP
PRESS SET
4 Press {SET}
L The Quick Setup Guide will be printed.
For Fax Advantage assistance, call 1-800-435-7329. |
17 |

2. Preparation
5Press {A} or {B} repeatedly to display the following.
SELECT A SETUP =DIST. RING [±]
6Press {SET}.
7Press {MENU}.
L The AUTO ANSWER light is ON.
LYou cannot change the receiving mode while the Distinctive Ring feature is activated.
2.3.5 How to receive calls
If the number assigned for phone calls is called, the fax machine and answering machine will ring and then the answering machine will record voice message automatically.
If the number assigned for fax is called, the fax machine and answering machine will ring and then the fax machine will start fax reception automatically.
If you subscribe for three or more phone numbers in a single telephone line
You will get phone numbers and each phone number has a different ring pattern.
To use one number for fax, program the ring pattern assigned for fax in feature #32 by referring to the ring pattern table (page 42).
18 |
For Fax Advantage assistance, call 1-800-435-7329. |
2. Preparation
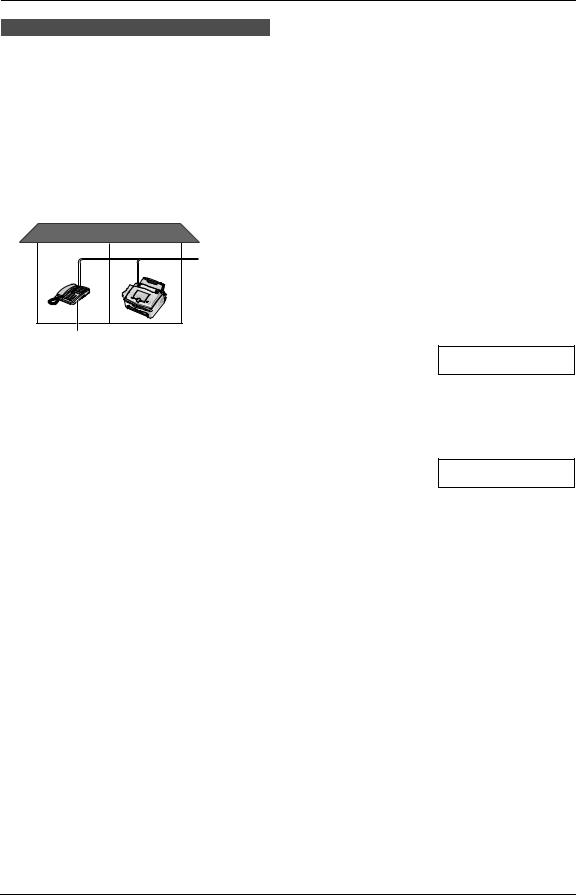
2.4 Case 2b: Distinctive Ring (using with voice mail service)
2.4.1 Your situation
You have already subscribed to voice mail service and also wish to receive a fax automatically.
You must get another phone number to use for fax besides the current phone number. To get a new phone number, you need to subscribe to a Distinctive Ring service at your local telephone company.
LDistinctive Ring service may be called Identa Ring service. The name of the service depends on the telephone company.
2.4.2 Telephone wiring image in house or office
2 numbers example
Room Room
Single telephone
line
(2 phone numbers)
Extension |
Fax machine |
telephone |
(555-1333) |
(555-1333) |
|
Telephone company service
Voice mail
(555-1111)
2.4.3 Connections for Case 2b
Connect to LINE.
To a single telephone line jack
Telephone line cord
To a power outlet
Power cord
2.4.4 How to setup
ON
{MENU} {A}{B} |
{SET} |
1Subscribe to Distinctive Ring service at your local telephone company to get a new fax number.
L You do not need to apply to a voice mail service for the new number.
2Press {MENU}.
3Press {#} then {0}{0}.
QUICK SETUP
PRESS SET
4 Press {SET}
L The Quick Setup Guide will be printed.
For Fax Advantage assistance, call 1-800-435-7329. |
19 |

2. Preparation
5Press {A} or {B} repeatedly to display the following.
SELECT A SETUP =DIST. RING [±]
6Press {SET}.
7Press {MENU}.
L The AUTO ANSWER light is ON.
LYou cannot change the receiving mode while the Distinctive Ring feature is activated.
2.4.5 How to receive calls
If the number assigned for phone calls is called, the voice message will be recorded in voice mail service.
If the number assigned for fax is called, the fax machine will ring. If an extension telephone is connected on the same line, it will also ring. Then the fax machine will start fax reception automatically.
If you subscribe for three or more phone numbers in a single telephone line
You will get phone numbers and each phone number has a different ring pattern.
To use one number for fax, program the ring pattern assigned for fax in feature #32 by referring to the ring pattern table (page 42).
20 |
For Fax Advantage assistance, call 1-800-435-7329. |

2. Preparation
2.5 Case 3: EXT. TAM
2.5.1 Your situation
You wish to use the fax machine and your answering machine in the same room.
2.5.2 Telephone wiring image in house or office
Single telephone line
(1 phone number)
Fax Answering machine machine
2.5.3 Connections for Case 3
Remove the stopper.
Answering machine (Not included)
To a single telephone line jack
Telephone line cord
To a power outlet
Power cord
2.5.4 How to setup
ON
{MENU} {A}{B} {SET}
{FAX START}
1Press {MENU}.
2Press {#} then {0}{0}.
QUICK SETUP
PRESS SET
3 Press {SET}
L The Quick Setup Guide will be printed.
4Press {A} or {B} repeatedly to display the following.
SELECT A SETUP =EXT. TAM [±]
5Press {SET}.
6Press {MENU}.
L The AUTO ANSWER light is ON.
7Turn on your answering machine.
8Adjust the ring setting of the answering machine less than 4.
L This will allow the answering machine to answer the call first.
2.5.5 How to receive calls
At first your answering machine will pick up the call.
LIf the call is a phone call, the answering machine will record voice message automatically.
LIf a fax calling tone is detected, the answering machine will be disconnected and the call will be switched to the fax machine. The fax machine will receive a fax automatically.
If the answering machine is turned OFF
The fax machine will ring 5 times and receive faxes automatically.
For Fax Advantage assistance, call 1-800-435-7329. |
21 |

2. Preparation
With the fax machine
1.When the fax machine rings, lift the handset of the fax machine.
2.When:
–document reception is required,
–a fax calling tone (slow beep) is heard, or
–no sound is heard,
press {FAX START}.
3. Replace the handset.
L The fax machine will start reception.
With an extension telephone
1.When the extension telephone rings, lift the handset of the extension telephone.
2.When:
–document reception is required,
–a fax calling tone (slow beep) is heard, or
–no sound is heard,
press *#9 (pre-selected fax activation code) firmly.
3. Replace the handset.
L The fax machine will start reception.
Note:
LYou can change the fax activation code in feature #41 (page 48).
22 |
For Fax Advantage assistance, call 1-800-435-7329. |
2. Preparation
2.6 Case 4: TEL ONLY
2.6.1 Your situation
You wish to use the fax machine and an extension telephone in a different room. Most incoming calls are phone calls and the fax machine is seldom used for fax reception.
2.6.2 Telephone wiring image in house or office
Room |
Room |
|
Single |
|
telephone |
|
line |
|
(1 phone |
|
number) |
Extension |
Fax machine |
telephone |
|
2.6.3 Connections for Case 4
Connect to LINE.
To a single telephone line jack
Telephone line cord
To a power outlet
Power cord
2.6.4 How to setup
OFF
{MENU} {A}{B} {SET}
{FAX START}
1Press {MENU}.
2Press {#} then {0}{0}.
QUICK SETUP
PRESS SET
3 Press {SET}
L The Quick Setup Guide will be printed.
4Press {A} or {B} repeatedly to display the following.
SELECT A SETUP =TEL ONLY [±]
5Press {SET}.
6Press {MENU}.
L The AUTO ANSWER light is OFF.
2.6.5 How to receive calls
You can receive a fax with the fax machine and an extension telephone.
With the fax machine
1.When the fax machine rings, lift the handset of the fax machine.
2.When:
–document reception is required,
–a fax calling tone (slow beep) is heard, or
–no sound is heard,
press {FAX START}.
3. Replace the handset.
L The fax machine will start reception.
With an extension telephone
1.When the extension telephone rings, lift the handset of the extension telephone.
2.When:
– document reception is required,
For Fax Advantage assistance, call 1-800-435-7329. |
23 |
 Loading...