


DV2300
•BORDERLESSGPRSORUETECECIVALECRULATION •ALL IN VIEW SENSOR •GYROSCOPE
M |
AX |
8mm |
|
Dynamic Navigation Unit Dynamisches Navigationsgerät Module de navigation dynamique Dynamische navigatie-eenheid Unità di navigazione dinamica Unidad de navegación dinámica
CY-TM100N
Operating Instructions Bedienungsanleitung Manuel d’instructions Gebruiksaanwijzing Manuale di istruzioni Manual de Instrucciones
●Please read these instructions carefully before using this product and keep this manual for future reference.
●Bitte lesen Sie diese Bedienungsanleitung vor der Verwendung dieses Produktes aufmerksam durch und bewahren Sie sie danach für spätere Nachschlagzwecke sorgfältig auf.
●Prière de lire ces instructions attentivement avant d’utiliser le produit et garder ce manuel pour l’utilisation ultérieure.
●Leest u deze instructie alstublieft zorgvuldig door voor u dit product in gebruik neemt en bewaar deze handle ding voor later gebruik.
●Si prega di leggere attentamente queste istruzioni prima di usare questo prodotto e di conservare questo manuale per usi futuri.
●Lea con atenciÓn estas instrucciones antes de utilizar el producto y guarde este manual para poderlo consultar en el
futuro.
ENG
Use Before
1
Contents and Accessories
. . . . . . . . . . . . . . . . . . . . . . . . . . . . .ENGLISH (ENG) |
2-57 |
Prepa- |
DEUTSCH (DEU) . . . . . . . . . . . . . . . . . . . . . . . . . . . . . . . . . . |
. 58-113 |
ration |
FRANÇAIS (FRA) . . . . . . . . . . . . . . . . . . . . . . . . . . . . . . . . . |
114-169 |
|
NEDERLANDS (NED) . . . . . . . . . . . . . . . . . . . . . . . . . . . . . . |
170-225 |
|
ITALIANO (ITA) |
226-281 |
|
|
||
ESPAÑOL (ESP) . . . . . . . . . . . . . . . . . . . . . . . . . . . . . . . . . . |
282-337 |
|
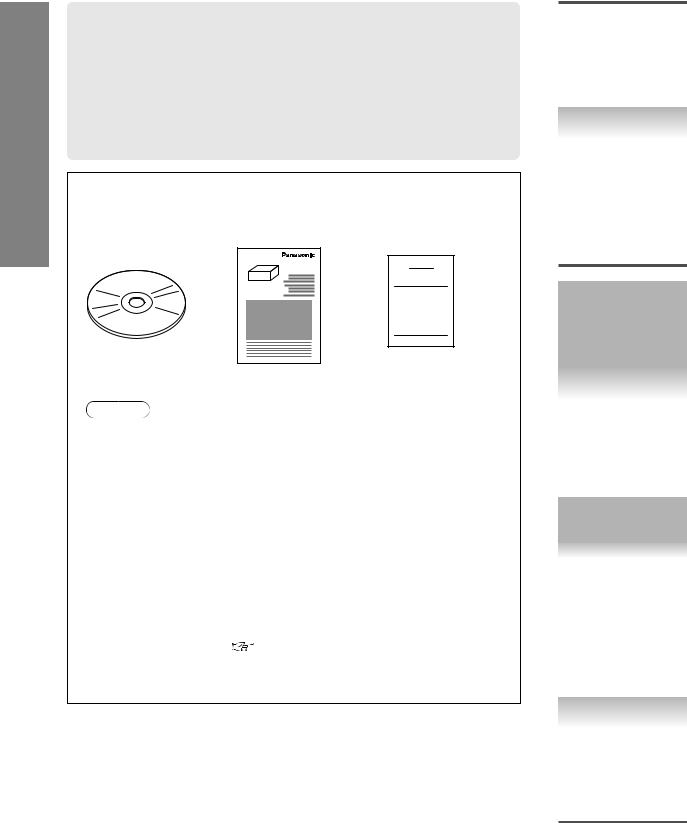
Accessories (CY-TM100N)
Please contact the shop where you purchased this product if you are missing any of the following accessories.
|
CY-TM100N |
|
|
|
Imme- |
|
|
diate |
●Upgrade disc |
●Warranty card |
use |
|
||
|
●Operating |
|
|
Instructions |
|
Notes
● Refer to the Original Operating Instructions for the Navigation |
|
System accessories. |
|
● Refer to the Installation Instructions, for a mounting kit (e.g. |
|
Screws and Brackets). |
|
● CY-TM100N is an optional unit to receive RDS-TMC by connecting |
|
to CN-DV1800EN and CN-DV2300N. This unit is designed only for |
Advanced |
connecting to CN-DV1800EN and CN-DV2300N. This unit cannot |
|
run on other systems. |
use |
● The Map Disc is sold separately. |
|
● The FM radio antenna for RDS-TMC reception is not supplied. |
|
● The use of an antenna distributor may disturb the TMC reception. |
|
In that case, please consult the shop where you purchased this |
|
unit. |
If |
● This TMC unit cannot run on the MRE map discs. Use “TMC- |
|
Ready” Map discs. ( page 12, 13) |
necessary |
|
|
|
|
2

Contents and Accessories . . . . . . . . . . . . . . . . . . . . . . . . . . . . . . . . . . . . . . . . . . . . . . . . . . . . 2 Safety Information . . . . . . . . . . . . . . . . . . . . . . . . . . . . . . . . . . . . . . . . . . . . . . . . . . . . . . . . . . . 4 Panasonic TMC Features . . . . . . . . . . . . . . . . . . . . . . . . . . . . . . . . . . . . . . . . . . . . . . . . . . . . 8 Introduction to TMC . . . . . . . . . . . . . . . . . . . . . . . . . . . . . . . . . . . . . . . . . . . . . . . . . . . . . . . . 12 Names and Functions . . . . . . . . . . . . . . . . . . . . . . . . . . . . . . . . . . . . . . . . . . . . . . . . . . . . . . 14
●Software Upgrade . . . . . . . . . . . . . . . . . . . . . . . . . . . . . . . . . . 18 ●Activation . . . . . . . . . . . . . . . . . . . . . . . . . . . . . . . . . . . . . . . . . . . 20 ●Pop Up Menu . . . . . . . . . . . . . . . . . . . . . . . . . . . . . . . . . . . . . . . 21 ●Checking Items . . . . . . . . . . . . . . . . . . . . . . . . . . . . . . . . . . . . . 22
(Wiring check, Automatic distance correction check, GPS reception check)
●Map Display . . . . . . . . . . . . . . . . . . . . . . . . . . . . . . . . . . . . . . . . 24
●Route / Flags and TMC Display . . . . . . . . . . . . . . . . . . . . 25 ●Changing the map Orientation / Scale . . . . . . . . . . . . . 26
●POI Icons on Maps . . . . . . . . . . . . . . . . . . . . . . . . . . . . . . . . . 27
Destination Entry and Route Search . . . . .28
●Destination by address, intersection, POI, history, a marked point and the map
Character Entry . . . . . . . . . . . . . . . . . . . . . . . . . . . . . . . . . . . . . . . . . . .30
City / House number Selection and Postcode Entry . . .31
Direct Destination Input . . . . . . . . . . . . . . . . . . . . . . . . . . . . . . . . . . . . . . . . . . . .32
After Routing ●Route Search Cancellation, Whole Route display,
Route guidance cancellation . . . . . . . . . . . . . . . . . . . . . . .33
Route Changes . . . . . . . . . . . . . . . . . . . . . . . . . . . . . . . . . . . . . . . . . . . . . . . . . . . . . .34
Dynamic Reroute . . . . . . . . . . . . . . . . . . . . . . . . . . . . . . . . . . . . . . . . . . . . . . . . . . . . . . . . . . . 36 Route list / Urgent TMC Information display . . . . . . . . . . . . . . . . . . . . . . . . . . . . . . . . . . . 37
Marked Point . . . . . . . . . . . . . . . . . . . . . . . . . . . . . . . . . . . . . . . . . . . . . . . . . . . . . . . . . . . . . . . 38
Setup . . . . . . . . . . . . . . . . . . . . . . . . . . . . . . . . . . . . . . . . . . . . . . . . . . . . . . . . . . . . . . . . . . . . . 40
TMC Station Selection . . . . . . . . . . . . . . . . . . . . . . . . . . . . . . . . . . . . . . . . . . . . . . . . . . . . . . 45
Precautions / System Performance
●Voice Guidance . . . . . . . . . . . . . . . . . . . . . . . . . . . . . . . . . . . . . . . 46
●Automatic Distance Correction . . . . . . . . . . . . . . . . . . . . . . . . . . . 46
●GPS . . . . . . . . . . . . . . . . . . . . . . . . . . . . . . . . . . . . . . . . . . . . . . . . . 47
●Map Matching . . . . . . . . . . . . . . . . . . . . . . . . . . . . . . . . . . . . . . . . . 47
●Positioning Accuracy . . . . . . . . . . . . . . . . . . . . . . . . . . . . . . . . . . . 48
●Route Guide . . . . . . . . . . . . . . . . . . . . . . . . . . . . . . . . . . . . . . . . . . 48
●Route Search . . . . . . . . . . . . . . . . . . . . . . . . . . . . . . . . . . . . . . . . . 49
Troubleshooting ●Verification First . . . . . . . . . . . . . . . . . . . . . . . . . . . . . . . . . . . . . . . 50
●Error Messages . . . . . . . . . . . . . . . . . . . . . . . . . . . . . . . . . . . . . . . . 52
●TMC . . . . . . . . . . . . . . . . . . . . . . . . . . . . . . . . . . . . . . . . . . . . . . . . .53
Installation (CY-TM100N) . . . . . . . . . . . . . . . . . . . . . . . . . . . . . . . . . . . . . . . . . . . . . . . . . . . 54
Maintenance / Specifications . . . . . . . . . . . . . . . . . . . . . . . . . . . . . . . . . . . . . . . . . . . . . . . . 57
Before Use
Routing
Rerouting
Marking
User setting
As necessary
3

ENG
Use Before
3
Safety Information
■Read the operating instructions for the unit and all other components of your Mobile Navigation System carefully before using the system. They contain instructions about how to use the system in a safe and effective manner. Panasonic assumes no responsibility for any problems resulting from failure to observe the instructions given in this manual.
■This manual uses pictographs to show you how to use the product safely and to alert you to potential dangers resulting from improper connections and operations. The meanings of the pictographs are explained below. It is important that you fully understand the meanings of the pictographs in order to use this manual and the system properly.
To the CN-DV1800EN Users.
¡CN-DV1800EN upgraded to the TMC unit cannot operate on the MRE map disc.
Please buy “TMC-Ready” map disc (Order No. T1000–5685, etc. as of May 2002).
|
|
Warning |
This label intends to alert you to the presence of important |
|
|
operating instructions and Installation Instructions. Failure to |
|
Warning |
|
|
heed the instructions may result in severe injury or death. |
|
|
|
|
|
■ Do not keep your eyes fixed on the monitor screen or operate the system |
||
|
|
while driving. |
|
Warnings |
|
Do not change the settings and destination locations while driving. Minimize the time |
|
|
|
spent on viewing the monitor screen and listening to the voice guidance while driving. |
|
|
|
Operating the system will distract the driver from looking ahead of the vehicle and can |
|
|
|
cause accidents. Always stop the vehicle in a safe location and use the parking brake |
|
|
|
before operating the system. |
|
|
■ Always obey local traffic regulations. |
||
|
|
Your guided route may include roads that are not open to vehicles or are closed due to |
|
|
|
traffic regulations. Comply with the local traffic regulations and take another route. |
|
|
■ Do not use the unit when it is out of order. |
||
|
|
If the unit is out of order (no image, no sound) or in an abnormal state (has foreign |
|
|
|
matter in it, is exposed to water, is smoking, or smells), then turn it off immediately and |
|
|
|
consult with the store where you purchased it. Using the unit in out-of-order condition |
|
|
|
may lead to accidents, fires, or electric shocks. |
|
|
■ Never install the product in a location where it interferes with your field of vision. |
||
|
|
Installing the product in locations where it obstructs your field of vision in front of or |
|
|
|
behind the vehicle or interferes with your driving (near the gear shift lever, brake pedal, |
|
|
|
etc.) will lead to accidents. |
|
|
■ Never use safety-related components for installation, grounding, and other such |
||
|
|
functions. |
|
|
|
Do not use safety-related vehicle components (gasoline tank, brake, suspension, |
|
|
|
steering wheel, etc.) for wiring or fixing the product or its accessories. |
|
|
■ Use the proper power supply. |
||
|
|
This product is designed for operation with a negative grounded 12 V DC battery |
|
|
|
system. |
|
|
■ Remove the negative (–) terminal from the battery before wiring. |
||
|
|
Wiring or installing the product with the minus battery terminal connected may lead to |
|
|
|
electric shock or injury due to short circuiting. |
|
4

|
Warning |
This label intends to alert you to the presence of important |
ENG |
|
operating instructions and Installation Instructions. Failure to |
|
|
Warning |
|
heed the instructions may result in severe injury or death. |
|
|
|
|
|
■ Refer fuse replacement to qualified service personnel.
 When the fuse burns out, eliminate the cause and have it replaced with the fuse Warnings prescribed for the unit by a qualified service engineer. Incorrect replacement of the
fuse may lead to smoke, fire, and damage to the product.
■Make sure the leads do not interfere with driving or getting in and out of the vehicle.
Bundle the leads together or attach them to prevent them from impeding with the steering wheel, gear shift lever, brake pedal, the driver's feet, or anything else. Otherwise the leads may get caught in moving parts such as the brake pedal and gear shift lever and will lead to accidents.
■Do not disassemble.
Do not disassemble the product or attempt to repair it yourself. If the product needs to be repaired, take it to the shop where you purchased it or to an authorized service centre.
■Installing the product on the airbag cover or in a location where it interferes with airbag operation is prohibited.
Never install the product on the airbag cover or in a location where it interferes with airbag operation. The airbag will not be able to operate properly or the unit or its parts may be expelled together with the airbag, leading to accidents or injuries.
■Check for piping, gasoline tank, electric wiring, and other items before installing the product.
If you need to open a hole in the vehicle chassis to attach or wire the product, first check where wire harnesses, gasoline tank, and electric wiring are located. Then open the hole from outside if possible.
■Follow installation and wiring directions.
Carefully follow the directions given in the installation manual when installing and wiring the product. Incorrect wiring may lead to accidents or fire or cause damage to the product.
■Connect the parking brake lead for safety.
Make sure to connect the parking brake lead for your own safety. Otherwise the navigation system safety functions will not operate which will lead to accidents.
■Attach the product securely.
Install the product securely, making sure to use appropriate tools. Also attach the cords with cord clamps or tape.
■Keep batteries out of reach of infants.
Batteries can be ingested so keep them out of the reach of infants. If an infant ingests a battery, please seek immediate medical attention.
■Store the remote control unit in the holder when it is not in use.
If the remote control unit is not stored in the holder, then it could fall down while driving, get wedged under the brake pedal, and lead to a traffic accident.
■Never attempt to play the map disc on an audio player.
Do not attempt to play the map disc on other CD (DVD) player. The loud sound produced may damage your hearing and your speakers.
5

ENG
Use Before
5
Safety Information
|
Caution |
This label intends to alert you to the presence of important |
|
operating instructions and Installation Instructions. Failure to |
|
Caution |
|
heed the instructions may result in injury or material damage. |
|
|
|
■ Do not use the product where it is exposed to water, moisture, or dust.
 Exposure to water, moisture, or dust may lead to smoke, fire, or other damage to the unit. Cautions Make especially sure that the unit does not get wet in car washes or on rainy days.
■Keep the voice guidance volume at an appropriate level.
Keep the volume level low enough to be aware of road and traffic conditions while driving.
■Protect the Deck Mechanism.
Do not insert any foreign objects into the slot of this unit.
■This navigation system is designed use for exclusively in automobiles.
This navigation system should only be installed in an automobile. Do not install it in a ship, aircraft, or any other vehicles except an automobile. Do not use it outdoors.
■Refer wiring and installation to qualified service personnel.
Installation of this navigation system requires special skills and experience. For maximum safety, have it installed by the shop where you purchased it. Panasonic is not liable for any problems resulting from your having installed the unit yourself.
■Take care not to damage the leads.
When wiring, take care not to damage the leads. Prevent them from getting caught in the vehicle chassis, screws, and moving parts such as seat rails. Do not scratch, pull, bend or twist the leads. Do not run them near heat sources or place heavy objects on top of them. If leads must be run over sharp metal edges, then protect the leads by winding them with vinyl tape or similar protection.
■Use the designated parts and tools for installation.
Use the supplied or designated parts and appropriate tools to install the product. The use of parts other than those supplied or designated may result in internal damage to the unit. Faulty installation may lead to accidents, malfunction, or fire.
■Do not block the air vent or the cooling plate of the unit.
Blocking these parts will cause the interior of the unit to overheat and will result in fire or other damage.
■Do not insert or allow your hand or fingers caught in the unit.
To prevent injury, do not get your hand or fingers caught in moving parts or in the disc slot. Especially watch out for infants.
■Do not install the product where it is exposed to strong vibrations or is unstable.
Avoid slanted or strongly curved surfaces. If the installation is not stable, the unit may fall down while driving and this can lead to accidents and injuries.
■Do not operate the unit for prolonged periods with the engine turned off.
Operating the navigation system for a long period of time with the engine turned off will drain the battery.
■Directions for using lithium batteries.
This product contains a lithium battery. There is danger of explosion if the battery is incorrectly replaced. Replace only with same type of battery or an equivalent type recommended by the manufacturer. Dispose of used batteries according to the manufacturer's instructions.
6

■ Battery Information
 ■ Observe the following cautions when handling the batteries for the remote control unit.
●Use only the specified AA batteries (R6PU).
Caution ●Match the polarity of the batteries with the (+) and (–) marks in the battery case. ●Do not mix old and new or different types of batteries.
●Replace dead batteries as soon as possible.
●Remove the batteries from the remote control unit when not using it for an extended period of time. ●Do not leave the batteries or the remote control unit with the batteries where temperatures can
become very high such as inside your vehicle when it is closed, the vehicle trunk, places exposed to direct sunlight, or near a heater.
●Insulate batteries (by placing them in a plastic bag or covering them with vinyl tape).before disposal or storage. Dispose of batteries according to the local regulations.
●Keep batteries out of reach of the infants. Batteries can be ingested by infants. In that event, seek immediate medical attention.
●Do not throw away the battery. Instead, take it to the designated collection point and hand it in as hazardous waste.
In case of battery leakage
●Thoroughly wipe the battery liquid off the battery case and insert new batteries.
●If any part of your body or clothing comes into contact with battery liquid, wash with plenty of water.
●If battery liquid comes into contact with your eyes, wash them with plenty of water and get immediate medical attention.
SOFTWARE (MAP DISC) LICENCE AGREEMENT
PLEASE READ THIS AGREEMENT CAREFULLY BEFORE USING NAVTECH PRODUCT
This software and data (“Software”) is provided for your personal, non-commercial use only. Copyright and other Laws protect it.
By using this Software you agree to the following terms and conditions.
You agree to use this Software for solely personal use or, if applicable, for use in your business‘ internal operations, and not for service bureau, time-sharing or other similar purposes. Except to save it on your hard drive, you may not copy or reproduce this Software, and may not distribute it in any form, for any purpose. You agree not to disassemble, decompile or otherwise reverse engineer the Software, except to the extent expressly permitted by mandatory laws.
Further Restrictions. You may not use this Software with: (i) any positioning devices, including without limitation, any GPS receivers, compasses, wheel sensors, or any other distance or direction sensors; or (ii) any products, systems or applications installed in or otherwise connected to or in communication with vehicles, or capable of vehicle navigation, positioning, dispatch, real time route guidance, fleet management or similar applications; or (iii) any hand-held computer devices, cell phones or similar mobile devices.
No warranty. This Software is provided to you “as is,” and you agree to use it at your own risk. Panasonic and its suppliers and licencers make no guarantees, representations or warranties of any kind, express or implied, arising by law or otherwise, including but not limited to, content, quality, accuracy, completeness, effectiveness, reliability, fitness for a particular purpose, usefulness, use or results to be obtained from this Software will be uninterrupted or error-free. Disclaimer of Warranty: Panasonic AND ITS SUPPLIERS AND LICENSORS DISCLAIM ANY WARRANTIES, EXPRESS OR IMPLIED, OF QUALITY, PERFORMANCE, MERCHANTABILITY, FITNESS FOR A PARTICULAR PURPOSE OR NON-INFRINGEMENT. Some States, Territories and Countries do not allow certain warranty exclusions, so to that extent the above exclusion may not apply to you.
Disclaimer of Liability: Panasonic AND ITS SUPPLIERS AND LICENSORS SHALL NOT BE LIABLE TO YOU: IN RESPECT OF ANY CLAIM, DEMAND OR ACTION, IRRESPECTIVE OF THE NATURE OF THE CAUSE OF THE CLAIM, DEMAND OR ACTION ALLEGING ANY LOSS, INJURY OR DAMAGES, DIRECT OR INDIRECT, WHICH MAY RESULT FROM THE USE OR POSSESSION OF THE SOFTWARE; OR FOR ANY LOSS OF PROFIT, REVENUE, CONTRACTS OR SAVINGS, OR ANY OTHER DIRECT, INDIRECT, INCIDENTAL, SPECIAL OR CONSEQUENTIAL DAMAGES ARISING OUT OF YOUR USE OF OR INABILITY TO USE THIS SOFTWARE, ANY DEFECT IN THE SOFTWARE, OR THE BREACH OF THESE TERMS OR CONDITIONS, WHETHER IN AN ACTION IN CONTRACT OR TORT OR BASED ON A WARRANTY, EVEN IF Panasonic OR ITS LICENSORS HAVE BEEN ADVISED OF THE POSSIBILITY OF SUCH DAMAGES. Some states, Territories and Countries do not allow certain liability exclusions or damages limitations, so to that extent the above may not apply to you.
Indemnity. You agree to indemnify and hold Panasonic and its suppliers and licensors harmless from any liability or loss of any kind arising out of or in connection with any use by you of this Software.
Export Control. You agree not to export from anywhere any part of the Software provided to you or any direct product thereof except in compliance with applicable export laws, rules and regulations.
Governing Law. The above terms and conditions shall be governed by the laws of the Netherlands, without giving effect to (i) its conflict of laws provisions, or (ii) the United Nations Convention for contracts for the international Sale of Goods.
ENG
Use Before
6
7

ENG
Use Before
7
Enhancing your navigation system
Panasonic TMC Features!


¡15 types TMC icons can be |
|
¡Practical Dynamic routing |
displayed on the map. |
|
|
|
|
|
|
|
|
15 types of the TMC event icons are displayed on the map screen so that you can recognize the events at a glance. ( page 25)
TMC reception indicator
The receiving conditions of TMC stations are displayed.
( page 25)
The car navigation system searches for a practical route on the basis of the TMC data, and is able to reroute according to the circumstances because it always observes closed road information. If there is something happened in the traffic, the system shows it immediately on the screen. ( page 36)
Start
8

¡Notification of Urgent TMC
Information with its position.
Note |
The pages that |
|
bear this mark |
|
explain the |
|
function of TMC. |
¡Preferred receiving station selection.
Priority mark
The car navigation system shows that |
TMC unit automatically selects a |
||
urgent TMC information is received |
station whose receiving condition is |
||
on the screen. It also indicates the |
the best, and you can specify which |
||
event position. Accordingly, you are |
TMC station should be high priority. |
||
offered higher level of safety in |
( |
page 45) |
|
driving. ( |
page 37) |
|
|
ENG
Use Before
8
Destination
9

Panasonic TMC Features Changes 


ENG
Use Before
9
Equipping with TMC will upgrade your navigation system as follows:
Pop Up Menu
<Before> <After>
Map Display
<Before>
This menu bar is added.
Extent icon represents the influential range of an
event and its direction (yellow)
<After>
Setup Menu
<Before>
These icons and indicators are added.
( page 25)
<After> |
This menu bar is added.
10
Preparation chart
START!!
Name of your car navigation system
CN-DV1800EN / 2300N
CN-DV1800EN |
CN-DV2300N |
|
DV1800 |
DV2300 |
|
|
•BORDERLESS ROUTE |
CALCULATION |
|
•ALL IN VIEW GPS RECEIVER |
|
|
•GYROSCOPE SENSOR |
|
Not supported.
Others Please consult the store where you purchased your system.
(e.g. CN-DV2000EN)
Is the TMC unit installed securely ?
Yes No
Refer installing the unit to the qualified installer.
( page 54)
Do you have “TMC-Ready” map disc?
ƒ
Check if the [TMC] lamp in the wiring check screen lights.
( page 22)
Yes No
Check if indicator
map screen in
ENG
Use Before
10
is
.
Yes No
This unit needs “TMC-Ready” map disc. Please buy it.
( page 13)
Hasn't the indicator become green in approx. an hour?
No
receiving
of FM radio
. ( page 53)
ƒ |
You are ready to use |
|
the TMC unit. |
||
|
11

ENG
Use Before
11
Introduction to TMC
Panasonic welcomes you to our ever growing family of electronic product owners. We know that this product will bring you many hours of enjoyment.
Our reputation is built on precise electronic and mechanical engineering, and our products are manufactured with carefully selected components and assembled by people who take pride in their work. Once you discover the quality, reliability, and value we have built into this product, you too will be proud to be a member of our family.
Note
This operating instructions explain the operations of Panasonic mobile navigation systems, CN-DV1800EN and CN-DV2300N, equipped with the TMC unit CY-TM100N.
Please refer to the original installation instructions supplied with each navigation system for installation. For installation of the TMC unit CY-TM100N, please refer to page 54 in this book.
TMC Unit
CY-TM100N is an optional unit to receive RDS-TMC by connecting to CN-DV1800EN and CN-DV2300N. This unit is designed only for connecting to CN-DV1800EN and CNDV2300N. This unit cannot run on other systems.
This unit needs to upgrade its navigation software to be used on the mobile navigation systems described above. Please refer to page 18 for upgrading.
●Panasonic is not liable for any problems resulting from having not upgraded the navigation software of this unit or improper use of it.
Cautions ● This TMC unit does not support MRE map discs. Use the “TMC-Ready” map disc.
Features
RDS-TMC stands for Radio Data System-Traffic Message Channel, that is, a system which utilizes the sub-carrier of FM radio waves to send various kinds of data. TMC is a channel of RDS to send traffic messages. This TMC system allows you to add the following functions to Panasonic navigation system.
1.Display of icons that represent traffic conditions on the navigation screen
2.Display of TMC urgent information on the navigation screen
3.Search the routes to avoid the closed roads referring to TMC information automatically.
TMC performance
●There are some areas where TMC service is not available. And some TMC stations may supply insufficient TMC data.
●This TMC unit covers Germany and Netherlands now (as of May 2002).
●The TMC covering area will gradually become larger. As for the new covered area, please ask the shop where you purchased this unit.
●TMC information is not always updated.
●TMC information does not cover all traffic conditions.
12
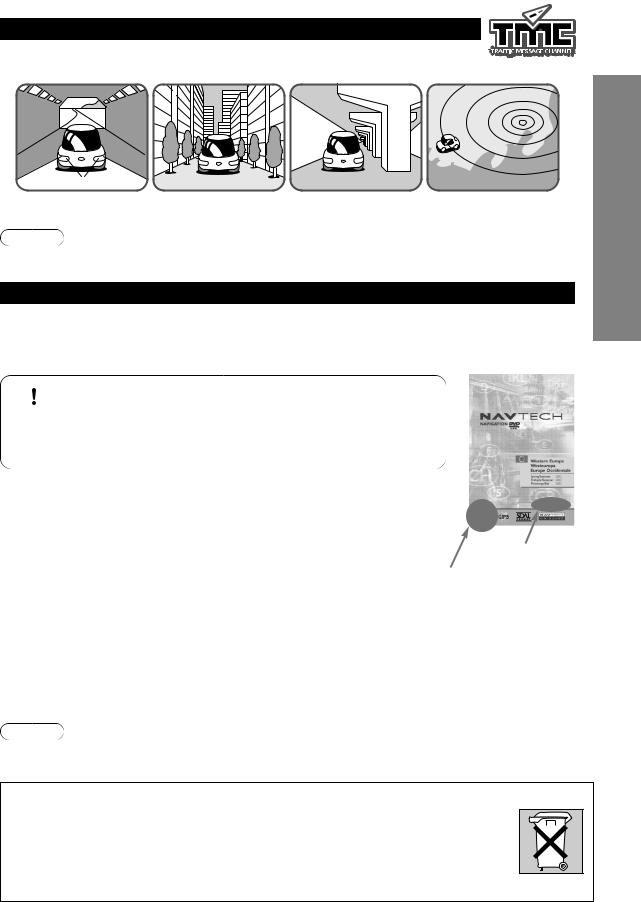
TMC Reception
TMC signal reception is poor in the following places:
In tunnels |
Among high-rise |
Under elevated roads |
Out of service area |
|
buildings |
|
|
Note
For some reasons, it may take approximately 30 minutes to recognize the TMC information.
Map Related Issues
Notice to Customers
Map discs you may use are available as options (Order Number: T1000-5685, etc. as of May 2002). For more information, contact the shop where you purchased the product.
 ■ Map Disc
This unit supports only DVD-SDAL-formatted map disc (TMC-
Caution Ready) that NAVTECH has specifically designed for this unit. Panasonic shall not be liable for any damages caused by using
other formatted discs.
●If you believe there to be an error in the map data, please report this directly to
Navigation Technologies (NAVTECH) via the driver feedback form located on |
|
|
|
|
their website. |
|
|
|
|
You can find their site at www.navtech.com. If you do not have access to the |
|
|
|
|
web, please forward this information to Navigation Technologies at the following |
Order Number |
|
||
address: |
|
|
||
|
|
|
|
|
|
Make sure the mark “TMC” |
|
||
|
(TMC-Ready) is attached. |
|
||
|
|
|
|
|
Navigation |
Navigation Technologies Customer Service |
|
|
|
Technologies’ |
PO Box 501 7300 AM Apeldoorn The Netherlands |
|
|
|
address: |
TELEPHONE NUMBER + 800 18 23 53 22 (Toll Free) or + 31 555 384 245 |
|
|
|
FAX NUMBER + 31 555 433 947 |
|
|
|
|
|
|
|
|
|
|
(When calling, replace the + sign with the international dialing code for |
|
|
|
|
The Netherlands from your country) |
|
|
|
|
|
|
|
|
Note
●Please have the map and software version numbers (DVD Version) available in advance. ( page 19)
How to dispose of batteries (Netherlands)
Bij dit produkt zijn batterijen geleverd. Wanneer deze leeg zijn, moet u ze niet weggooien maar inleveran als KCA.
Used battery disposal: This appliance contains a lithium battery for memory back-up. Please consult the store where you purchased the product when the battery needs replacement. Do not throw away the battery.
Instead, take it to the designated collection point and hand it in as hazardous waste.
ENG
Use Before
12
13

ENG
Use Before
13
Names and Functions (CN-DV2300N)
Infrared transmitter
Joystick
Selects items
by tilting it up, down, right, and left.
Monitor / Navigation changeover switch |
NAVI |
|
Set to Navi mode. |
||
|
||
LAST key |
MONITOR |
Returns to the previous screen.
ZOOM key
Changes the map scale.
( page 26)
MODE key
Switches the screen mode.
(See Note below)
VOICE key
Initiates vocal guidance for route maneuvers.
For Monitor Operation
(CY-VMR5800N, CQ-VA707N etc.) (Option)
Set to Monitor Mode.
POWER
●Turns the monitor into the stand-by mode or power-on mode (changeover).
VOL (Volume)
●Adjusts the volume. (Operative only for the speakers that are embedded in the monitor)
MODE
●Not used.
Notes
Joystick
(Only for CQ-VA707N)
●Item selection ●Item adjustment
ENTER
(Only for CQ-VA707N)
●Executes the selected item.
ASPECT
●Switches the aspect ratio.
●This remote control can also control some functions of the Panasonic monitors. Refer to each monitor's operation instructions for details.
●Mode key switches the screen mode between navigation and others. If the monitor is switched to external input while then the navigation system is in operation, the screen background colour may change to black.
See the Operating Instructions for Monitor operation details.
14
Note
These operating instructions describe the case of using CN-DV2300N. Basically, CN-DV1800EN can be used in much the same fashion as CN-DV2300N. Refer to page 16 for differences in operations between CN-DV2300N and CN-DV1800EN. These operating instructions describe the enhanced navigation functions except TMC for CN-DV1800EN users. Therefore, some explanations are overlapped. CN-DV2300N users can ignore them.
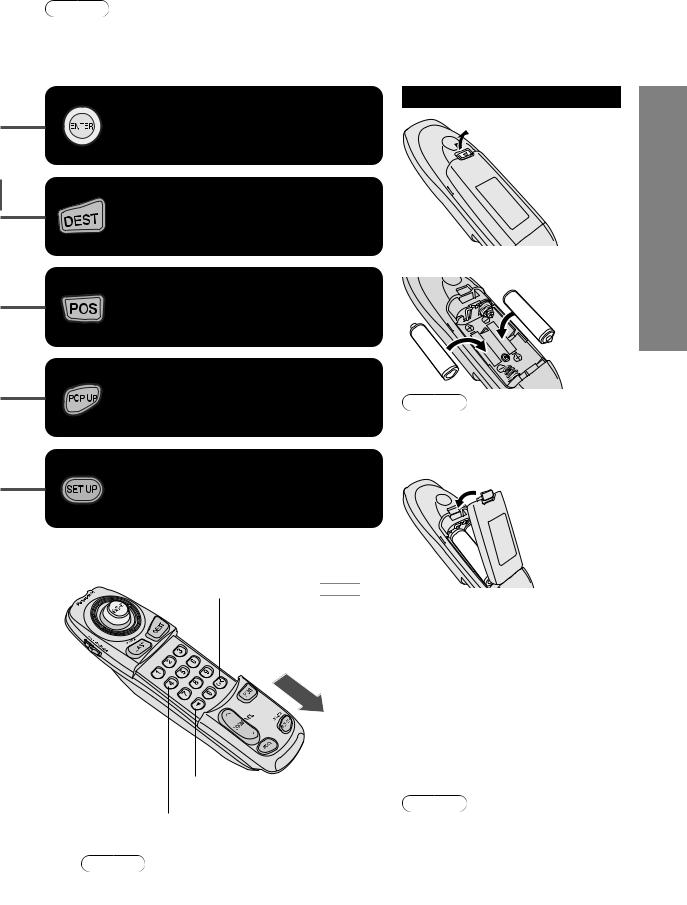
ENTER key |
Battery Inserting |
|
@Open the |
||
Executes a selected item. |
||
battery |
||
|
compartment |
|
|
cover. |
DEST (Destination) key
Selects a destination.
( page 28)
POS (Position) key |
AInsert the |
i | j new |
|
Displays the current position. |
batteries. |
i { j |
|
( page 24) |
|
|
i { j |
POP UP key |
i | j |
Displays the searching menu. |
Note |
( page 21)
SET UP key
Changes the settings.
( page 40)
OK: Equivalent to 
Match the polarity of the batteries with the !and @marks in the battery case.
BClose the battery compartment cover.
●Battery : Two AA batteries (R6PU) ●Battery life : Approximately 5
months of normal use (when using manganese batteries at ambient temperatures)
●Battery replacement : Replace the batteries as soon as possible when the infrared receiver does not respond properly to remote control operations, or when the remote control does not work.
ENG
Use Before
14
 :Backspace
Numeric keys
●Numeric input
Note
You can input the postcode using these numeric keys ( page 30, 31).
Note
Make sure that there is not any pressure applied to any of the remote control buttons when placing the remote control in the console box. Pressure on any of the buttons will drain the batteries.
15

ENG
Use Before
15
Names and Functions (CN-DV1800EN)
Joystick
Selects items
by tilting it up, down, right, and left.
Lock Switch
Up: NAV (Navigation) Mode
Down:Key Lock Mode
LAST key
Returns to the previous screen.
ZOOM key
Changes the map scale.
( page 26)
Infrared transmitter
Navi
ENTER
Key Lock
L |
A |
|
|
|
|
T |
|
|
S |
T |
E |
|
|
|
|
|
D |
|
|
|
ZOOM |
|
|
POS |
|||
|
|
|
|
|||
MODE |
|
|
POP UP |
|||
CROSS CURSOR KEYS |
VOICE |
SET UP |
●These four keys are not assigned to any functions by now.
MOBILE NAVIGATION
SYSTEM
MODE key
Switches the screen mode.
(See Note below)
VOICE key
Initiates vocal guidance for route maneuvers.
Notes
●MODE Key switches the screen mode between navigation and others. If the monitor is switched to external input while then the navigation system is in operation, the screen background colour may change to black.
See the Operating Instructions for Monitor operation details.
●These instructions applies to the remote control supplied with CN-DV2300N. As for CN-DV1800EN, refer to the descriptions of the corresponding keys on this page.
●Optional monitors do not operate with the remote control of CN-DV1800EN.
16

Note
These operating instructions describe the case of using CN-DV2300N. Basically, CN-DV1800EN can be used in much the same fashion as CN-DV2300N. Refer to page 16 for differences in operations between CN-DV2300N and CN-DV1800EN. These operating instructions describe the enhanced navigation functions except TMC for CN-DV1800EN users. Therefore, some explanations are overlapped. CN-DV2300N users can ignore them.
Battery Inserting
ENTER key
@Open the
Executes a selected item.  battery
compartment
cover.
DEST (Destination) key
Selects a destination.
( |
page 28) |
|
AInsert the |
|
|
|
|
||
|
|
i | j |
new |
|
POS (Position) key |
batteries. |
|||
|
||||
Displays the current position. |
i { j |
|
||
|
|
|||
( |
page 24) |
|
|
|
|
|
|
i { j |
|
POP UP key |
i | j |
|
||
Displays the searching menu. |
Note |
|
||
( |
page 21) |
Match the polarity of the batteries |
||
|
|
with the ! and @ marks in the |
||
SET UP key |
battery case. |
|
||
|
BClose the |
|||
Changes the settings. |
|
|||
|
battery |
|||
( |
page 40) |
|
compartment |
|
|
|
|
cover. |
|
LA |
ST |
|
EST |
● Battery : Two AA batteries (R6PU) |
|
|
D |
● Battery life : Approximately 5 |
|
|
|
|
|
|
1 |
|
2 |
3 |
months of normal use (when |
|
using manganese batteries at |
|||
4 |
|
5 |
6 |
|
|
ambient temperatures) |
|||
|
|
|
Numeric keys |
|
|
|
|
● Battery replacement : Replace the |
|
7 |
|
8 |
9 |
|
|
|
0 |
Equivalent to |
batteries as soon as possible |
|
|
OK |
||
|
|
|
:Backspace |
when the infrared receiver does |
ZOOM |
|
POS |
not respond properly to remote |
|
|
|
|||
|
|
control operations, or when the |
||
|
|
|
|
|
|
|
|
|
remote control does not work. |
ENG
Use Before
16
Note
You can input the postcode using these numeric keys ( page 30, 31).
Note
Make sure that there is not any pressure applied to any of the remote control buttons when placing the remote control in the console box. Pressure on any of the buttons will drain the batteries.
17

ENG
Use Before
17
Before Use Software Upgrade
Before initial use of the TMC unit, insert the upgrade disc (supplied with CY-TM100N) into the unit to upgrade the navigation software.
■ Software upgrade
|
● Be sure to upgrade the navigation software before using the TMC unit. |
||
Cautions |
● Panasonic is not liable for any problems resulting from having not upgraded the |
||
navigation software or improper use of it. |
|||
|
|||
|
● This TMC unit does not support the MRE map discs. Use “TMC-Ready” map discs |
||
|
( |
page 13). |
|
Turn the vehicle's ignition switch 1 to the ON or ACC position.
●Do not get your hand or fingers caught in
|
moving parts or in the disc slot. This can |
|
Caution |
cause injuries. Be especially careful when |
|
infants are present. |
||
|
||
|
●Keep the front panel of the navigation system |
|
|
closed except when loading or unloading a |
|
|
map disc. Dust can cause malfunction. |
2 |
Slide the front cover of the unit. |
● When there is a different disc in the unit. |
|
Press u (EJECT). |
|
|
|
|
|
DV2300 |
|
|
•••GABLOYLRRIODNESVRCIELOEWPSESGSPRESONRUSETOCERECIVALECRULATION |
|
Insert the upgrade disc with the |
Take out the different disc. |
|
|
printed side facing up, and close |
|
3 the front cover by pushing it up. |
|
Accessing Data screen
Upgrade starts (Loading |
Upgrade is completed |
the program)* |
|
●If the update confirmation screen is displayed before this screen appears(*), select [YES] and press [ENTER] to start loading the update software.
● Never turn off the ignition switch while loading the program.
18 Cautions
 Loading...