


CW-C240KR
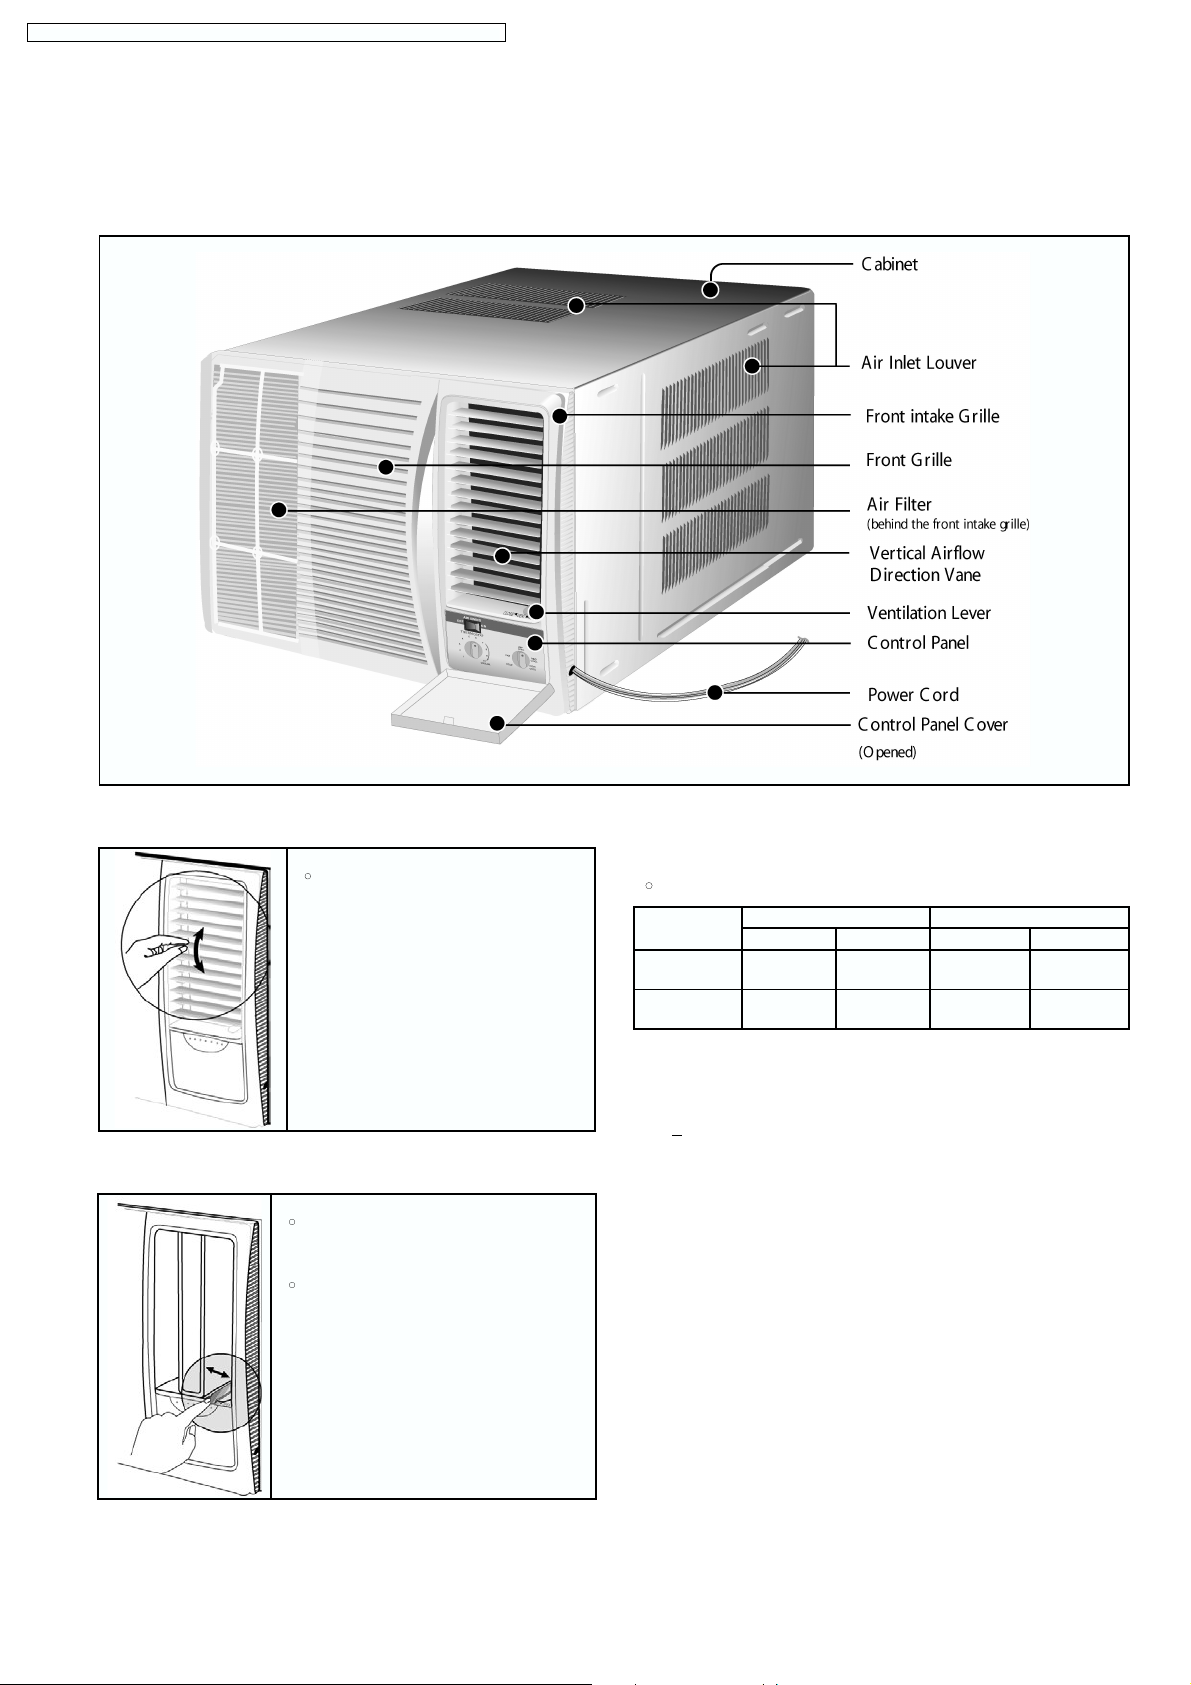
9.1.1. Parts Identification.
9.1.1.1. Vertical Airflow Direction Vane.
Airflow direction adjustment Up-and-Down.
•
The vertical airflow direction vane is
controlled by positioning the vane to
discharge the air upwards, downwards
or straight out.
9.1.1.2. Ventilation Lever.
When the slide lever is in the:
•
“OPEN” position, the ventilation door
opens to allow air, smoke or odours to be
expelled from the room.
•
“CLOSE” position, the ventilation door is
closed and the air will be circulated inside
the room and conditioned.
9.1.1.3. Recommended.
Use the air conditioner under the following conditions:
•
Operating temperature range.
Indoor side Outdoor side
D.B.T. W.B.T. D.B.T. W.B.T.
Maximum
Temperature
32°C 23°C 43°C 26°C
Minimum
Temperature
21°C 15°C 21°C 15°C
D.B.T.: Dry Bulb Temperature
W.B.T.: Wet Bulb Temperature
Note: Humidity may exceed 90%.
− Continuous operation at over 90% high humidity may
create condensation and result in water drops on the
intake and outlet vanes.
9 Operating Instructions
9.1. CW-C170KR, CW-C200KR, & CW-C240KR (Cooling only).
12
CW-C170KR / CW-C200KR / CW-C240KR / CW-A170KR / CW-A200KR / CW-A240KR

9.1.2. How to Operate.
(1) Open the Control Panel Cover.
Fig. 1
(2) Power Supply
Switch off the breaker and set the Main Control Knob to the
OFF position before connecting the power plug cord to an
independent power supply.
Fig. 2
(3) Main Control Knob
Set the Main Control Knob to either LOW COOL or HIGH
COOL as desired, FAN setting operates the fan only.
Caution: If the Main Control Knob is turned off or
changed to a fan setting from a cooling operation
setting, WAIT at least 3 minutes before resetting to
cooling operation.
Fig. 3
(4) Thermostat Control Knob
Turn the Thermostat Control Knob as shown in Fig. 4.
Usually “6” ~ “7” is the recommended setting position.
Note: When the Thermostat Control Knob is set to “10”,
moisture may freeze onto the evaporator fins and prevent
effective cooling. If this happens, turn the Main Control
Knob to HIGH FAN, and the Thermostat Control Knob
counterclockwise. This will quickly defrost the evaporator
fins so that normal cooling can be resumed.
Fig.4
(5) Air Swing Switch
(Airflow direction adjustment side-to-side)
To obtain a fixed airflow direction, set the Air Swing Switch
to “ON” for the vanes to swing from side to side until the
desired flow direction is reached, then switch it to “OFF”.
For continuous side-to-side air circulation, set the Air Swing
Switch to “ON”.
Fig. 5
13
Main Control
knob
Thermostat
control knob
Air Swing Switch
CW-C170KR / CW-C200KR / CW-C240KR / CW-A170KR / CW-A200KR / CW-A240KR
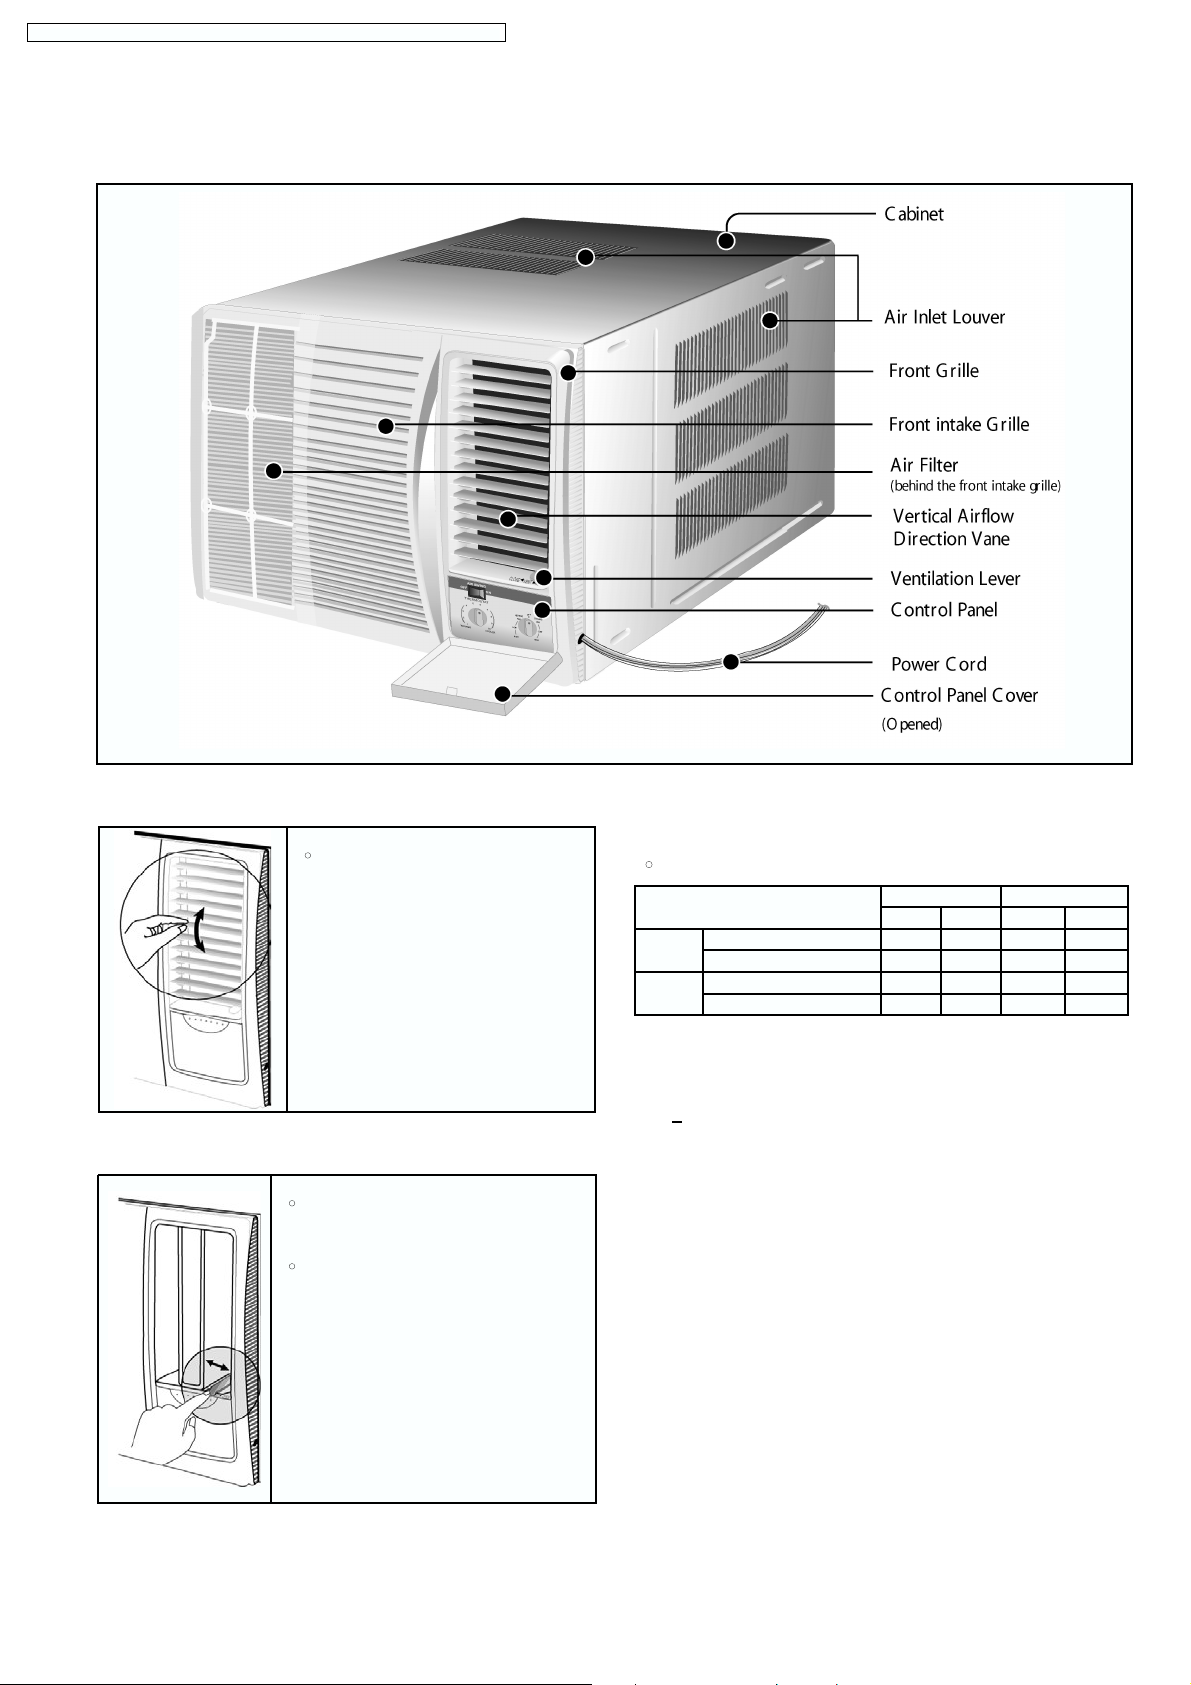
9.2.1. Parts Identification.
9.2.1.1. Vertical Airflow Direction Vane.
Airflow direction adjustment Up-and-Down.
•
The vertical airflow direction vane is
controlled by positioning the vane to
discharge the air upwards, downwards
or straight out.
9.2.1.2. Ventilation Lever.
When the slide lever is in the:
•
“OPEN” position, the ventilation door
opens to allow air, smoke or odours to be
expelled from the room.
•
“CLOSE” position, the ventilation door is
closed and the air will be circulated inside
the room and conditioned.
9.2.1.3. Recommended.
Use the air conditioner under the following conditions:
•
Operating temperature range.
Indoor side Outdoor side
D.B.T. W.B.T. D.B.T. W.B.T.
Cooling Maximum Temperature 32°C 23°C 43°C 26°C
Minimum Temperature 21°C 15°C 21°C 15°C
Heating Maximum Temperature 27°C ---- 21°C 15°C
Minimum Temperature 20°C ---- -5°C -6°C
D.B.T.: Dry Bulb Temperature
W.B.T.: Wet Bulb Temperature
Note: Humidity may exceed 90%.
− Continuous operation at humidities of over 90% may
create condensation to form on the intake and outlet
vanes.
9.2. CW-A170KR, CW-A200KR, & CW-A240KR (Cooling and Heating).
14
CW-C170KR / CW-C200KR / CW-C240KR / CW-A170KR / CW-A200KR / CW-A240KR
 Loading...