


K-1681
KOHLER K-1681, K-1682, K-1690, K-1687, K-1688 User Manual
...
Installation Guide
Sonata
Acrylic Shower Modules
R
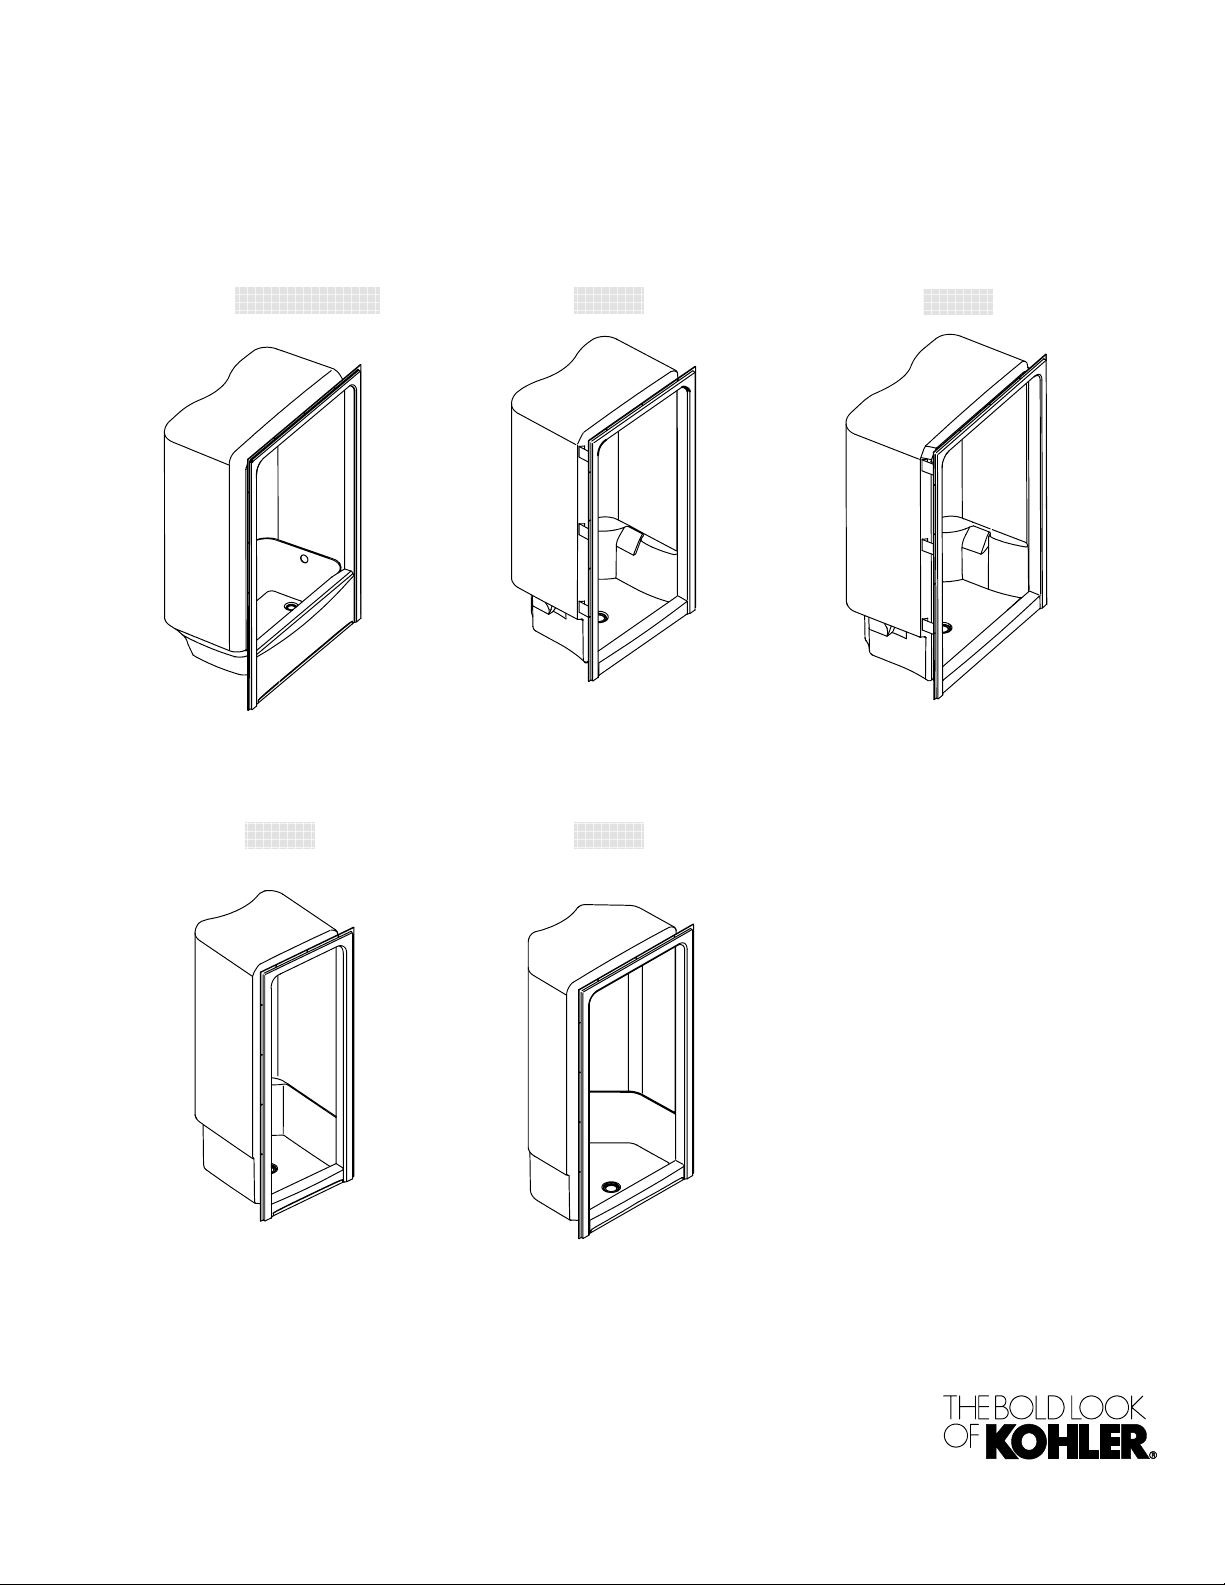
K-1681/K-1682
K-1689
K-1687
K-1690
K-1688
1022476-2-B
Français, Page 7
Español, Página 12
Thank You For Choosing Kohler Company
We appreciate your commitment to Kohler quality. Please take a few minutes to review this manual before you start
installation. If you encounter any installation or performance problems, please don’t hesitate to contact us. Our phone
numbers and website are listed on the back cover. Thanks again for choosing Kohler Company.
Before You Begin
- Observe local plumbing codes.
- Leave the packaging material in place until you begin installation.
- Be sure you have sufficient access to move the module into the construction area.
- Avoid flexing the side walls to prevent damage to the module.
- Insulate all exterior walls before installation.
- When fire-rated wall is specified, the stud opening dimensions are to the inside of the wallboard.
- If the module will be installed adjacent to the vertical ducts or chases, surround the unit with fire-rated gypsum
wallboard.
- The basin area requires no additional support when the subfloor is level and square with respect to the stud framing.
Consider using shims for additional support if the subfloor is uneven.
- Protect the module floor during installation.
- Consult all applicable instructions for accessories and shower doors before beginning this installation.
- Install K-9459 Sonata Accessory Kit before installing the module.
- Provide access to all plumbing connections. This is a one-piece module, and you cannot make the drain and overflow
connections by reaching over the end of the module.
- Position the rough drain plumbing according to the roughing-in dimensions.
- This product is designed for use with the Kohler K-1652 steam generator. Kohler is not responsible for problems
encountered due to the installation and use of other manufacturers’ steam generators.
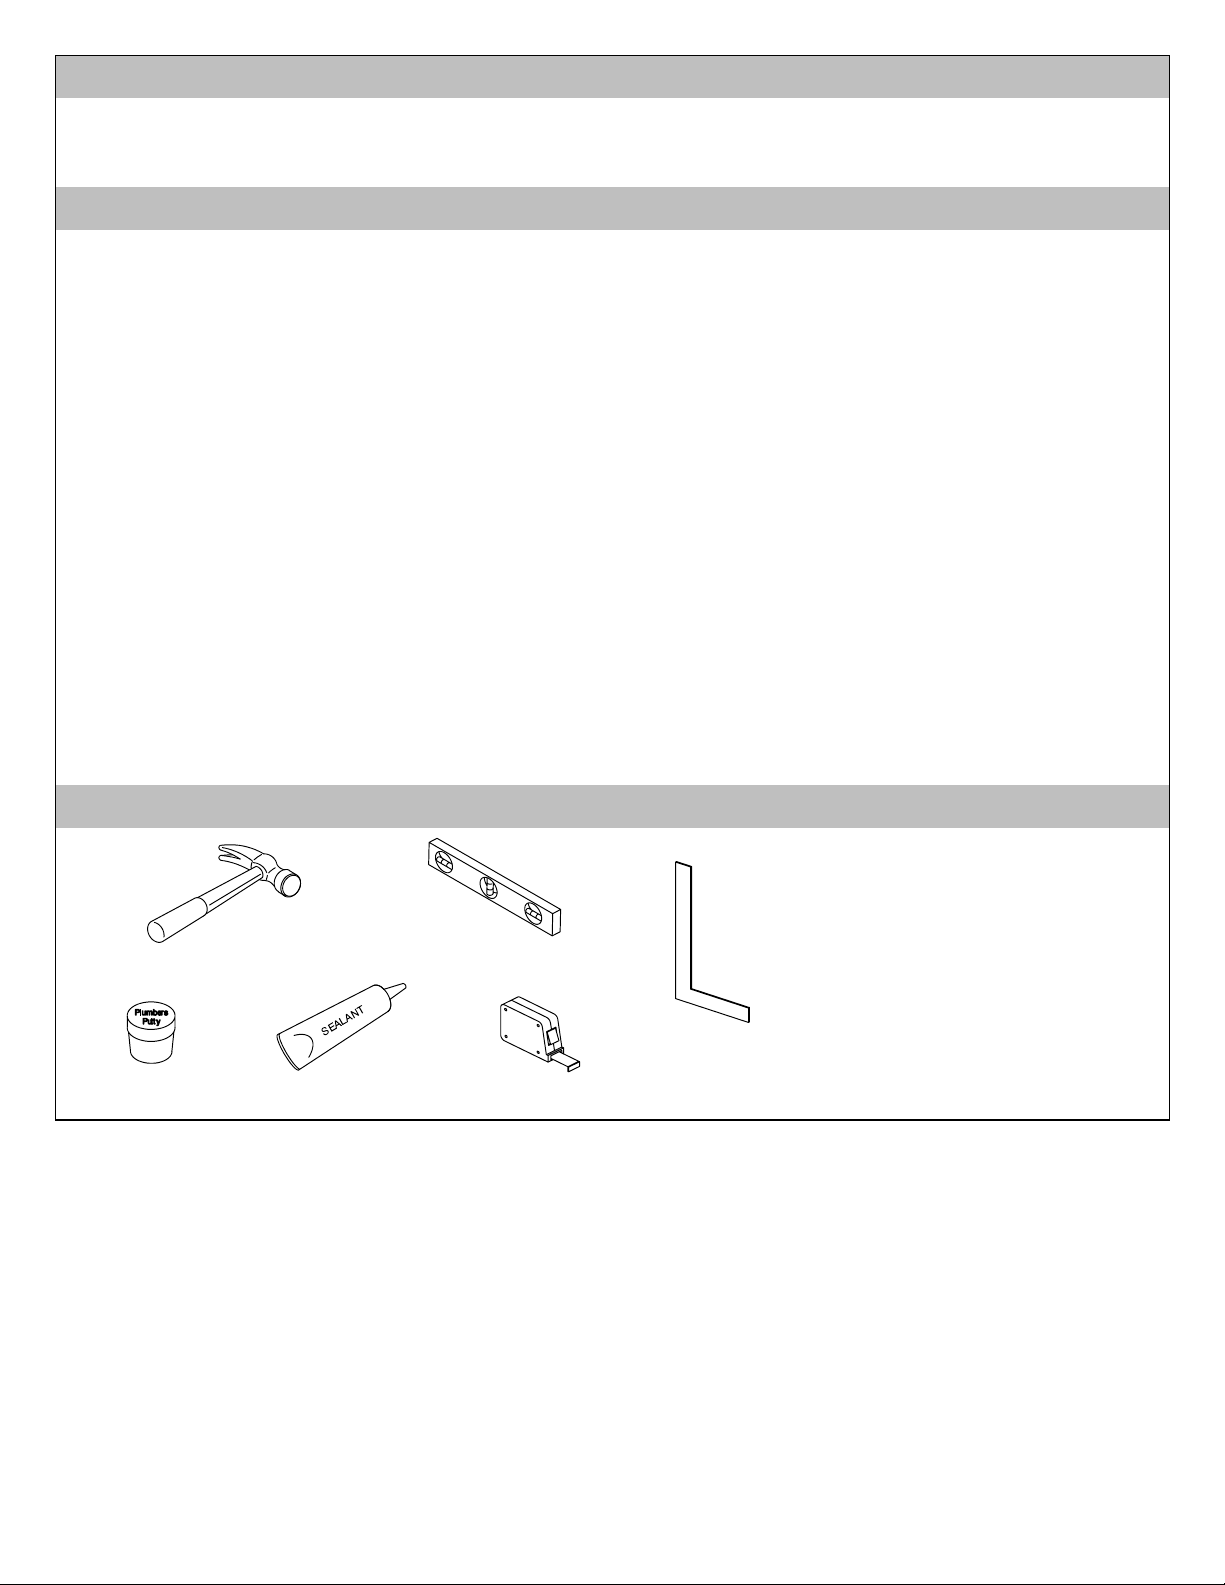
Recommended Tools and Materials
Hammer and
Nails
Plumbers Putty
Silicone
Sealant
Level
Tape Measure
Square
Plus:
Conventional woodworking tools
and materials
Water-resistant wallboard
2x4’s or 2x6’s
Hole saws
1022476-2-B
2
Kohler Co.
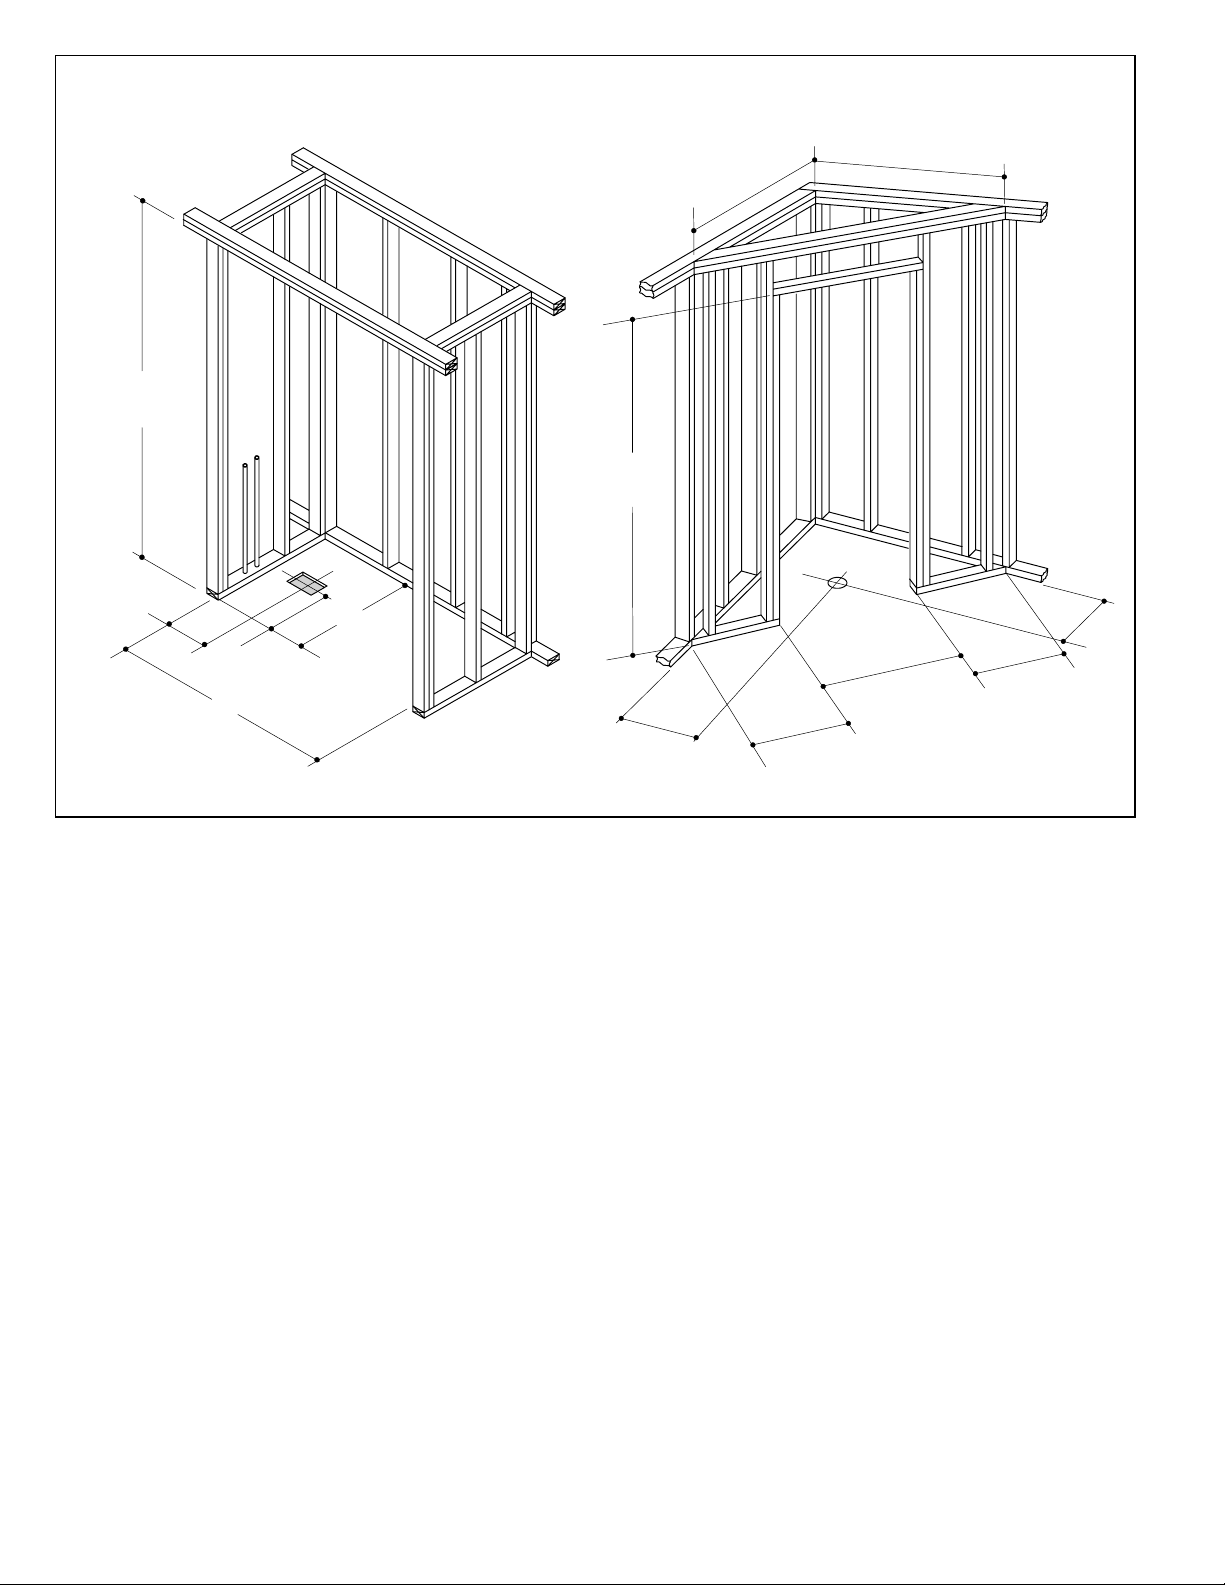
Position the rough
struct2x4or2x6s
tudframinga
ati
plumbing
88”
(223.5cm)
8-3/8”
(21.3cm)
58” (147.3cm)
Con
ccordingtotheroughing--ininform
on
If necessary, leave one of the framing side walls loose until you move the module into position
Verify that the subfloor offers adequate support, and is flat and level
66-5/16”
(165.9cm)
88”
(223.5cm)
35” (88.9cm)
17-1/2”
(44.5cm)
Measure and
cut the drain
hole
66-5/16”
(165.9cm)
45”
(114.3cm)
Position the
rough
plumbing
25-7/8”
(65.7cm)
24-3/8”
(61.9cm)
K-1681, K-1682
Measure and cut
the drain hole
25-7/8”
(65.7cm)
24-3/8”
(61.9cm)
K-1690
Kohler Co.
3
1022476-2-B

Con
struct2x4or2x6s
tudfr
aminga
rdingtother
ati
If necessary, leave one of the framing side walls loose until you move the module into position
Verify that the subfloor offers adequate support, and is flat and level
cco
oughing--ininform
on
Position the
rough plumbing
K-1687 K-1688 K-1689
A 46” 58” 34”
(116.8cm) (147.3cm) (86.5cm)
B 23” 29” 17”
(8.4cm) (73.7cm) (43.2cm)
C 35” 35” 35”
(88.9cm) (88.9cm) (88.9cm)
D 17-1/2” 17-1/2” 17-1/2”
(44.5cm) (44.5cm) (44.5cm)
88” (223.5cm)
C
D
B
A
1. Construct the Framing
NOTICE: Unless otherwise specified, floor support under the module must provide for a minimum of 80
lbs./square foot (390 Kg./square meter) loading.
NOTE: Refer to the shower door installation instructions for any special framing considerations.
- Make sure the flooring offers adequate support for your shower module, and verify that the subfloor is flat and
level.
- Construct a 2x4 or 2x6 stud recess according to the roughing-in information packed. P rovide double or triple stud
framing a round the recess opening. Make sure the header is level and square.
- If necessary, leave one of the stud recess walls loose until you move the module into position. Then line the recess
wall up with the module, and secure the recess wall permanently in place to the stud framing.
- Add any bridging or support needed for extra grab bars or towel bars. Refer to the accessory manufacturer’s
instructions.
- Measure and cut the drain hole opening in the floor, and install the rough drain lines. Install the rough plumbing.
Refer to the roughing-in information packed.
- Stud opening tolerance is +1/4”, -0” (+6mm, -0mm). When a fire rated wall is specified, dimensions are to the
inside of the wallboard. Some shimming between the stud frame and fixture may be required.
1022476-2-B
4
Kohler Co.
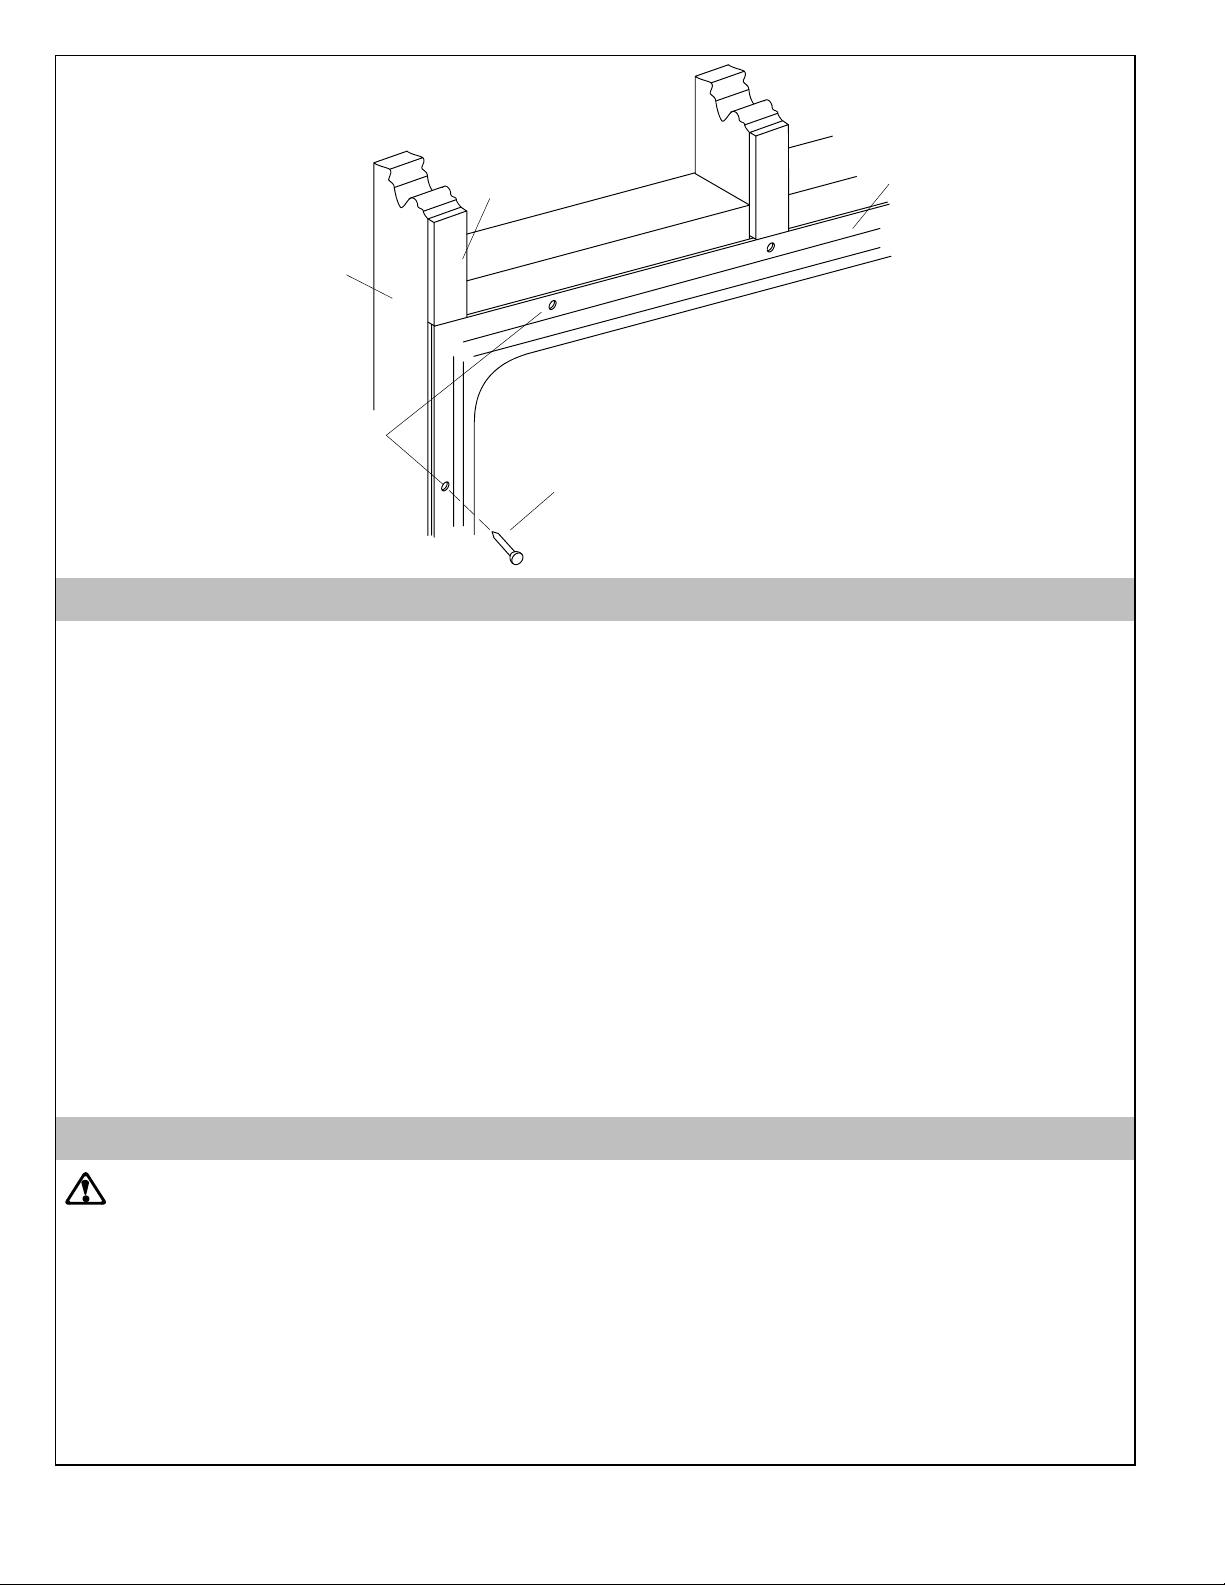
Stud
Nail 1/4” (6mm) thick
furring strips to shim
out to the edge of the
nailing--in flange
Nailing-In
Flange
Use the pre--drilled
holes in the
nailing--in flanges
Use #6 large--head
galvanized nails to
secure the nailing--in
flanges to the studs
2. Install the Module
- Remove the packaging from the front of the module.
- Install K-9459 Sonata Accessory Kit according the the instructions packed in the kit.
- Install the drain to the shower module according to the drain manufacturer’s instructions.
- Use a drop cloth or similar material to protect the bottom surface of the module.
- Lay out and mark the location of the mixing valve, shower, and bath spout holes as required on the back
(unfinished) surface of the module wall. Drill 1/4” (6mm) pilot holes at the marked locations.
- From inside the module (finished surf ace), use a hole saw of the correct diameter to carefully drill the fitting
holes. Refer to the fitting manufacturer’s instructions to determine the correct hole sizes.
- Clean the module to reduce the risk of surface damage.
- With help, carefully move the module into the recess.
- Be sure the bottom of the module is firmly supported against the floor. You may need to adjust some of the
framing. Use shims as necessary. However, no additional support is required. The module must be plumb and
level to ensure proper shower door installation.
- Use #6 large-head galvanized nails to fasten the nailing-in flanges to the studs. Use the pre-drilled holes in the
nailing-in flanges. Be careful to avoid damaging the module surface - shim between the nailing-in flange and the
studs to fill any gaps.
3. Install the Plumbing
CAUTION: Risk of property damage. Ensure a watertight seal on the drain.
- Connect the drain to the trap according to the drain manufacturer’s instructions.
NOTICE: An access panel will simplify future maintenance.
- Install the shower, fill spout, valving, and supply connections as required. Strap the supply connections to the
stud framing. Provide access to the connections for future maintenance.
- Connect the drain to the trap.
- Open the hot and cold water supplies, and check the connections for leakage. Install the faucet trim according to
the manufacturer’s instructions.
- Run water into the shower module, and check the drain connections for leakage.
Kohler Co.
5
1022476-2-B
 Loading...